Edge Features
gSender Edge is our test arena for working on new and exciting gSender updates that will eventually be released to everyone. Think of it as a program that you can download independently from traditional gSender that allows you to participate in public Beta testing. This gives you the opportunity to use all the new features that we’re working on and make an impact by giving us feedback to inform the final result, that’s what it’s like to be on the bleeding Edge.
Edge isn’t a replacement for gSender in any way – it’s a way for us to test and get feedback on new, bigger features without exposing them to users who may not be interested or causing unexpected bugs. This follows a cycle that can be several months long where:
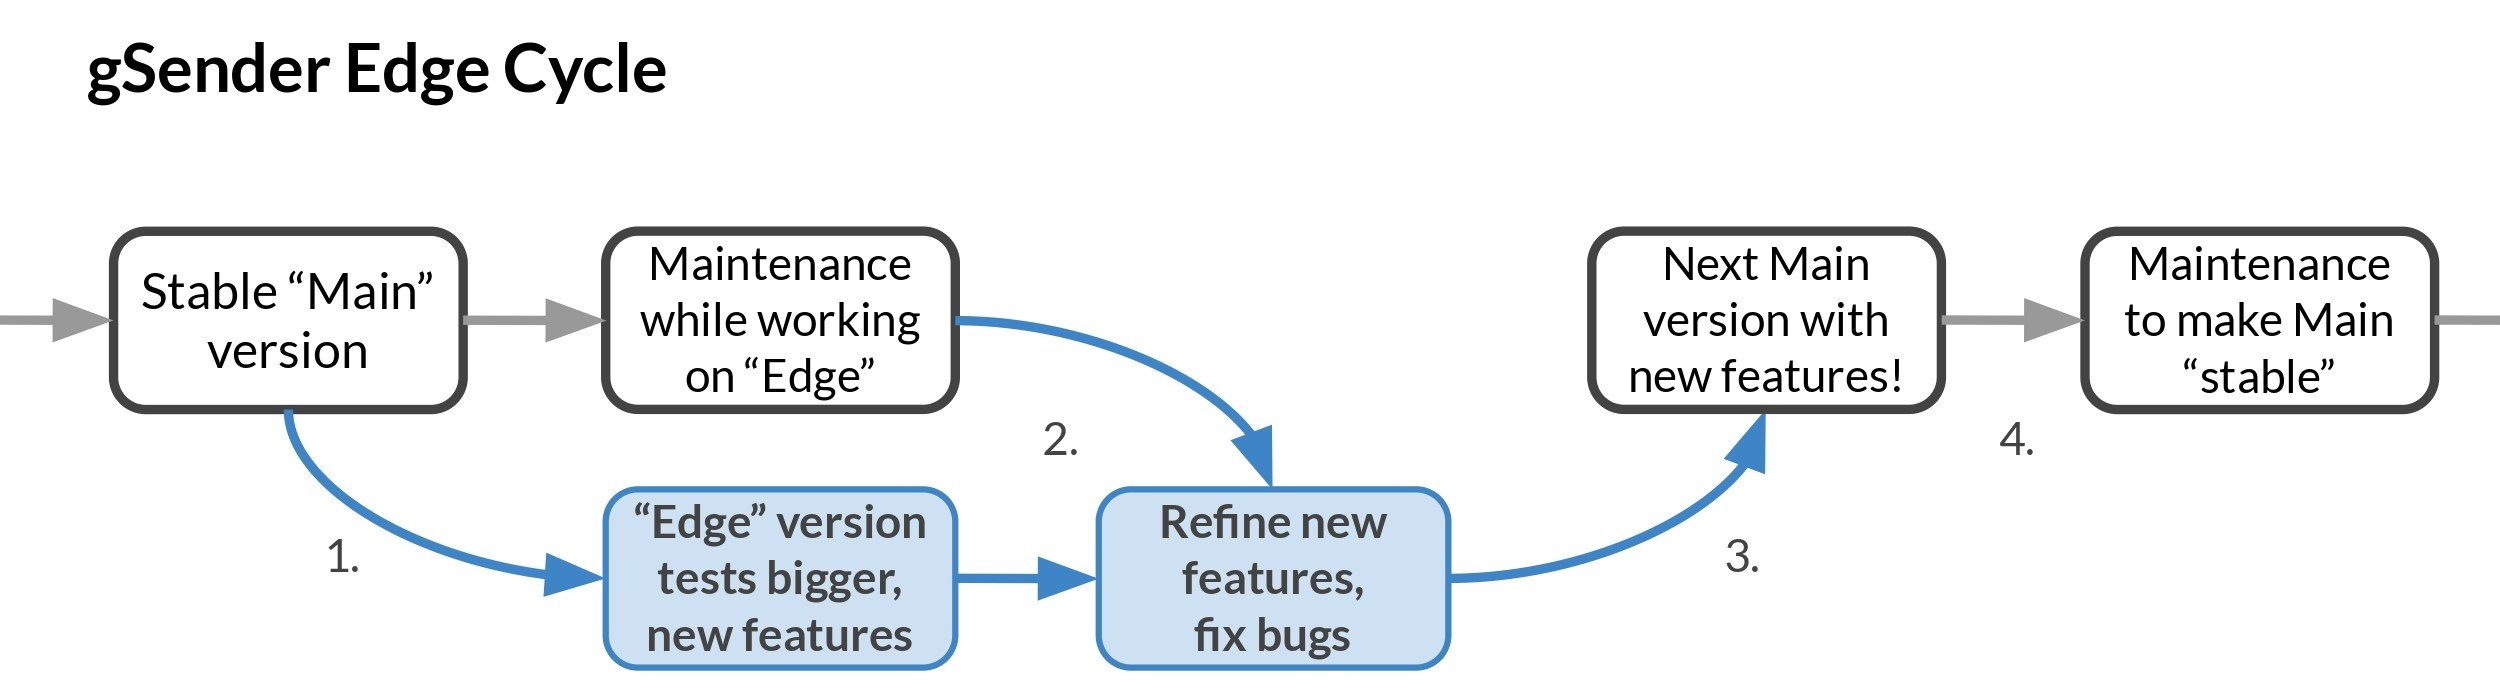
- A new Edge version is split off from Main in order to prototype some new functionality and features (you can tell when this happens because the numbering scheme will jump up from 1.1.6 to EDGE-1.2.0, for example)
- Edge eventually stops adding major features so it can become more refined from user feedback and squashing bugs
- Once everything seems stable, everything that’s been added to Edge becomes a part of Main gSender so that everyone can now enjoy the new features
- The process repeats
Downloading Edge is similar to the Main version of gSender and is available on the same page: https://sienci.com/gsender/. The main caveat is that we don’t post the links for each operating system, so once you click the link to download Edge you’ll need to scroll down on the page to the “Assets” and click on the program download for your specific device. For Windows it’ll end in “.exe”, Mac will be “.dmg”, and the rest are for Linux and Pi.
Unique Differences
If you used to see a feature here but don’t see it any longer, it’s likely been added into the main version of gSender! Look for it on the other gSender documentation pages.
As of version 1.6.1 all Edge features are merged with the main version of gSender. Stay tuned for our next version of Edge!