New Features
Let’s take a closer look at some of the latest features to make it out of our gSender Edge development cycle and into our main version.
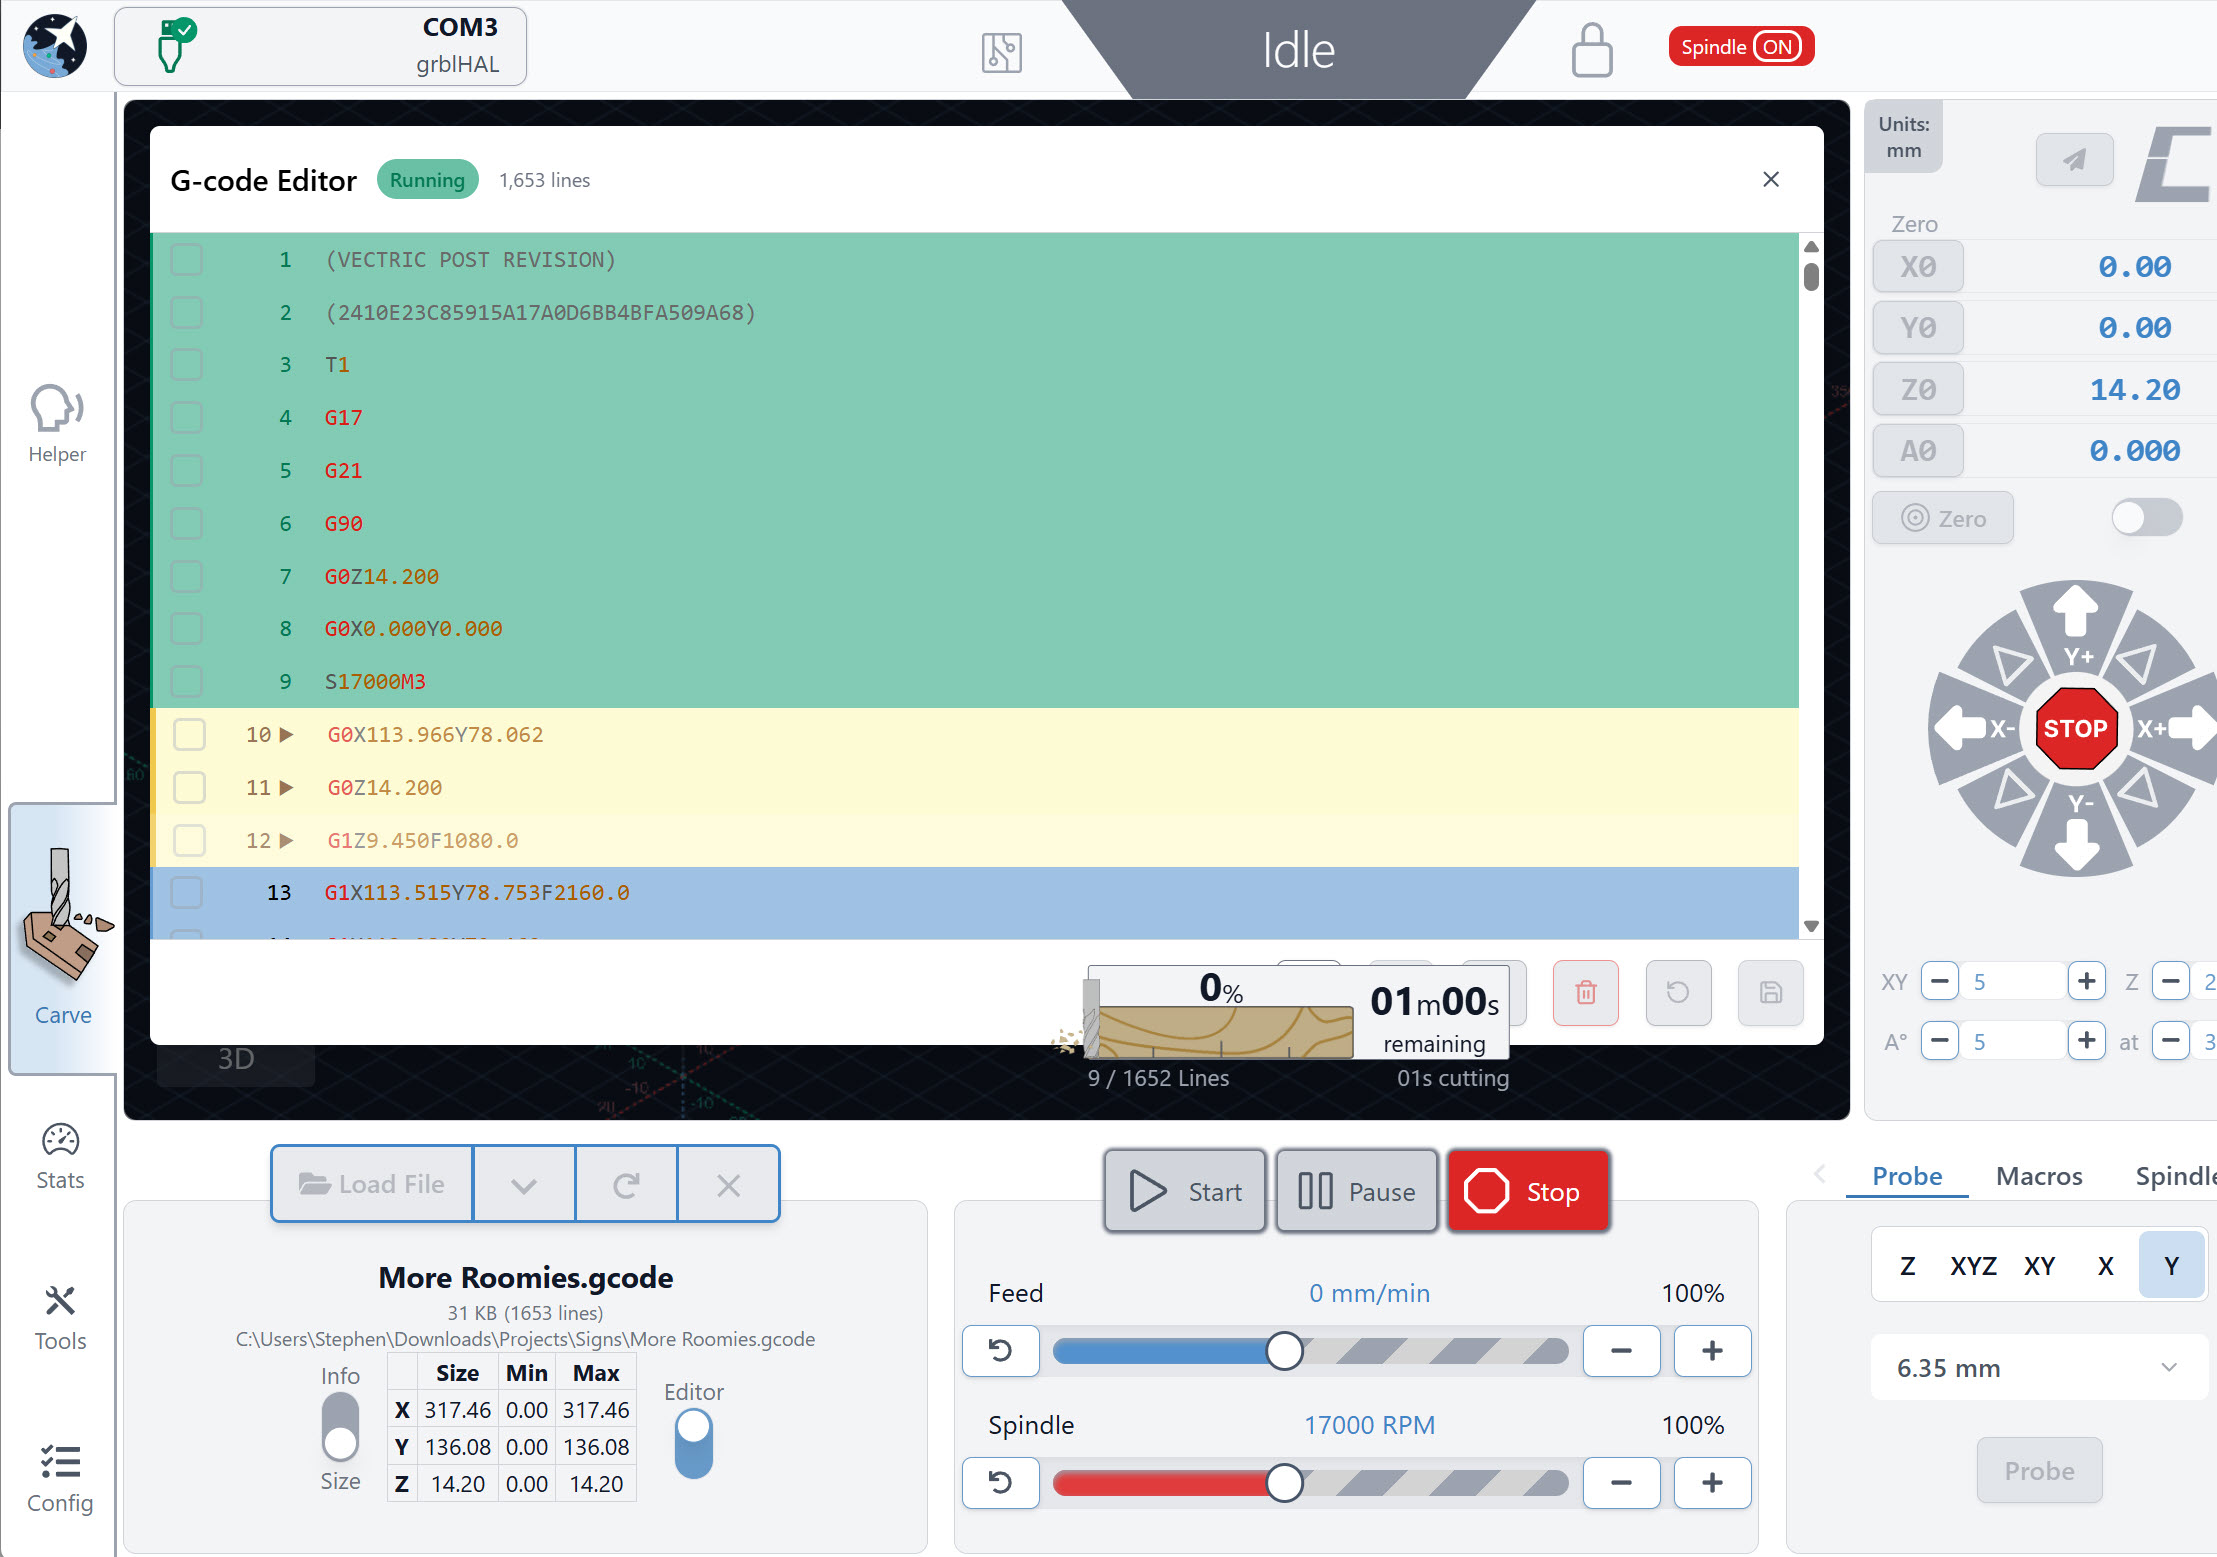
G-code Editor
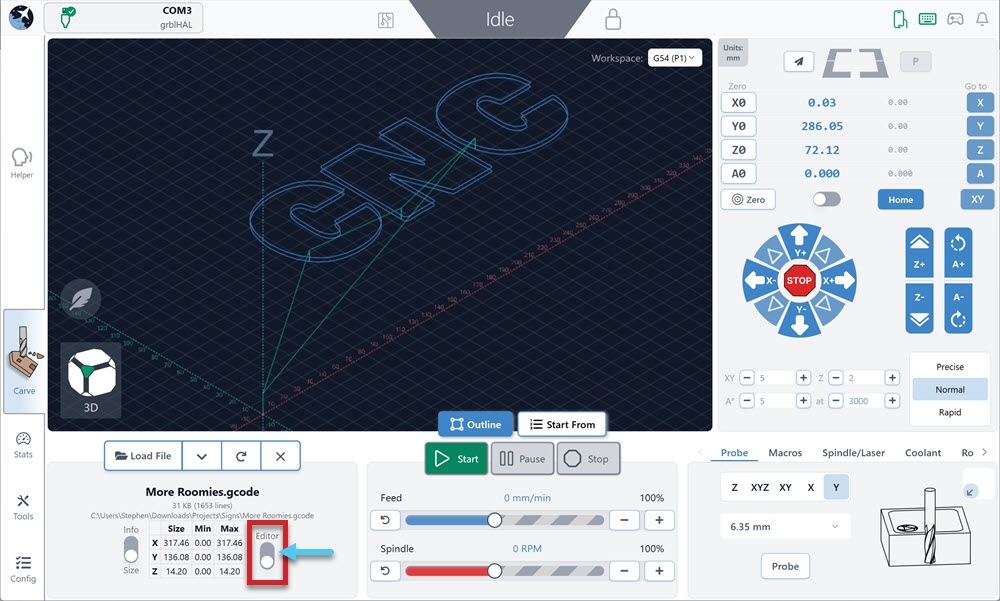
gSender now includes a built-in G-code editor, allowing you to inspect and make quick edits to your file directly inside the application without needing to open external software.
The editor includes:
- Syntax highlighting for easier readability
- Search functionality for quickly locating commands or values
- Quick navigation to specific lines or terms
- Basic editing and saving capabilities
Once a file is loaded, you will be able to turn the editor on with a toggle.
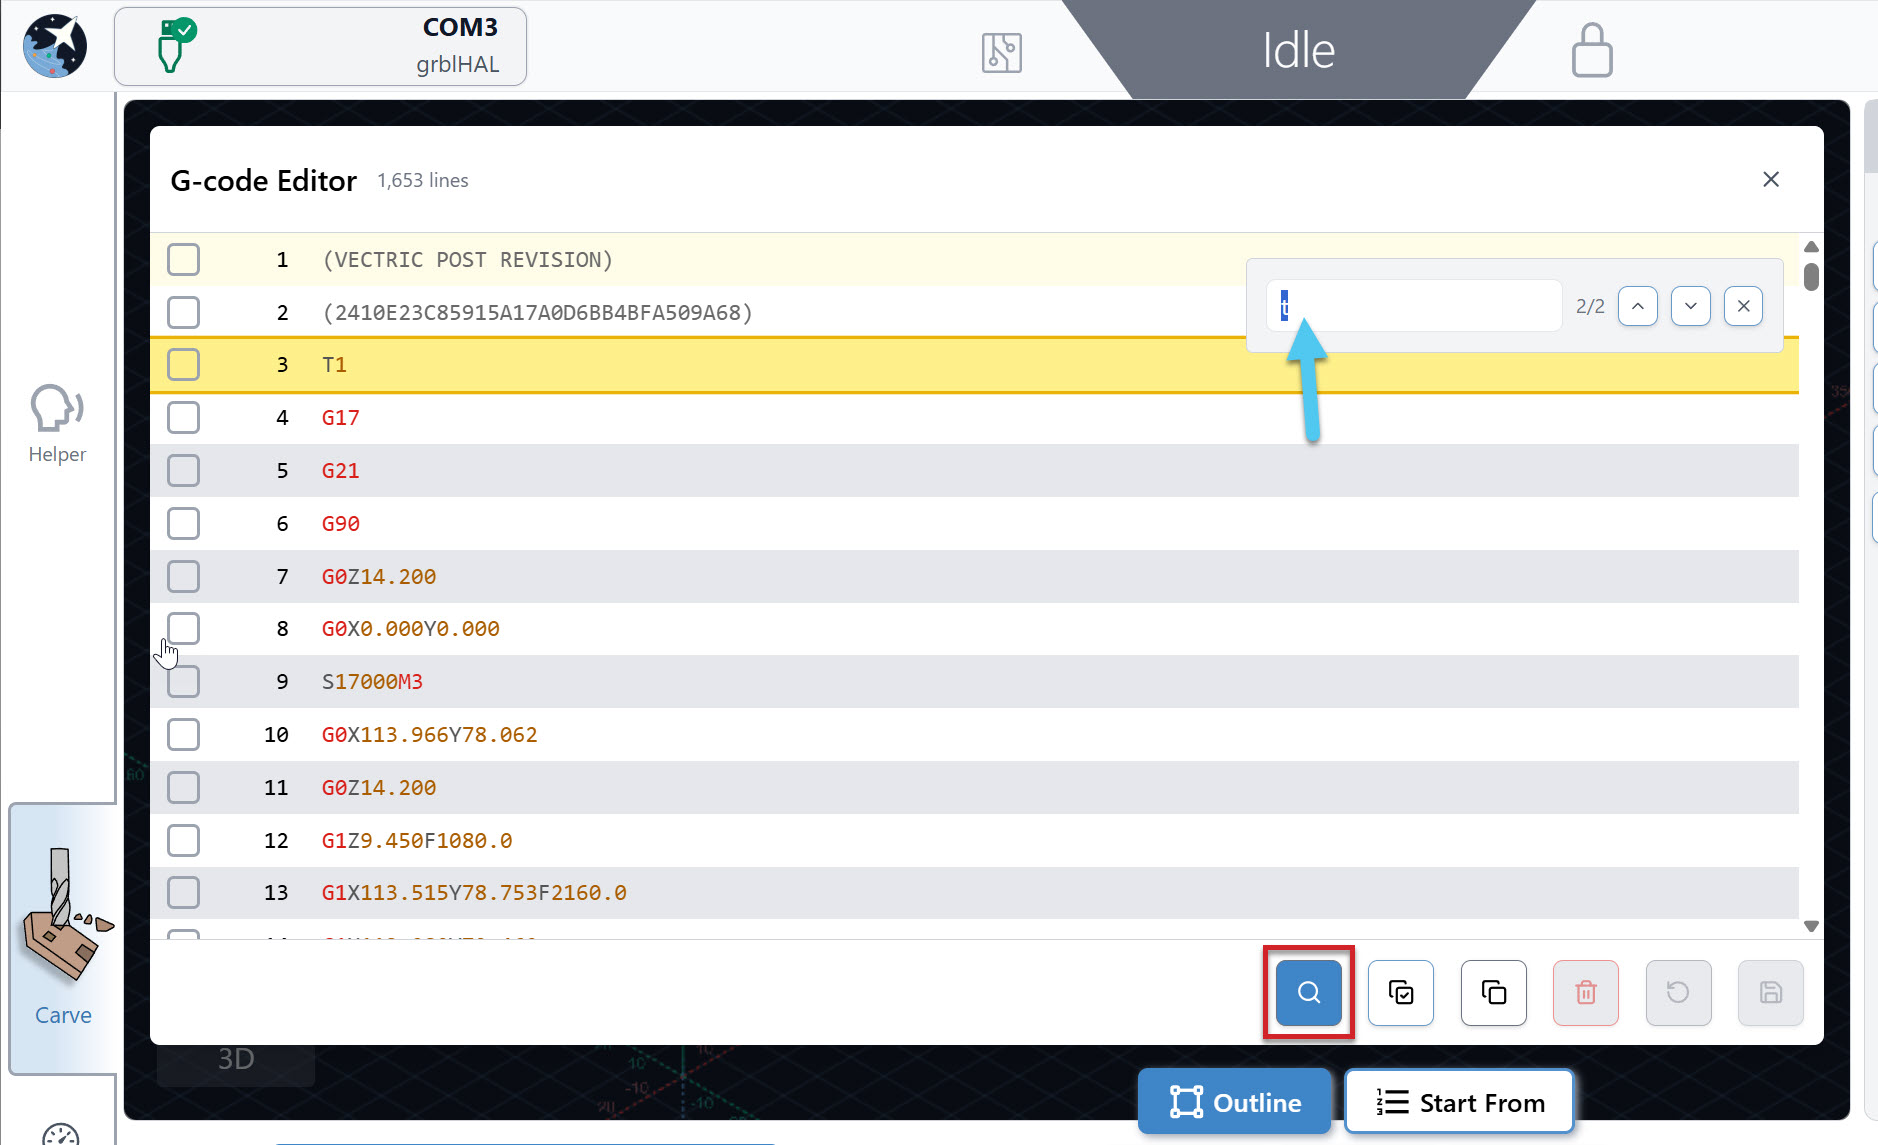
Search
Have a specific line of g-code you are hunting or simply want to step through all of your T-commands? Use the search feature to enter your text and this function will find exactly what you are looking for.
Copy/Paste/Delete/Refresh
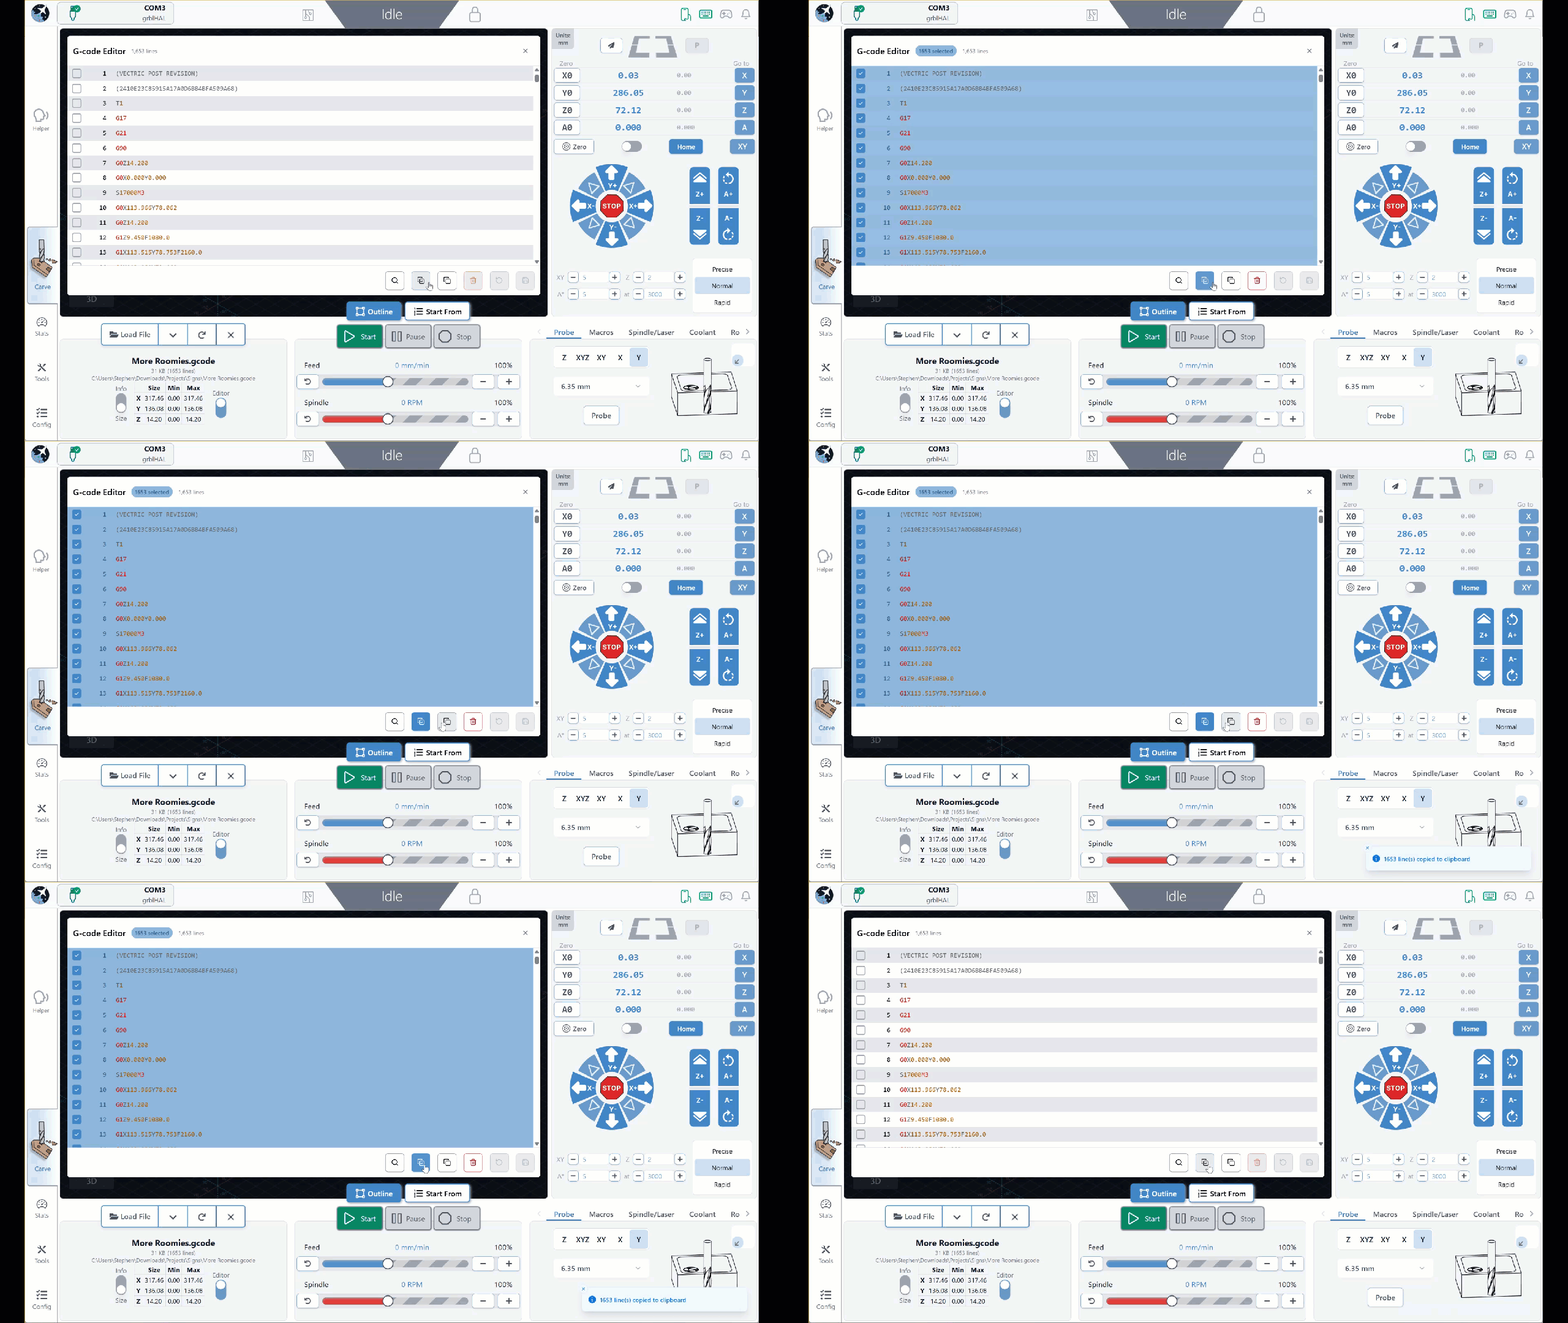
To assist in editing, you can select & copy large chunks of code. Delete some lines if you want, then use the refresh button to bring all of your changes back. Just be careful, if you save your changes, you won’t be able to revert/refresh any changes.
Running a job
During a running job, the editor also acts as a live progress indicator by highlighting the lines currently being processed. This makes it much easier to follow along with complex jobs or troubleshoot unexpected machine behaviour.
This feature is especially useful for:
- Verifying post-processor output
- Making quick feedrate or spindle adjustments
- Checking tool change commands
- Troubleshooting problematic sections of code
- Reviewing comments and job structure before running
EEPROM Editor
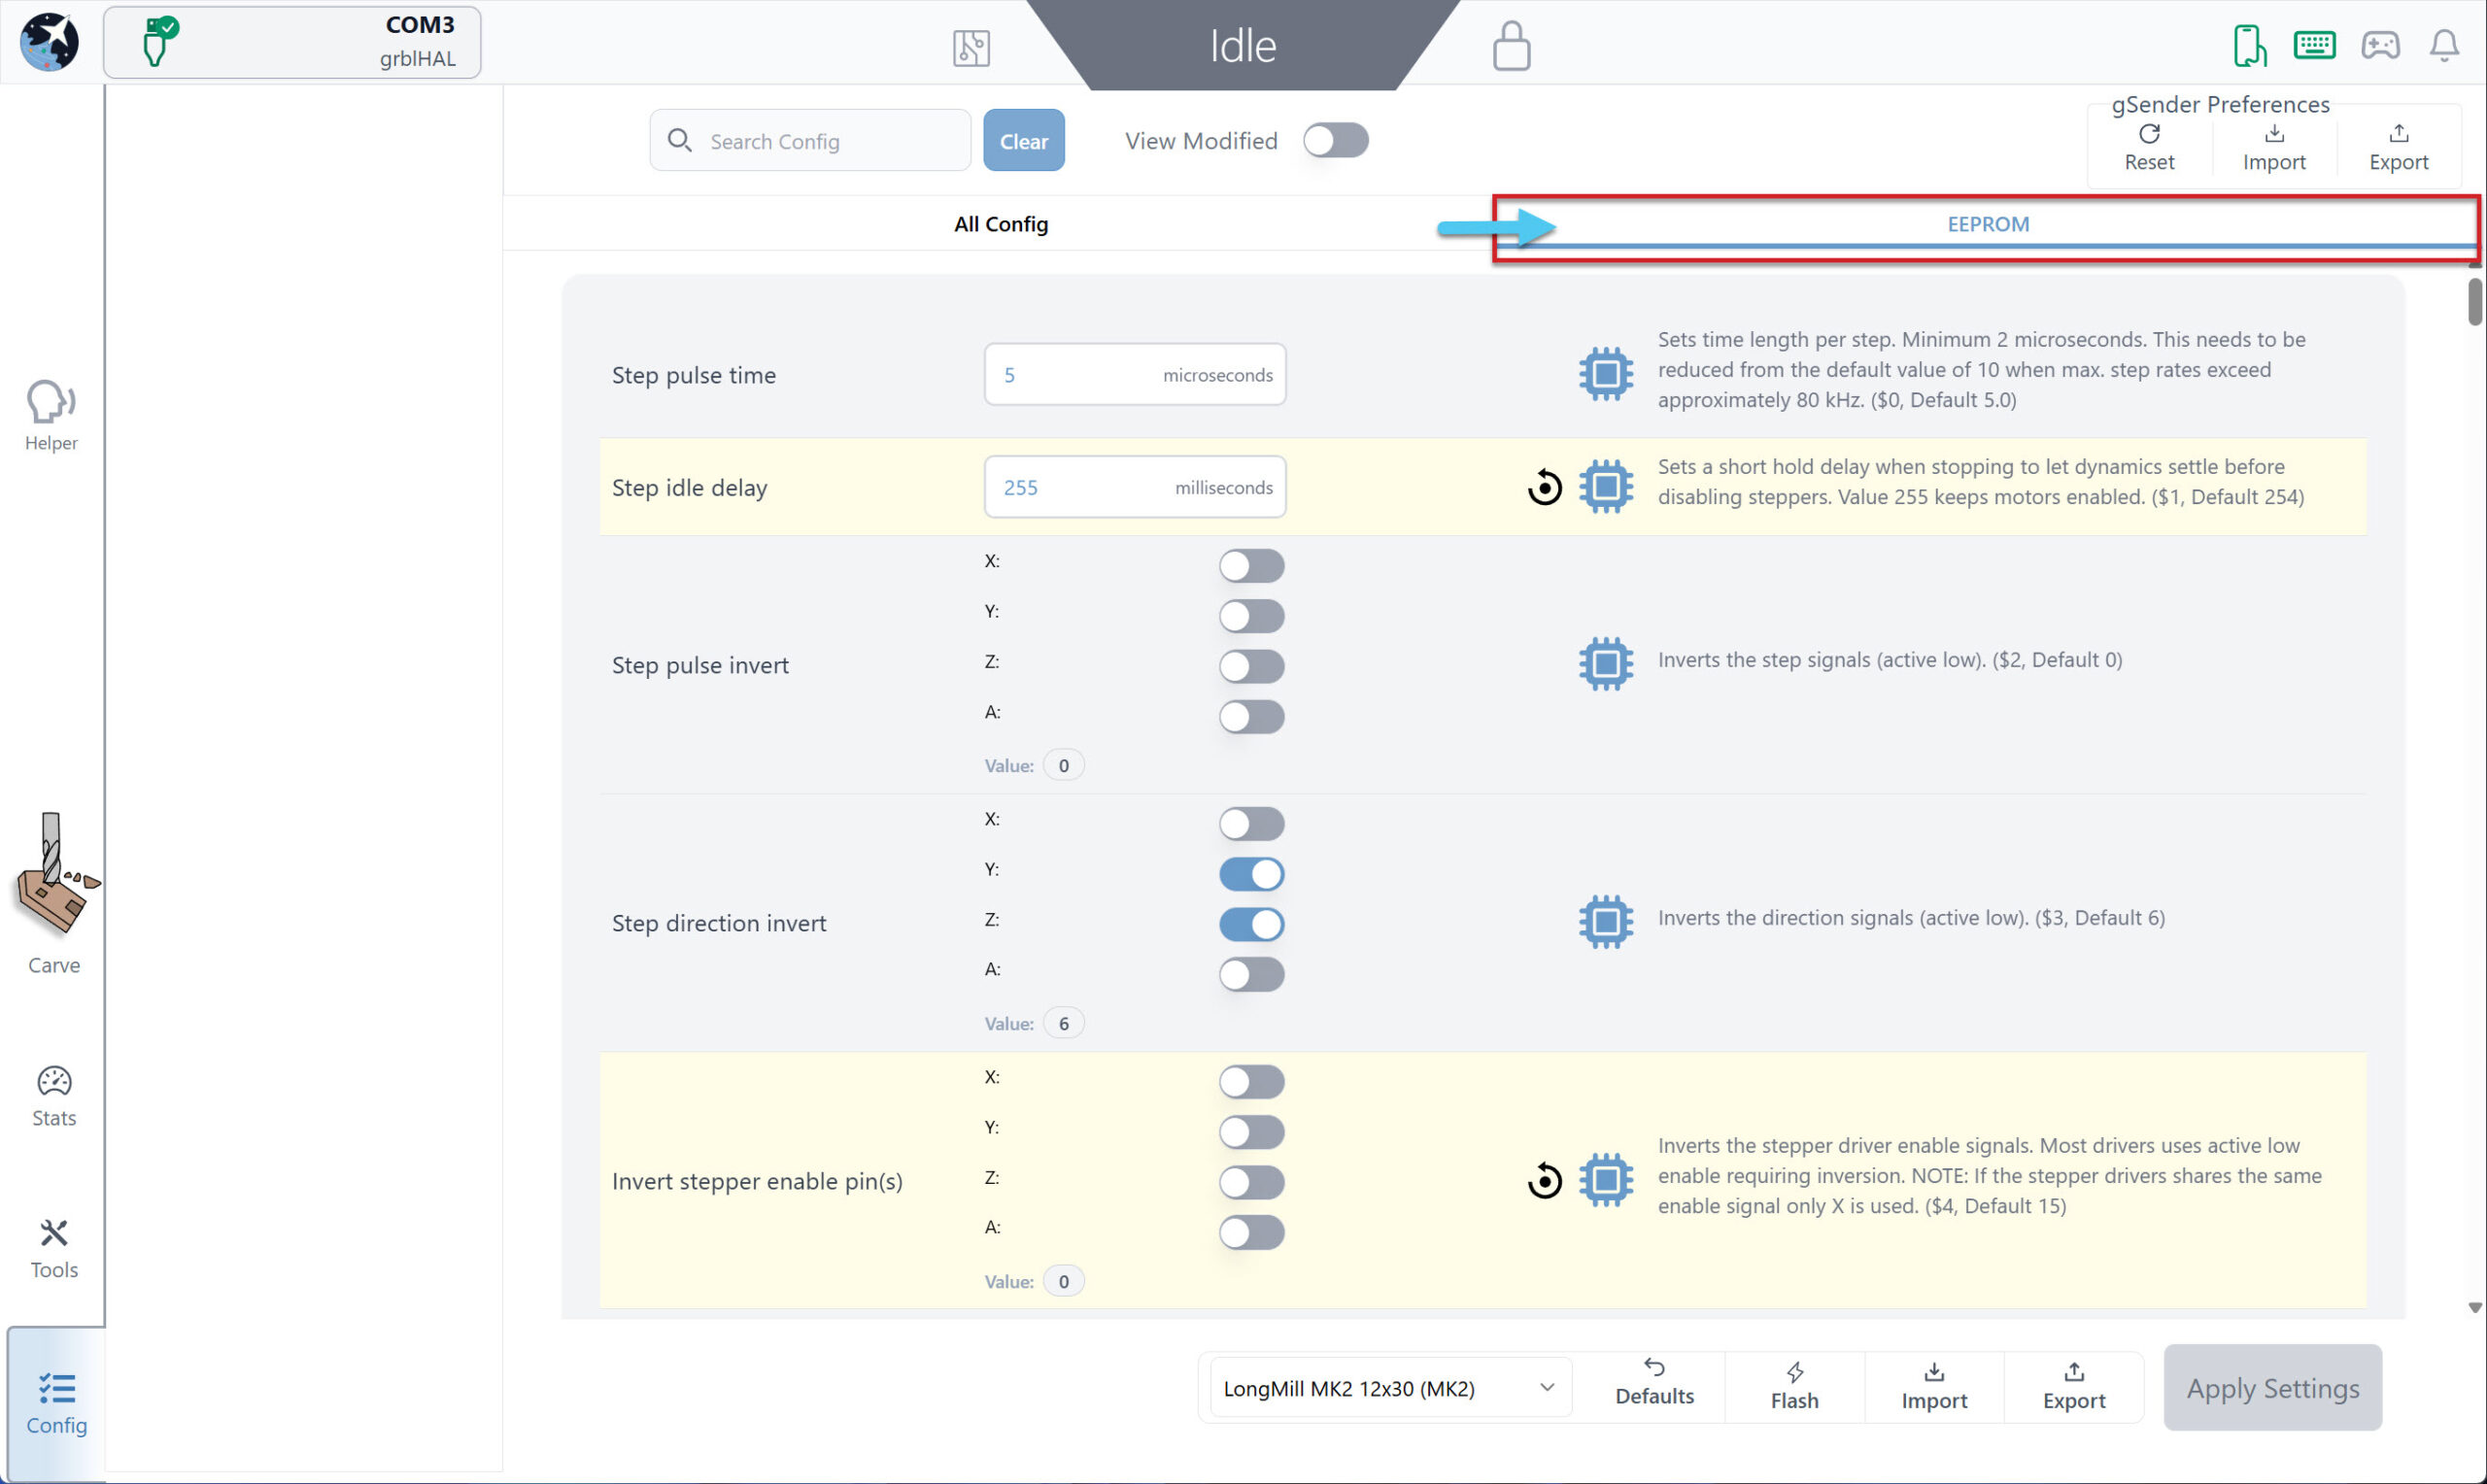
The new EEPROM editor gives advanced users direct access to controller configuration values from inside gSender.
This tool replaces the older legacy firmware tool and provides a cleaner, more searchable interface for managing controller settings.
With the EEPROM editor you can:
- View EEPROM values directly from the controller
- Modify configuration parameters & view what’s been modified already
- Search for specific settings quickly
- Access controller configuration from the Config section of gSender
This is particularly useful for users working with grblHAL controllers who need deeper access to machine configuration and tuning.
Because EEPROM values directly affect machine behaviour, only experienced users should modify settings unless following official documentation or support instructions. To find them, navigate to your Config tab, then click on the EEPROM tab, to the right of the All Config header.
EEPROM vs gSender Settings
Although both can be found under the Config tab, EEPROM values and gSender settings serve very different purposes.
EEPROM values are stored on your CNC controller (SLB or SLB-EXT). These settings define how your machine physically operates, including values like motor calibration, acceleration, homing behaviour, travel limits, and limit switch configuration. Because they’re stored on the controller itself, they remain the same even if you connect using a different computer or CNC sender.
gSender settings are stored on your computer. These control how the gSender application behaves, including things like your interface preferences, macros, display options, maintenance reminders, and other application-specific settings. Changing computers or reinstalling gSender will not change your controller’s EEPROM values.
A simple way to remember the difference is:
EEPROM = Machine Settings (stored on the controller)
gSender = Application Settings (stored on your computer)
Think of it like a printer. The printer has its own built-in settings that determine how it functions, while the print application on your computer has its own preferences for how you interact with it. The two work together, but changing one doesn’t necessarily affect the other.
Tip: If a setting changes how the CNC machine moves, homes, or behaves, it’s probably an EEPROM setting. If it changes how gSender looks or works, it’s probably a gSender setting.
SD Card
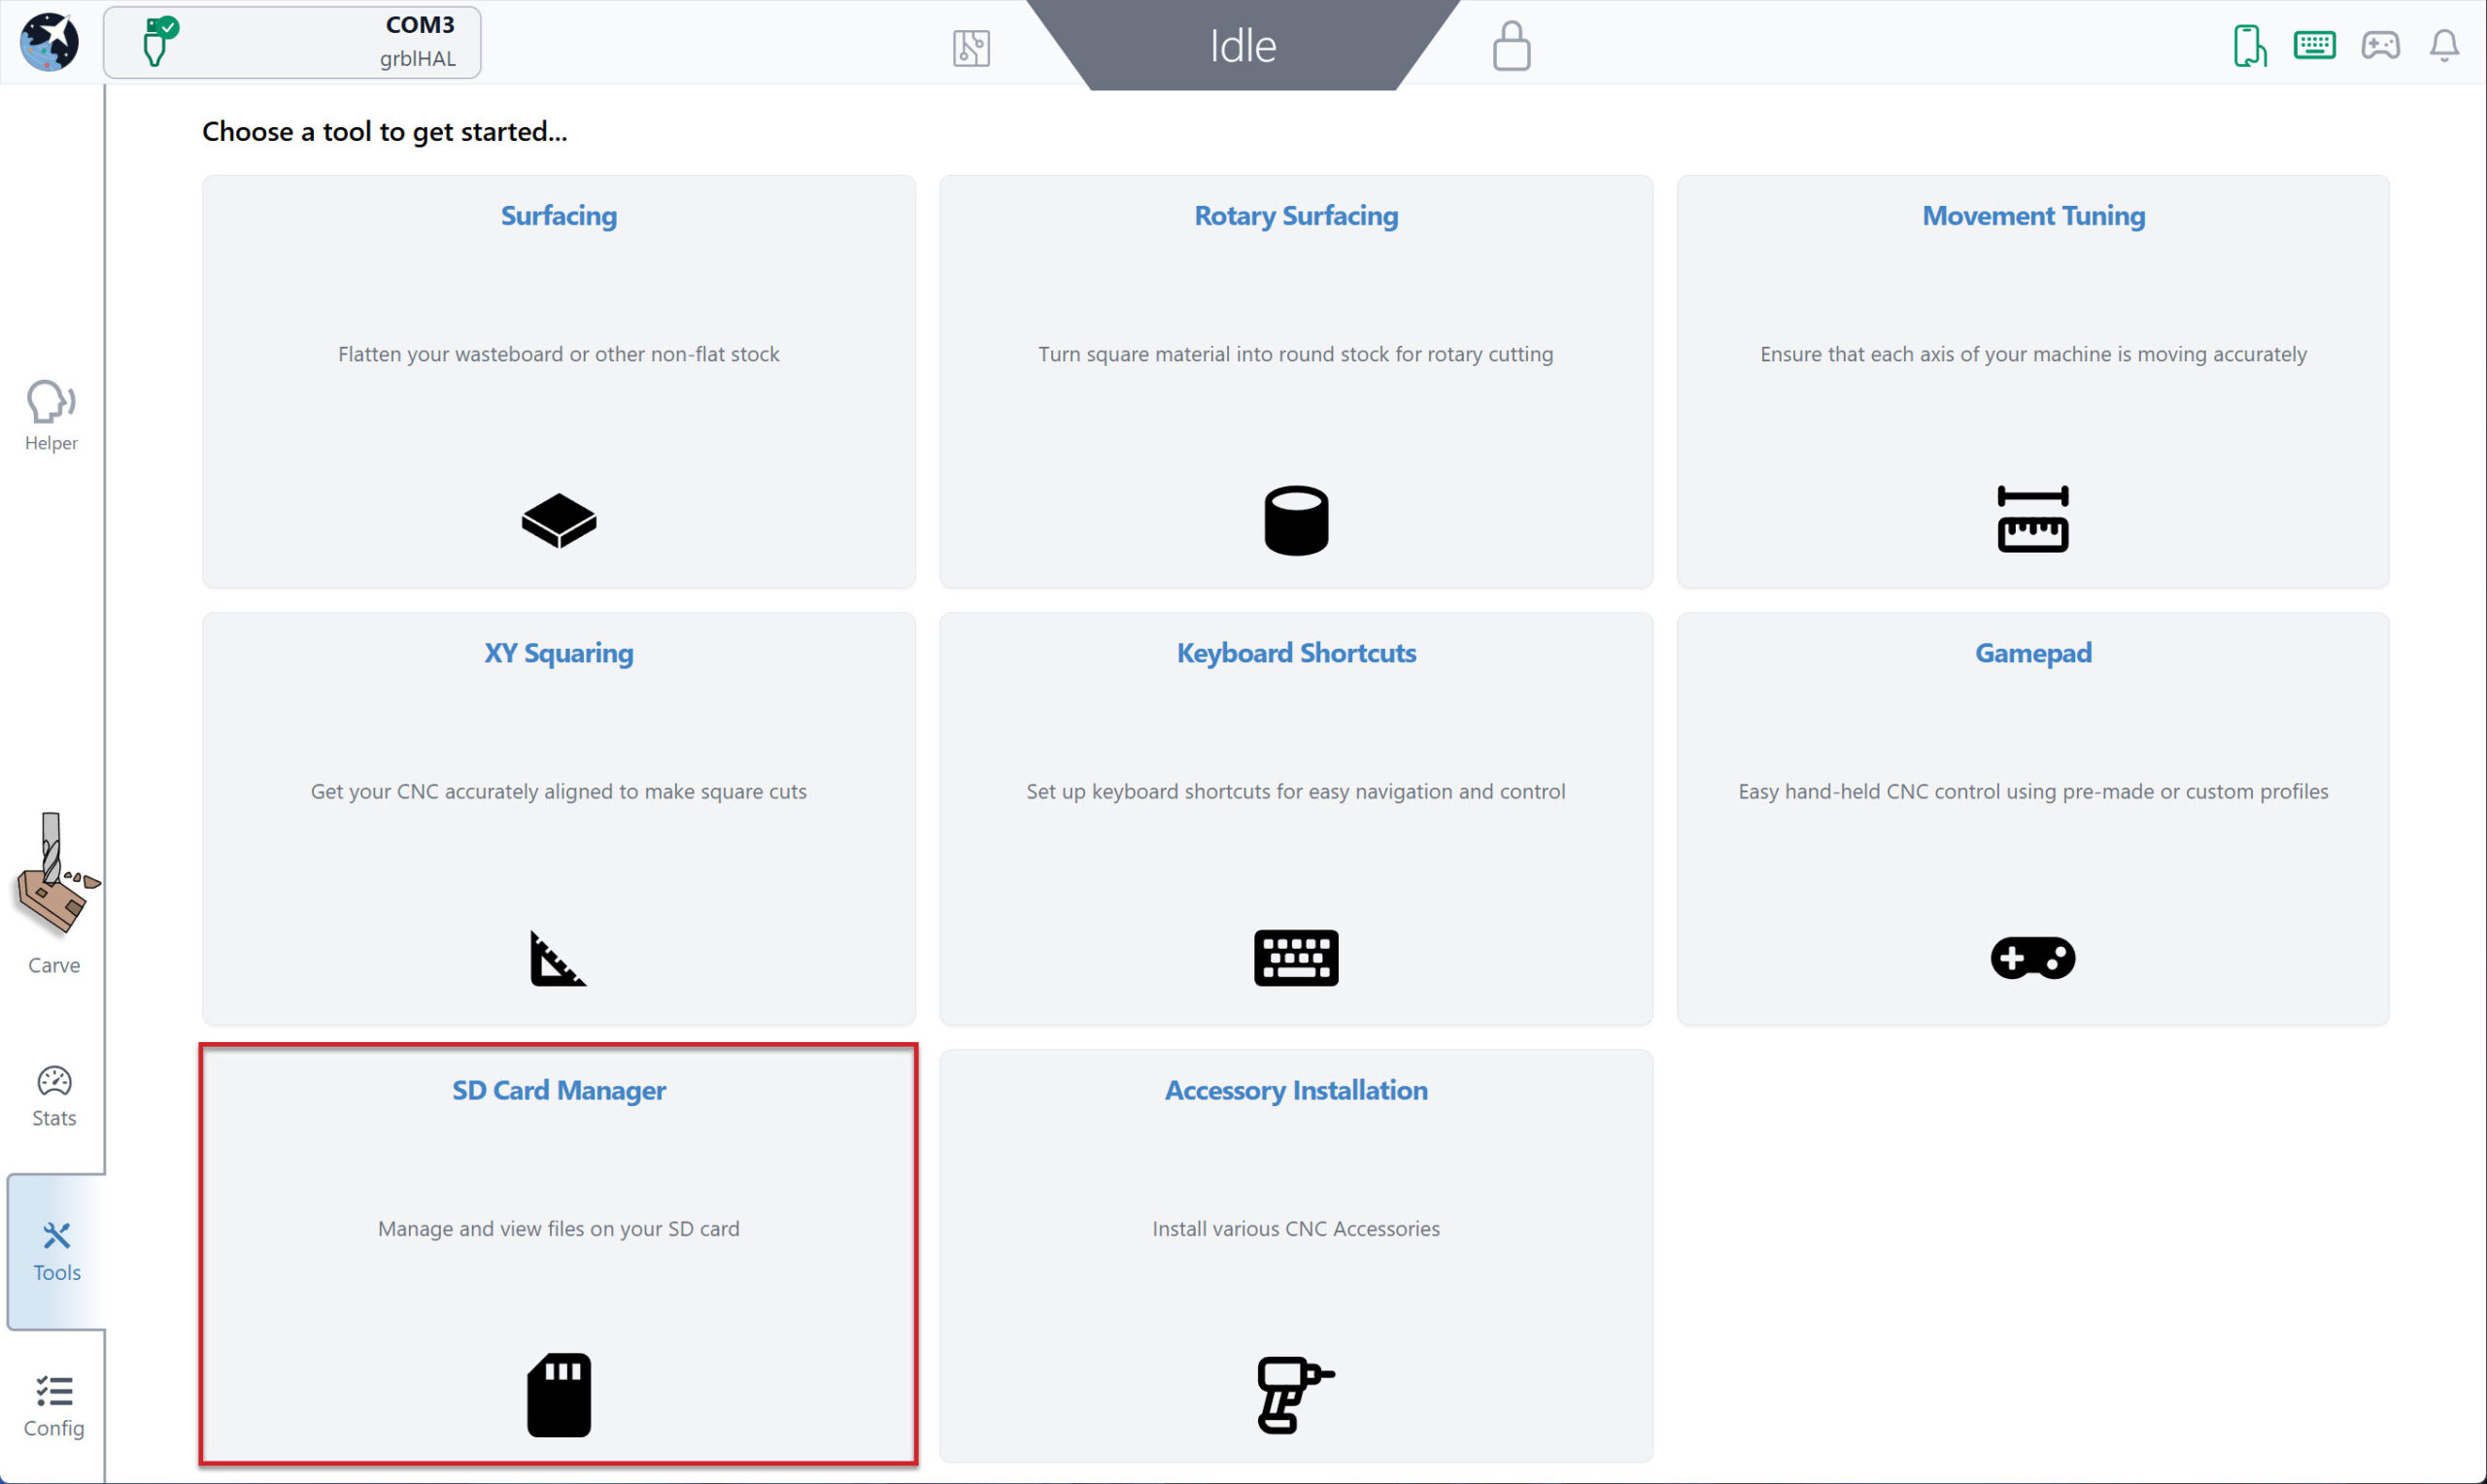
gSender now includes expanded SD card file management support for grblHAL-based controllers.
This allows gSender to interact directly with files stored on the controller’s SD card. Cards must be 32 GB or smaller in size, and utilize the FAT 32 file structure format.
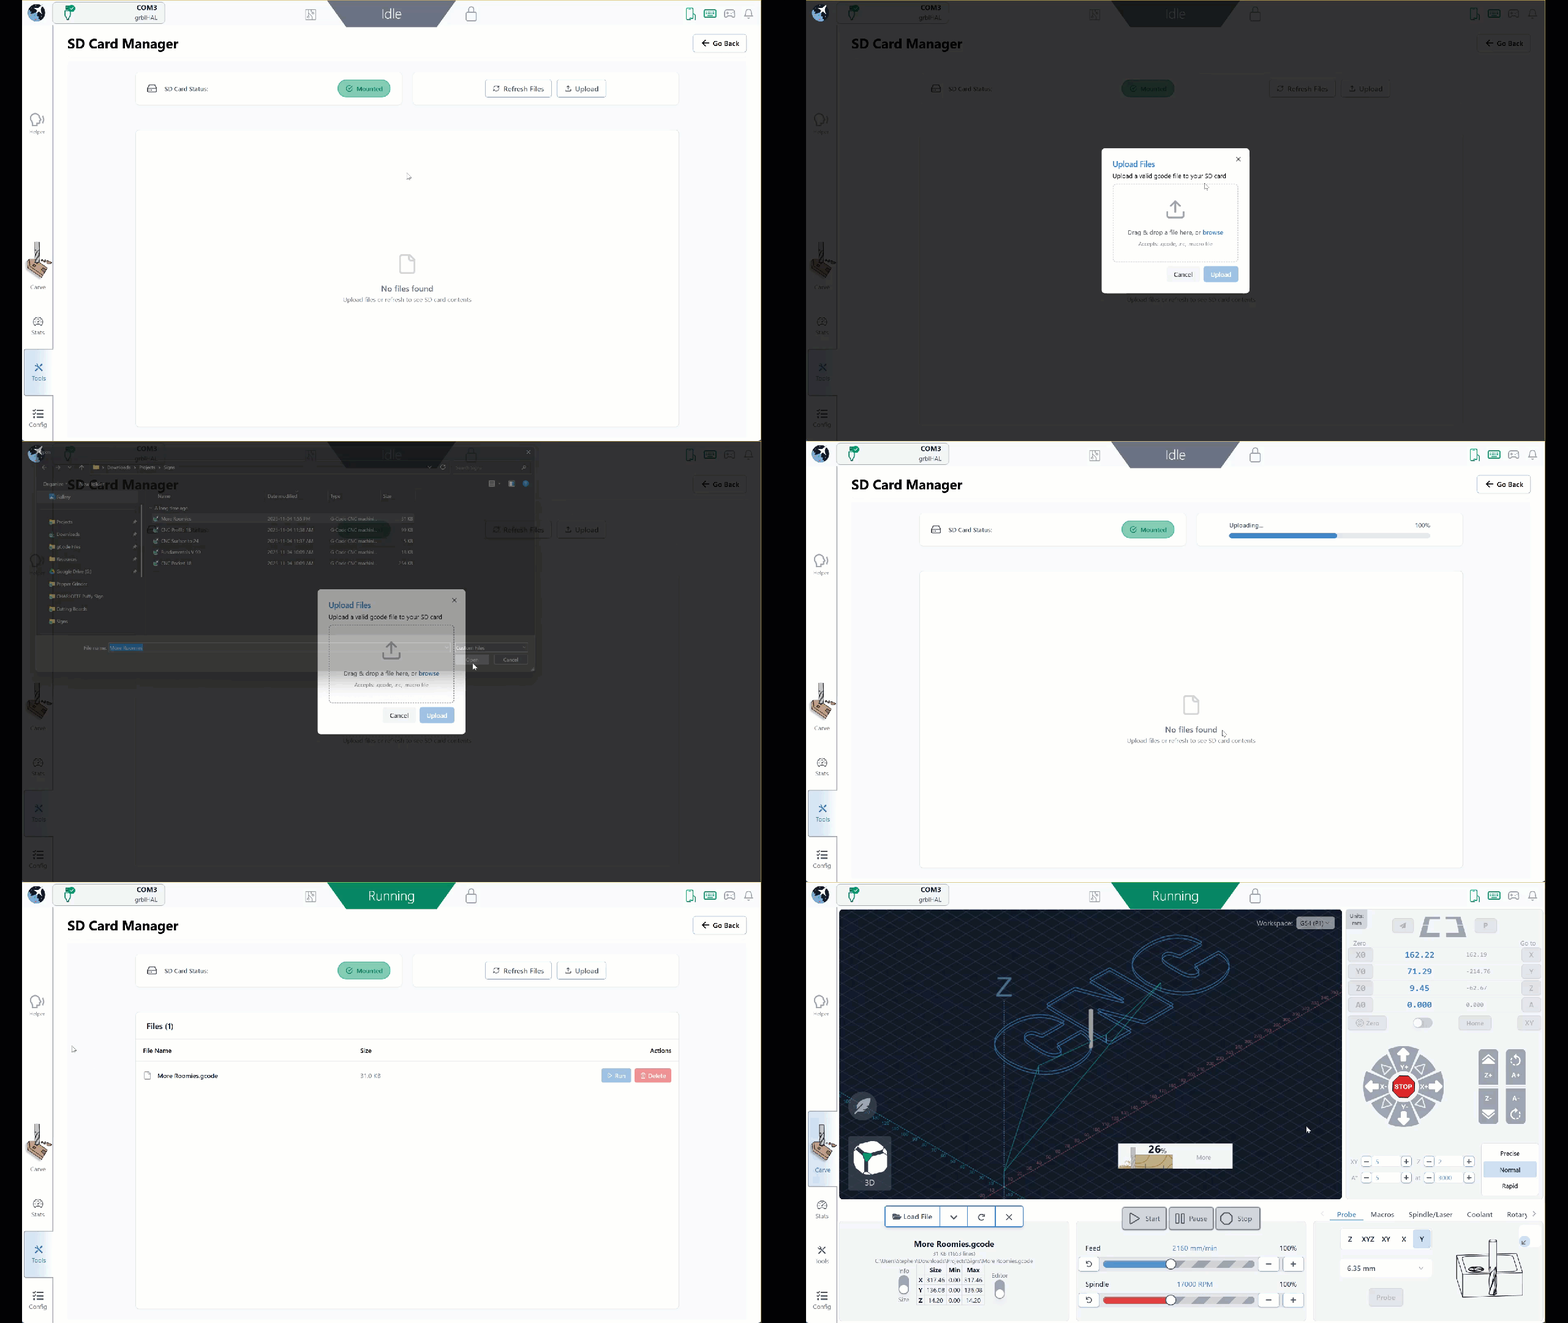
Users can now:
- View files stored on the SD card
- Upload files directly from gSender
- Run jobs directly from the controller
- Delete files from the SD card
Files can be uploaded using drag-and-drop or through standard file selection, making it much easier to transfer jobs to the machine.
When running jobs directly from the SD card, gSender still provides live progress feedback similar to normal streaming operations.
Running jobs from the controller’s SD card can help reduce communication interruptions and improve reliability for larger or longer-running jobs. You can find this feature under the tools tab, SD Card Manager.
In the gif below, we load up a g-code file and run it, from the SD Card manager!
Note: To stop the job you will need to hit the stop in the DRO, not the workflow control stop. This is a macro running g-code handled by the firmware, not gSender itself.
Accessory Install Area
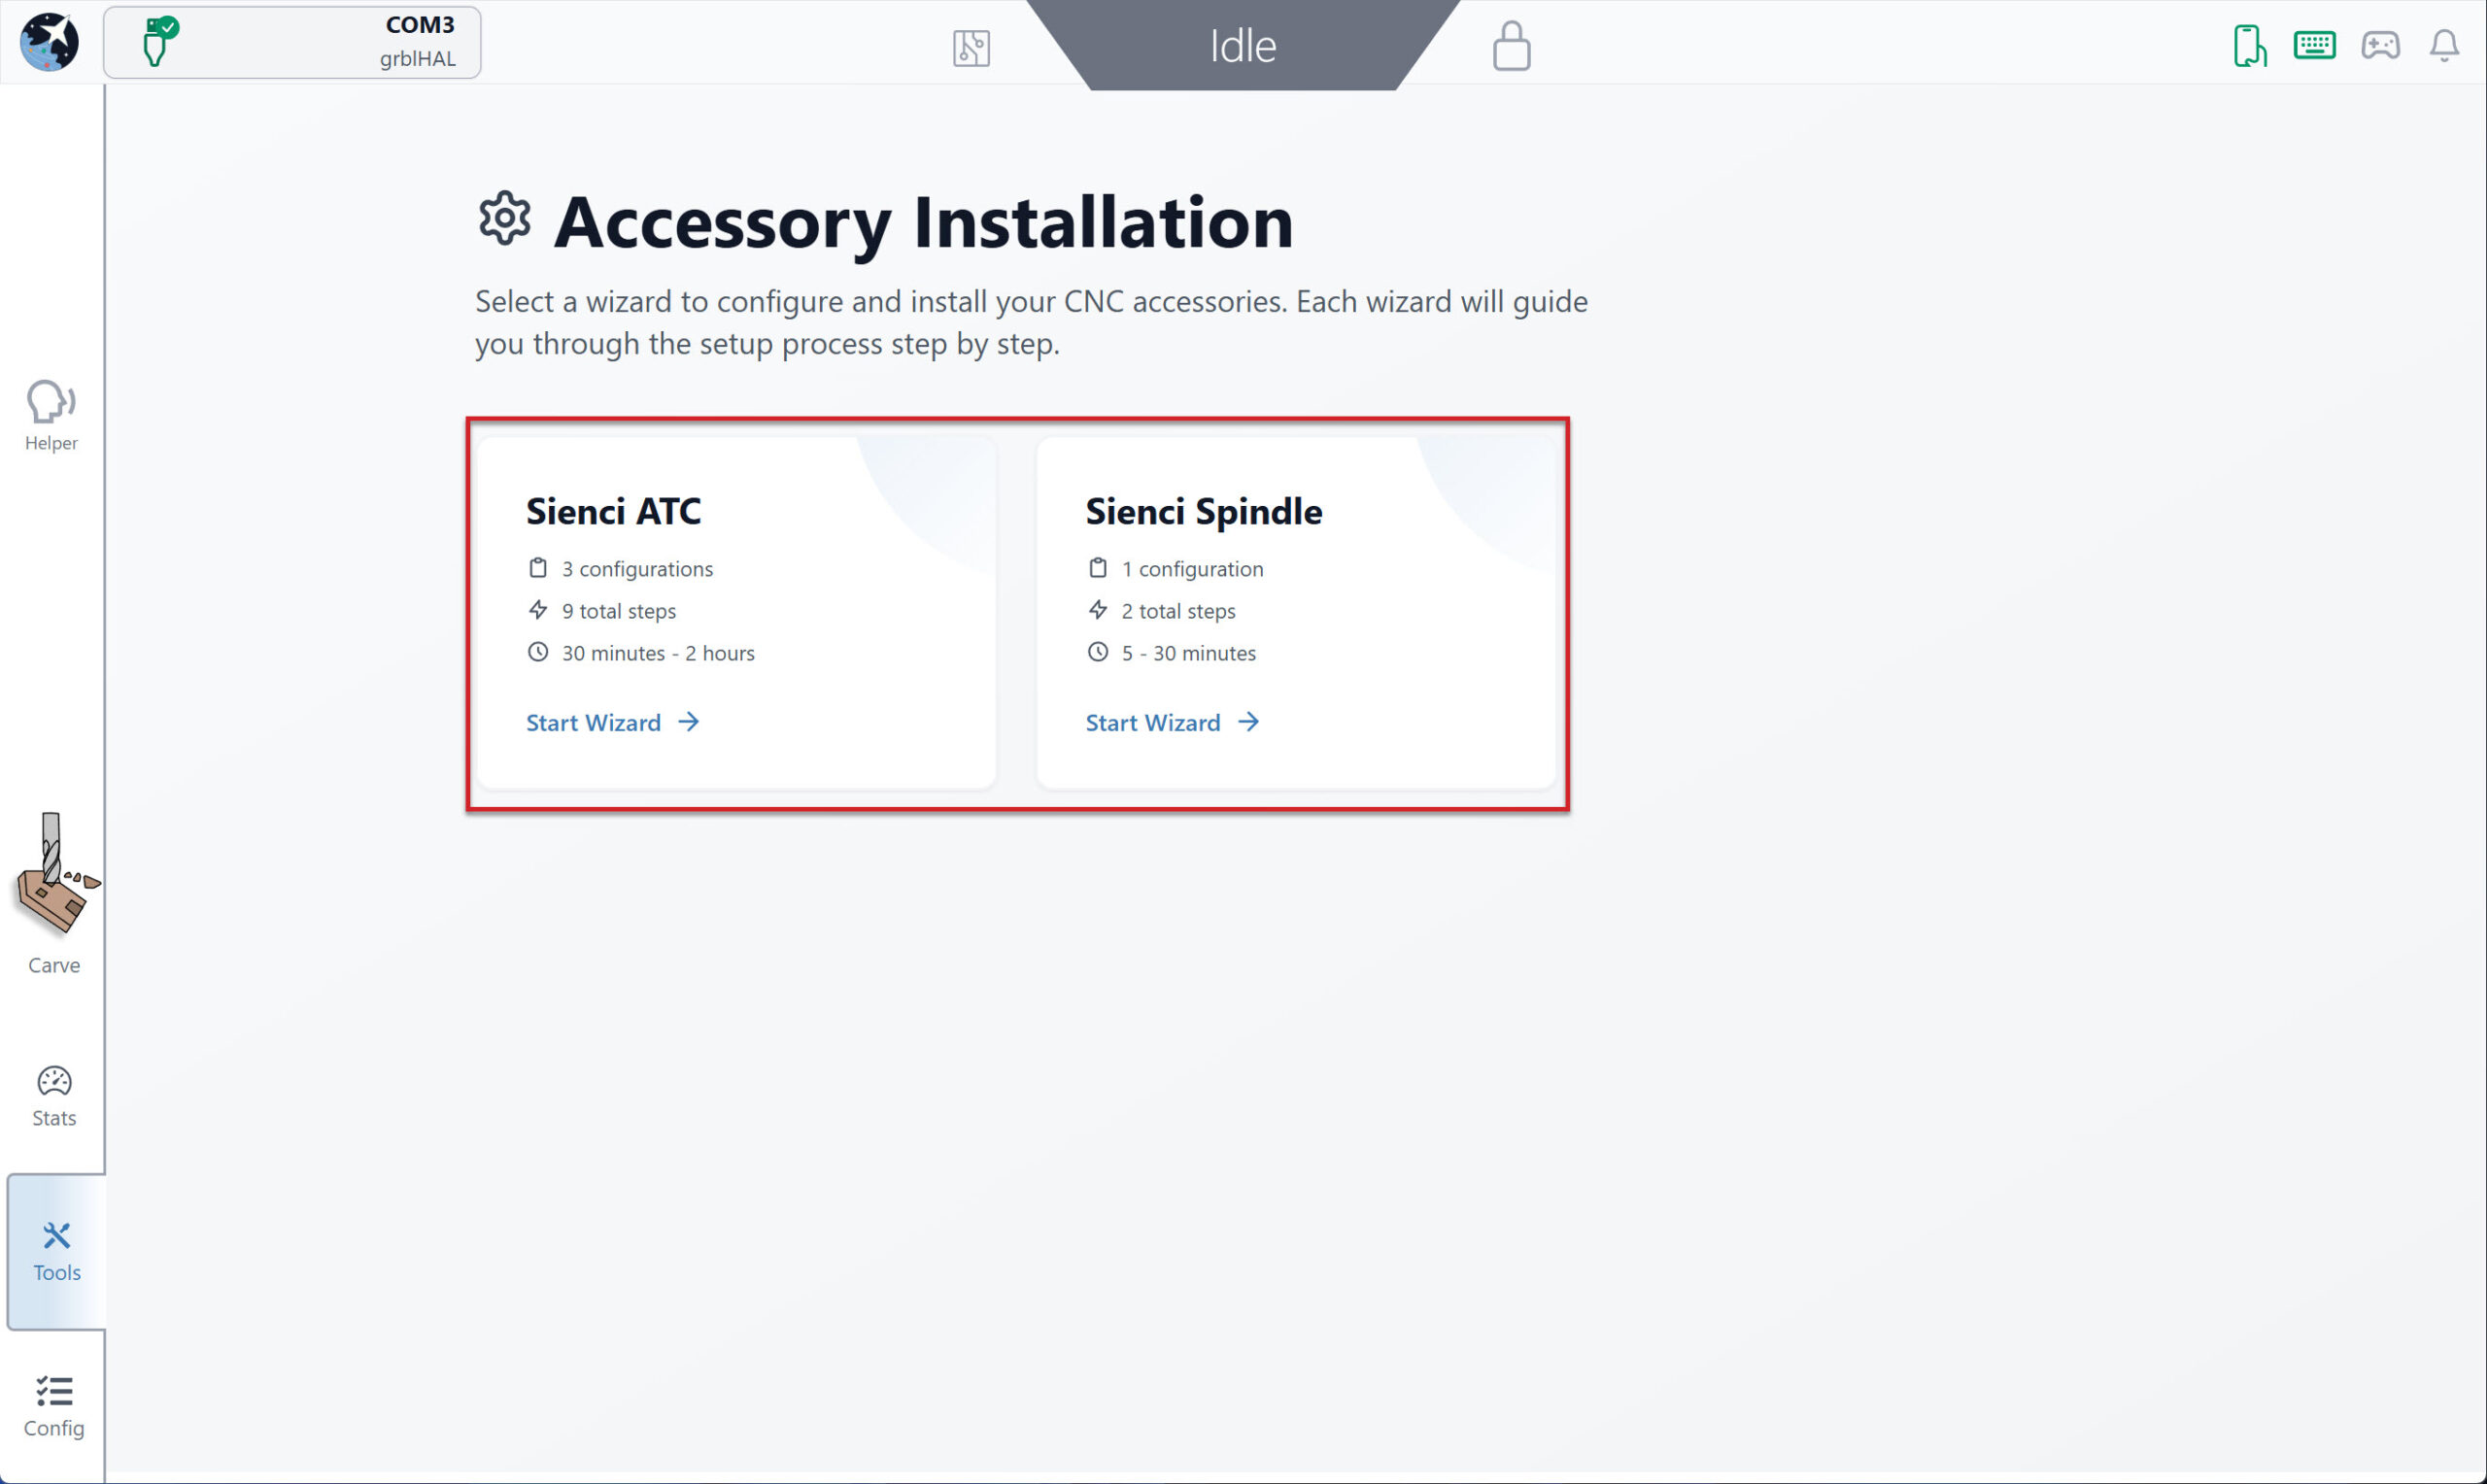
The Accessory Install Area was added to simplify setup and configuration for supported accessories such as the Sienci Automatic Tool Changer (ATC) and spindle systems.
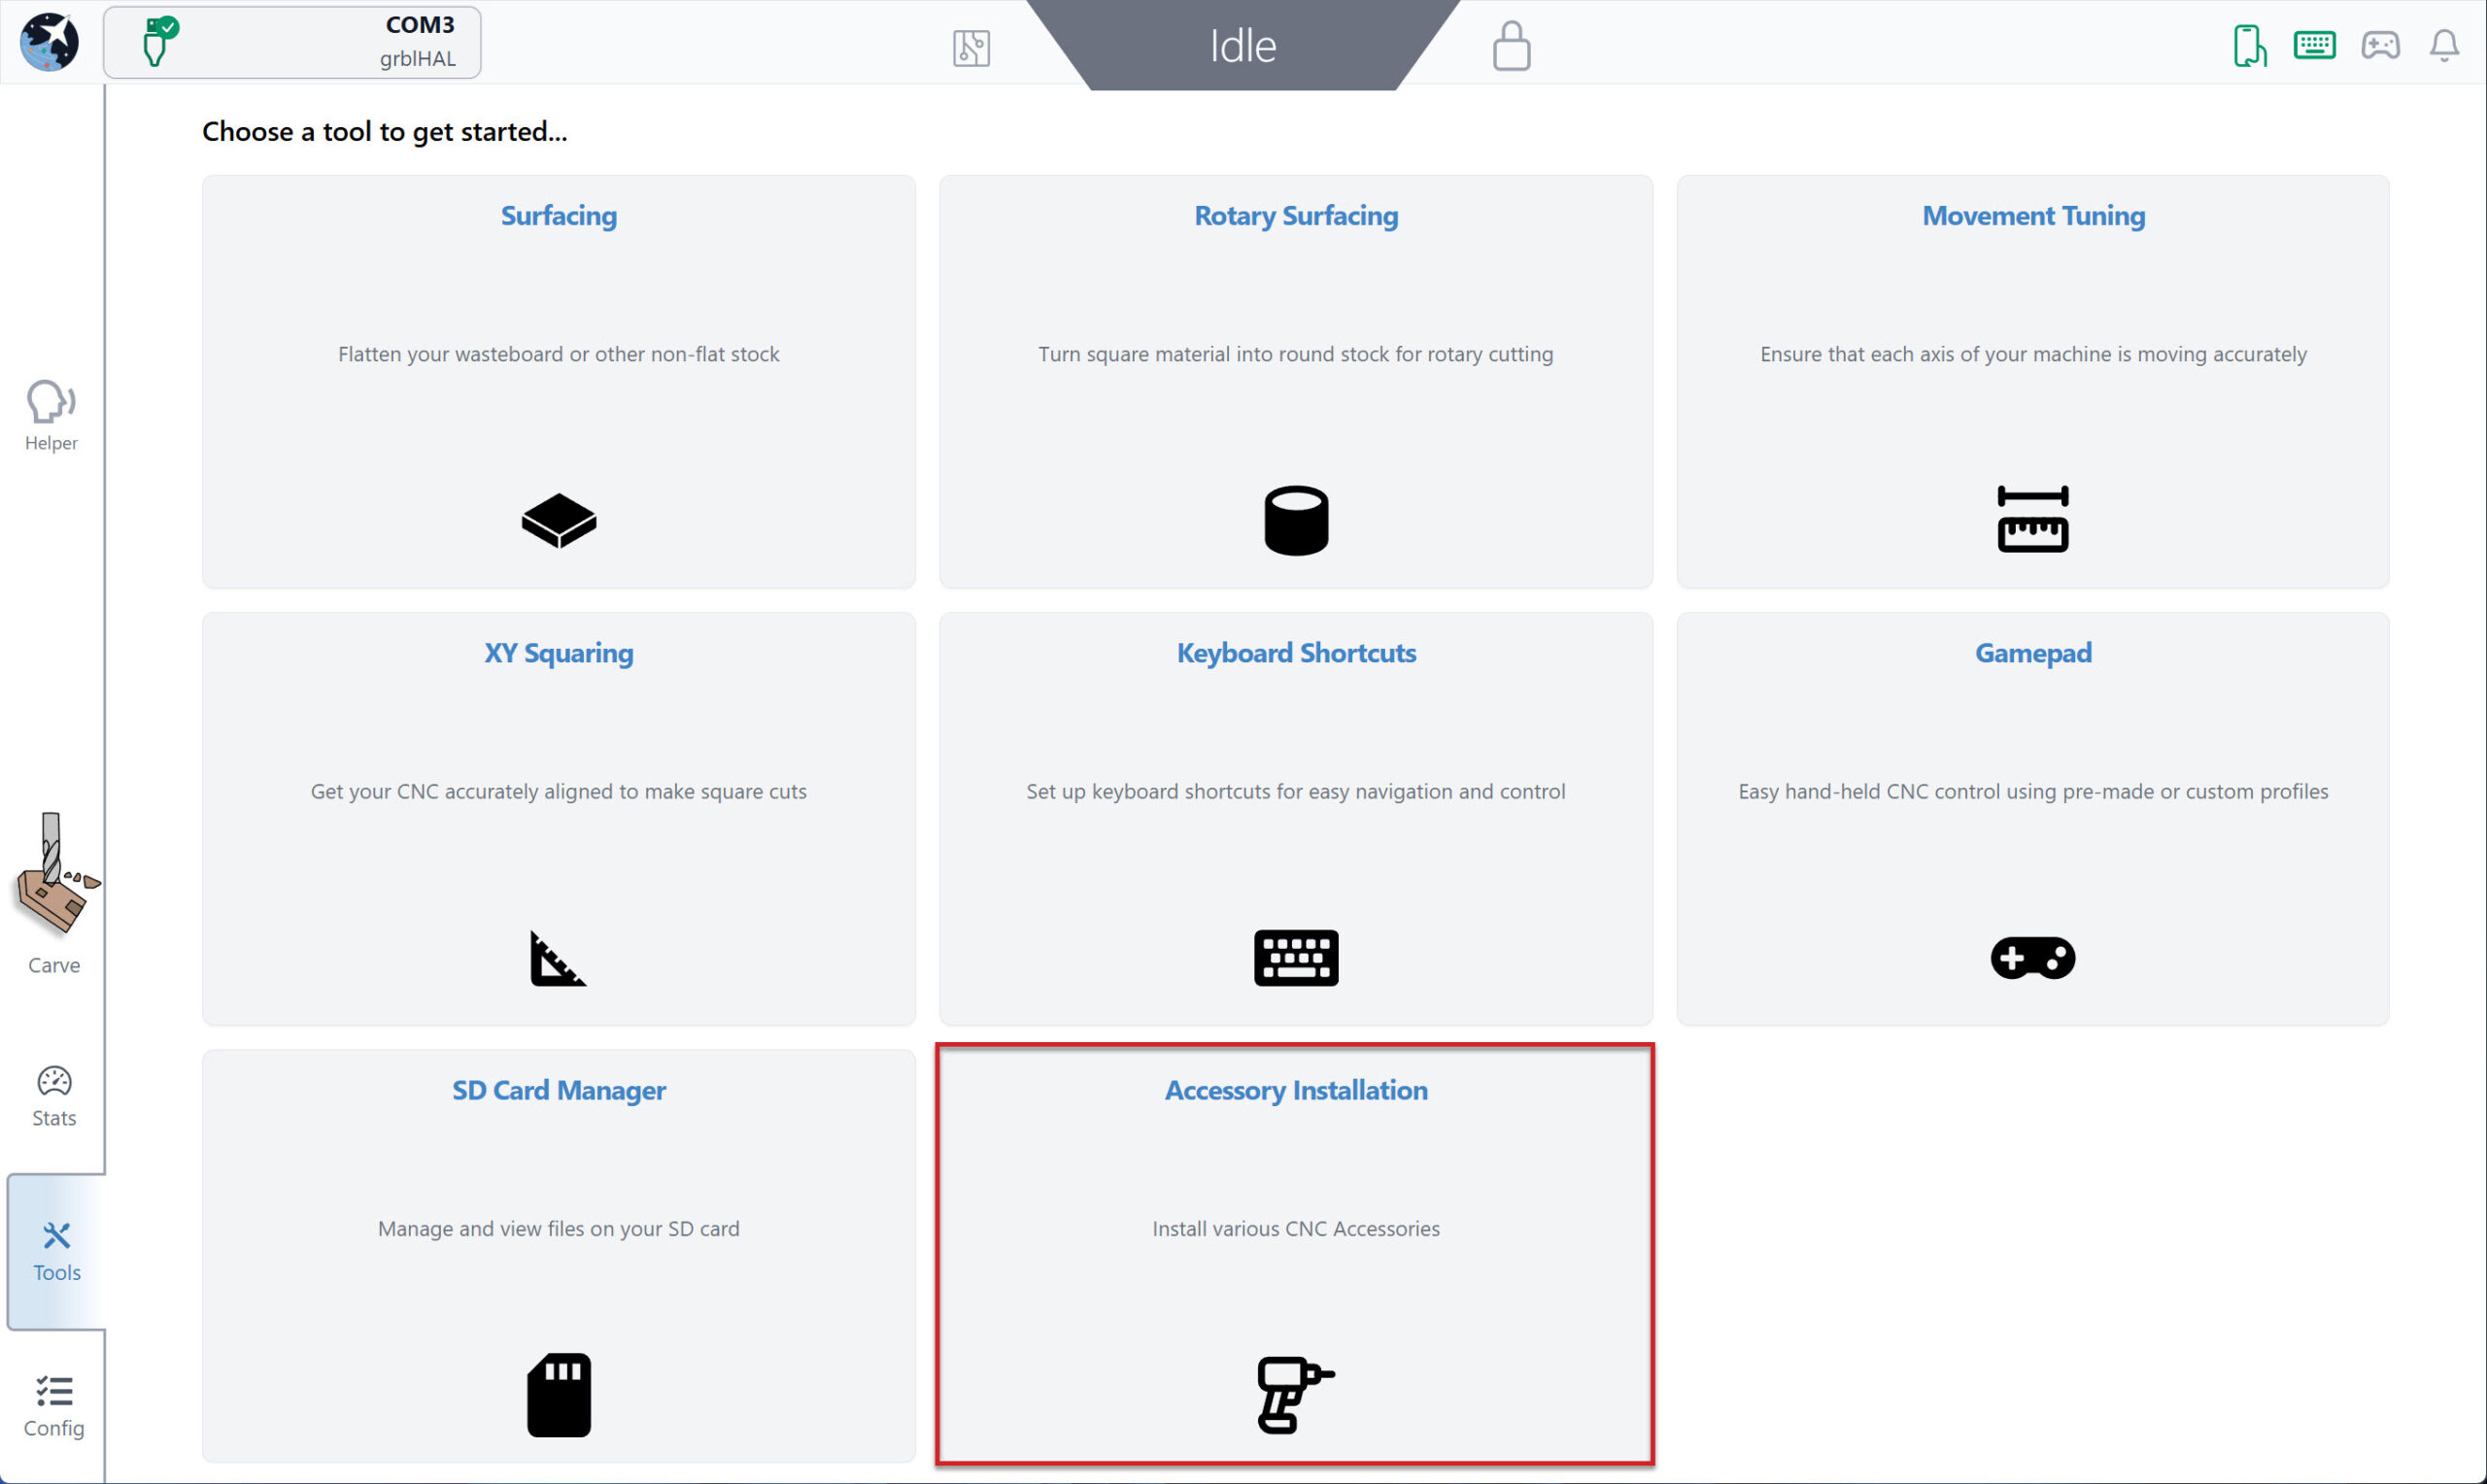
Instead of manually copying macros and configuration files, the setup tool walks users through the installation process step-by-step in a guided process.
The goal of this tool is to reduce setup complexity and minimize configuration mistakes during installation. This helps users get accessories operational faster while ensuring required files and macros are installed correctly.
Tool Timelines
Tool Timelines provide a visual overview of tool changes throughout a job, if you’ve loaded up a file with multiple toolpaths in one g-code file.
As a file runs, gSender displays:
- When tool changes occur based on how many lines each tool is doing
- Which tool is currently active
- The order of tool usage throughout the program
This makes it significantly easier to understand and monitor multi-tool jobs.
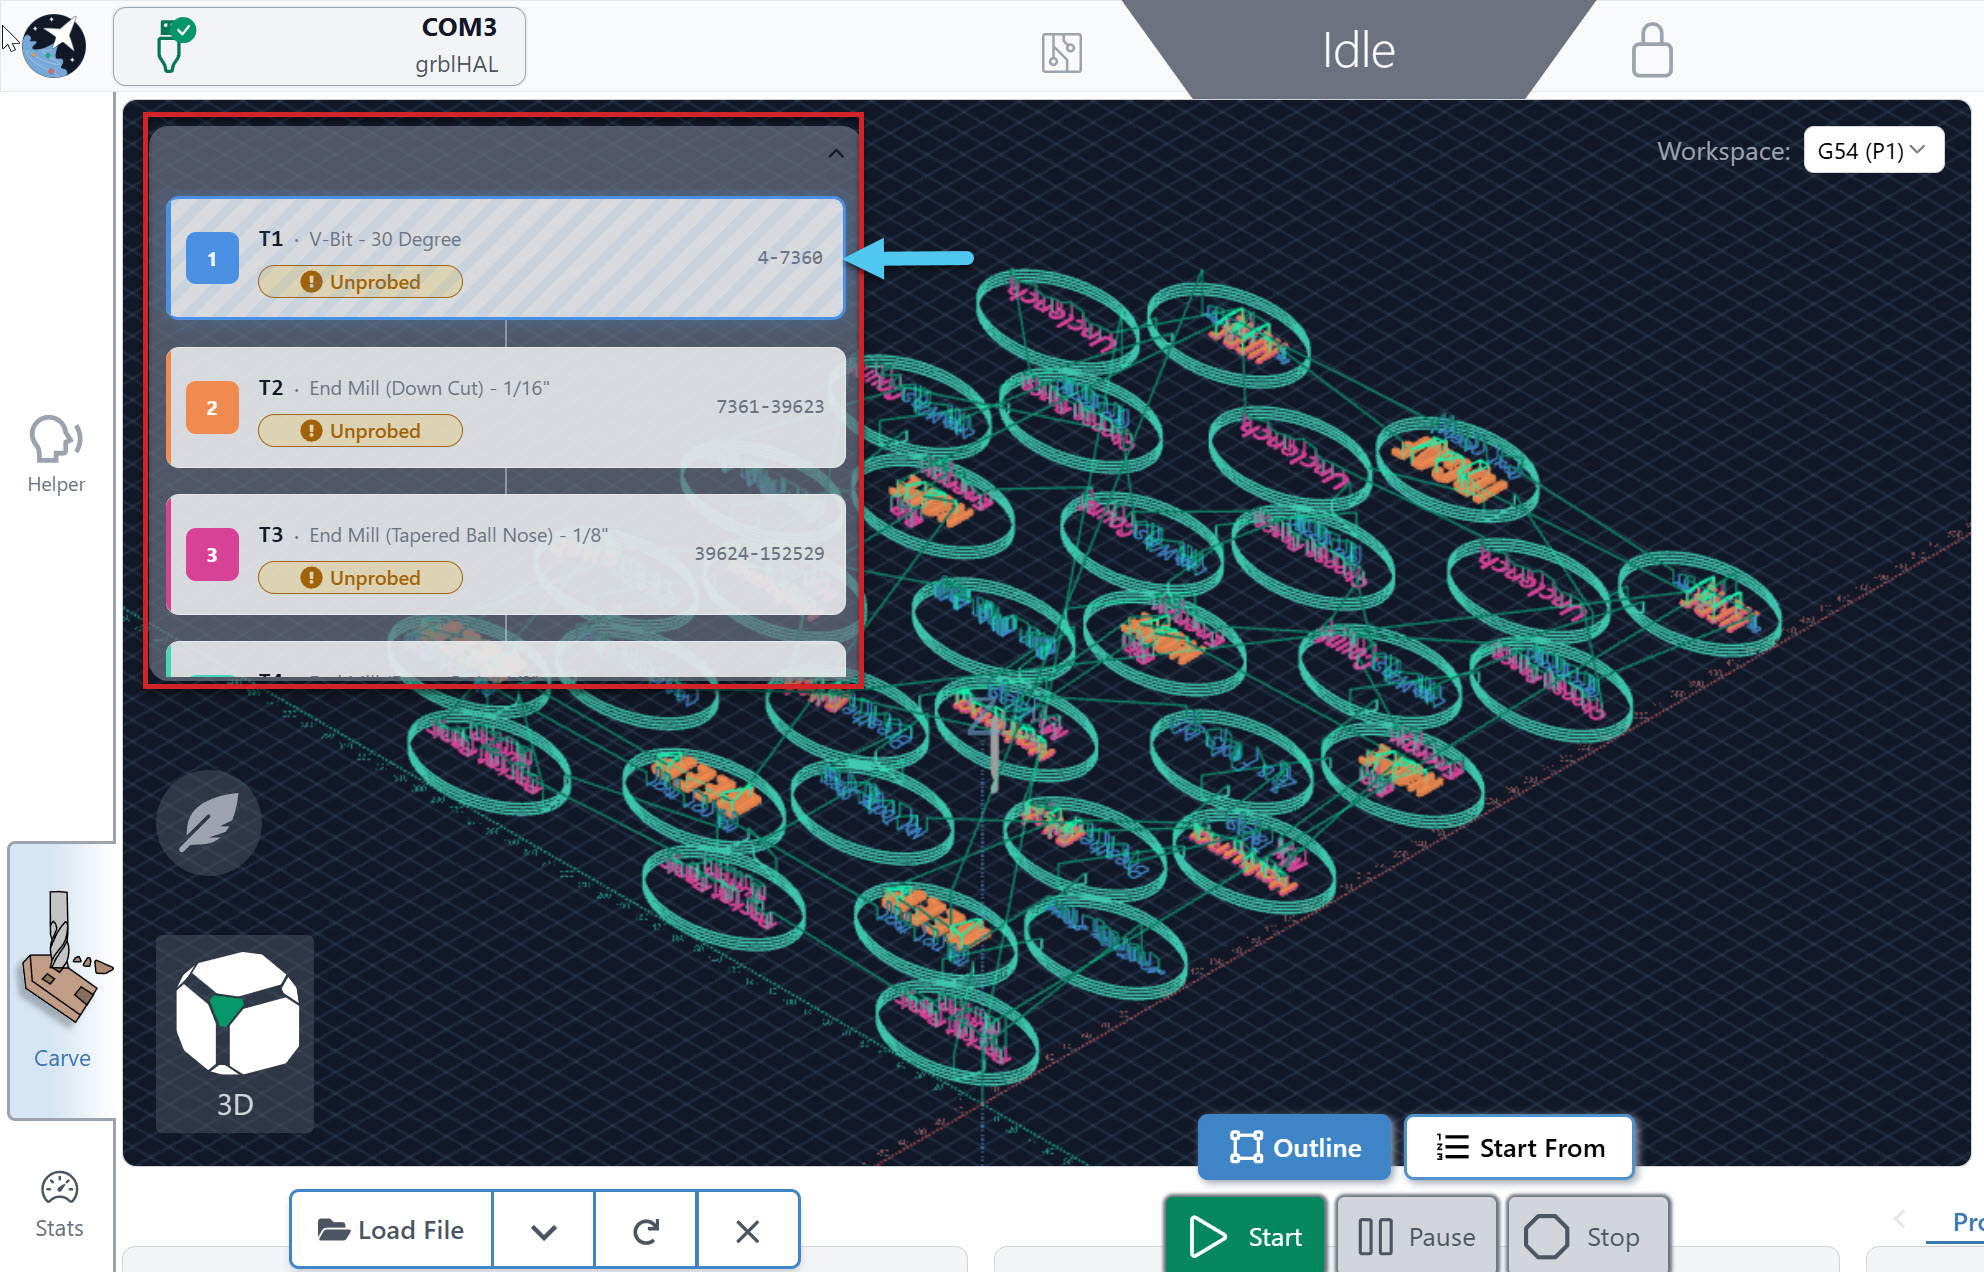
Tool Timelines also integrate with gSender’s updated visualization system, where different tools can be represented using separate colours in the visualizer.
Benefits include:
- Easier tracking of multi-tool operations
- Faster troubleshooting of CAM output
- Better visibility into job progress
- Improved ATC workflow monitoring
Tool Timelines are useful even for manual tool changes, helping users anticipate upcoming operations before they occur.
Extras
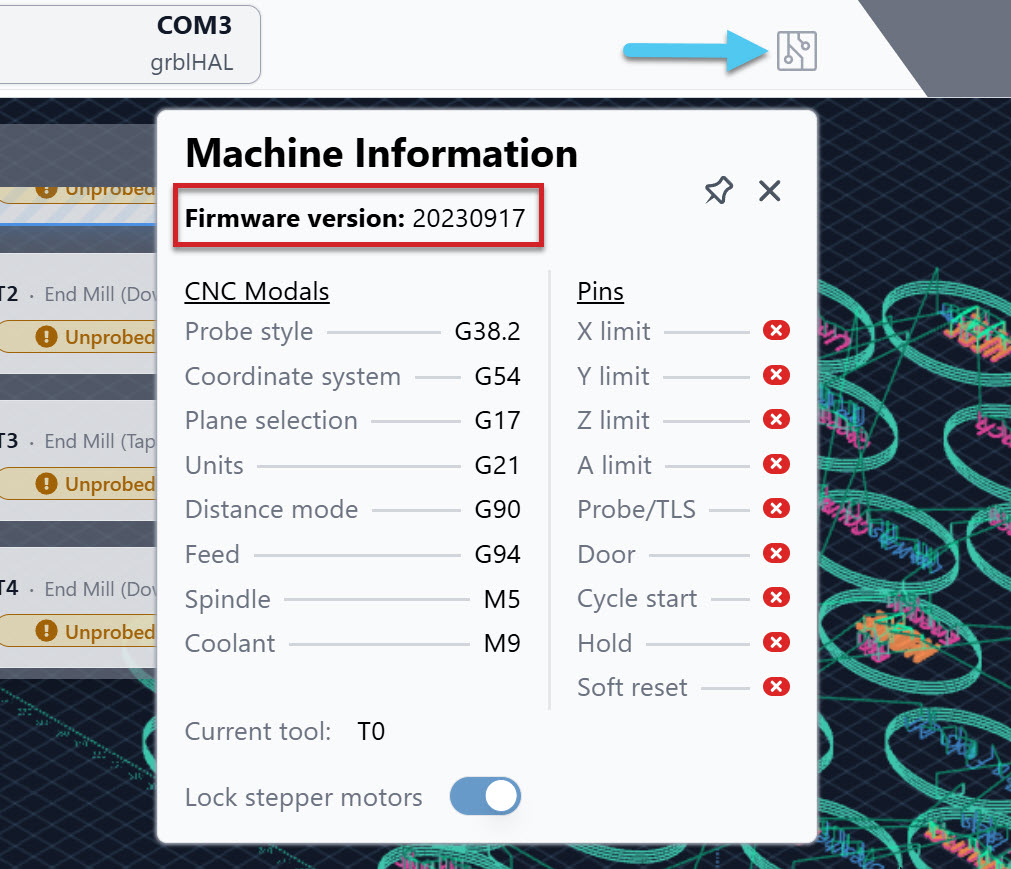
Machine Info
You can now view your firmware version, simply by clicking on your Machine Info icon. You can also see your current tool and if the ATC is enabled and setup, you will have a toggle to turn the Keep out zone on/off, just in case you get stuck.
Safe Height
We’ve updated how the GoTo safe height works. If your machine has been homed using limit switches, the safe height is calculated from the machine’s maximum Z height, so the spindle will move to max height minus the entered safe height value. If the machine has not been homed, the Z-axis will simply move upward by the safe height distance you entered.
Accessibility
You can now adjust gSender’s display scale independently of your operating system’s DPI settings, allowing you to choose the interface size that works best for your setup and visibility preferences.
Maintenance Reset
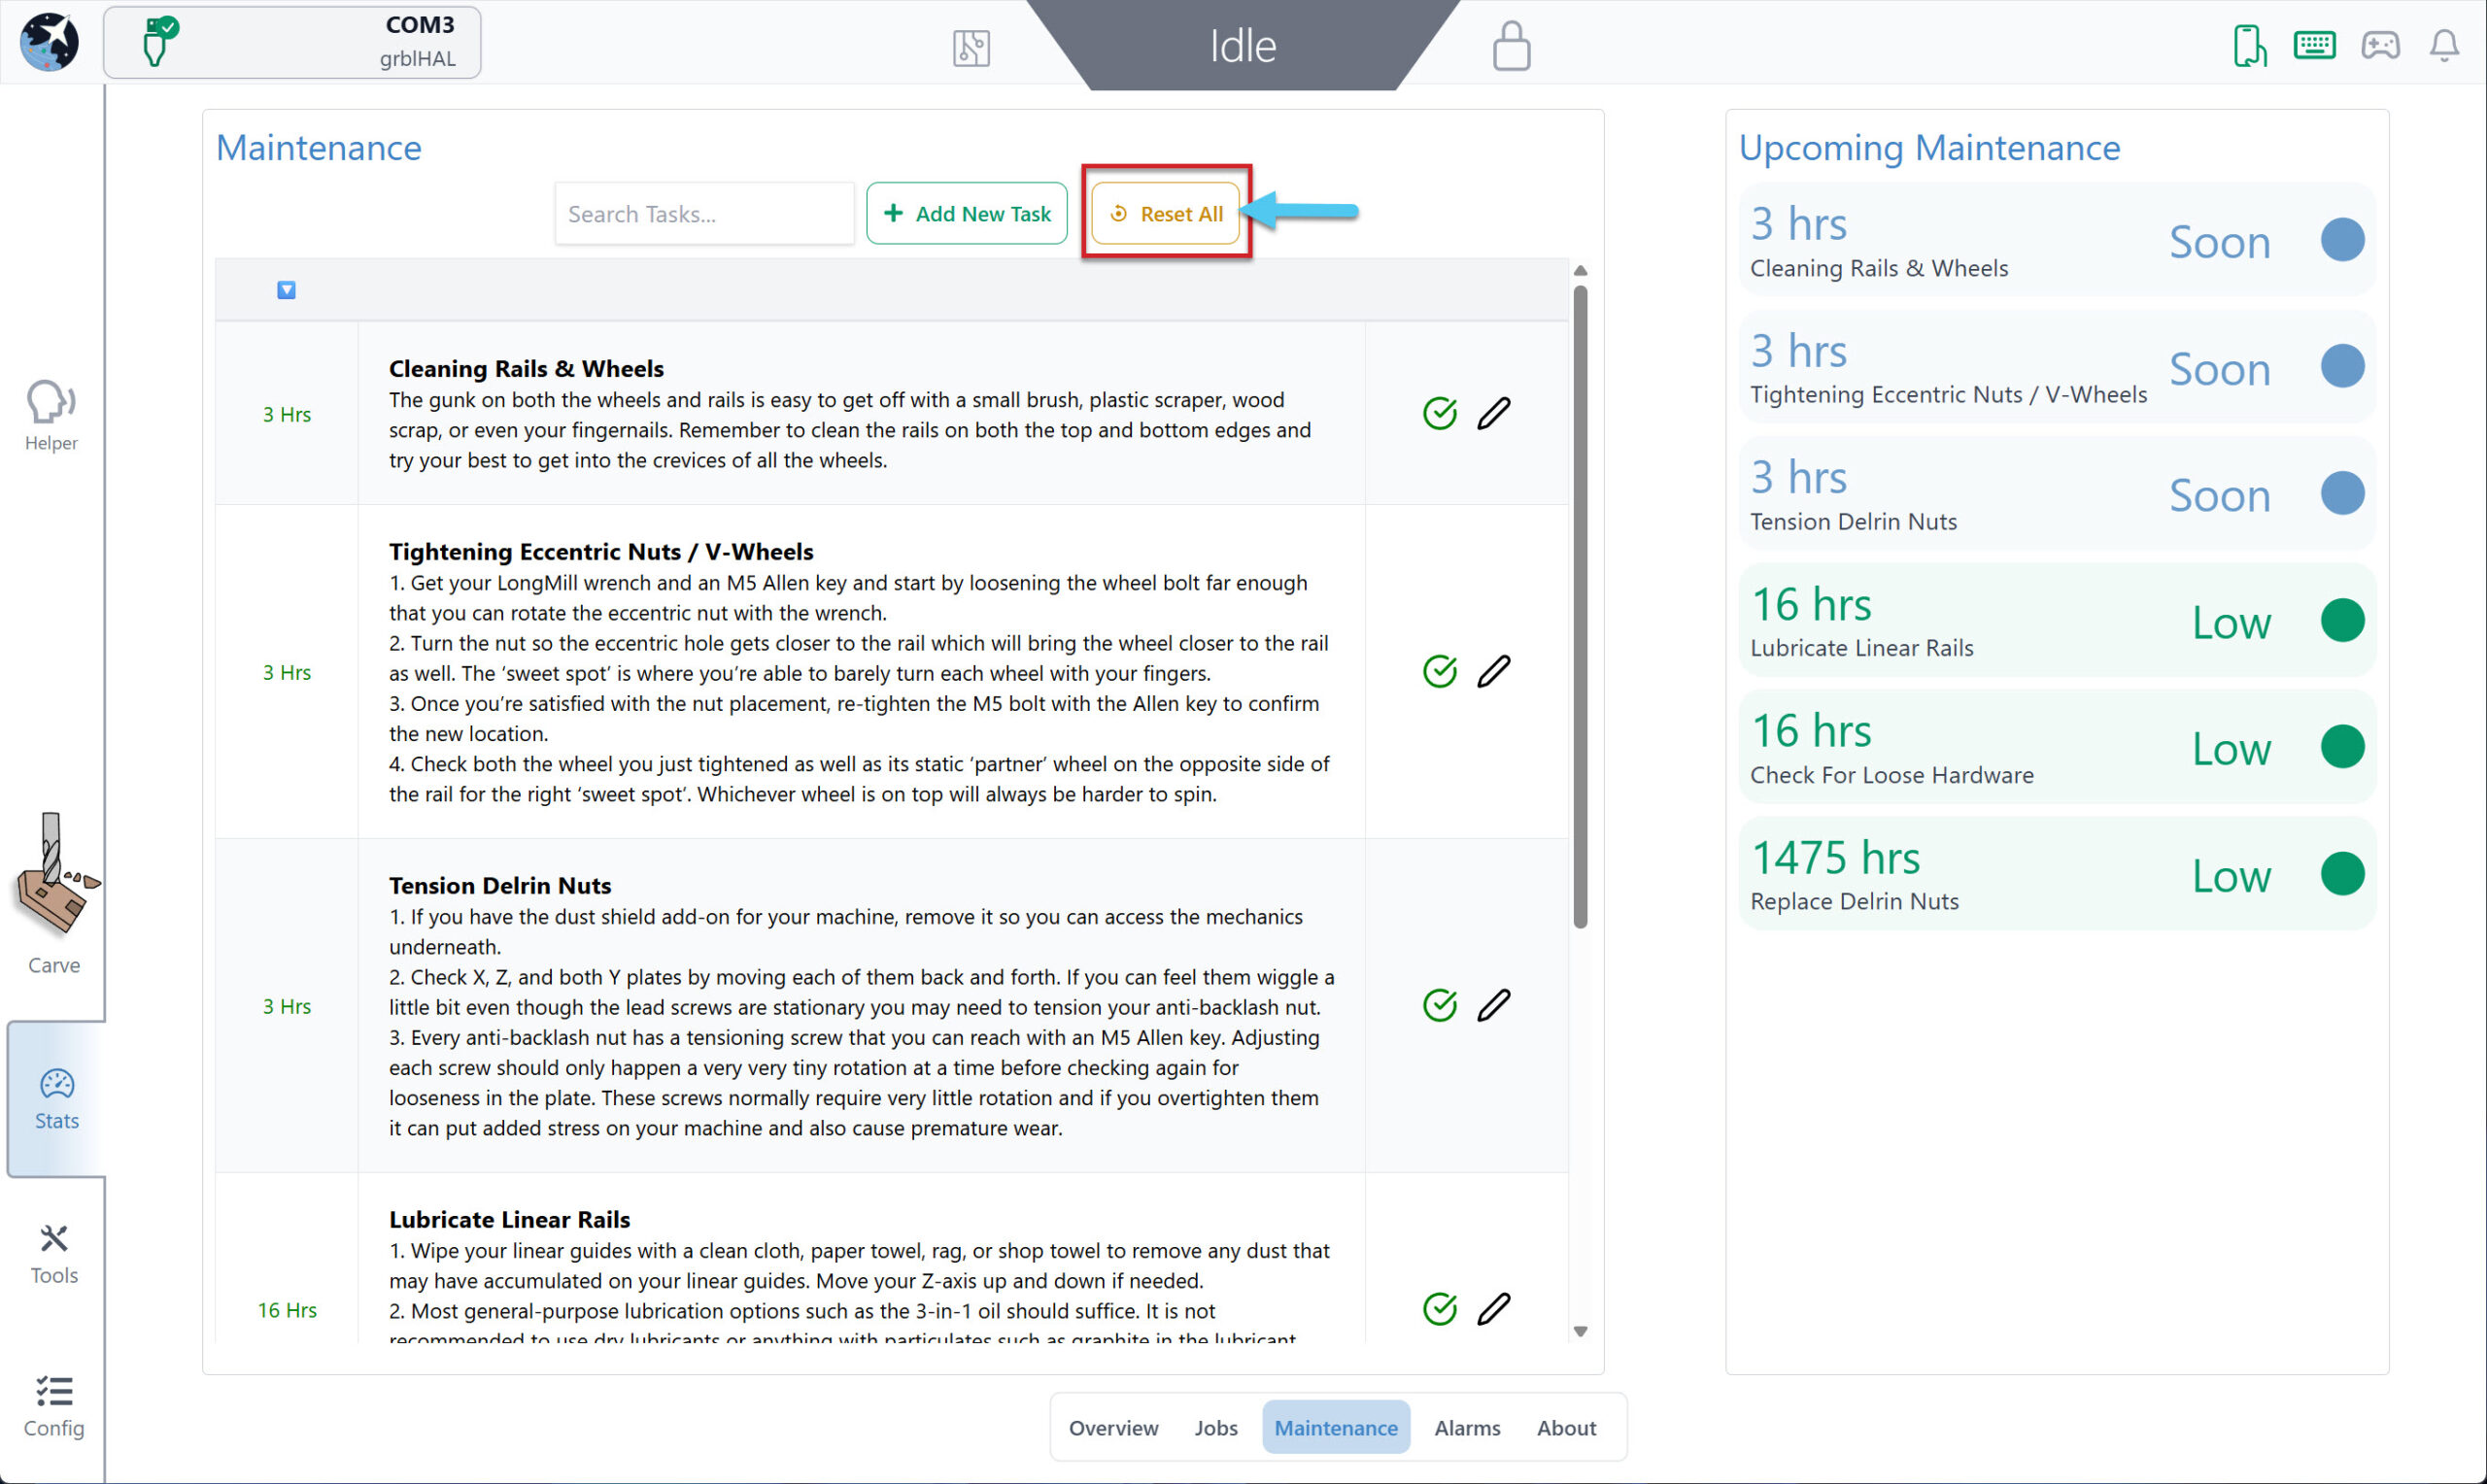
You can also now reset all of your maintenance reminders at one time, with the all powerful Reset All button.
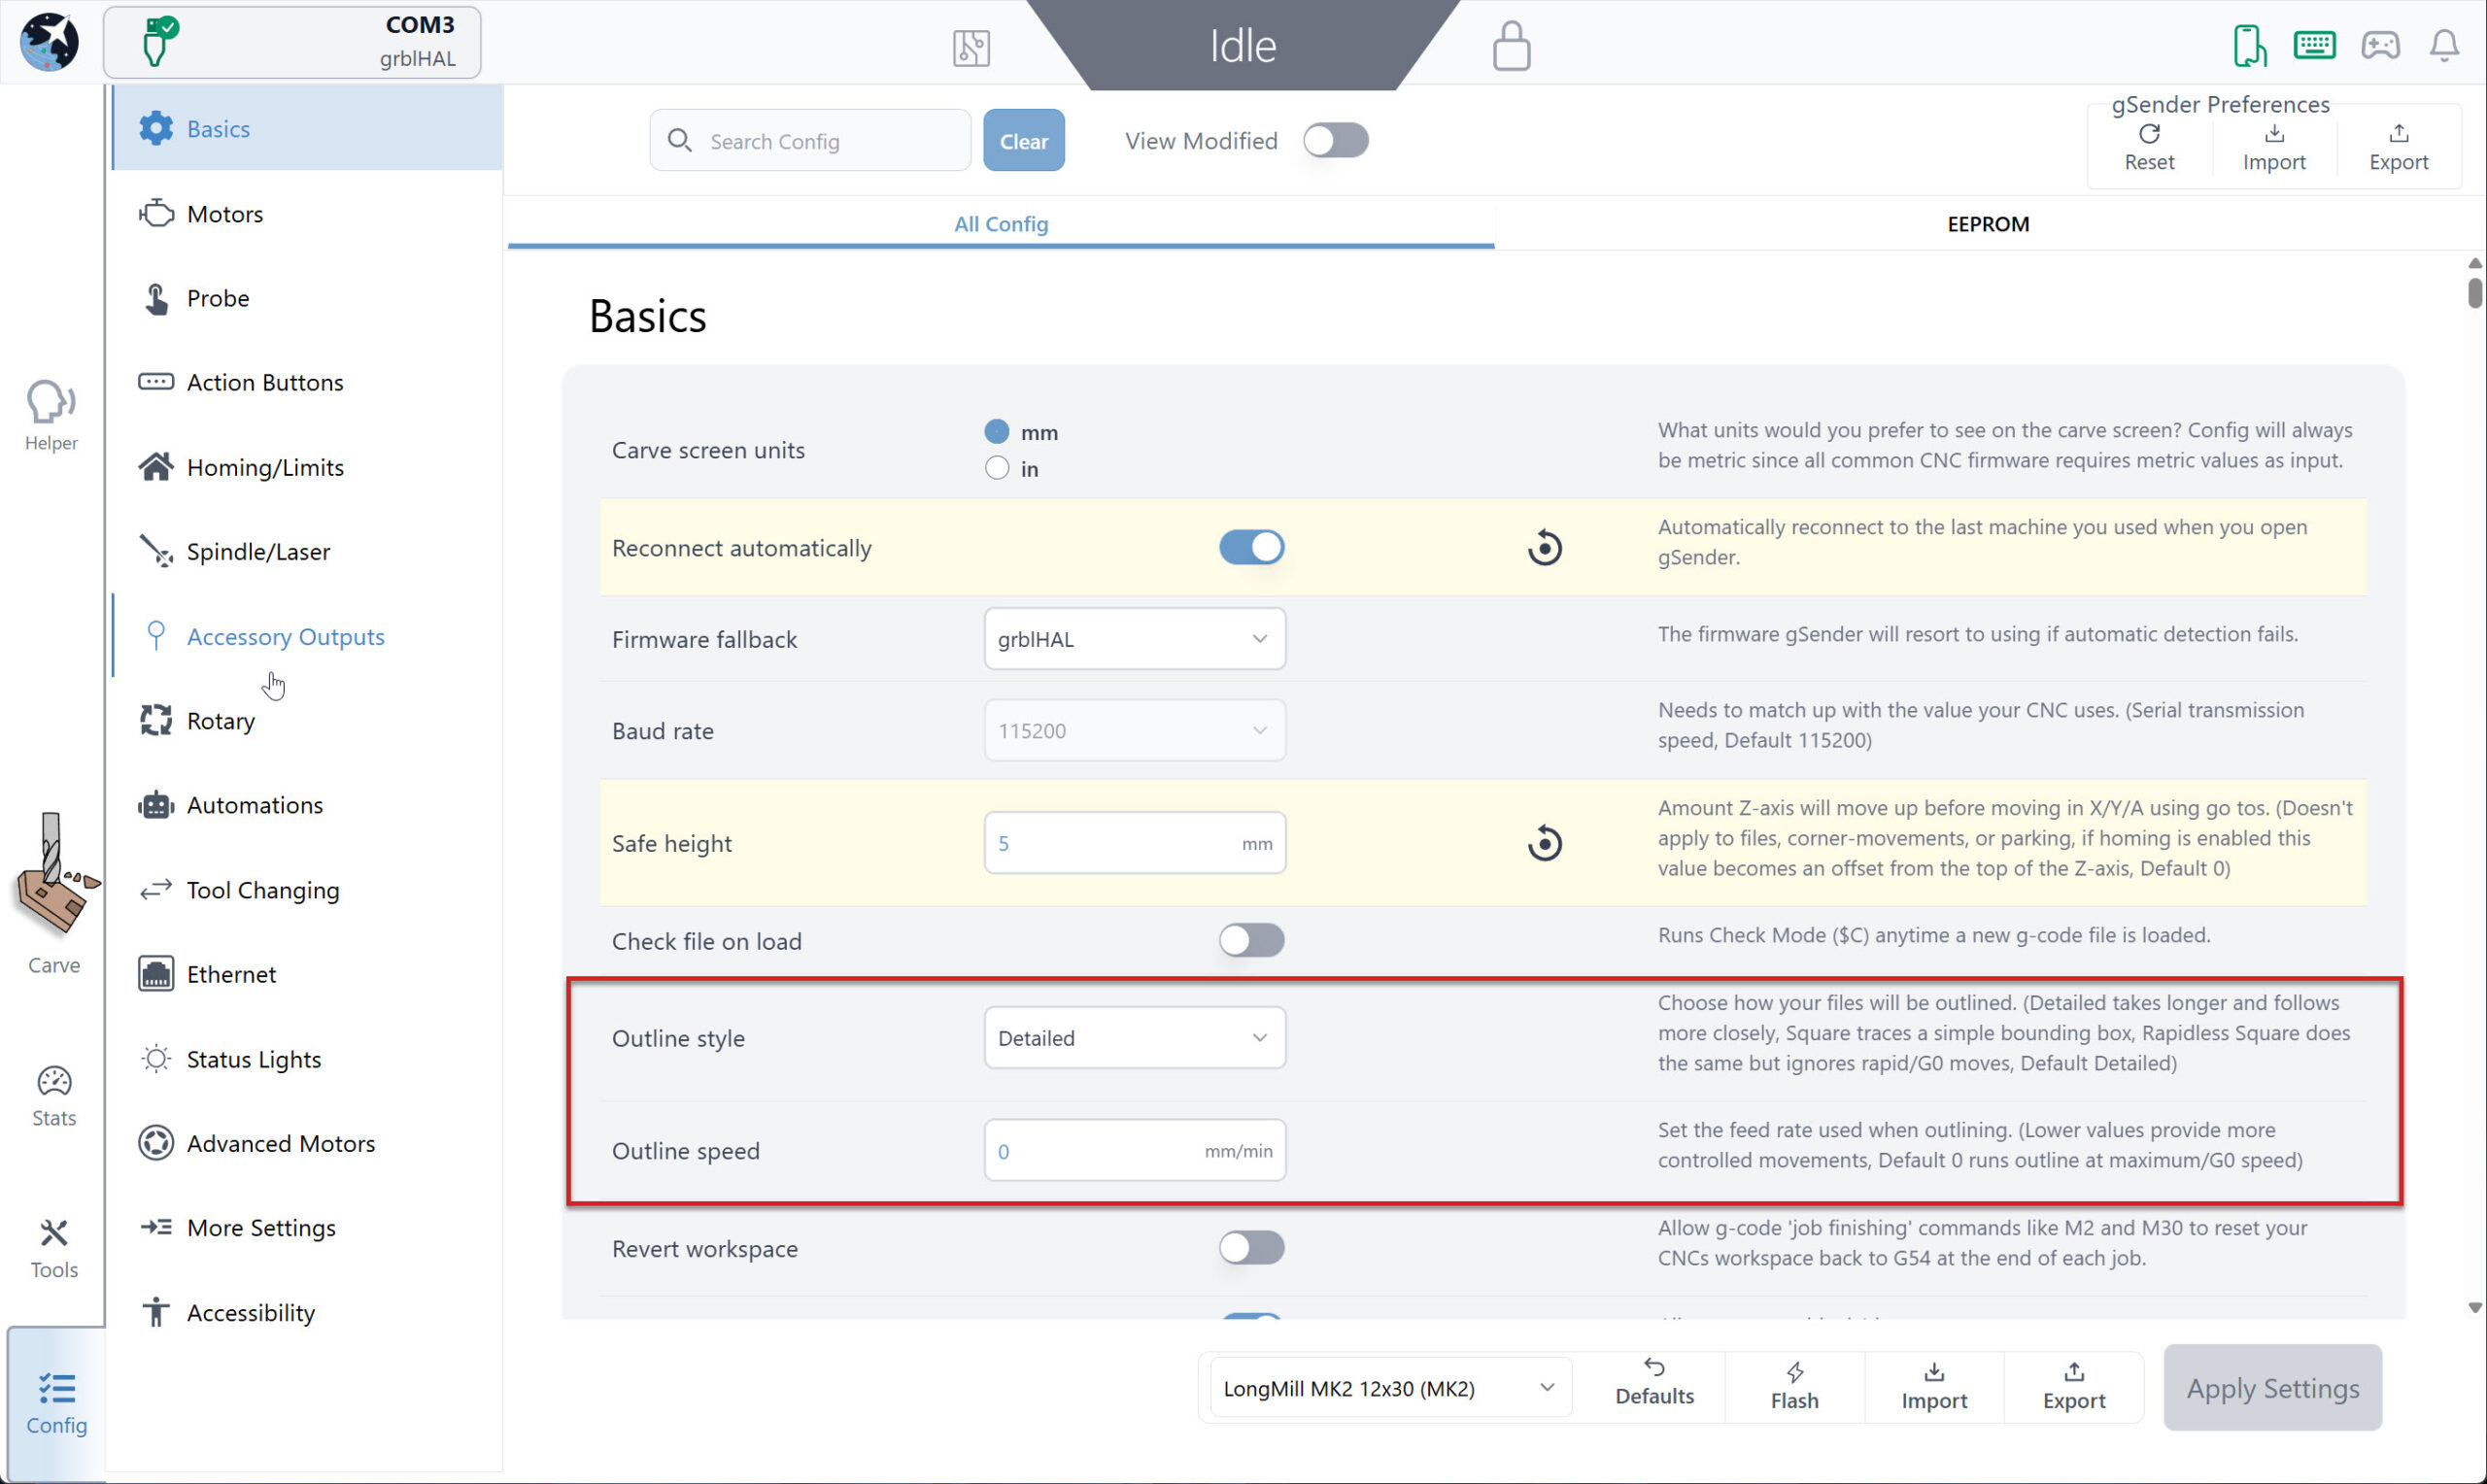
Outline Speed
You can now set the style and speed of your job outlines. Choose between detailed (most accurate), square (simple bounding box) and rapidless square (same as square, but no rapid/G0 moves)
When setting speed feed rate, know that lower values offer more controlled movements. Setting a value of 0 will disable this feature, and run at max speed.