Tool Changing
Tool Changing
For CNC machines, tool changes are pauses that are programmed in the g-code for a user to switch out the cutting tool for a different one, or the machine to do that automatically. The workflow can also sometimes involve pausing until the user tells it to continue, usually through a ‘Resume’ and/or ‘Confirm Tool Change’ button on the machine interface. This allows you to run multiple toolpaths (cutting operations) within one g-code file.
The g-code for tool changing is an M6 command. gSender is quite capable when it comes to customizing CNCs for tool changing, even having full Wizards built-in. The tool change options are in Config ➜ Tool Changing. You can select from one of 6 different options, and even choose to ‘passthrough’ the M6 and T commands to the CNC controller for CNCs that are capable of handling tool changes on their own.
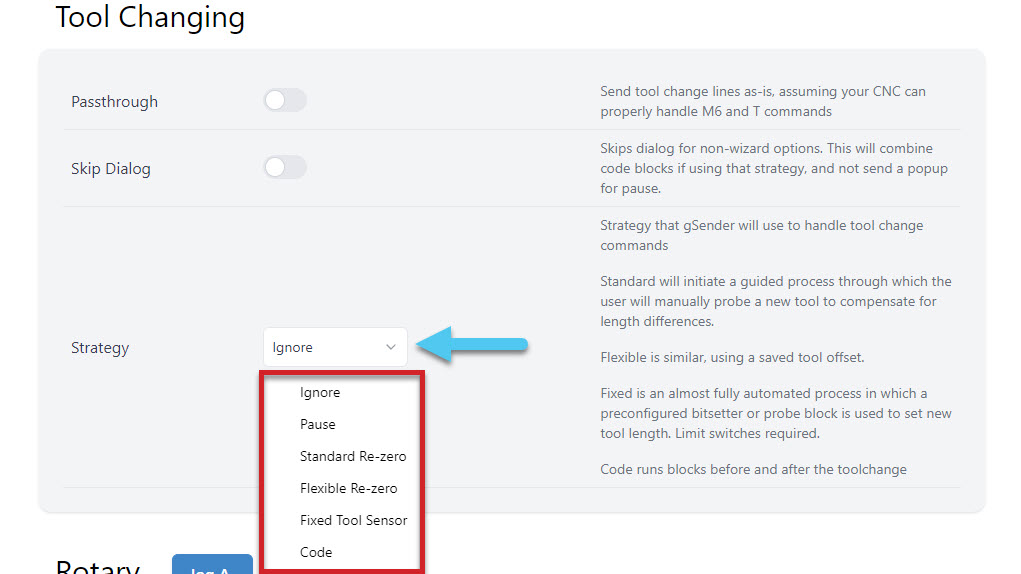
You can Ignore any M6 tool change commands, Pause the job when a tool change is recognized, or select one of the Wizards that will guide you through pre-set tool changing methods. In the image below, you can see an example of the Helper window opening up to show the Standard Re-zero Wizard with all of its guided steps.
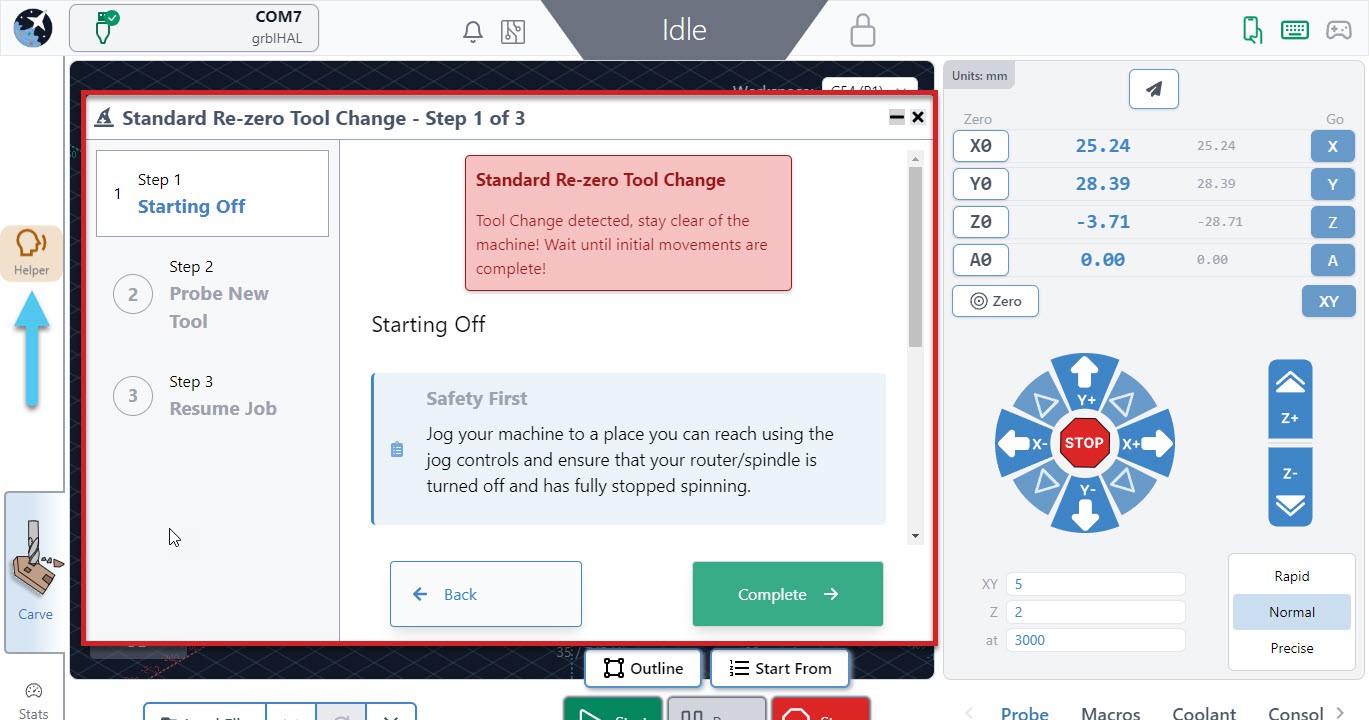
If you are using one of the wizard options, know that you can access all other gSender controls while the wizard is open like jogging and zeroing. It also has flexibility to go back a step if you missed something or had a mistake, or to be minimized temporarily if you want to check the visualizer.
- Ignore
This simply ignores any M6 commands in the g-code file. This is the default option since it’s perfect for beginners that only make projects with one tool or those that create separate files for each tool and prefer to manually perform tool changes between files. - Pause
Pauses gSender at the tool change point, as if you had hit the pause button manually. This gives you freedom to jog, zero, or anything else you’d like, and is great for those that are running multi-tool files but want to use a different process than the Wizards provide. This could be a manual probing process, a different tool changing approach, or running custom macros to support your machines specific hardware. gSender is compatible with tool length sensors like the Carbide 3D bitsetter, and our community has compiled a list of macros for tool changing that you can use when you are paused. Just note that pausing can’t always guarantee keeping track of your movements and actions when it comes time to resume the job so try to ensure you get back to the starting point and set zeros correctly. - Standard Re-zero (Wizard)
Titled ‘standard’ because it’s exactly the same as the standard process you might normally follow for running a file, changing the tool, re-zeroing Z, then running the next file except it’s applied to a single file with multiple toolpaths. Since the process is so familiar, this is a great way to dip your toes into tool changing within one file. Compatible with using a touch plate or the paper method, zero out at a predetermined spot (usually at the front left corner), and use jogging to move around. The advantage of introducing this extra automation and guidance during tool changes is that you don’t have to worry about custom macros and it reminds you of simple steps like turning the router back on or zeroing Z. - Flexible Re-zero (Wizard)
Similar to the ‘standard’ wizard with similar steps and manual movements but provides the ability to zero Z off a point that wasn’t your starting Z when it comes time to change the tool. This is useful if you tend to carve away your material and lose the starting Z or you don’t have limit switches but would like a process similar to a tool length sensor. - Fixed Tool Sensor (Wizard)
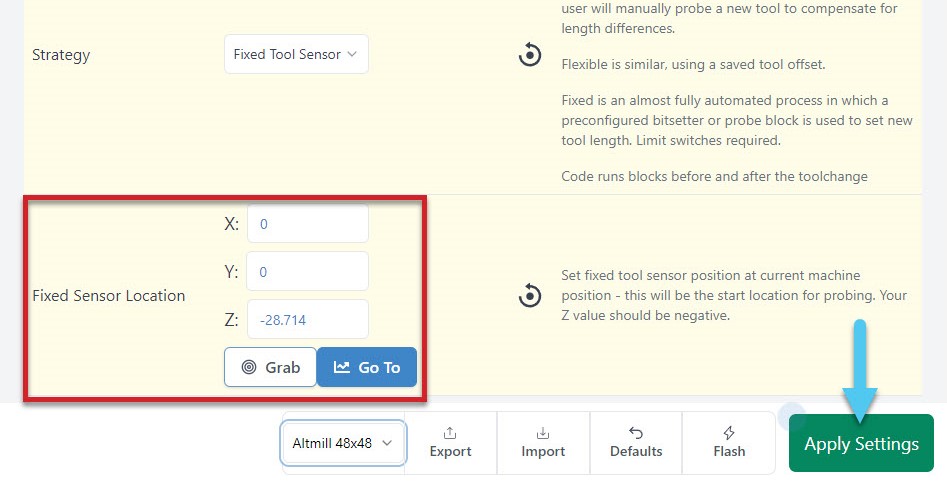
This is the most automated setting where all probes and movements are done for you, you only need to intervene by changing the tools. Set up the job and zero normally then expect the machine to move to the sensor location when it reaches a tool change, verify tool length, prompt for a change, probe new tool, then resume cutting. Your machine will need to be homed, have limit switches, and have a tool length sensor (compatible with Carbide 3D bitsetter for example) in order for this option to work. To set up the sensor mount the router/spindle as far down as you might typically put it, with the longest bit mounted in it, then jog it to hover over the tool length sensor with some room to spare and open Config ➜ Tool Changing to Grab that location, then apply the new settings. This will be the spot your machine moves to every tool change so if it’s too low or your sensor doesn’t work it’ll run into the sensor. You can also enter these coordinates manually, and test them with the Go To button.
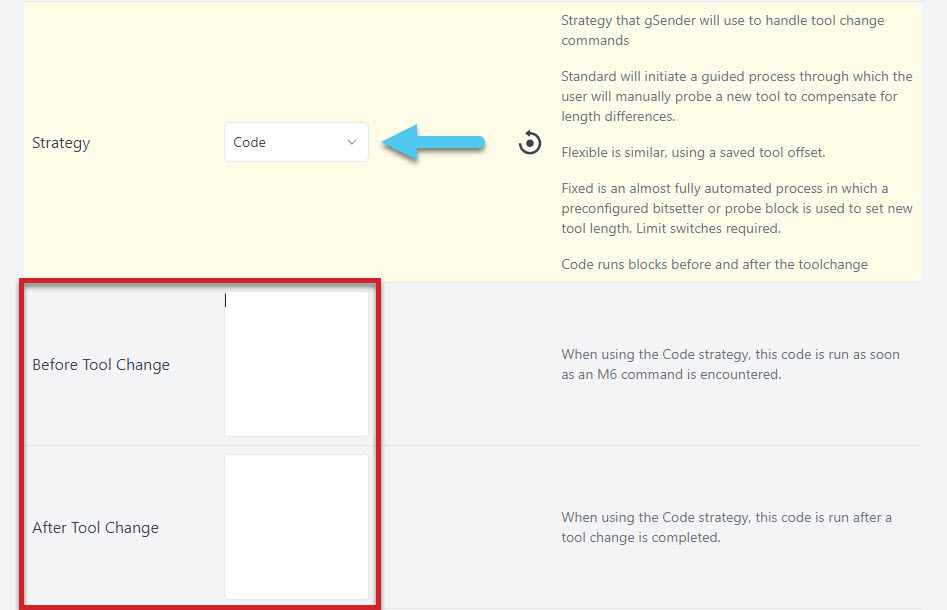
- Code
You can enter your own macros before and after the tool change with this strategy selected which is fairly powerful for making tool changing processes that are more automated than just pausing.
You can also learn more about how some of this works by checking out this user-made video by SparksTech!