Wireless Control
Wireless Control
If you’ve ever wanted to run your CNC without being stuck right next to it, this is the feature you’re looking for. Once enabled, it will allow other devices on the same internet network to connect to the main computer that’s running your CNC. These ‘remote devices‘ can be anything that can connect to the internet and run a web browser, meanwhile the ‘inline computer‘ plugs into your CNC with a USB or Ethernet cable and will receive commands over the internet from the remote device.
This feature is handy if you’d like to:
- Load in a file from your design computer outside your shop then run it on your computer inside the shop
- Use a tablet as the primary means of controlling your CNC rather than a mouse and keyboard
- Use a phone for occasional use when jogging or running functions
- Leverage a mini PC or Raspberry Pi as the inline (tethered) computer for cheap, fanless, and reliable operation without taxing them with a display, keyboard, and mouse (though this still doesn’t create a fully ‘headless’ setup)
Before diving into the setup, here are some quirks and warnings that are important to keep in mind:
- Both systems need to be on the same internet network to work
- The ‘remote device‘ needs to be able to run a web browser
- The setup process can be a little more involved, so we don’t advise using this feature if you’re not confident with troubleshooting your own setup
- You may need to be an Administrator of the inline computer to make the changes needed
- If you intend to use this feature for more important projects or with expensive tools or materials, keep in mind that it will always be inherently less reliable than a hard-wired connection
- This feature is NOT intended to enable use of your CNC while AWAY FROM YOUR WORKSHOP. A CNC should always be run while you or another knowledgeable operator is in the vicinity to ensure safe machine operation and be able to react if intervention is required. CNCs can cause fires from electronics, material friction, and can have other safety hazards if not properly monitored.
Wireless Setup
All setup steps need to happen on the inline computer (the computer you’ll have connected via USB or Ethernet to your CNC) and have been simplified to mostly happen within gSender:
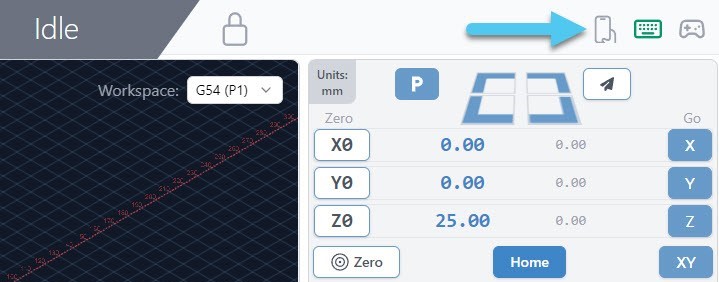
- To begin, click the cell phone icon on the top right of the screen.
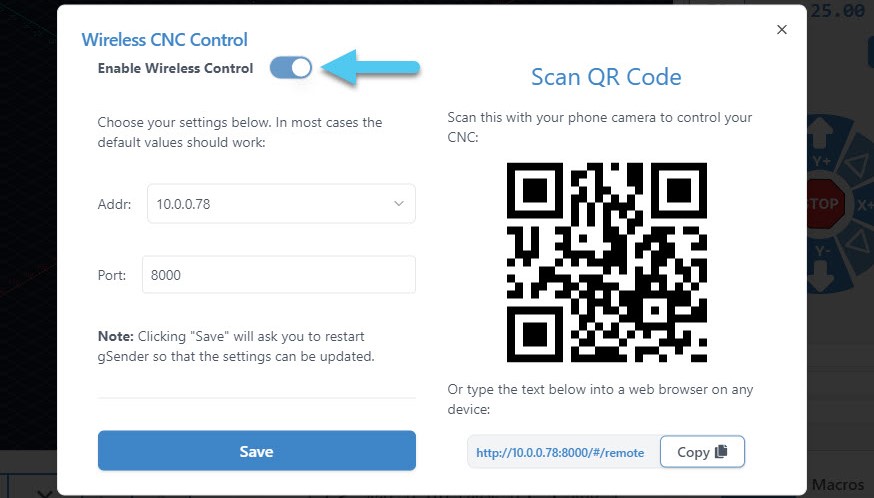
- This is where wireless control is set up. First, click the ‘Enable Wireless Control‘ toggle. Second, you’ll see the boxes for ‘Addr’ (address) and ‘Port’ become available. The default values for these should work but if you have a particular setup or require troubleshooting then consider changing these.
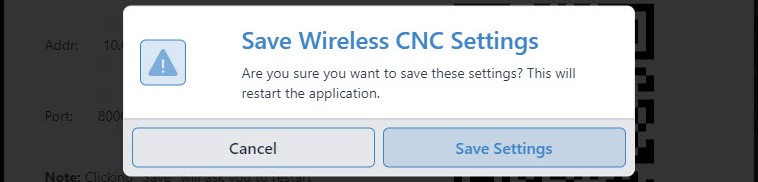
- Once you click the ‘Save’ button, gSender will automatically restart in order for the changes to take place.
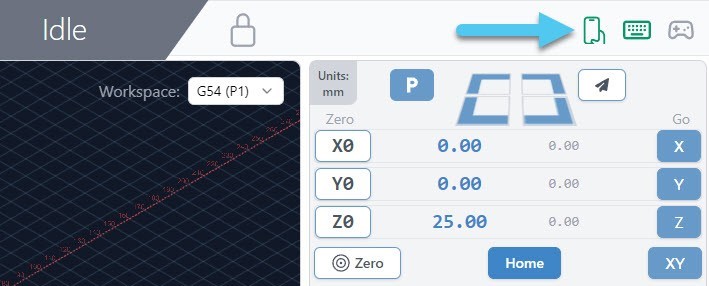
- You’ll know the setup was successful if gSender restarts and the remote connect icon is green.
- To connect with your ‘remote device‘, click the cell phone icon again to open the wireless control settings. If you plan to use a phone, use the camera to scan the QR code, and for any other device ‘copy’ the text at the bottom right into the address bar of a web browser like Chrome or Edge. After the page loads, you should see a copy of gSender running in the web browser!
- If there was a problem during setup, then you might’ve encountered a firewall or unavailable port. Solutions to these are covered in the troubleshooting section.
Using gSender Remotely
With setup complete, regular use is very straightforward:
- As long as your ‘inline computer’ is on and connected to your CNC, and your CNC is powered on, then re-using the same text on the web browser of any device will give you access to a copy of gSender running fully remotely. Example text could look like this “192.168.68.155:8000” where for the phone interface it would have “/#/remote” added onto the end.
- For phones and tablets, it can also be easy to re-use this webpage by saving it to a bookmark on your home-screen so you can open Remote gSender easily anytime you want! Check out this video for details.
- Once connected, you’ll be able to control your CNC remotely with most of the same features and functions you’d normally expect:
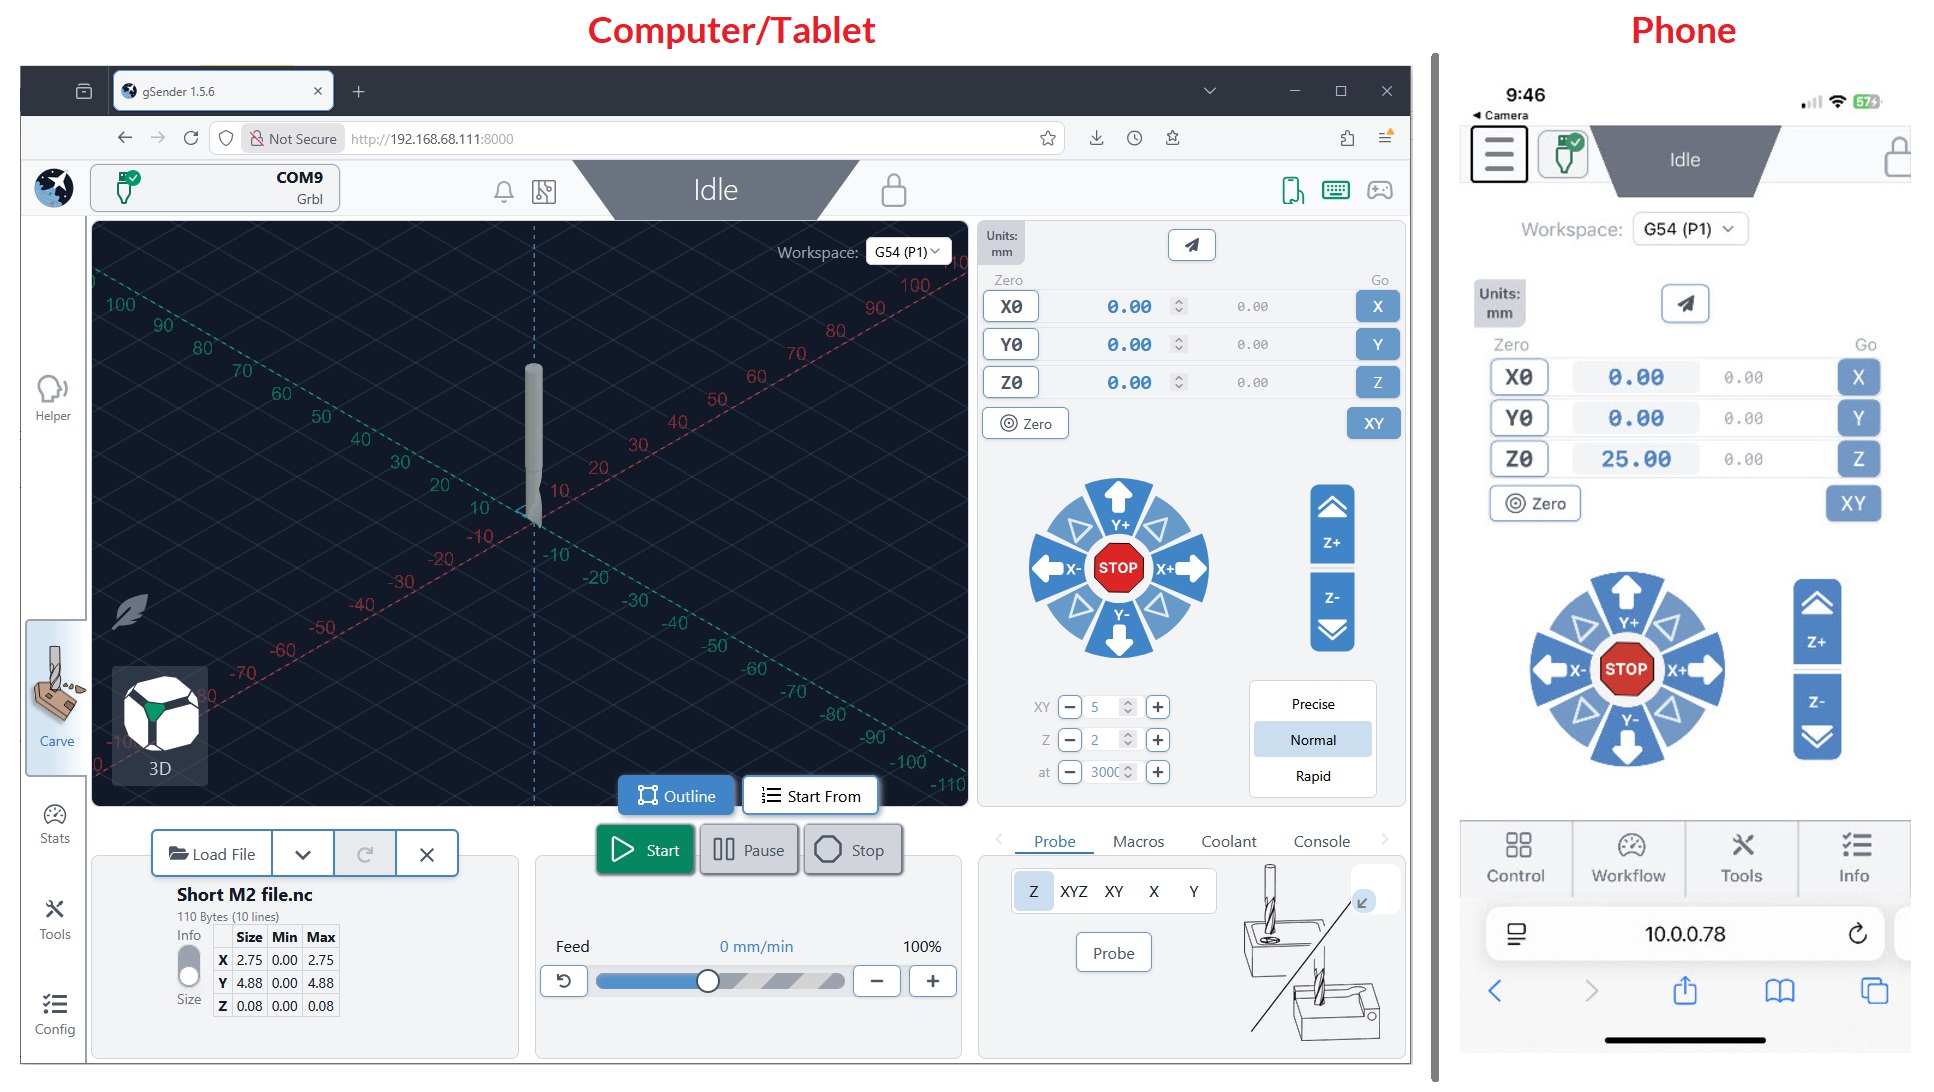
- Use both the remote and inline devices simultaneously to control your CNC like jogging, opening and closing files, probing, macros, and more
- Notice that both their screens look exactly the same so you can watch the visualizer move around or check on the machine state
- On phones the screen will look different since we’ve optimized it for jogging, setting zeros, and probing
- When you click to ‘load a file’ you’ll only be able to load files from the device you’re currently on, don’t expect to gain access to the files stored on the opposite device. However once the file is loaded into gSender, you’ll be able to run it from any device.
- There can be multiple remote devices all connected to the same inline computer at the same time to control your CNC from multiple devices. There can also be multiple inline computers controlled from the same remote computer, giving you multi-CNC control from the same device.
- Some gSender-specific ‘local’ settings like won’t carry over to the remote device so if you want to make sure files are run the same way every time you’ll need to transfer your gSender settings over by following the ‘Transfer Settings’ instructions
Troubleshooting
If you ran into issues during remote control setup, here are some checks you can make:
- Make sure you have gSender open, have gSender connected to your CNC, and you’ve turned wireless control on
- Ensure both your computers / devices are on the same internet network and the IP numbers match on both devices
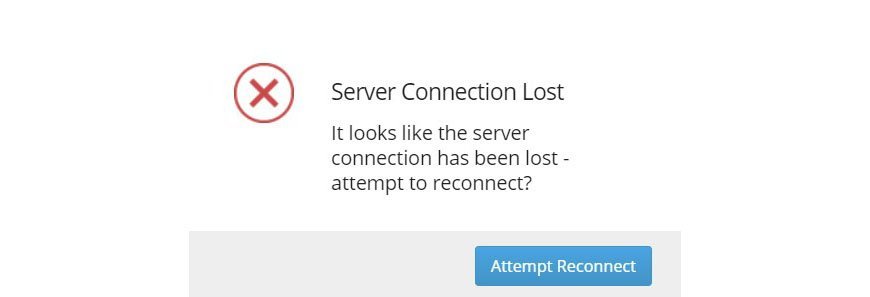
- If on the remote device you get a popup for “Server Connection Lost”, this just means that either gSender on the inline computer was closed or the shared internet is disconnecting. You should be able to fix this by restarting gSender on the inline device, then clicking “Attempt Reconnect” on the remote device.
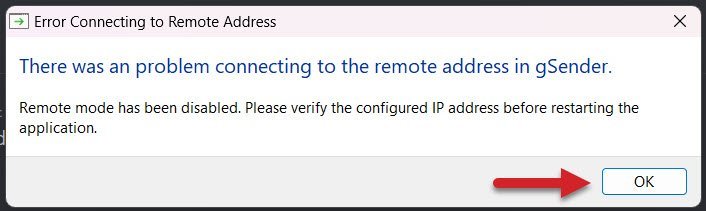
- If there was a problem using the specified IP address or Port, you’ll get an error window to let you know. In this case you should be able to reopen gSender, go back to the Wireless Control settings, and try another IP or Port until the setup is successful. Common port values are 3000, 8000, and 8080 and generally don’t go below 1024 since those are considered privileged. Changing IP addresses can also help if you’re running a VPN or need a different internal IP to external IP mapping.
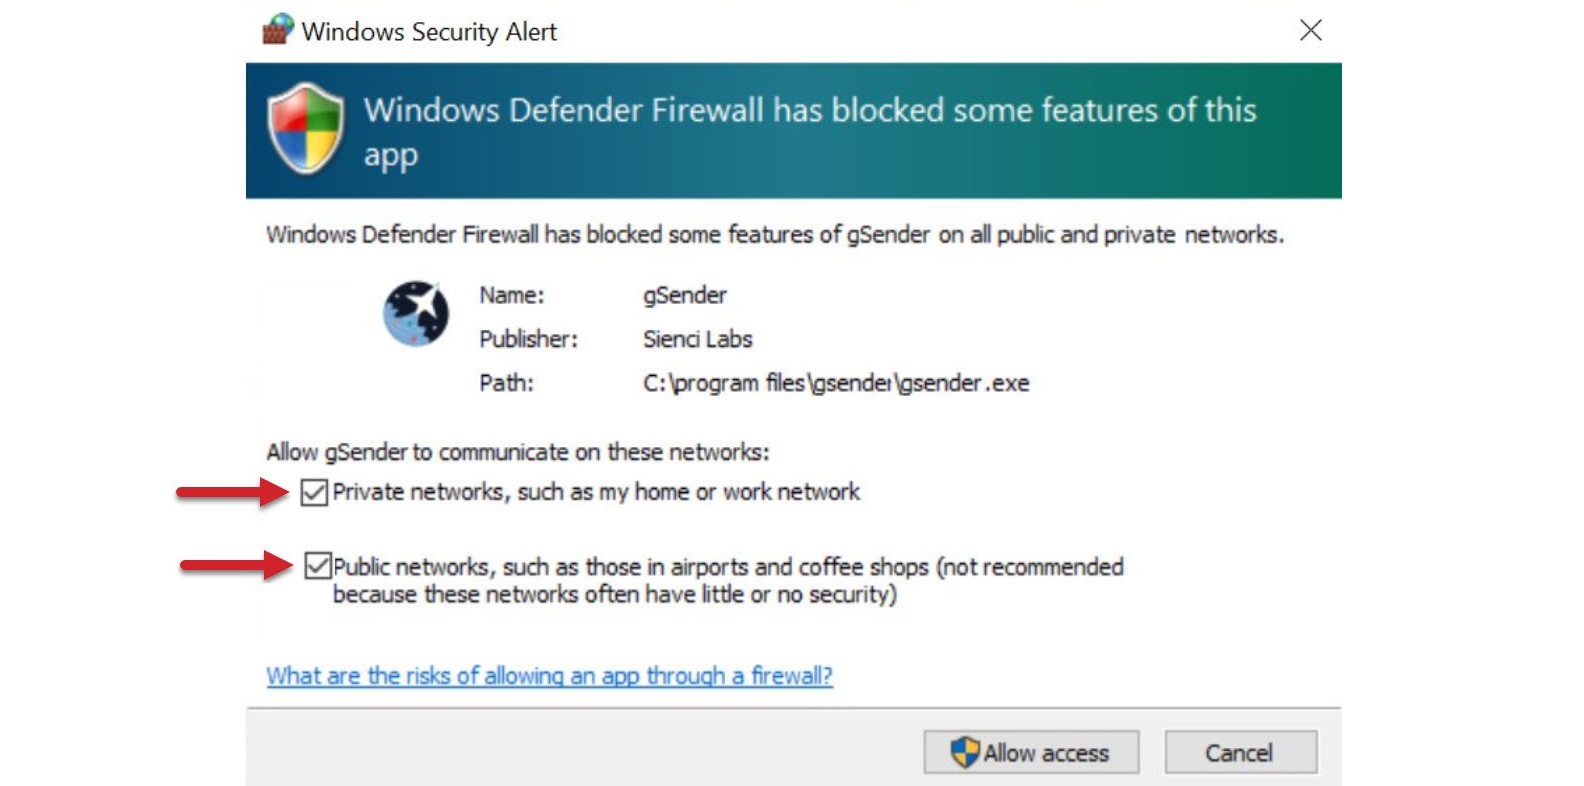
- If you have a Windows Security Alert window pop up during setup, it means your inline computers firewall isn’t allowing gSender to communicate to other devices on your network.
- Check the boxes beside “Private networks” and “Public networks” and click the ‘Allow access’ button
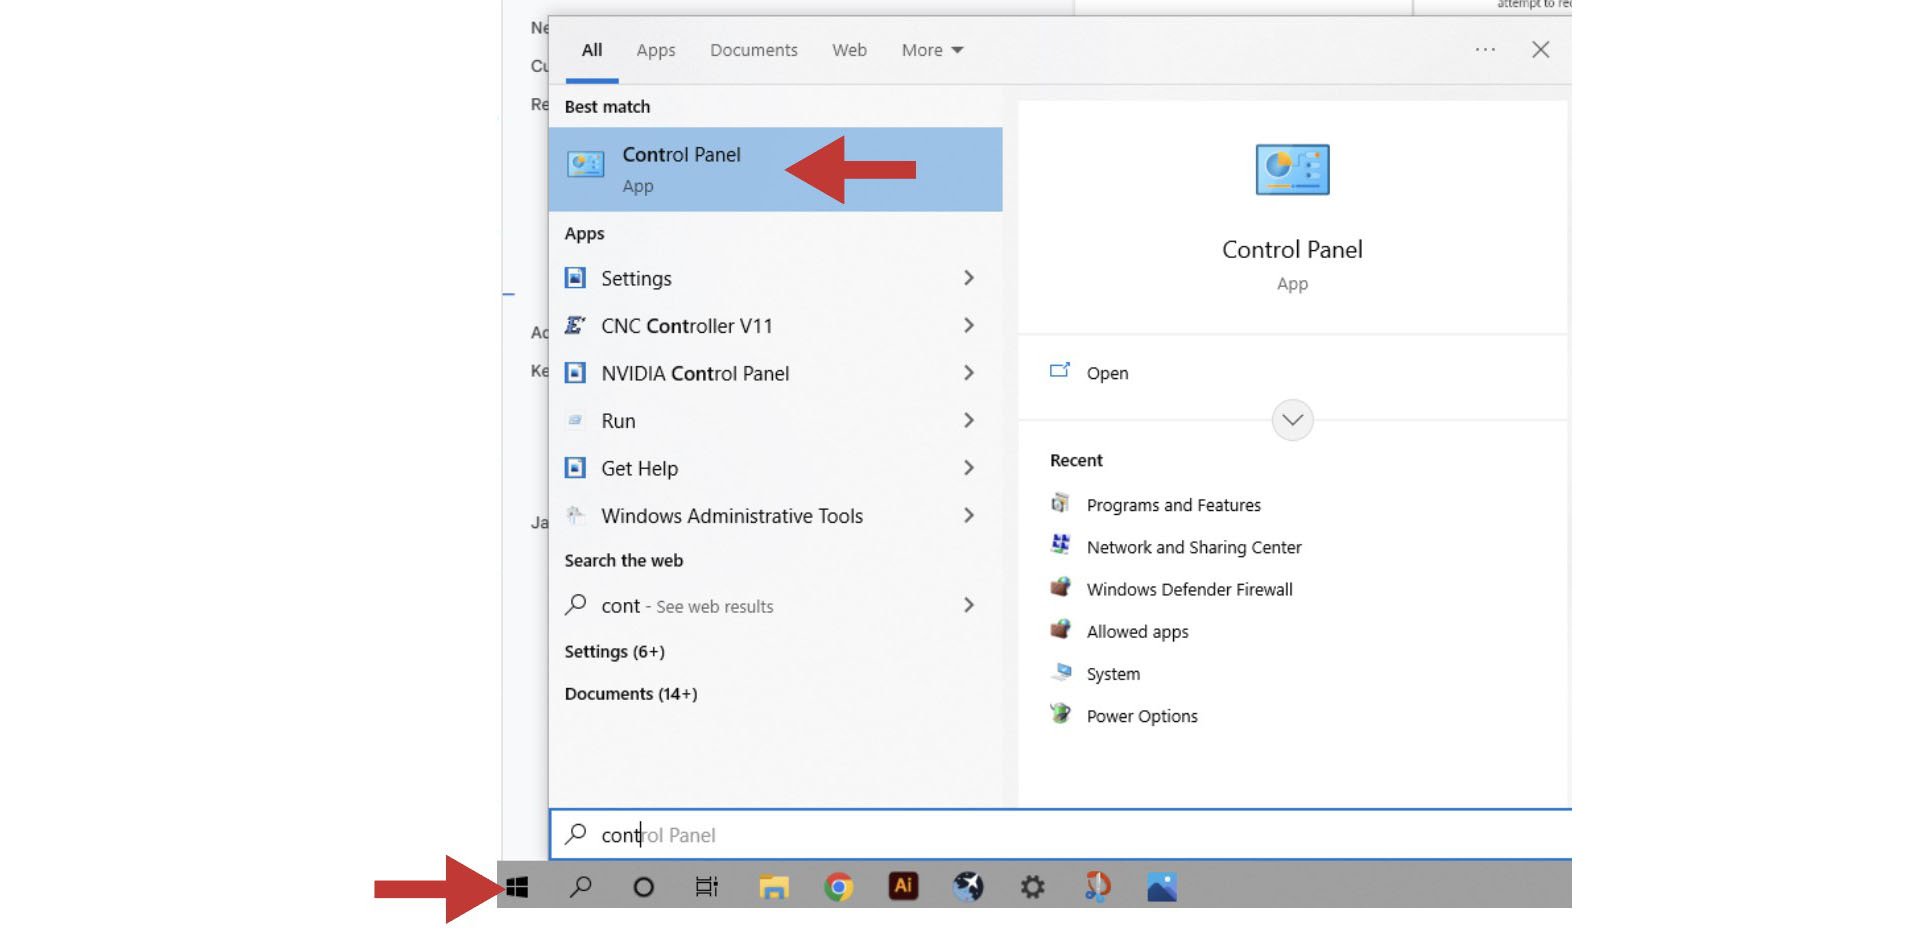
- If you don’t see this popup, click Start and open your computer’s Control Panel
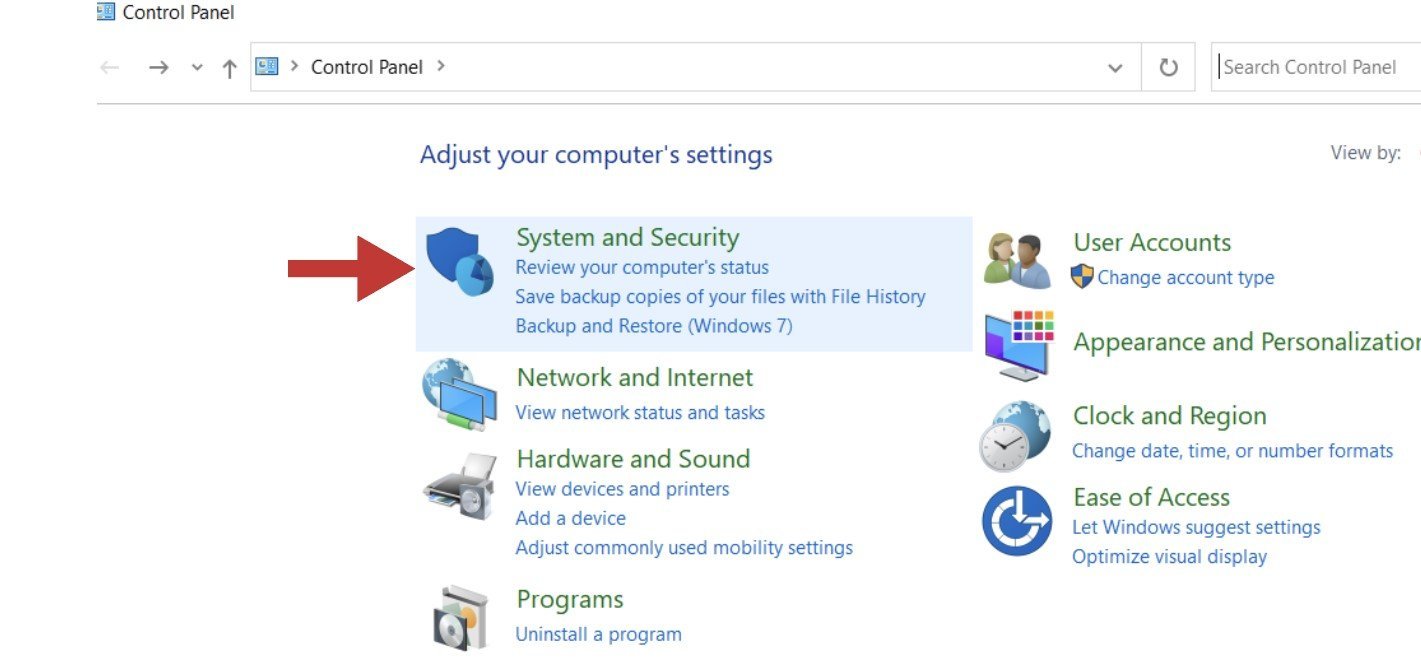
- Open the ‘System and Security’ settings
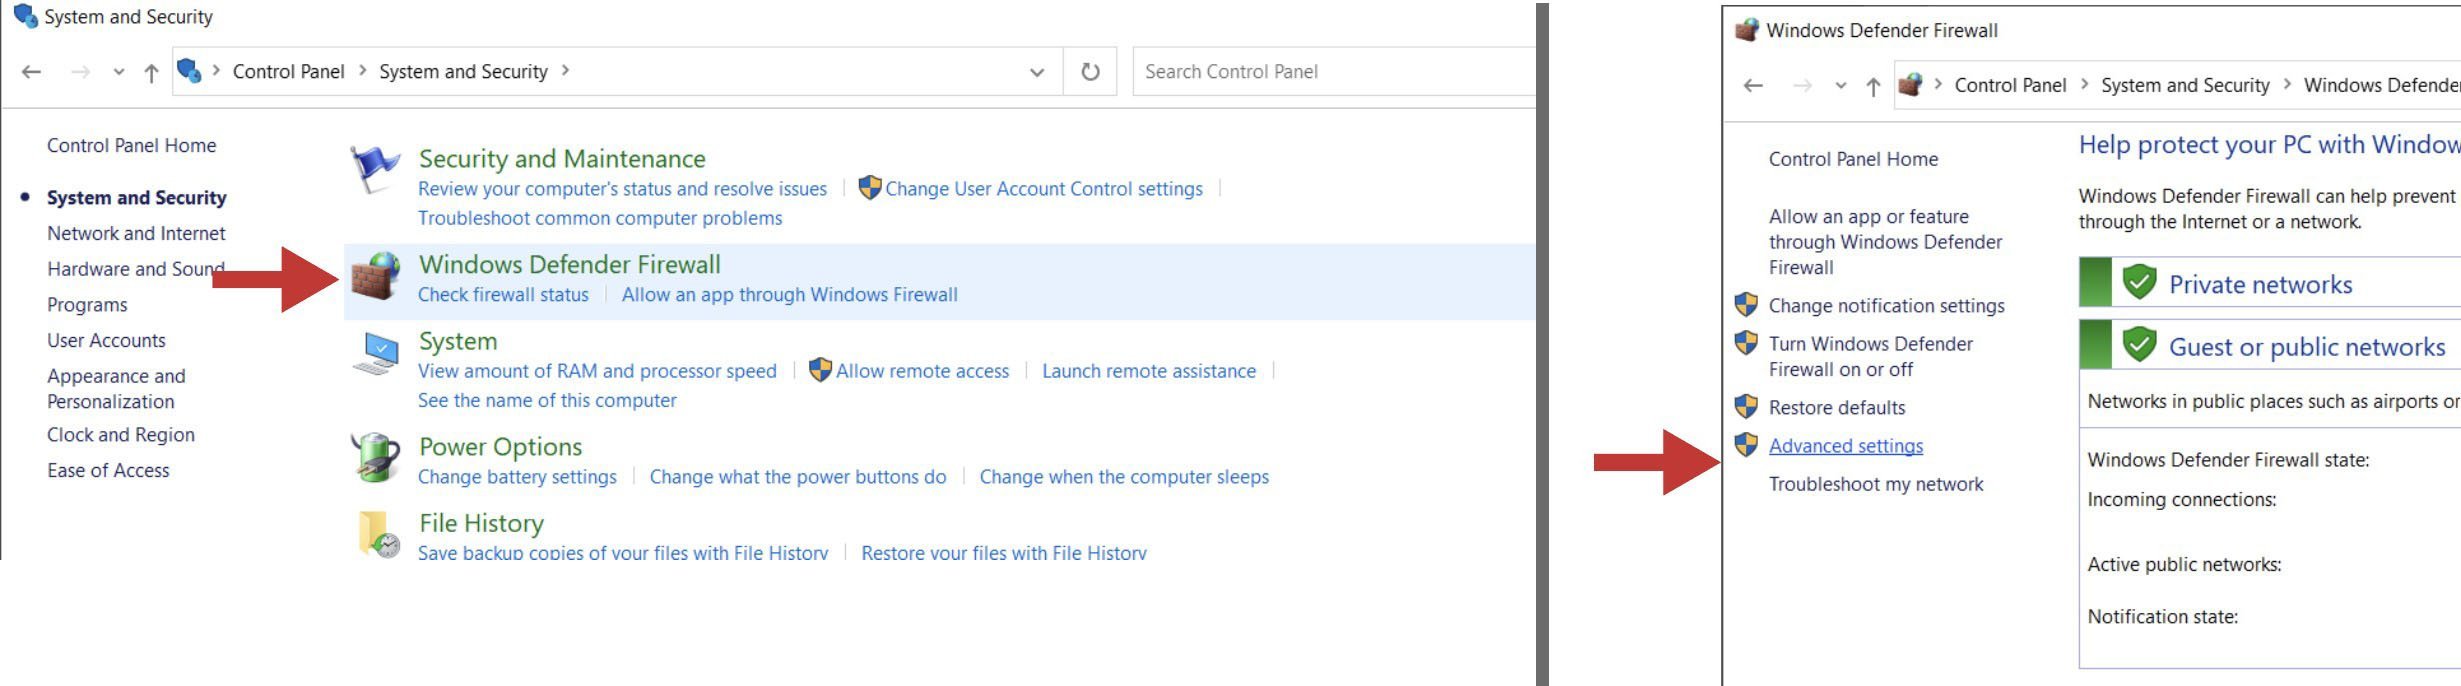
- Open the ‘Windows Defender Firewall’ and go to its ‘Advanced settings’
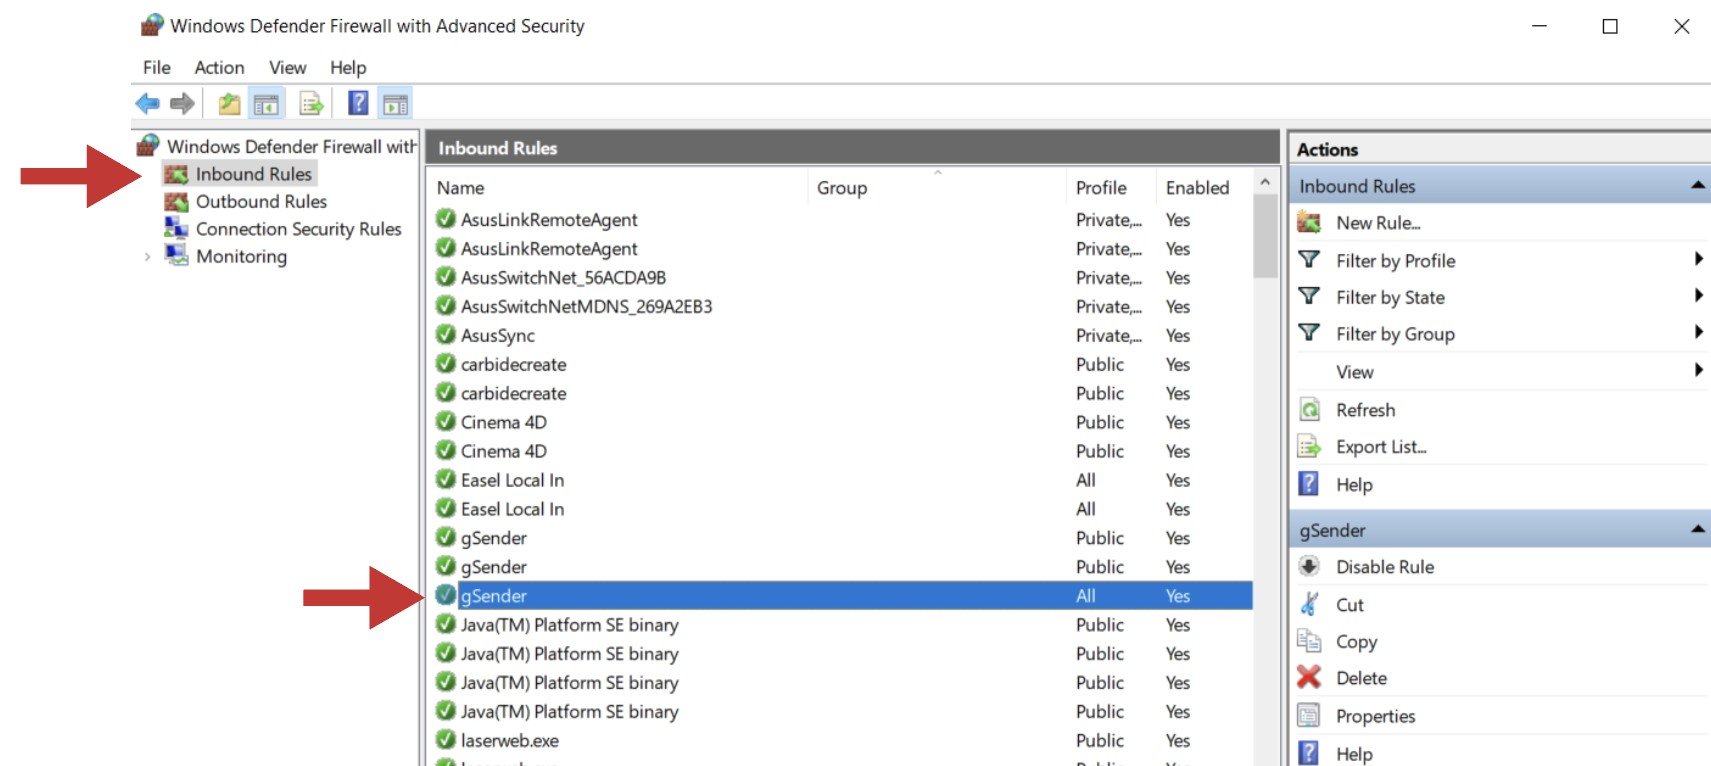
- In the column on the left, click on ‘Inbound Rules’ and then find and double-click on ‘gSender’. There might be three options of gSender to click on, you’ll want to click on the version that has the word “All” under the ‘Profile’ column
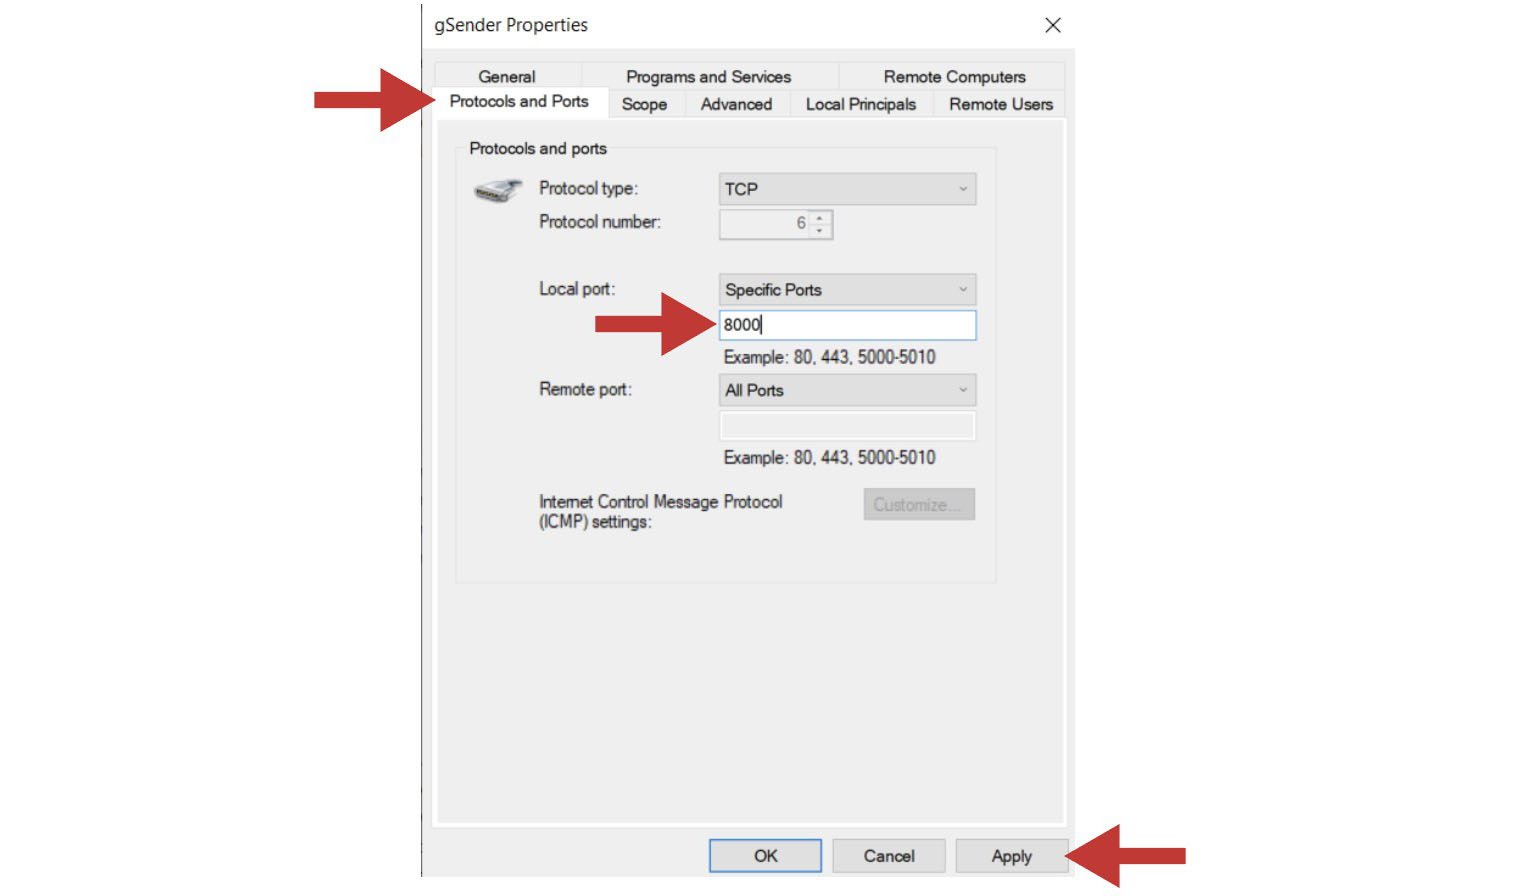
- In the pop-up box, click on the tab labelled ‘Protocols and Ports’. By ‘Local port:’ you’ll want to use the drop-down menu to select “Specific Ports” and then type in the default port of “8000”. If you have added a custom port to gSender’s Shortcut properties, you’ll need to type in that number instead. Once you hit ‘Apply’, you can check to see if this resolved your problem.
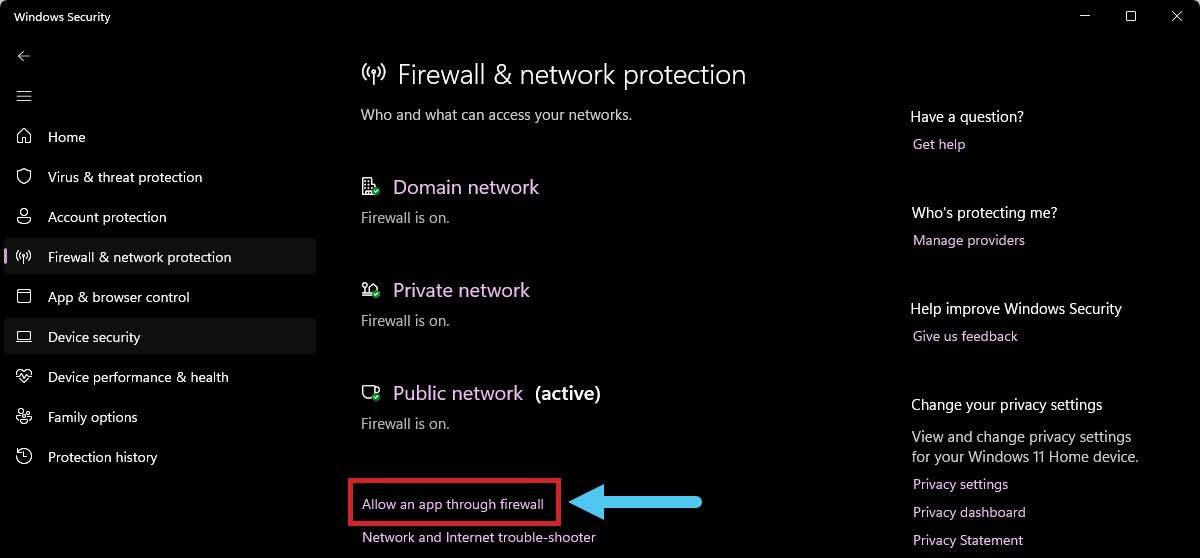
- On newer devices you might alternatively need to go to your Windows security tab, and click the Allow an app through firewall text.
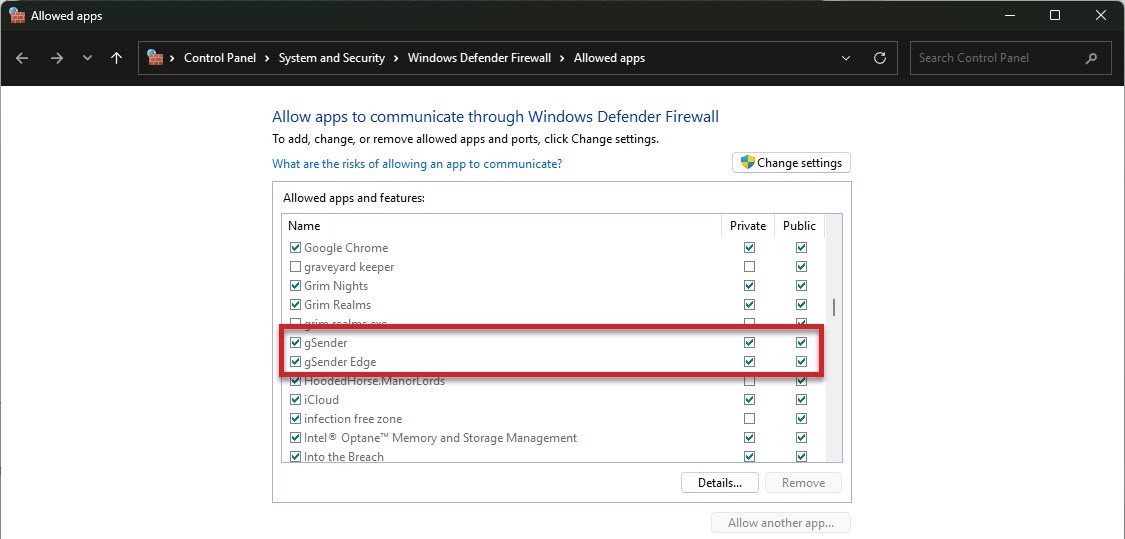
- Scroll down until you see gSender, click on Change Settings, then enable gSender to communicate through the firewall by clicking the checkbox.
- Check the boxes beside “Private networks” and “Public networks” and click the ‘Allow access’ button
- If on Mac, Linux, or Pi you find that you can’t connect with outside devices or just want some extra safety you might want to try opening the Universal FireWall (UFW) on a given port to allow external access. This can be started with
sudo ufw enable(if UFW is not found then install it usingsudo apt-get install ufwand your root password) then opening the desired port, for examplesudo ufw allow 8080opens port 8080 for external access. If you want to see what ports are already open, you can useufw status verbose. - If when gSender reopens you’re met with a white screen, this means an error has occurred that we weren’t able to detect. This is rare, but unless we can find some other way to manage this the only fix is to uninstall gSender and reinstall it again.