Maintenance
Like any other CNC, the LongMill MK3 needs regular maintenance to stay in tip-top shape long-term. Depending on how often the machine is being used, the frequency of maintenance tasks can vary greatly.
We have some general estimates on when you should do these tasks, but the most important thing is to use your senses! Keep an ear out for new sounds like squeaking or binding – these will indicate that your machine might need a little TLC.
Materials Needed
- Grease gun kit
- Lithium grease tube, 3oz
- Grease gun
- Nozzle
- Spout
- Dry lube
- Anti-backlash nut (4 pcs)
- Shop towel
- Scotch Brite
- 2mm Allen key
- Flathead screwdriver
- Small brush or toothpick
- Carbon brushes, if you have a router
Preparations
Clean the Components
Wipe the linear guide blocks, rails, and lead screws with shop towel to remove debris and dirt. If there is rust, scrub down with Scotch Brite.
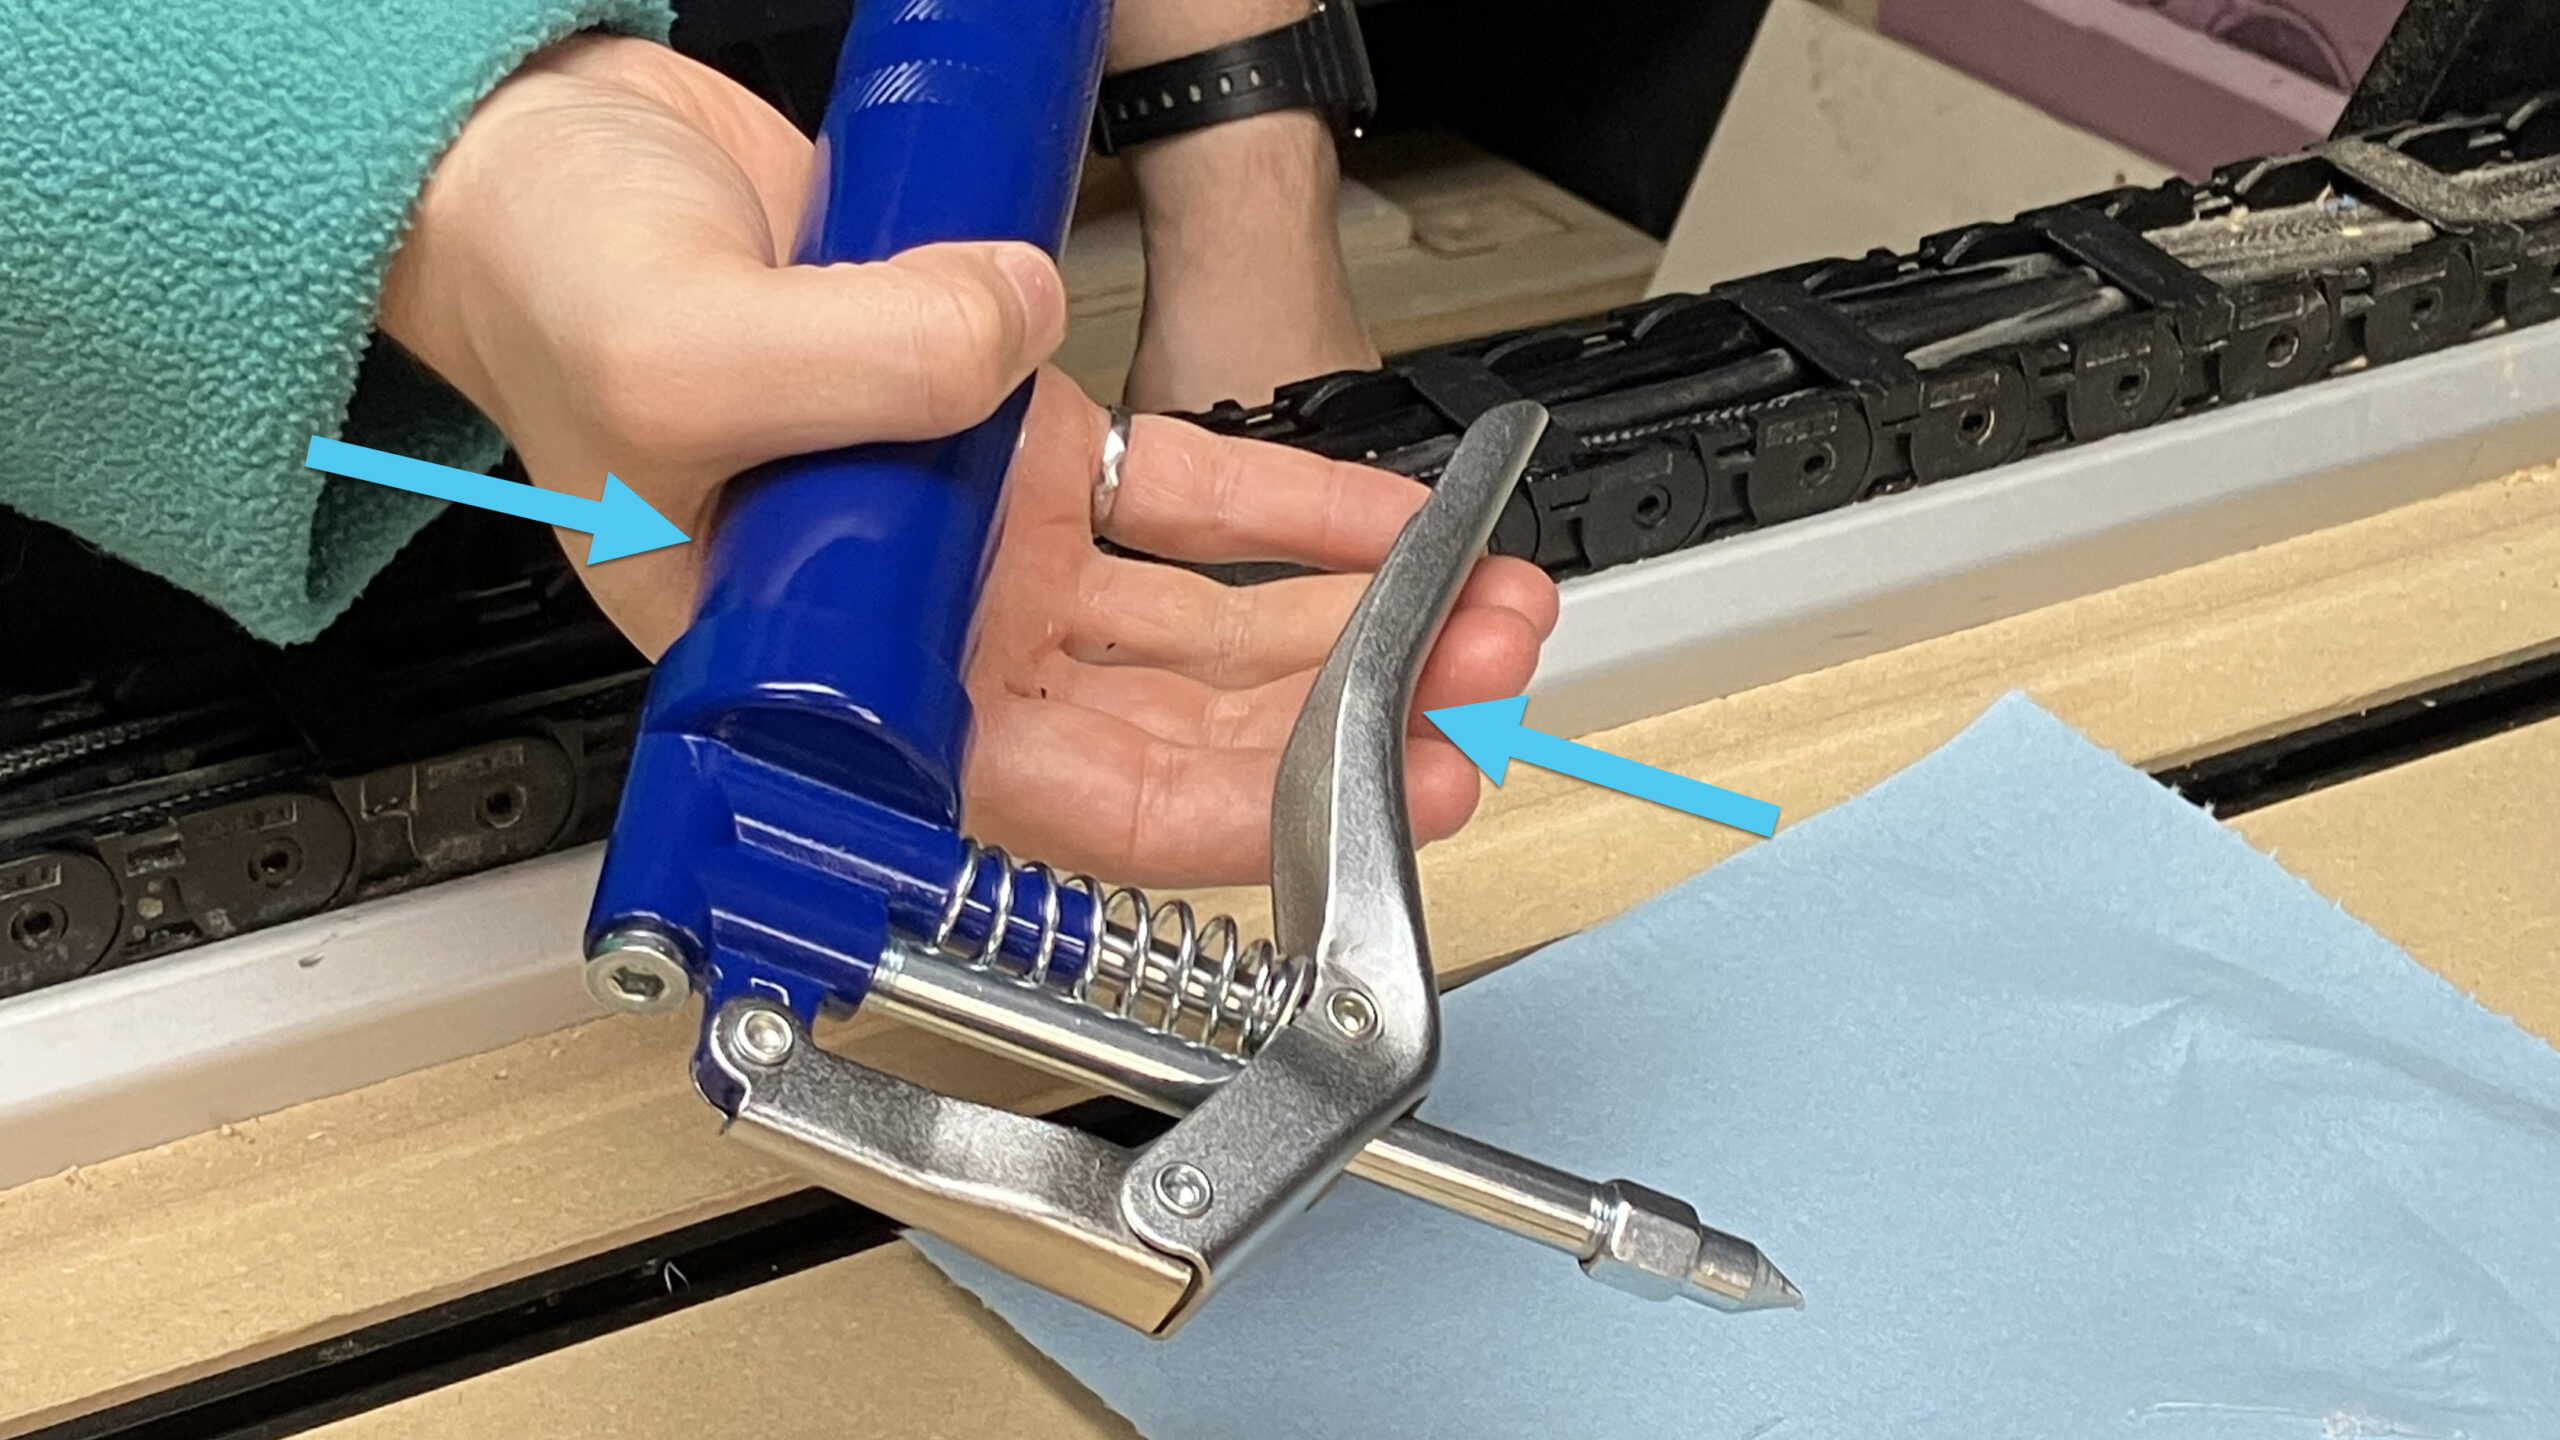
Set up Grease Gun
We will use the grease gun to apply lithium grease on the linear guides only. Do not apply lithium grease onto the lead screws. Do not put dry lube into the grease gun.
-
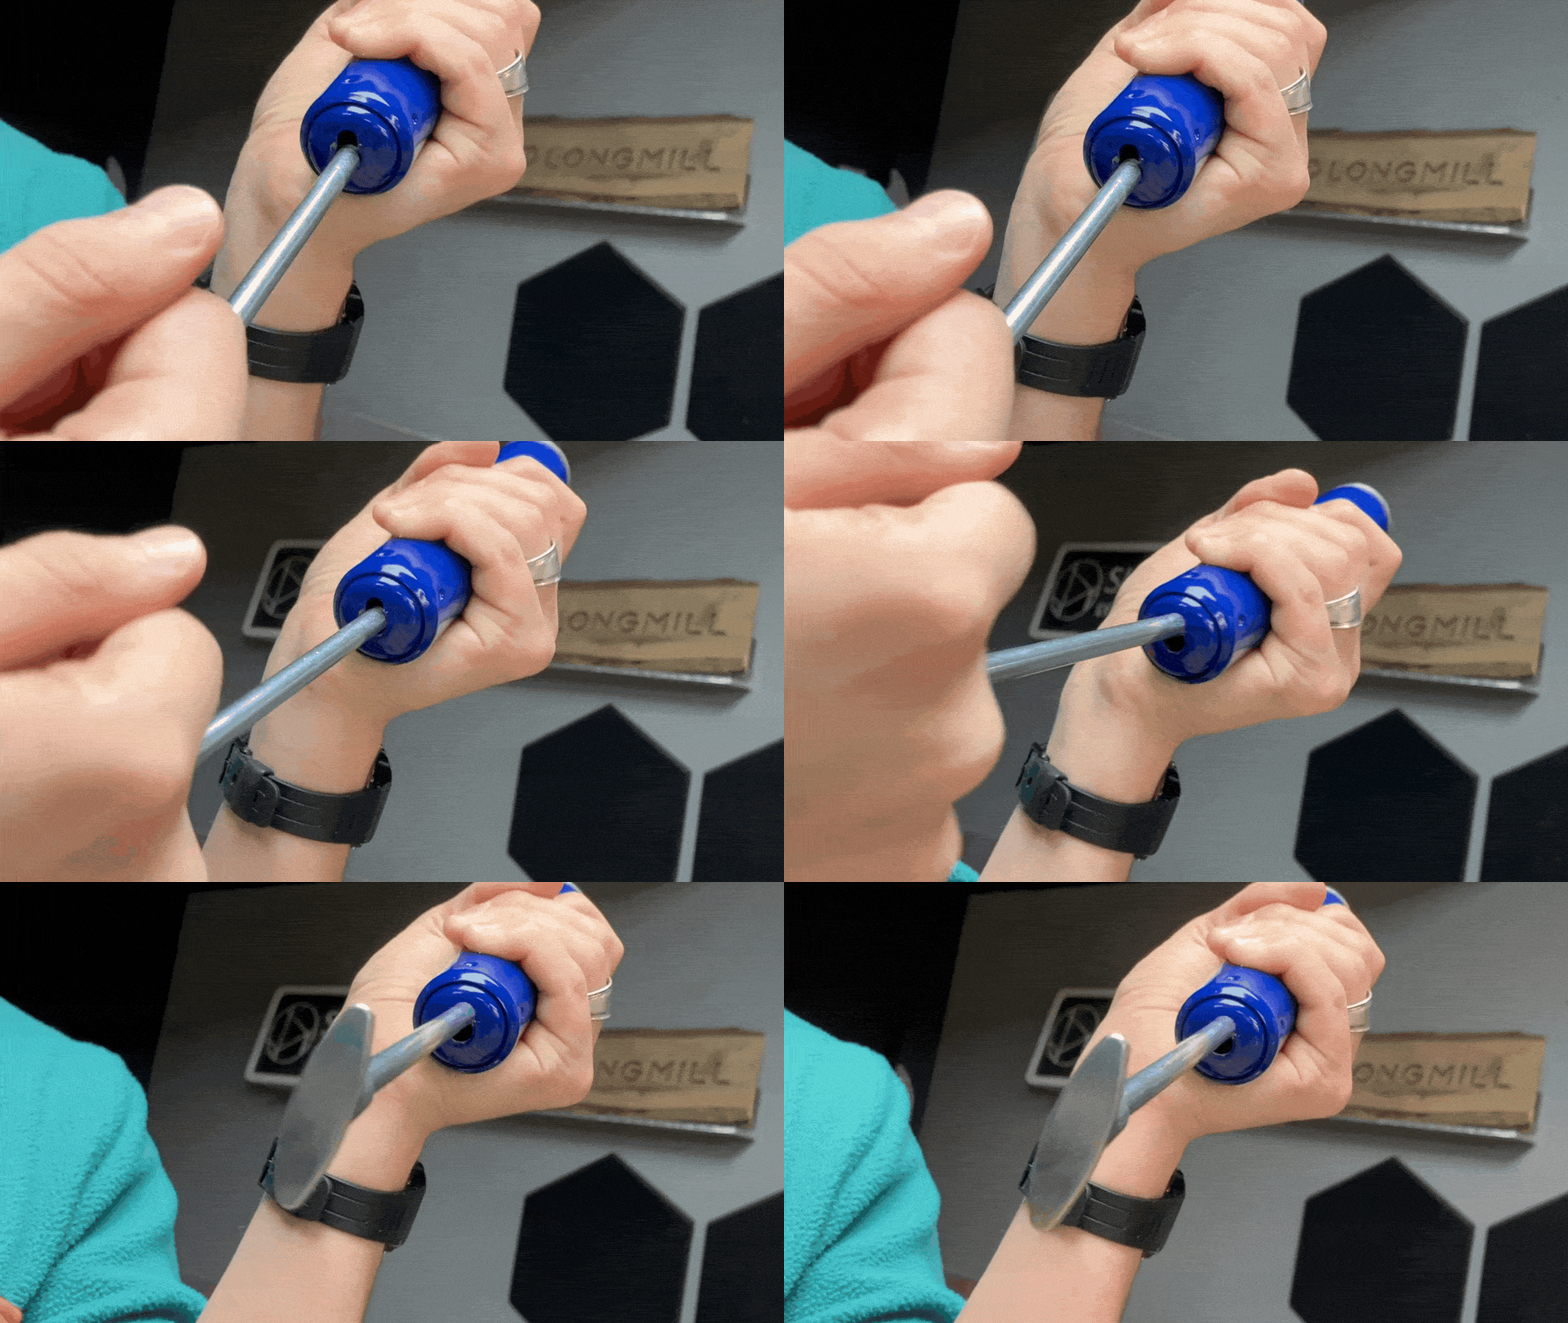
Pull the handle on the grease gun to its furthest extent, then lock it into place at the notch.
-
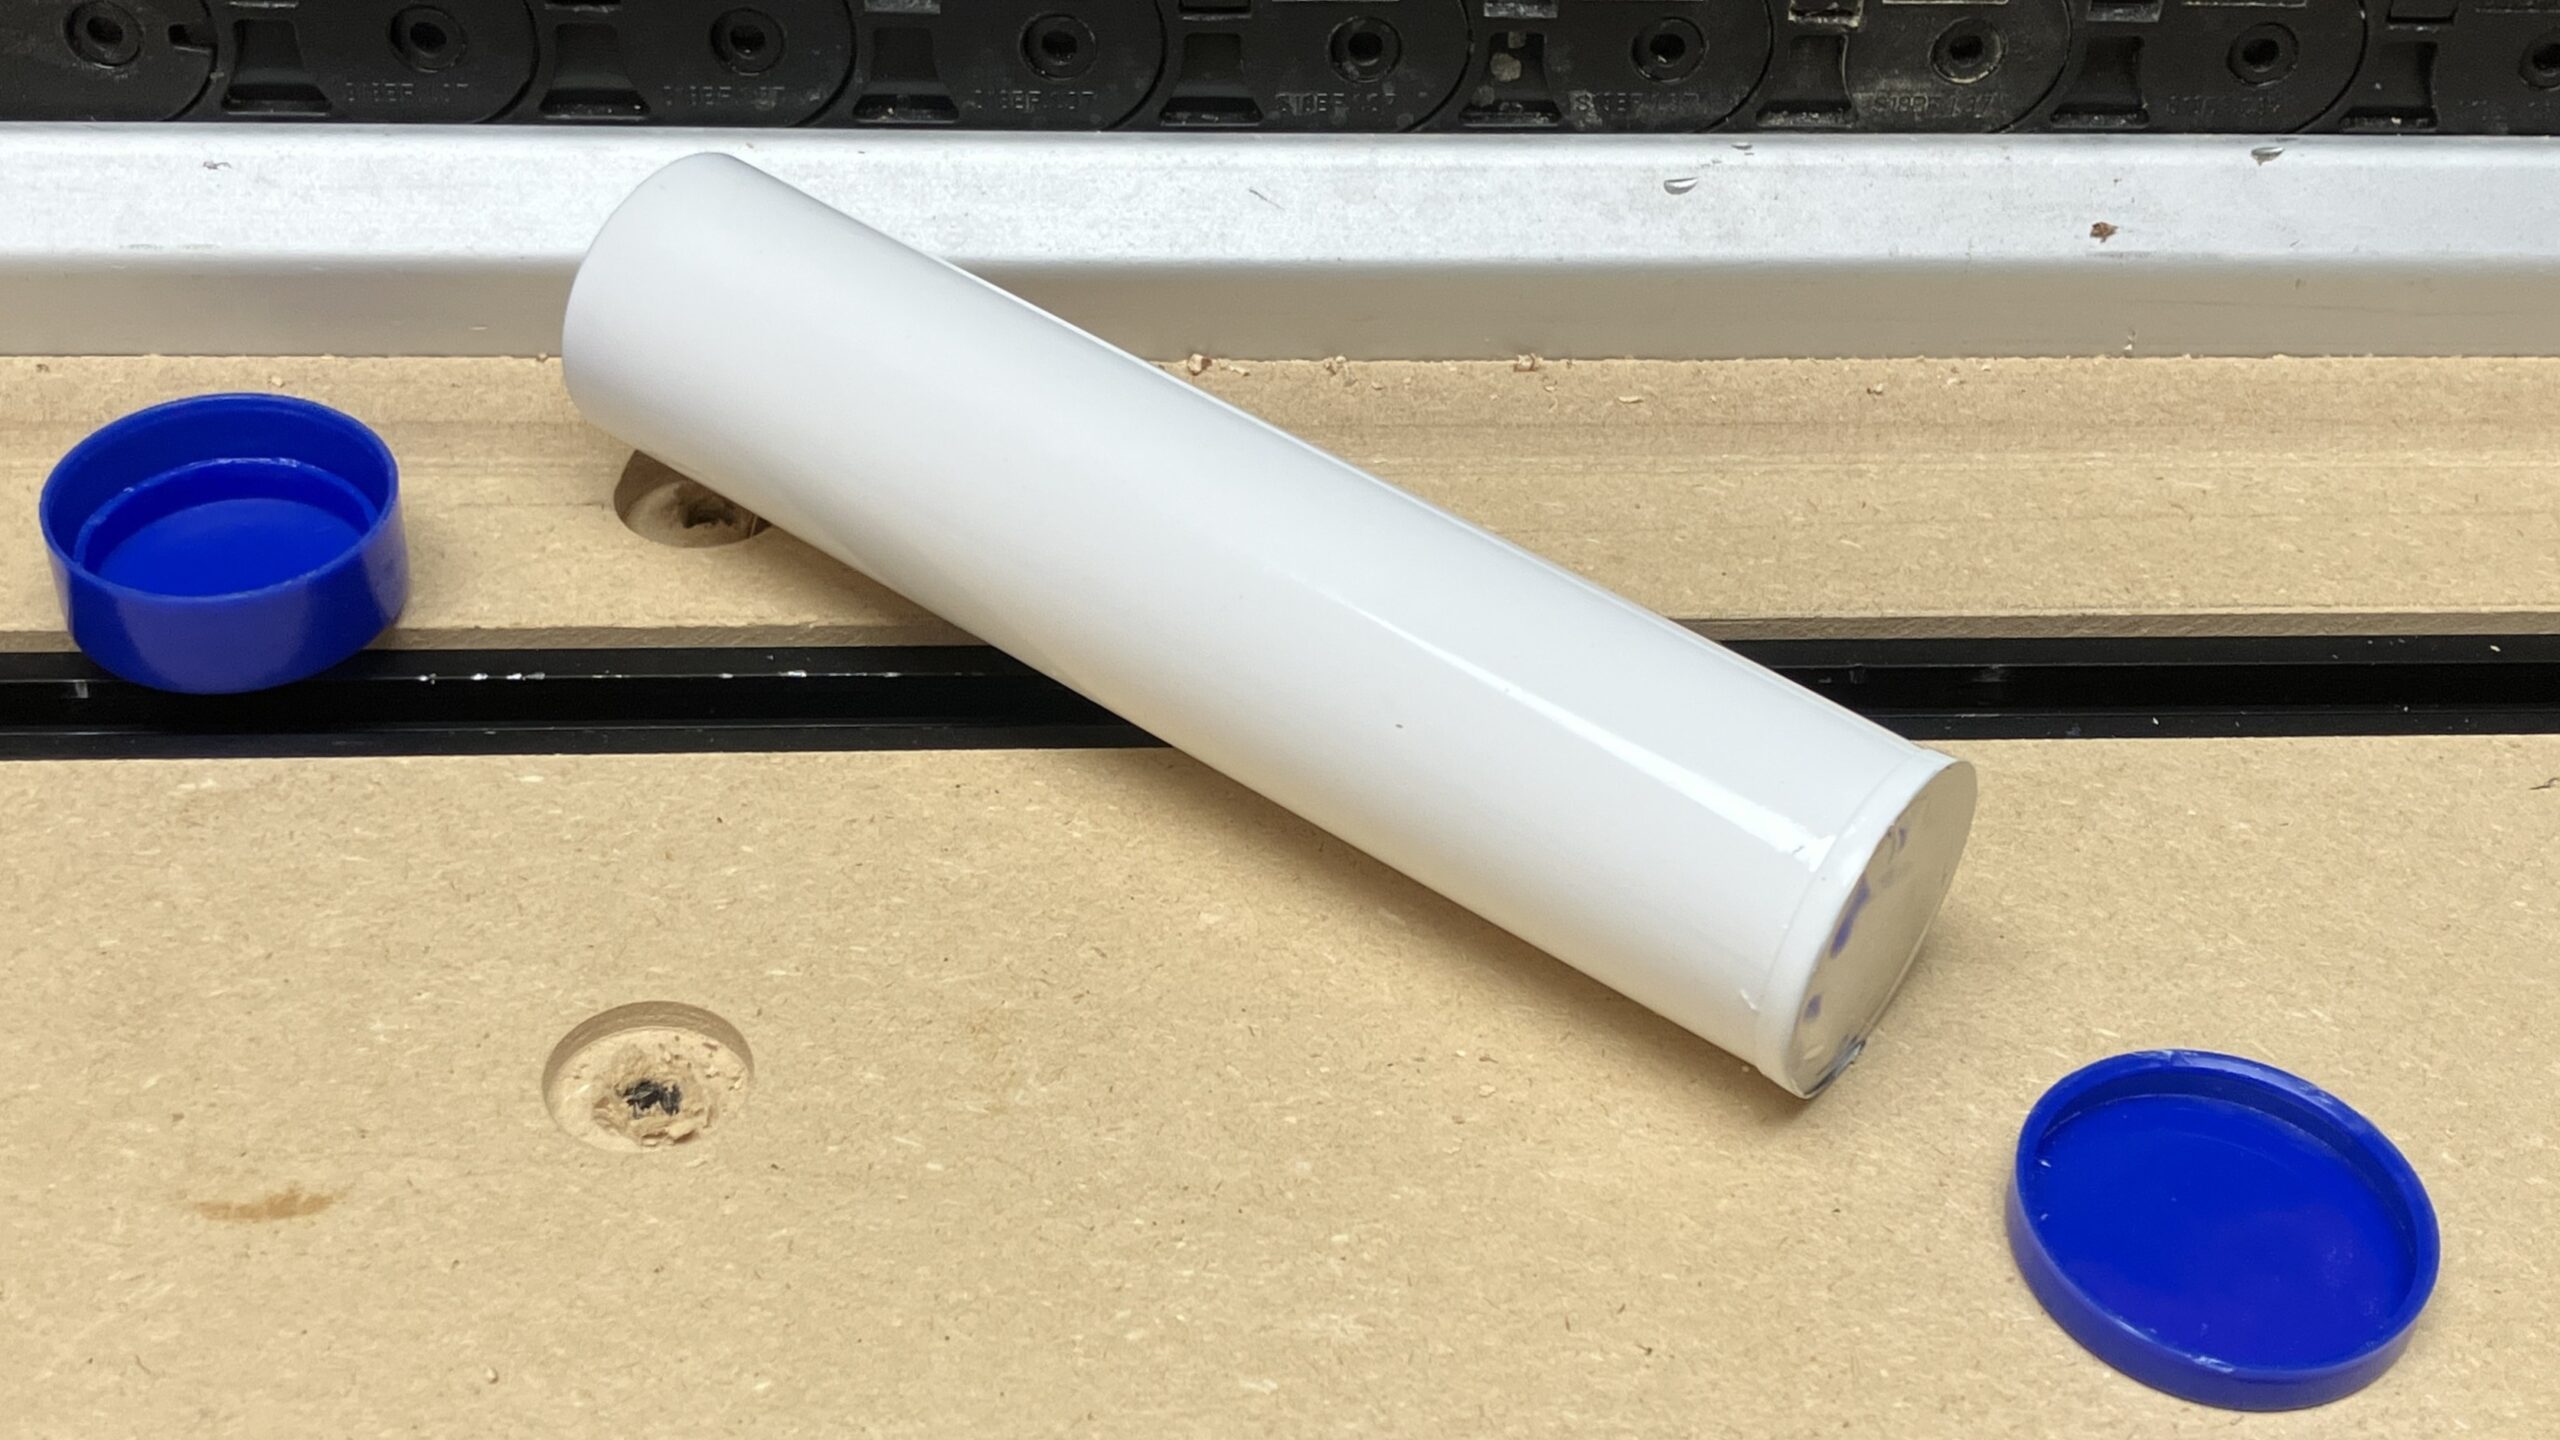
Grab the lithium grease tube, and remove the caps on both ends using a flathead screwdriver.
-
Put the grease tube into the gun, with the foil facing up.
-
Remove the foil.
-
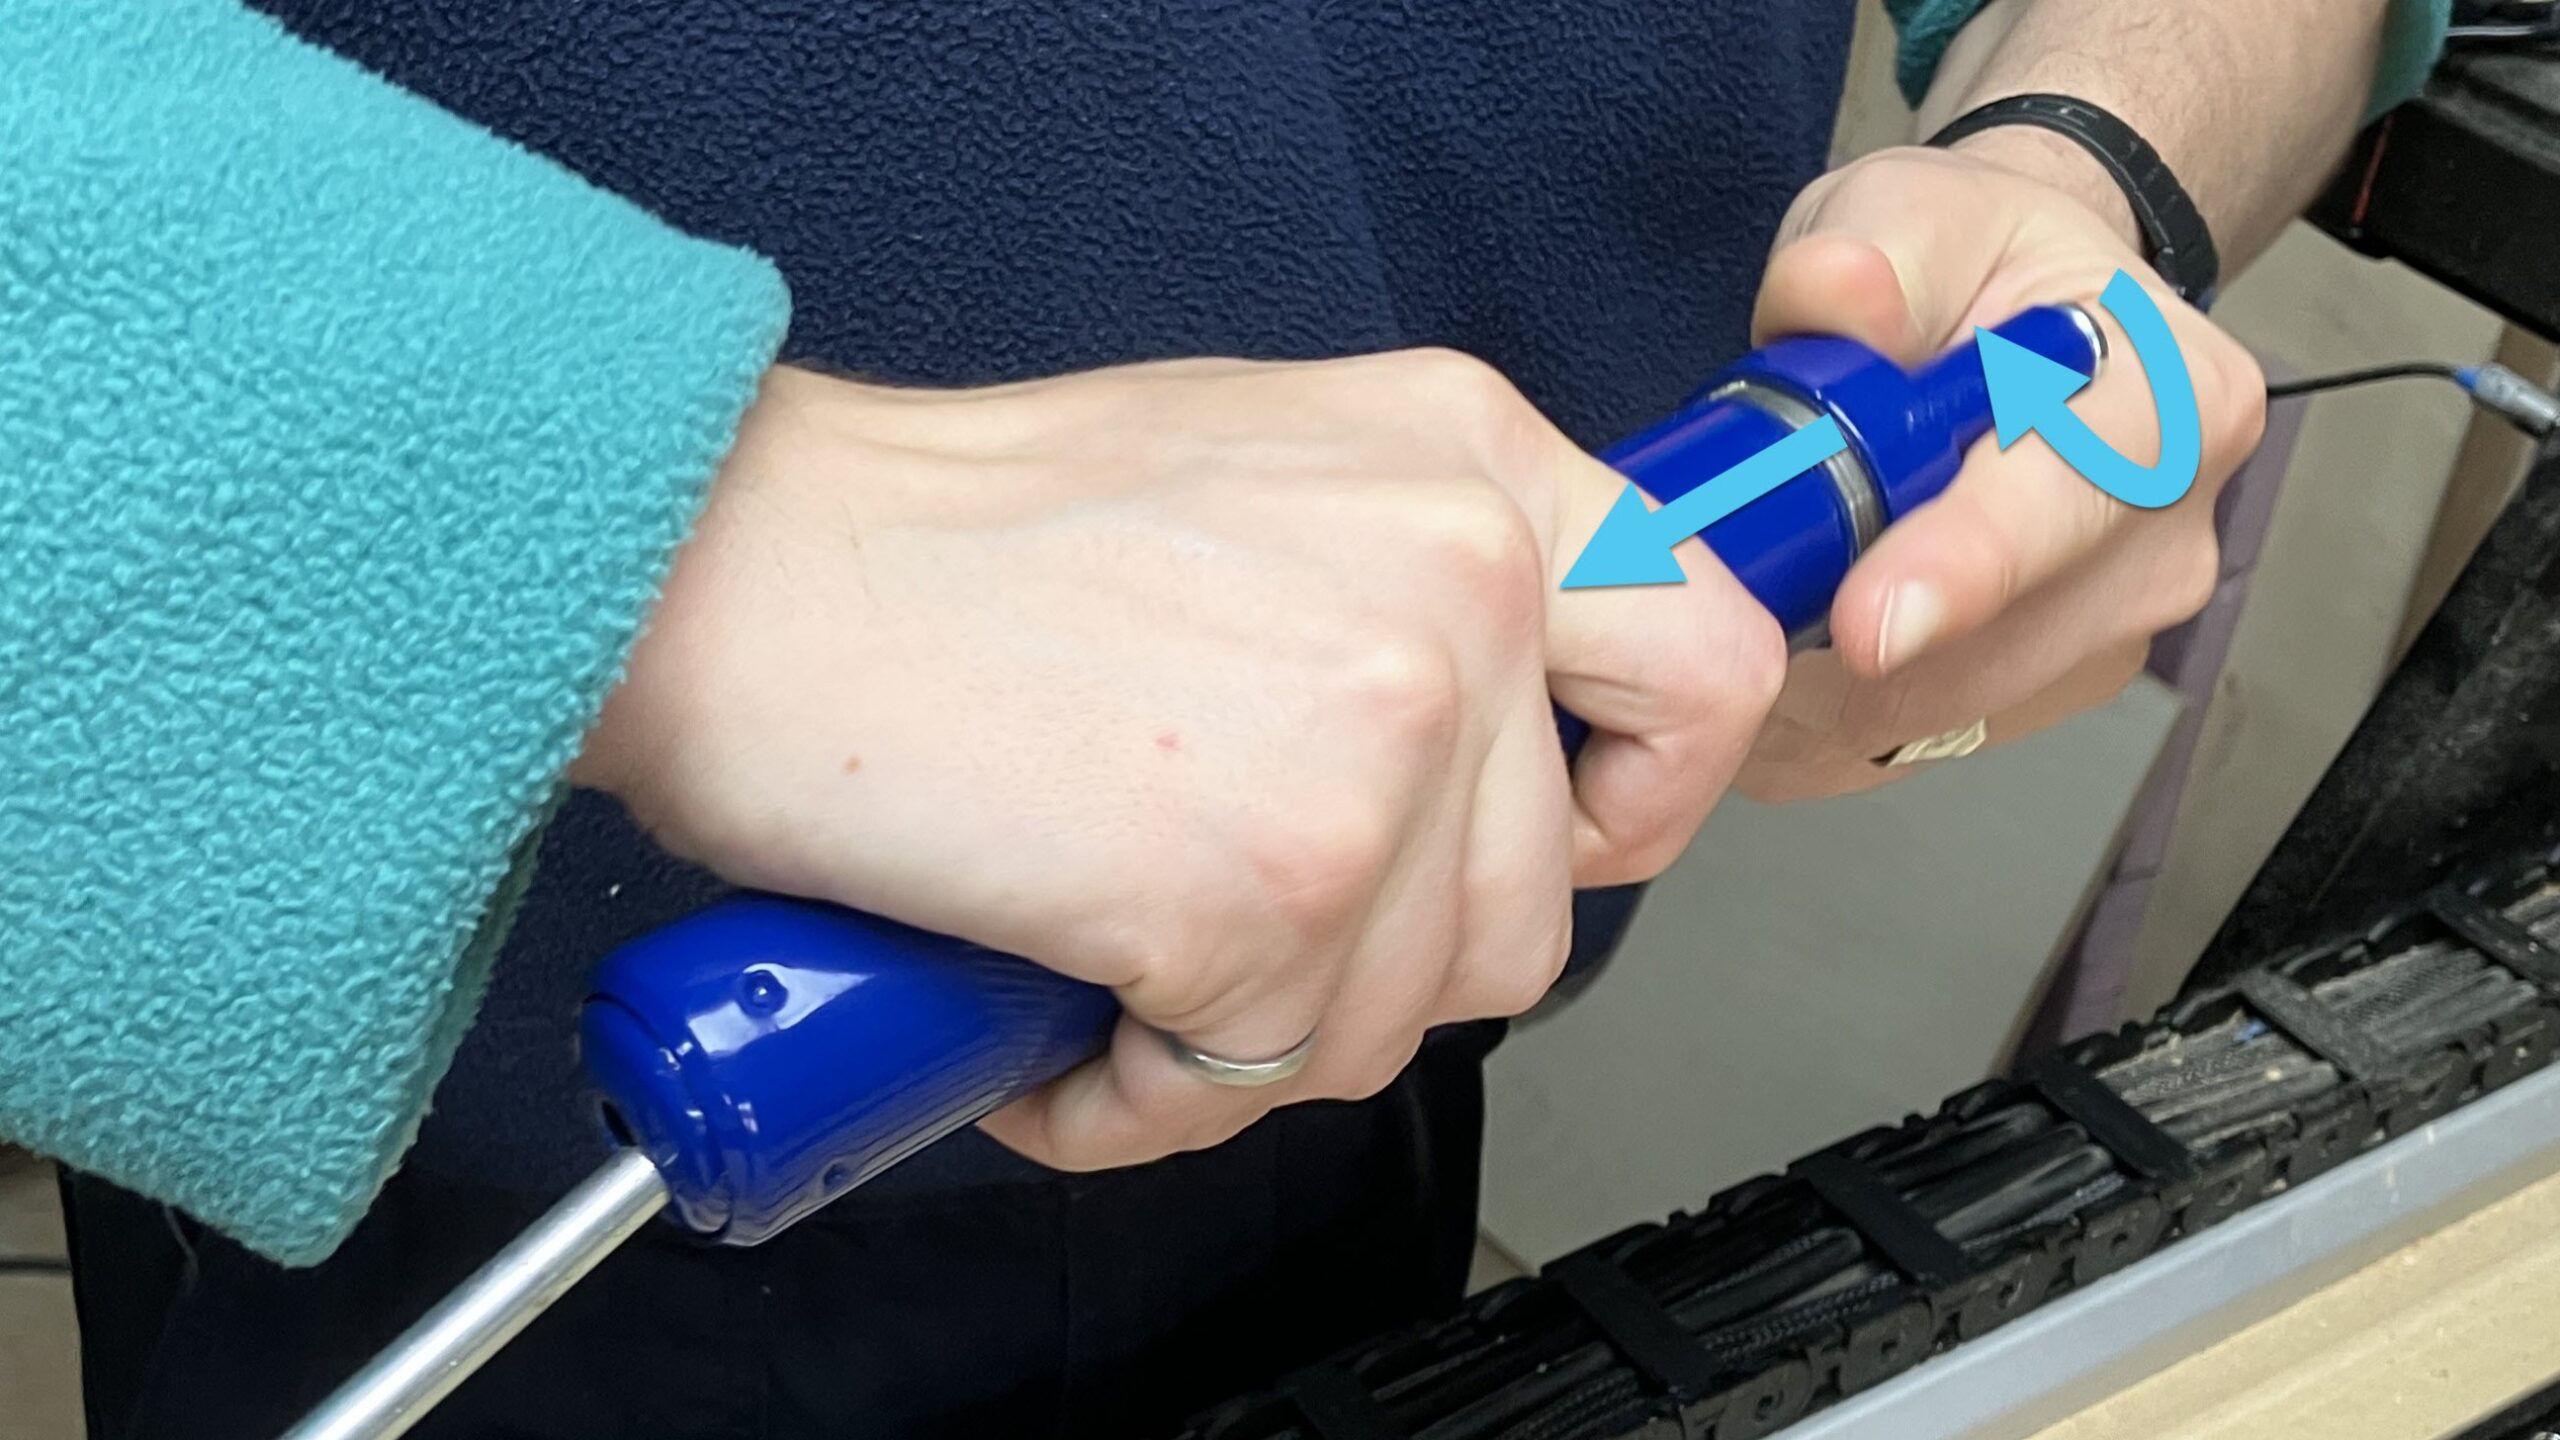
With the top of the grease gun, push the grease tube as you twist the top on.
-
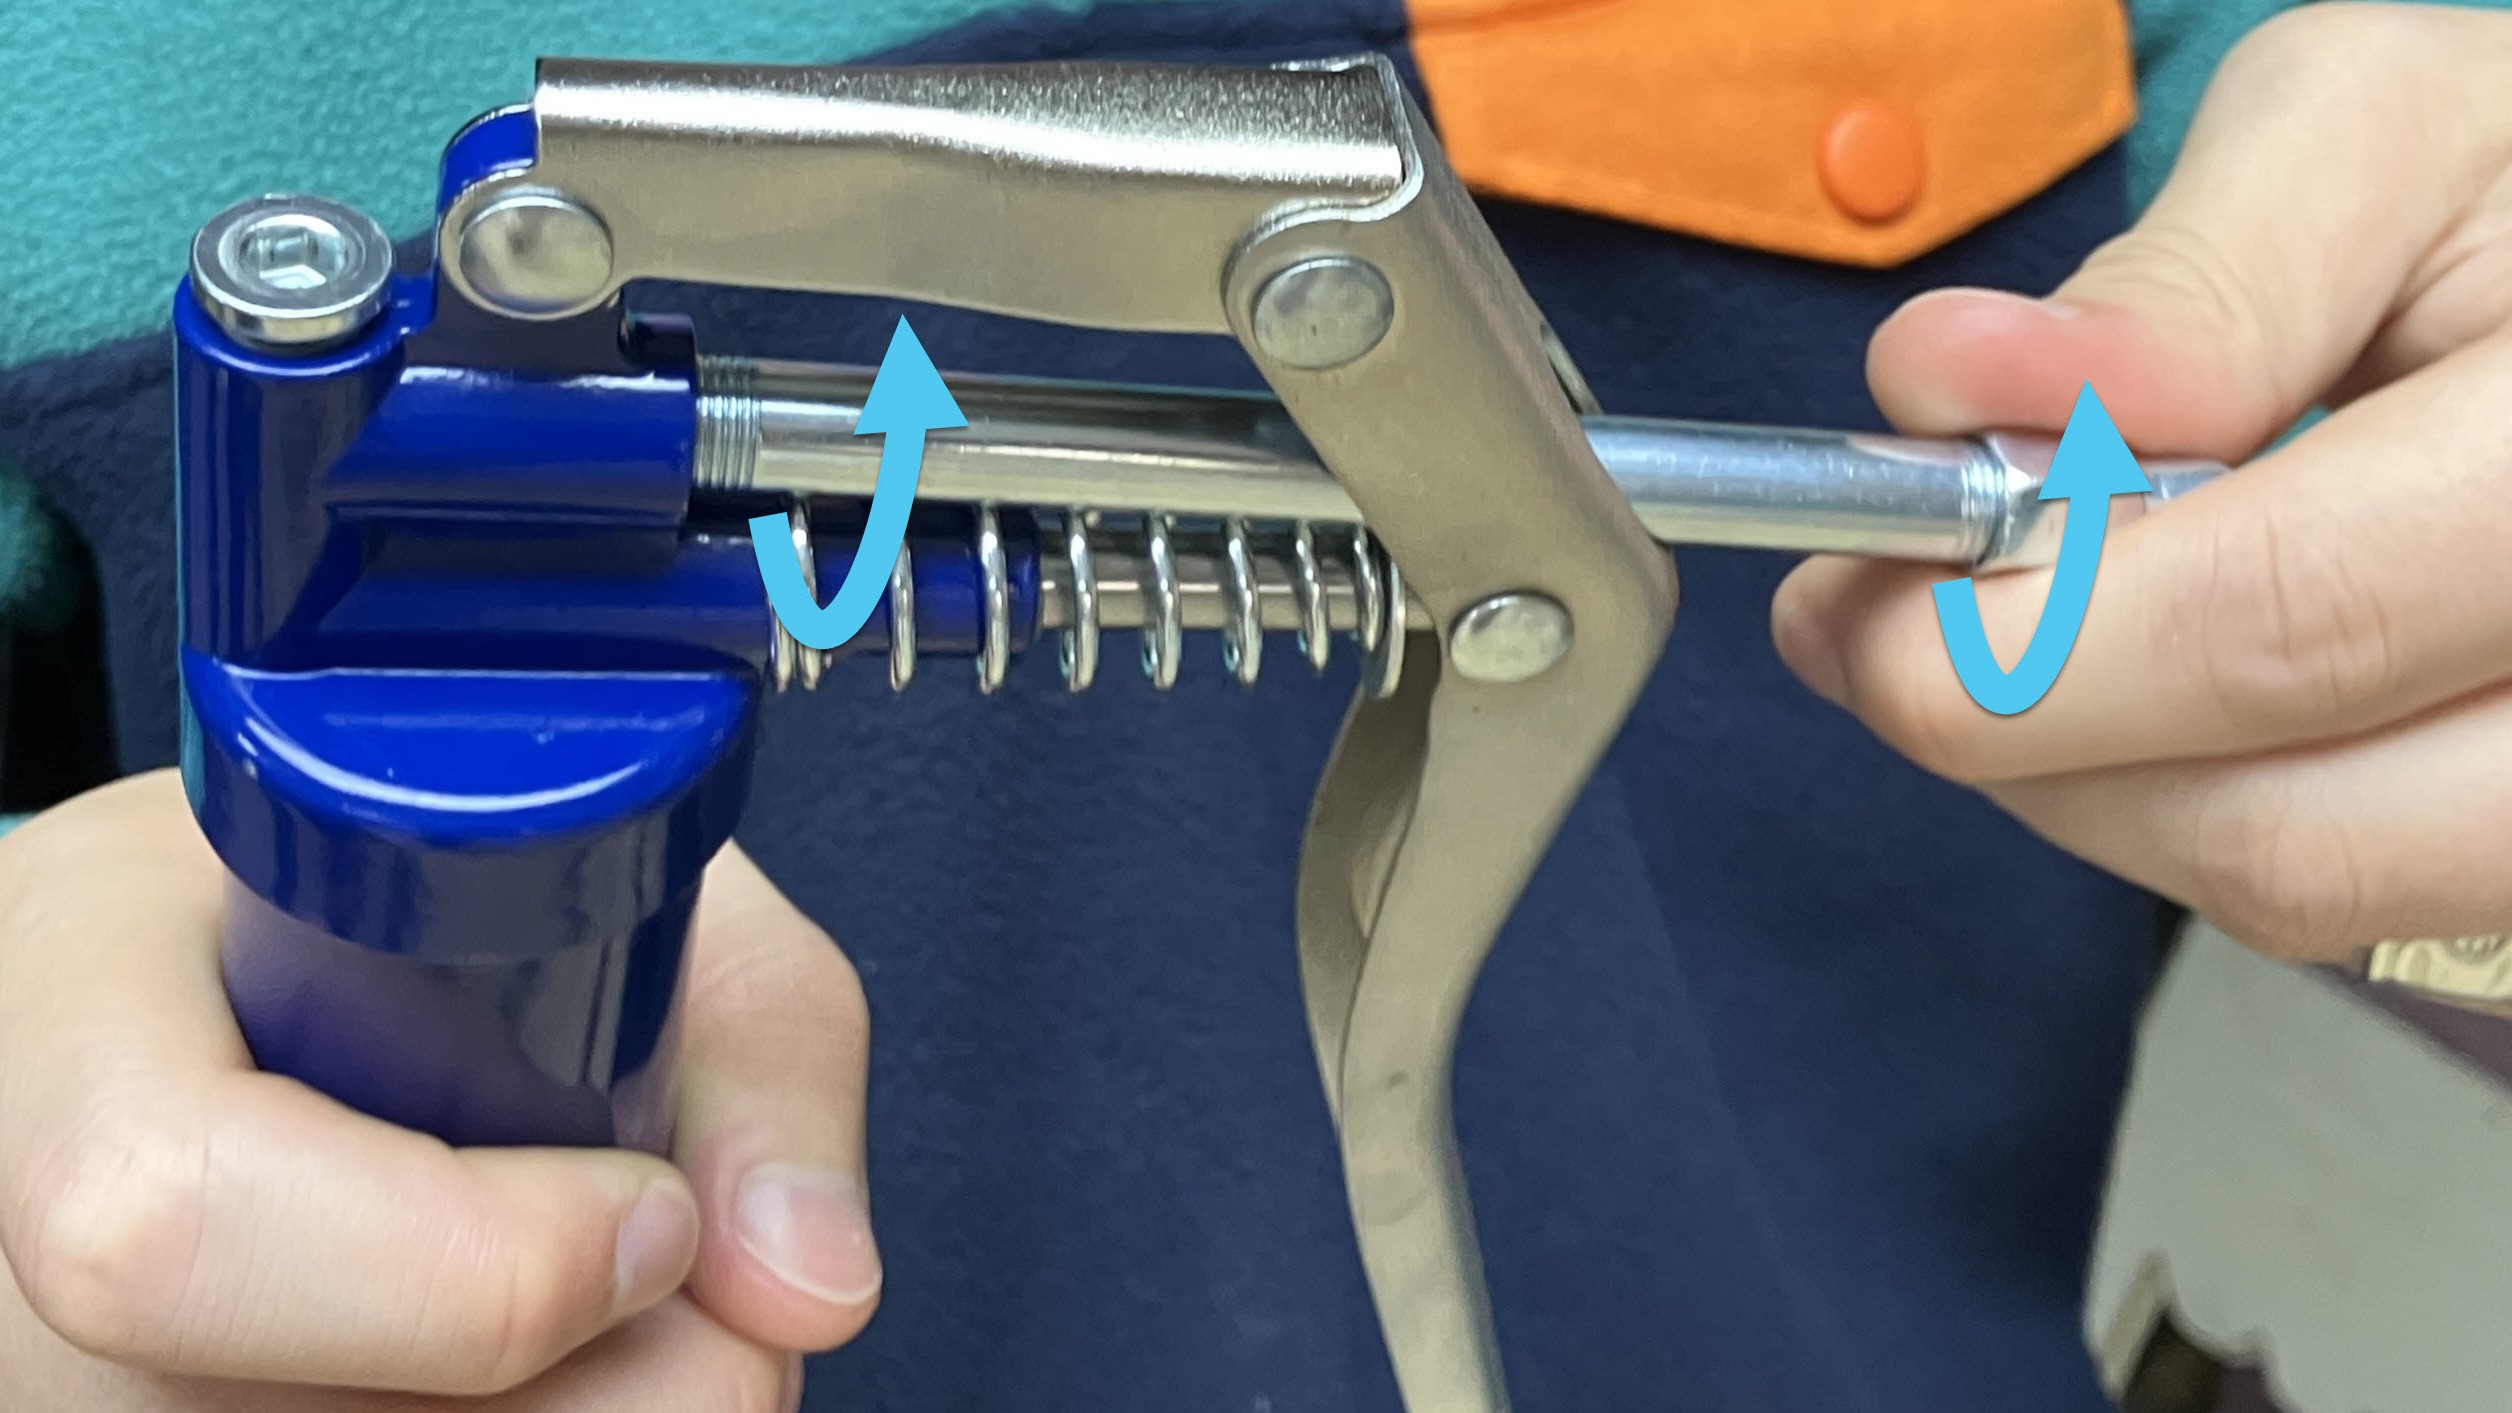
Grab one of the spouts and the fine tip nozzle, fasten the spout onto the grease gun, then fasten the nozzle onto the spout.
-
Unlock the handle from the notch.
-
Pump the grease gun until grease comes out.
Lubricate Linear Guides
Do every 160 hours of cutting. If you are running the machine 8 hours a day, 5 days a week, you should be greasing every 4 weeks.
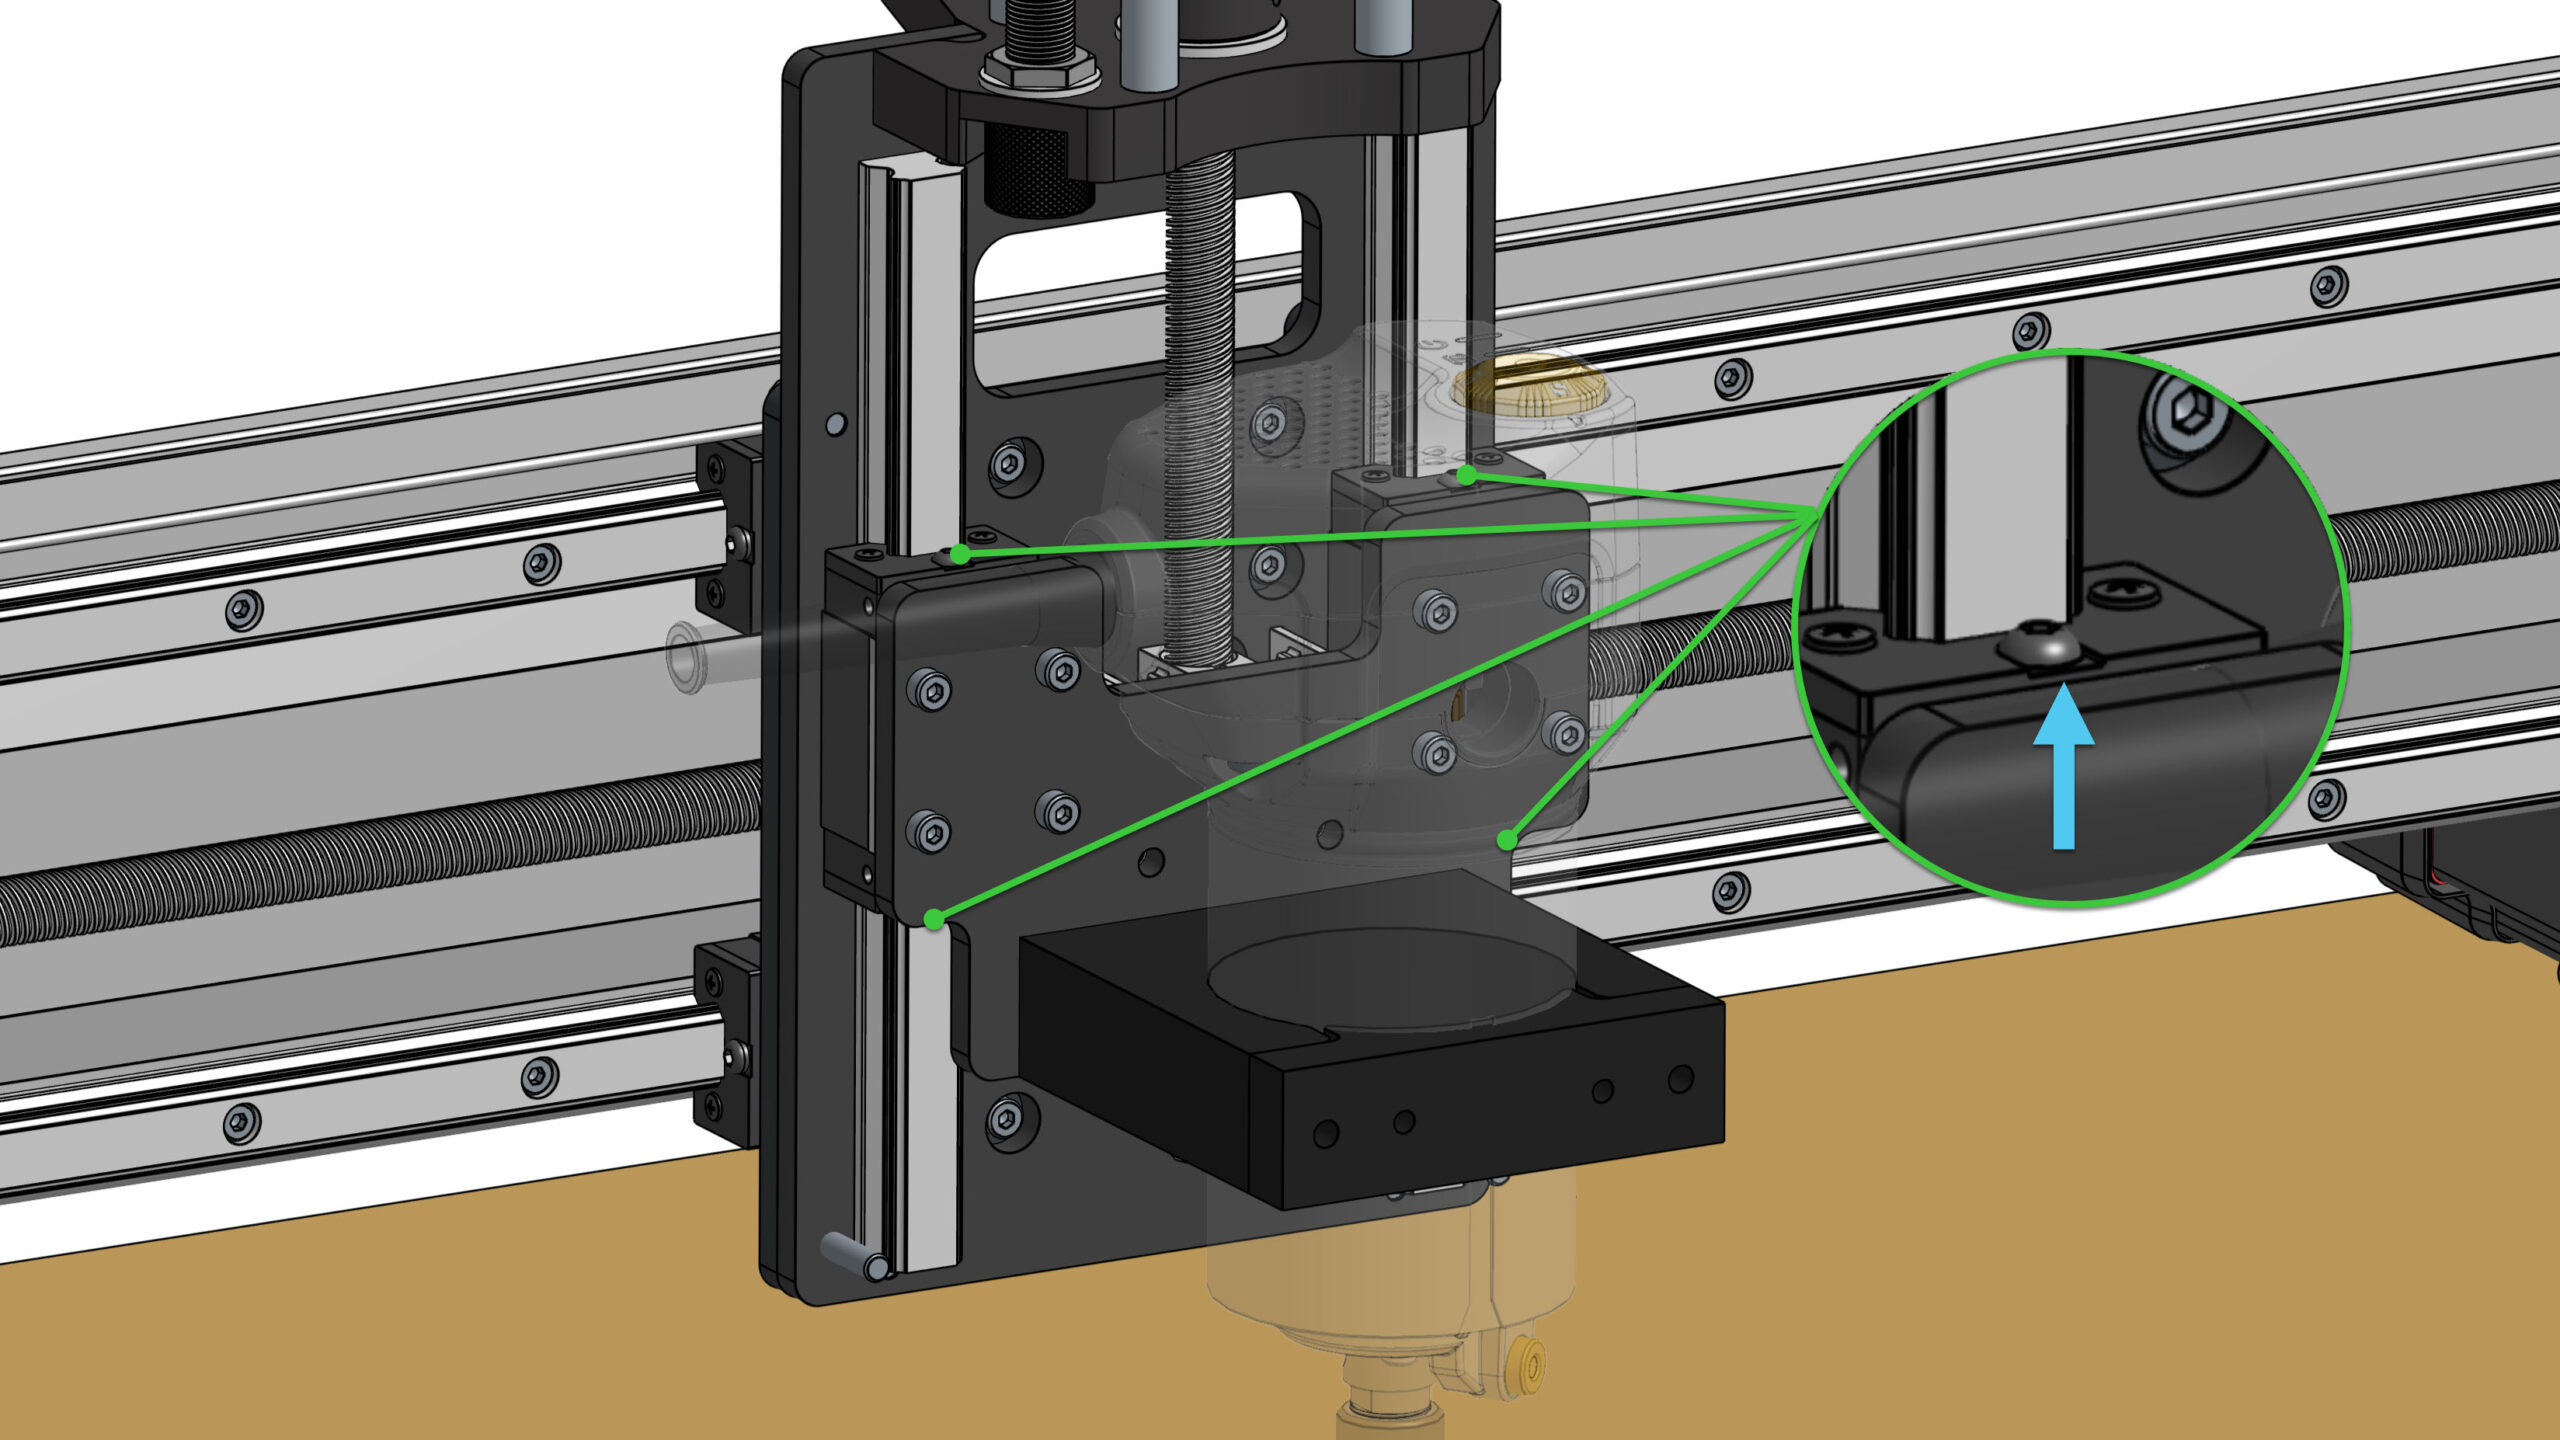
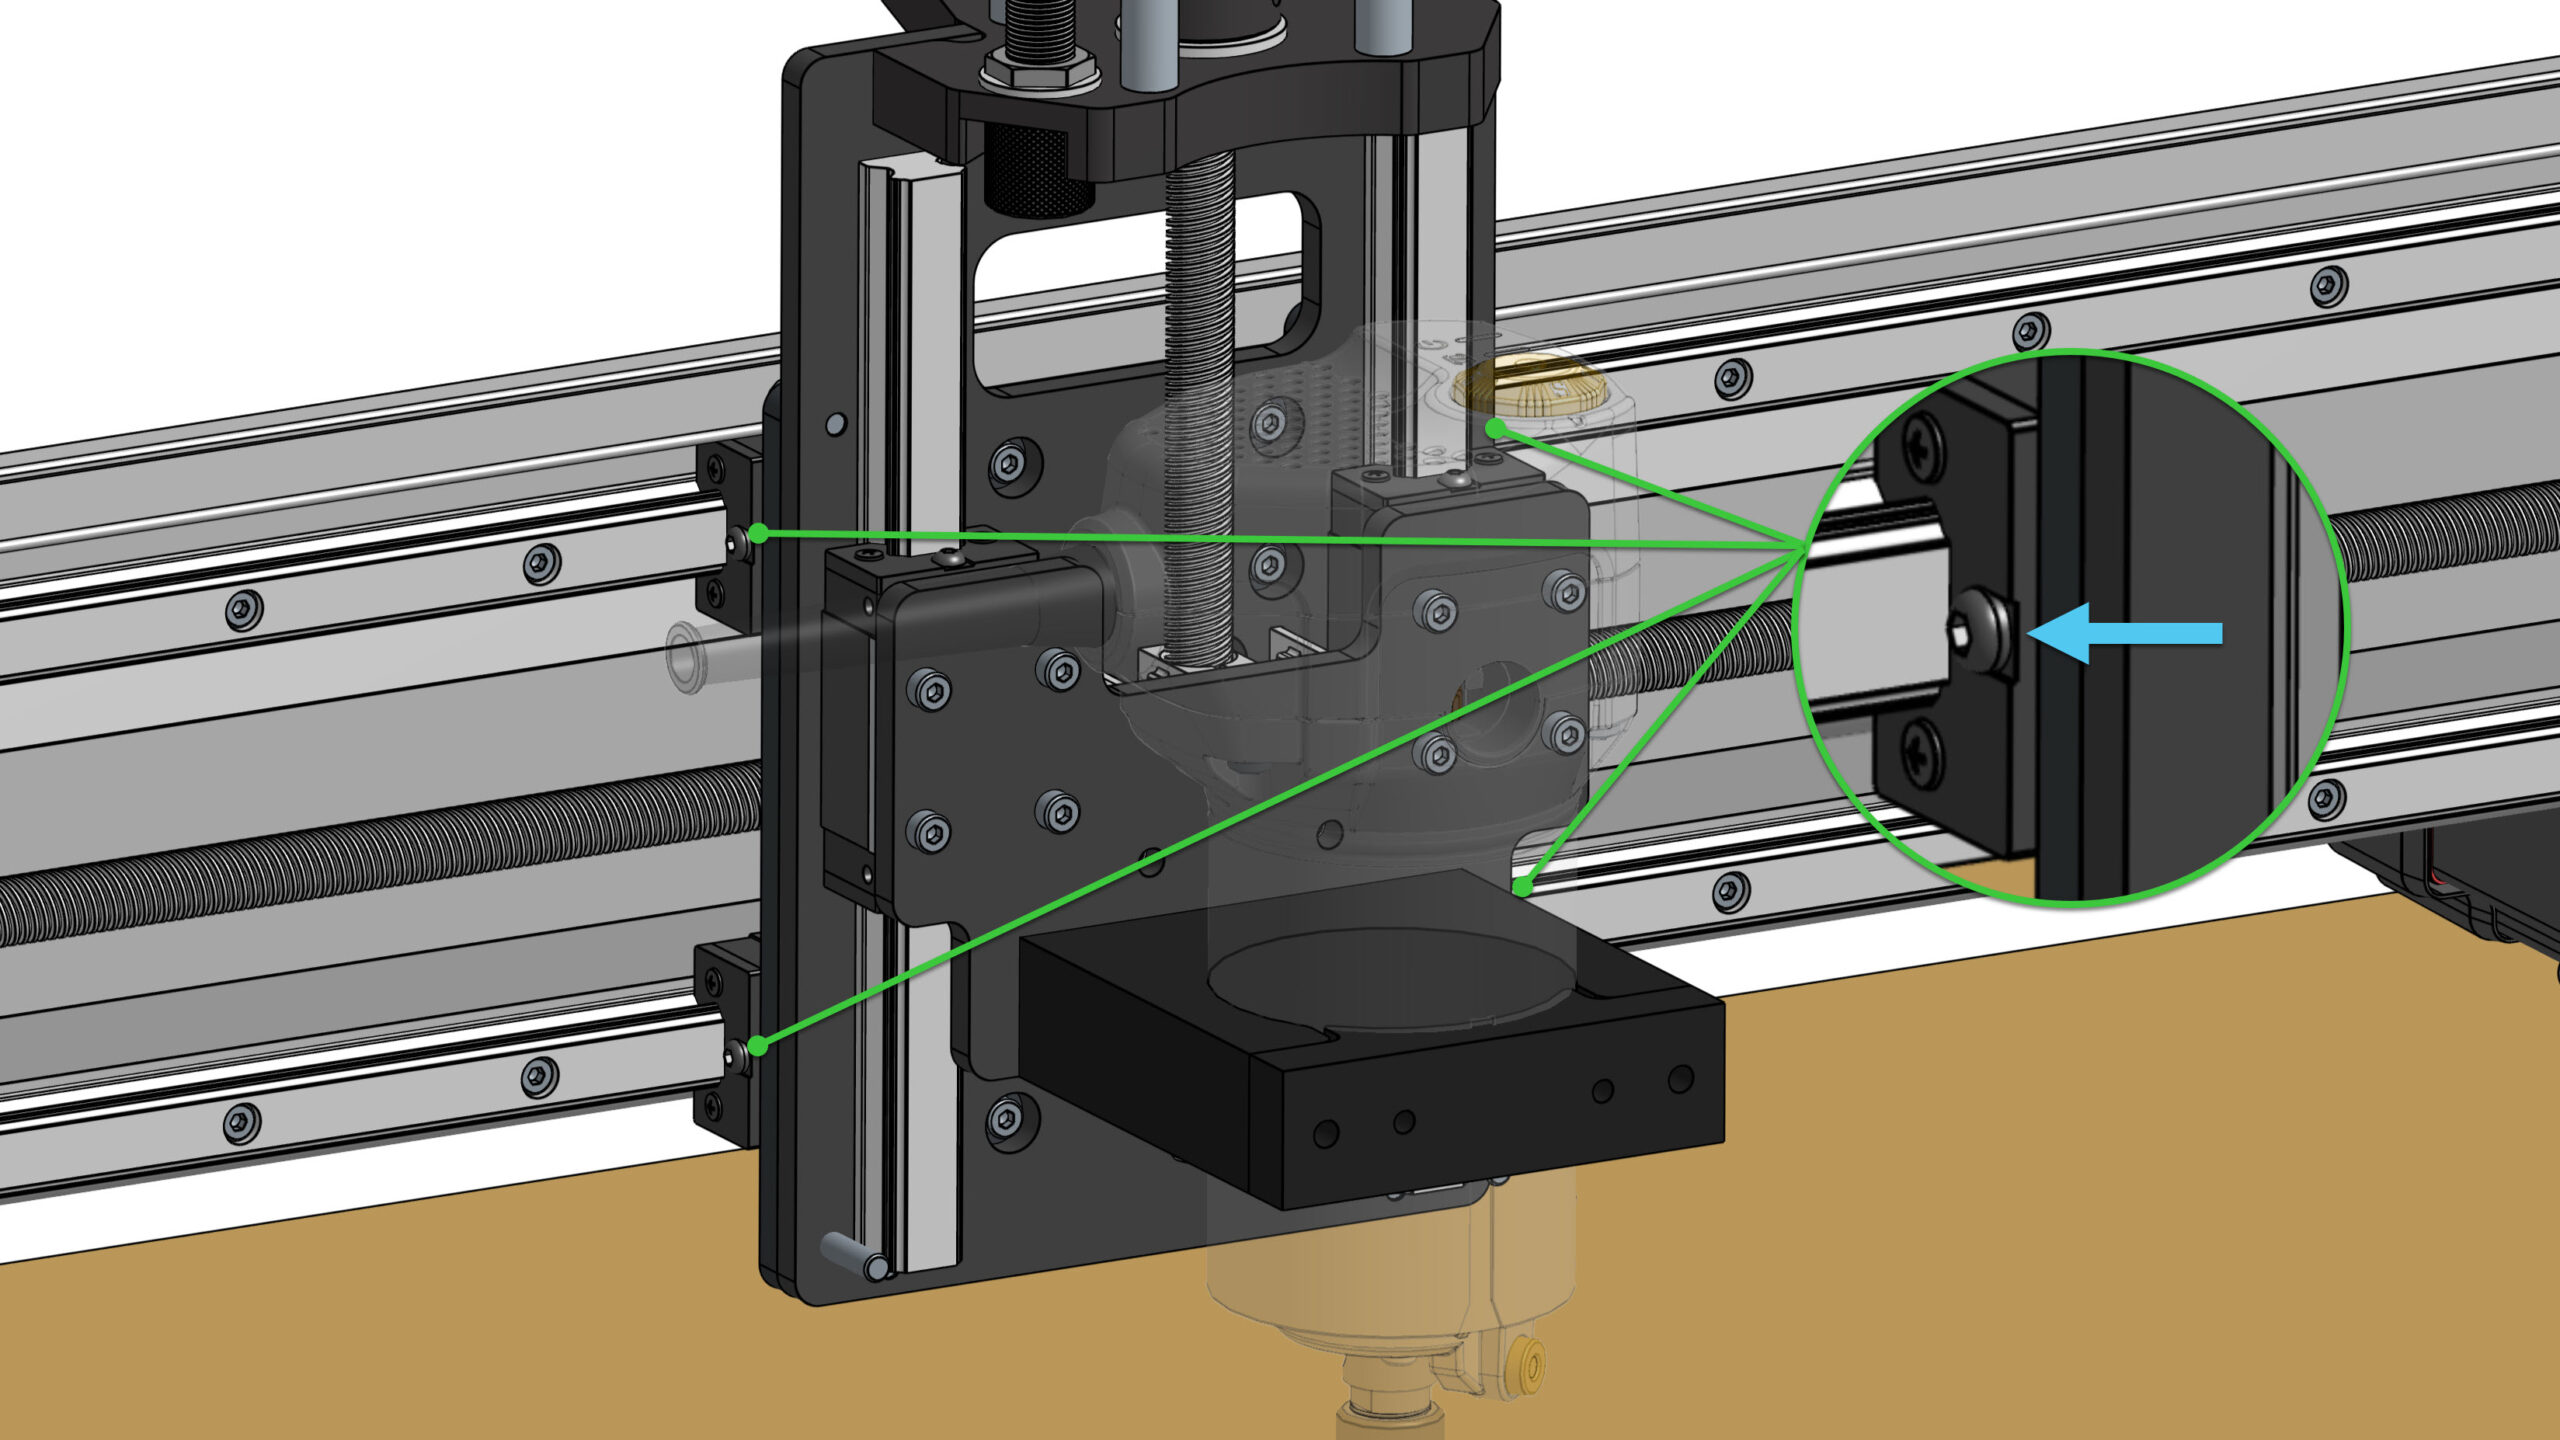
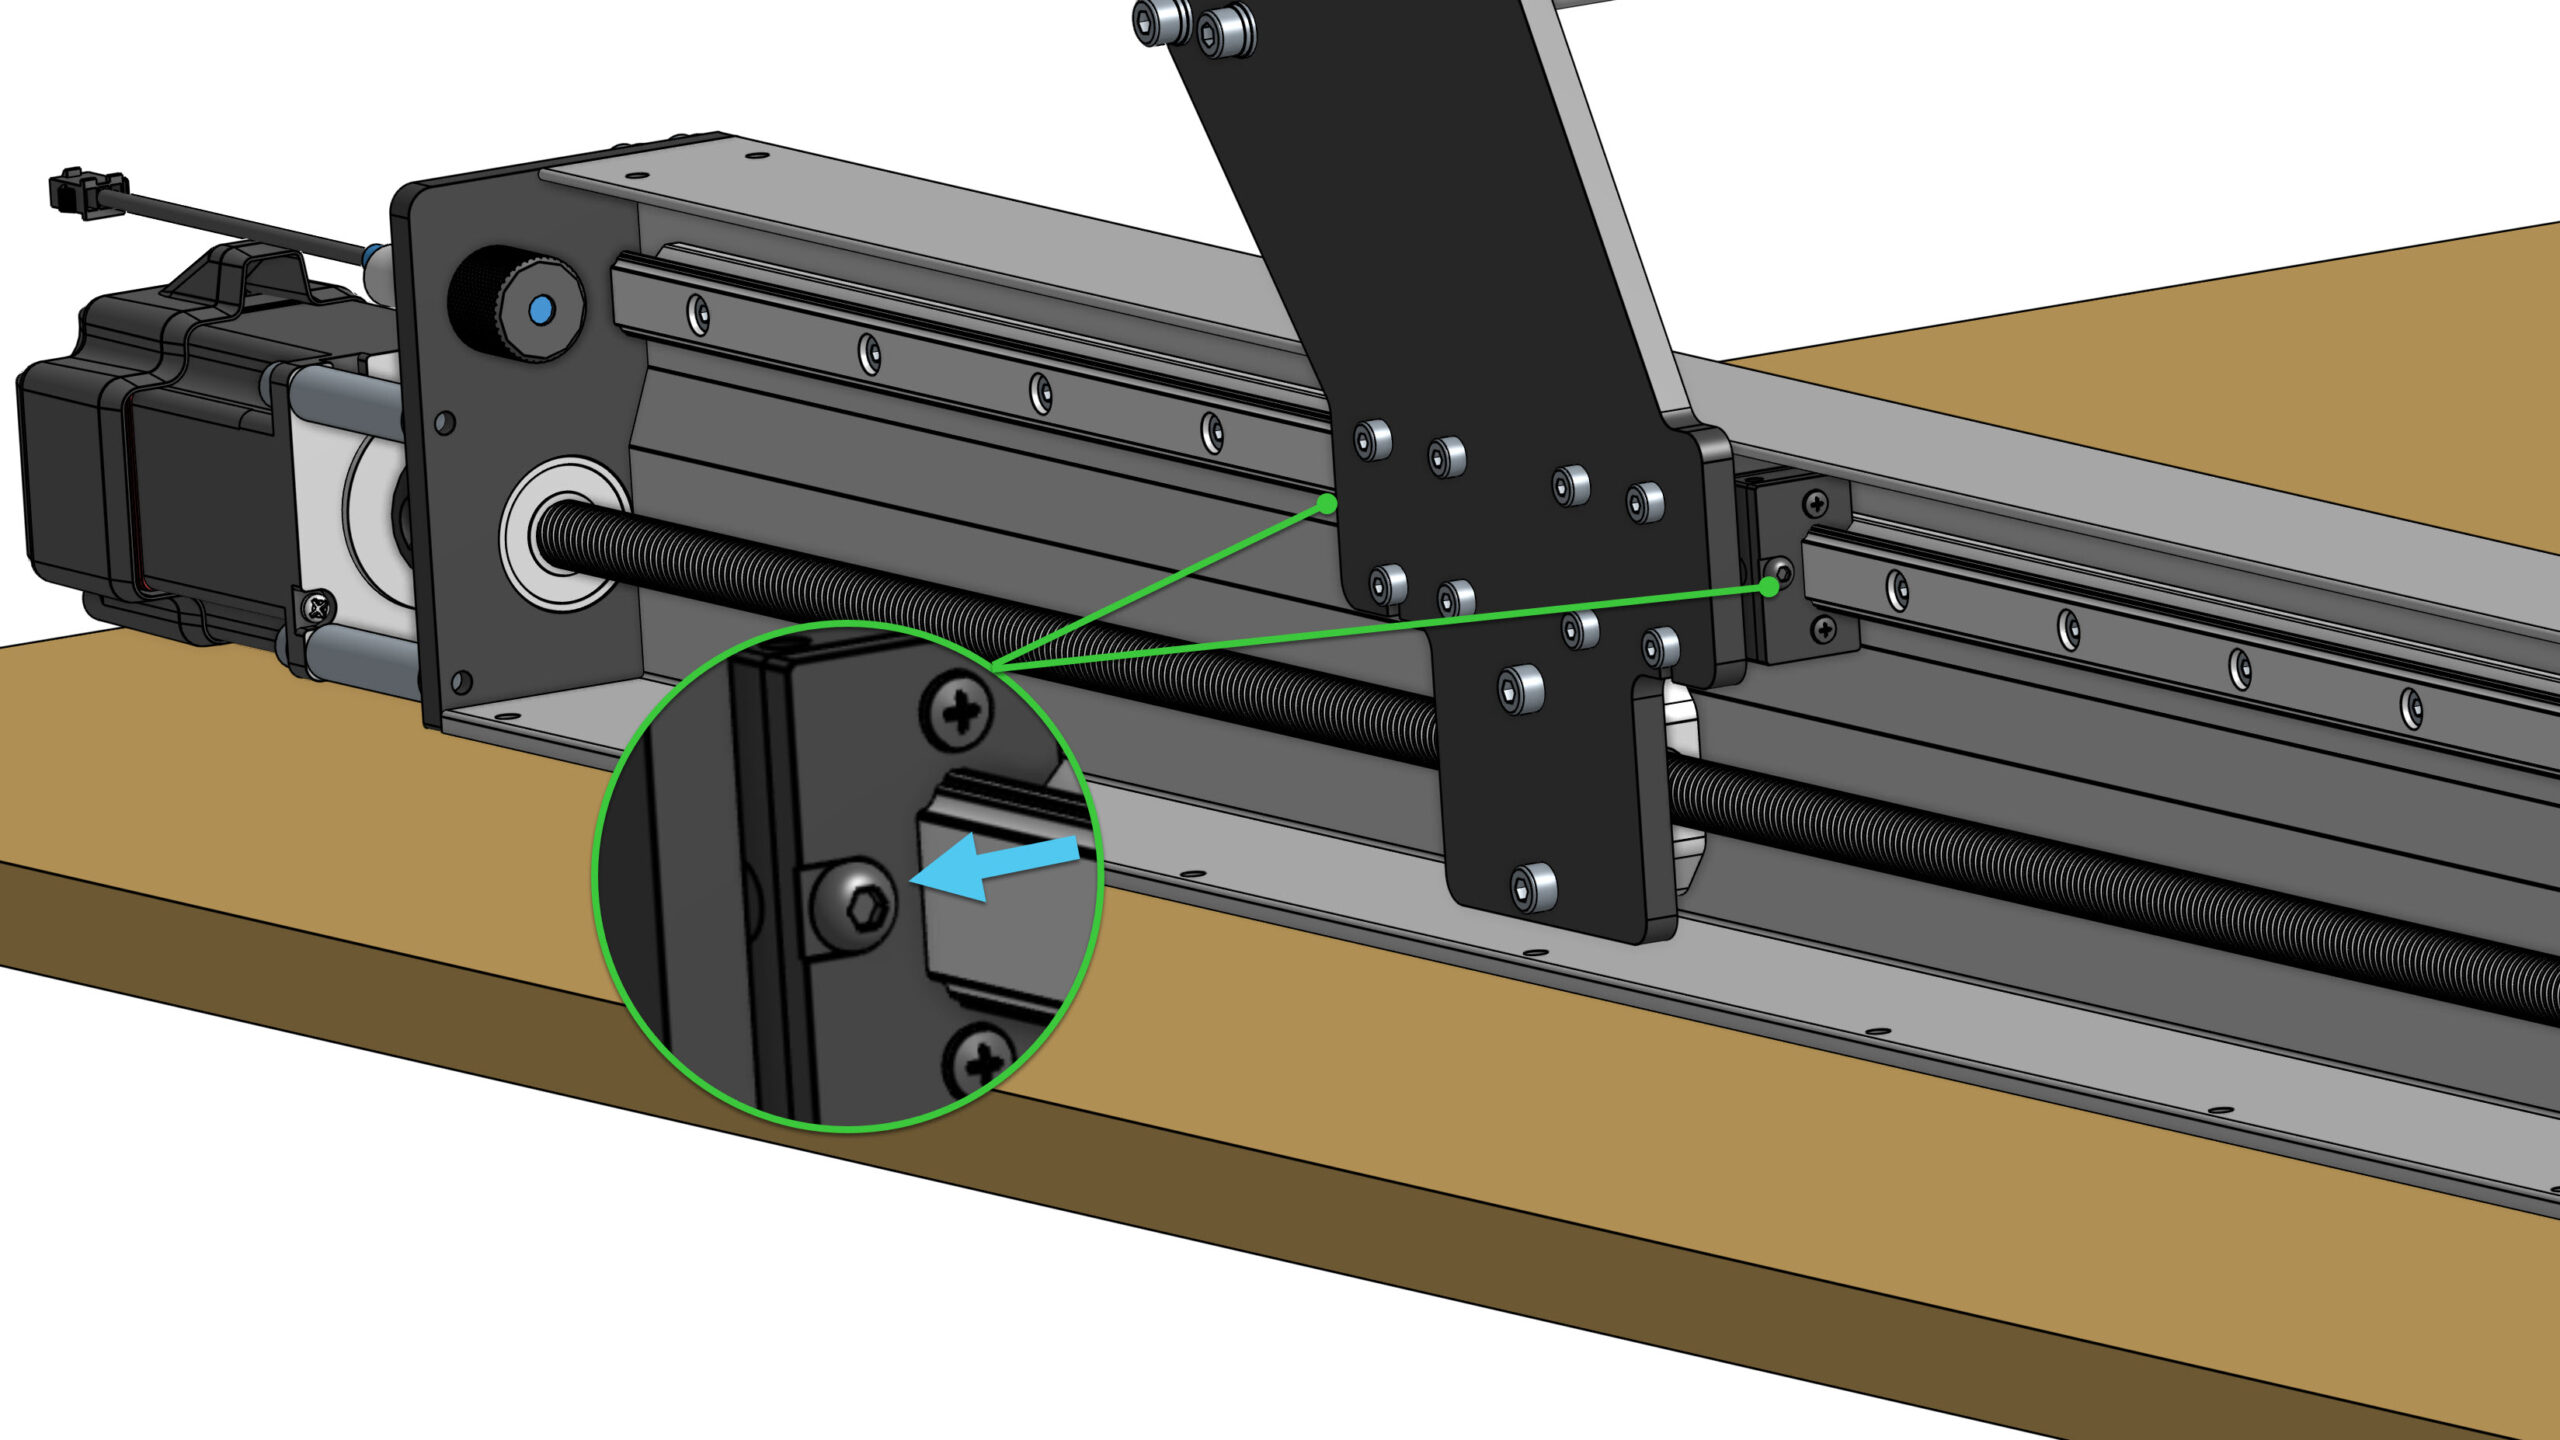
- For the Z-axis, first jog to the top to get access to the screws.
- Remove one (1) screw from each linear guide block using the Allen key. See below for locations on each axis.
- Push the nozzle firmly against the hole, and slowly pump until a small amount of grease comes out between the block and rail.
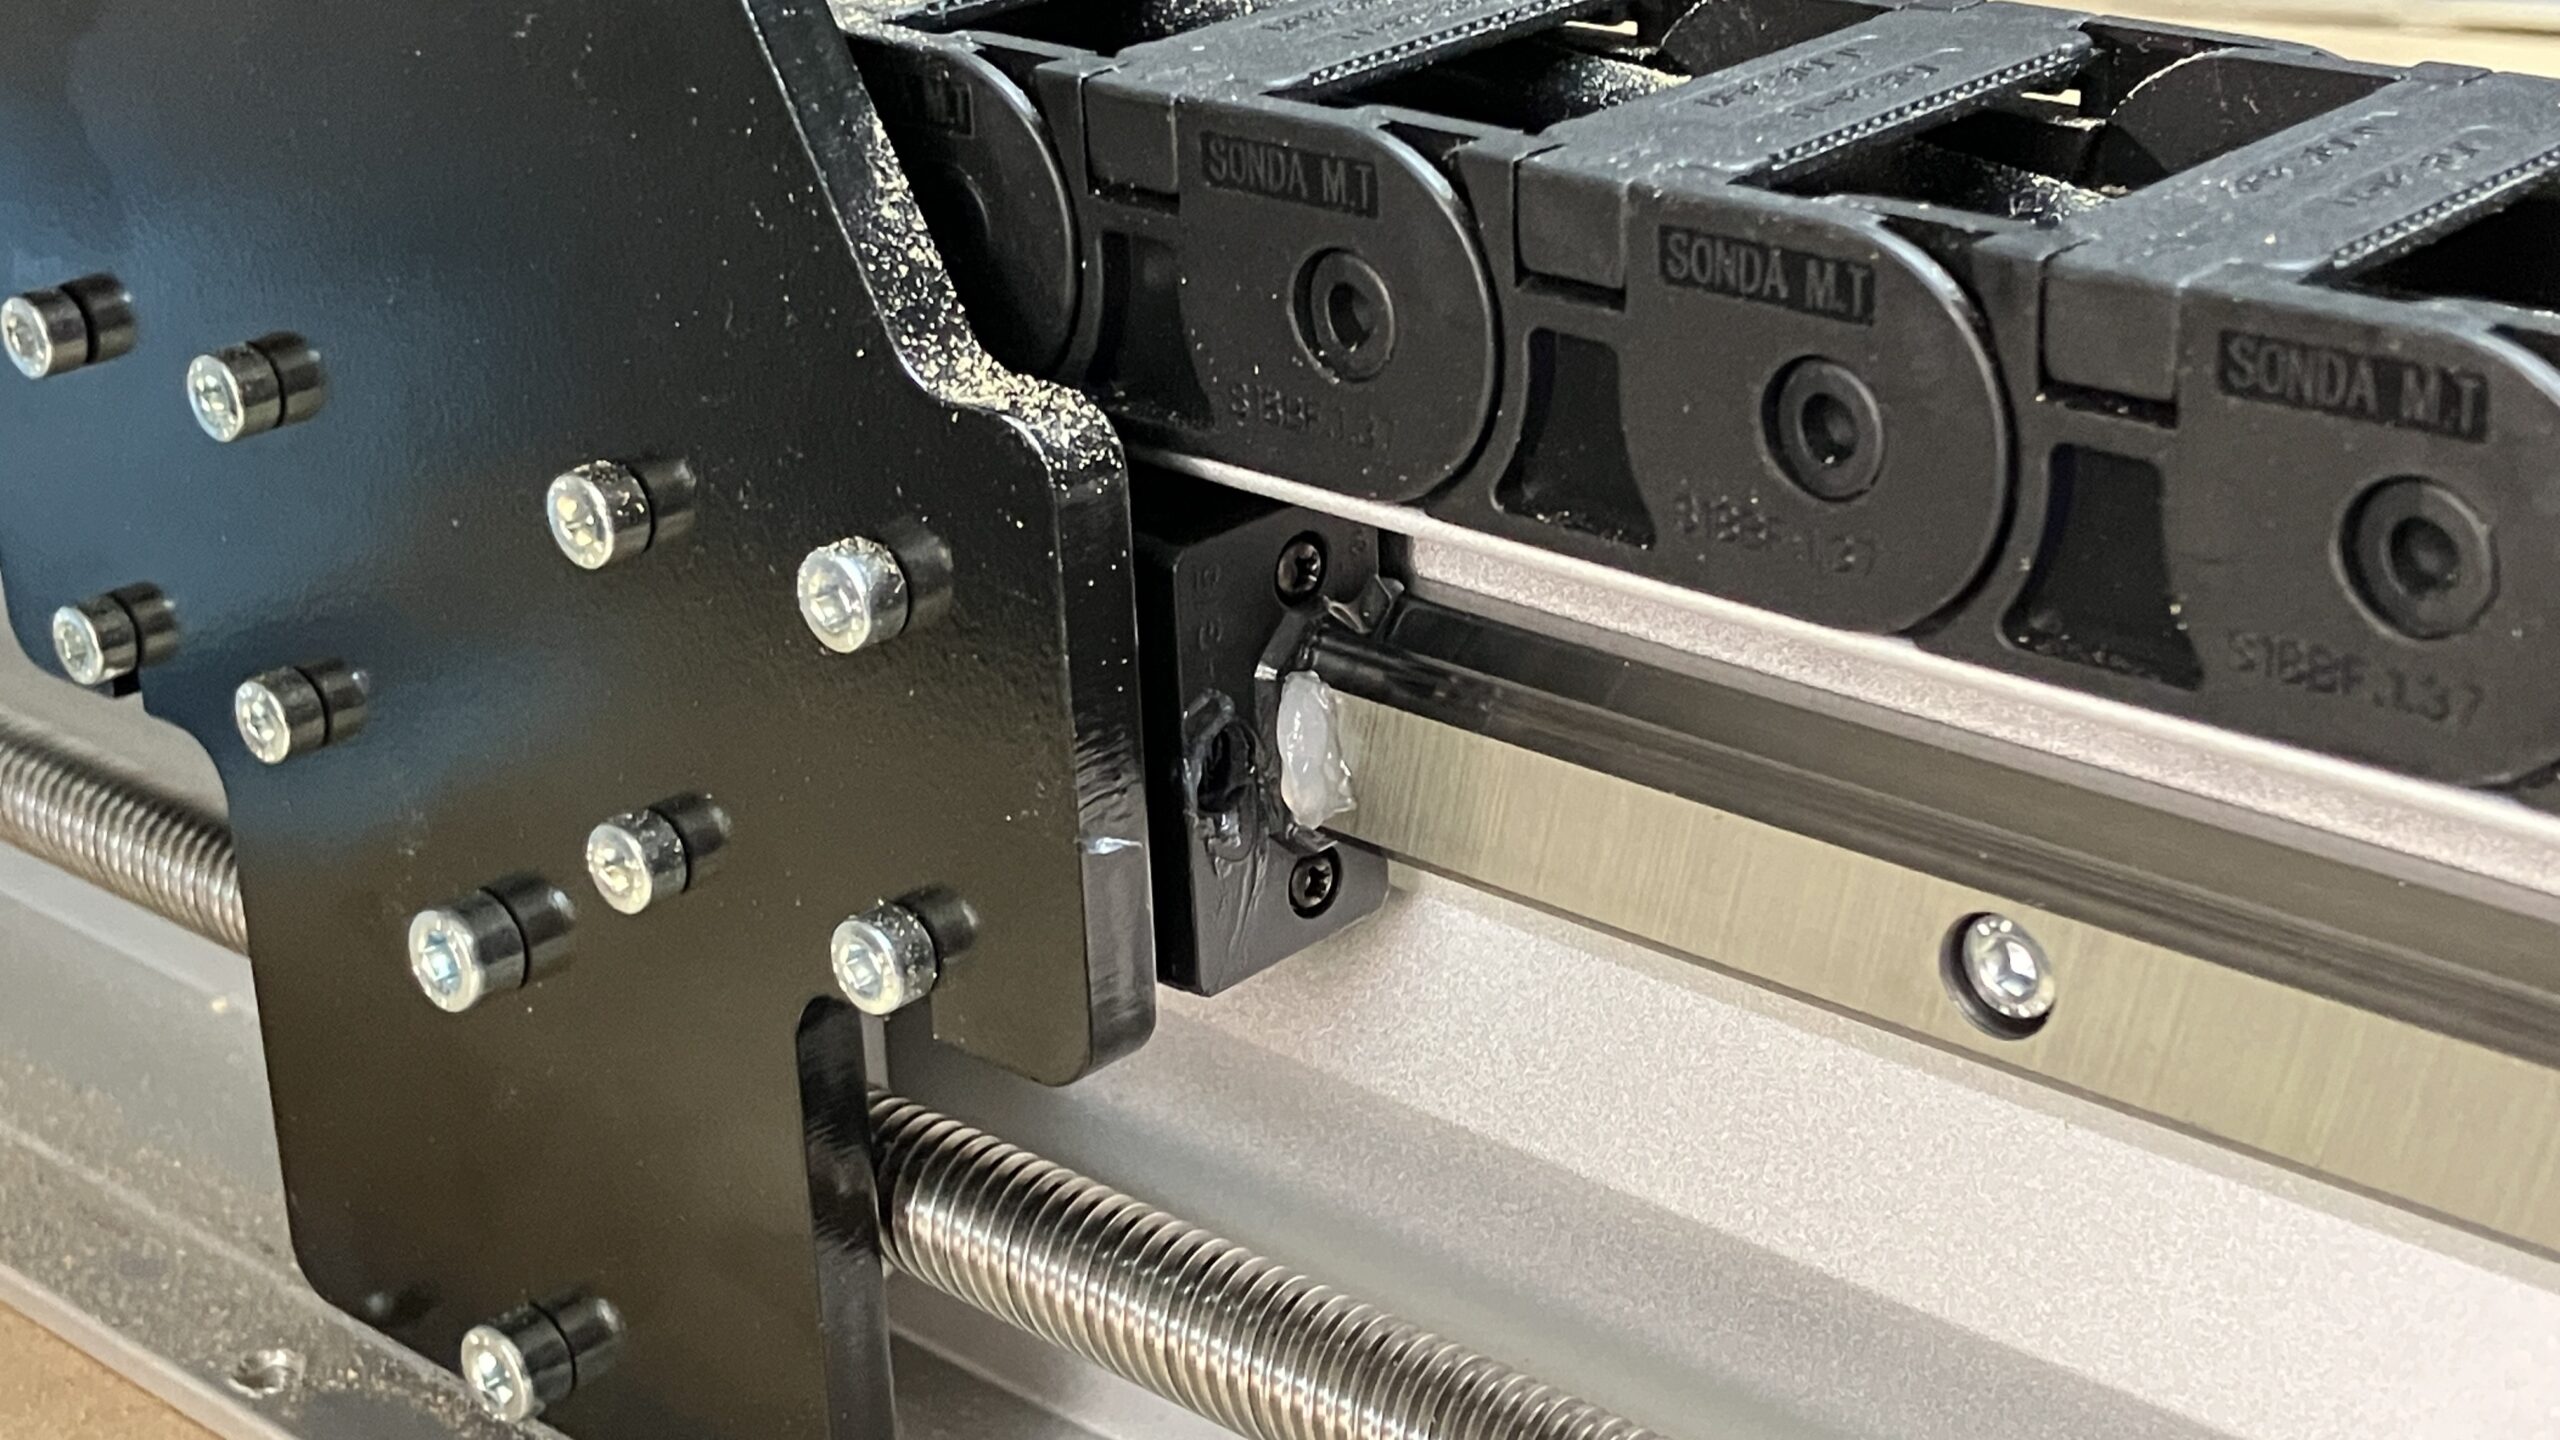
- Wipe with shop towel to remove the excess.
- Refasten the screw.
- Jog to each end of the axis, to fully distribute the grease.
-
Repeat the above steps for each axis.
Maintain Lead Screws
Do every 160 hours of cutting. If you are running the machine 8 hours a day, 5 days a week, you should be doing this every 4 weeks.
- Apply dry lube directly onto shop towel
- Grab the lead screw with the shop towel, then run the towel across the length of the lead screw, rotating to get into the threads at all angles
- Remove the shop towel
- Jog the machine so the dry lube distributes along the entire lead screw
Replace Anti-backlash Nuts
Do as needed, usually once every few years.
Anti-backlash nuts are used to tension the lead screws so that the machine can move accurately. Since they are spring-loaded, they will continue to adjust themselves to apply the right tension.
However, if you start noticing lead screw vibrations, then the nut has probably worn out and needs replacing.
X and Y axis
- Power off the machine
- Unscrew the two M5-25mm screws holding the anti-backlash nut
- Unfasten the black ACME nut, which is located opposite of the motor end of the lead screw, and remove it from the lead screw
- At the same area, loosen the end plate/gantry screws connecting to the rail, and remove them
- Rotate the lead screw manually at the coupler, to move the anti-backlash nut off the lead screw
- Replace with the new anti-backlash nut, carefully threading it onto the lead screw
- Do this slowly! We do not want to crossthread the nut
- Refasten the end plate/gantry, ACME nut and anti-backlash nut screws to secure components in place
- Do not overtighten the anti-backlash nut fasteners screws, otherwise it will cause binding
Z-axis
- Power off the machine
- Remove your router from the mount
- Unfasten the router mount from the Z-axis assembly
- Jog the machine down until the gantry bottoms out, then turn OFF the controller
- Unscrew the four (4) M5-25mm screws at the back
- Unscrew the two M5-25mm screws holding the anti-backlash nut
- Rotate the lead screw manually at the coupler, to move the anti-backlash nut off the lead screw
- Orient the new anti-backlash nut so the spring is facing upwards, then carefully thread it onto the lead screw
- Do this slowly! We do not want to crossthread the nut
- Refasten the anti-backlash nut and router mount screws to secure components in place
- Do not overtighten the anti-backlash nut fasteners screws, otherwise it will cause binding
Router
We recommend cleaning out your collets and collet nuts, as dust buildup can cause bits to get stuck in your router. Use a small brush or toothpick to clean in between the grooves and threads.
If you notice sparks from your router or a burnt smell, it means that your carbon brushes are worn out. Please review the instructions here on how to replace them.