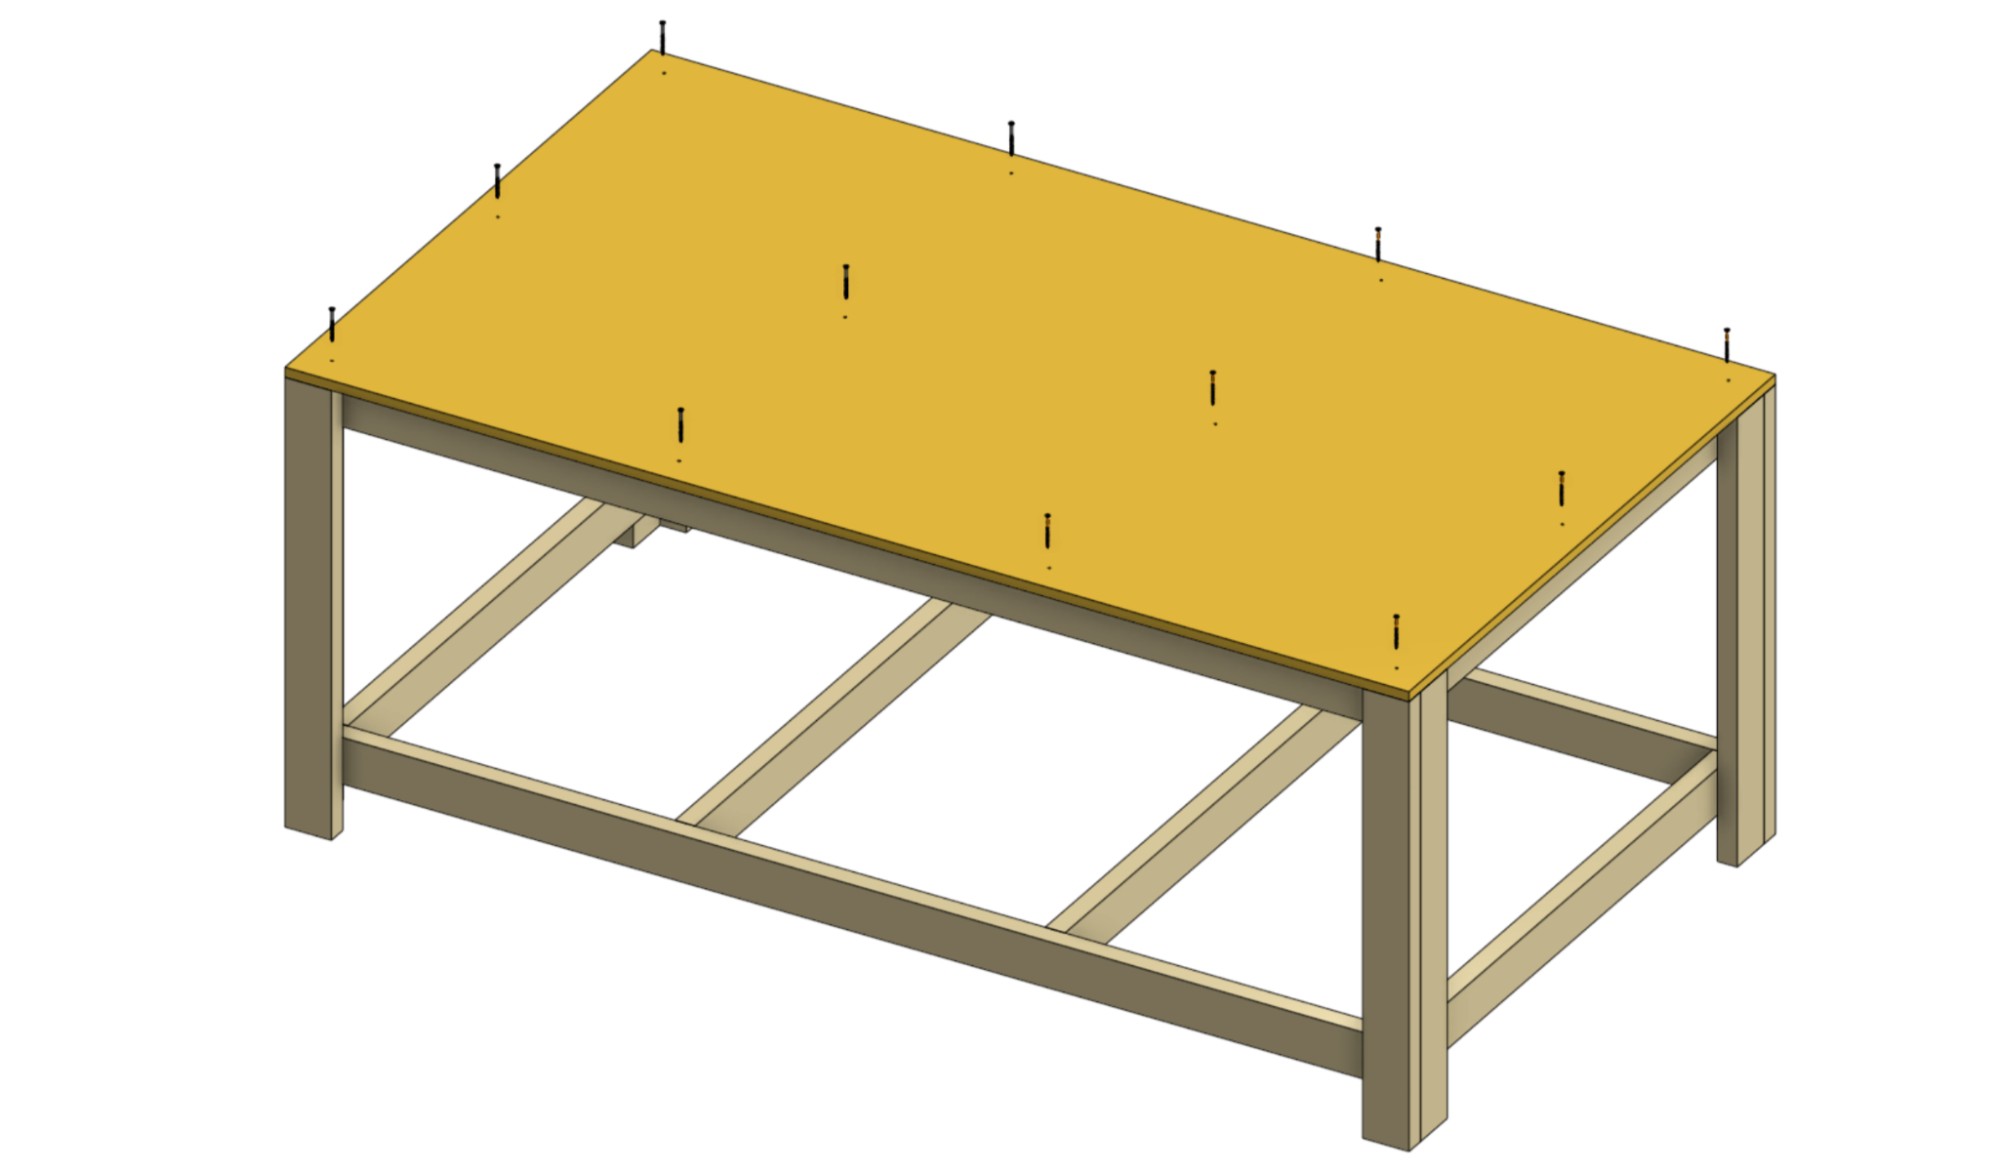
Table Plans
Looking to build a table for your LongMill MK3? We have plans for that! Use the Table of Contents to navigate to your machine size, to begin preparing and building.
See the 3D CAD model for your reference.
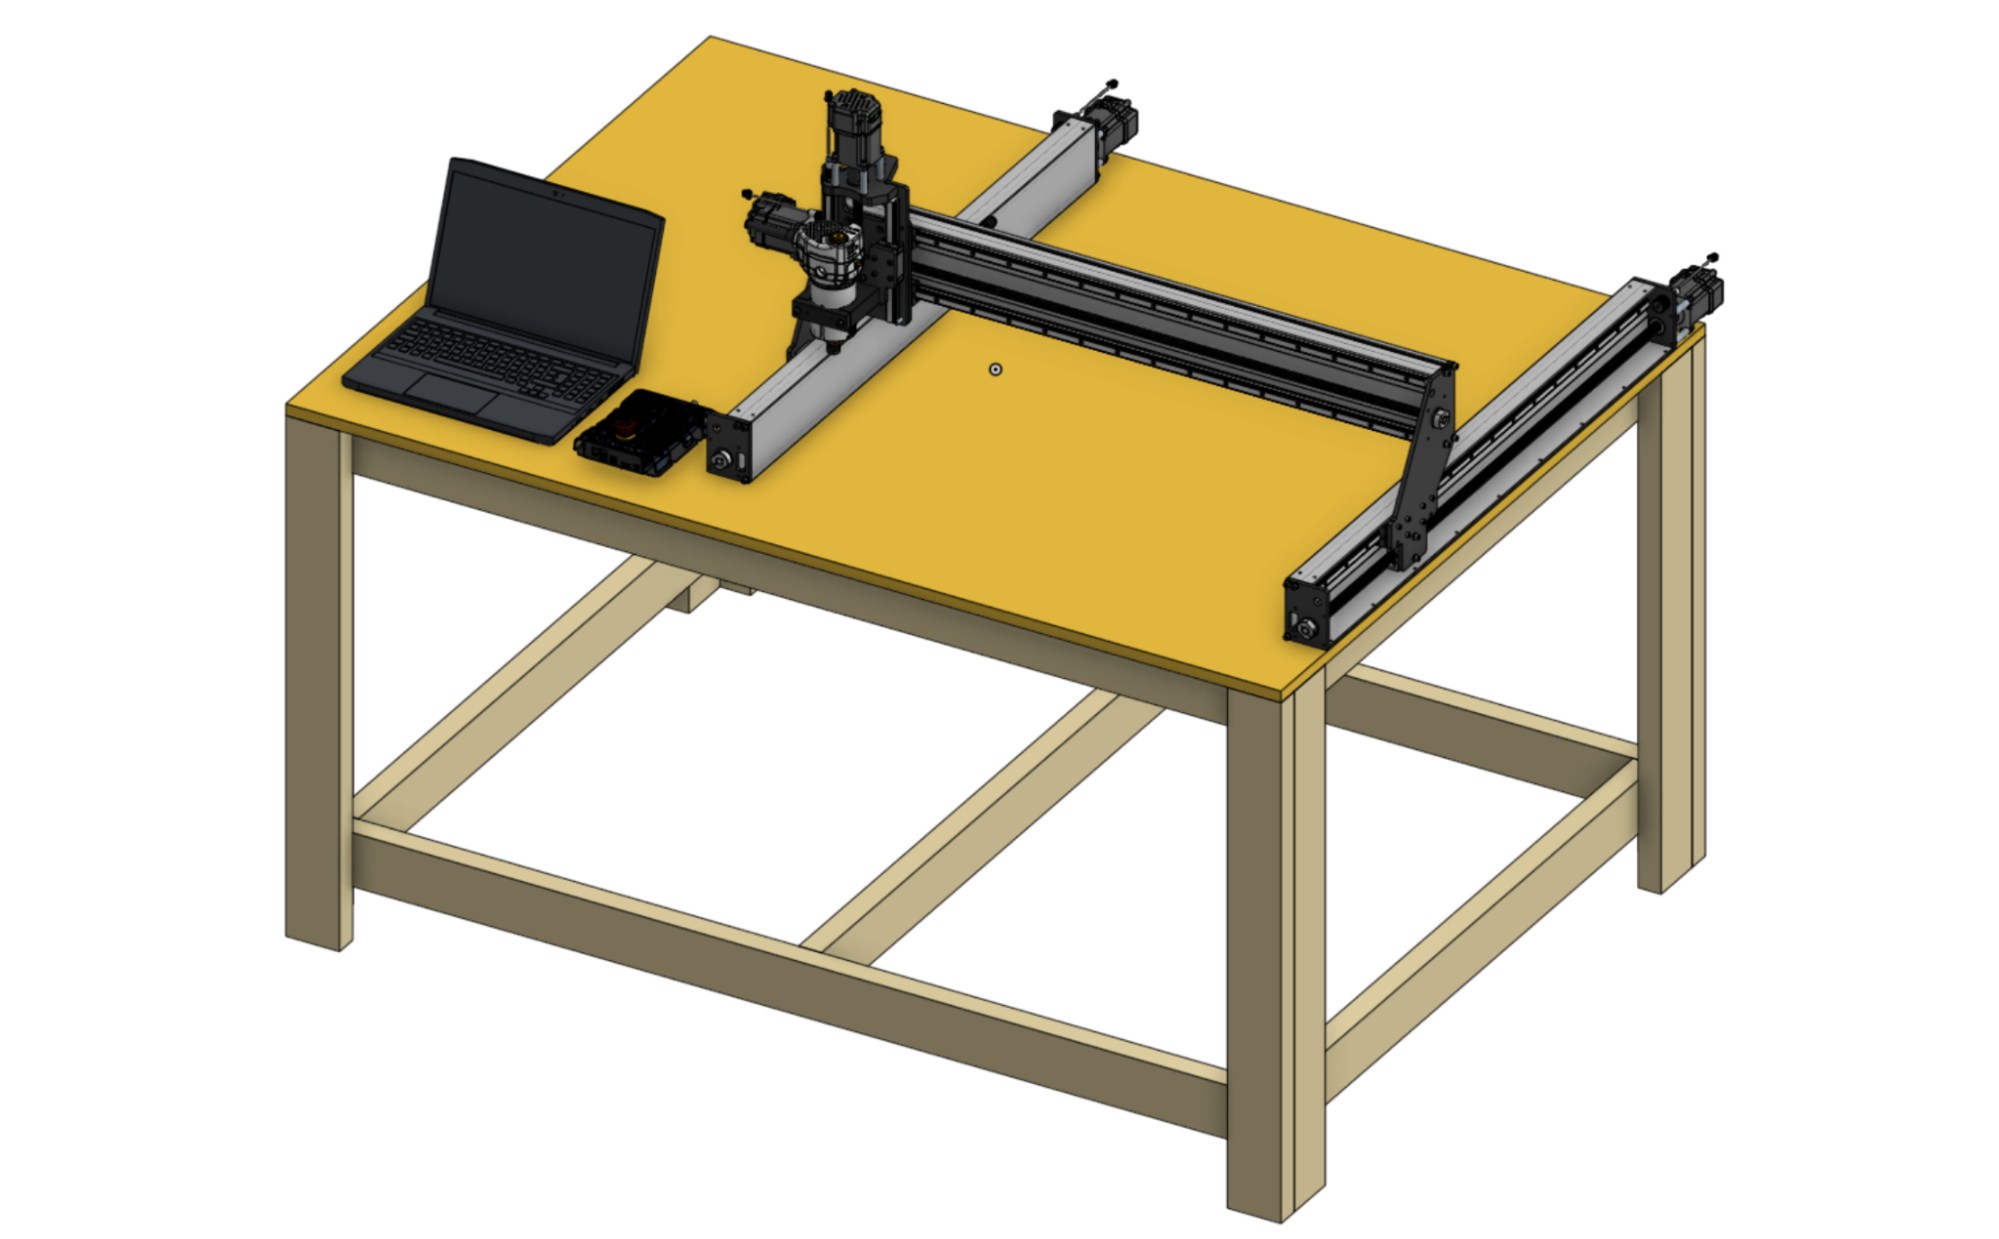
Materials Needed
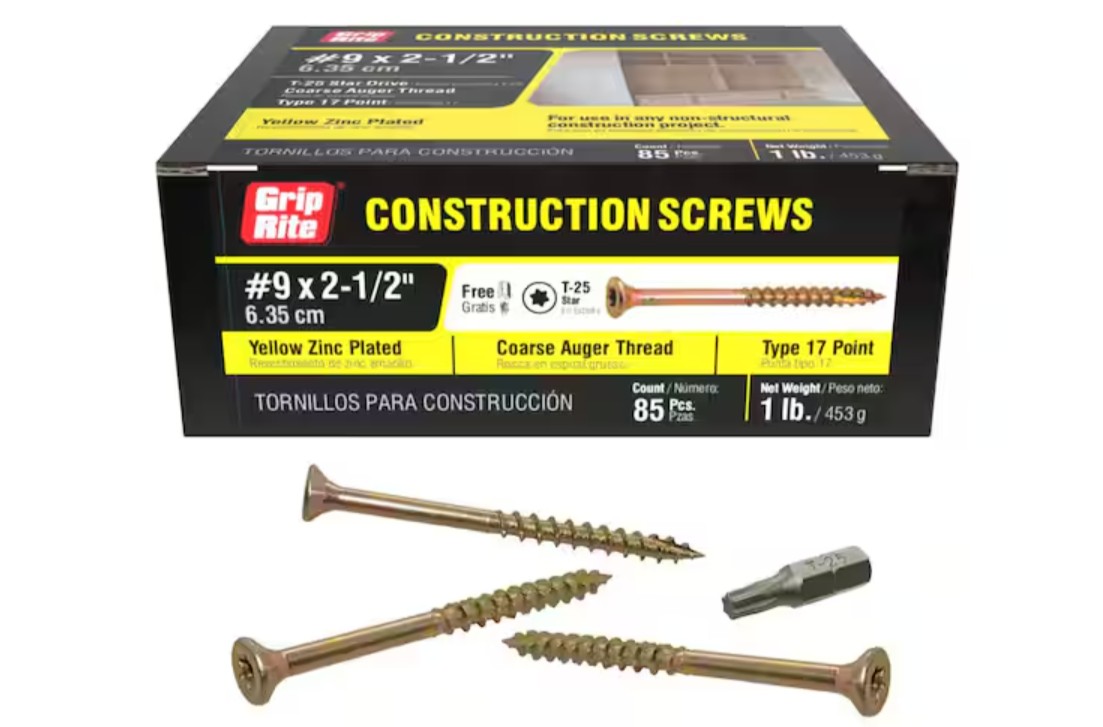
- One (85 pcs) pack construction screws – #9 x 2-½″
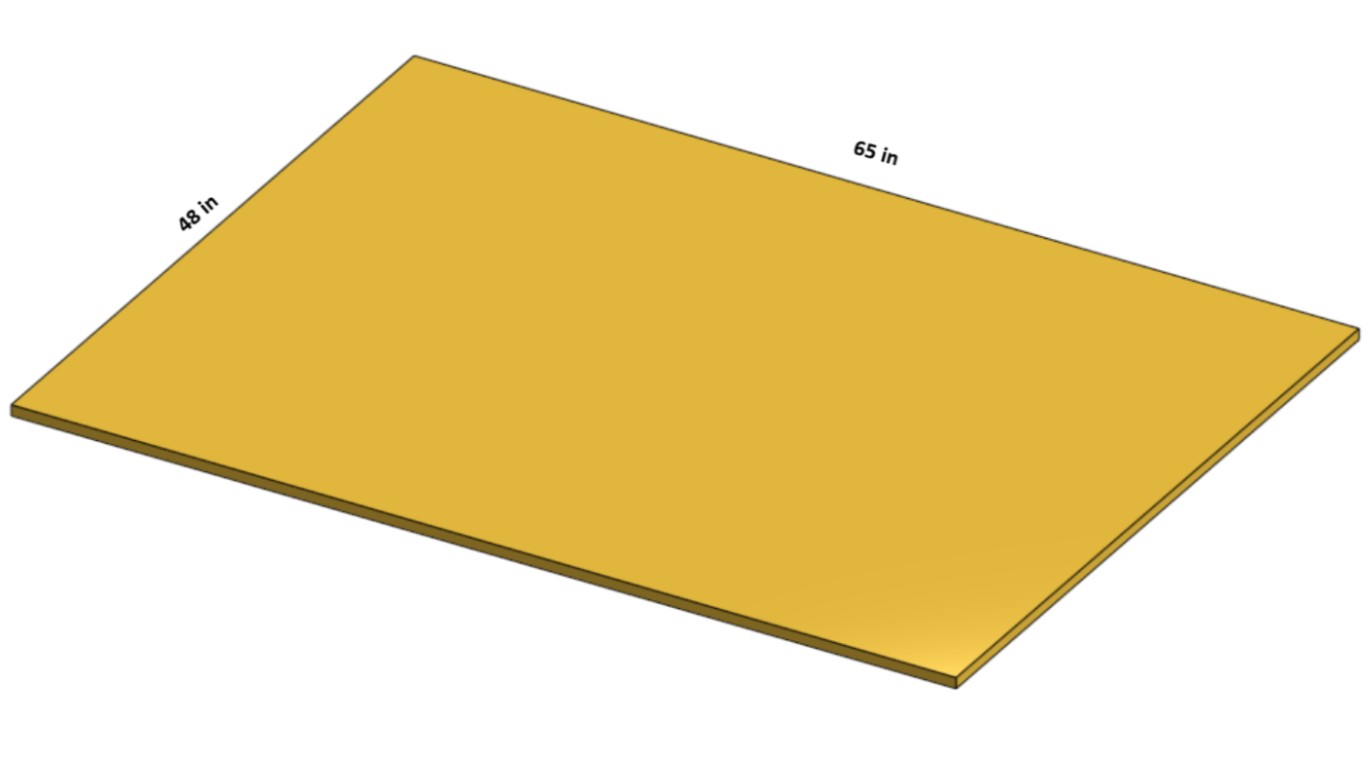
- One (1) MDF board
- 30×30 → 65″x48″ inch, ¾″ thick
- 48×30 → 85″x48″ inch, ¾″ thick
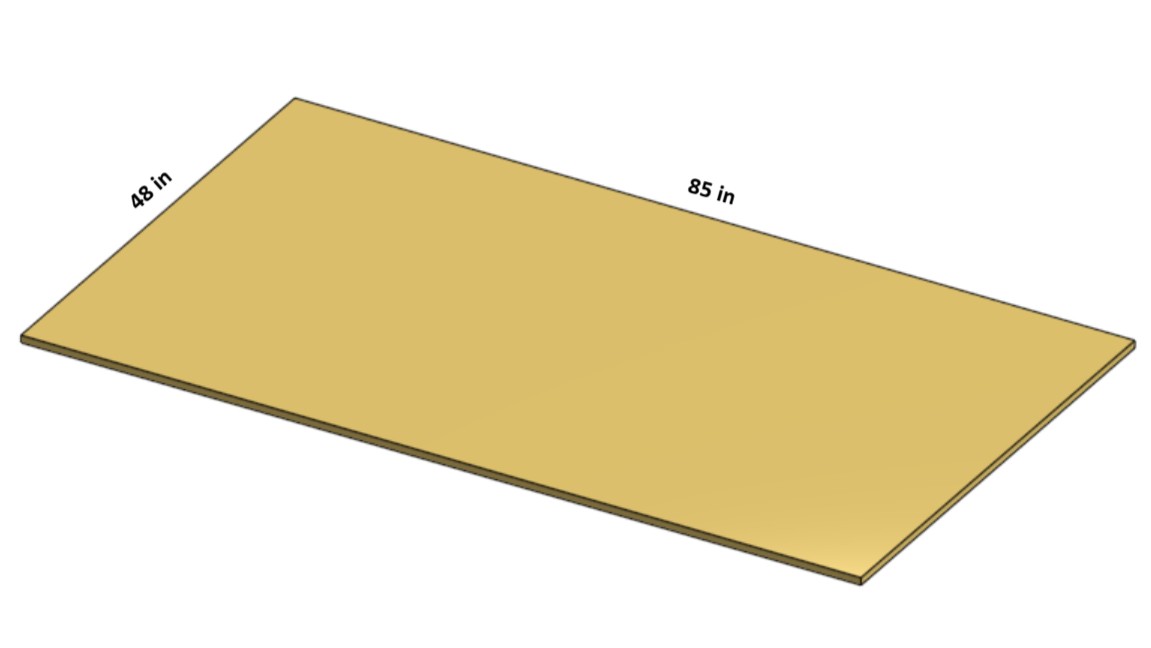
- 30×30 → 65″x48″ inch, ¾″ thick
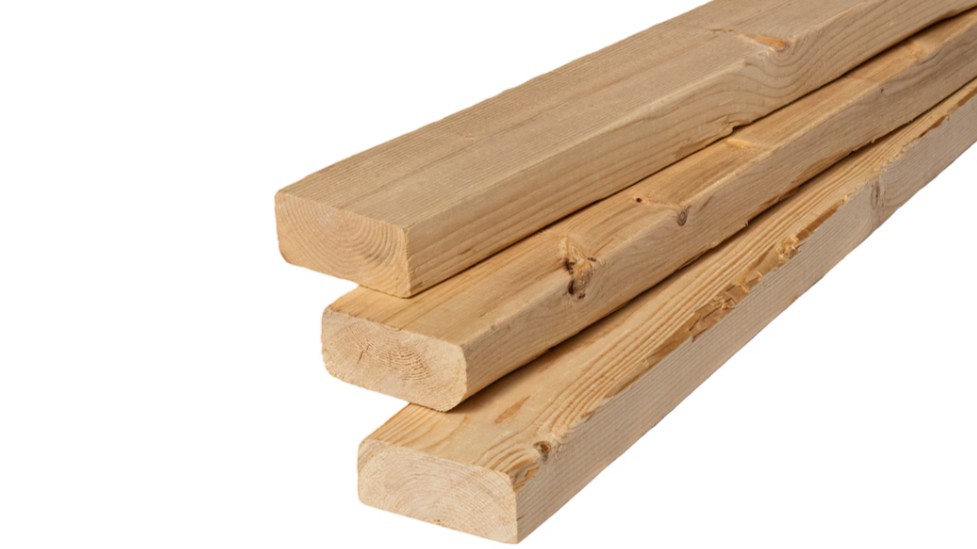
- 8 pcs of 2″x4″x10′ OR 12 pcs of 2″x4″x8′ dimensional lumber
30×30 Cut Lists
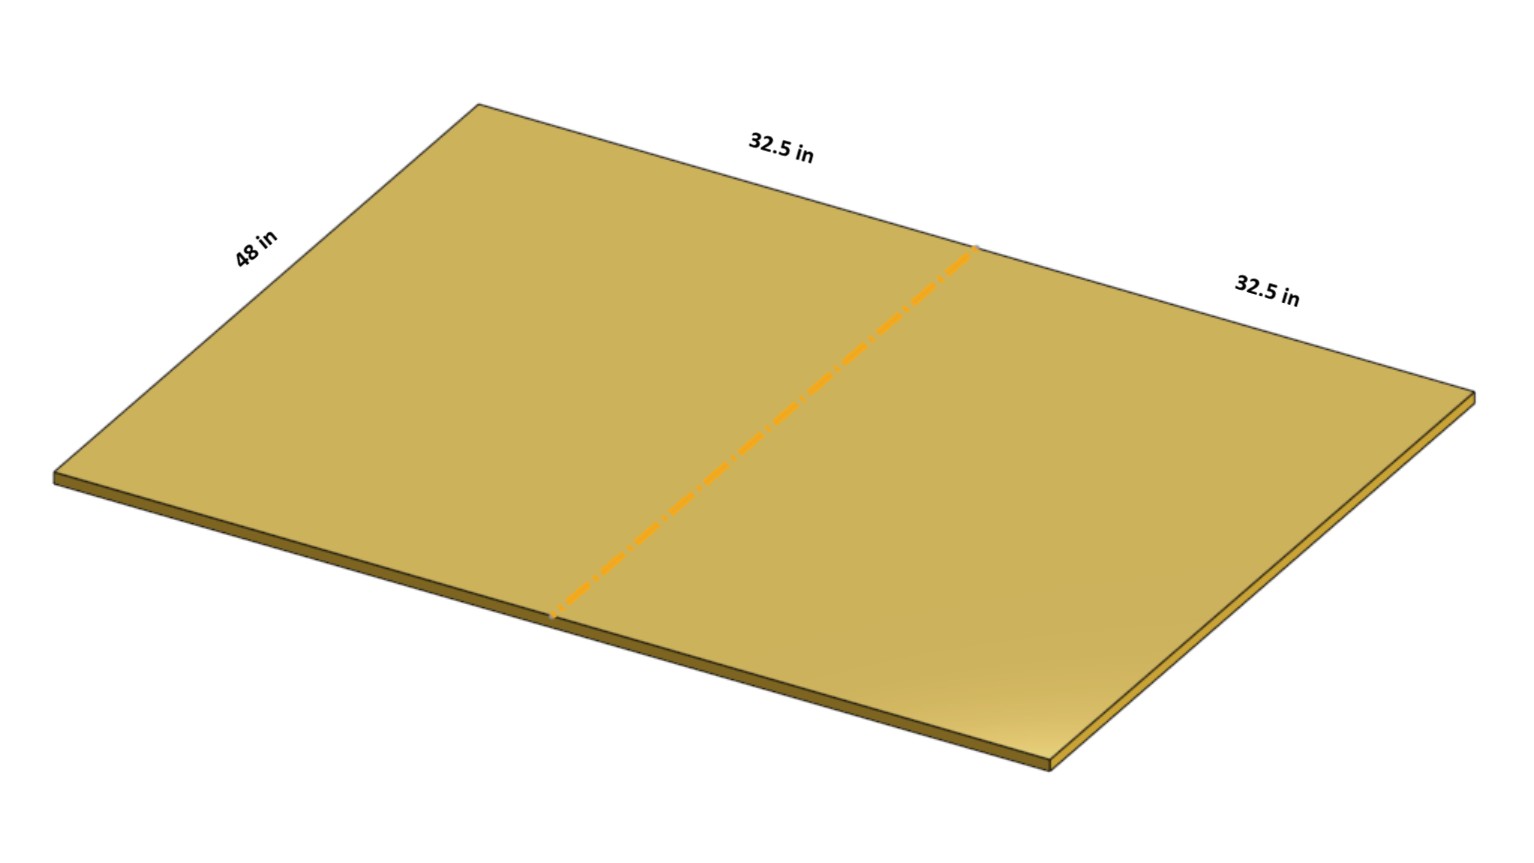
If you can’t transport a 65″ × 48″ sheet, you can cut it into two pieces of 32.5″ x 48″.
Cut list for 8 pcs 2″x4″x10′ Lumber:
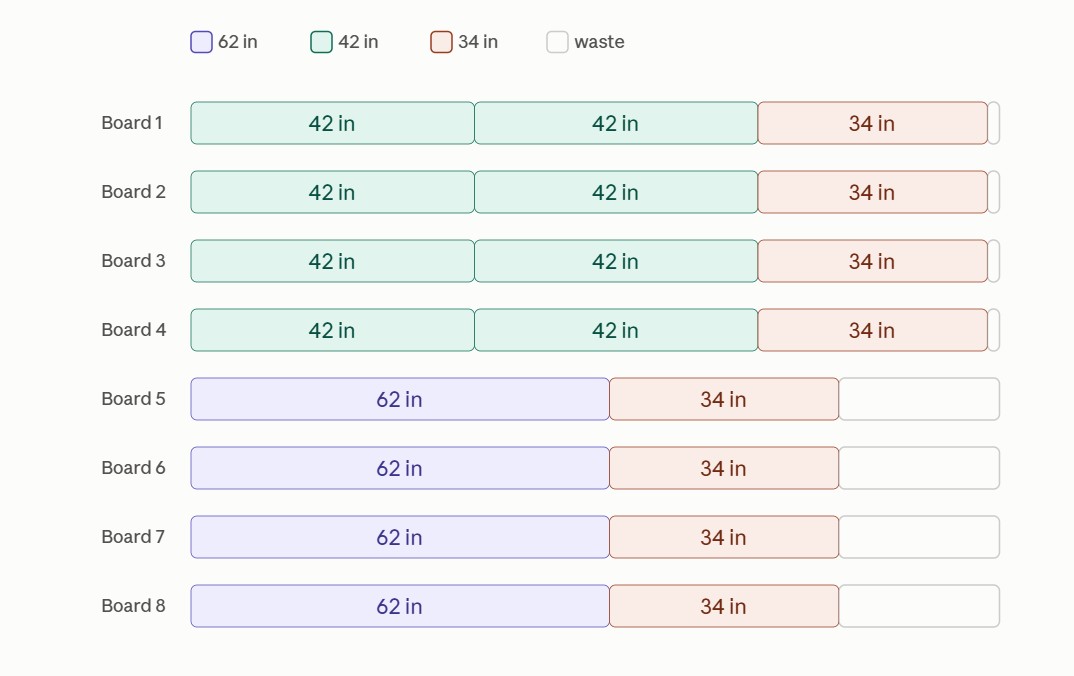
Cut list for 12 pcs 2”x4”x8’ Lumber:
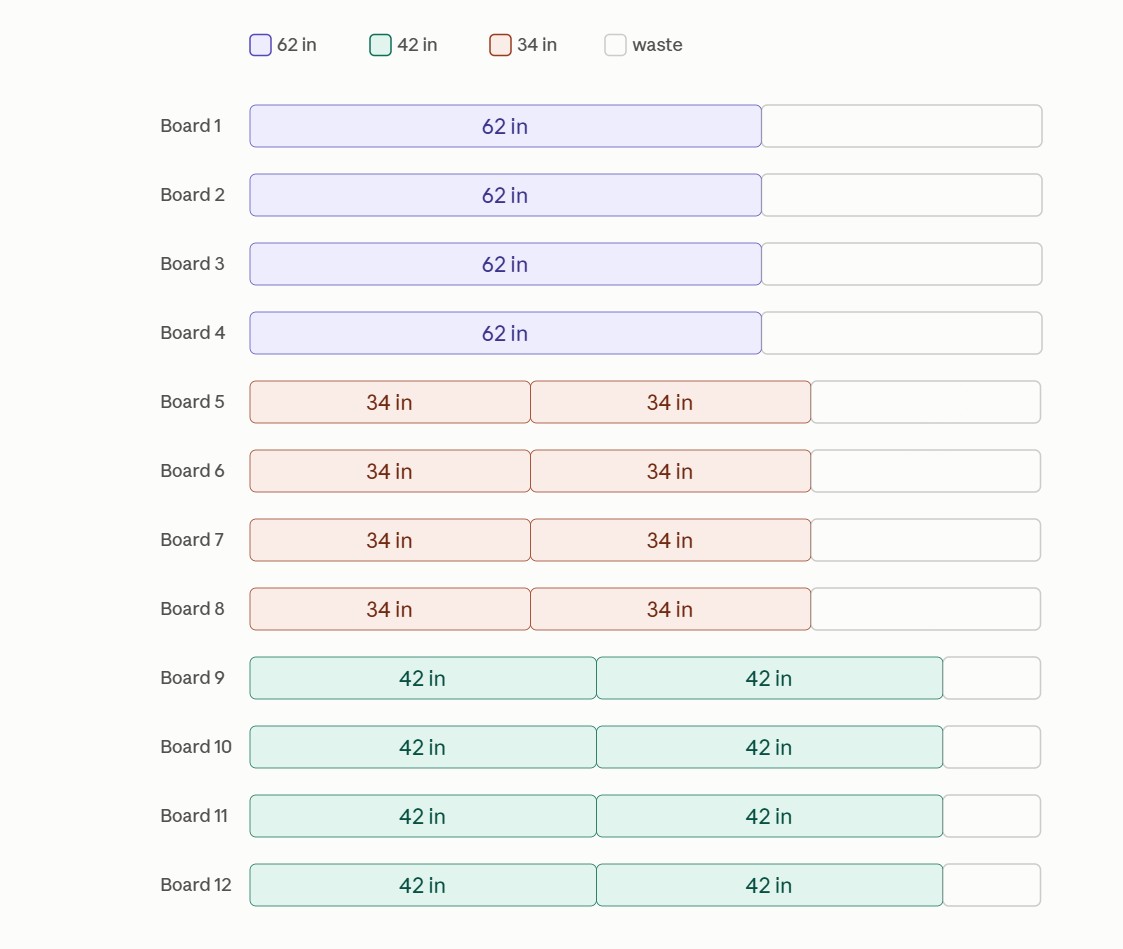
Note: Try to get at least three straight boards to cut two 82″ pieces and two 42″ pieces. This will help you create a relatively flat base for the MDF top.30×30 Steps
-
Use your MDF board as a base, or find the flattest part of the floor available.
-
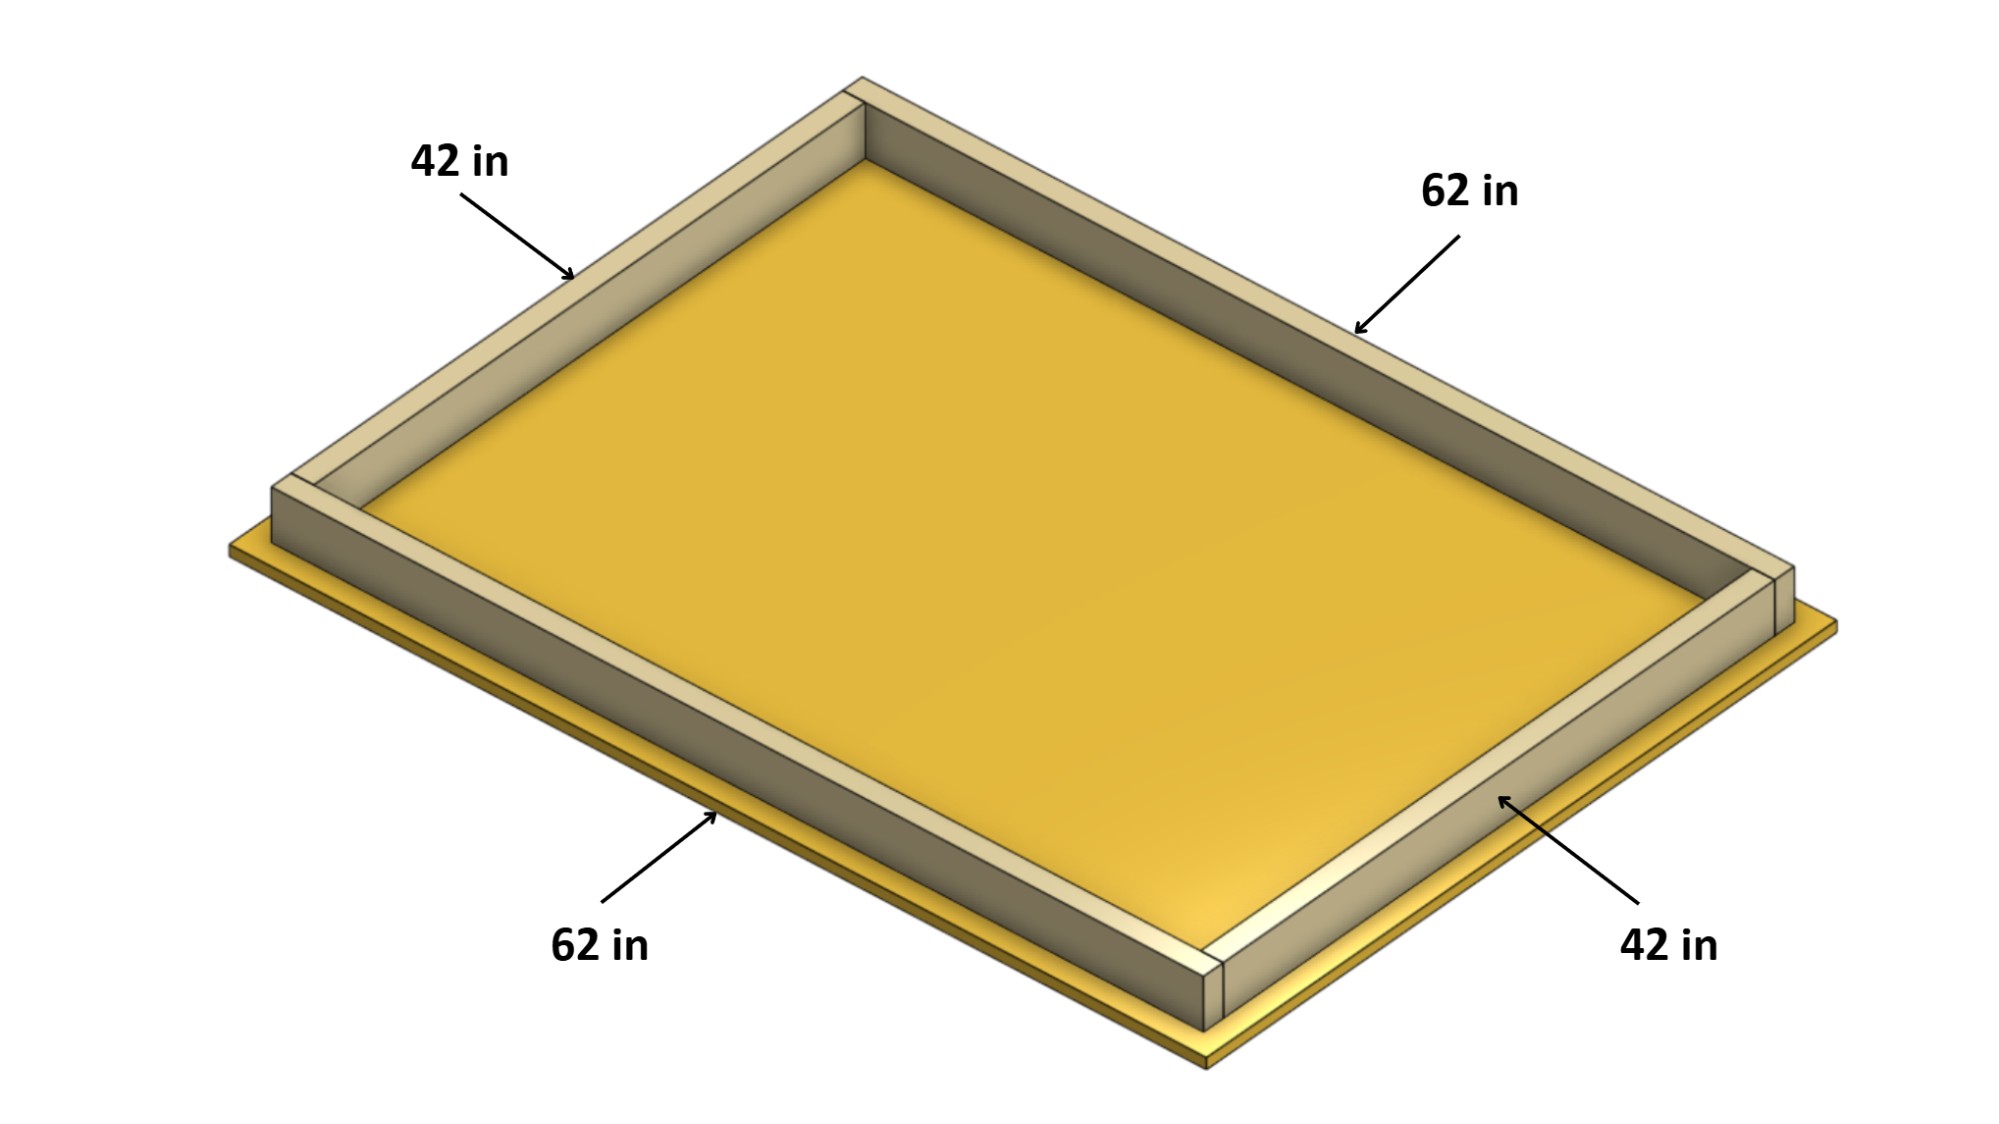
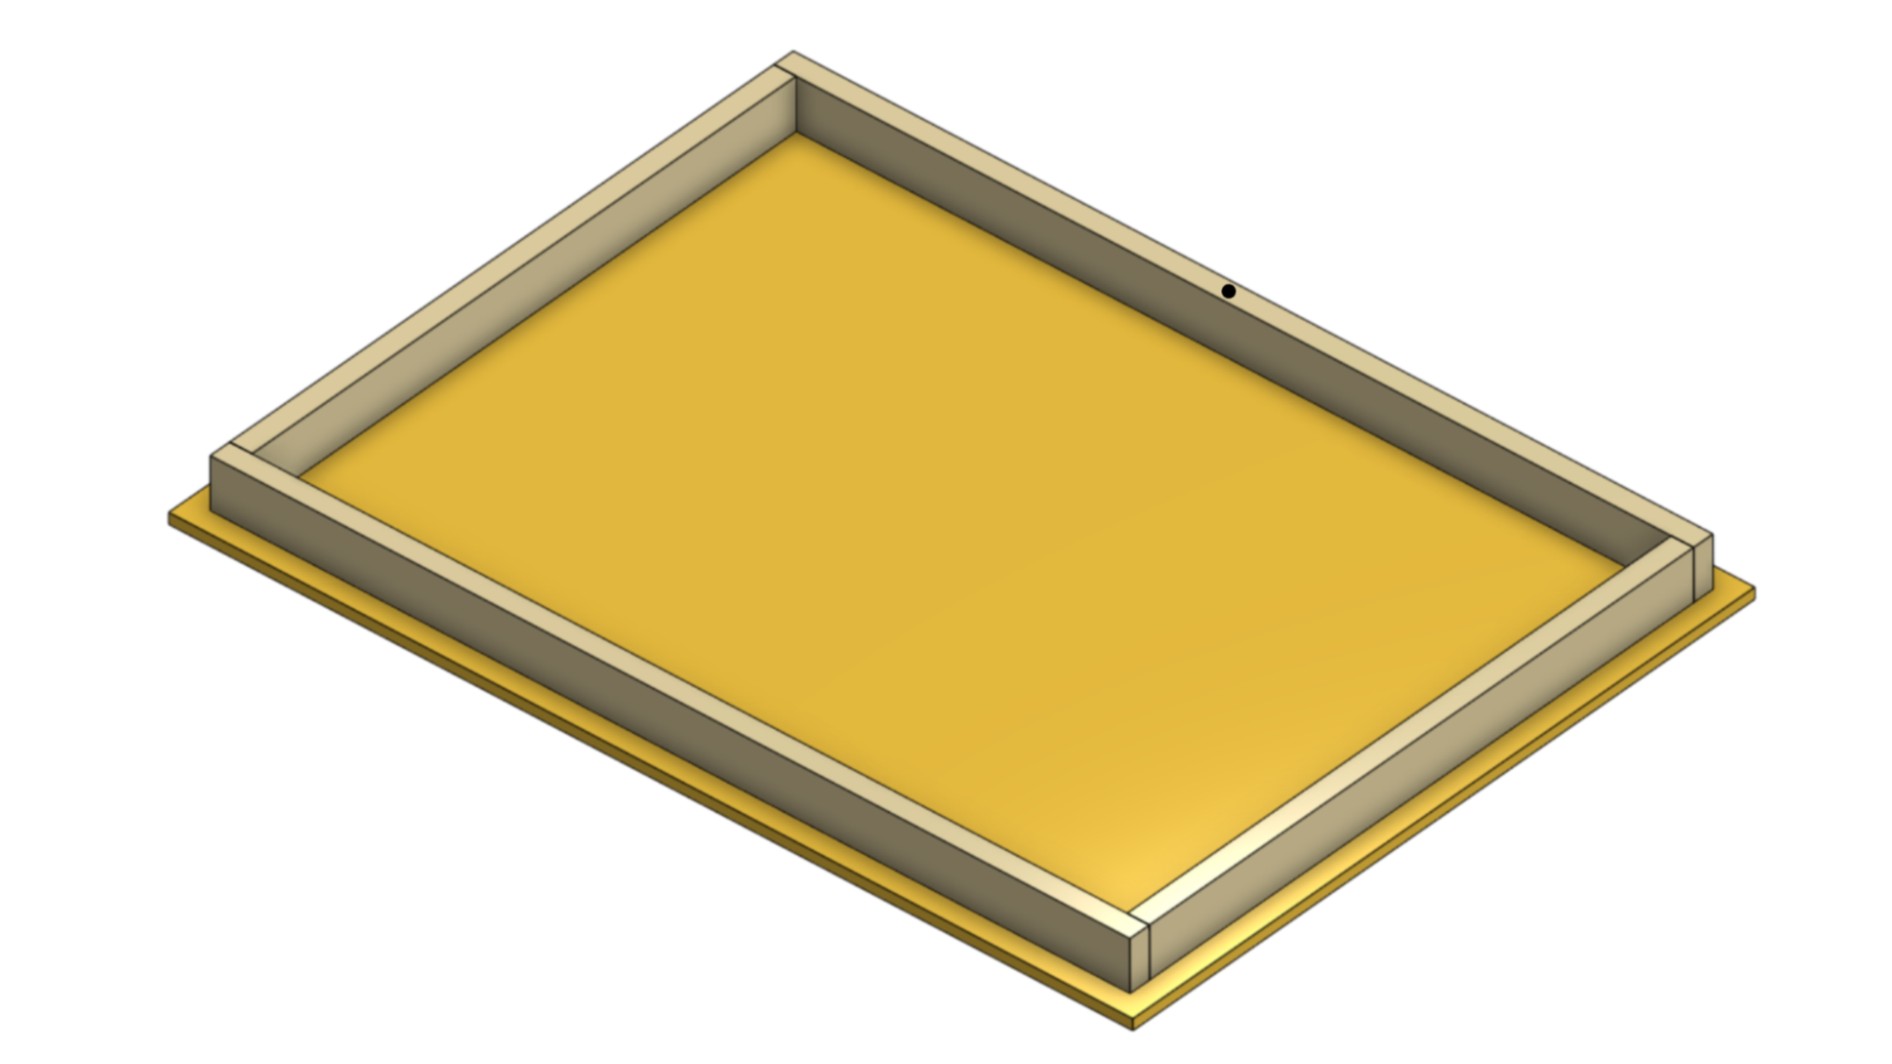
Form the square frame as shown: 82″ pieces for the long sides and 42″ pieces for the short sides. Use the straight pieces you selected previously.
-
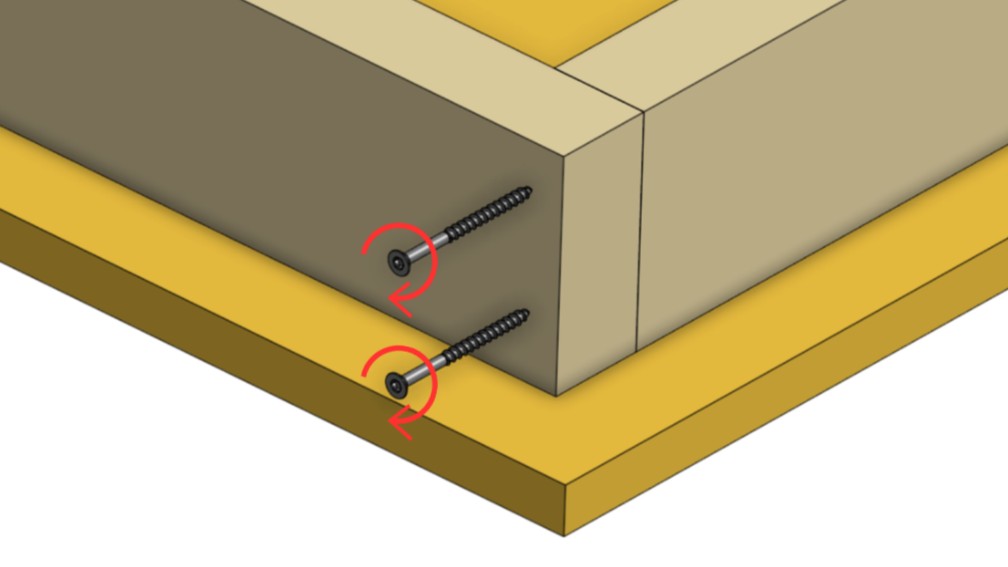
Drive two screws into one of the corners. Repeat for the remaining corners.
-
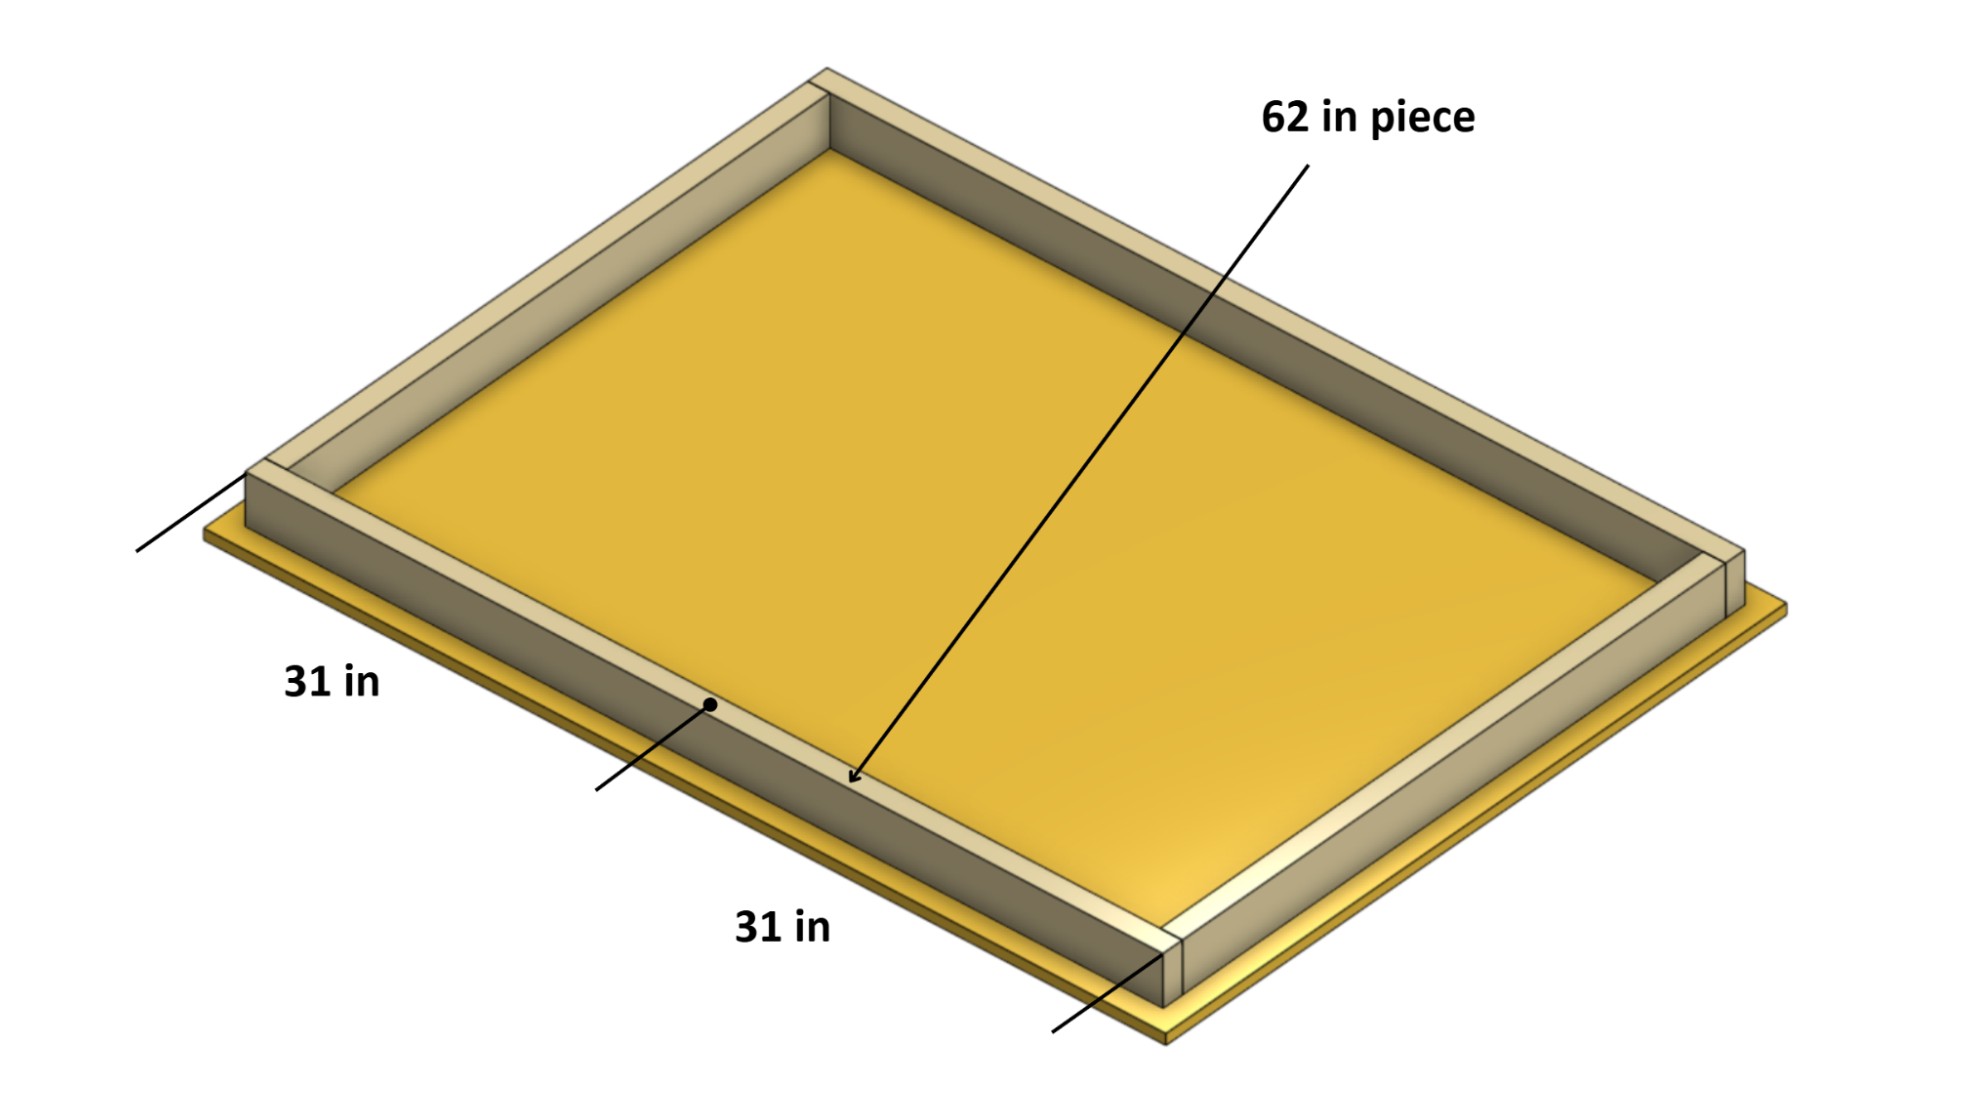
Make a mark on a 62″ piece, 31″ from one of the ends.
-
Make the same mark on the other 62″ piece.
-
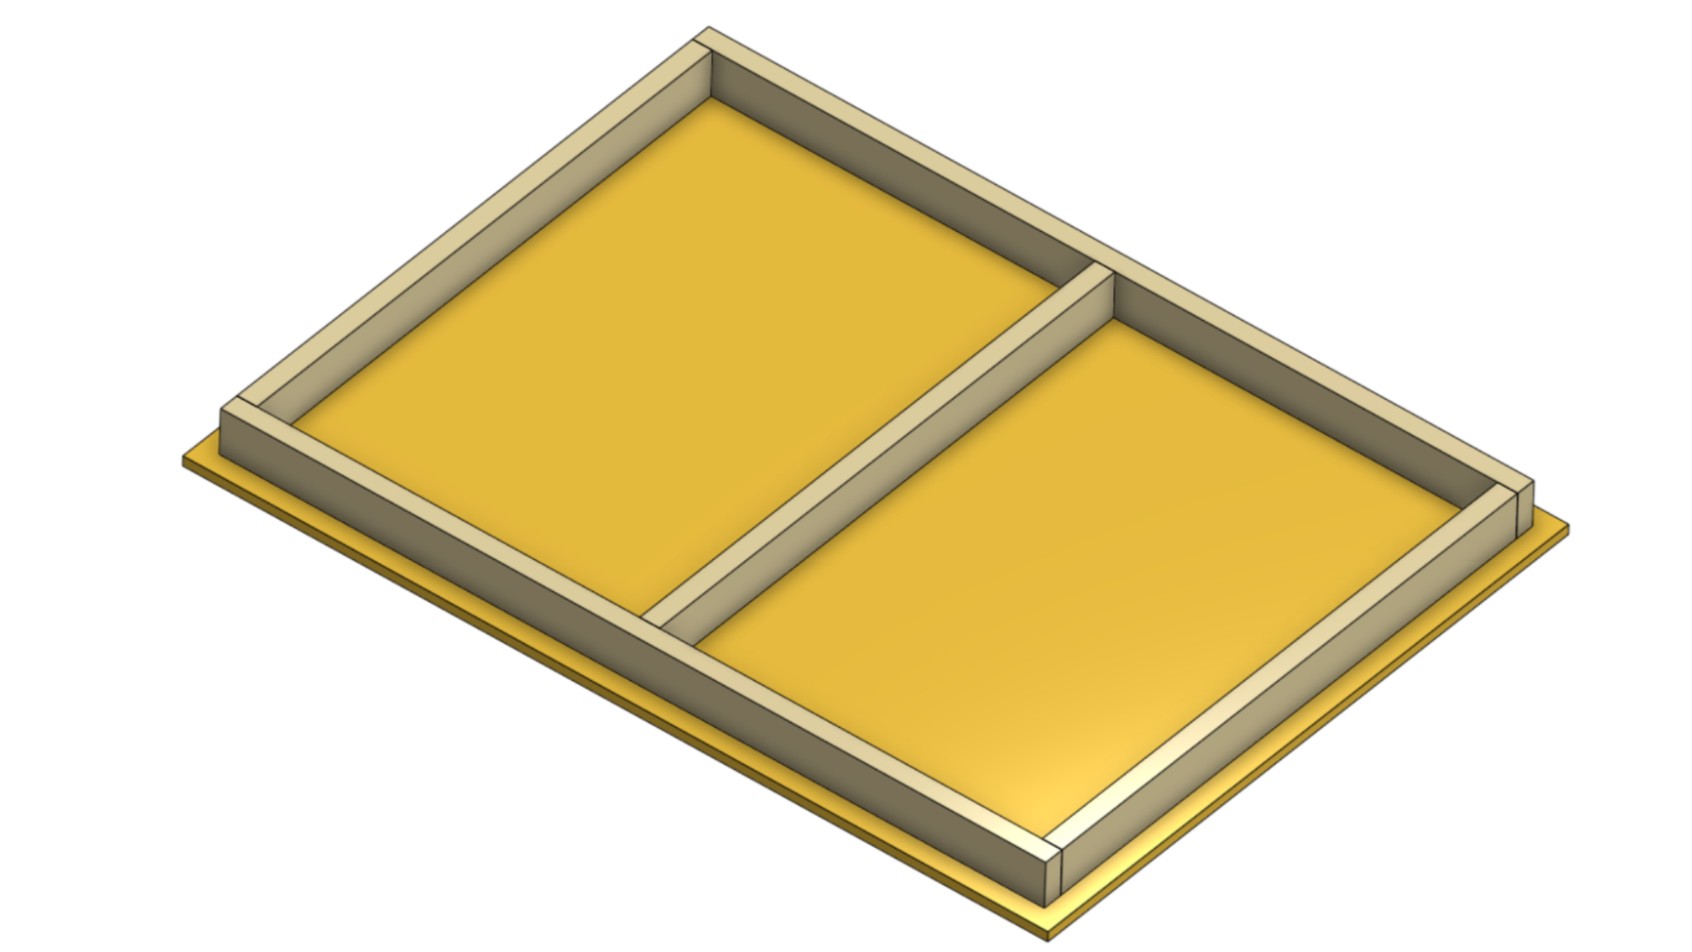
Place the two 42″ pieces against your marks as shown.
-
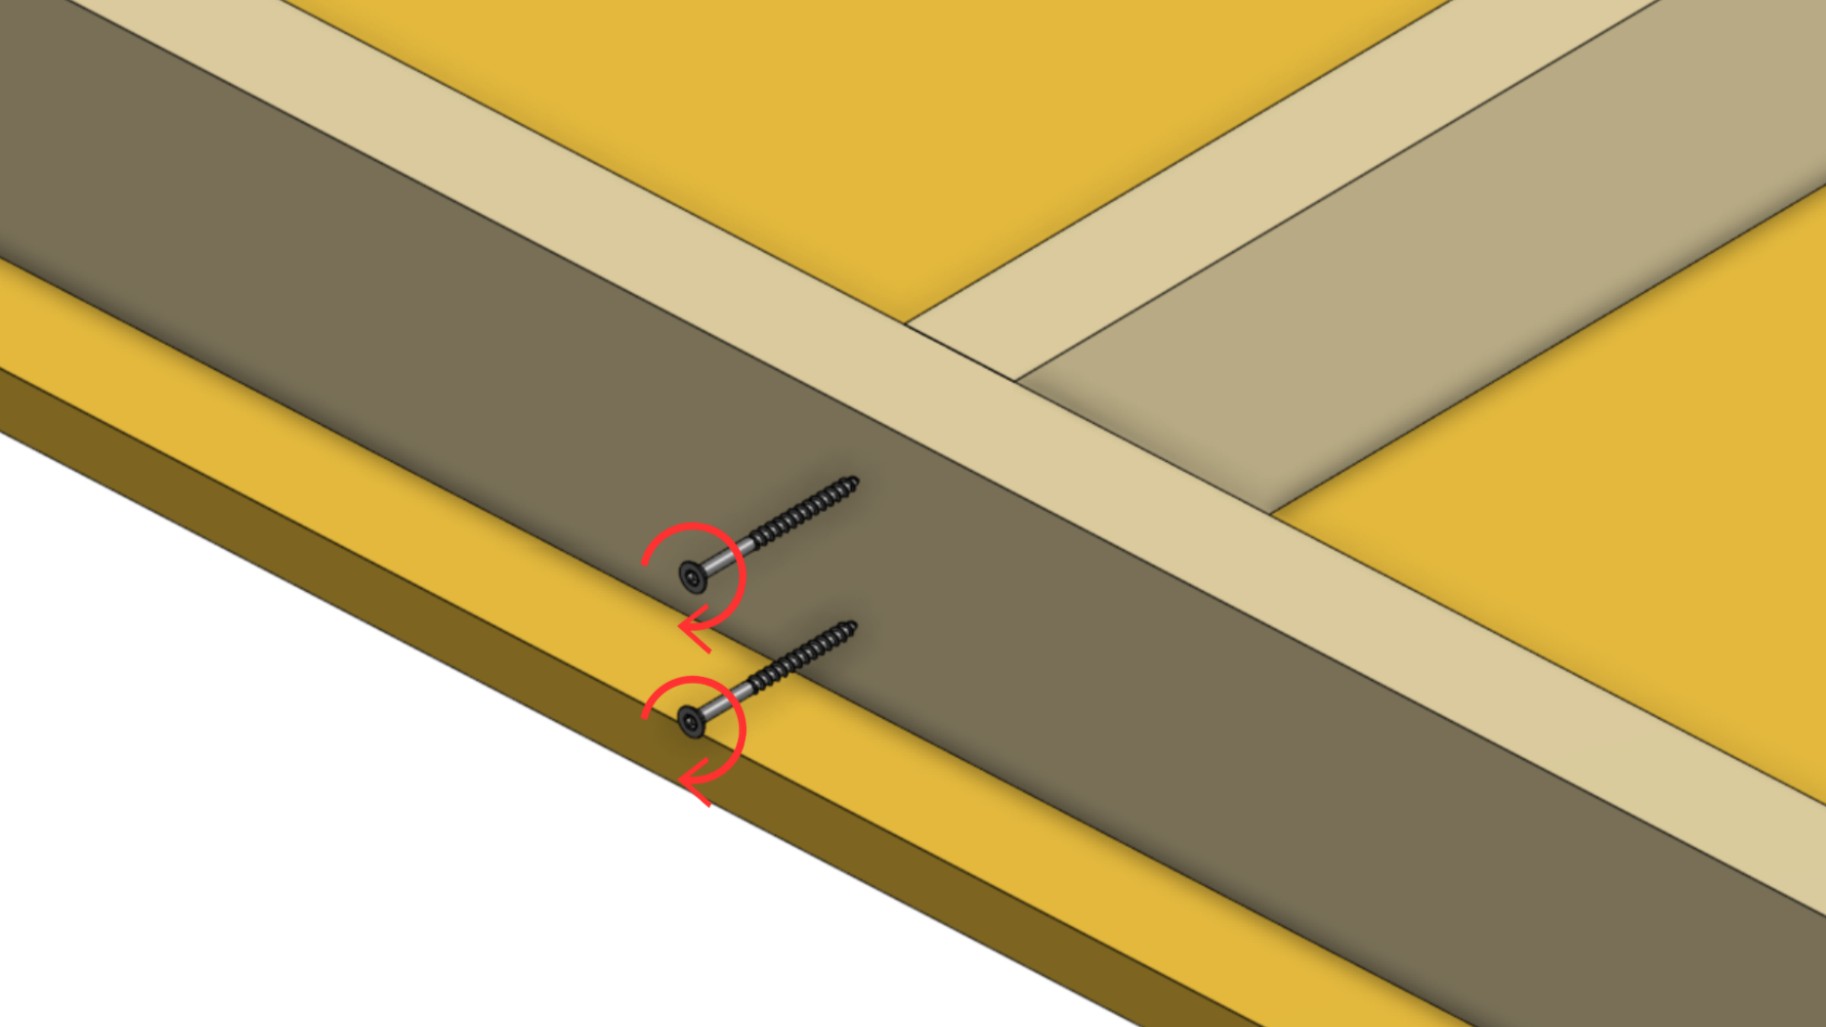
Drive screws into the ends of the 42″ pieces to secure them.
-
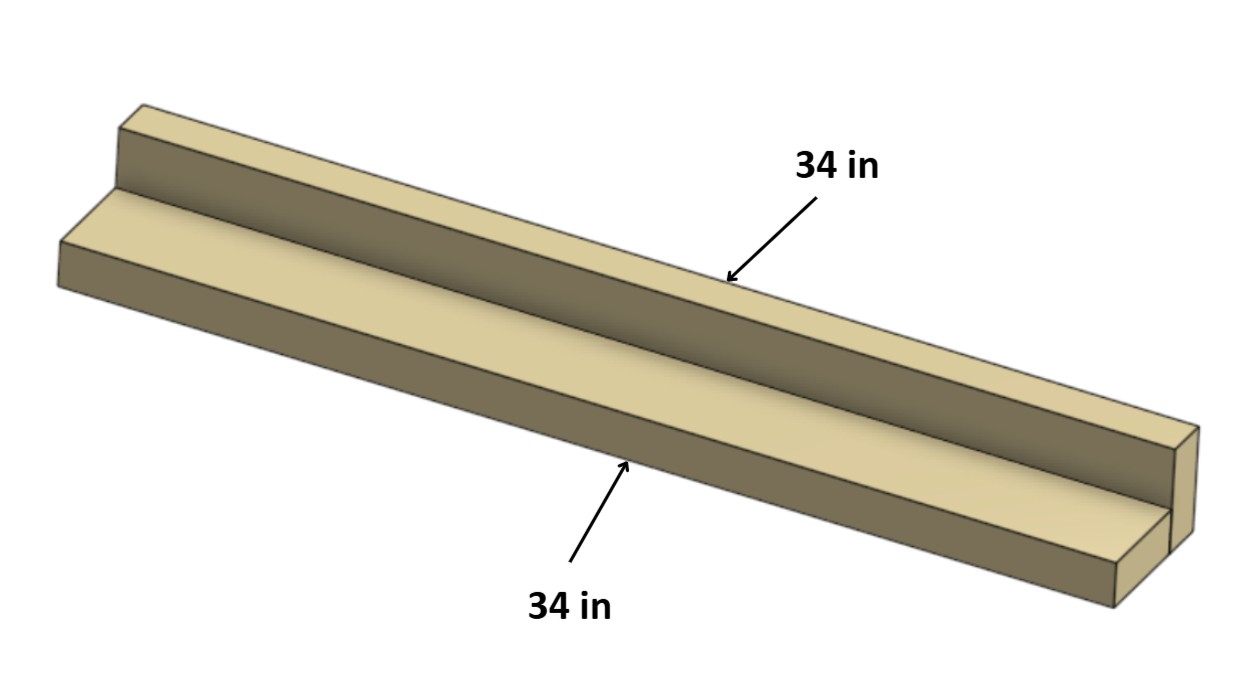
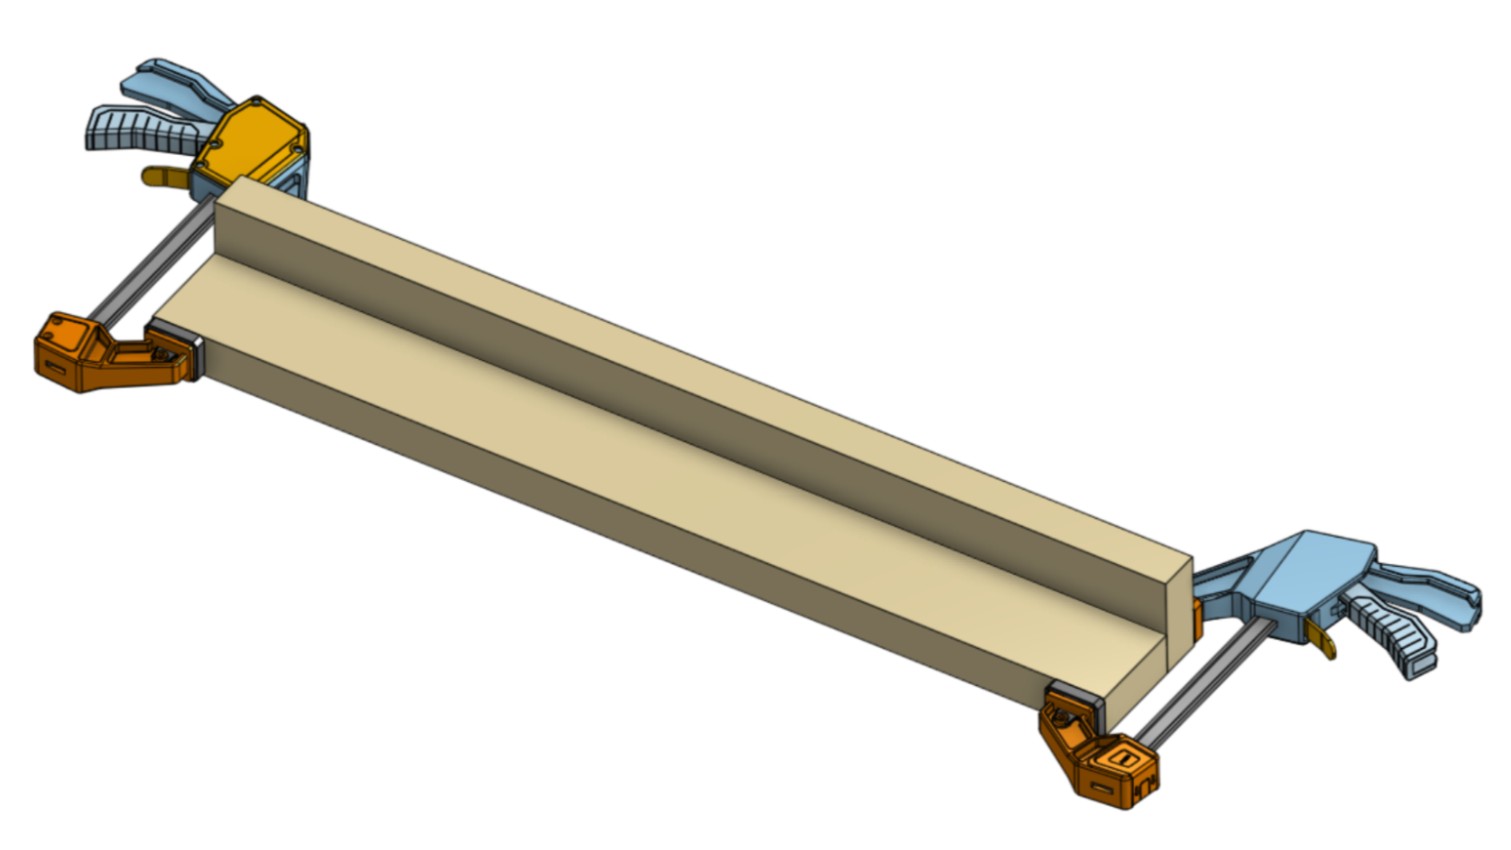
Place two 34″ inch pieces in position as shown.
-
Using clamps, secure the ends of both pieces together.
-
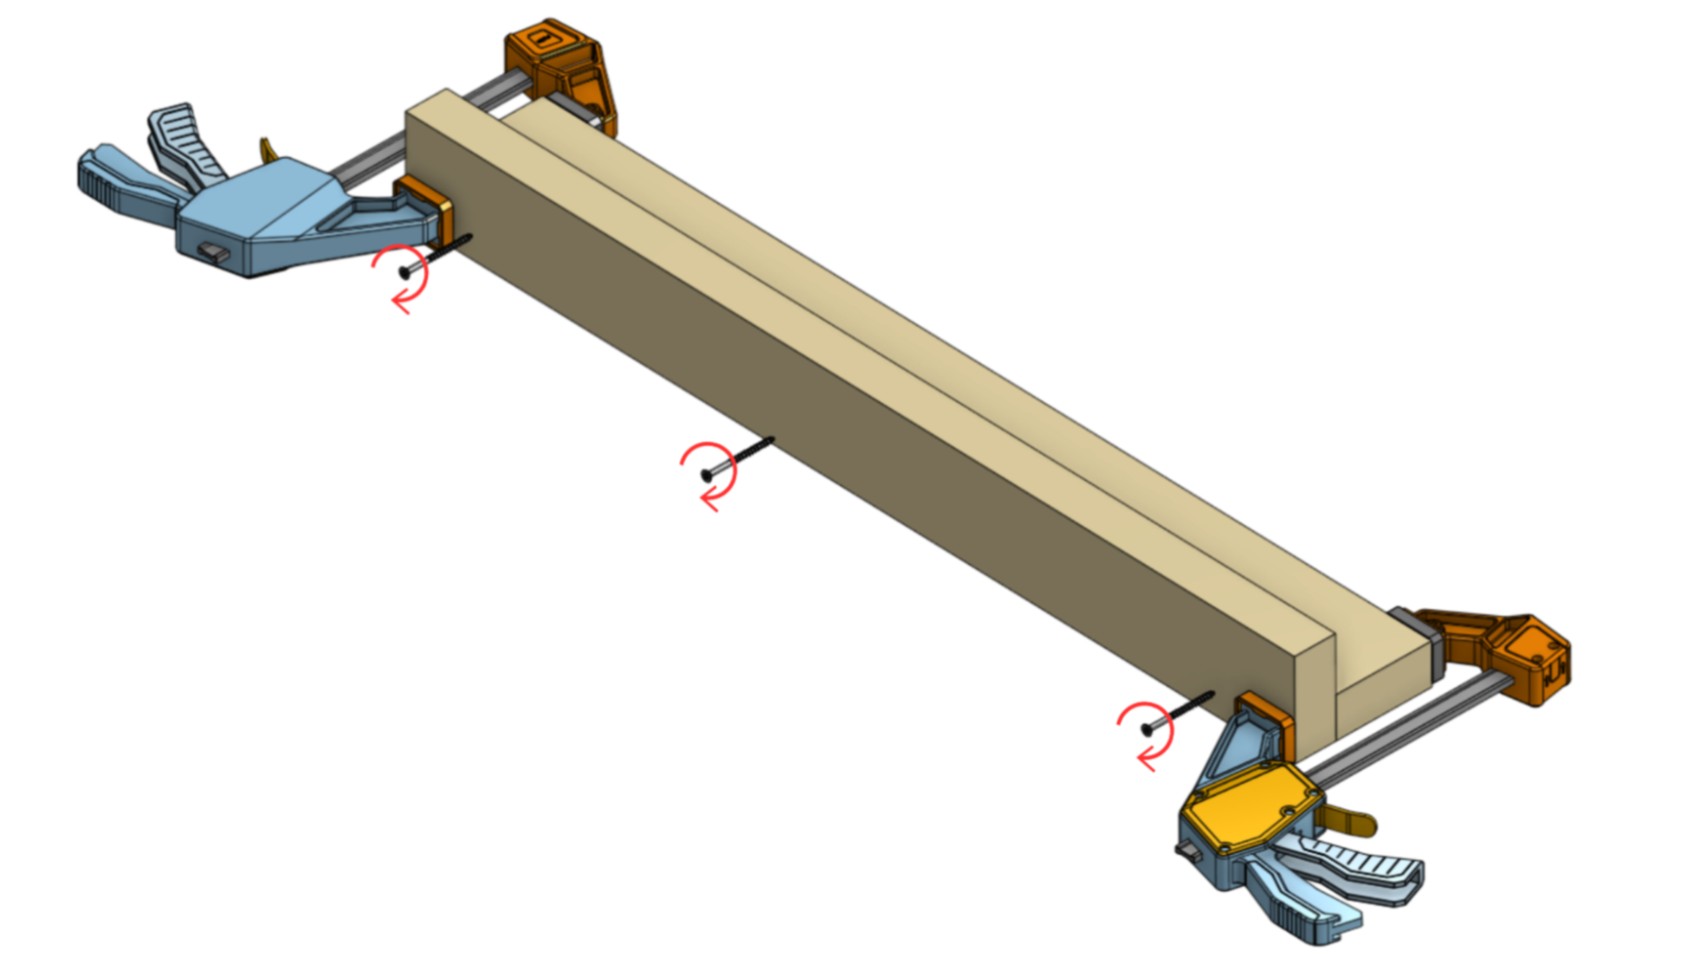
Drive screws into the pieces to secure them.
-
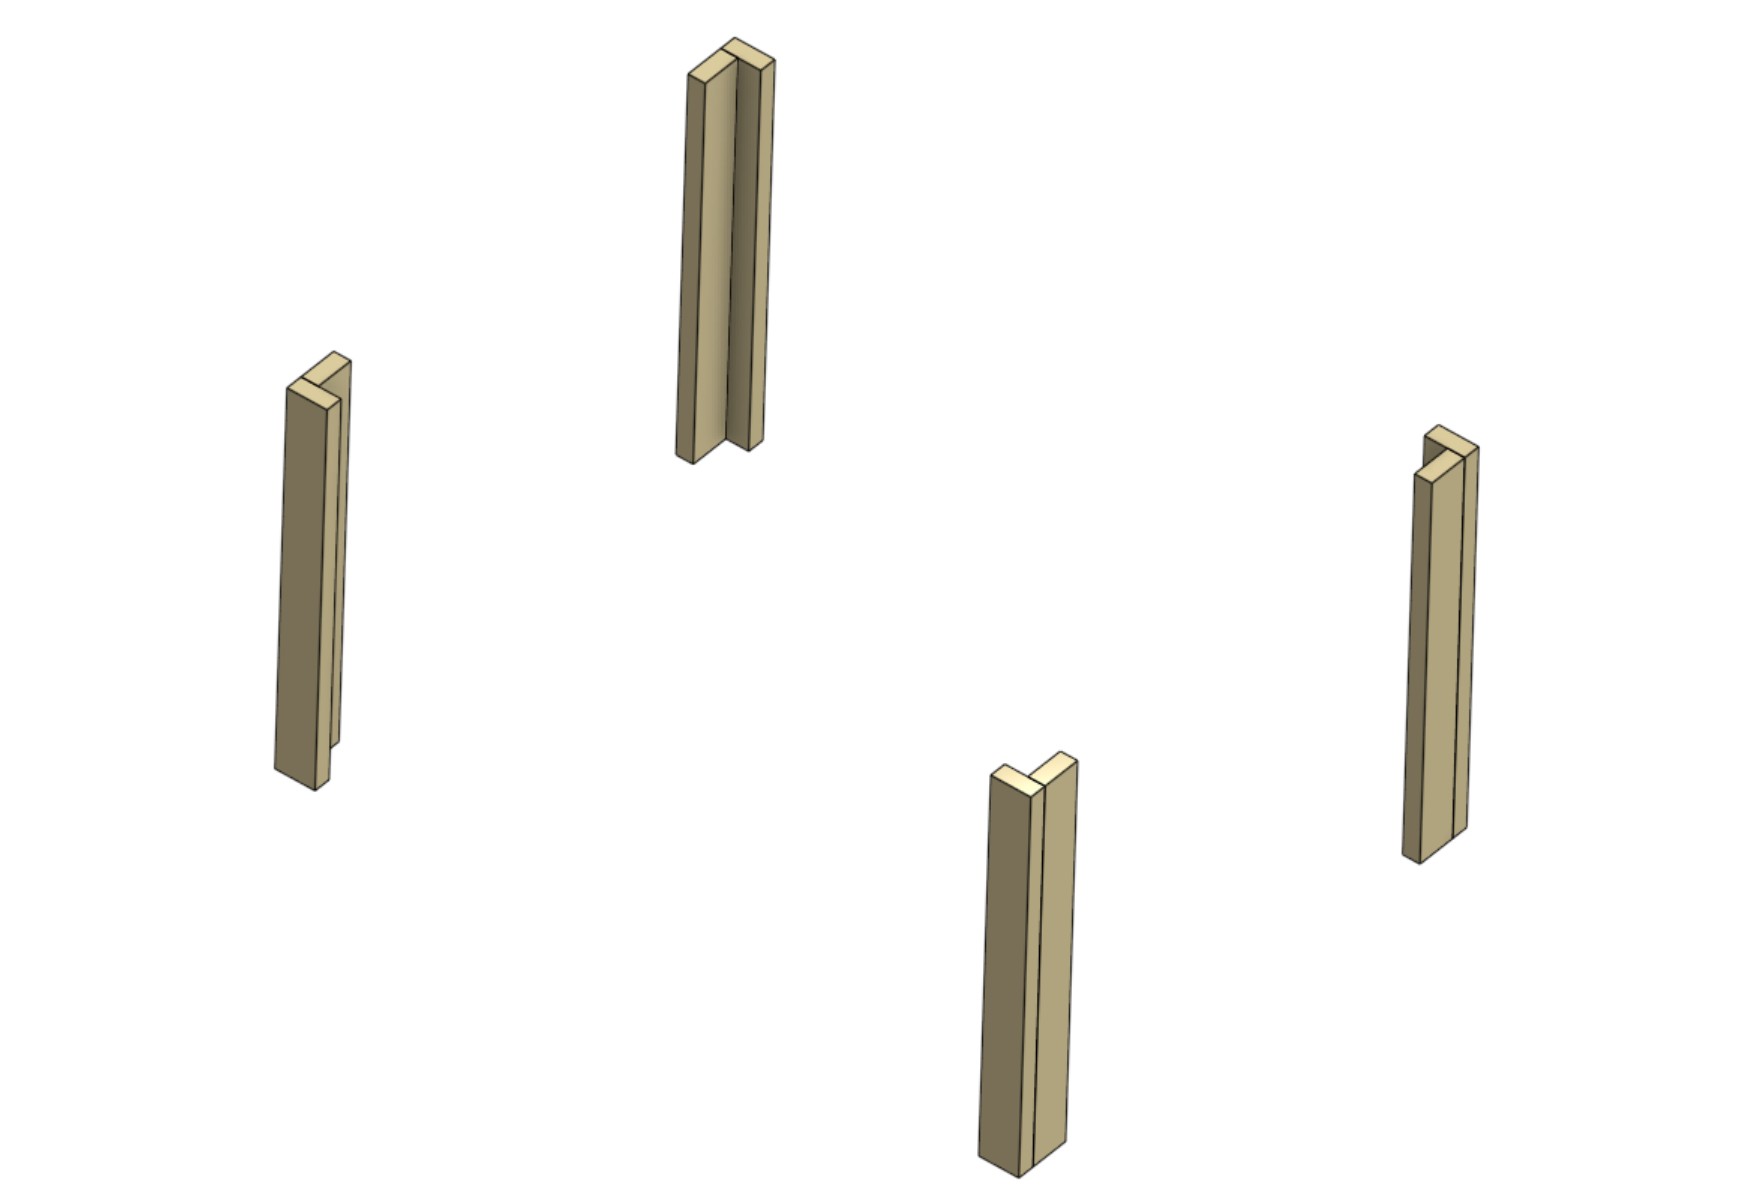
Repeat the previous three steps to build the remaining legs.
-
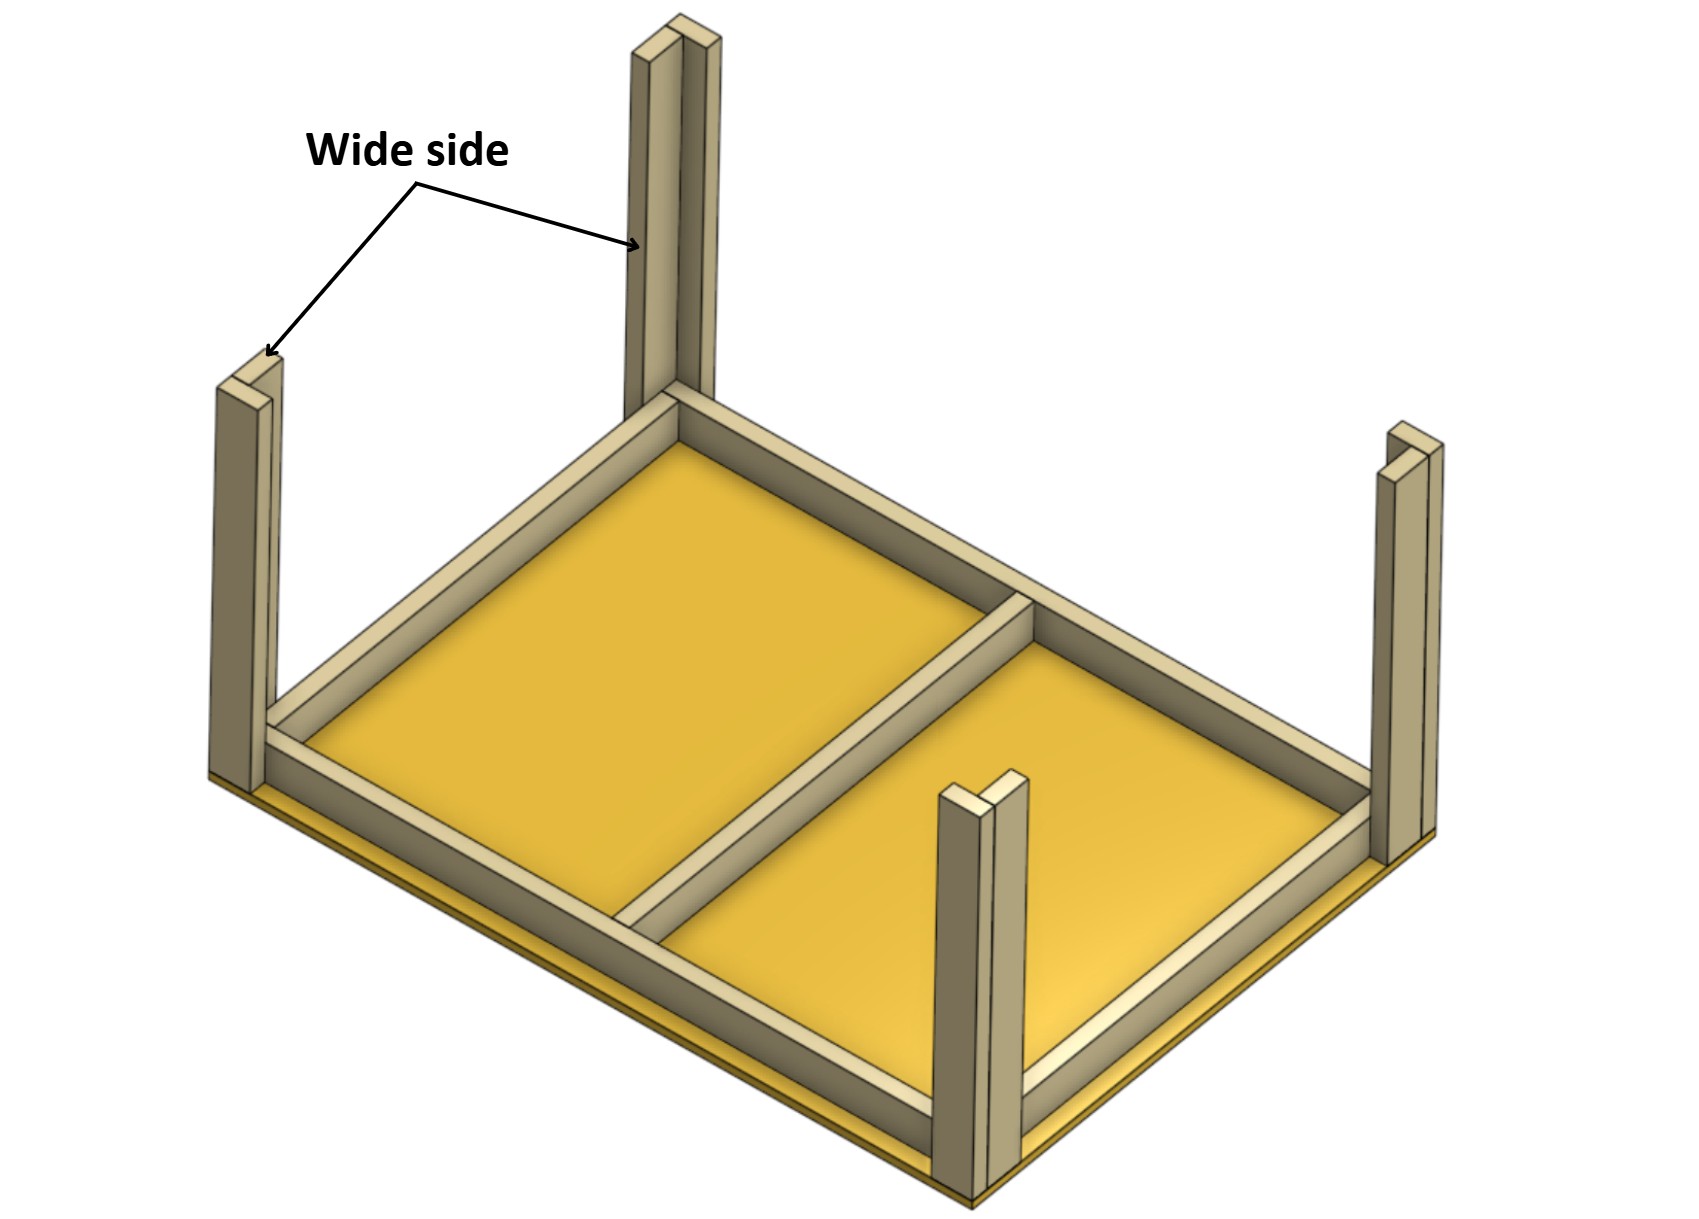
Position the assembled legs as shown, with the wider sides facing inward.
-
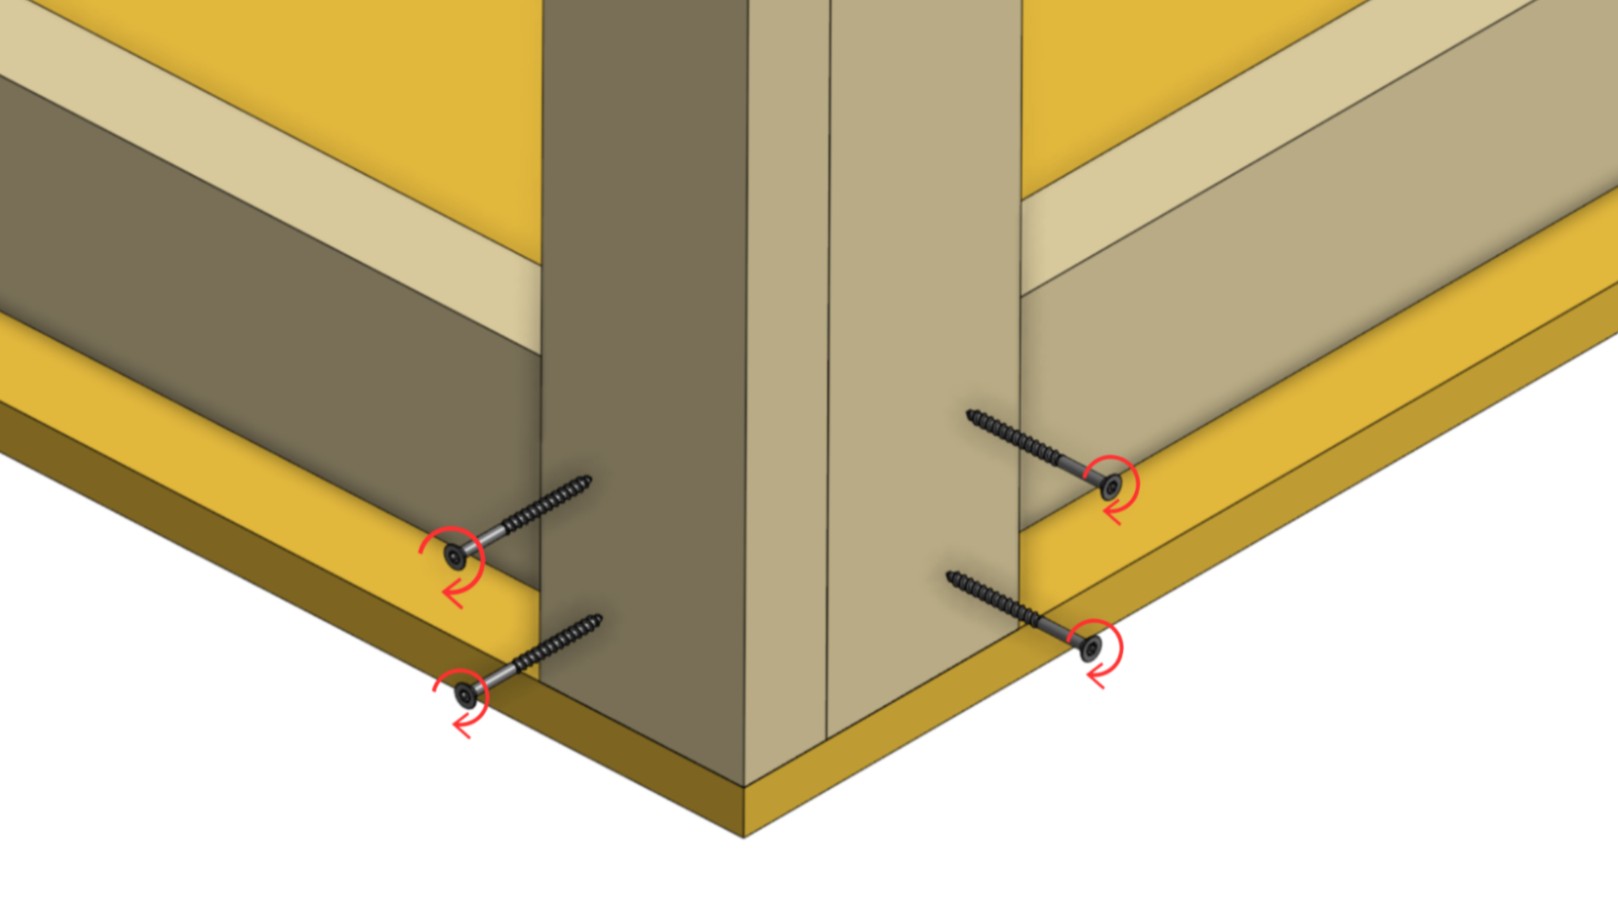
Secure one of the legs to the frame with screws as shown. Repeat for the remaining legs.
-
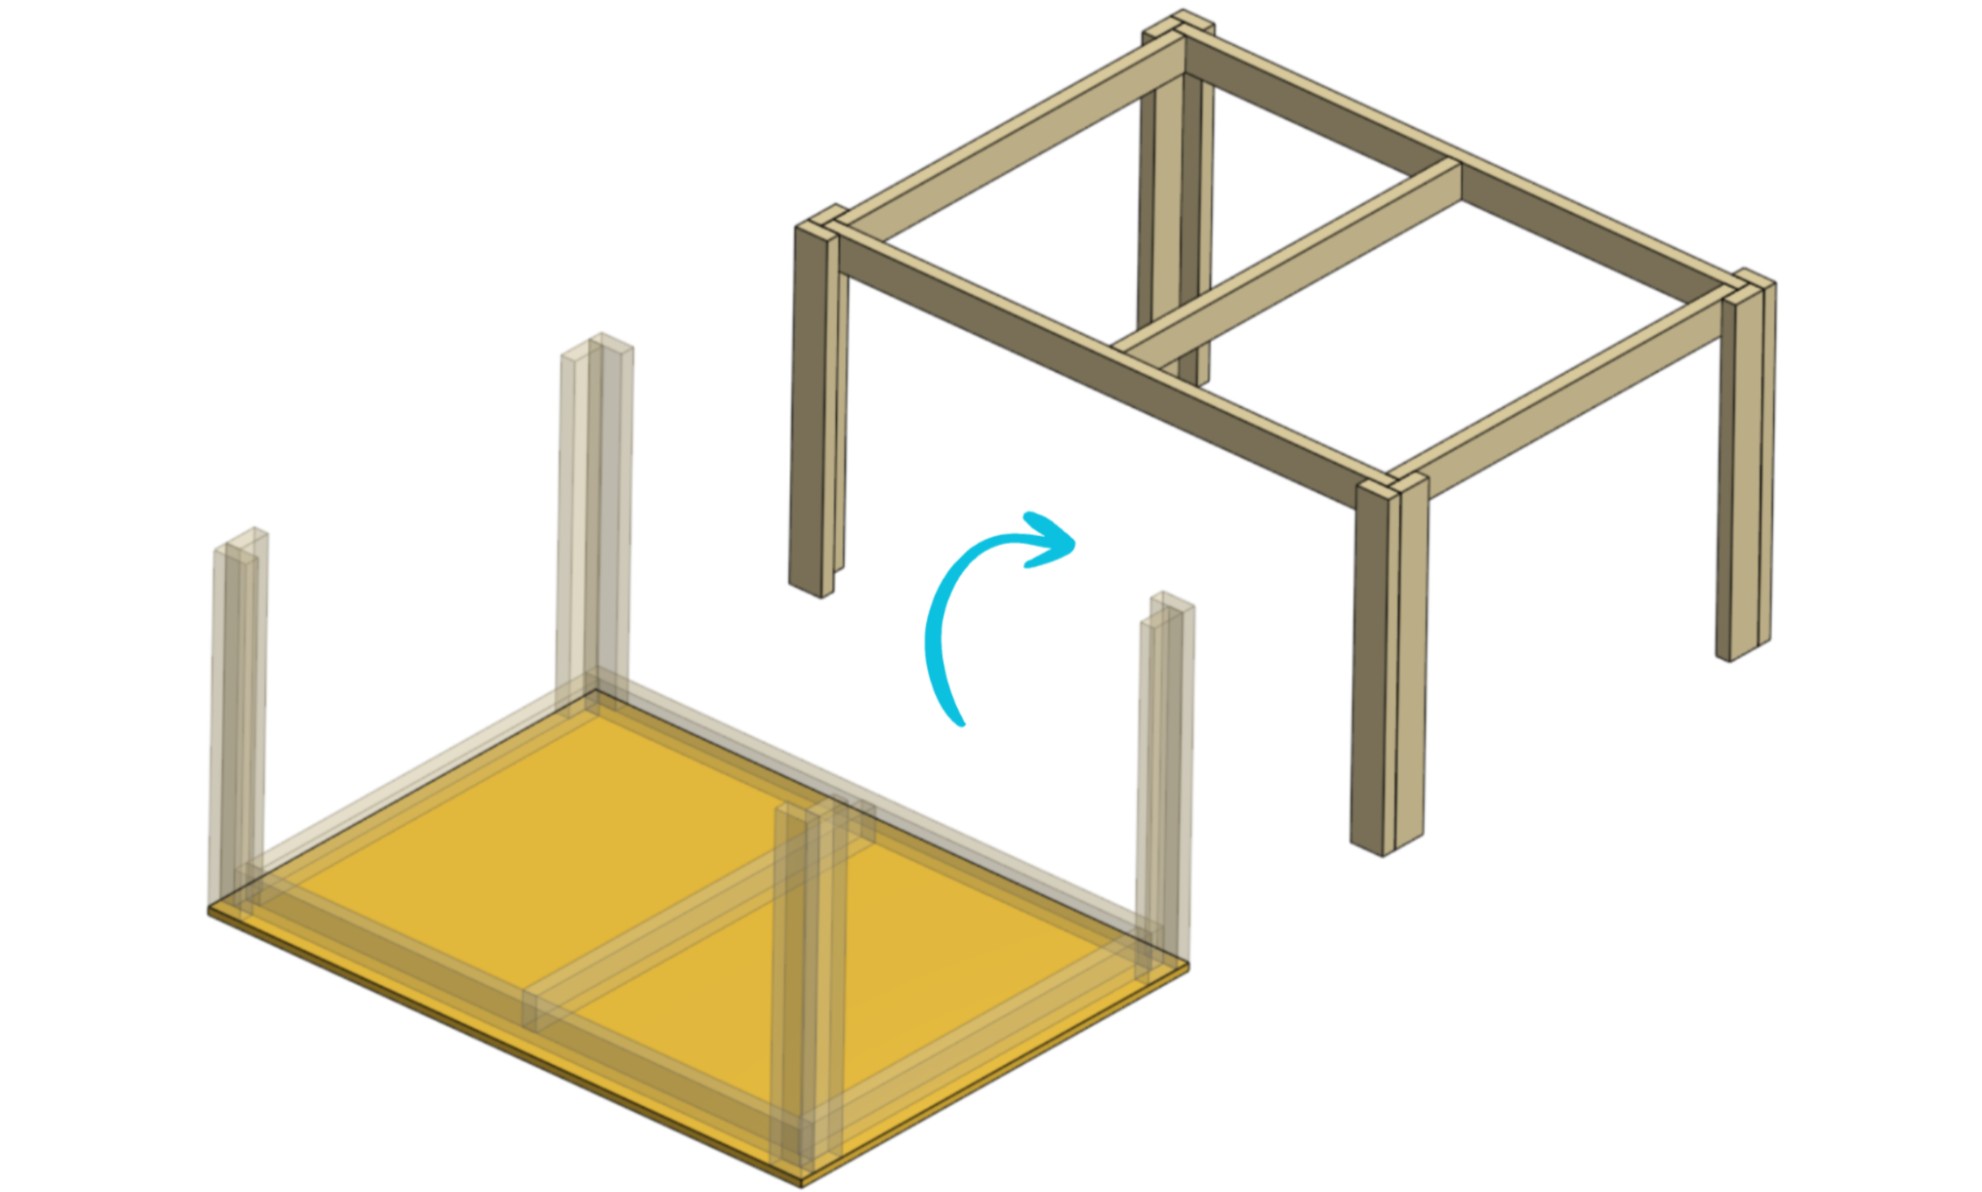
Turn over the assembled structure.
-
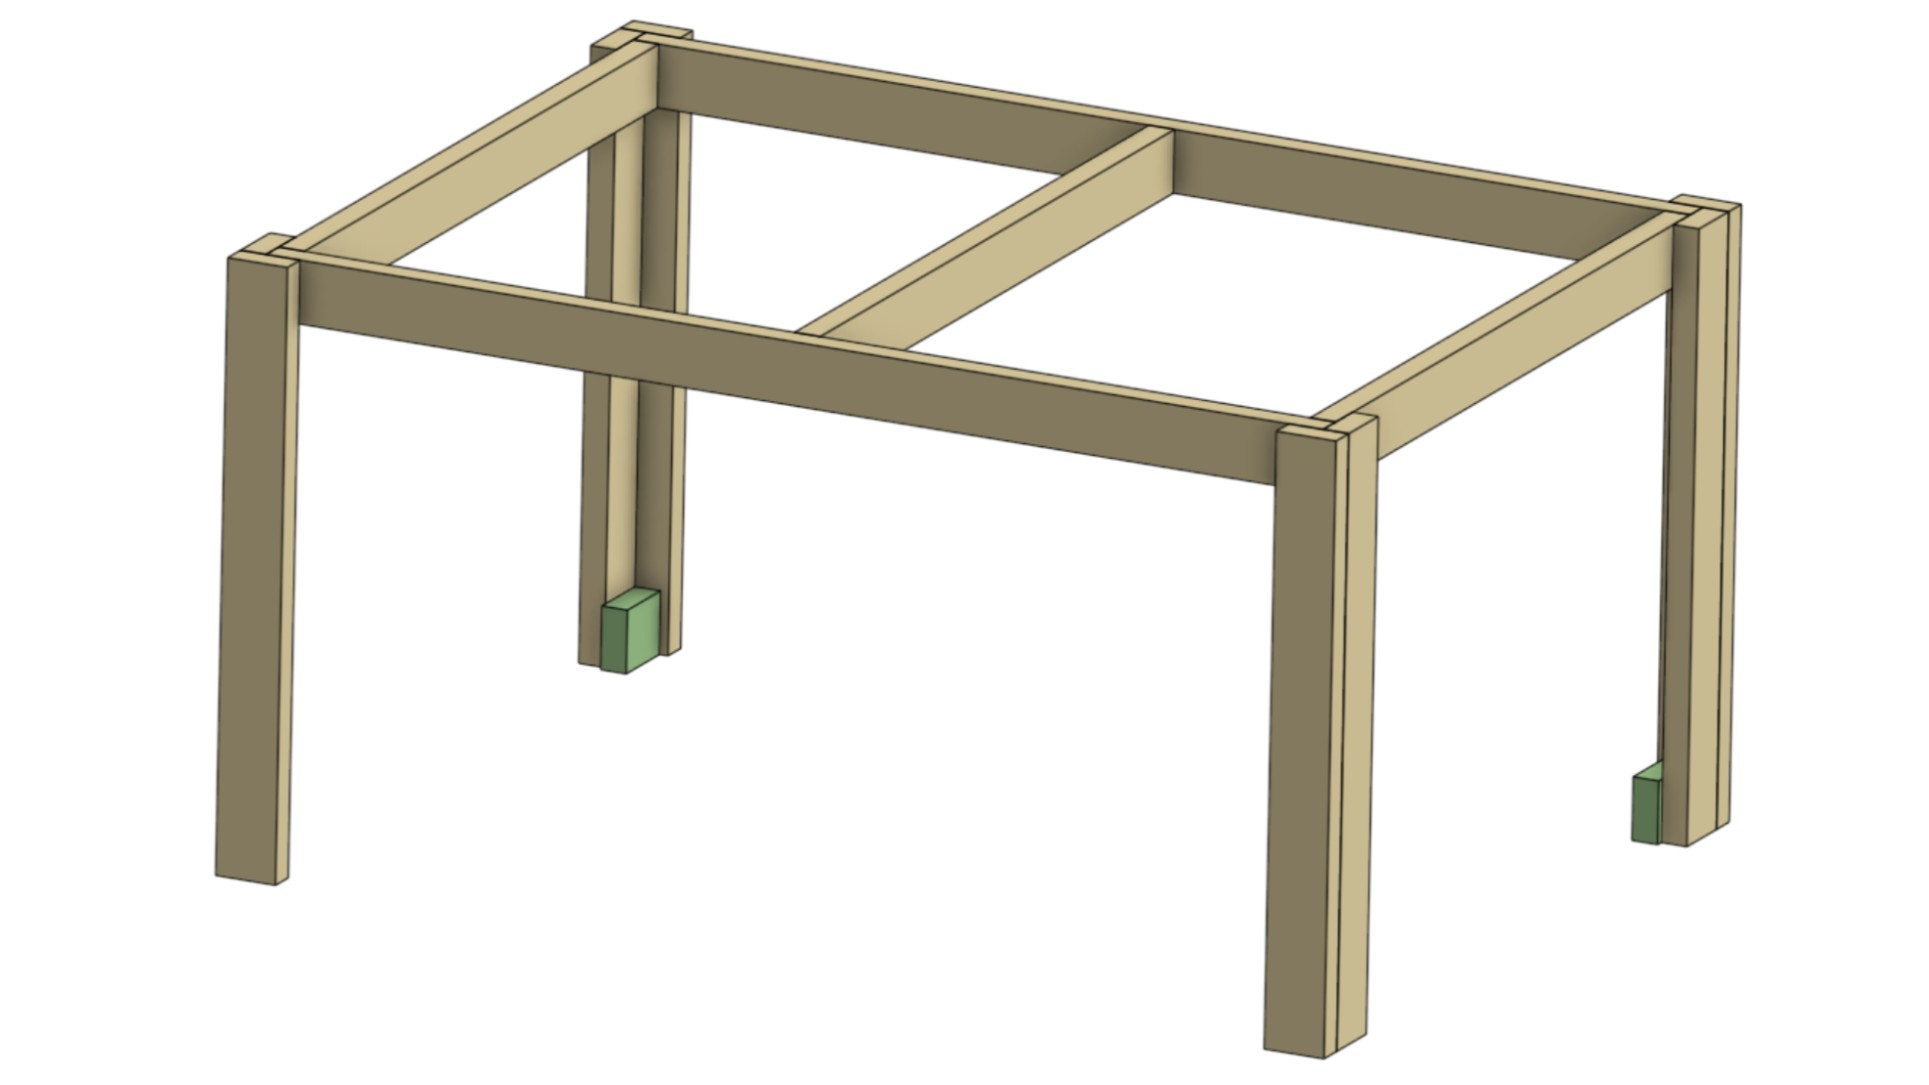
Take two 2×4 offcuts and place them as shown.
-
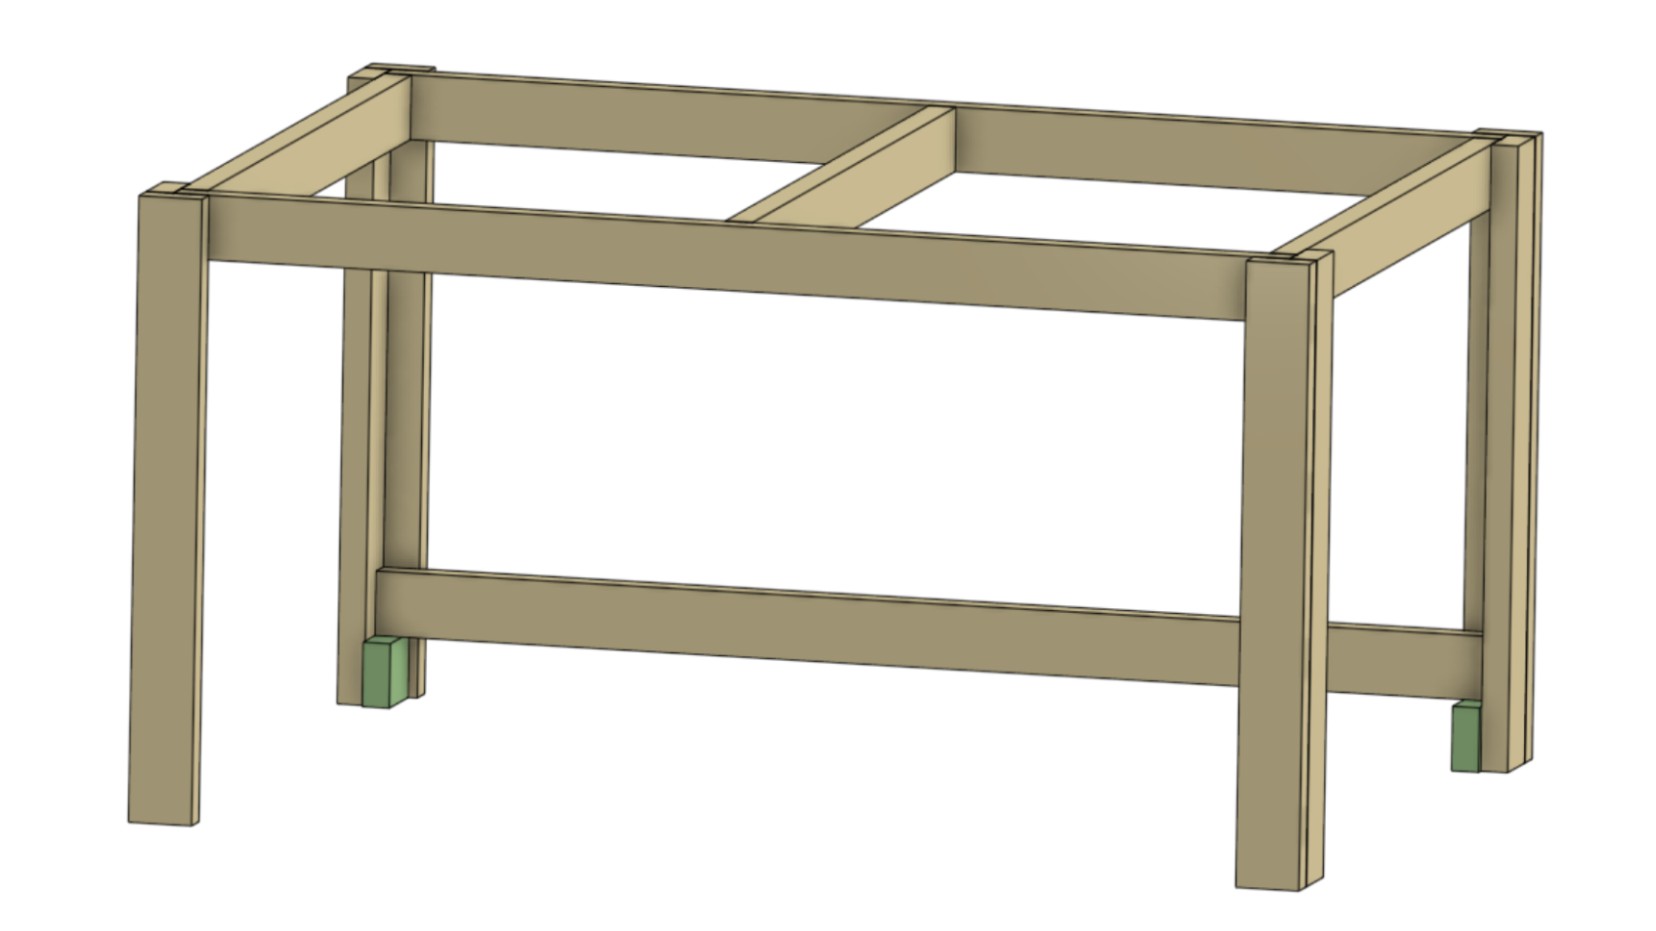
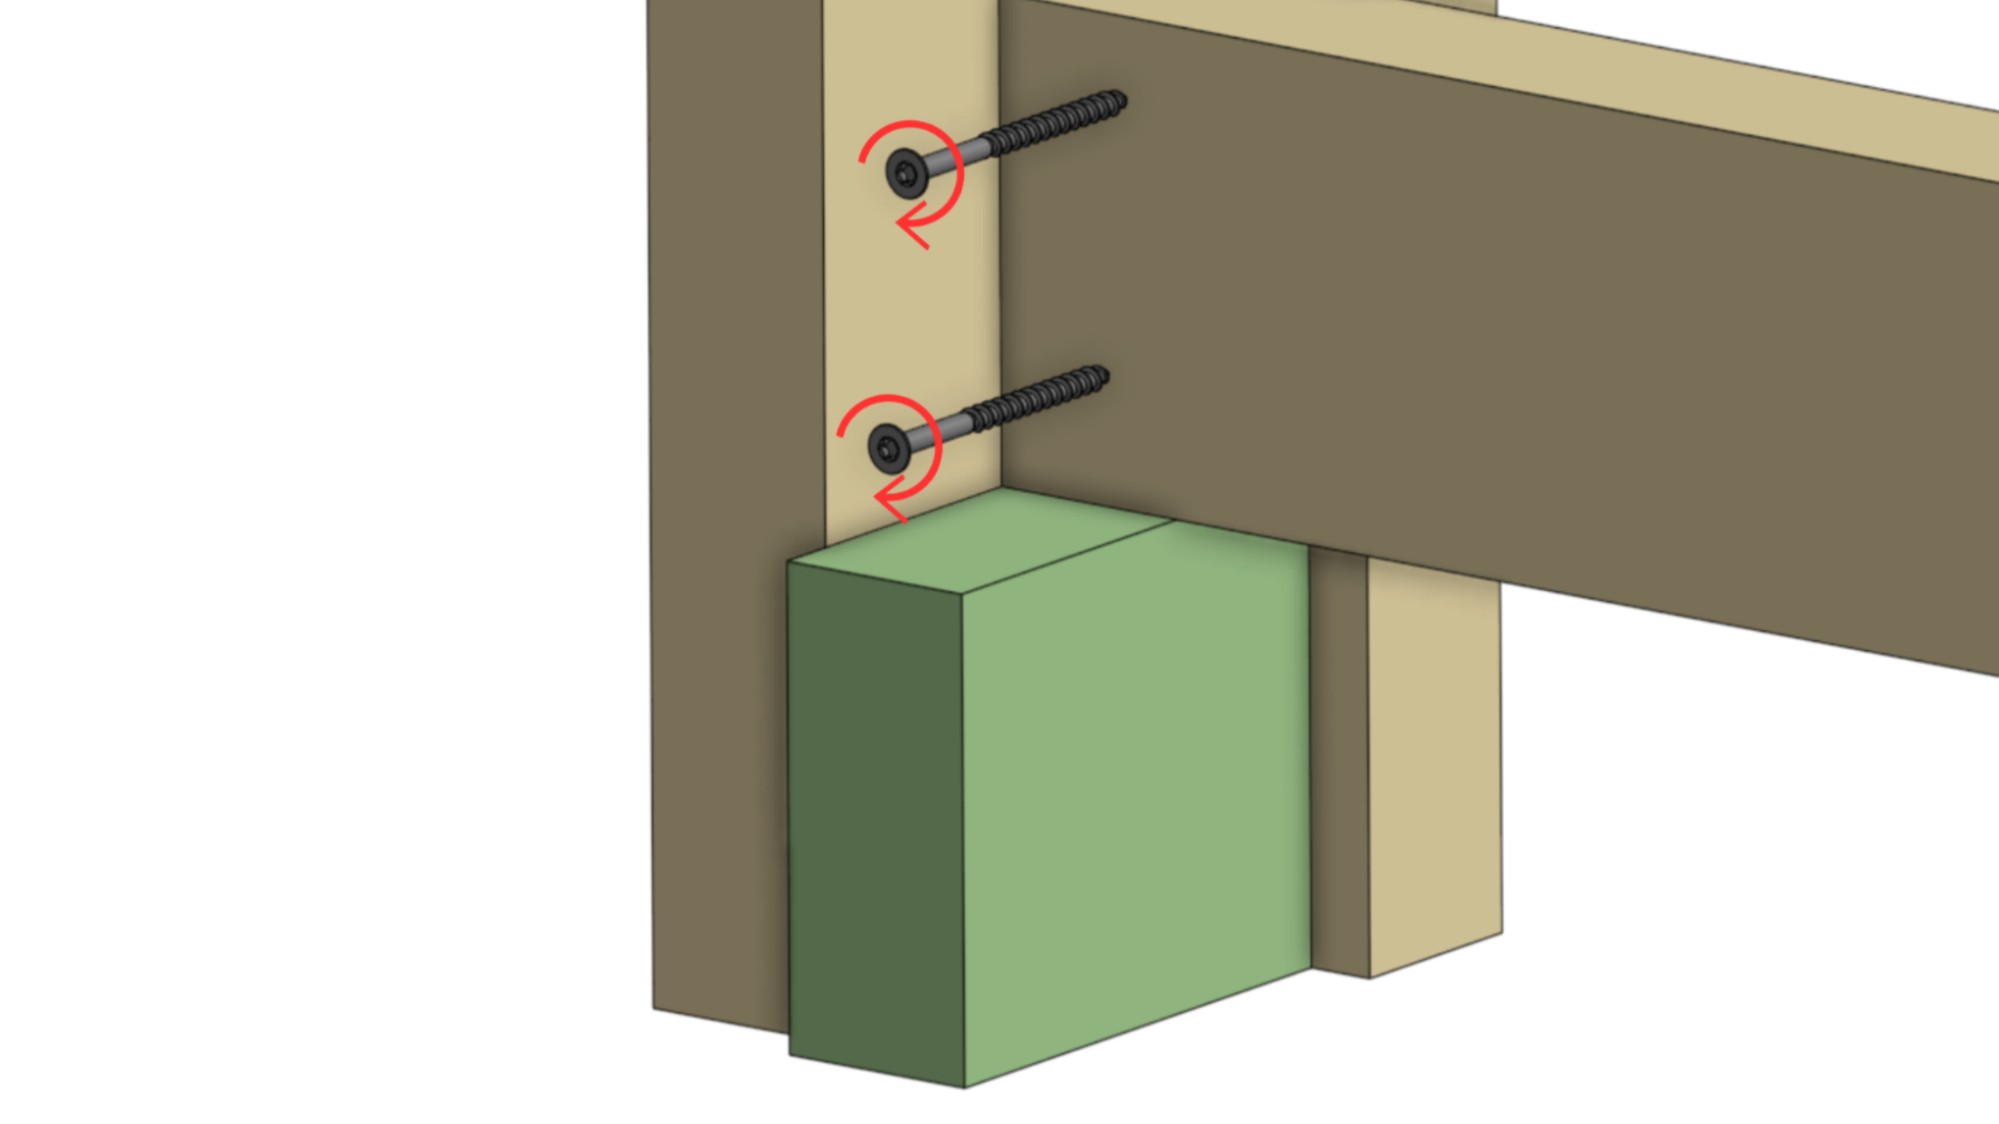
Place the 62″ piece on top of the offcuts.
-
Secure both sides of the 62″ piece with screws.
-
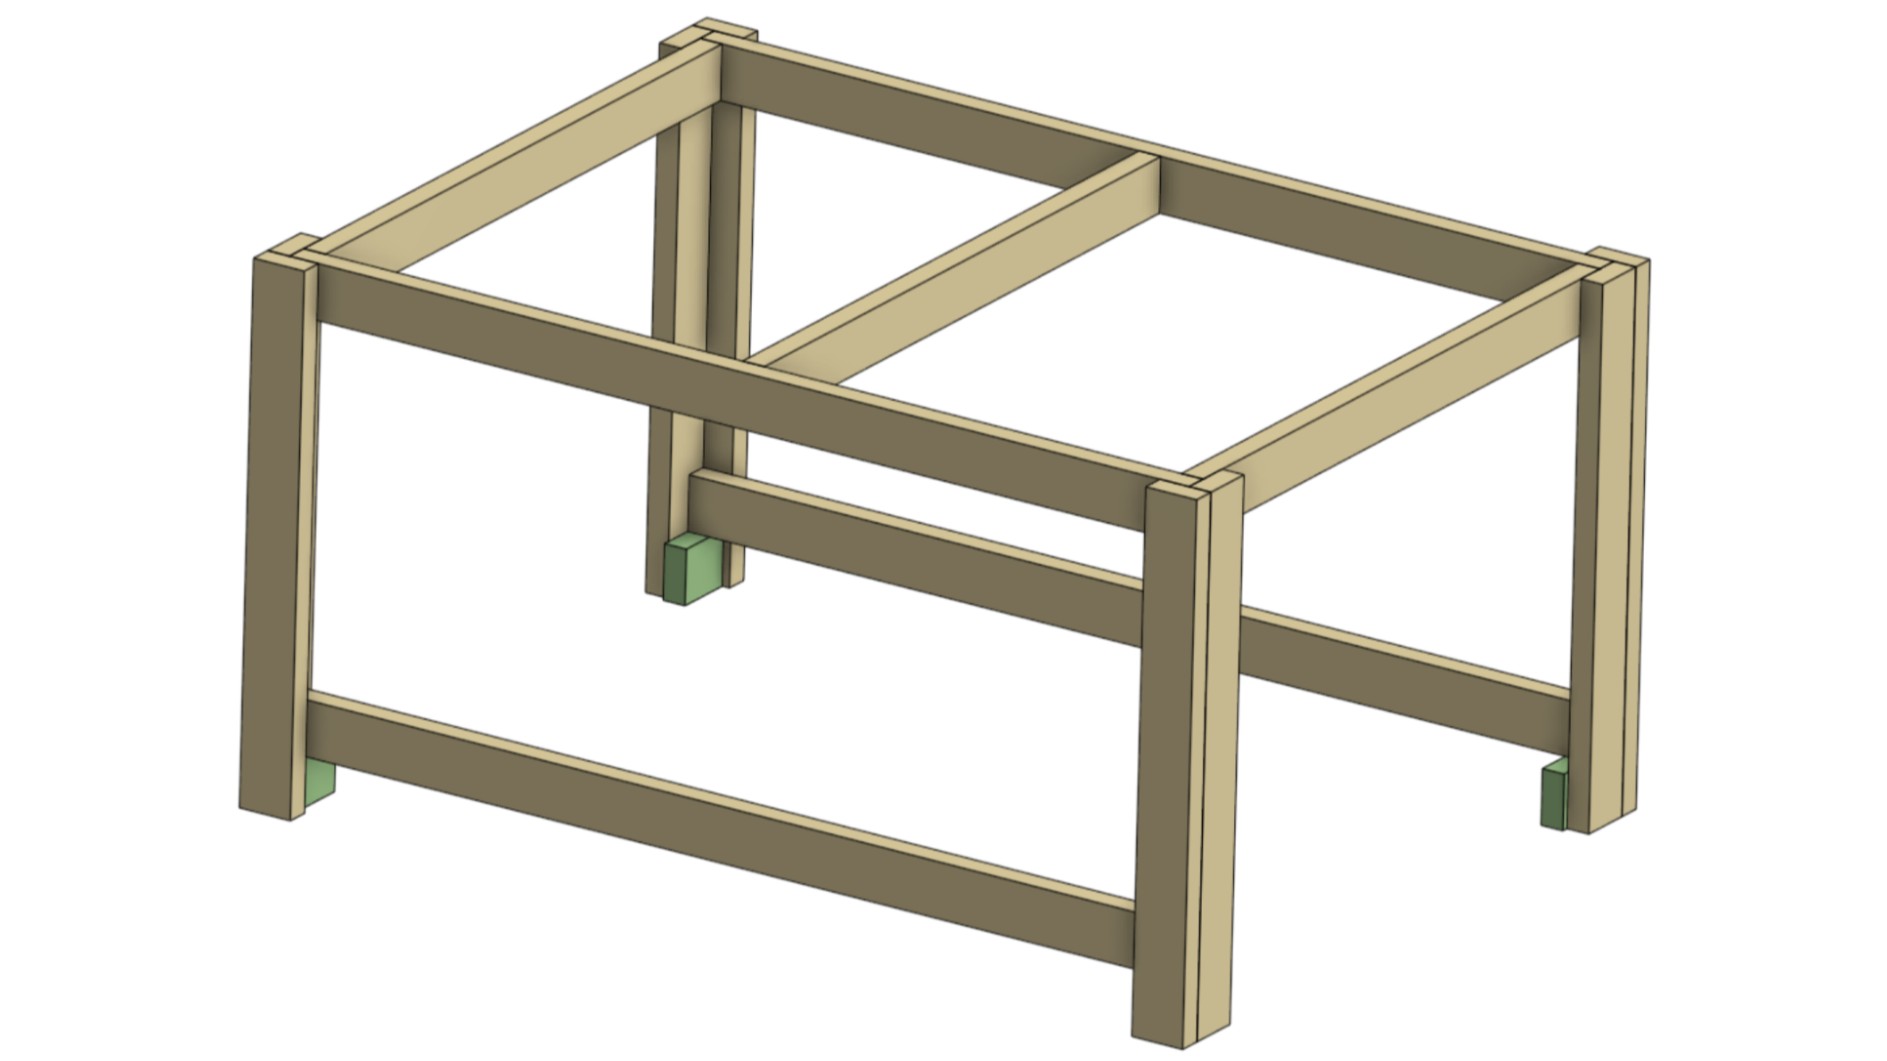
Repeat the previous three steps to mount the second 62″ piece.
-
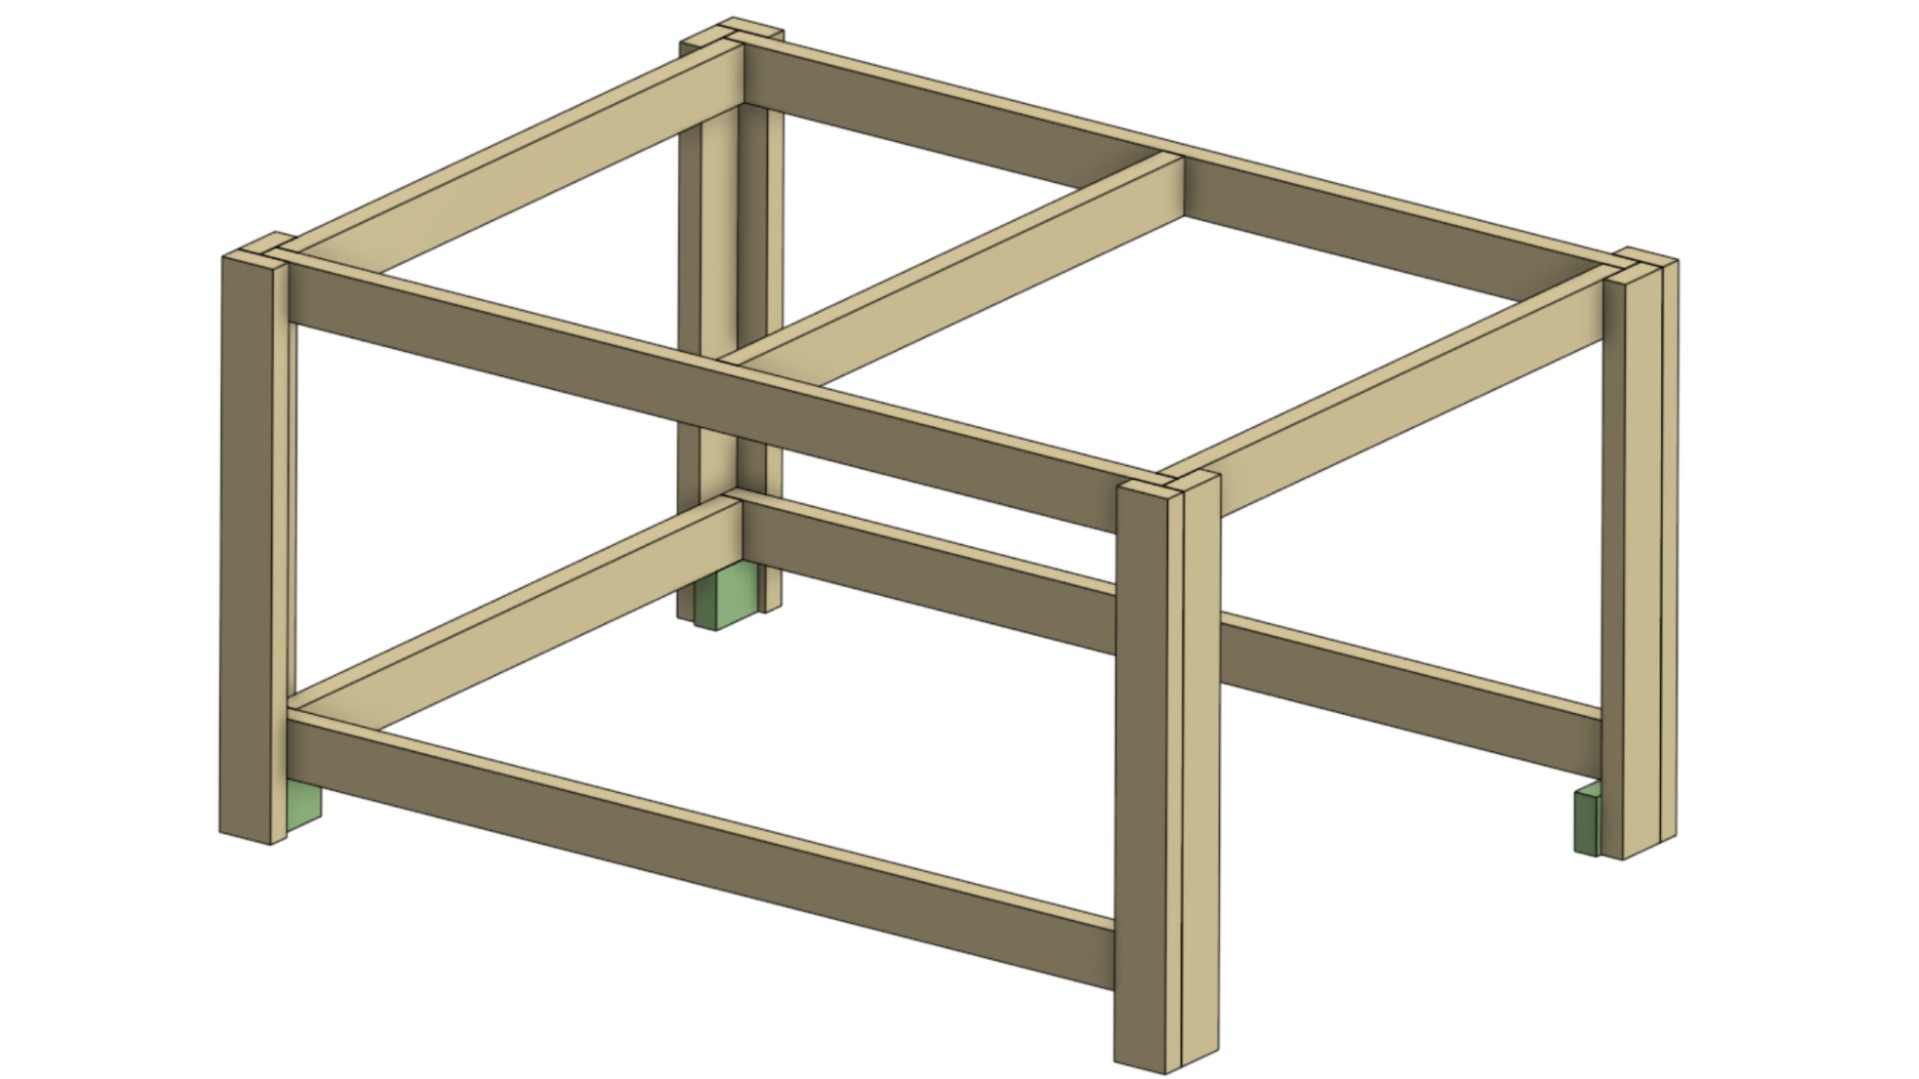
Place the 42″ piece in position as shown.
-
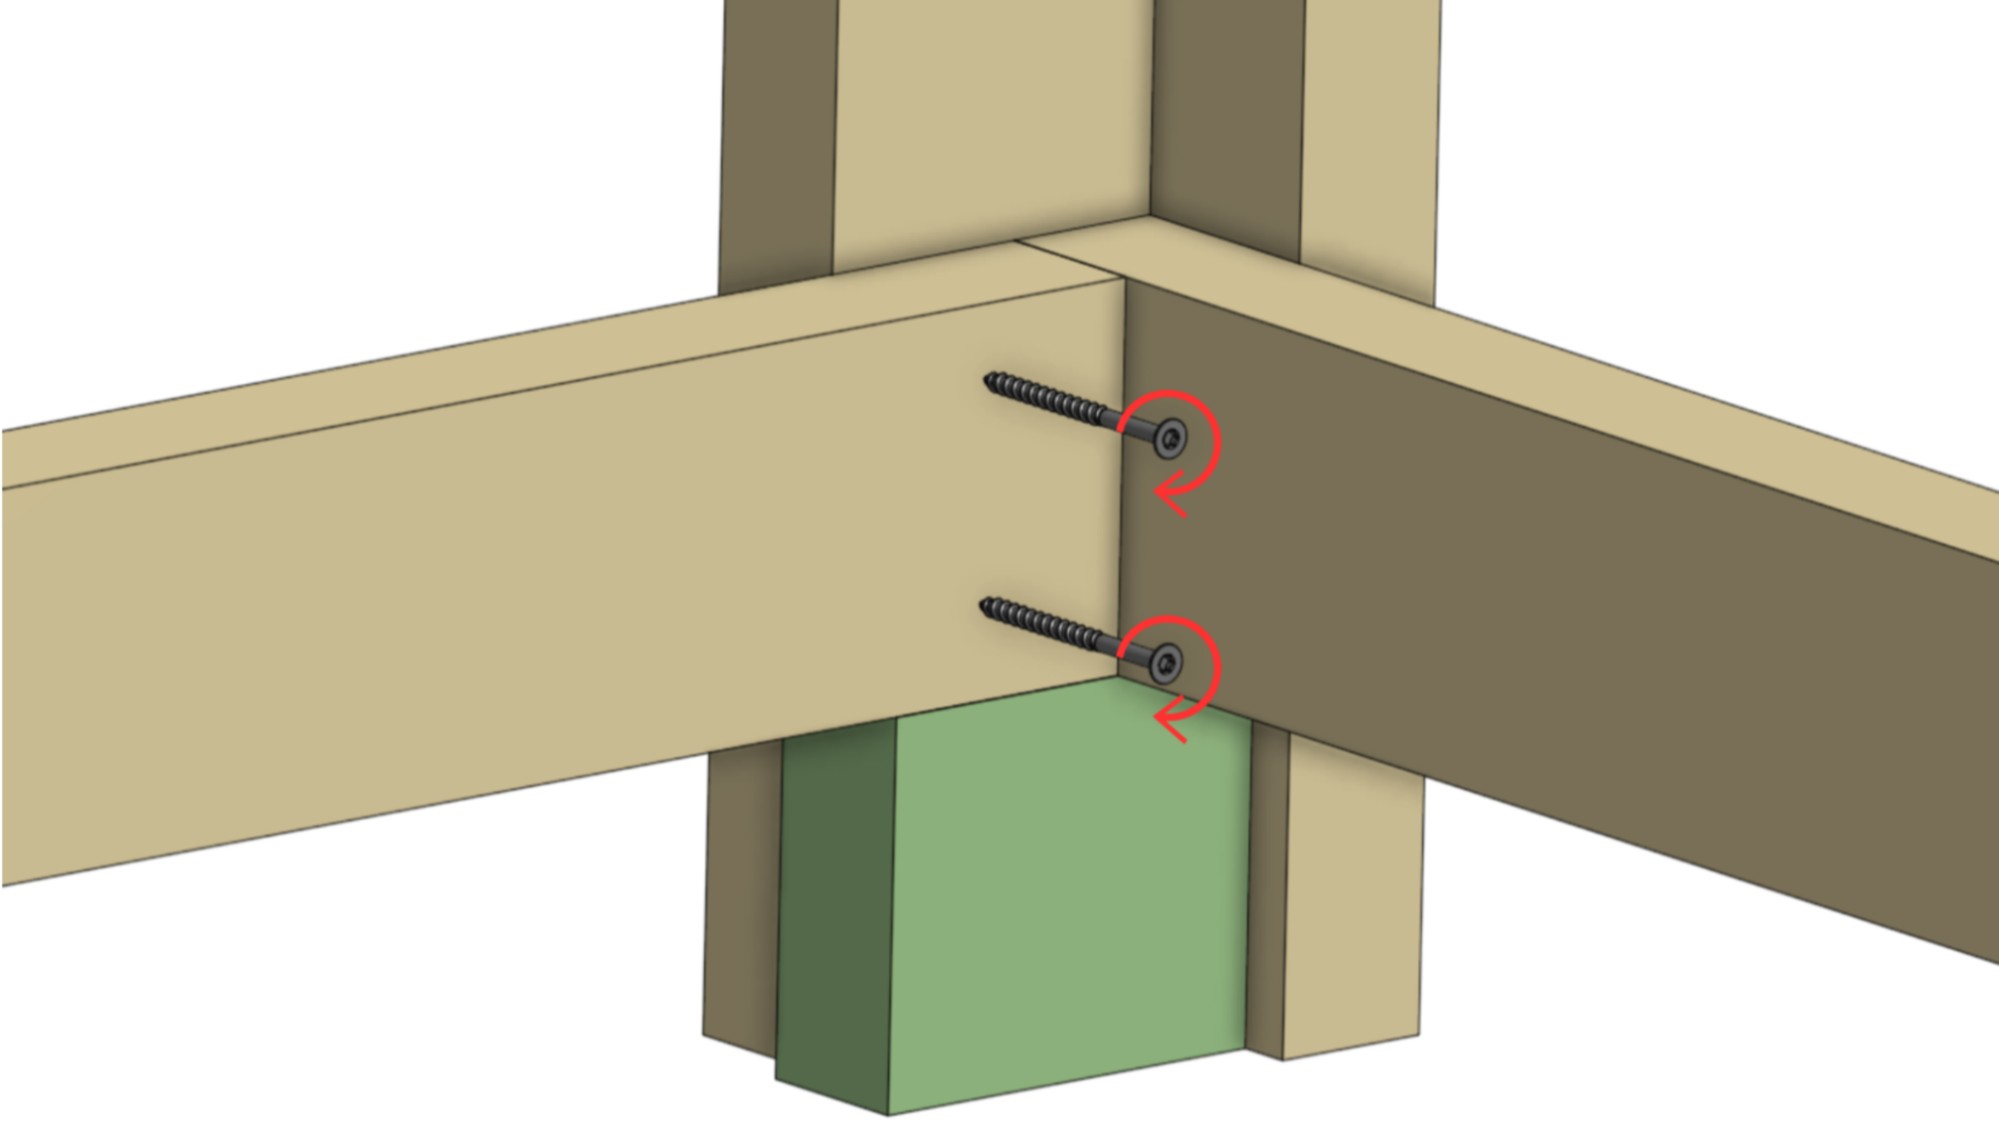
Secure both sides of the 42″ piece with screws.
-
Repeat the previous three steps to mount the second 42″ piece.
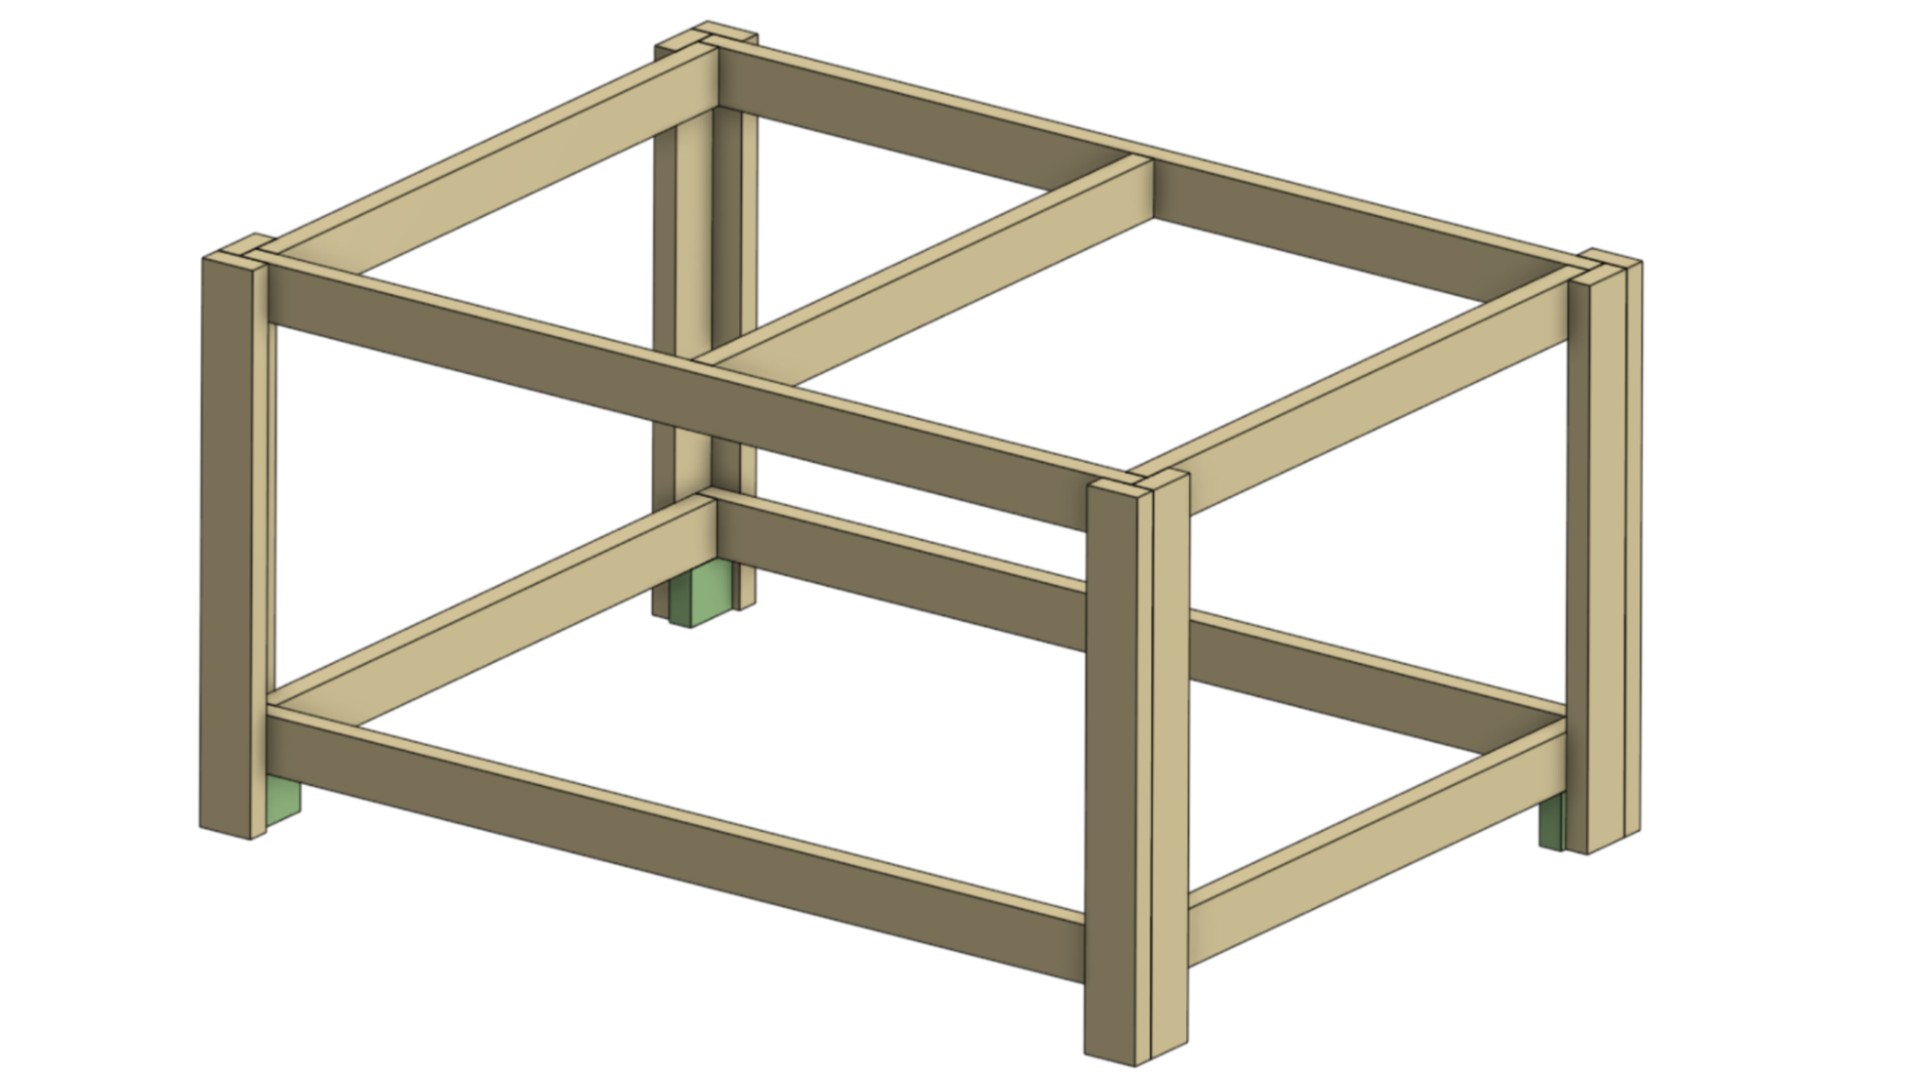
-
Make a mark on a 62″ piece, 31″ from one of the ends.
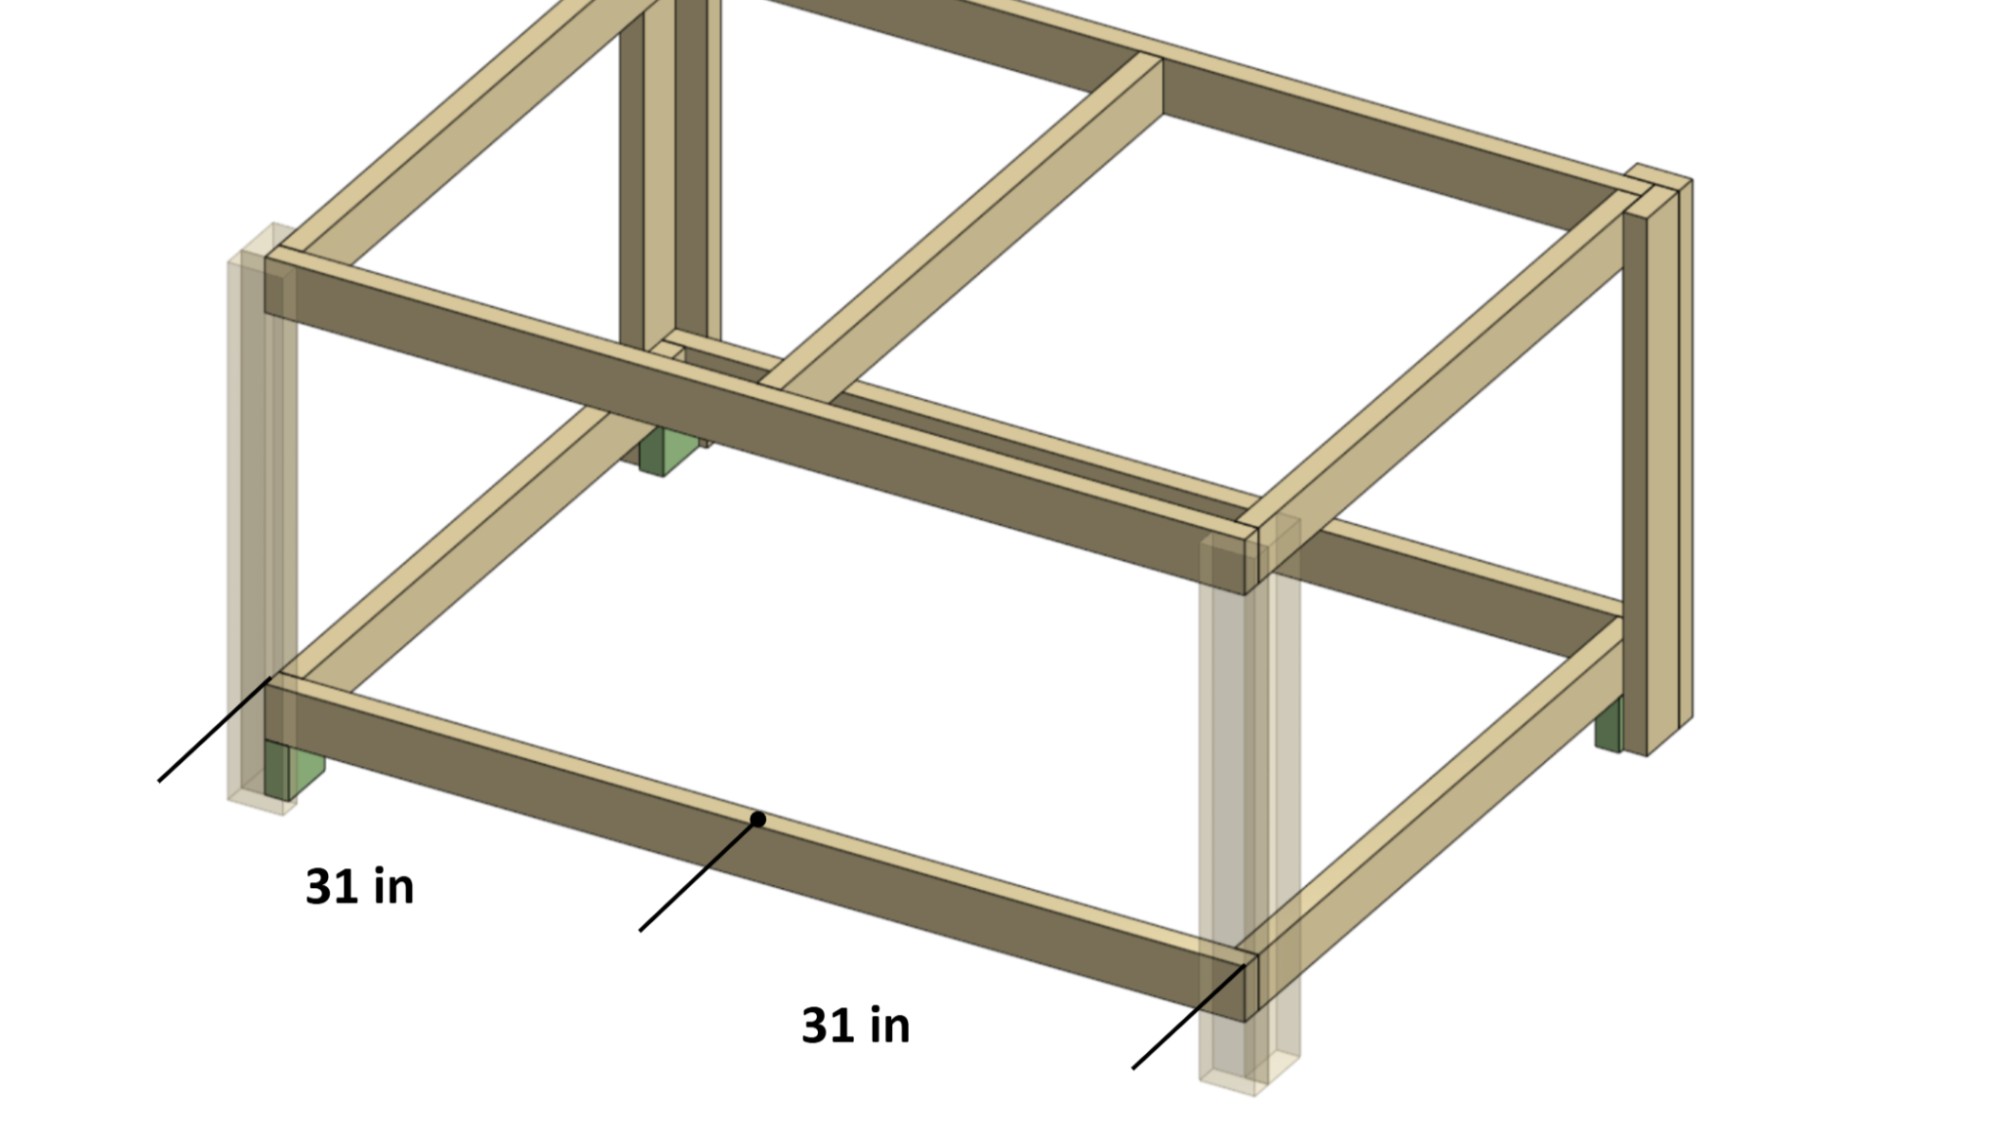
-
Make the same mark on the other 62″ piece.
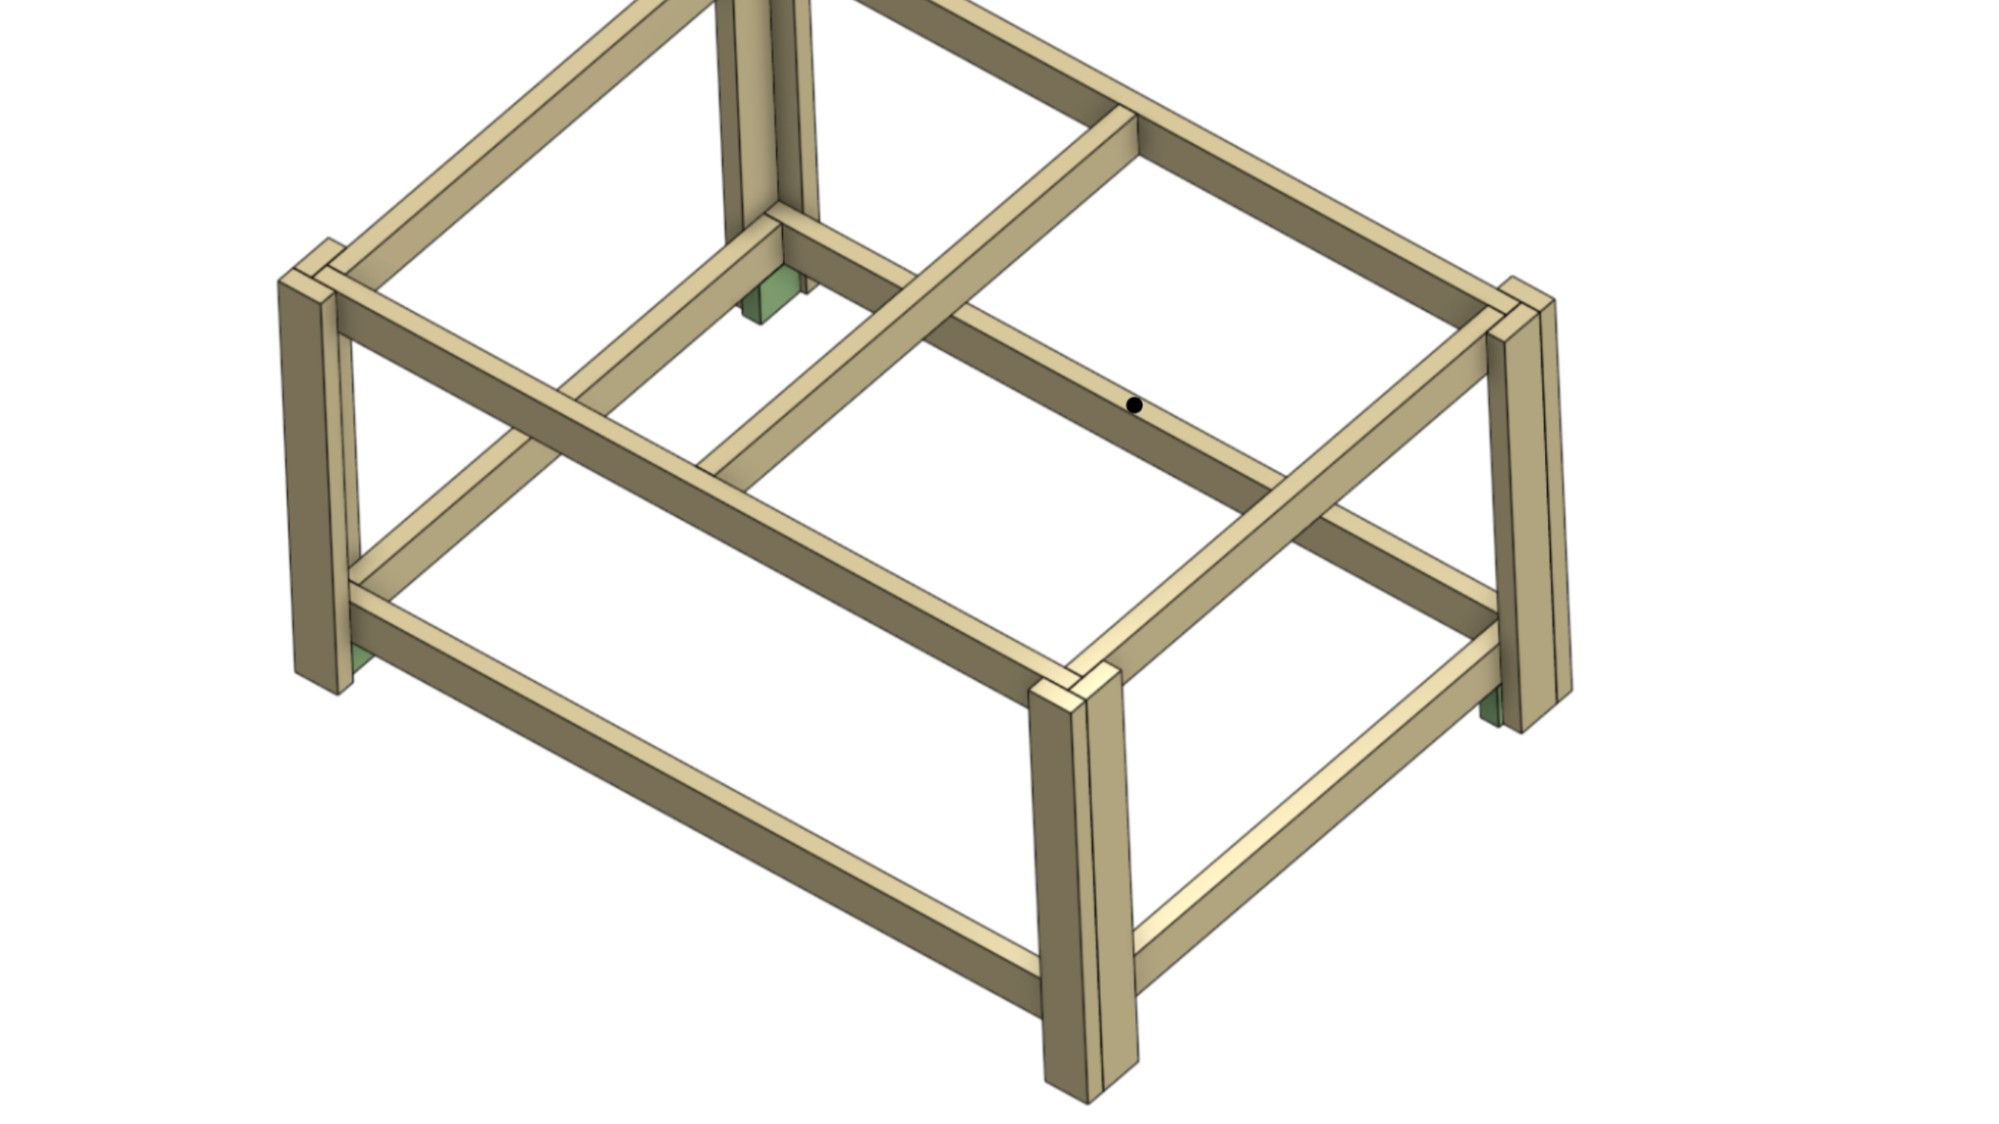
-
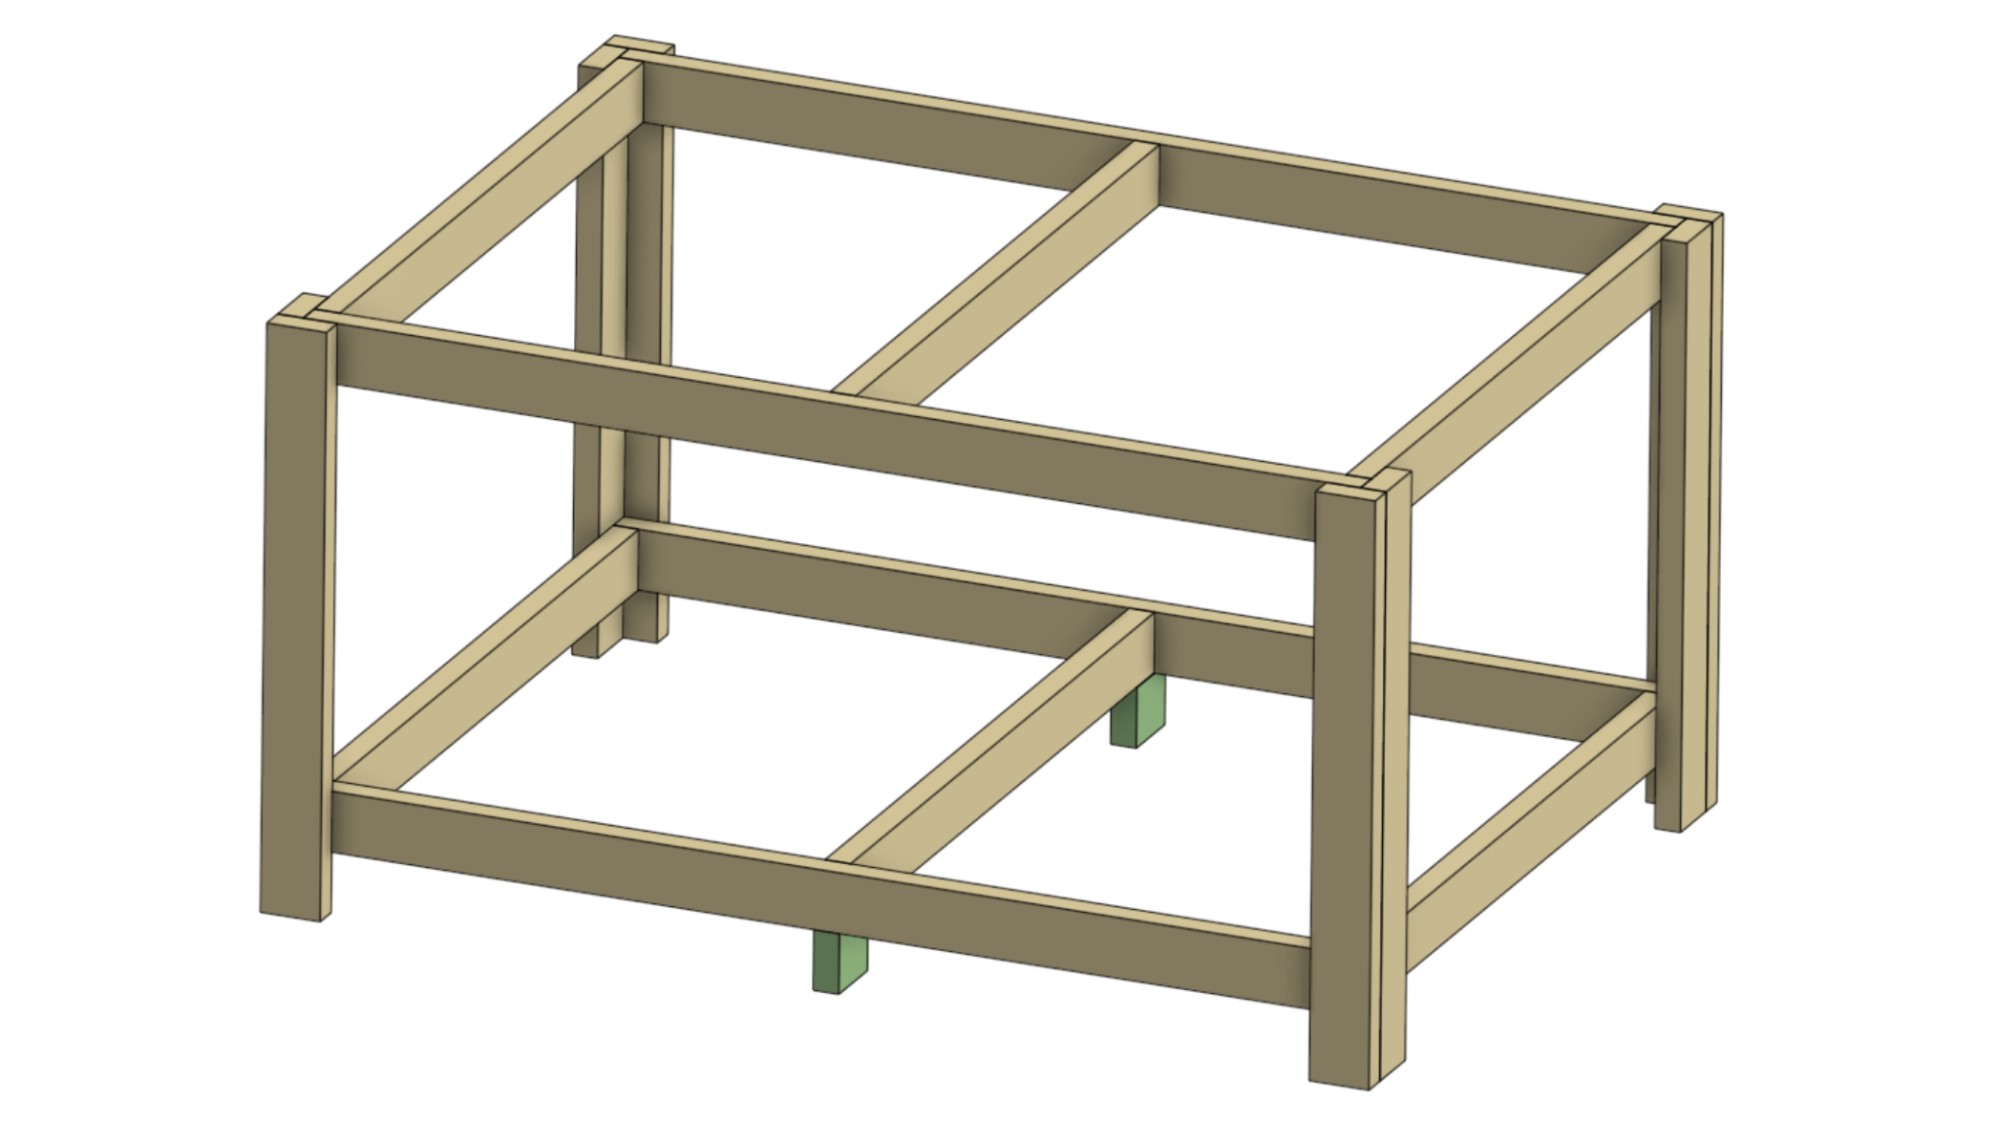
Place the offcuts against the marks.
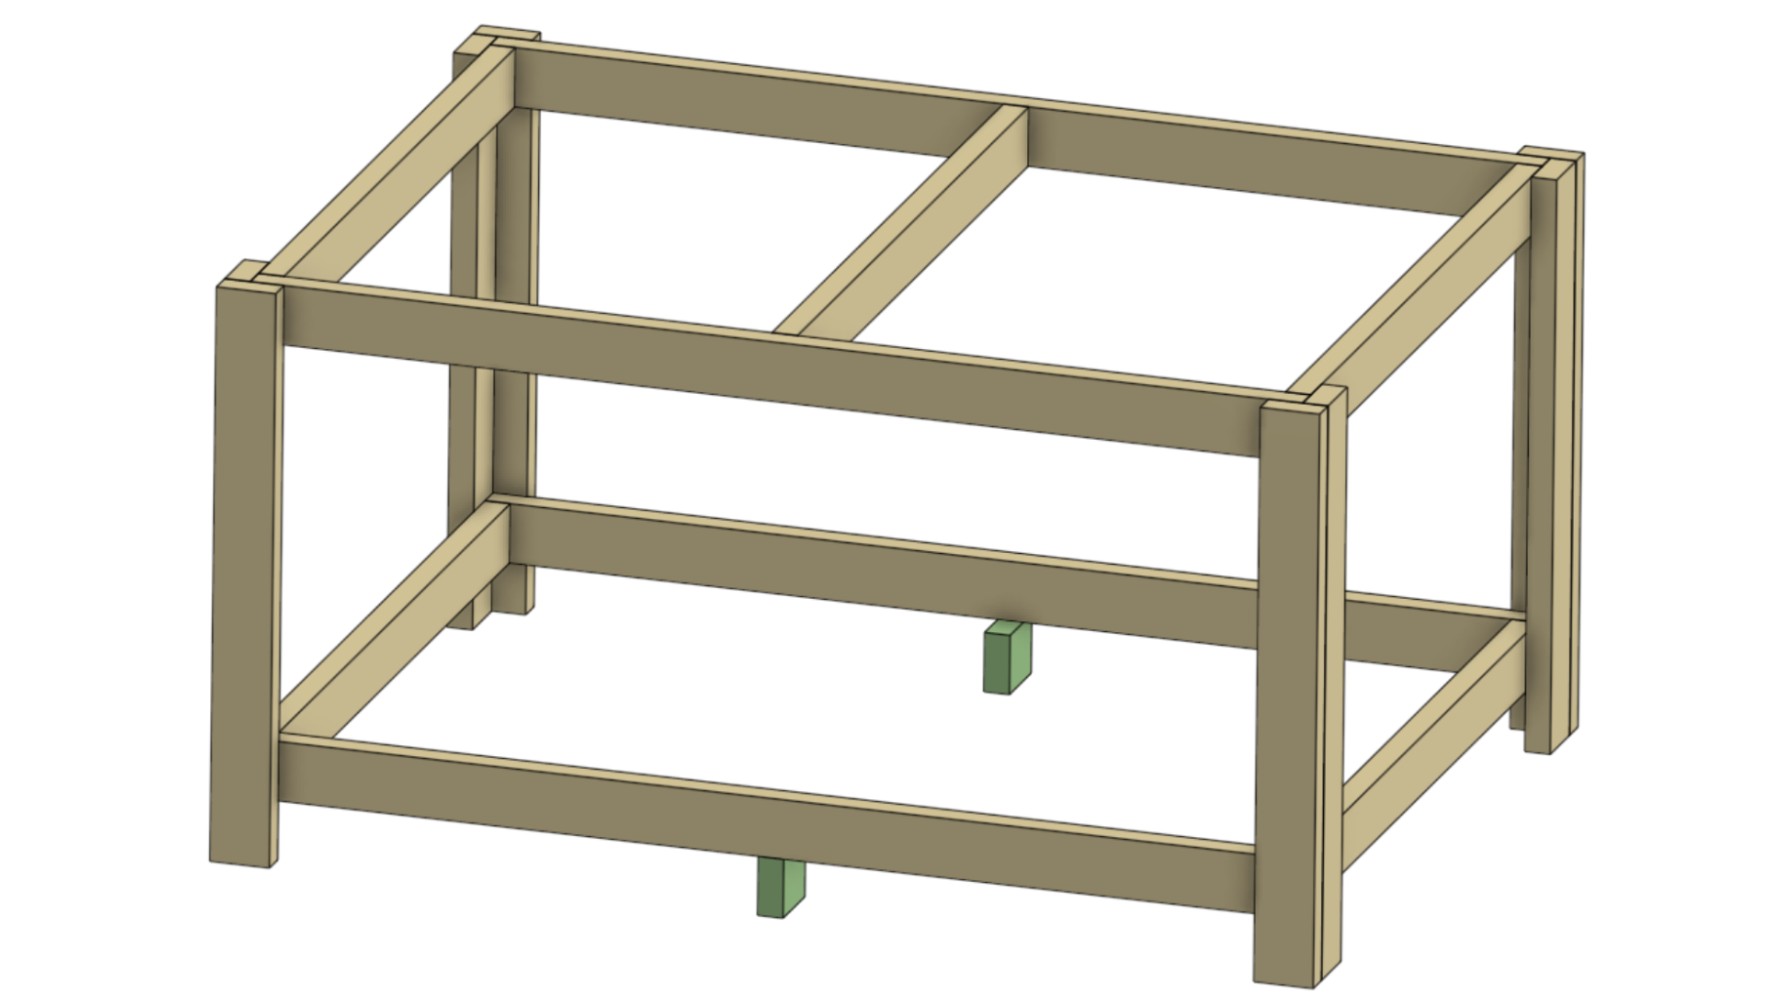
-
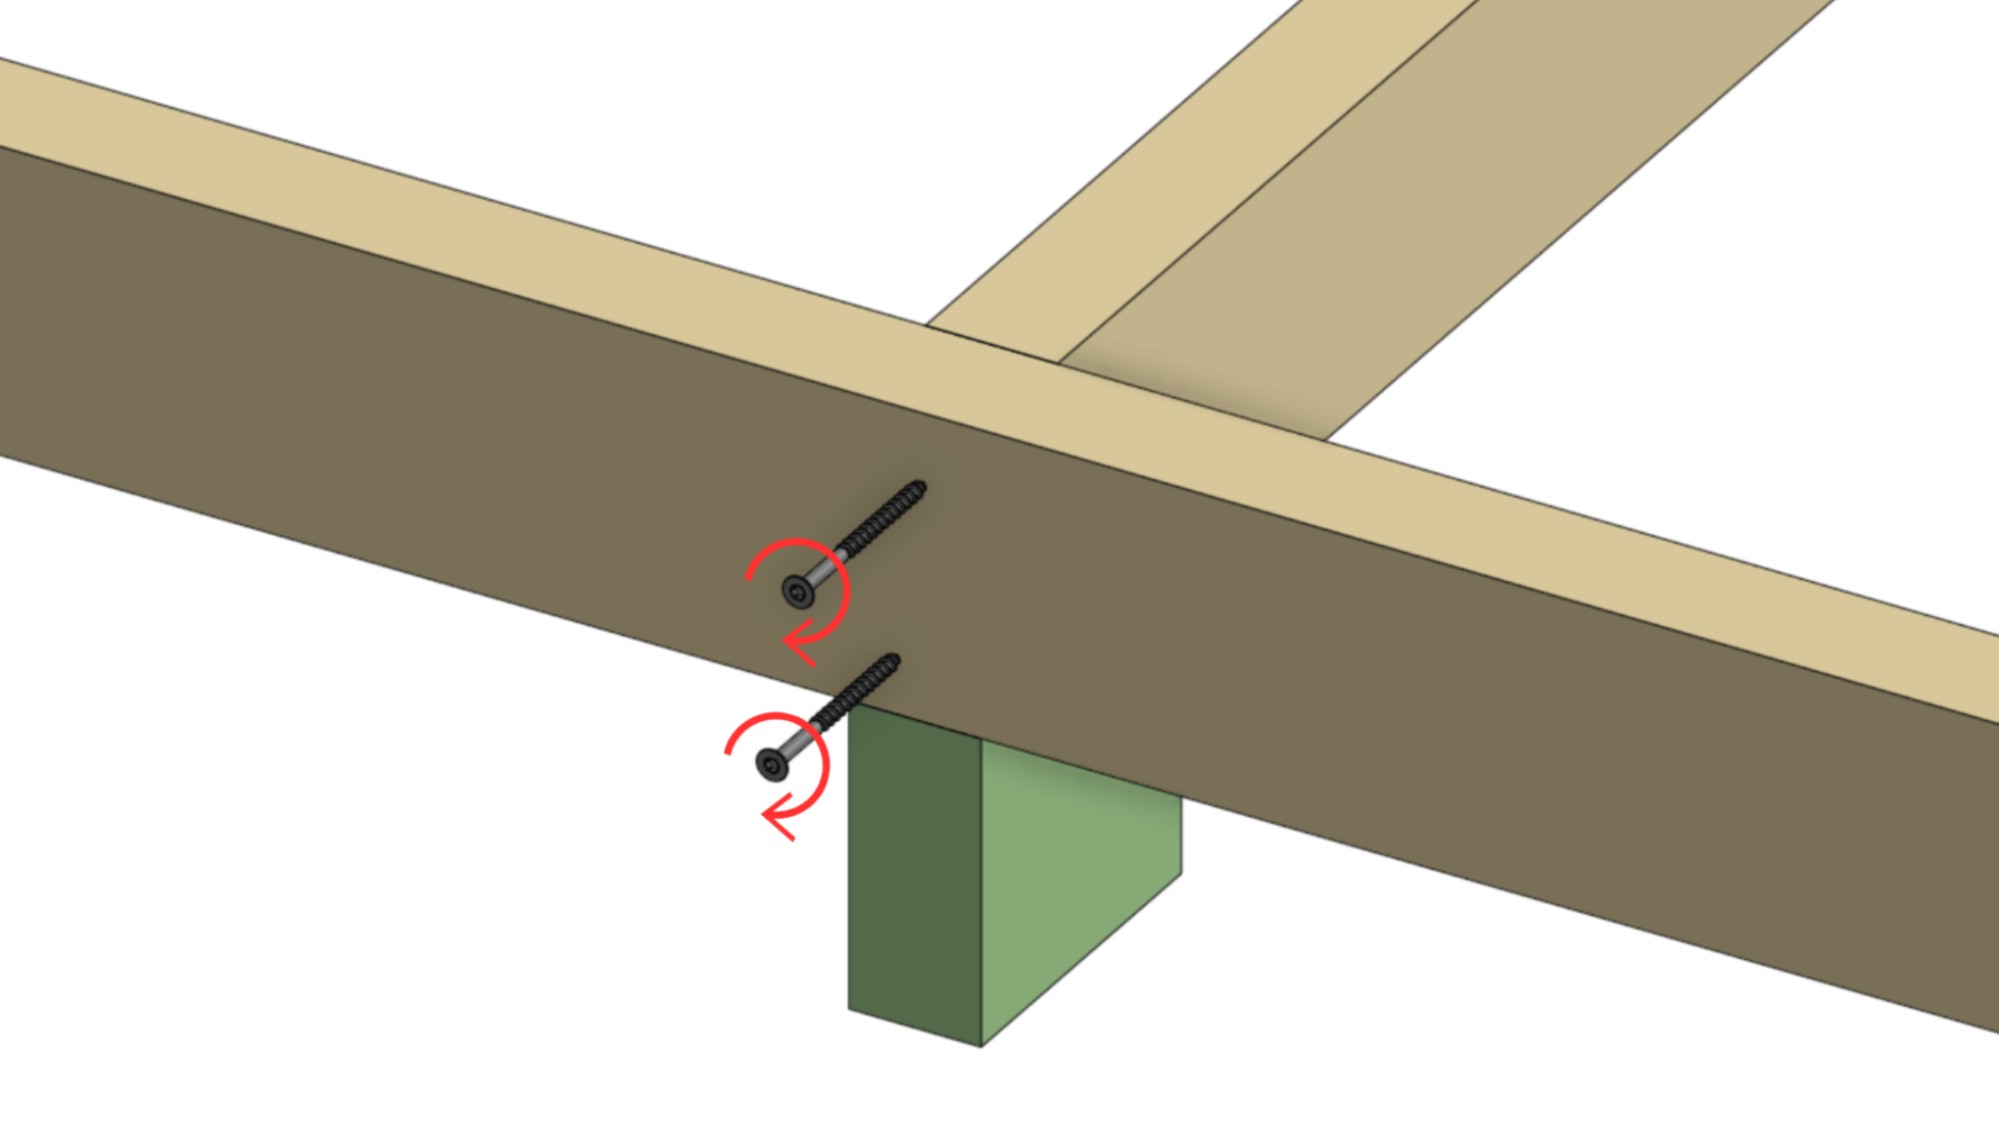
Place the 42″ piece against the marks as shown.
-
Secure the ends of the 42″ piece with screws.
-
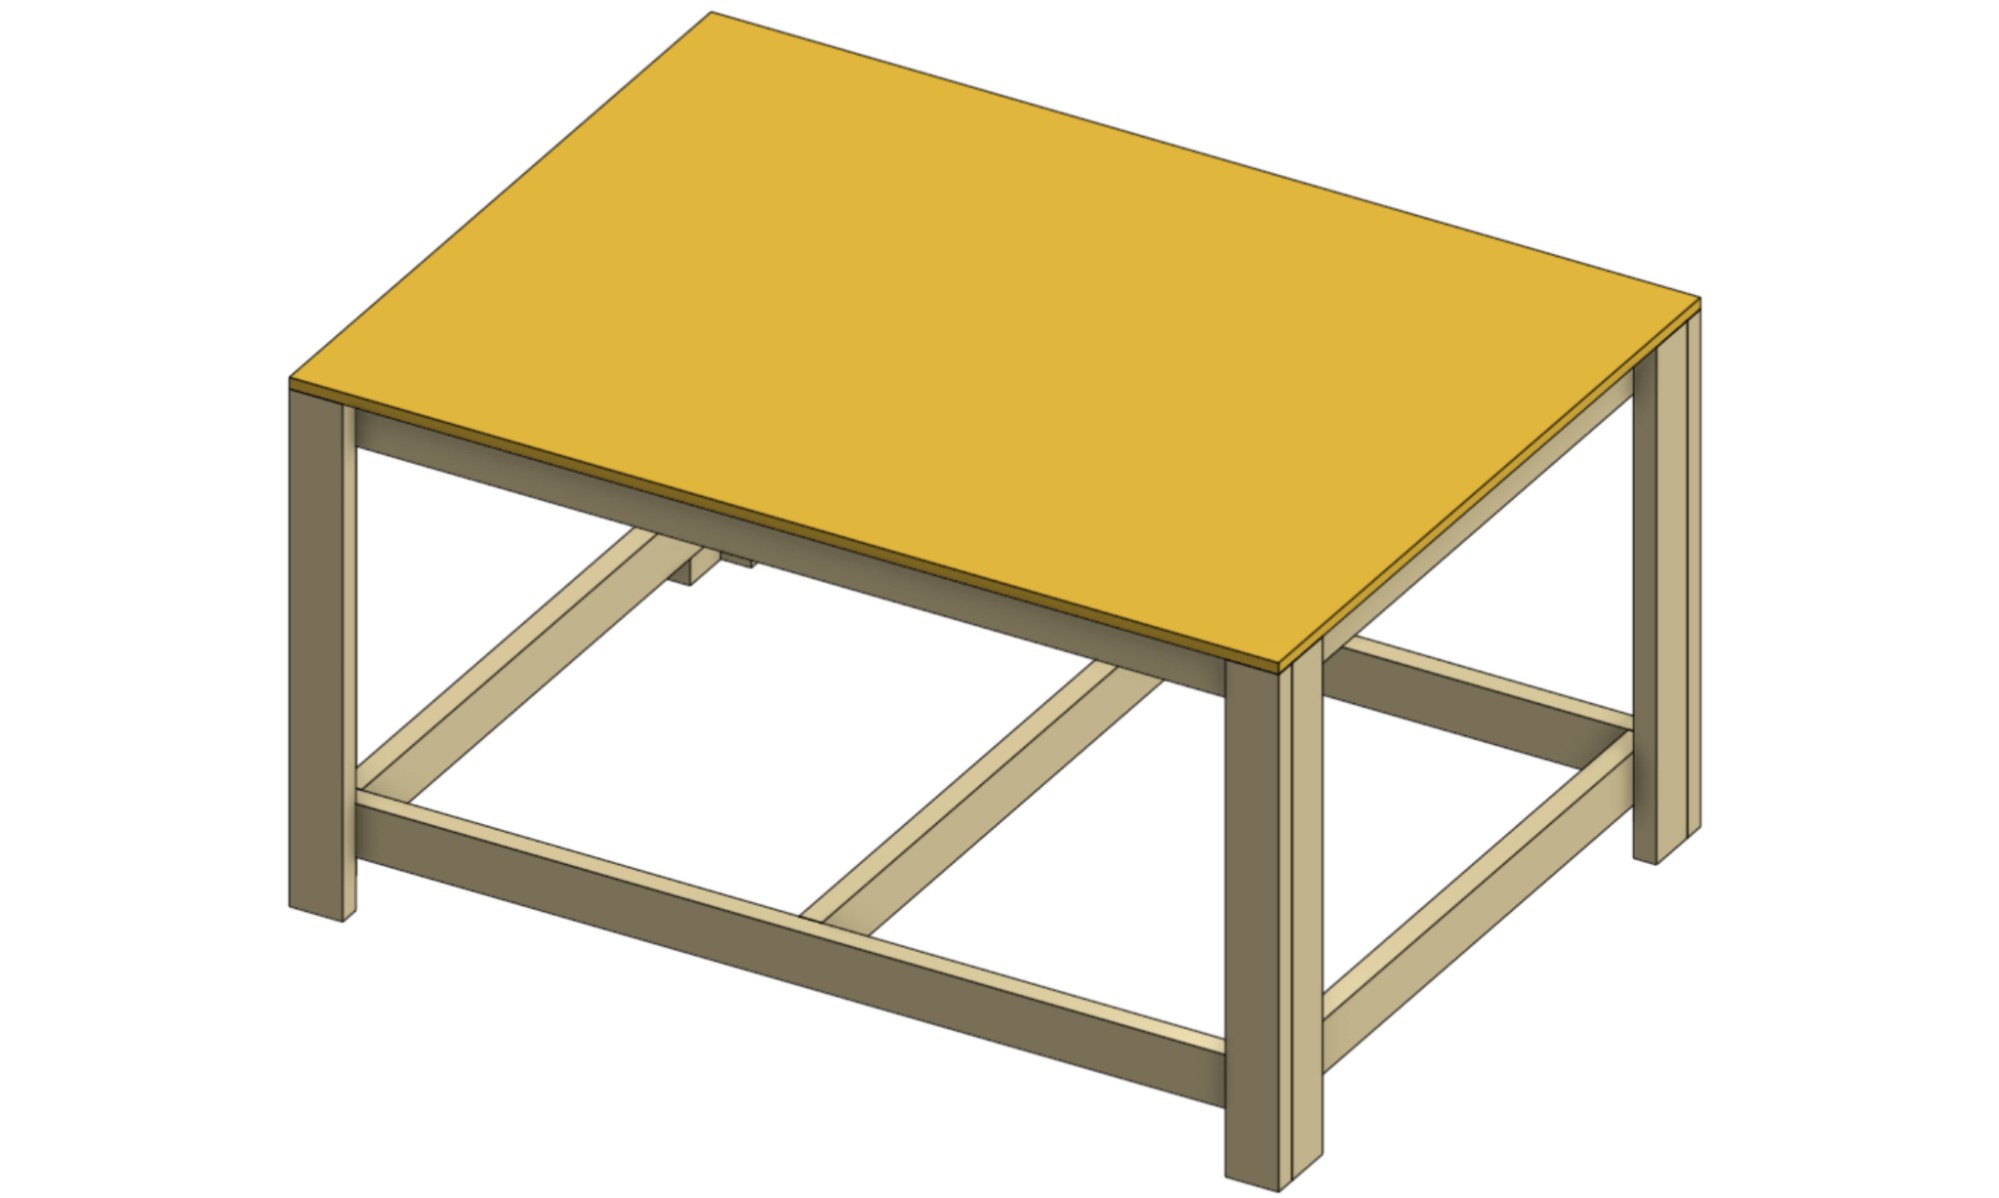
Place the MDF board on top of the table.
Note: You may find that your table is not perfectly square and does not precisely fit the MDF board. To fix this, secure one side of the MDF board to the table with screws. Then, move the other side of the table to match the MDF board and secure it with screws.
-
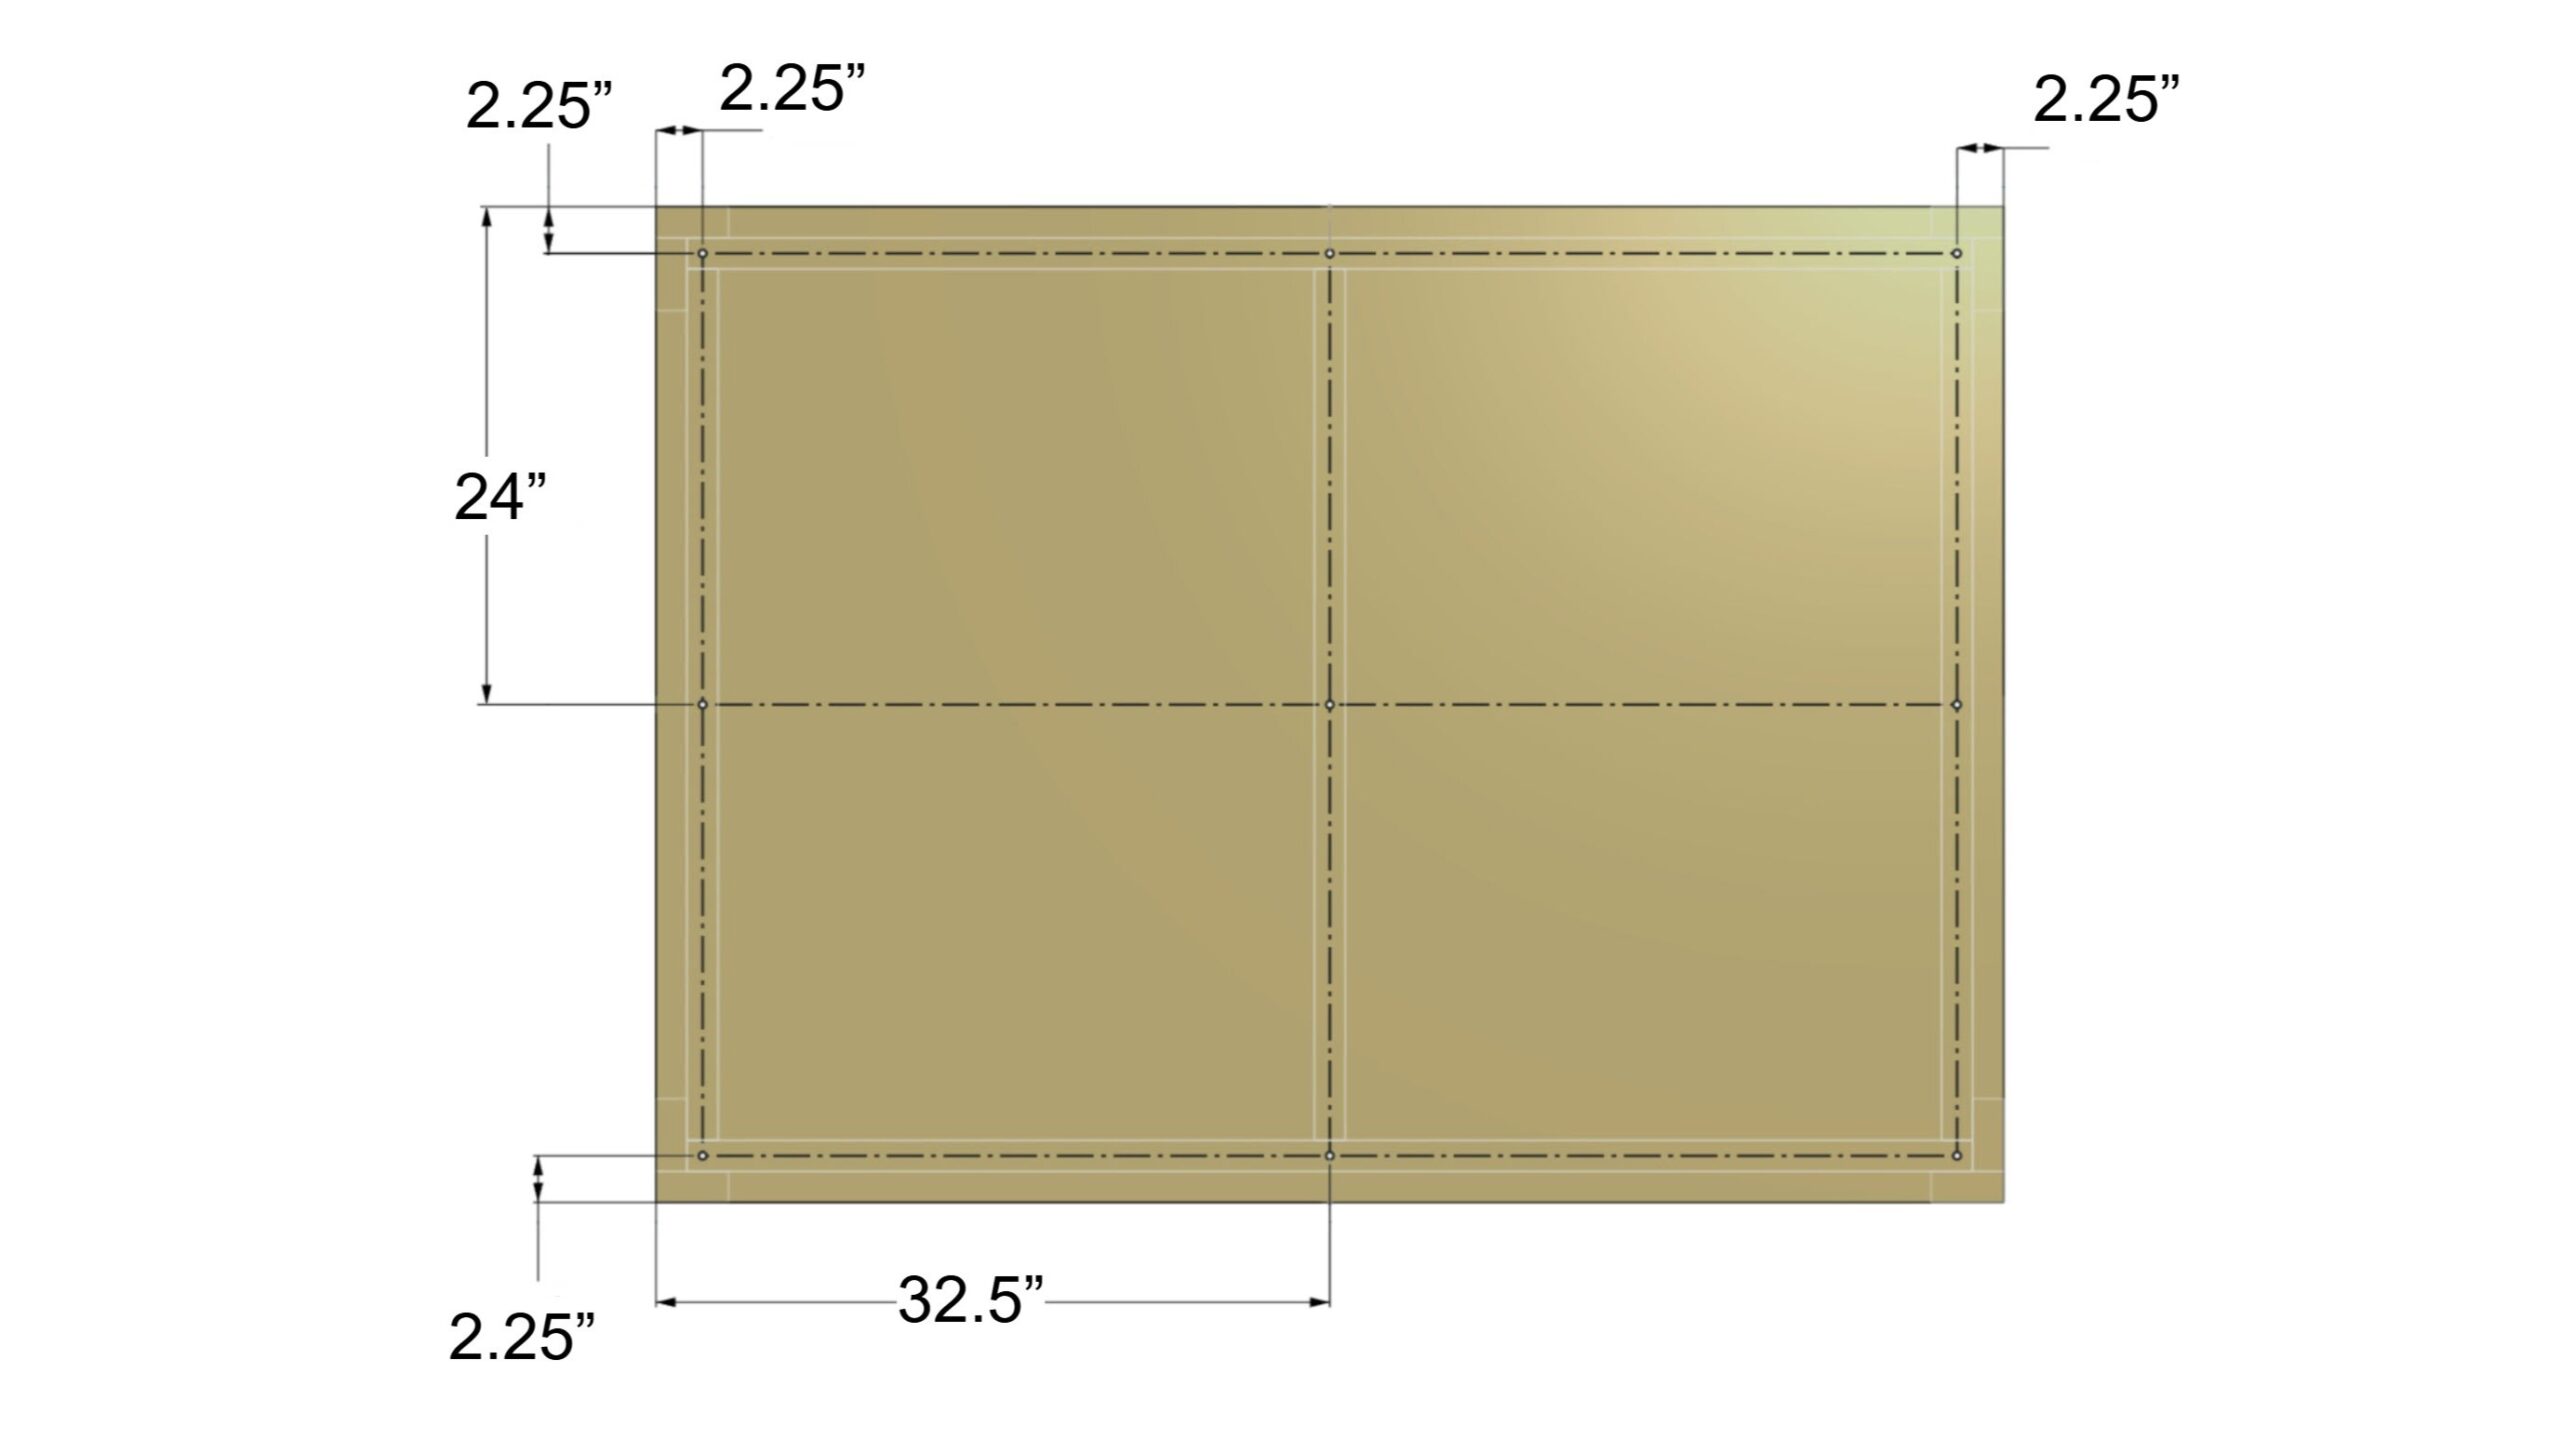
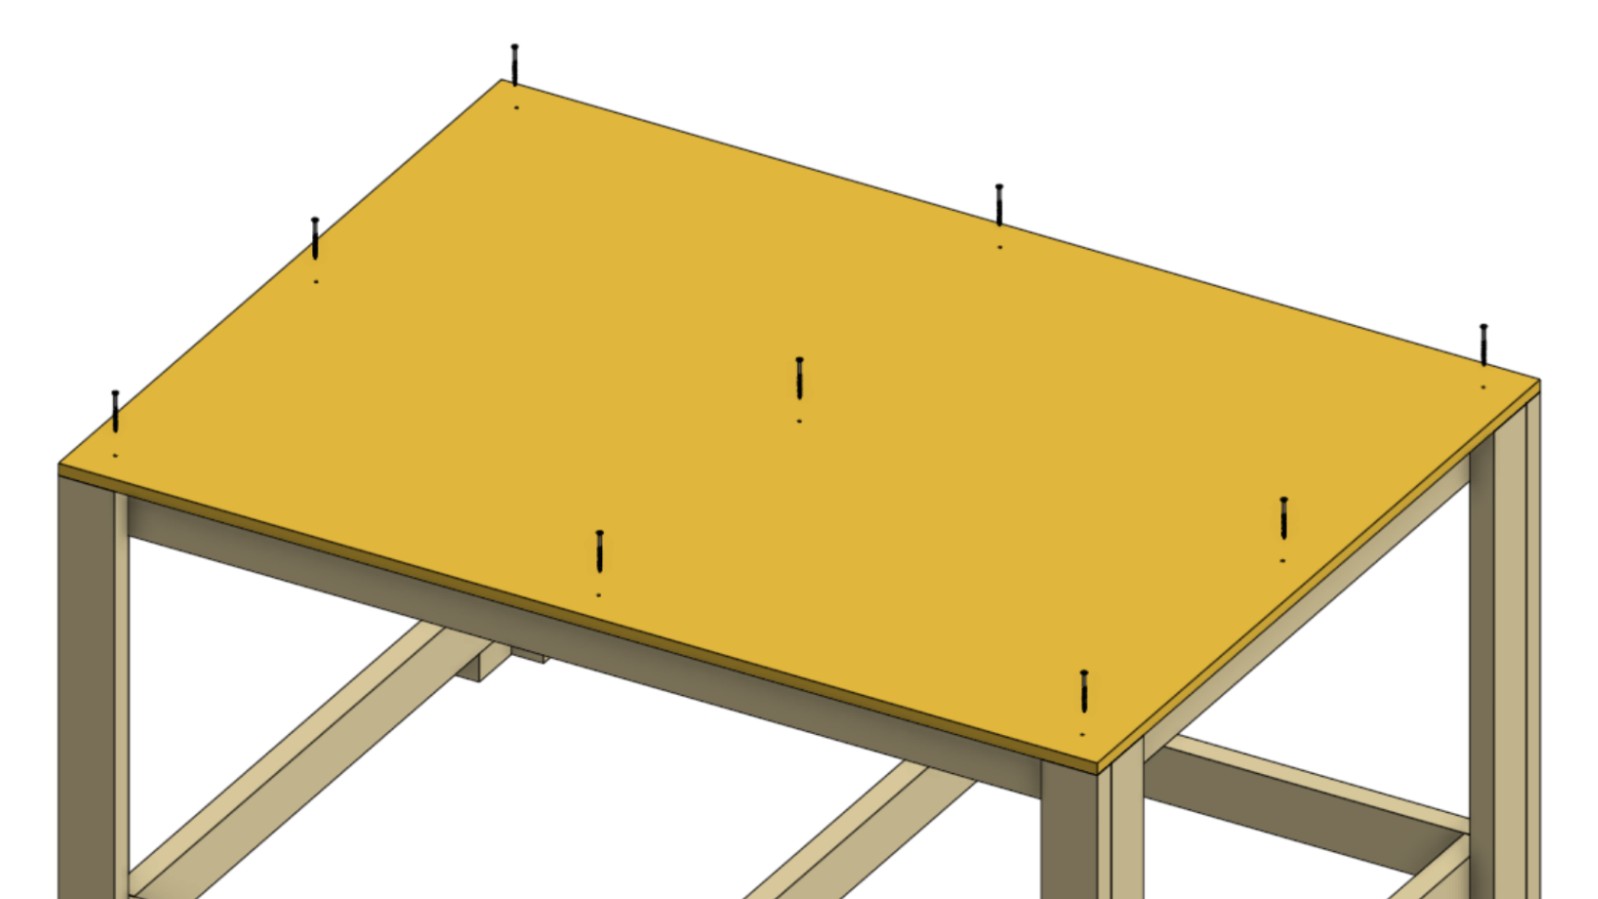
Mark the 9 screw locations as shown in the image below.
-
Secure the MDF sheet with screws.
48×30 Cut Lists
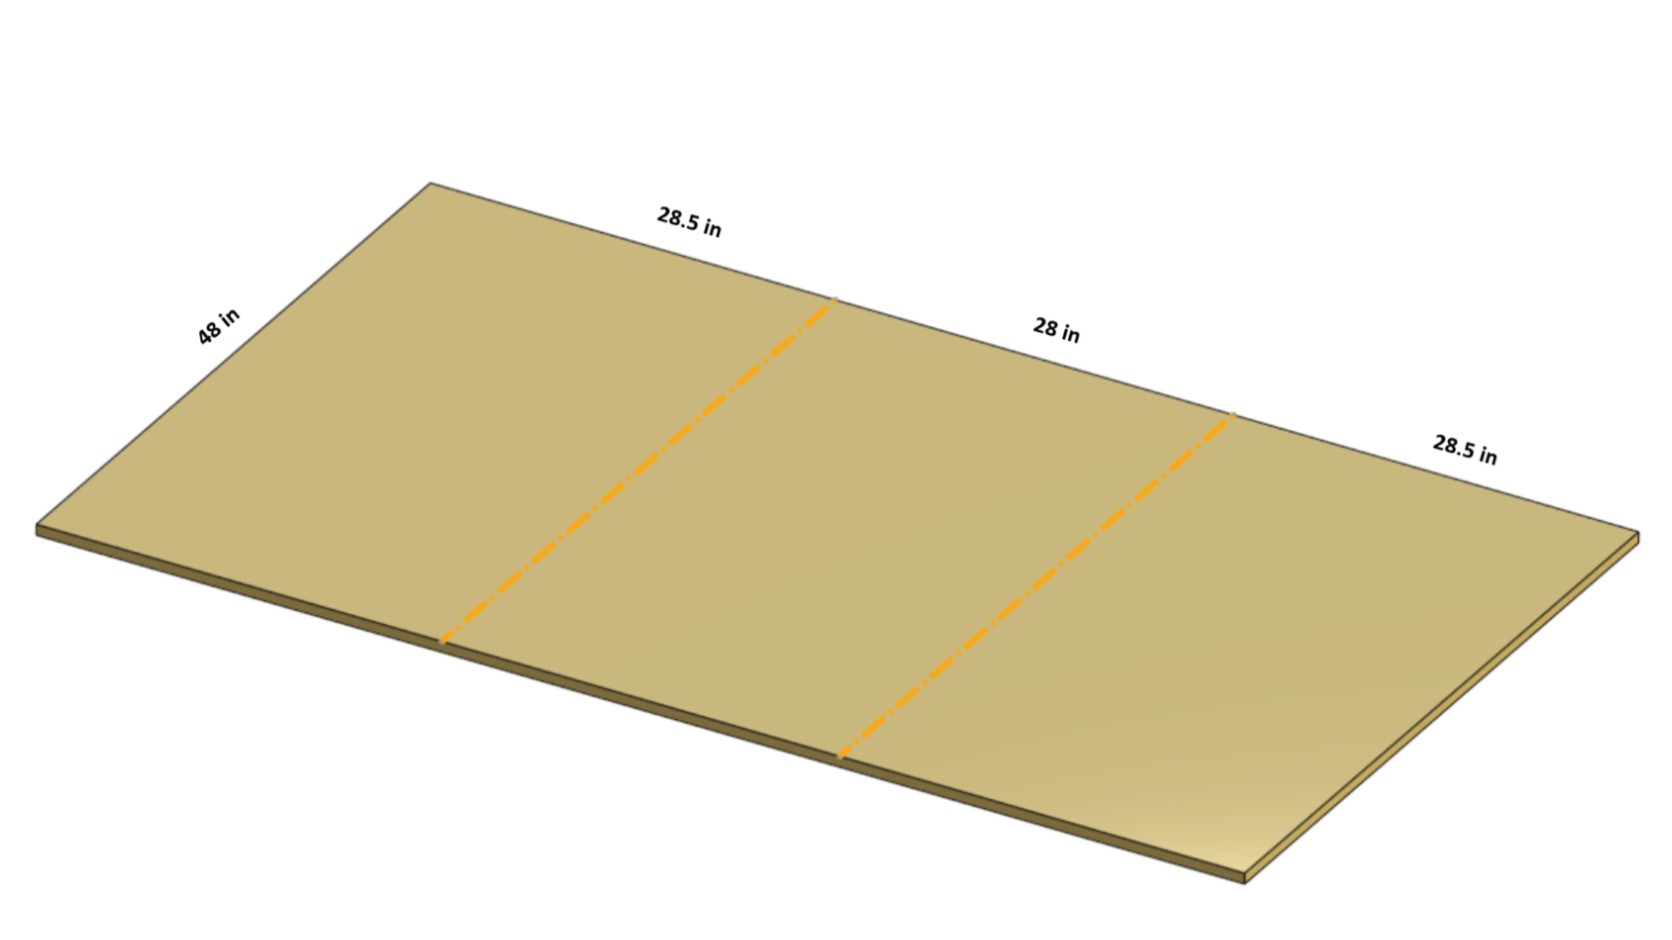
If you can’t transport an 85″ × 48″ sheet, you can cut it into three (3) pieces of 28.5″ x 48″.
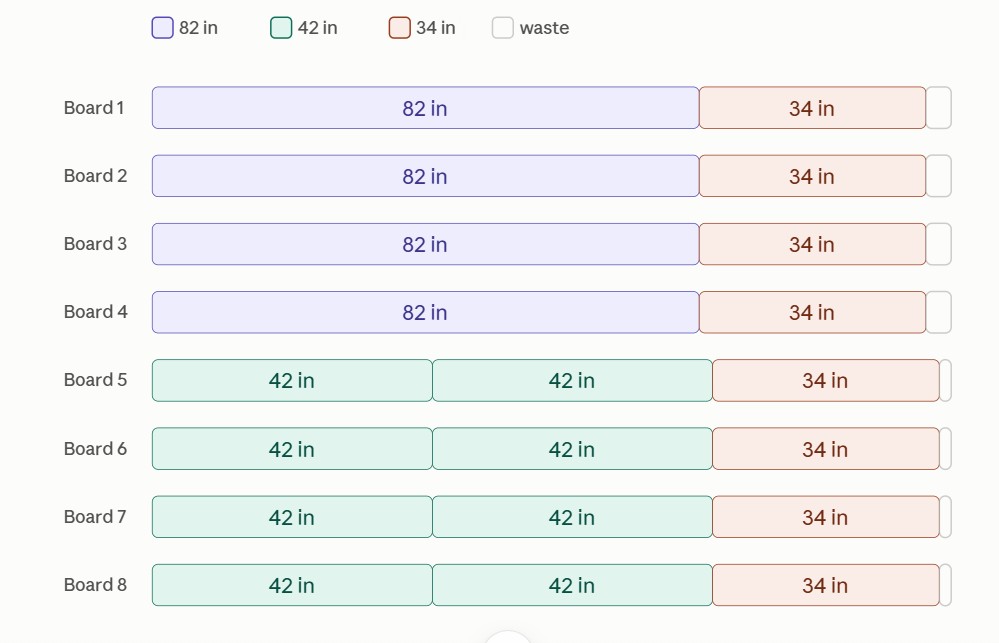
Cut list for 8 pcs 2″x4″x10′ Lumber:
Cut list for 12 pcs 2”x4”x8’ Lumber:
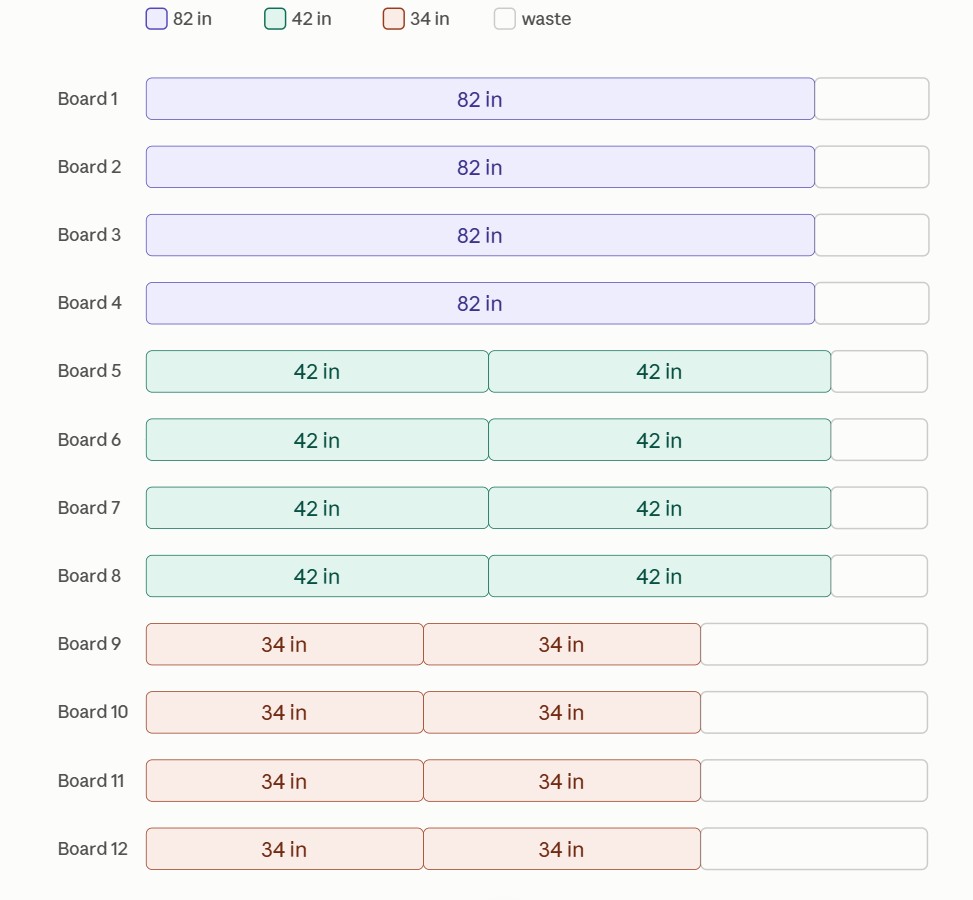
Note: Try to get at least three straight boards to cut two 82″ pieces and two 42″ pieces. This will help you create a relatively flat base for the MDF top.48×30 Steps
-
Use your MDF board as a base, or find the flattest part of the floor available.
-
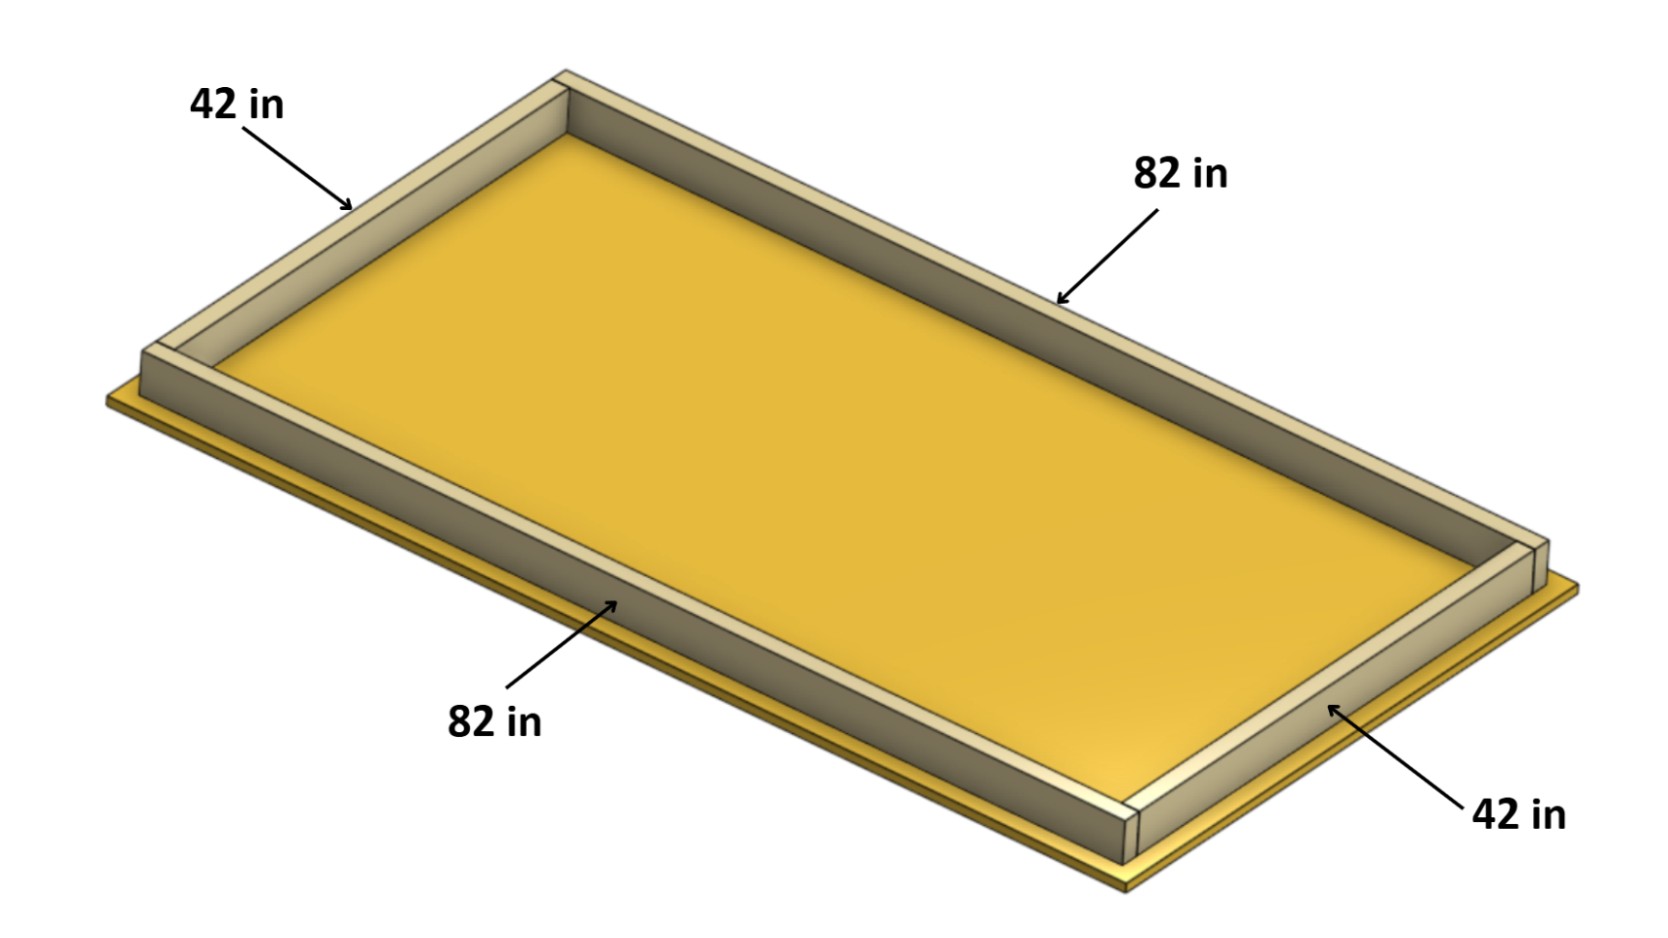
Form the square frame as shown: 82″ pieces for the long sides and 42″ pieces for the short sides. Use the straight pieces you selected previously.
-
Drive two screws into one of the corners. Repeat for the remaining corners.
-
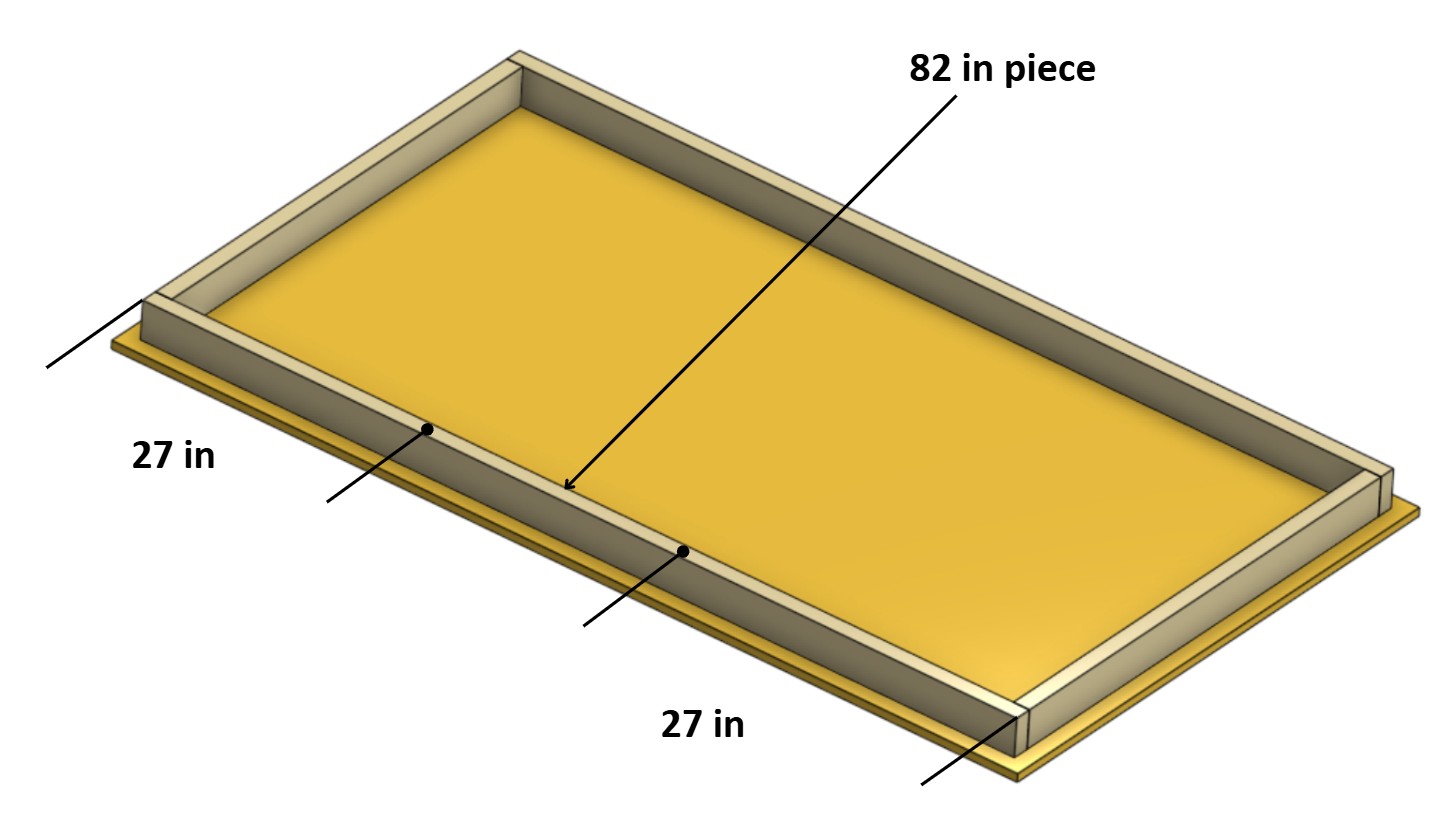
Make two marks on an 82″ piece, 27″ from both ends.
-
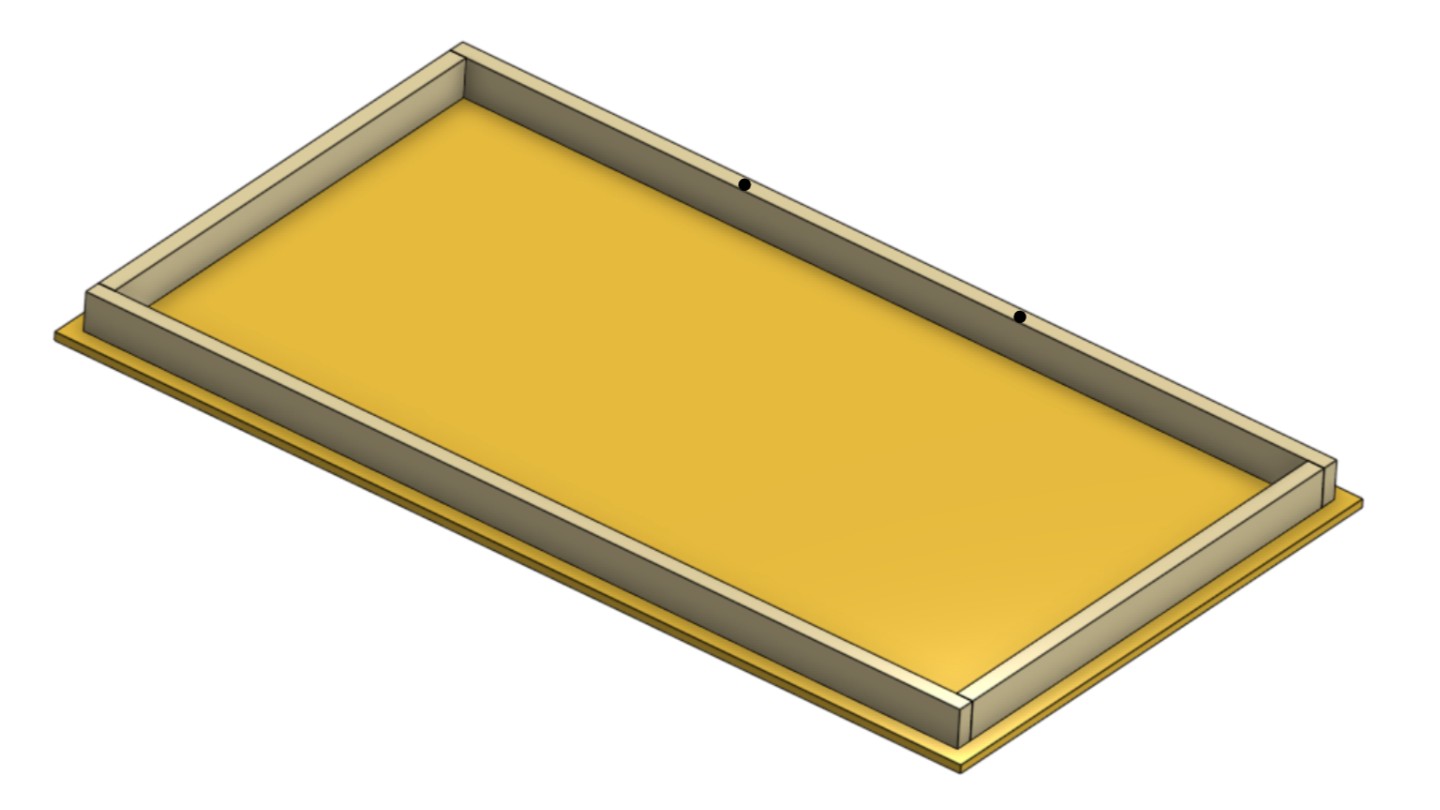
Make the same marks on the other 82″ piece.
-
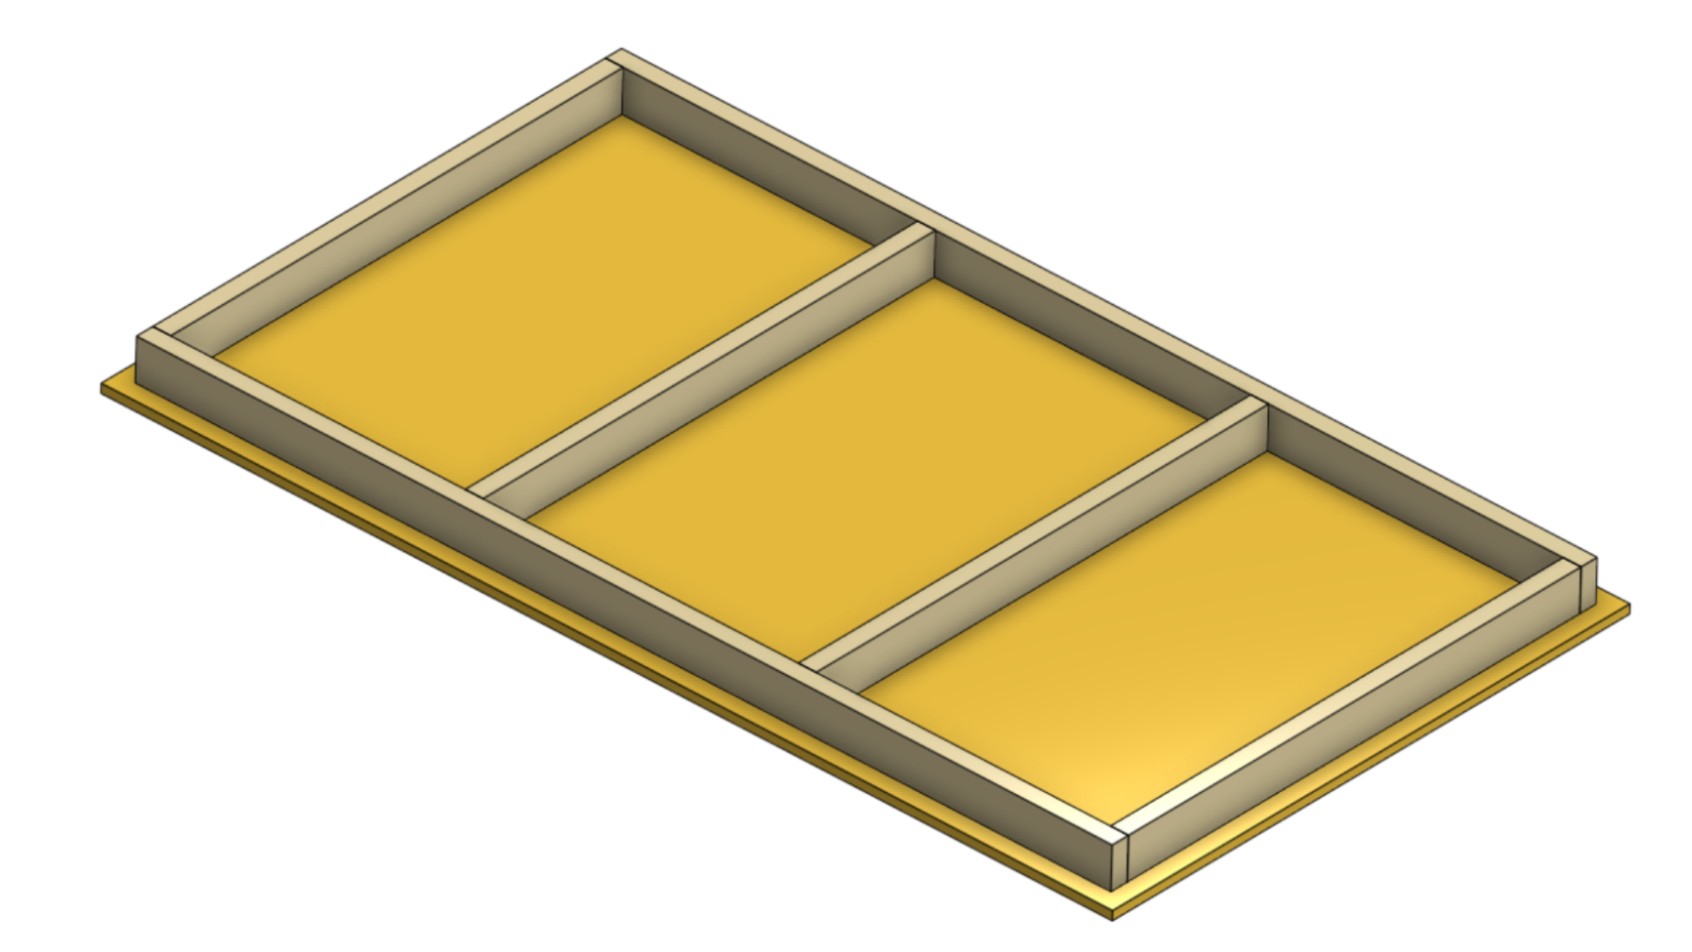
Place the two 42″ pieces against your marks as shown.
-
Drive screws into the ends of the 42″ pieces to secure them.
-
Place two 34″ inch pieces in position as shown.
-
Using clamps, secure the ends of both pieces together.
-
Drive screws into the pieces to secure them.
-
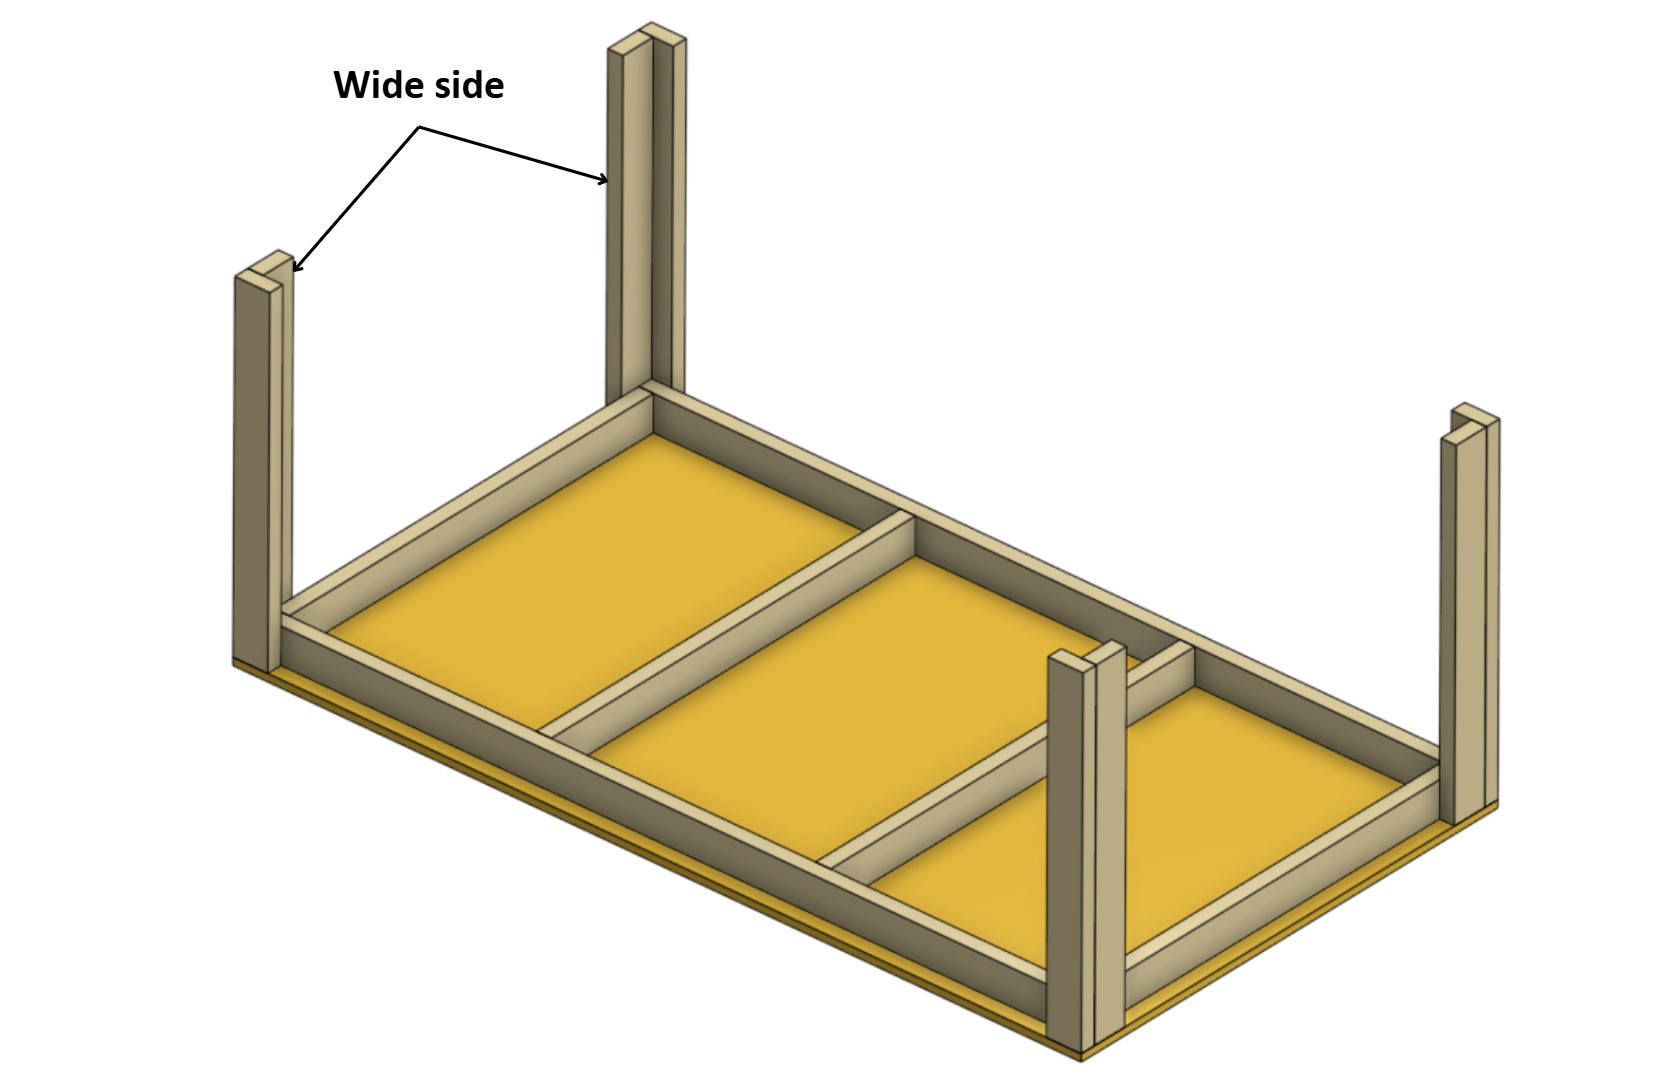
Repeat the previous three steps to build the remaining legs.
-
Position the assembled legs as shown, with the wider sides facing inward.
-
Secure one of the legs to the frame with screws as shown. Repeat for the remaining legs.
-
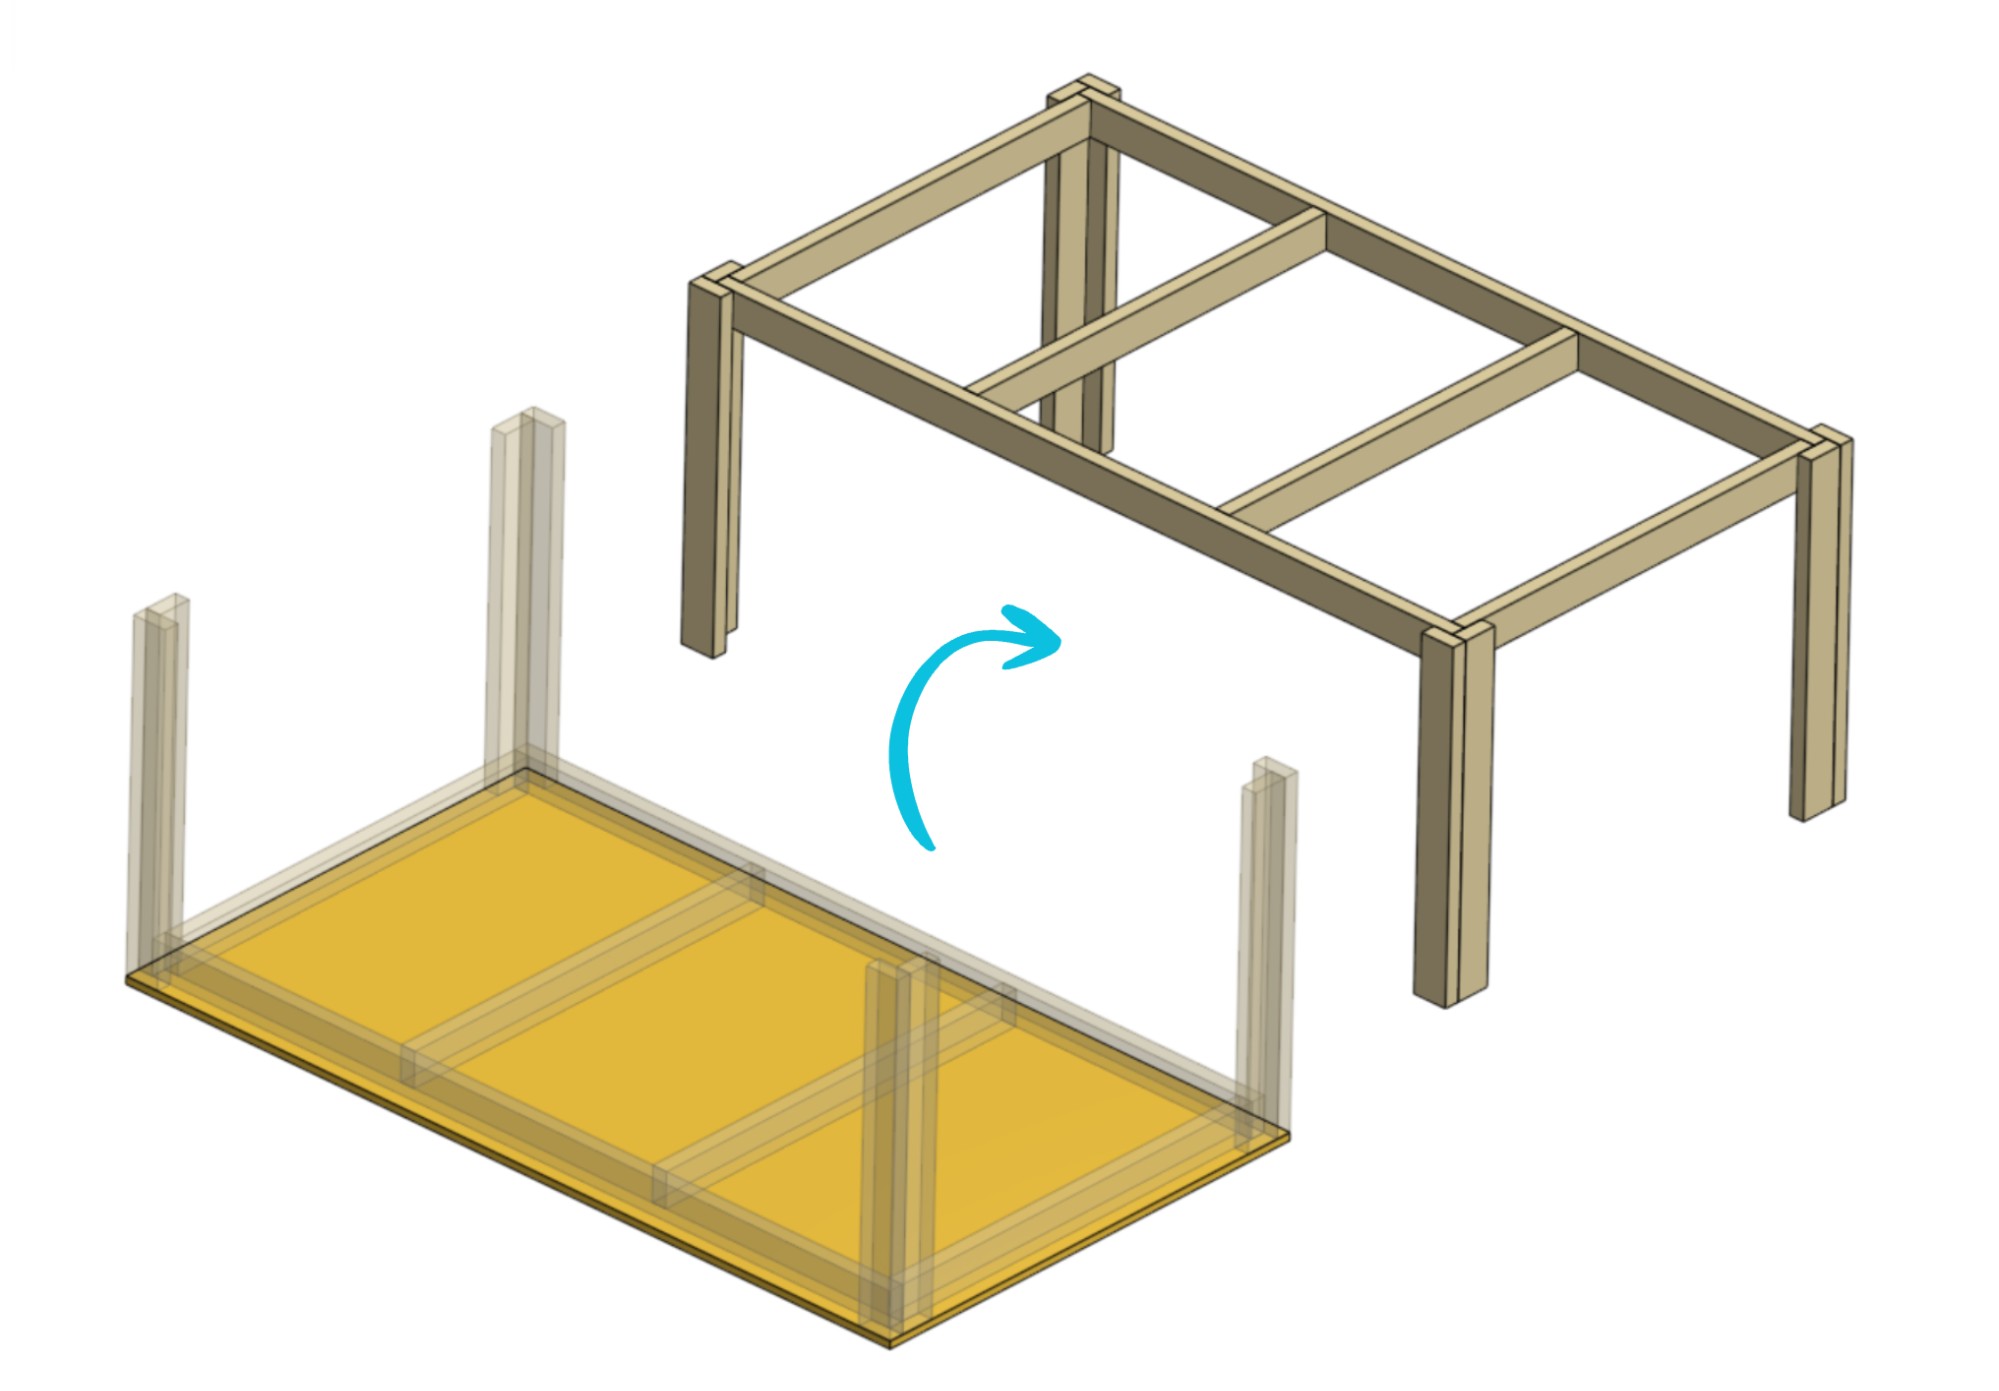
Turn over the assembled structure.
-
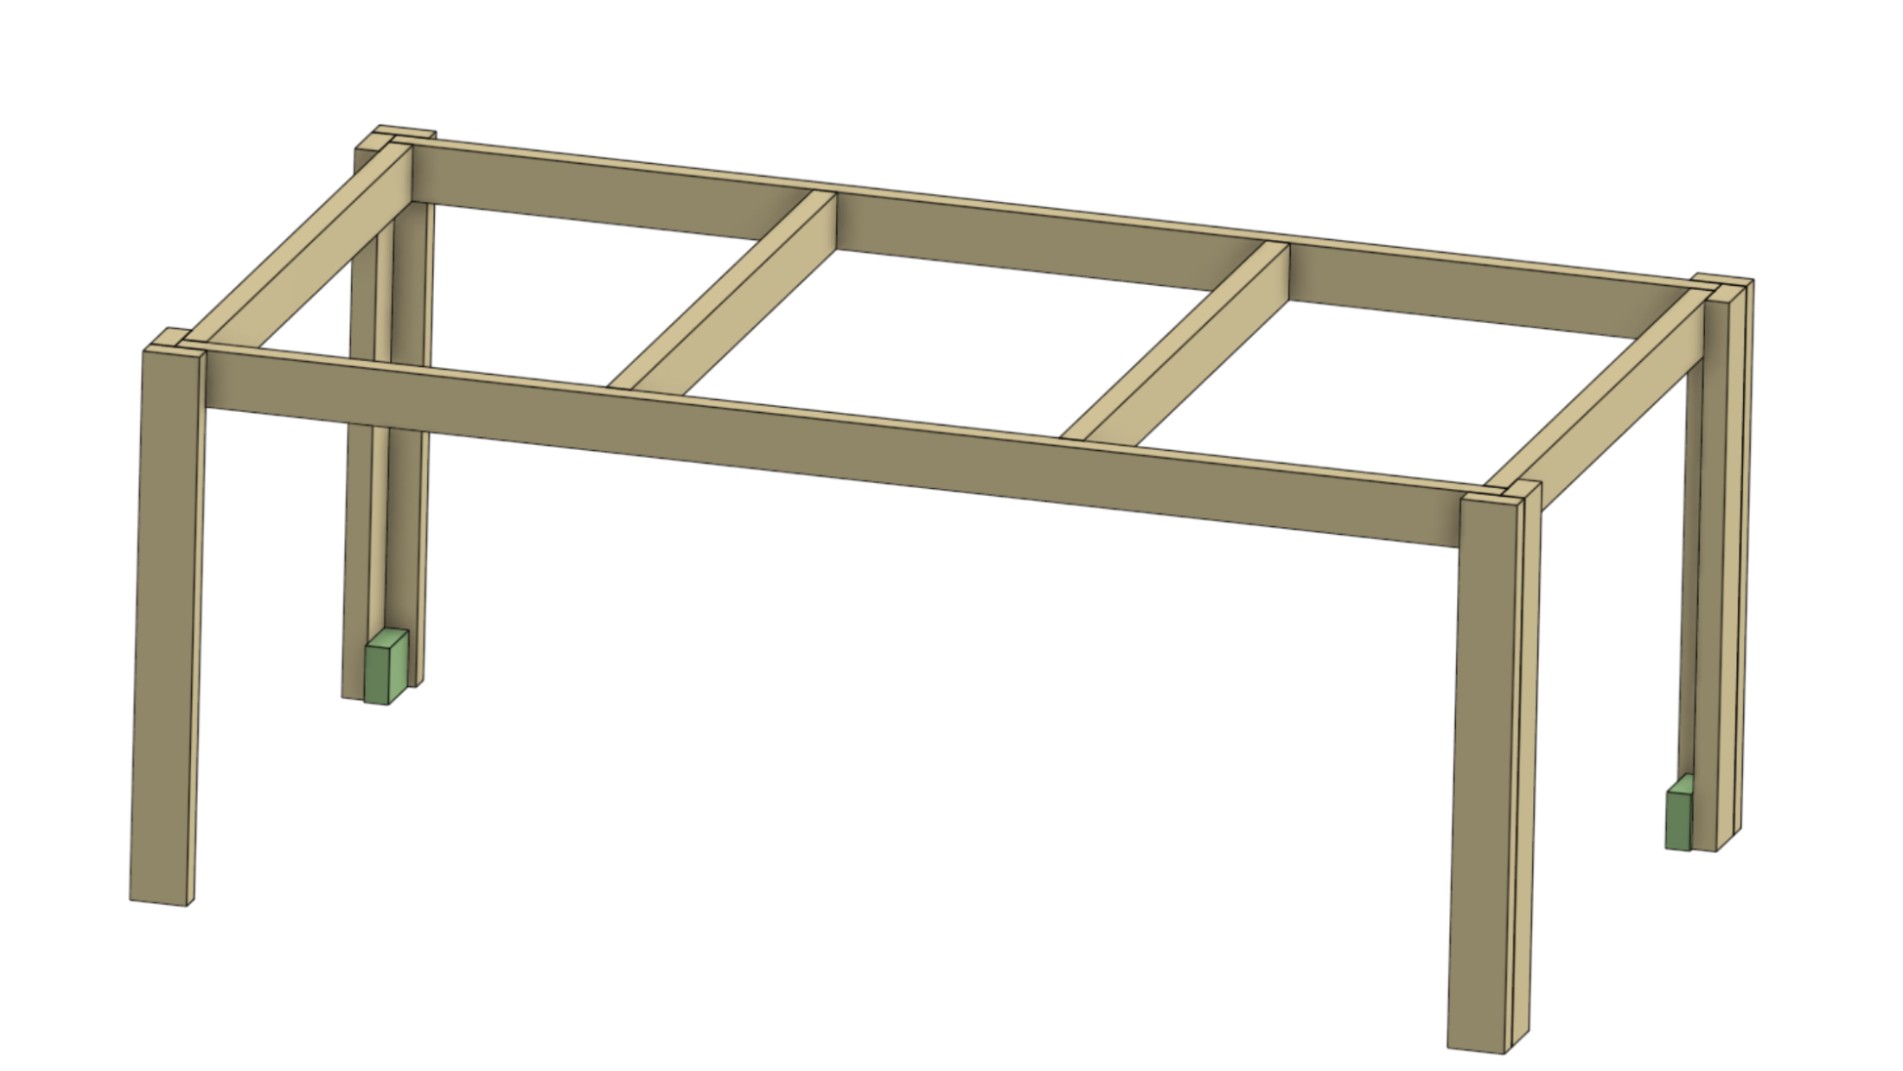
Take two 2×4 offcuts and place them as shown.
-
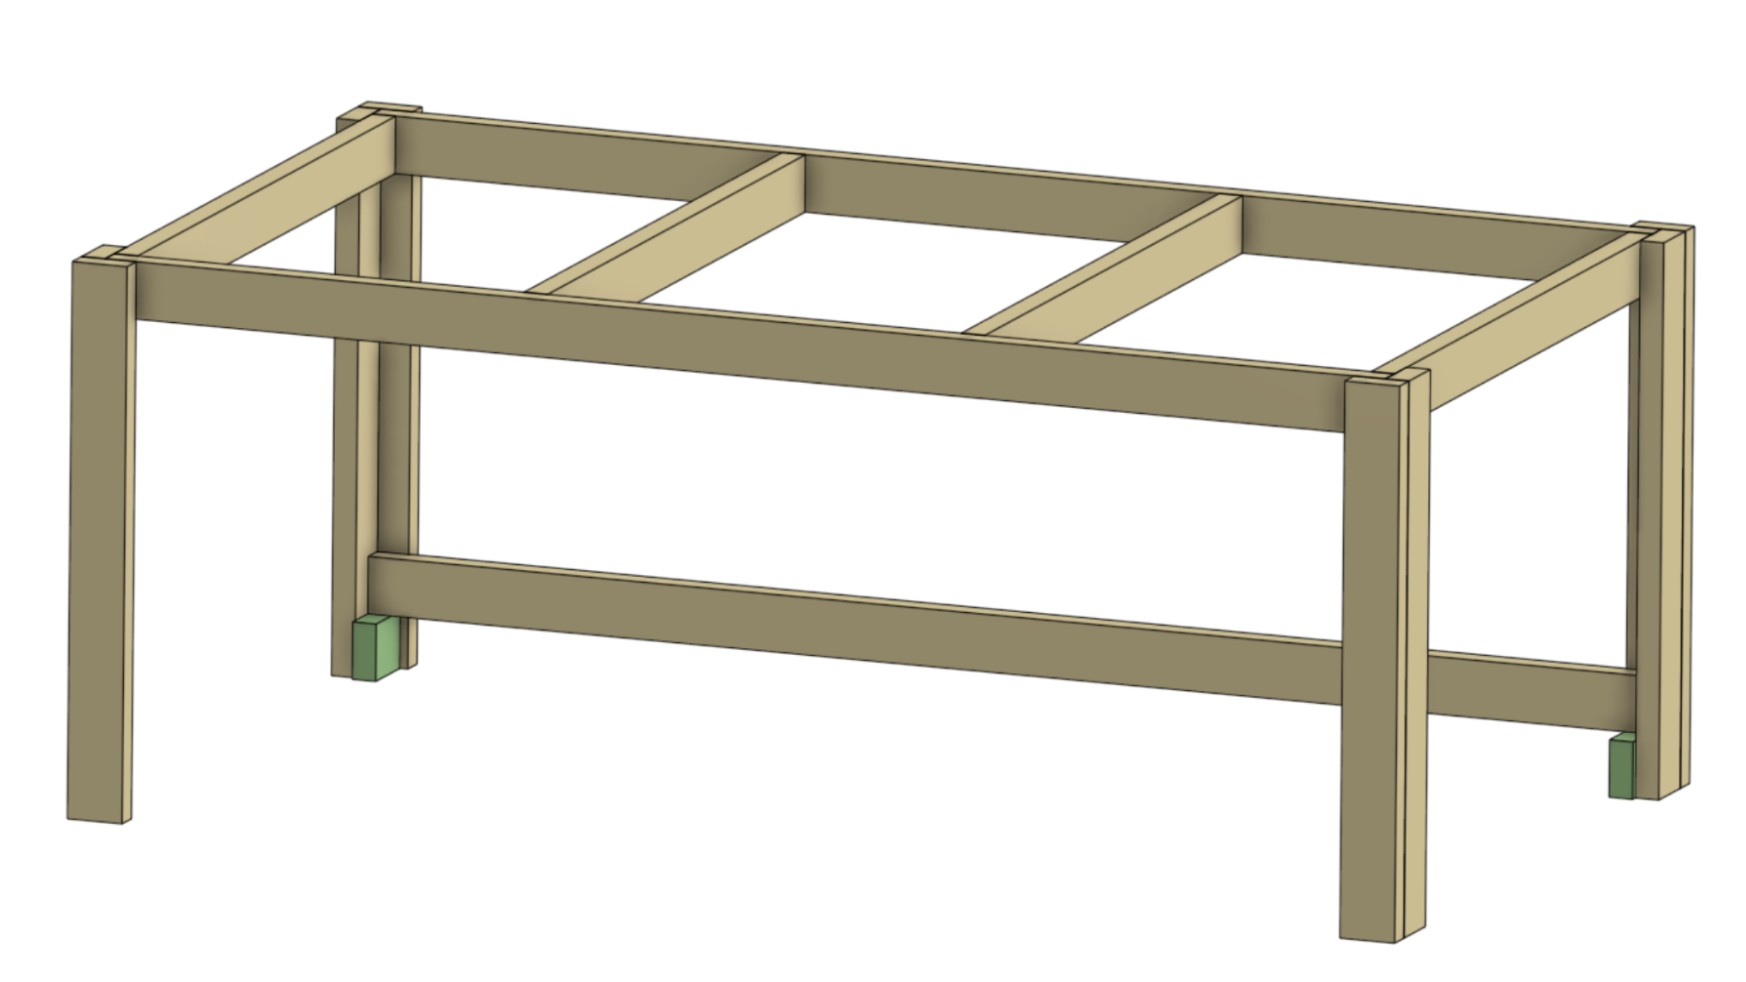
Place the 82″ piece on top of the offcuts.
-
Secure both sides of the 82″ piece with screws.
-
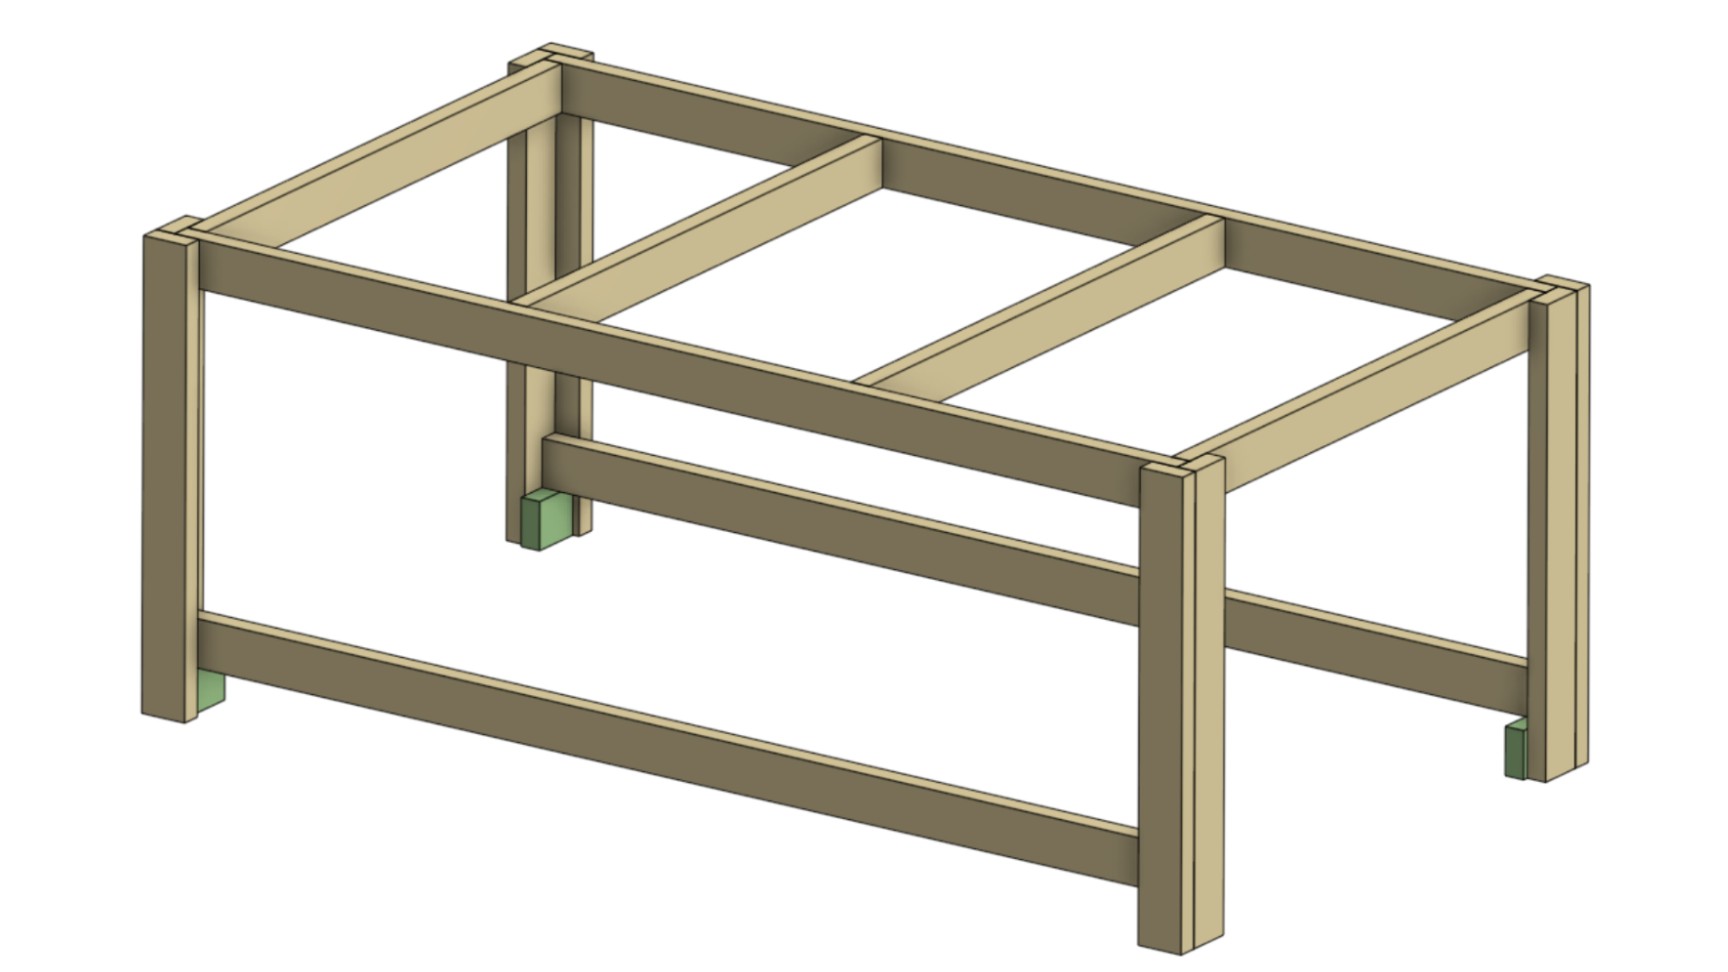
Repeat the previous three steps to mount the second 82″ piece.
-
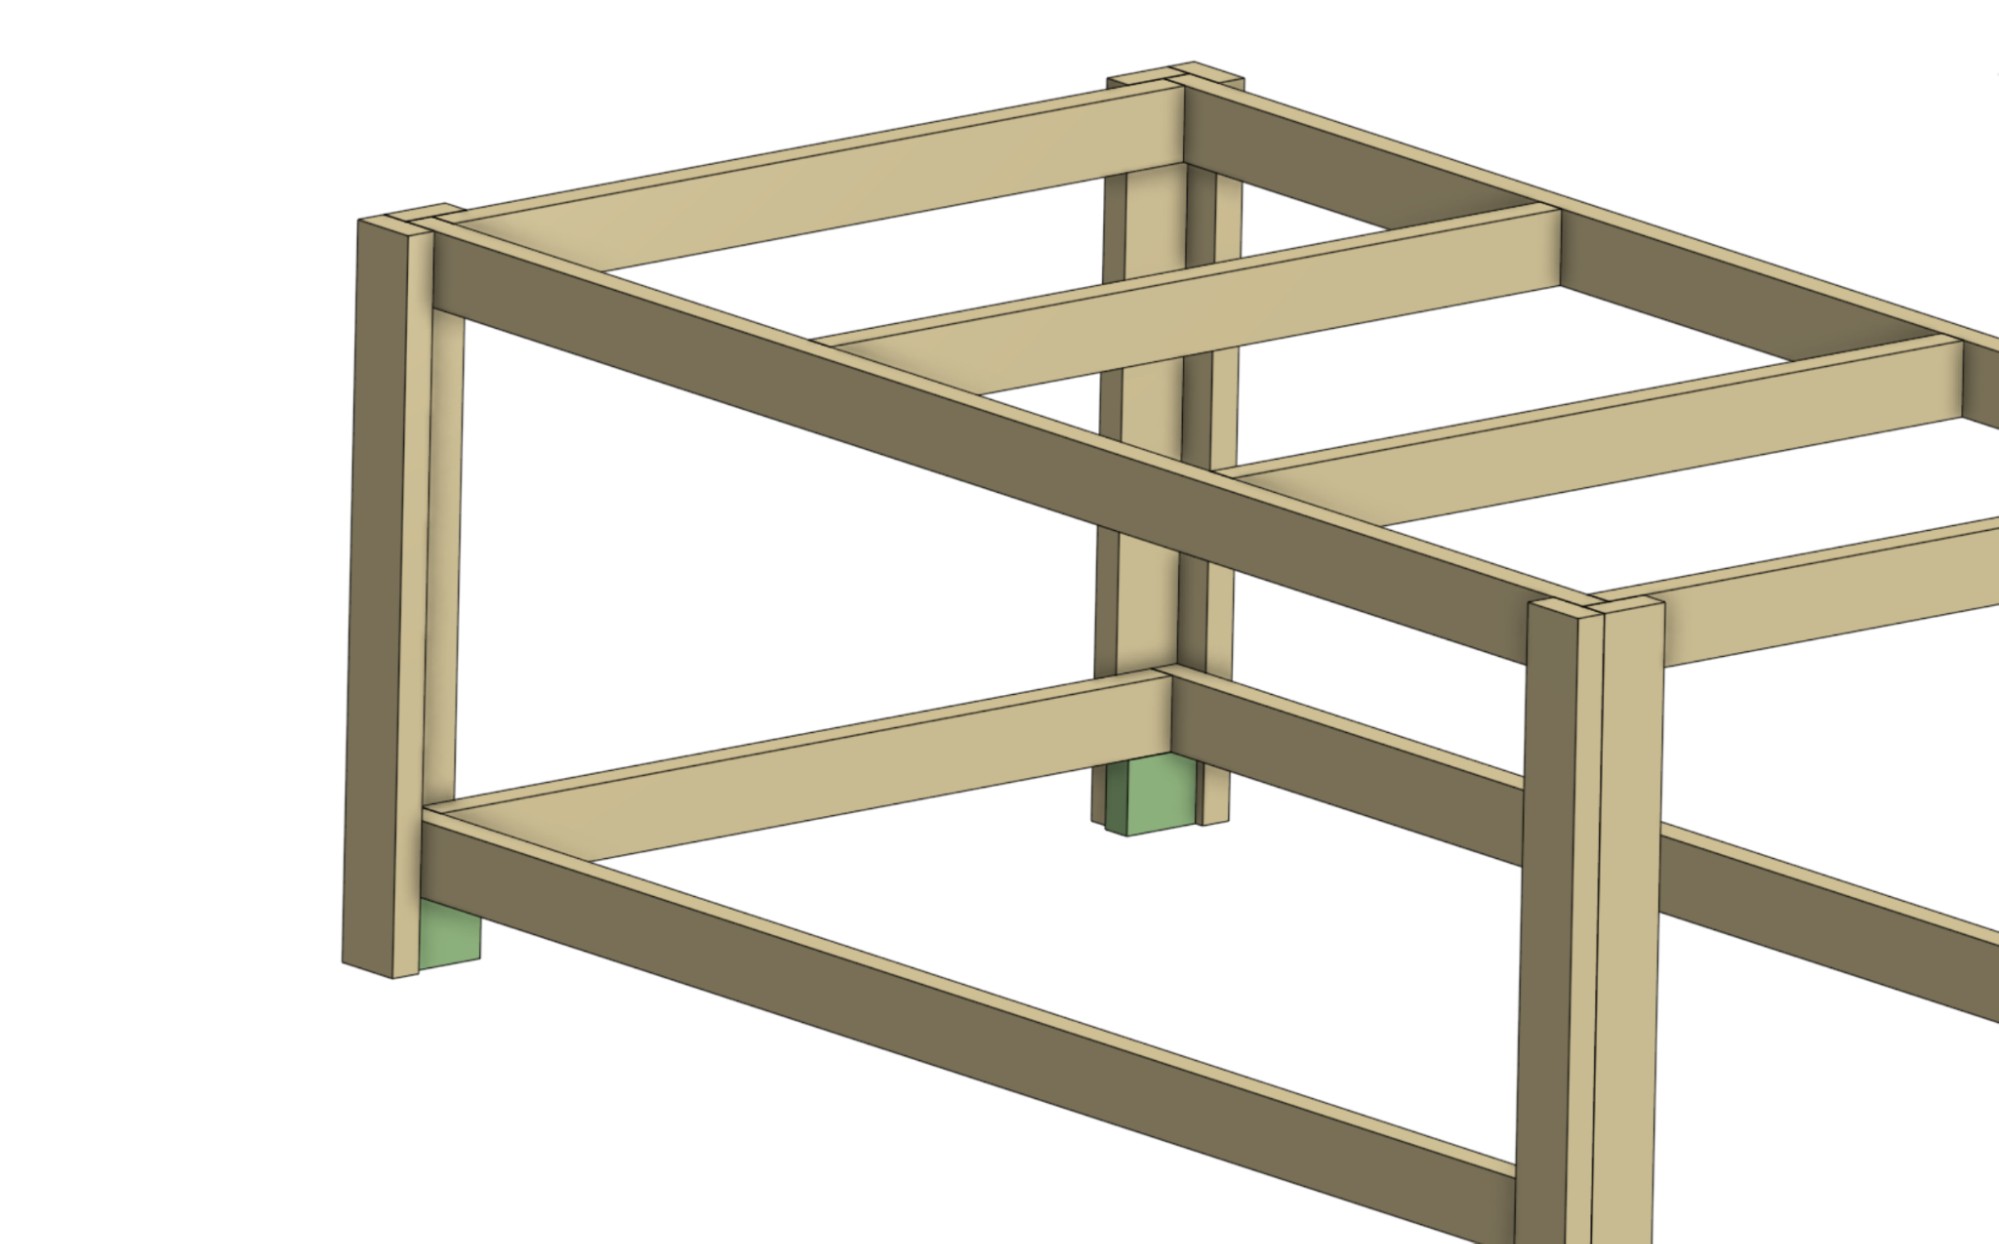
Place the 42″ piece in position as shown.
-
Secure both sides of the 42″ piece with screws.
-
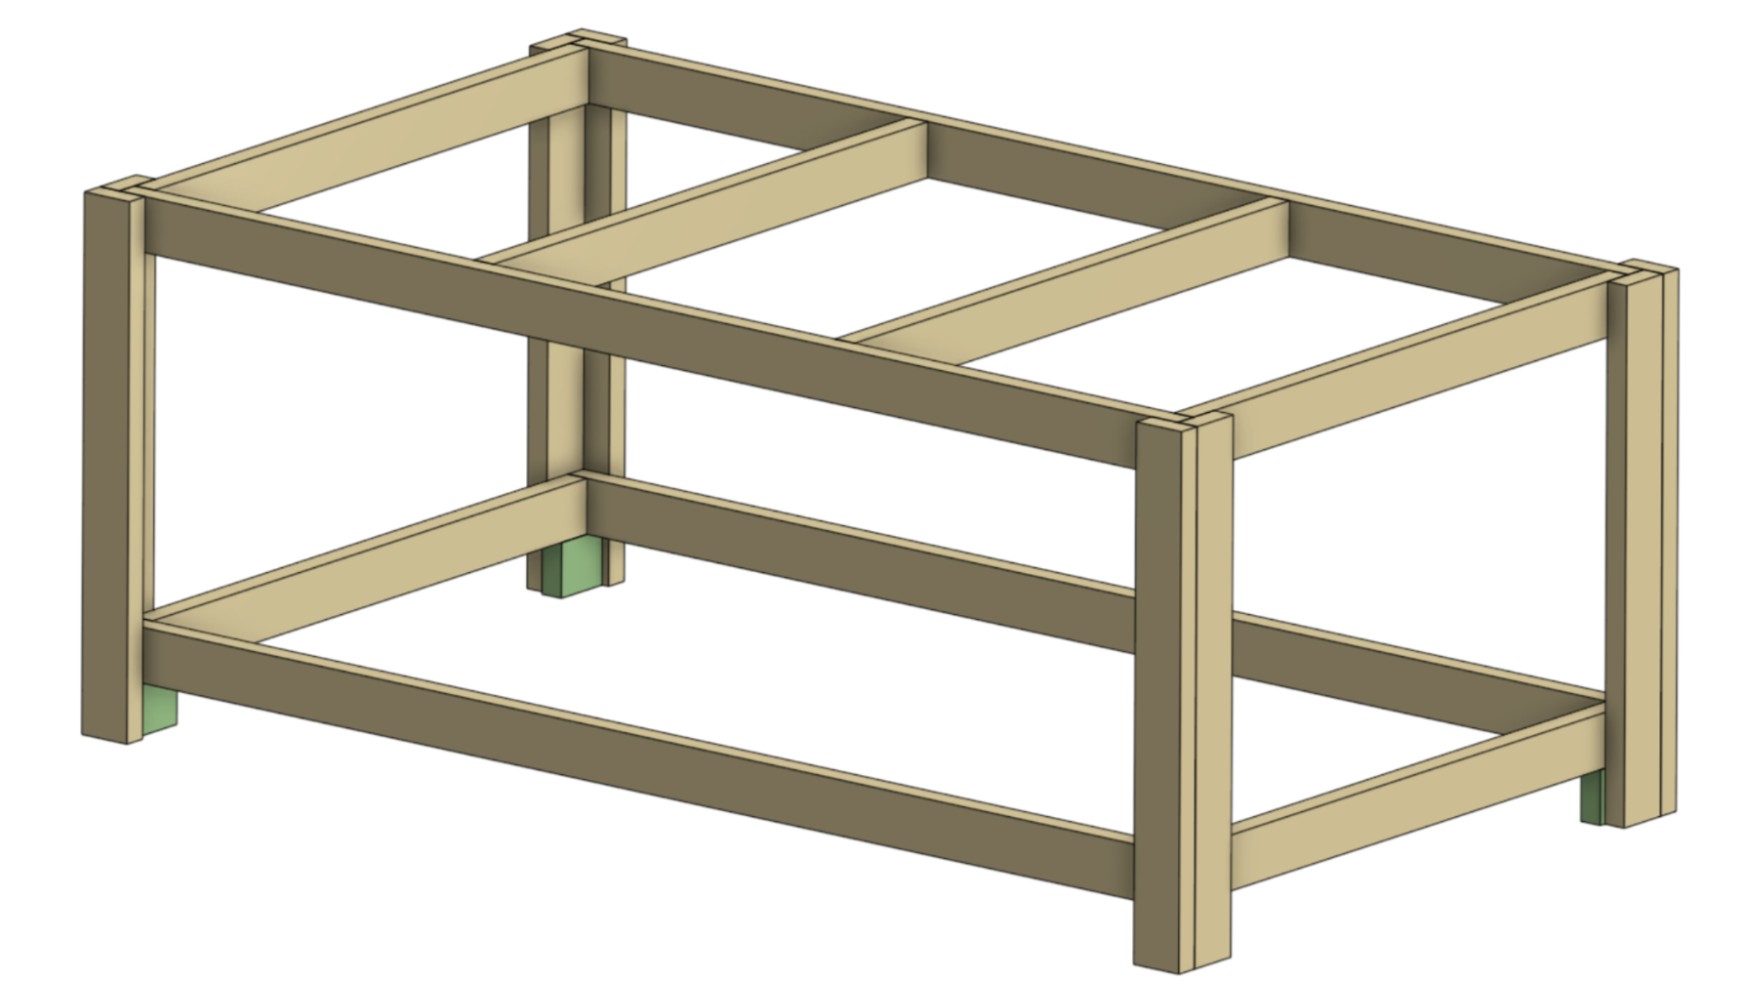
Repeat the previous three steps to mount the second 42″ piece.
-
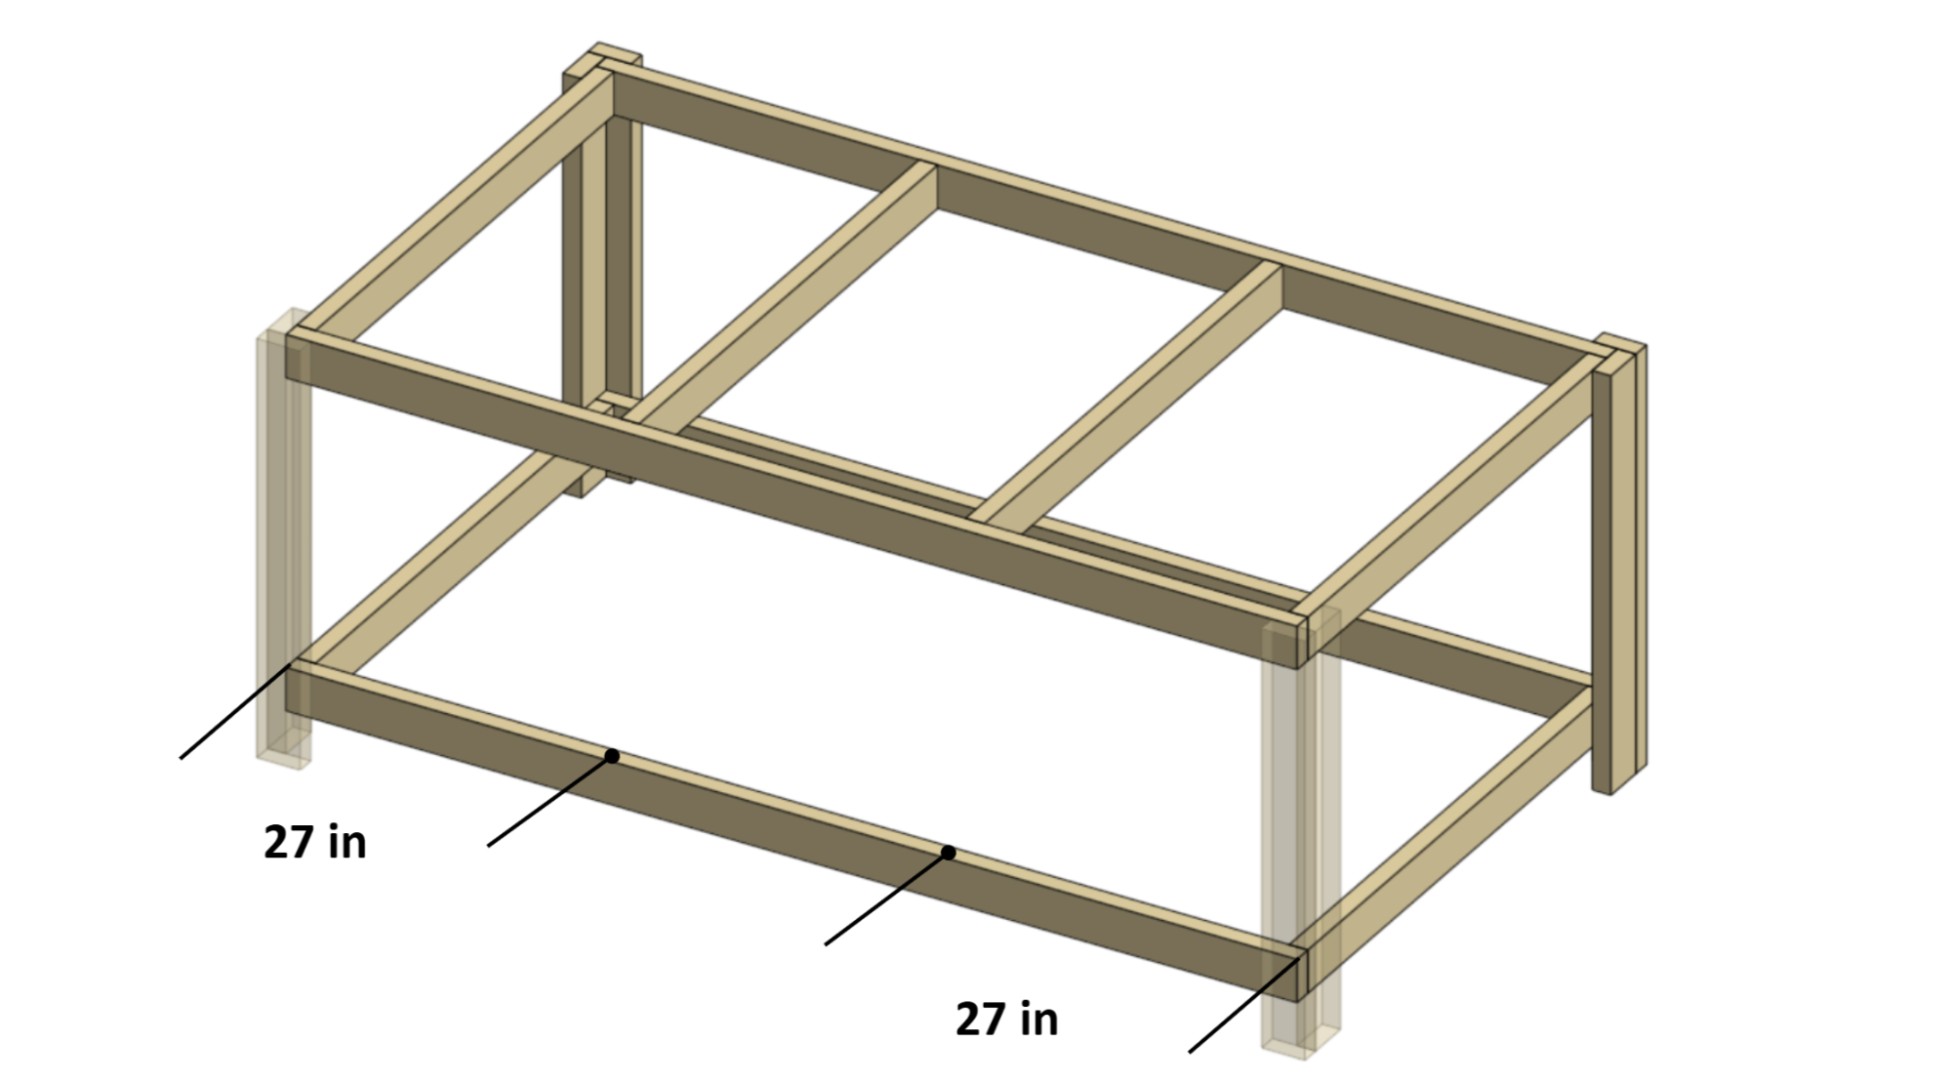
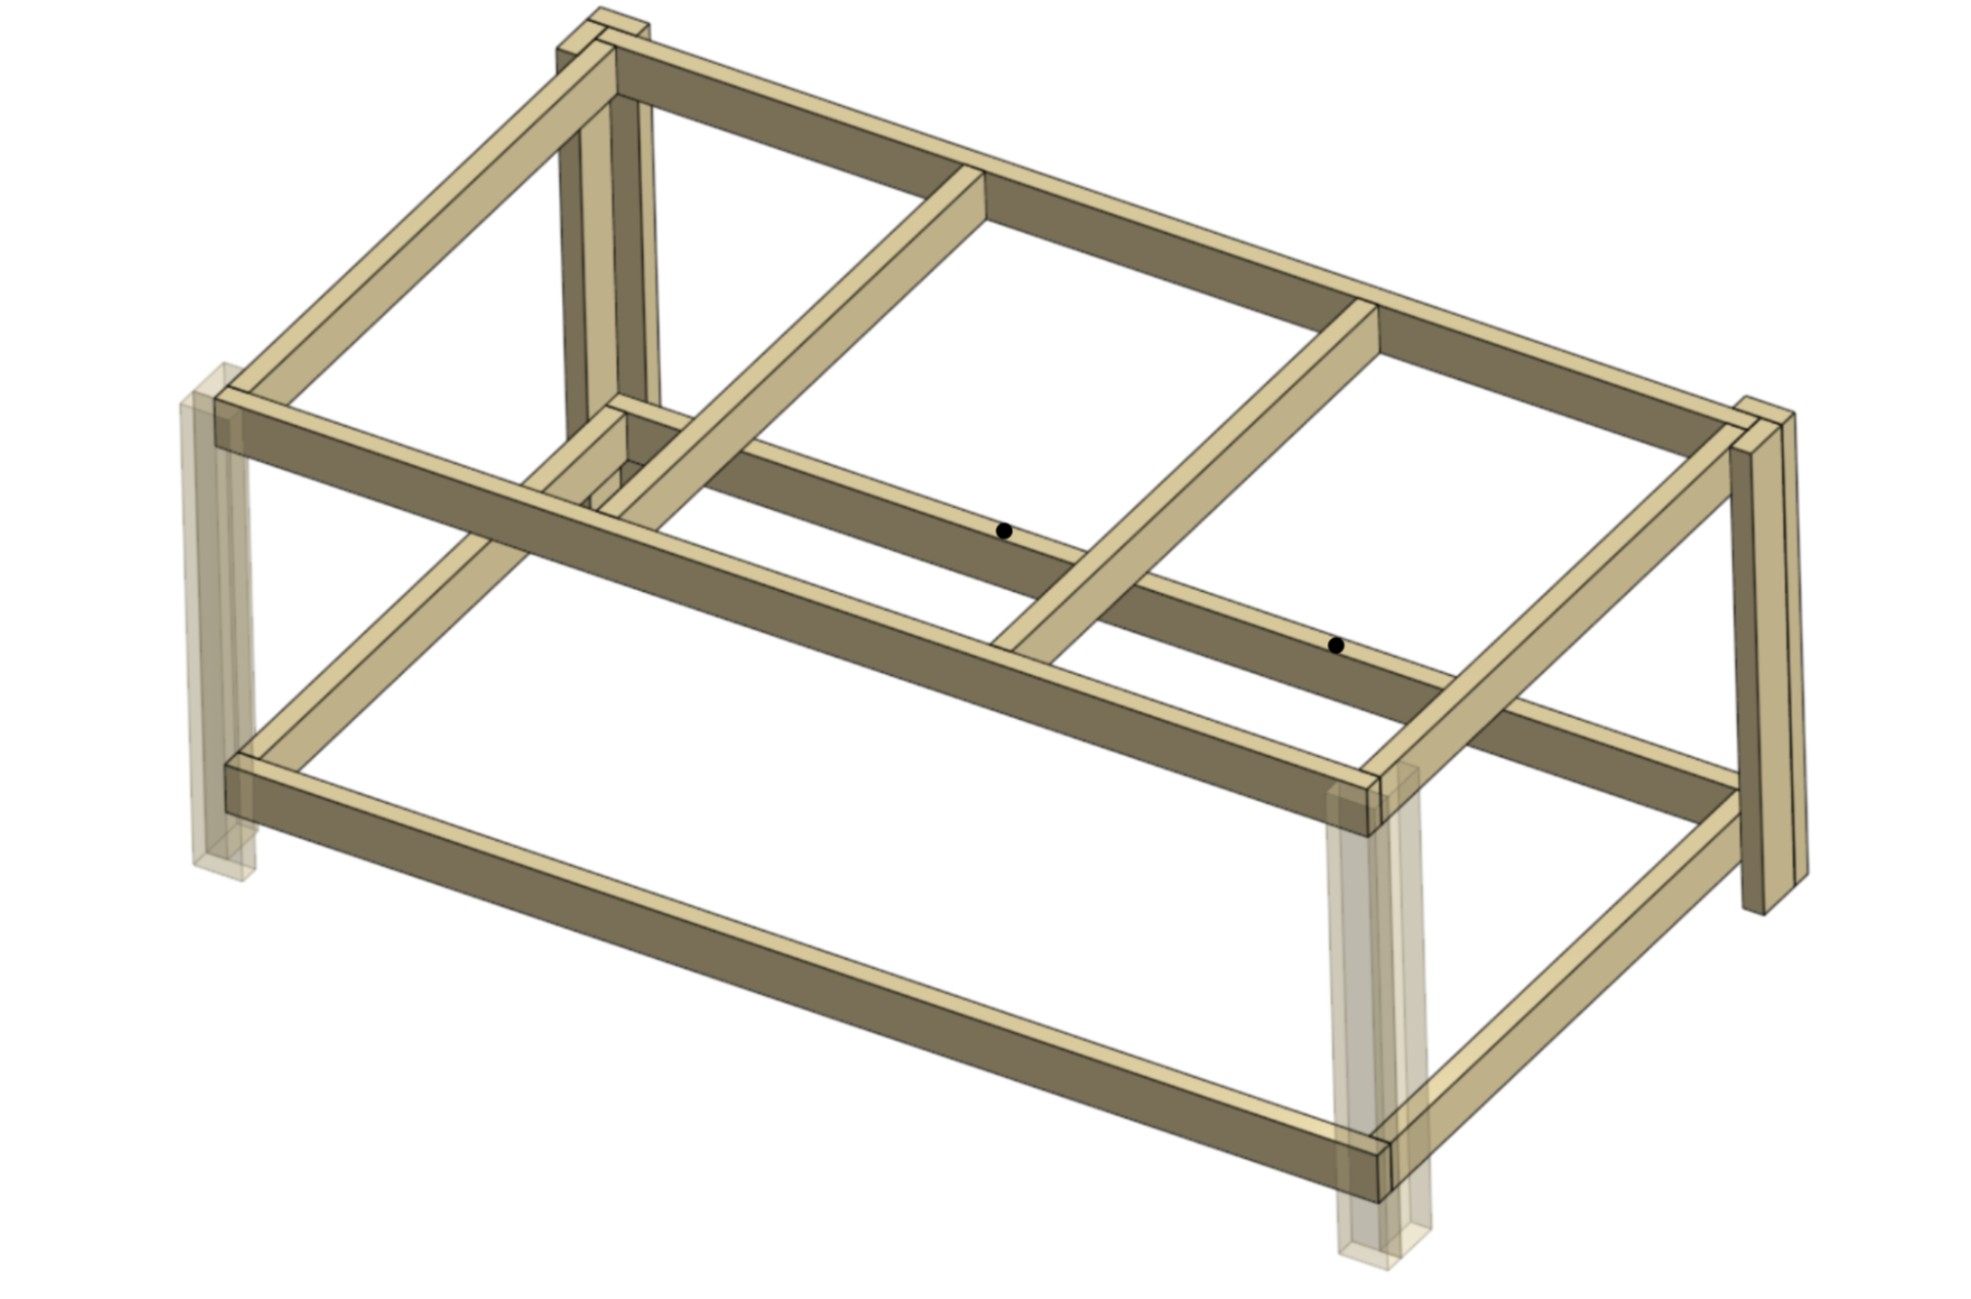
Make two marks on an 82″ piece, 27″ from both ends.
-
Make the same marks on the other 82″ piece.
-
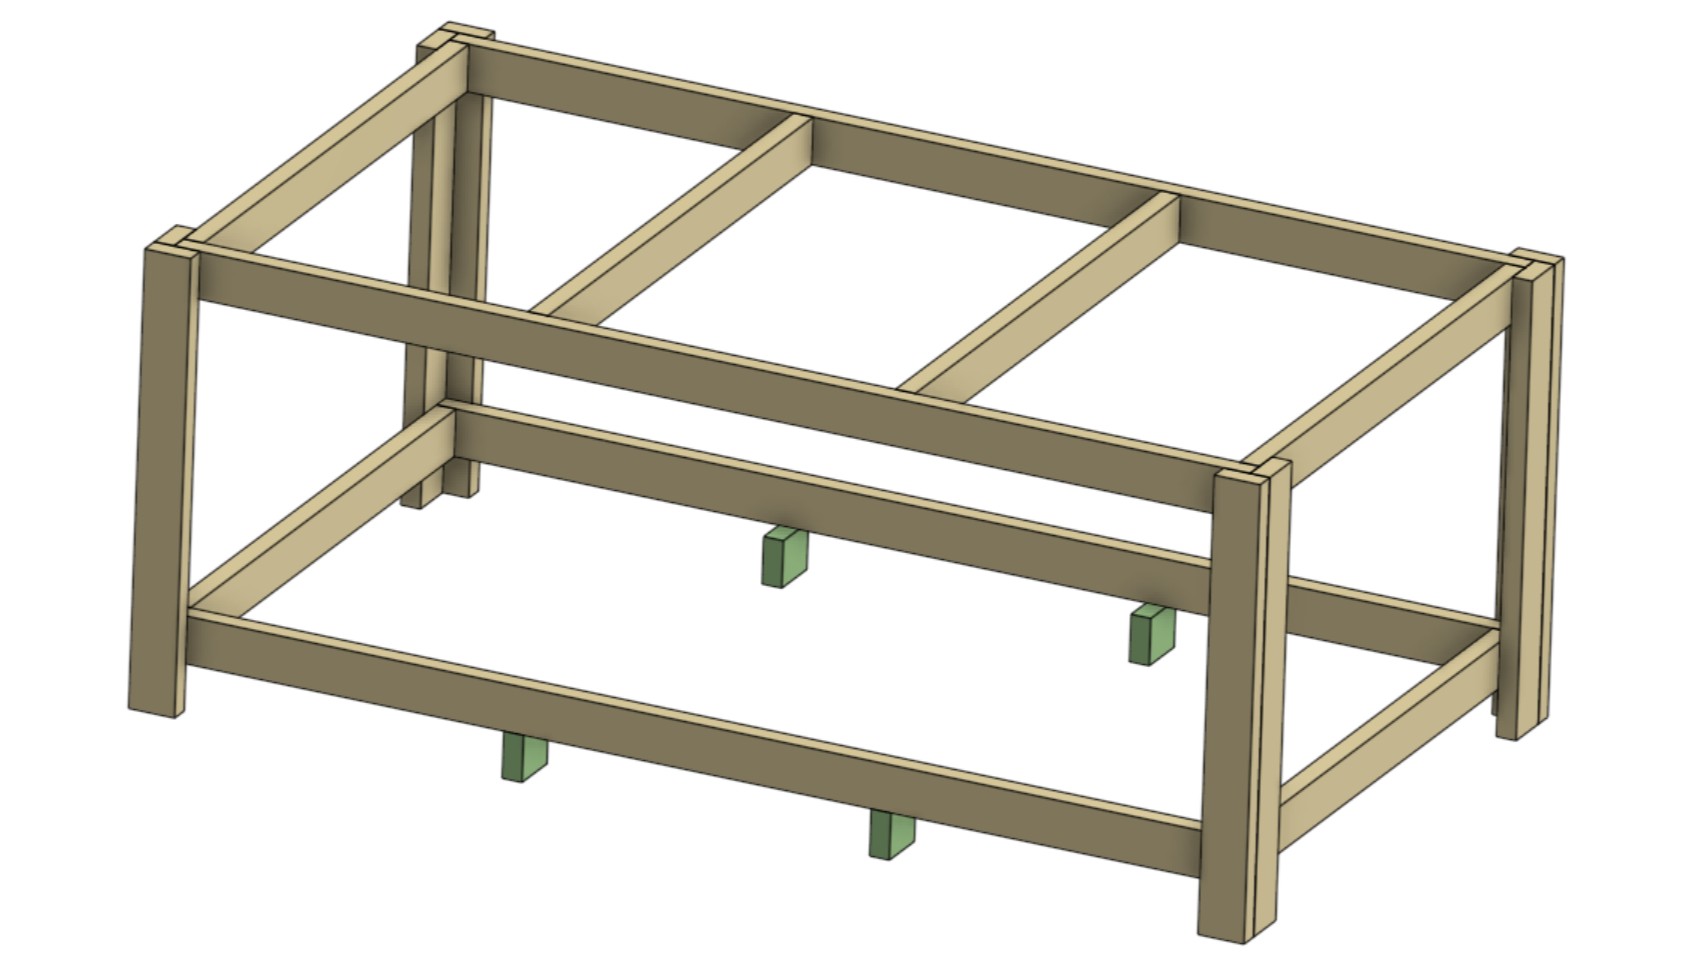
Place the offcuts against the marks.
-
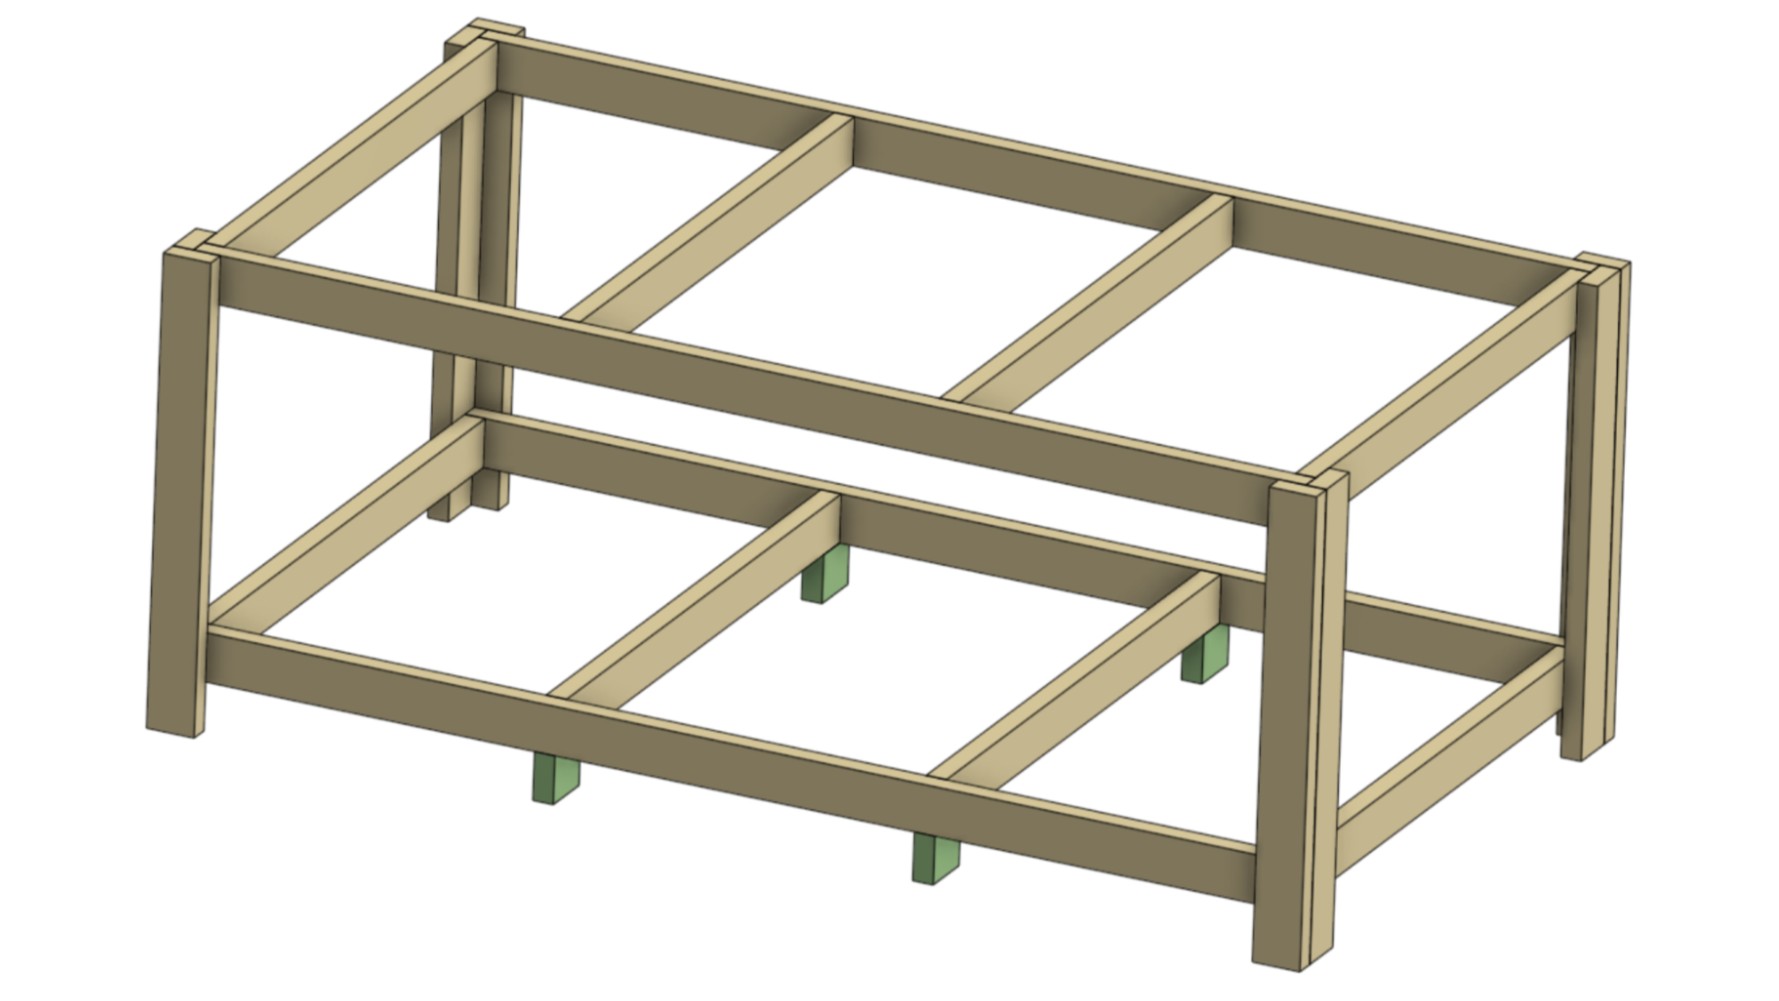
Place the two 42″ pieces against the marks as shown.
-
Secure the ends of each 42″ piece with screws.
-
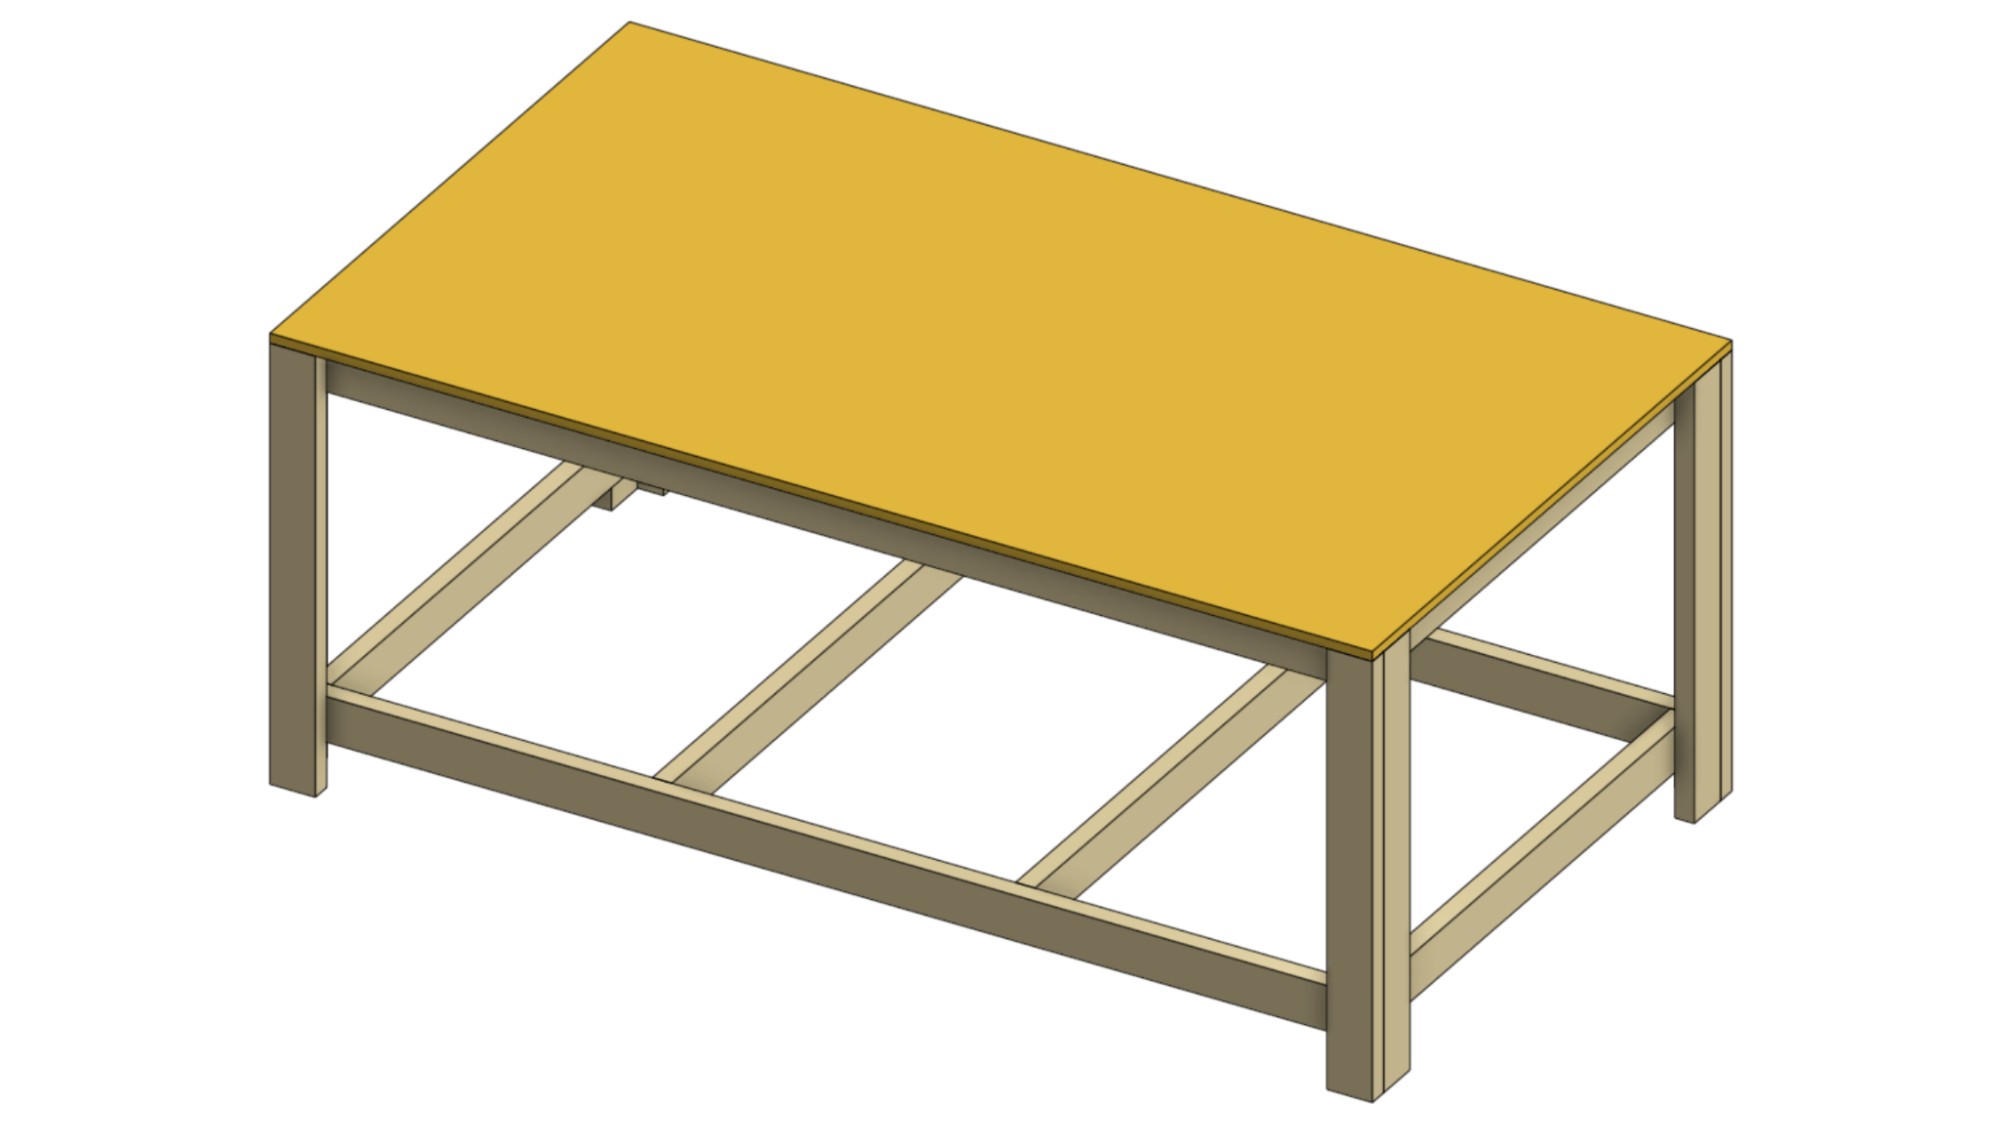
Place the MDF board on top of the table.
Note: You may find that your table is not perfectly square and does not precisely fit the MDF board. To fix this, secure one side of the MDF board to the table with screws. Then, move the other side of the table to match the MDF board and secure it with screws.
-
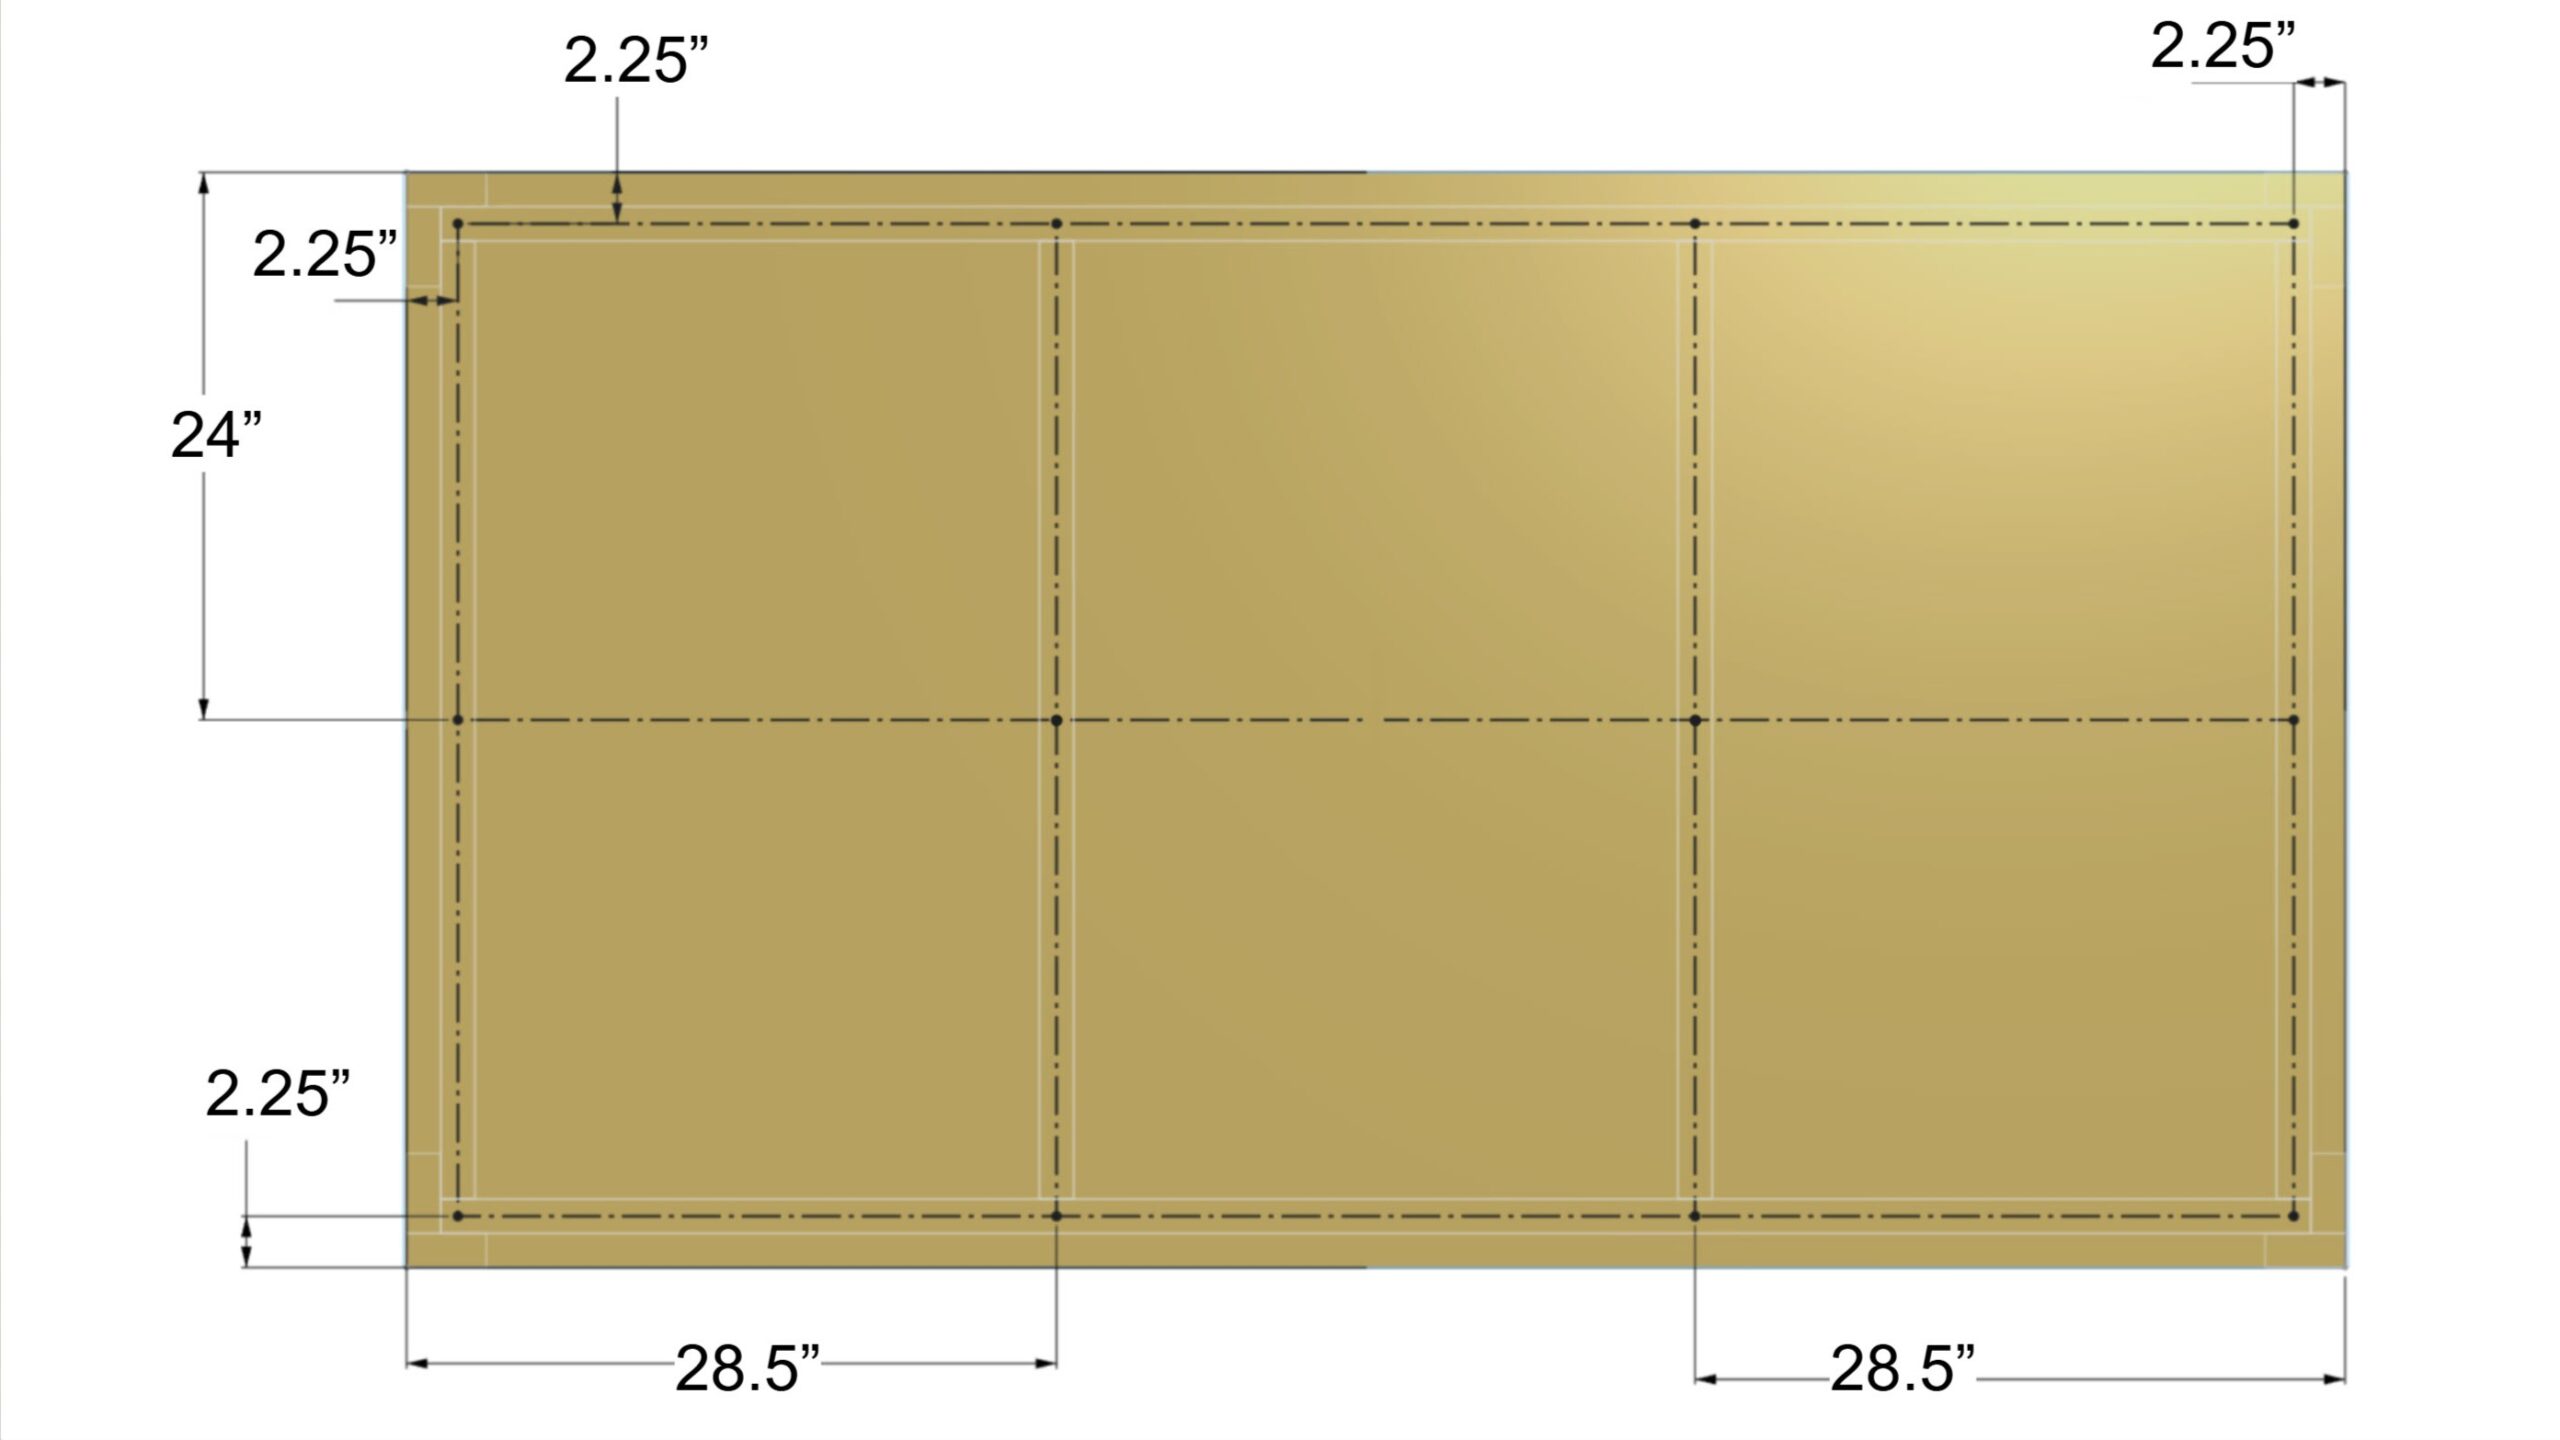
Mark the 12 screw locations as shown in the image below.
-
Secure the MDF sheet with screws.