Homing / Limits
Before getting into the weeds on how you can set up limit switches and homing on your CNC for various benefits, it would be good to briefly cover some of the basics:
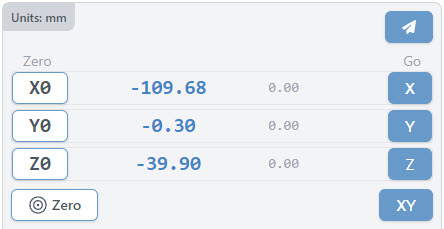
- On the main Carve page, above the jog controls, you should see a set of numbers and buttons that make up your machines ‘DRO’ (Digital Read Out). You can think of it as similar to a car navigation system.
- The buttons around this area allow you to make quick movements (blue buttons) and set the blue numbers back to a value of 0.
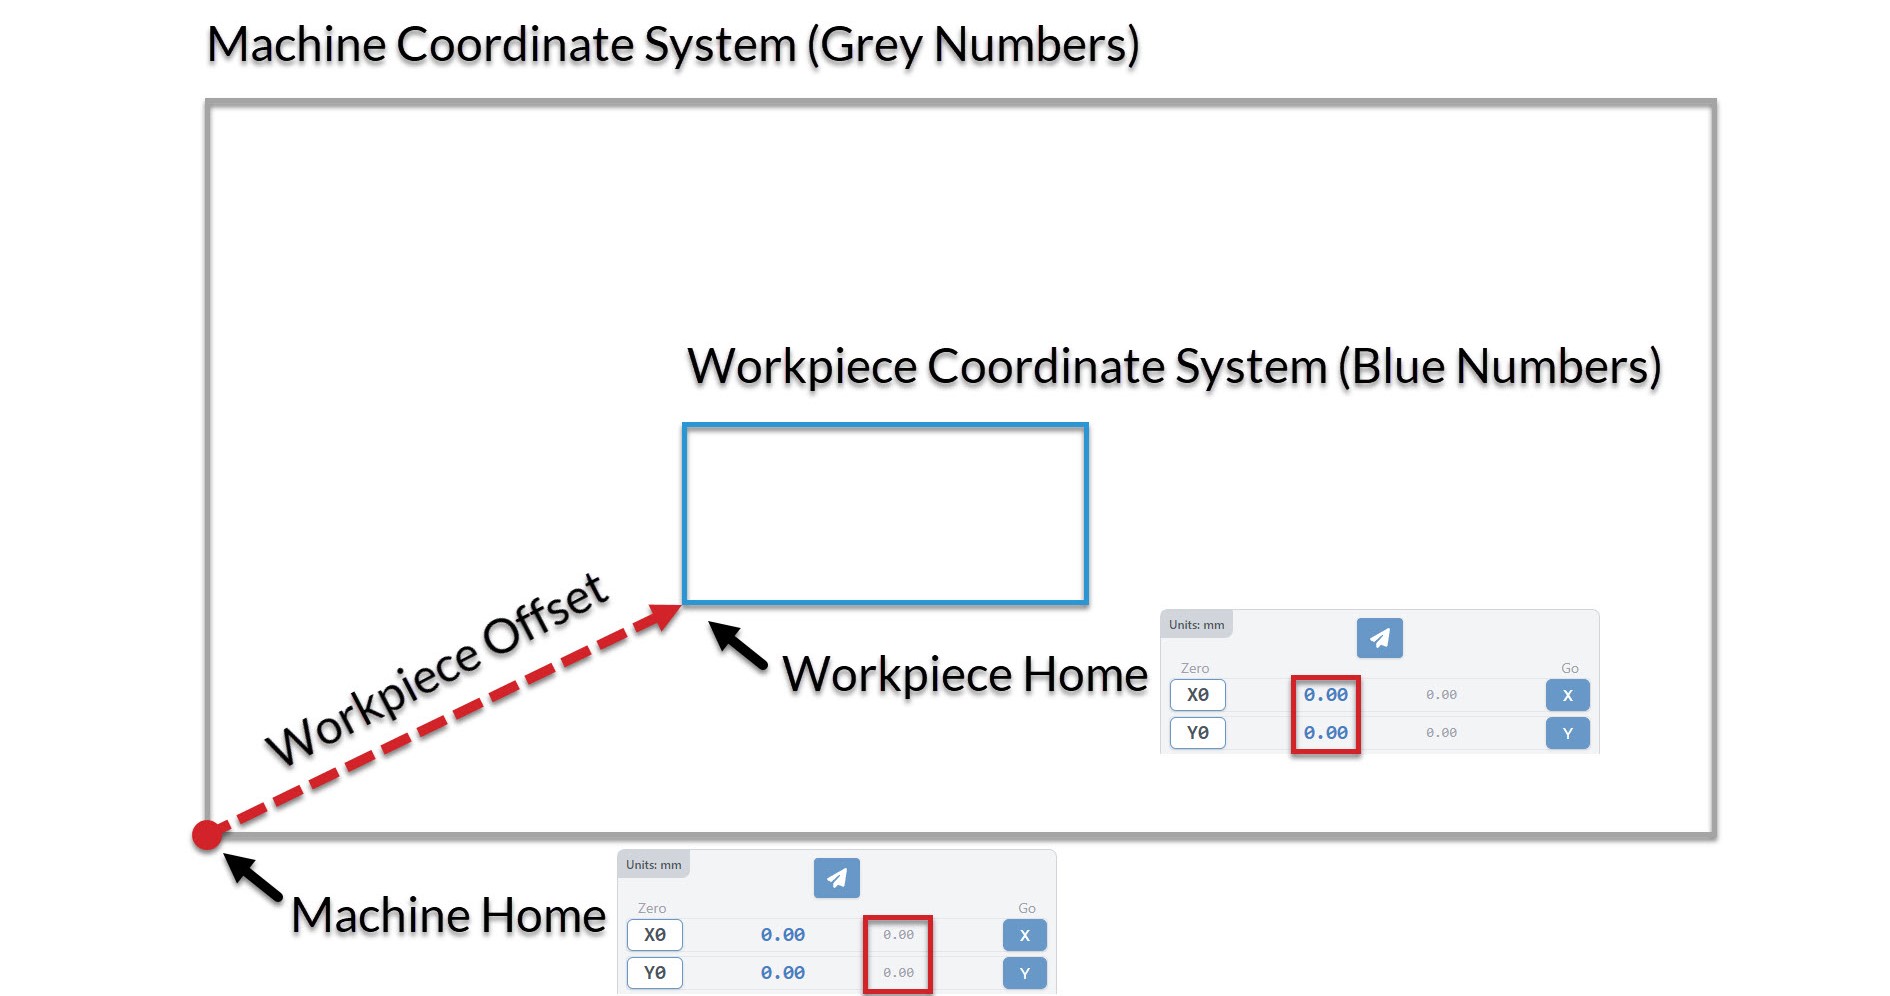
- You’ll see two sets of numbers, where the blue ones on the left are your Work Coordinates and the gray ones on the right are your Machine Coordinates; these are the two primary coordinate systems that guide a CNCs movements.
- A CNC’s Work Coordinates are very often used/edited in day-to-day cutting since they describe the exact location of the project that you’re planning to cut.
- This is effectively the ‘working area’ of your project.
- Once you’ve placed your material on the machine bed, you’ll bring the cutting head to the starting point for the project (also known as the ‘zero point’ or ‘origin’) then let the machine know that it’s now at the starting location.
- When you’re at the starting location for your project, the work coordinates should all read as ‘0’, but if you manually move your CNC to the left, down, or towards you then the number will start to decrease, or they’ll increase if you move right, up, or away from you.
- The Machine Coordinates starts to become more important once you’ve set up Homing on your CNC
- These numbers are very similar to work coordinates, except they describe the ‘working area’ of the CNC itself.
- This means that once you turn on your machine and home it, it’ll now know exactly where it’s located within its physical size constraints, it’ll also know the exact offset between the homing location and the location of your work coordinates.
- This starts to become powerful because you can then do things like resume cutting your job after a loss of connection or power-outage for example. Using homing and machine coordinates gives your CNC the memory of its location no matter the circumstances.
- Using machine coordinates without homing is also still possible, but you’d need to bring your machine to a reliable location using probing or some other method, then power-cycle the machine, since without homing the machine coordinates are set at the time the machine first powers on.
Workspaces
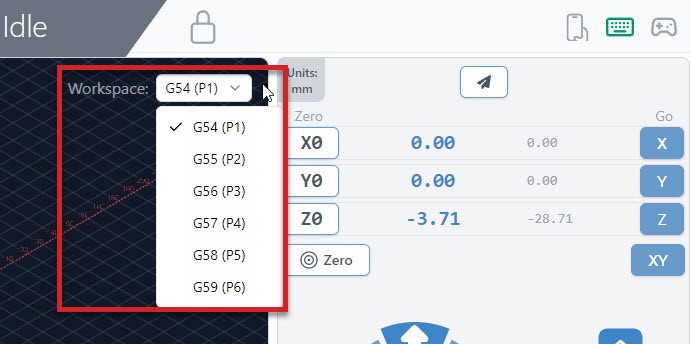
Another concept worth mentioning is workspaces. Usually you would only have one ‘zero position’ per project, but what about cases where:
- You need to reorient your material to cut at it from a different side
- You plan to do a series of carves that require different zero positions
- You want to align your projects to jigs you’ve fixed to the CNC bed
In these cases, workspaces are basically the ability for you to set multiple work coordinates that your machine will remember and can toggle between. All you have to do to use these is select a new workspace using the dropdown on the Carve page, after which everything else will continue to behave as normal including zeroing, probing, running files, and more.
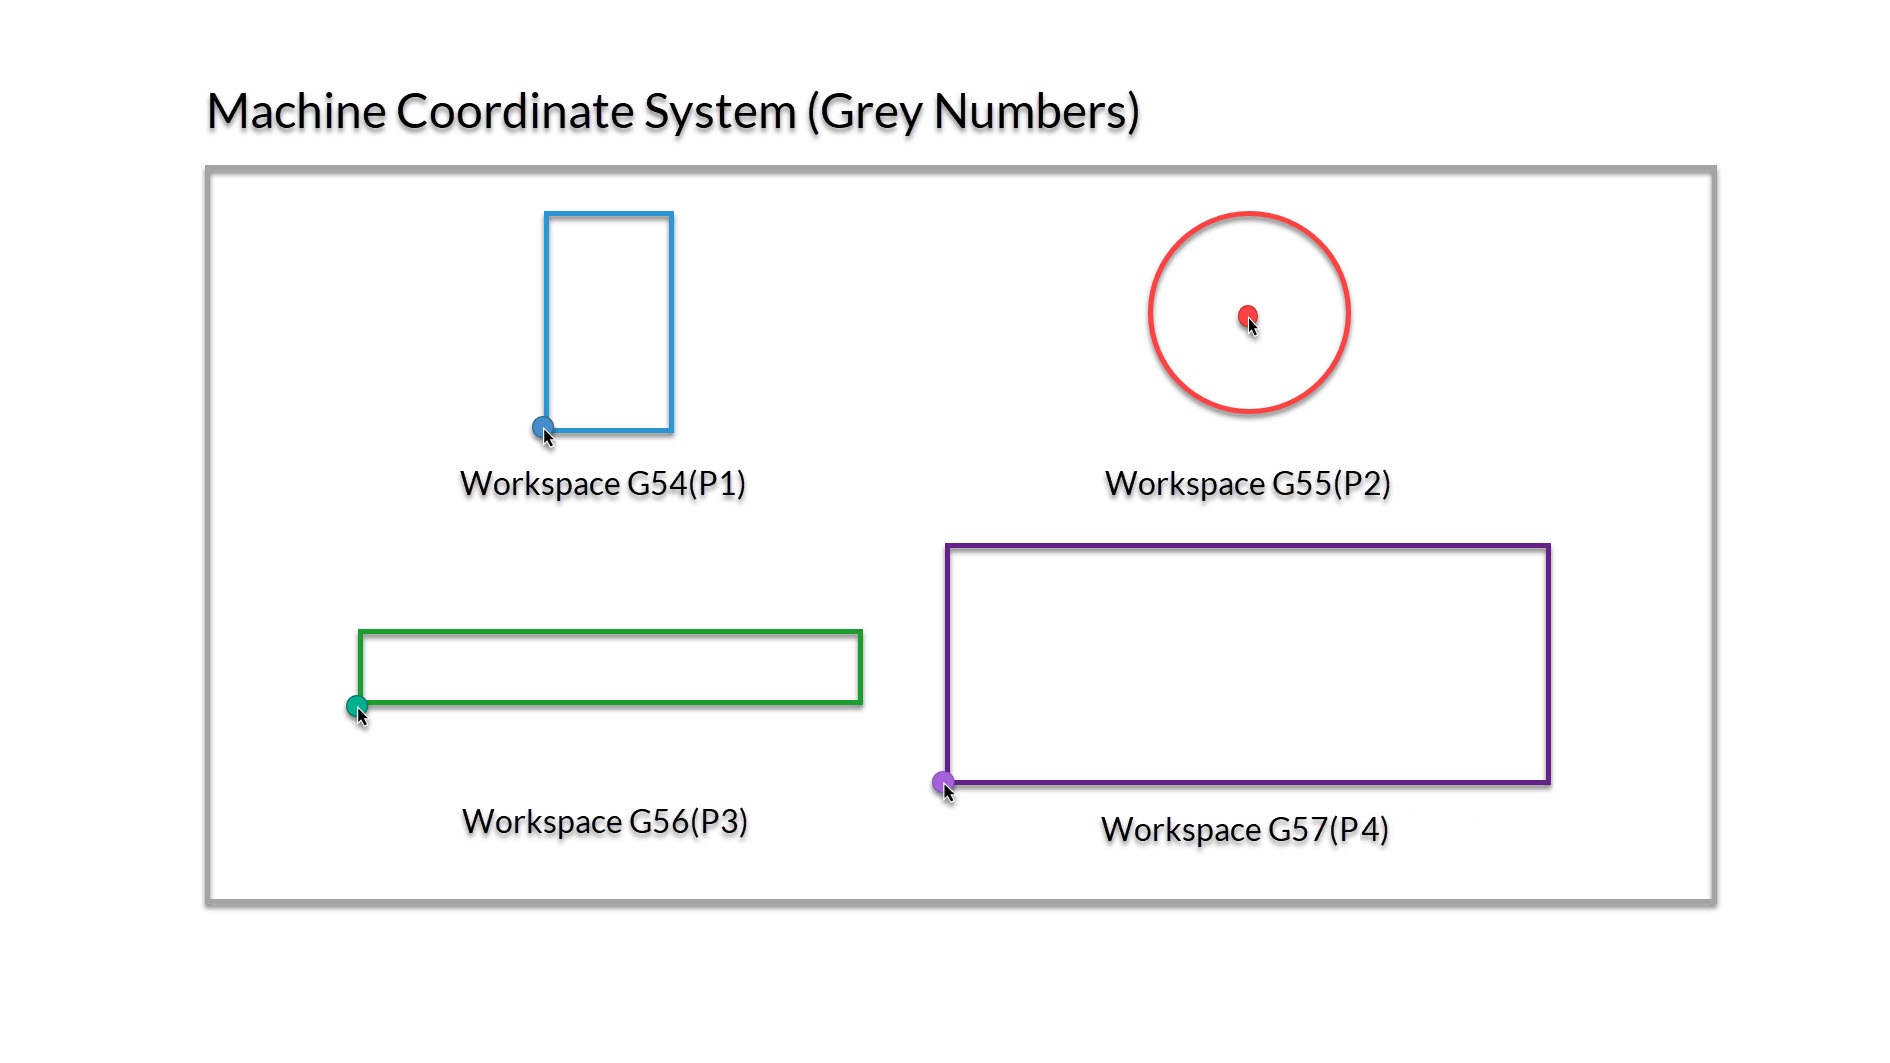
In the image below you can see a demonstration of setting up 4 different workspaces to align to jigs on the wasteboard of the CNC. Each of these has their zero set to the bottom left corner, except the circle jig which has the zero placed at the middle.
This is also discussed at about 5:30 of the video below:
Setting up Homing
The summary of the benefits of homing is that it allows your CNC to reliably know its own location. This provides many benefits like job recovery and using workspaces for more complex jobs or batch cutting. To get homing working on your CNC, you’ll need:
- Limit switches (also referred to as end stops or homing switches) which are installed at one or both ends of each movement axis of the CNC. You can see an example of these on our store.
- Homing enabled in firmware which can be done through the Config tab
- Machine limits set up to match the physical travel distances of your CNC
- Any other customization you’d like to make for your particular setup
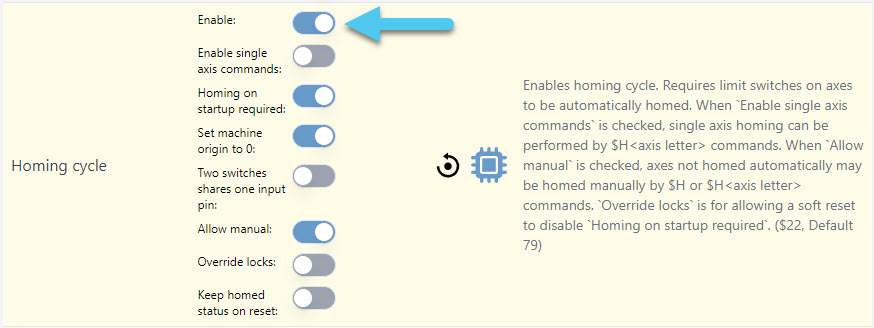
Going to the Config Tab and scrolling to the Homing/Limits section you’ll see an option to turn Homing on:
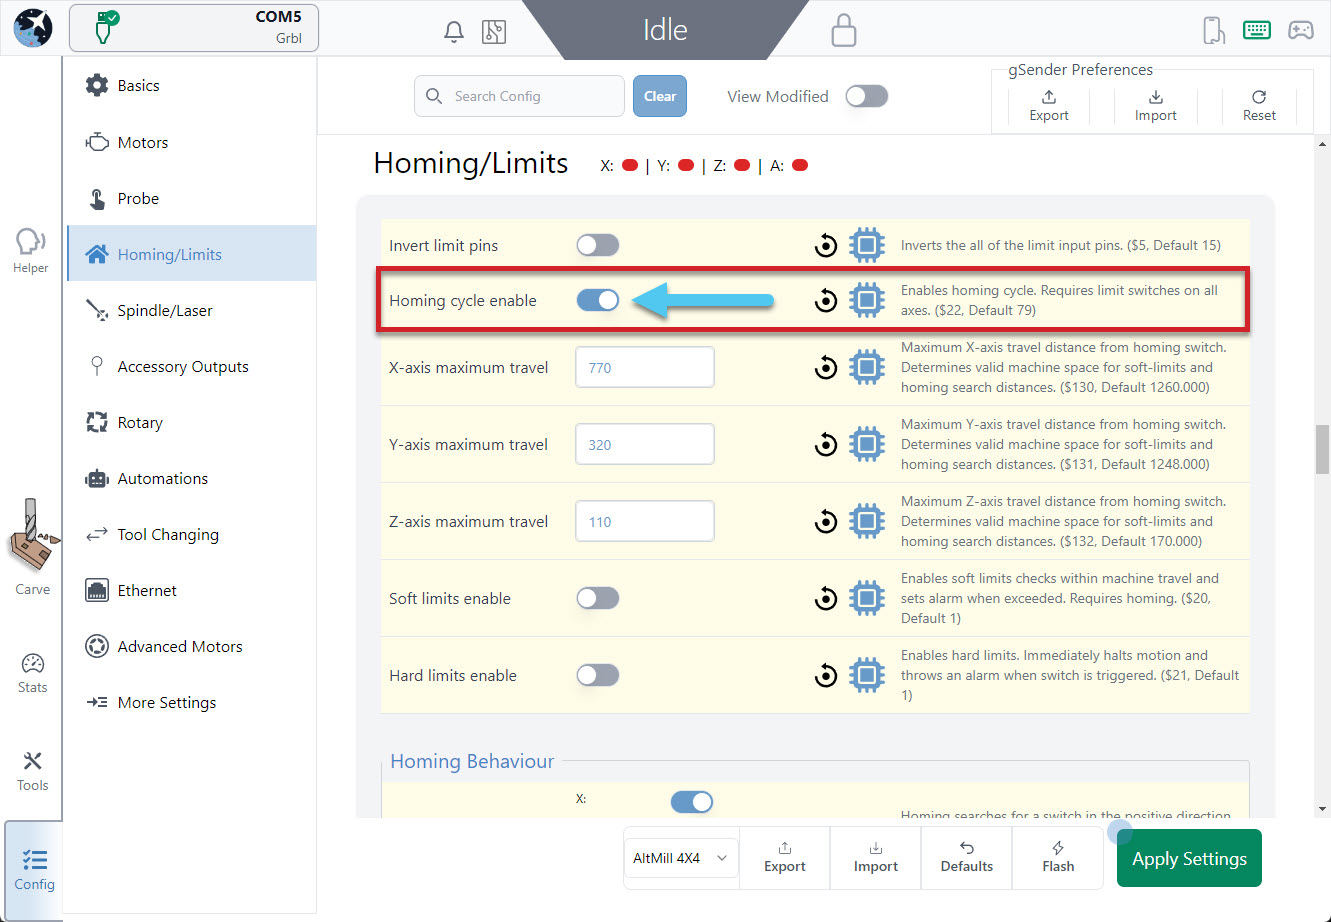
grblHAL machines will also have additional options to choose from, like homing single axes, requiring homing on startup, set machine origin to 0, and more. Typically you’ll at least want to turn on ‘Set machine origin to 0’.
While you’re here, we’d also recommend that you use the lights at the top of the Homing/Limits section to check that all your limit switches are plugged in and working correctly. They should be red by default and light up green when they’re triggered, and if that’s not the case then you might want to change your settings or check your wiring.
Once you apply settings, you’ll find back on the main Carve screen that there are some new buttons available:
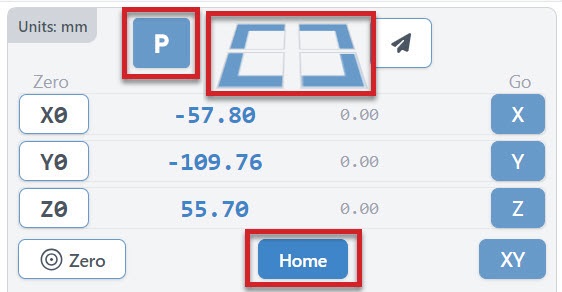
- The Home button will help you to manually home your machine any time you need (sends the typical $h command). For your first time homing, have your hand on the machines E-stop in case the homing goes the wrong direction. Many machines home to the front left corner or the back right, so if your machine is behaving incorrectly then go back to Config to adjust your homing directions.
- Four Rapid-Travel buttons to move your CNC at its maximum speed to any of your machine’s 4 corners (offset by 5mm). These should only be used once your machine is homed and you’ve correctly set up your machines maximum travel.
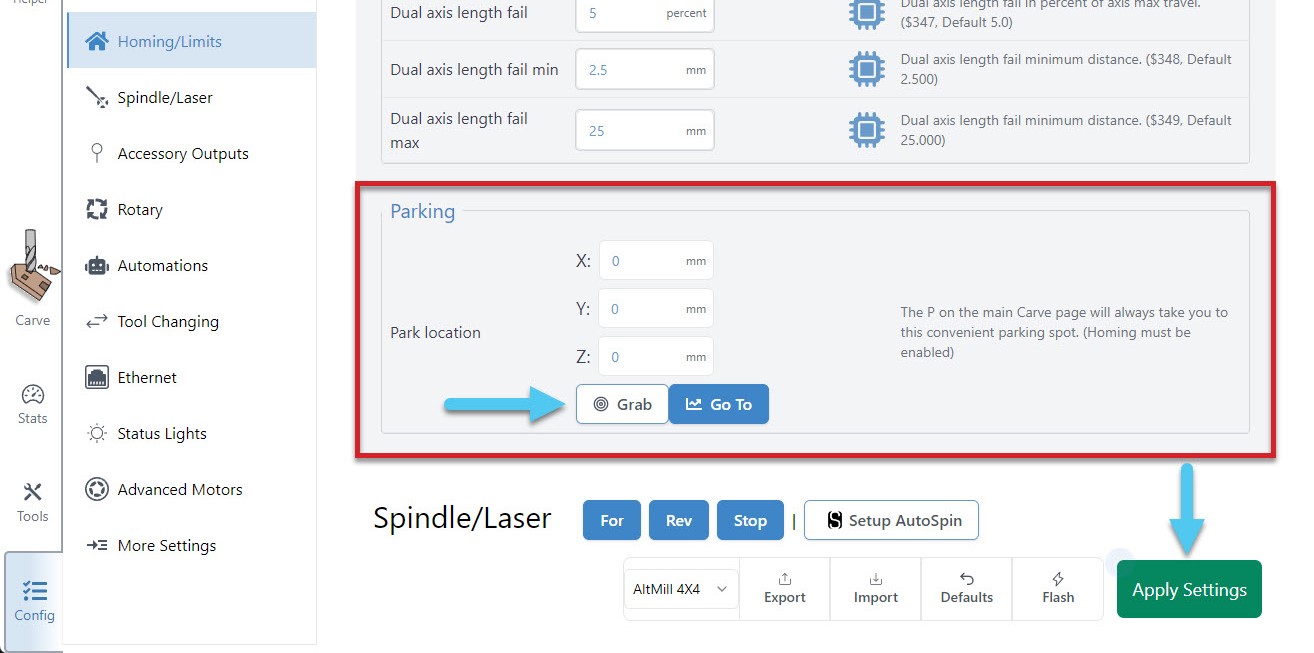
- A configurable Park Location that acts similarly to the Rapid travel buttons but instead moves to a custom location you set yourself. To set up your parking spot, go to Config ➜ Homing/Limits and scroll down to the bottom of the section. Here you can enter the coordinates of your parking spot manually, or move your router/spindle to the spot you wish to park and hit the Grab current position button. Test out your new spot by hitting the ‘Go to’ button in settings or hitting the ‘P’ button on the DRO. Don’t forget to hit the Apply Settings button to save your new spot!
Setting Limits
Things like machine limits for the Machine Coordinate system are usually set up by the manufacturer and so might never need changing. There are cases though where depending on your model or if you’ve assembled a kit and installed add-on your maximum travel area might need to be adjusted to properly reflect your machines travel limits.
We recommend you do this especially if you’re planning to use the ‘quick-travel’ buttons. You can find these settings by going to Config ➜ Homing/Limits ➜ X-axis maximum travel (Y, Z-axes are here too). Remember to hit the Apply Settings button afterwards.

If you’d like more information on how to set up and use limit switches, read here: https://resources.sienci.com/view/lm-adding-limit-switches/
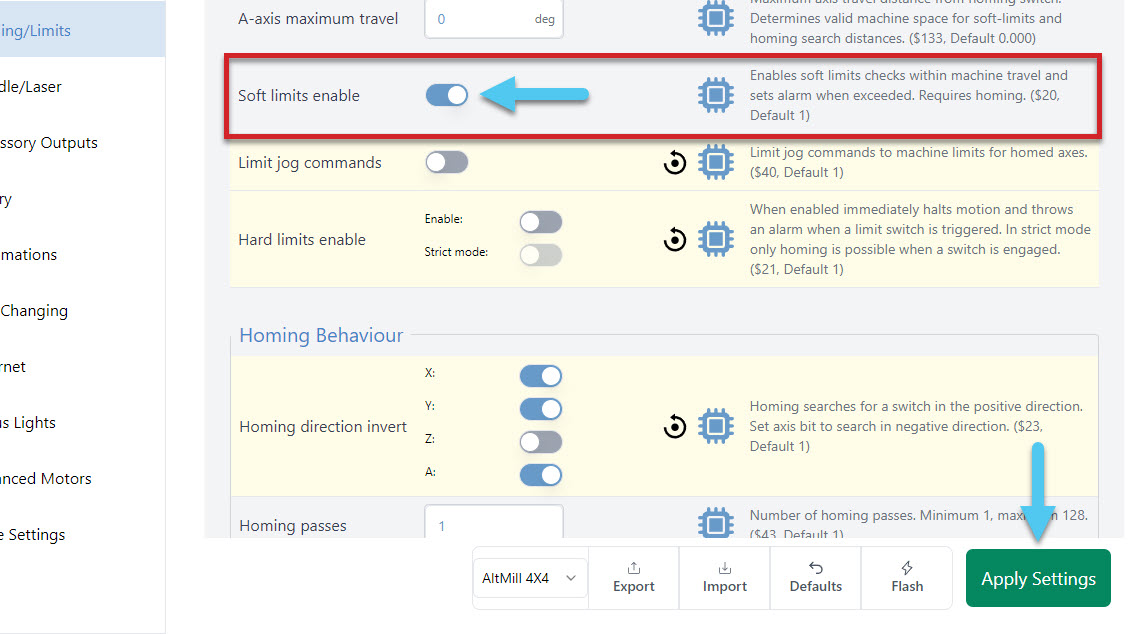
Soft Limits
With homing working, you can optionally choose to turn on soft limits. This feature will keep an eye out after you home your machine to see if any movements are trying to go past your machine limits, and stop those movements from happening to protect your machine. Enable these in Config ➜ Homing/Limits ➜ Soft limits enable. Don’t forget to hit the Apply Settings button to save!
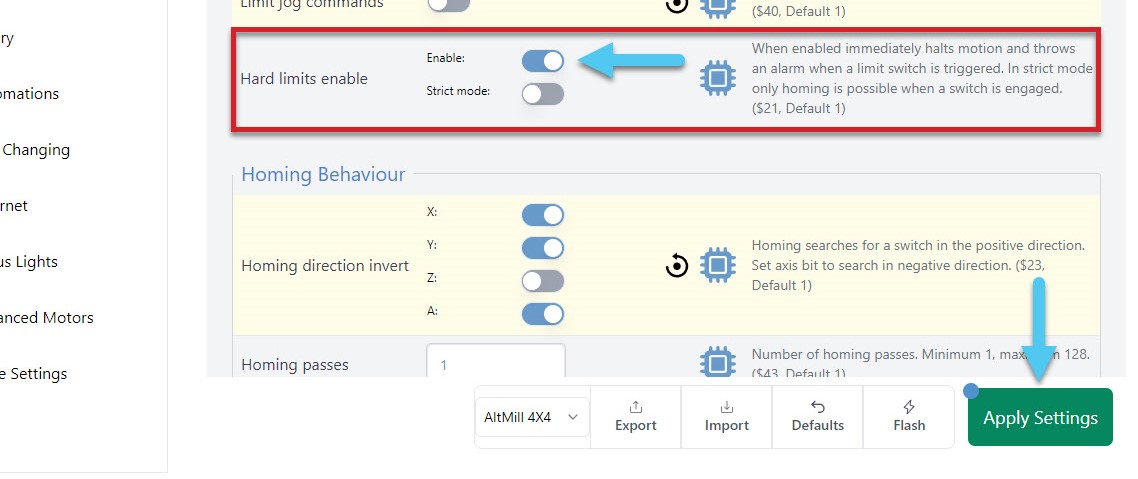
Hard Limits
If you have a sensor on both sides of each axis, all 6 sensors can provide you a hardware backup solution, to the software solution provided above with the soft limits. With hard limits on, if your machine get’s close to the edge of an axis, your sensor will trigger, stopping any further movement. Enable this in Config ➜ Homing/Limits ➜ Hard limits enable.