Macros
Macros are standalone buttons within the gSender interface that allow you to execute a series of g-code commands when they’re run. Macros can come in handy for a variety of uses:
- Button to run a v-carve or laser engraving of a common insignia into the back of your wood pieces
- Perform a specialized probing function for a particular jig you’ve set up
- Apply a predetermined offset that allows you to easily array your cutting jobs
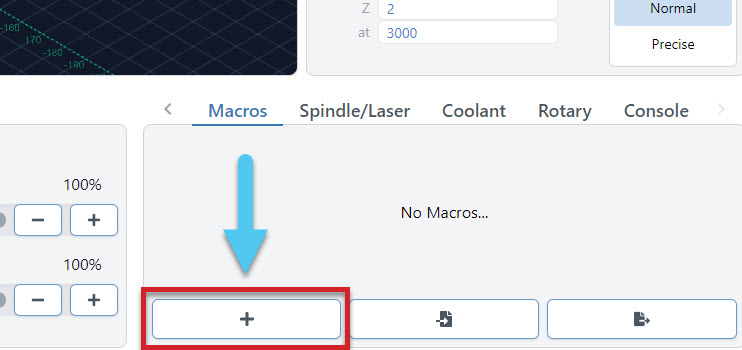
You can create macros using the ‘+’ button under the ‘Macros’ tab.
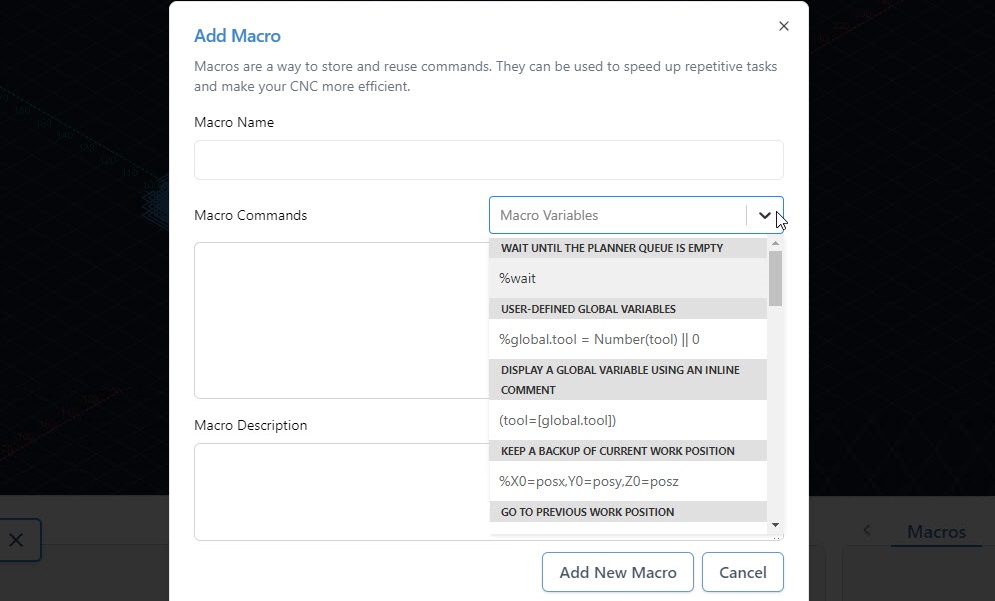
Here you’ll see a space for inputting your custom g-code and adding a name and description for the macro. Advanced users may also want to leverage ‘Macro Variables’ which allow for greater g-code manipulation and pseudo-programming. Press ‘Add New Macro’ when completed.
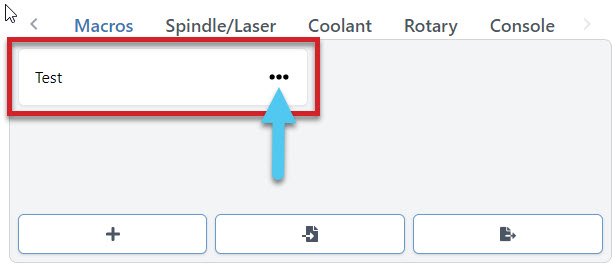
New macros will appear as buttons in the ‘Macro’ tab that can be rearranged by dragging them around. These buttons will display the macro name, show the description if you hover your mouse over them, and can always be later altered or deleted by clicking on their ‘…’ button.
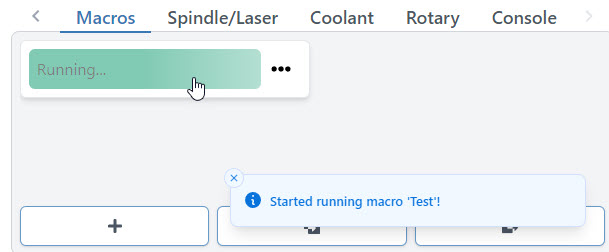
Any macro can be run by pressing it. Once running, you should see the macro start to pulse green while a toast notification on the bottom right hand side of gSender also notifies you that it’s running.
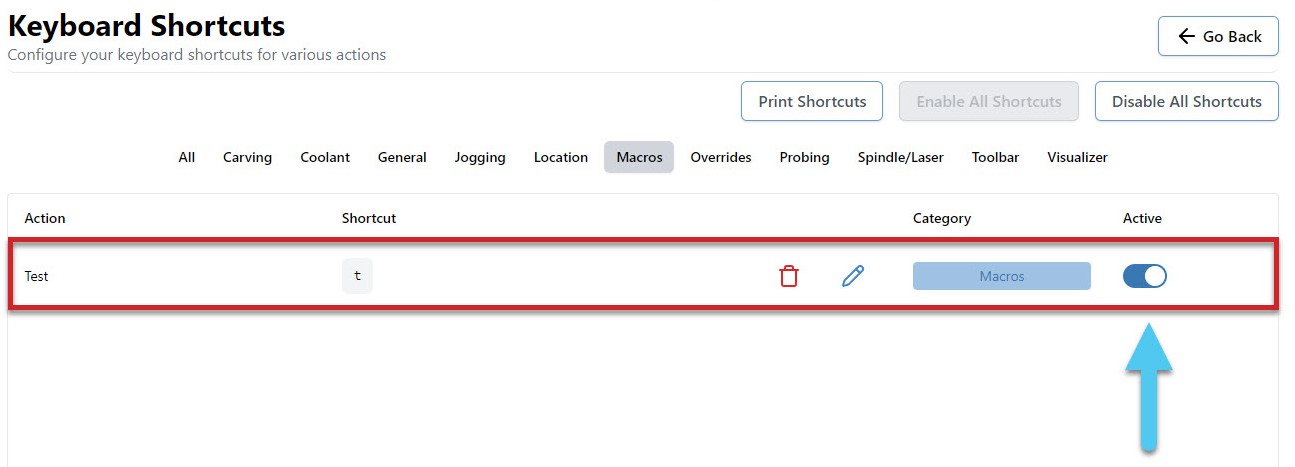
Macros can also be ran using shortcuts. Every time you create a new macro it’ll become available on the shortcuts list for you to assign a key or gamepad button to. Add your keybindings and press the Active toggle to enable the shortcut.
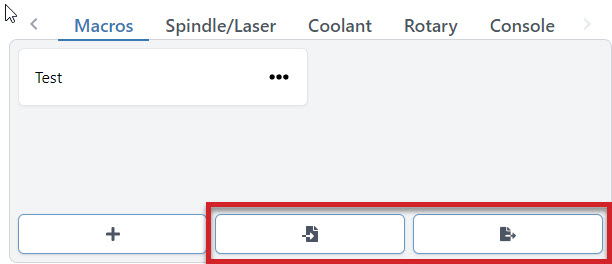
You can share macros with other users or transfer them between computers by using the import and export features. To import one or multiple macros, just press the button on the left and a browsing window will appear so that you can select the macros you wish to import. Similarly, to export all your current macros, press the button on the right and it’ll open a save window, to generate a save file for you.
Advanced Macros
gSenders Macro architecture is based on JavaScript and uses the Esprima library (https://esprima.org/) and so will theoretically support any code that it does. This is exciting because Macros can move far past basic variables if you’d like to perform advanced functions on your CNC:
If you want some initial inspiration, see other macros made by our community or ones made for CNCjs (another g-code sender) which should also work in gSender. Otherwise, here are some other points of guidance:
- You’ll want to develop your understanding of typical g-codes and m-codes that are used for CNC control (the pages linked are very good sources for that)
- The “Macro Variables” dropdown in gSender shows many of the most commonly used operations when making your own macro
- Make your own variable with
%variable = value_you_want_to_set(ex. % probeSpeed = 150) - Use your variable in g-code, like
G21 G91 G0 X[variable](moves the X-axis by the amount set in the variable) - Test your code by printing it to the console
([variable]) - Make dialog boxes appear on the screen to confirm a value or position by putting in an M0 line with a comment, for example
M0 ;Remember to turn on your router before the next stepwhich will pause the macro and give you the option to ‘continue’ or ‘cancel’ - Start experimenting with basic math using numbers and variables like
%combo = (variable + variable2 + 4)/2(Hint: you don’t need square brackets around variable names when the line starts with%, explanation) - Use global variables
global.variableif you want variables that you can use in other macros (note that these get reset once gSender is closed) - Read up on all the other Math features available like absolute value, rounding, and trigonometry (become very useful for more advanced probing cycles for example)
- Start to add more logic to your code using ternary expressions to choose between two outcomes (e.g.
%variable = (30 > 20) ? 10 : 20which is checking if 30 is bigger than 20, and if it is it’ll make the variable = 10, otherwise it’ll make the variable = 20). - Here’s an example of a more advanced macro, made by gSenders Lead Developer, which shows off much of the guidance given above. This macro was made for our new SLB control board in order to cycle between its 3 status light states.
- The macro is only 3 lines. First it checks what the current light state is and sets it to 0 if it doesn’t have a state. Next, it sets the lights to the current state but applies a modulus of 3 since we can only have a state value of 0, 1, or 2 so we’ll get an error if the value is 3 or above. Lastly, it adds +1 to the state so that if the macro is run again it’ll put the lights into a new state.
%nextLight = global.lightState || 0M356 P0 Q[nextLight % 3]%global.lightState = Number(nextLight) + 1
- Store many variables in an array so that those variables can be used in other macros without assigning them all as global
%setup = {}%setup.this = 0%setup.that = 1%global.setup = setup- then in the other macro
%setup = global.setup
- Create functions that you can then call later such as
%rapid = function (x, y) {return 'G53 G90 G0 X' + x + ' Y' + y + 'n'}then later run it with[rapid(x, y)] - Read more about the Esprima library here: https://docs.esprima.org/en/latest/syntactic-analysis.html
Community Macros
If you’d like to add your own macros to this page, edit the page on GitHub and use the template below for each macro.
Disclaimer! These Macros are submitted by our community. They aren’t vetted by us and might cause damage to your machine so use them at your own risk! Please review the code and test it before assuming it will work with your machine setup.
Automations
A powerful feature to control your accessories automatically (like turning on/off a spindle or vacuum) or to run movement macros that are custom to your machine. ‘Program Events’ (formerly “Start/Stop G-code”)’ in gSenders settings automatically apply g-code to your cutting job at the start, end, or if you stop, pause, or resume the job. The ‘Stop’ event is there to ensure that “ending g-code” is always run even if you have to stop a job prematurely. You can also toggle these on and off if you don’t want them run for specific jobs.
Three massive perks to setting up automations this way are:
- There’s no need to get into the weeds customizing your CAM post processor
- gSender is able to send code when you pause, resume, or emergency stop your machine, all of which a g-code file on its own would never be able to do
- This additional amount of control will make your CNC safer to use
For example, if you were to add M3/M5 commands to your CAM post processor to control your spindle but then chose to pause your job midway to check something, then most CNCs wouldn’t know to stop spinning your spindle or retract it since g-code files can’t carry this information; this is where gSender is able to the heavy lifting.
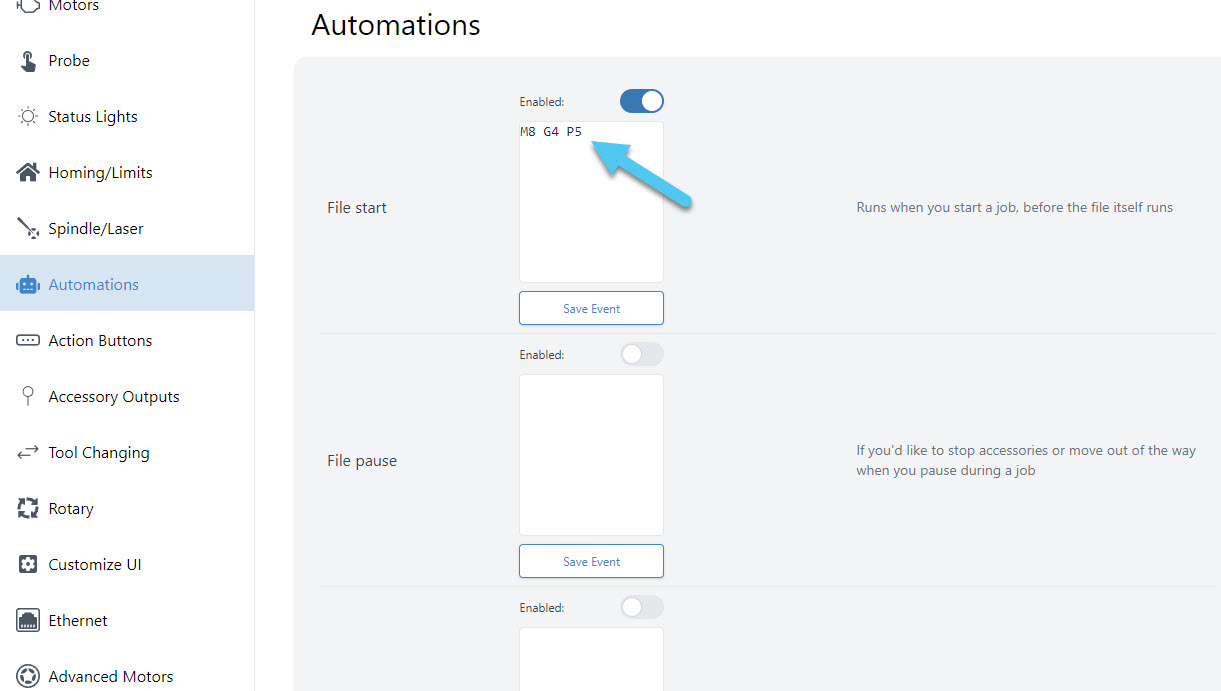
For the text-box of the situation you want the action to happen, type in the g-code commands you wish to run, then press the ‘Update‘ button to save it. For example, if you installed an IOT relay to turn your router and vacuum on and off and wanted to make sure they were enabled for every job you ran, you could add:
- “M8” for Start and Resume
- “M9” for Stop and Pause
- If you wanted to add a delay to give your vacuum or router time to fully turn on, then you could add “G4 P5” after the M8 for a delay of 5 seconds (you can customize that delay to your equipment)
- If you wanted to keep the vacuum and router running during a pause, then you don’t need to add “M9” to Pause
- All this can also apply to automatically control a spindle, where you’d instead use “M3” and “M5“, you can also add a delay with “G4 P#“
- If you want to raise the Z-axis on Pause and lower it on Resume, you could also add:
- “%global.move=modal.distance” then “G91 G0 Z-5” for Pause to move 5mm out of the way
- “G91 G0 Z5” then “[global.move]” for Resume to move back down