

Check Firmware Version
Your board will likely ship with the latest firmware already installed, but we occasionally make updates to add new features or address any discovered issues. You may also choose to re-flash the firmware onto your board if you’ve attempted to customize it, or for troubleshooting purposes.
Before getting started, check what your current version is by going to the ‘Machine Information’ icon, and see what version you are currently running. If the version number in the Latest Firmware section is higher than what’s on your board, we recommend upgrading.
Latest Firmware
SLB-LITE: Click Here
- Version 20260902
- Newest, main version of grblHAL
- Requires gSender 1.6.4 or newer
- Huanyang or generic ‘MODVFD’ spindle setups included
Preparations
To successfully flash new firmware onto your SLB-LITE/SLB-EXT V2, you’ll need to:
- Download the firmware file (.uf2 file)
- Use a computer that can run gSender 1.6.4 or above, connected to the controller over USB
- It cannot flash through Ethernet
- Note down any firmware settings that you have changed from the default firmware settings. This is especially important if you have a third-party CNC.
- Turn OFF any accessories that receive a control signal from the controller, just in case the flashing process inadvertently sends signals to those accessories.
- Unplug your VFD cable at the spindle side, not the VFD side.
- Keep your controller powered ON during flashing.
gSender Flashing
-
Connect to gSender over USB with the power on
-
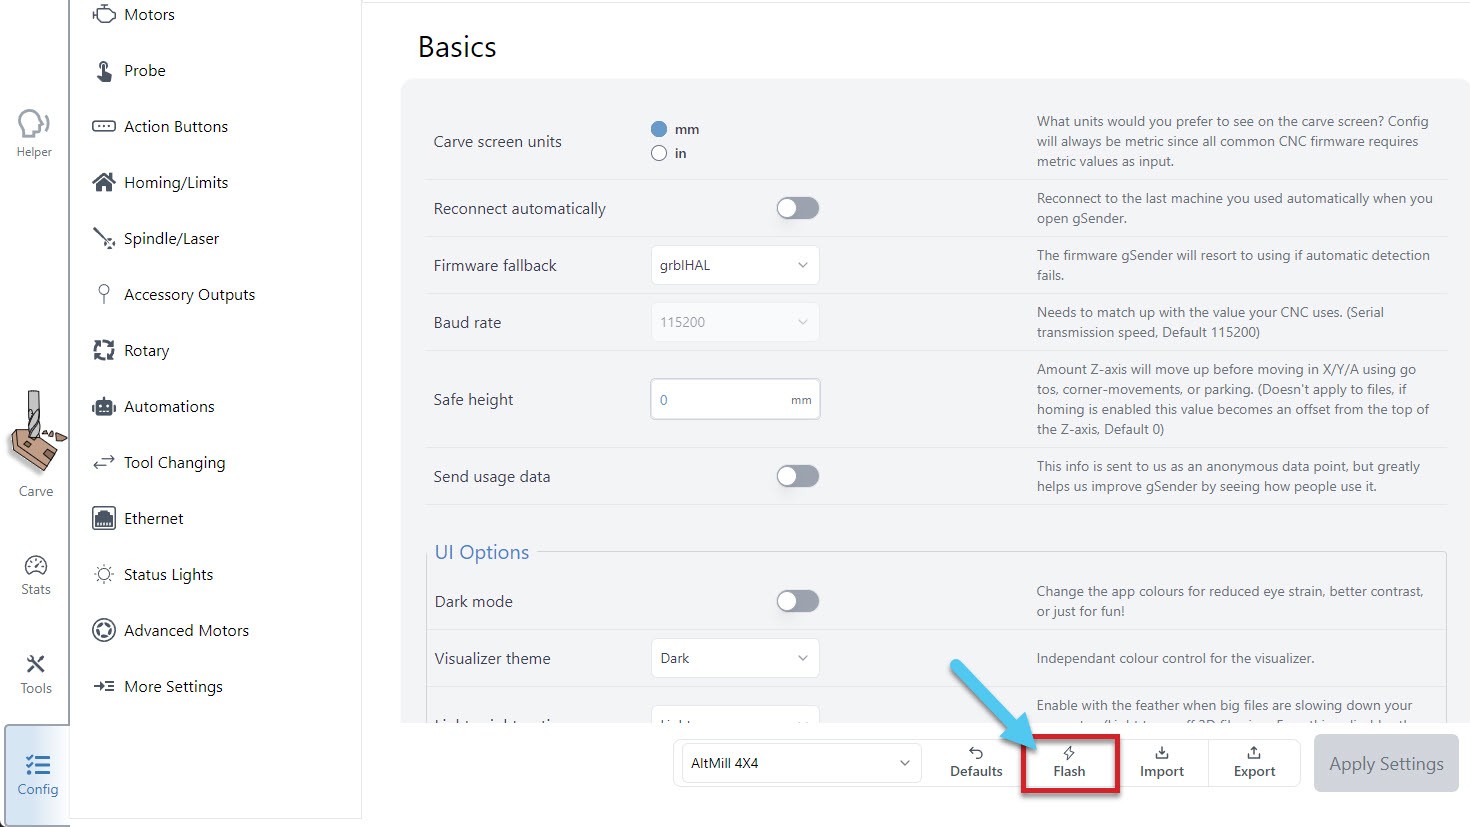
Go to the Config tab and click the Flash button
-
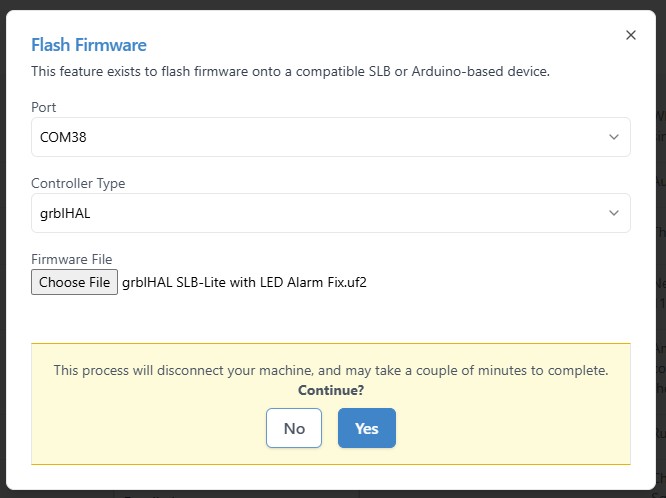
Select the same COM port as before, and ensure grblHAL is selected as your controller type.
-
Click ‘Choose File’ to select the firmware file you plan to update to.
-
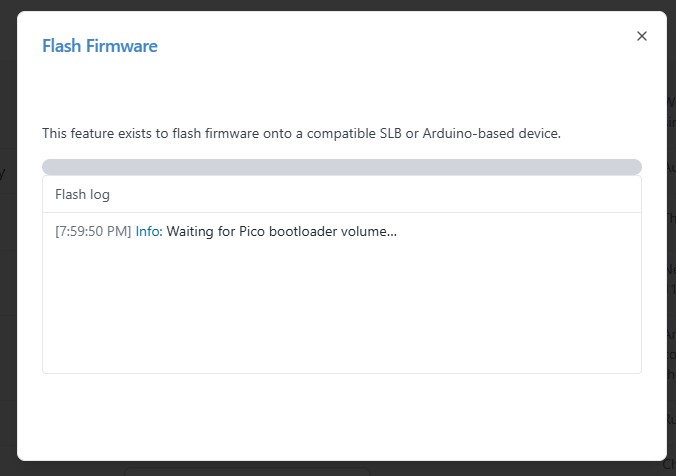
Click ‘Yes’ to begin the flashing process.
-
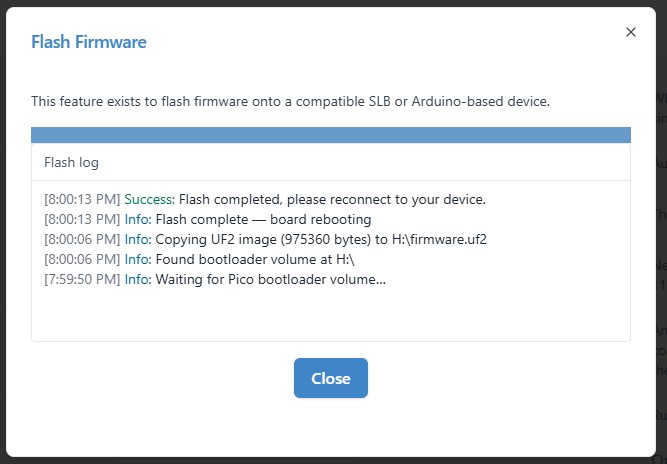
Once you see the loading bar at 100%, flashing is complete. Close the window and turn OFF/ON the controller.
-
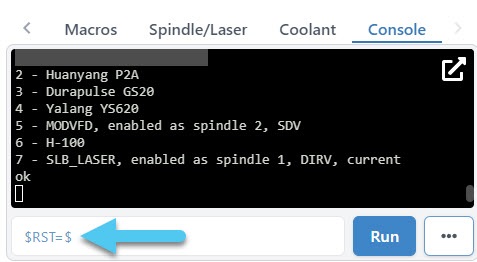
Reconnect to gSender. Go to the Console tab and send the command $RST=$ to revert your machine back to the default firmware settings (you shouldn’t get any errors when you send this command).
-
Power OFF and ON the controller.
-
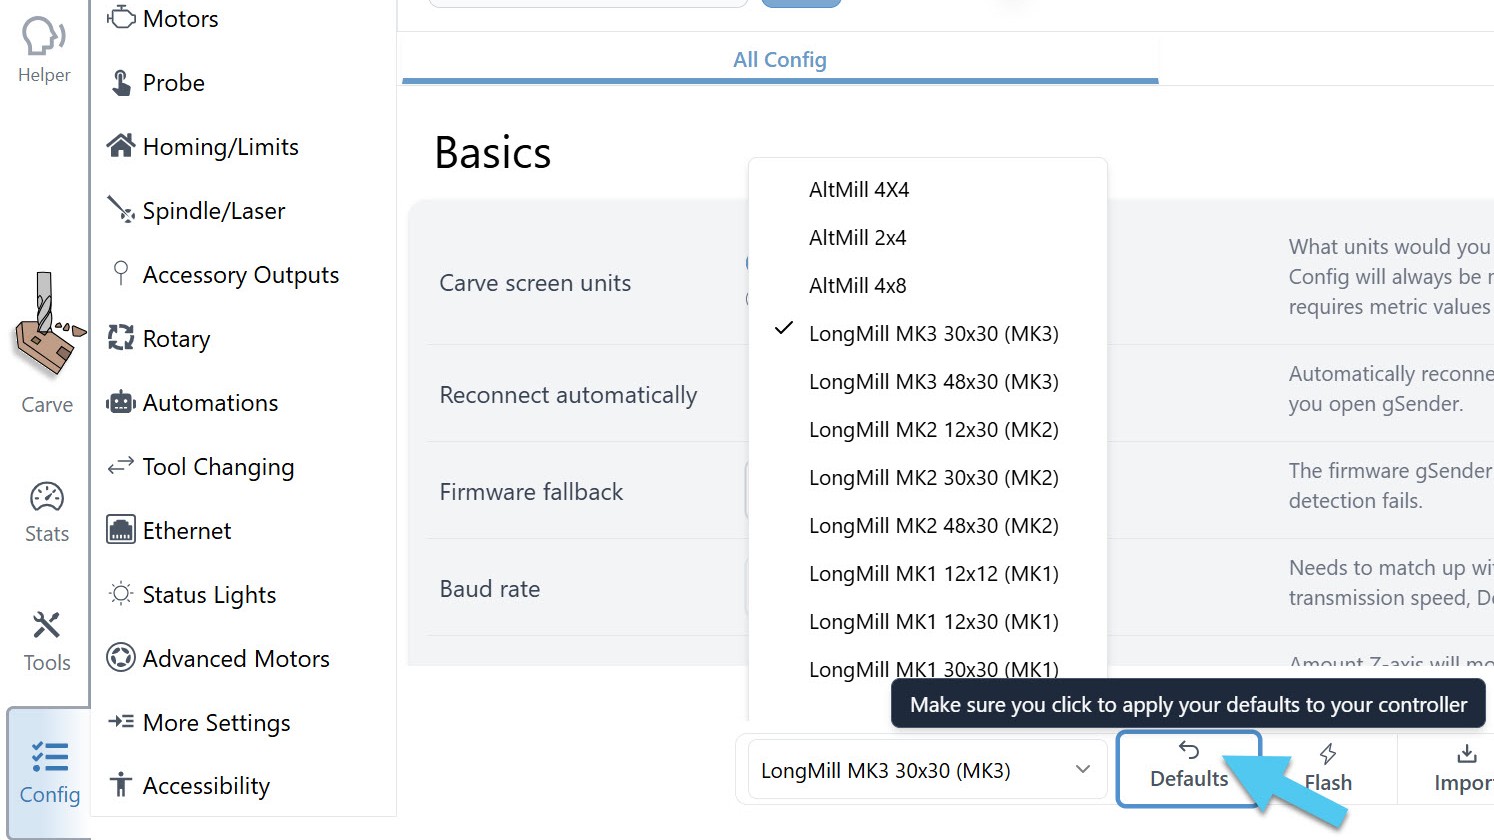
Reconnect to gSender, navigate to Config and select your machine profile. Then press Defaults.
-
Finally, if you had any specific settings from your previous setup that you want to reapply, connect back to gSender, go to Config and change those firmware values back. Press Apply Settings then turn OFF/ON your controller to have these take effect.
-
Go to the ‘Console’, type in $i and press Run. Scroll up and check that the version number matches the firmware version you uploaded.
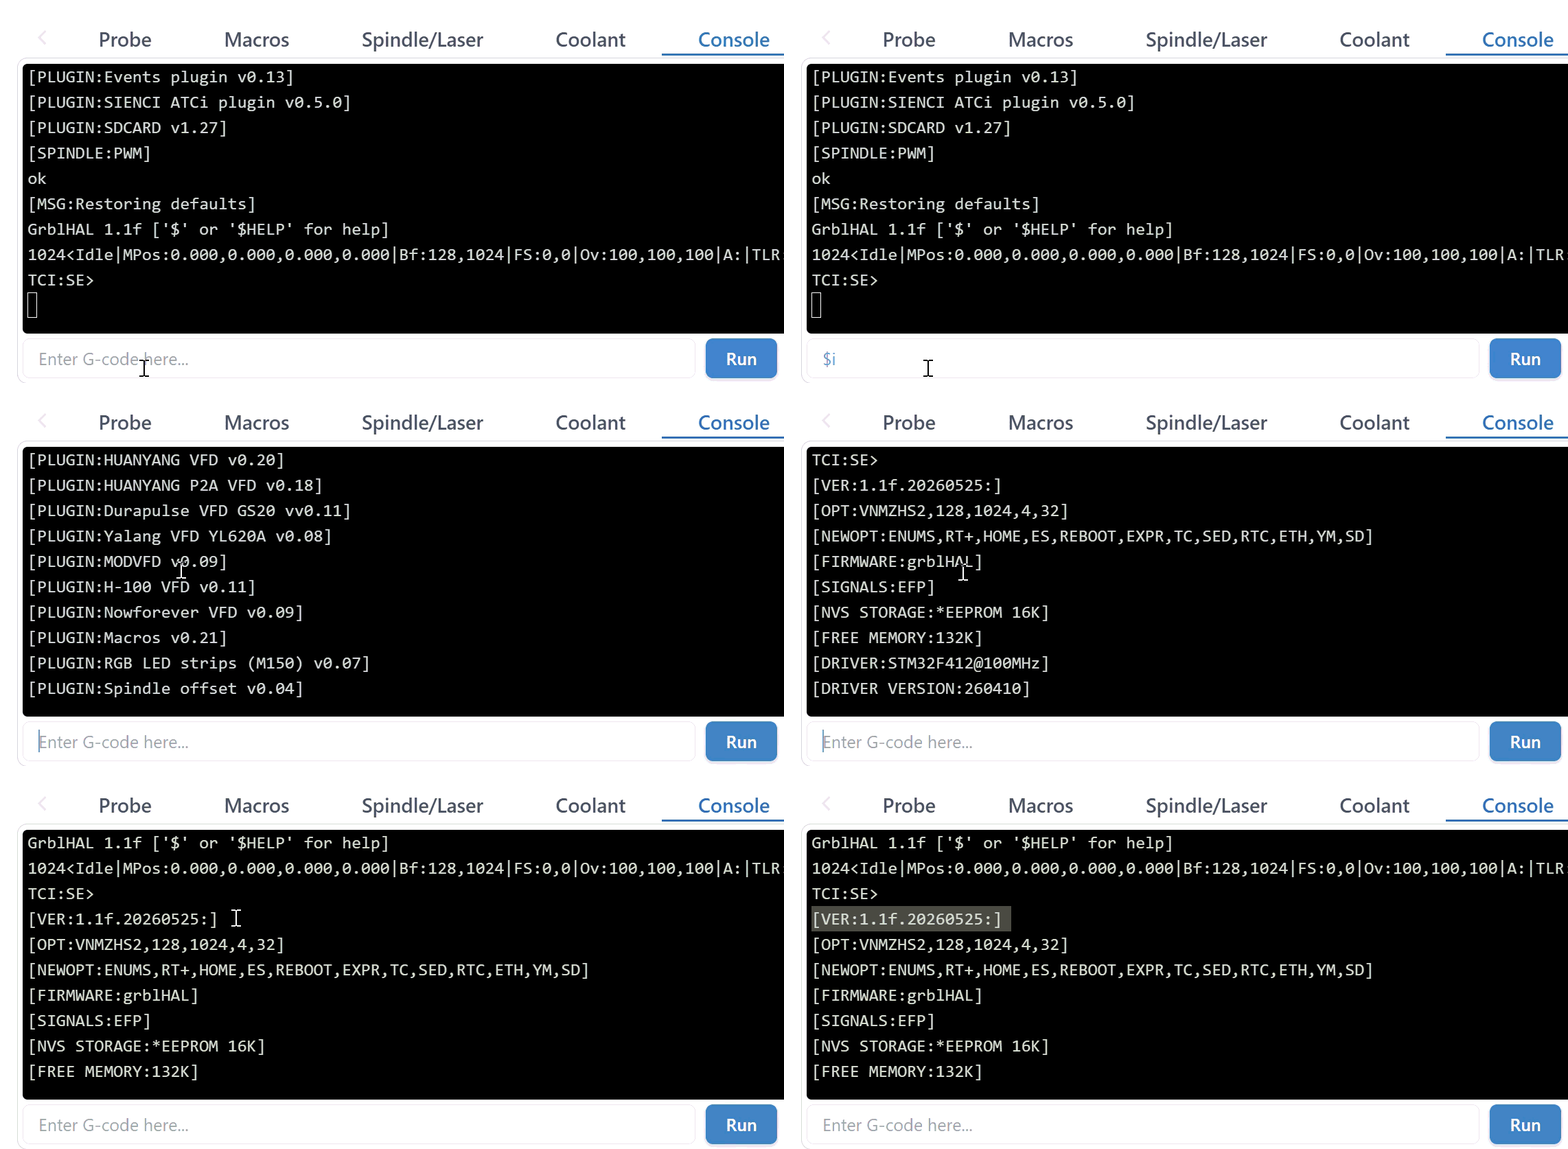
Congrats are in order, you have successfully flashed the firmware!
Manual Flashing
This method should only be used if you are unable to flash through gSender. This could happen if your firmware got corrupted. We recommend trying the gSender method again, and if still unsuccessful, contacting Technical Support before attempting this method.
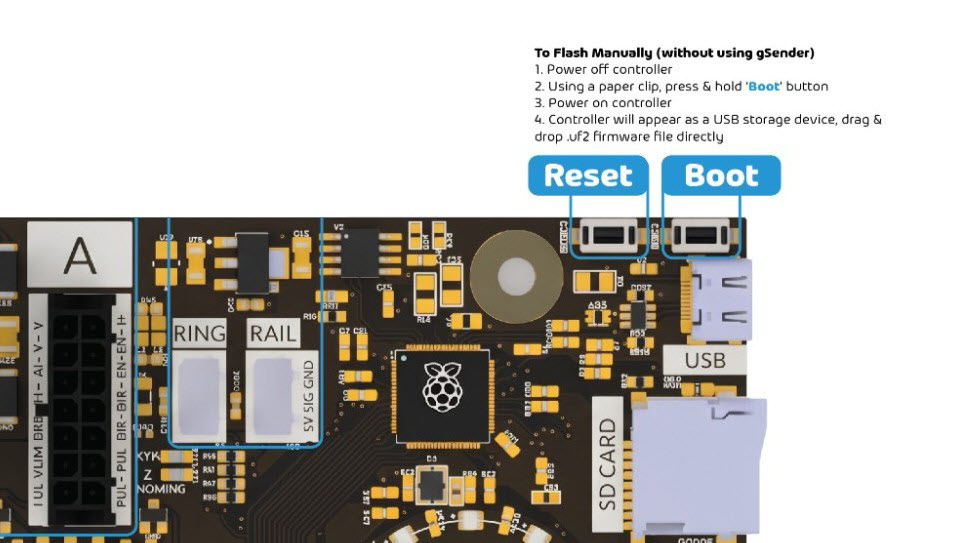
- Download the firmware file from above
- Power off the controller
- Using a paperclip, press and hold the Boot button on the controller
- Power ON the controller
- On the computer, you should see the USB storage folder appear. Open it.
- Drag the firmware file into the folder
- Then press the Reset button on the controller. A window should pop up with a loading bar. The status LEDs near the E-stop may rotate and flash during this process.
- Once you see the loading bar at 100%, flashing is complete. Close the window and turn OFF/ON the controller.