Router Installation
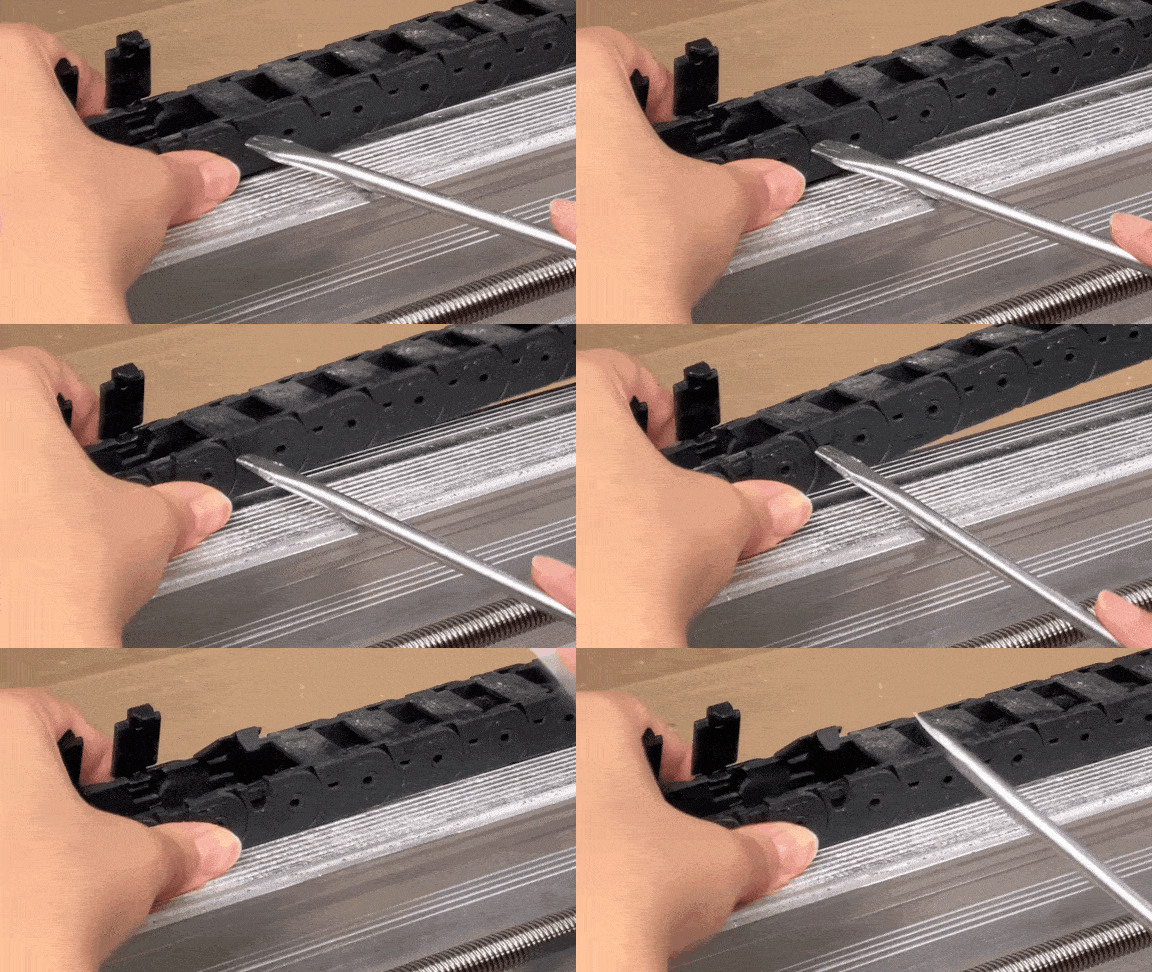
If you have an existing router or spindle, unplug it from power. Undo all drag chain clips and remove the power cord of the old router. You can use a sturdy flathead screwdriver to pry the clips open at the side. Loosen the two M5 screws in front of the router mount and remove the existing router or spindle.
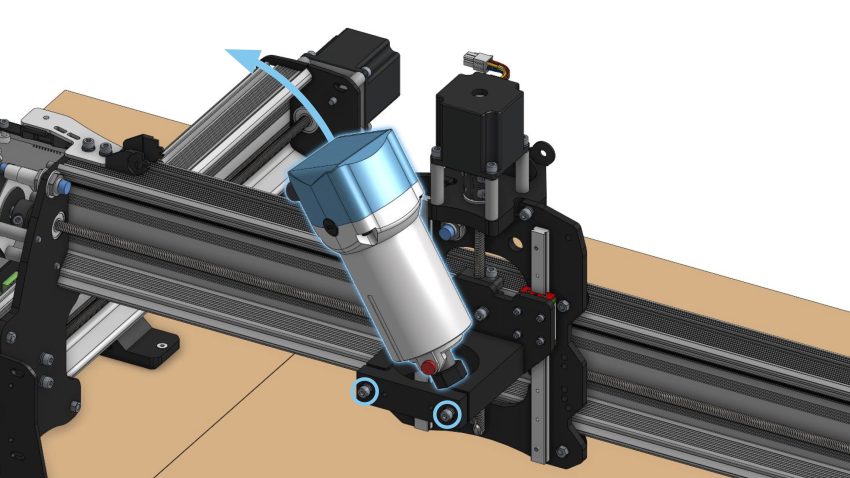
Place the AutoSpin into the 65mm mount, orienting it so the cables are on the left side, then securely fasten the two M5 screws at the front of the mount.
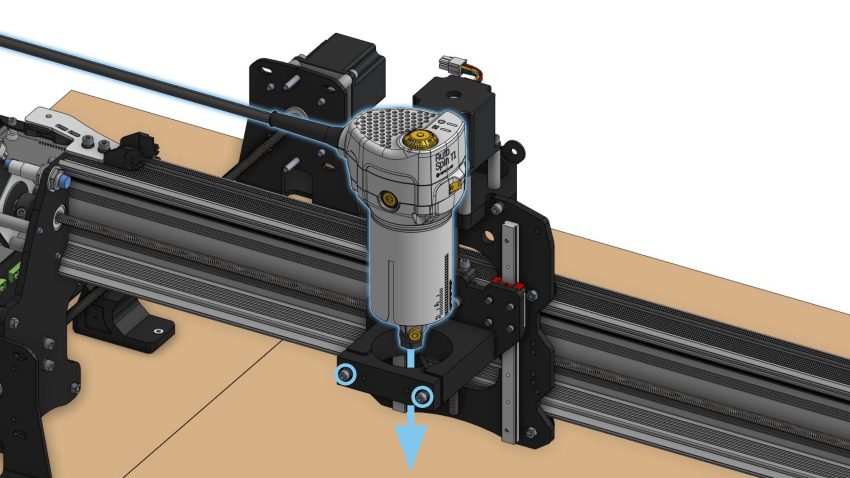
Guide the AutoSpin signal and power cables through the drag chain, then close the drag chain clips to secure the cables in place.
Wiring
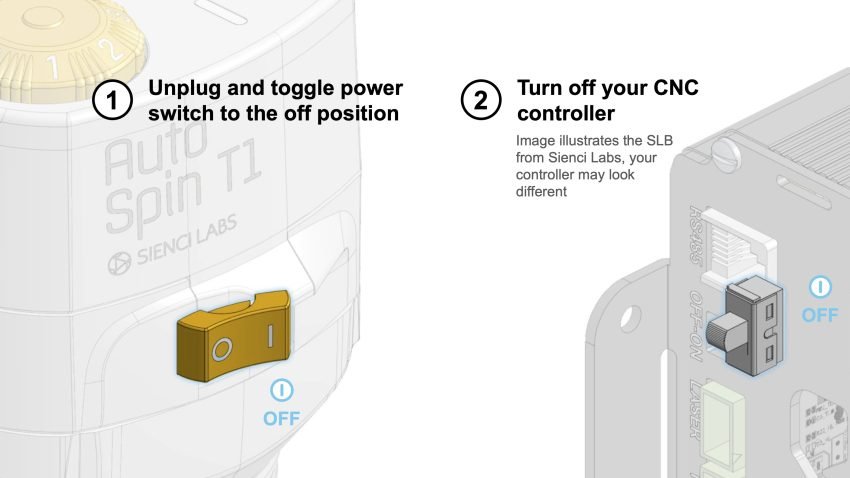
Make sure the AutoSpin is unplugged and the power switch is in the OFF “O” position.
Also make sure the controller is powered OFF.
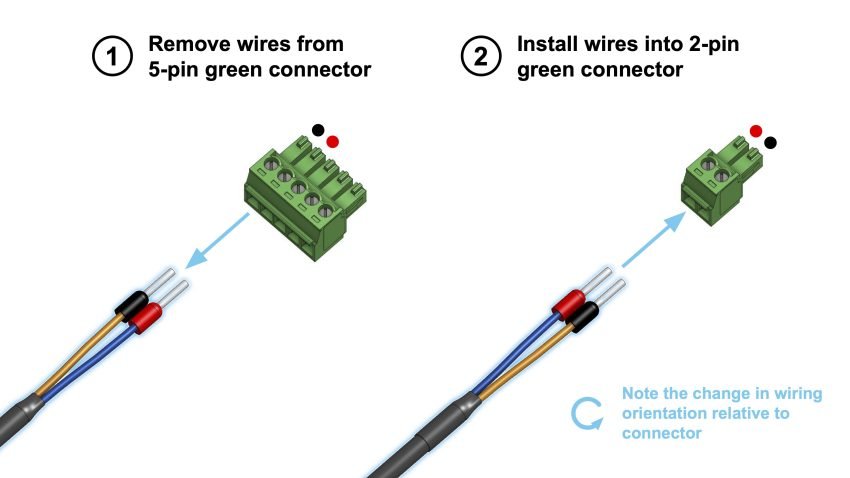
Use a small flathead screwdriver to remove the default 5-pin connector from the signal pigtail.
Grab the 2-pin connector included in the AutoSpin T1 box.
Flip the wires so the polarity matches the picture below. Then install the wires into the 2-pin connector.
After installing the new connector, gently tug on the wires to ensure they are fully seated.
- If the wires feel loose, they may not be properly installed.
- In that case, loosen the connector screws completely (about a dozen turns), reinsert the wires, and tighten the screws securely before testing again.
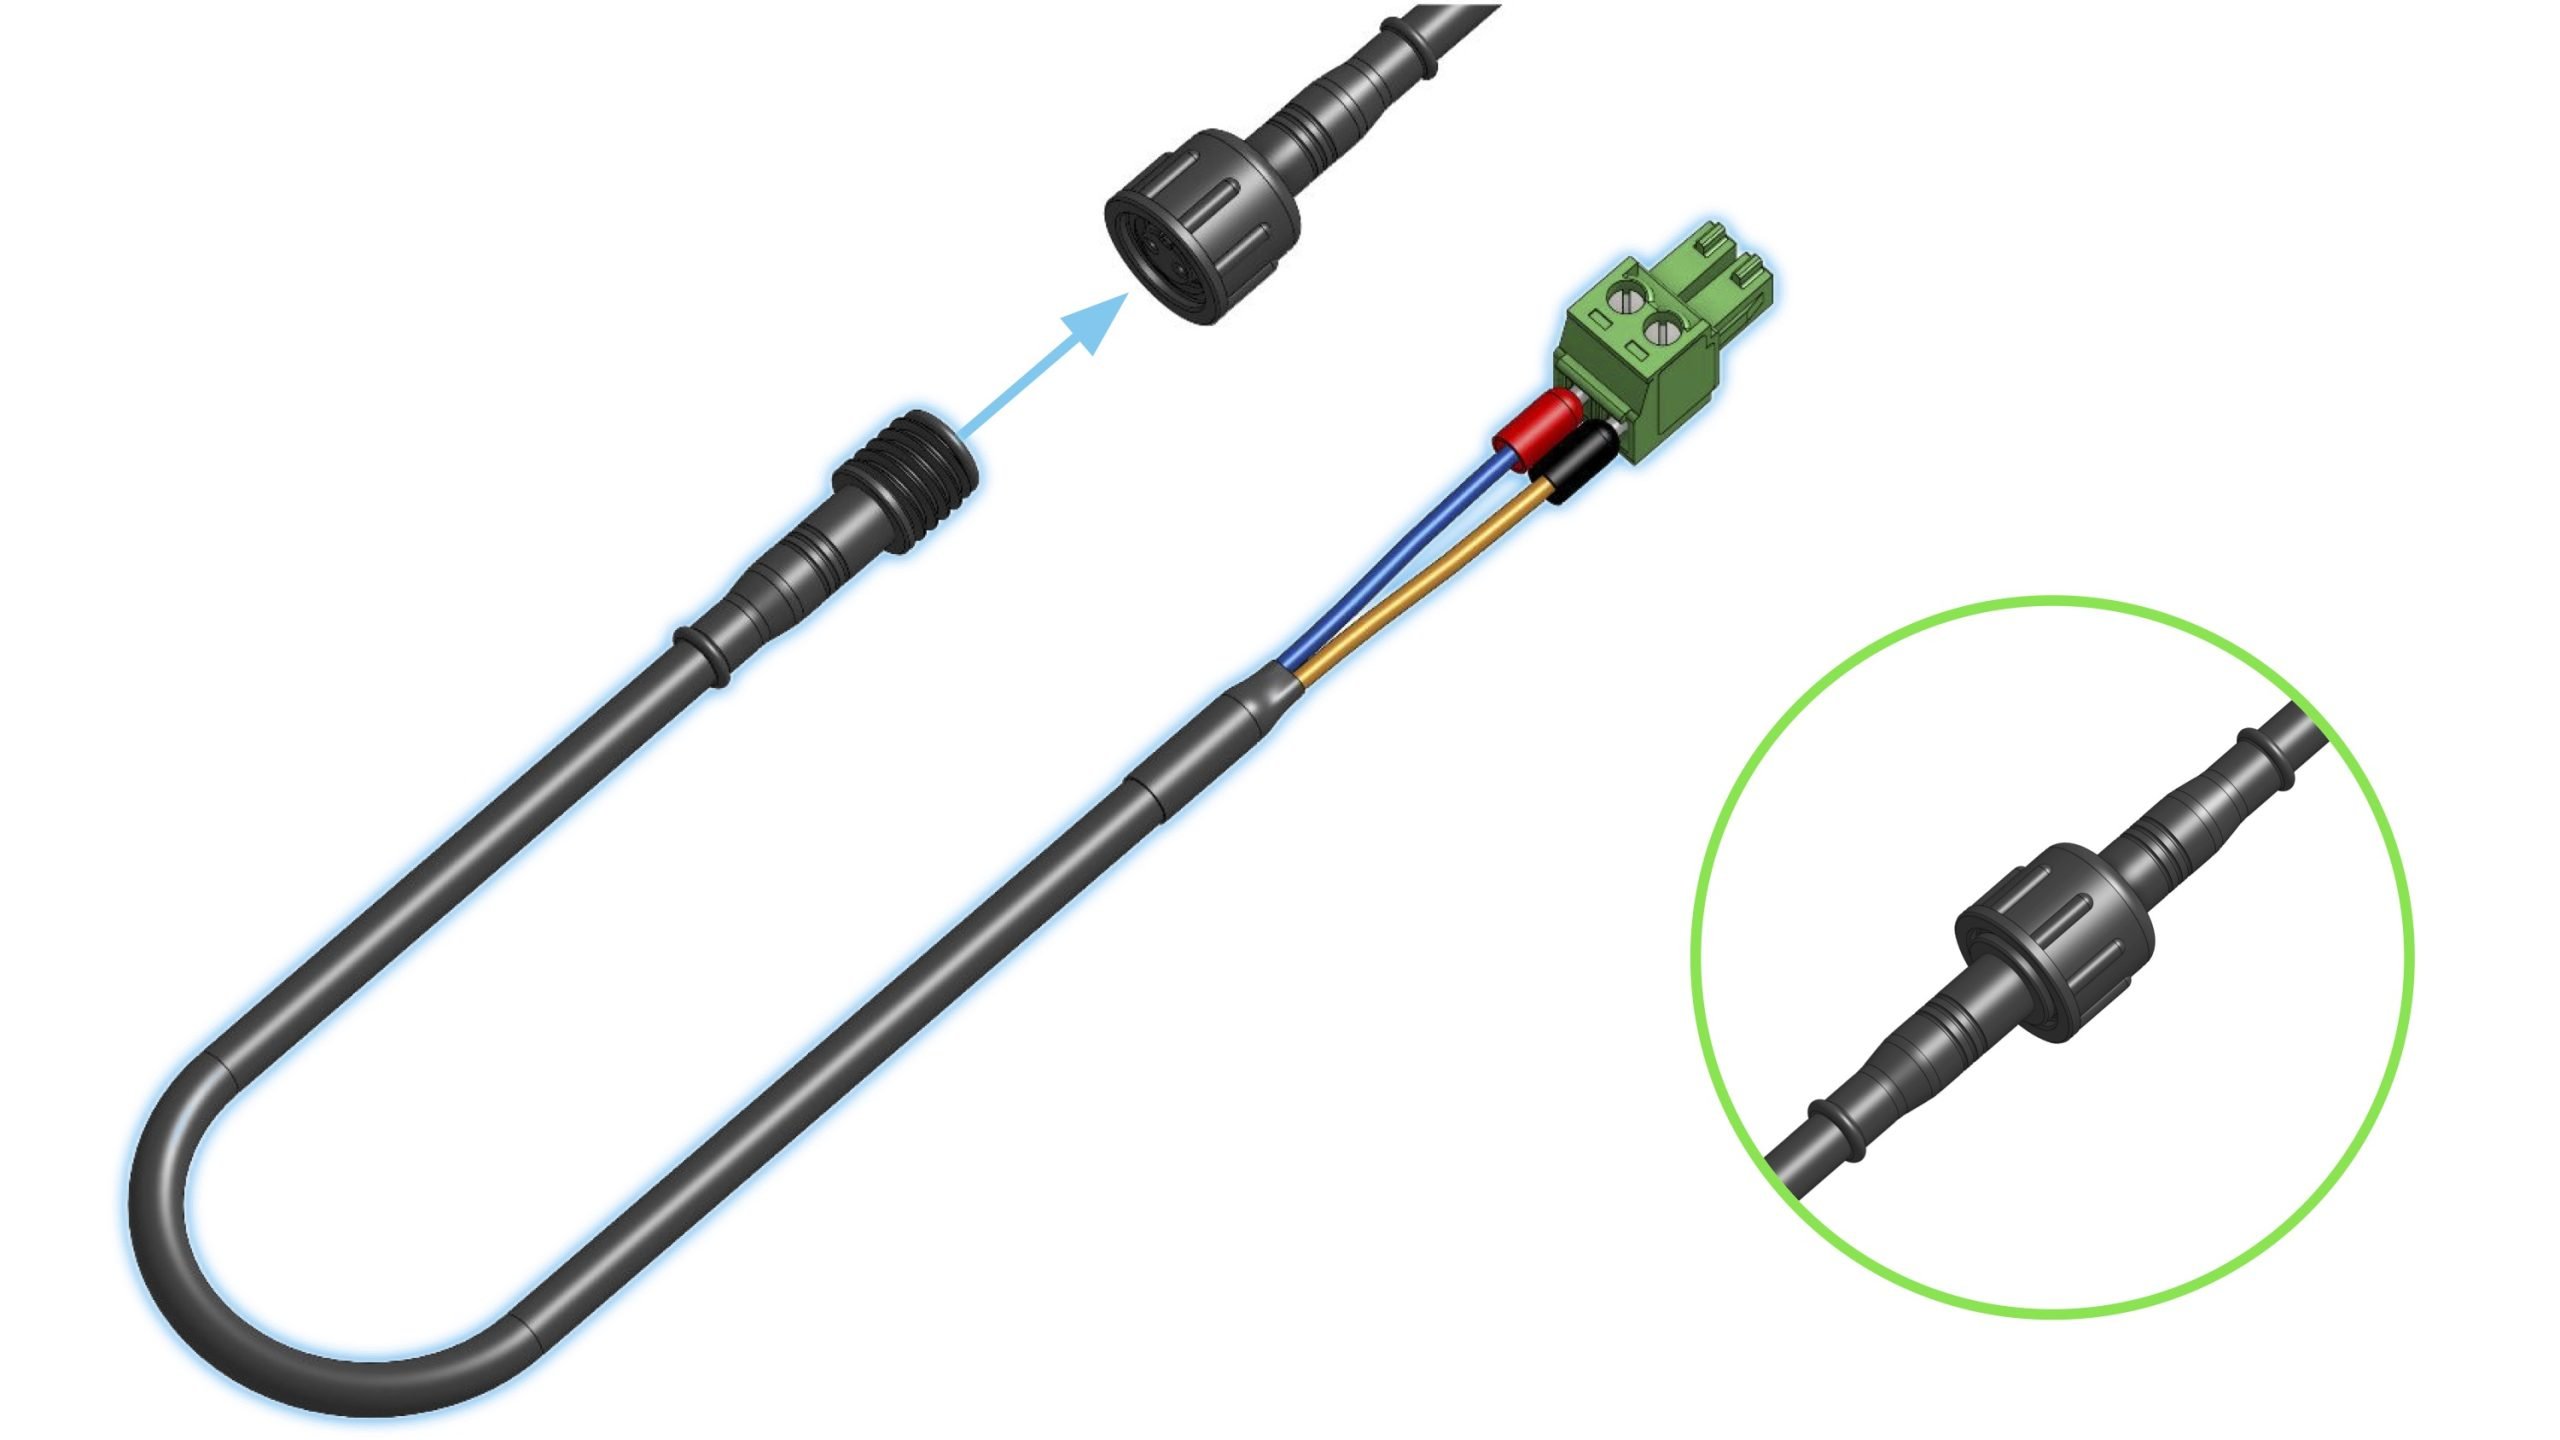
Connect the pigtail with the signal cable coming out of the router.
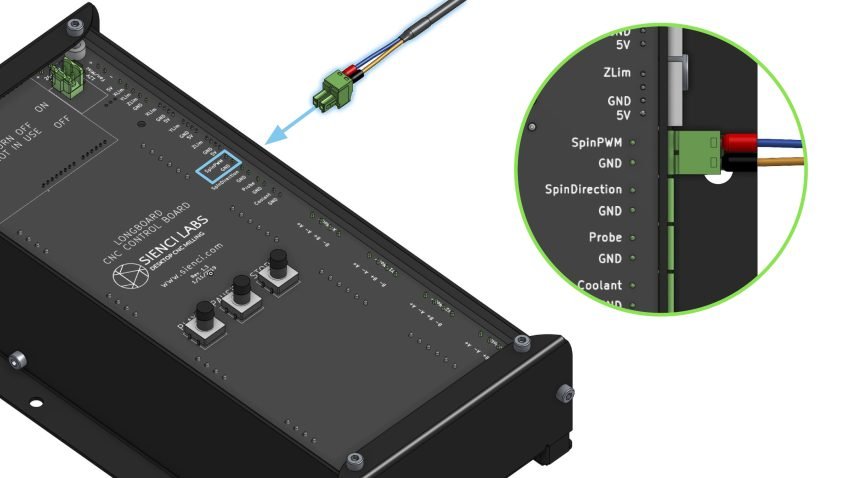
Plug the 2-pin connector from the pigtail into the SpinPWM and GND ports on the controller, ensuring the GND wire (brown) goes into GND.
Close up the controller and power it ON. Make sure to leave the router unplugged until a later step.
Firmware Setup
gSender Version 1.4.12 or older
Download the firmware setup G-code for the LongBoard:
Open gSender and connect to your machine, then select “Load File” and open the downloaded g-code file.
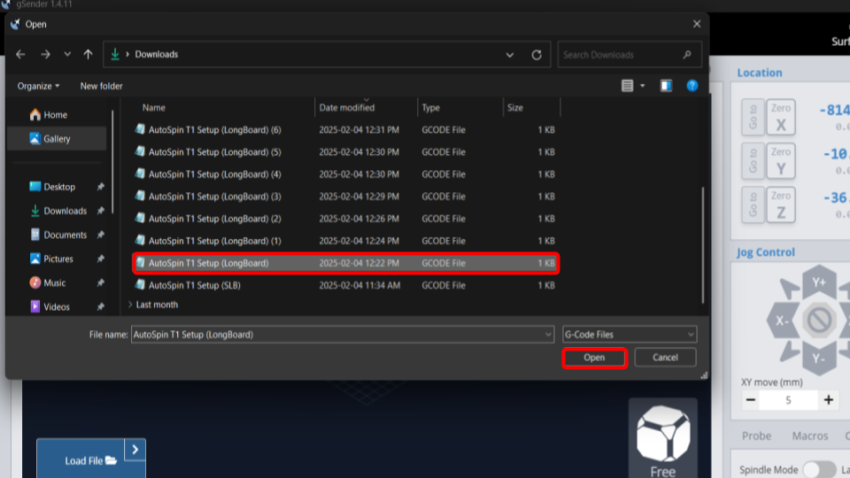
Select “Start Job”, the visualizer will not show a design, but the G-code should finish running within a few seconds.
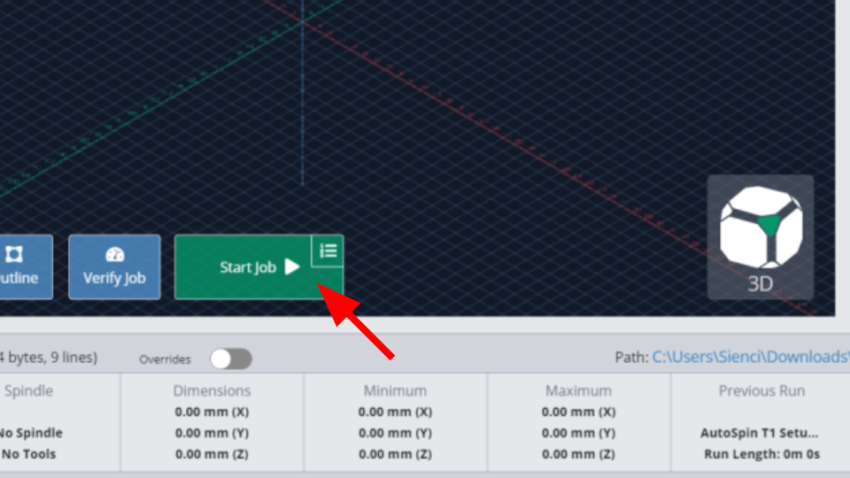
Disconnect from gSender, then reconnect again.
Select the gear icon and navigate to the “Spindle/Laser” tab.
Turn ON the Spindle/Laser toggle to enable spindle controls.
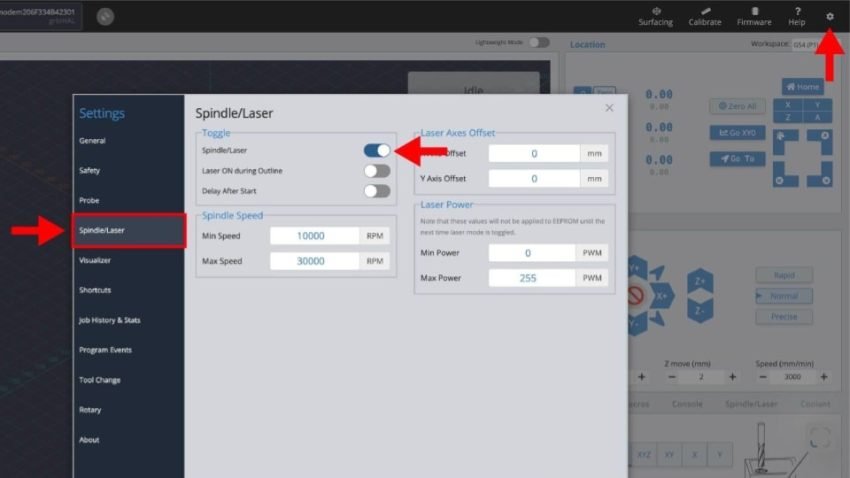
gSender Version 1.5.0 or newer
Connect to your machine through USB or ethernet.
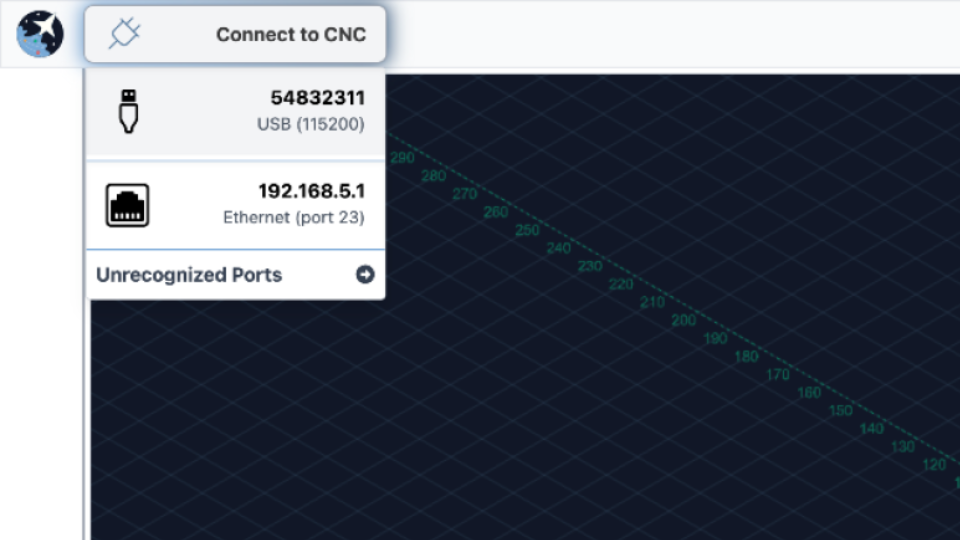
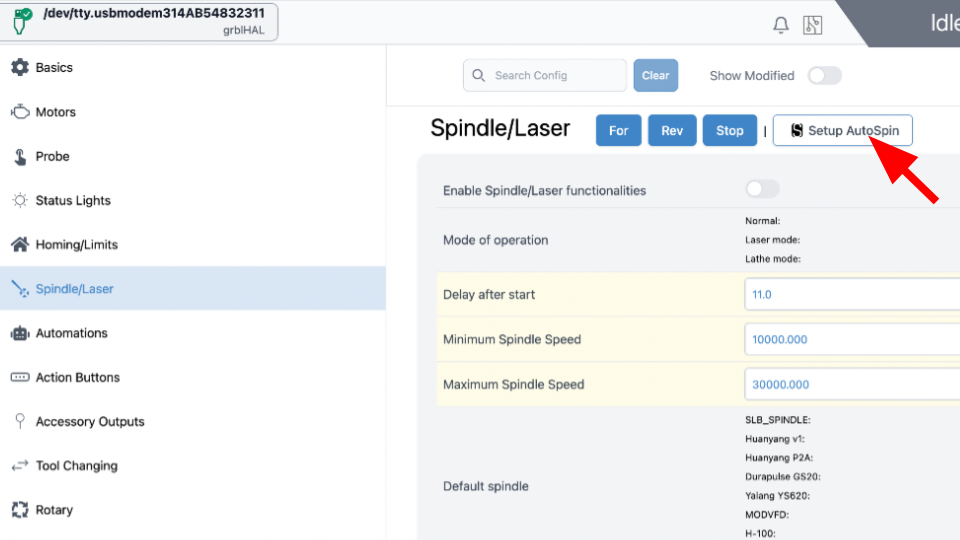
Navigate to the Config tab at the bottom left corner.
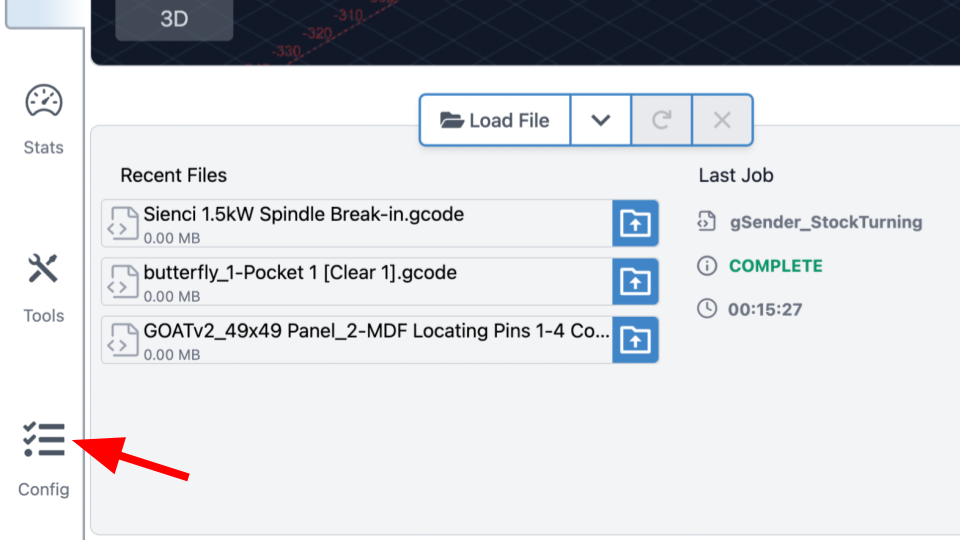
On the left side menu, select the ‘Spindle/Laser’ option.
You will be navigated to the Spindle/Laser section. Select the ‘Setup AutoSpin’ button.
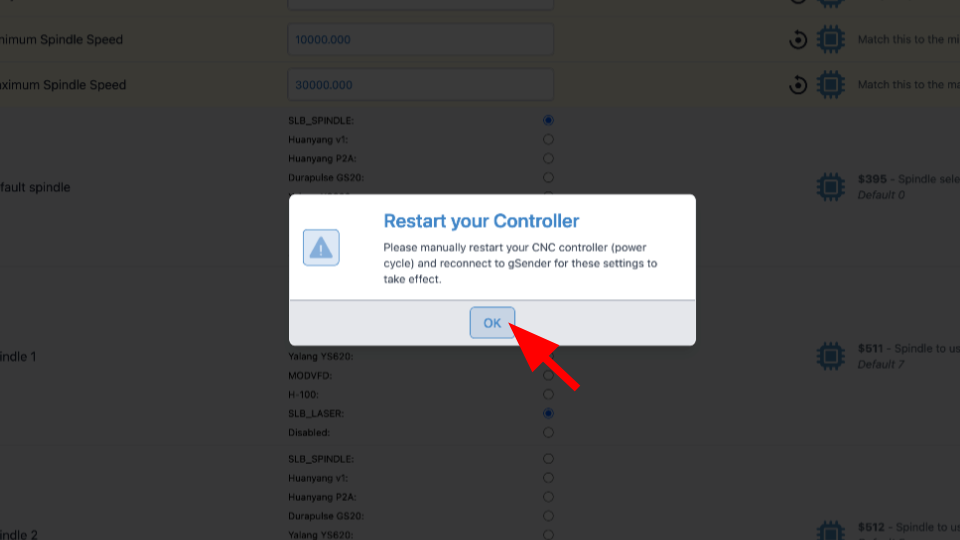
Press OK on the popup window.
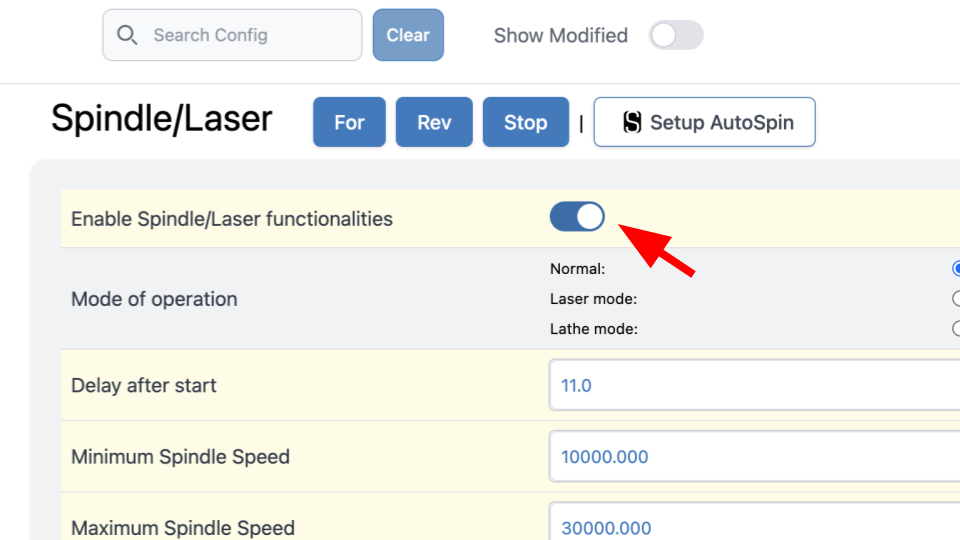
Reconnect to gSender. Go back to ‘Config’ and under Spindle/Laser, toggle ON ‘Enable Spindle/Laser functionalities.’
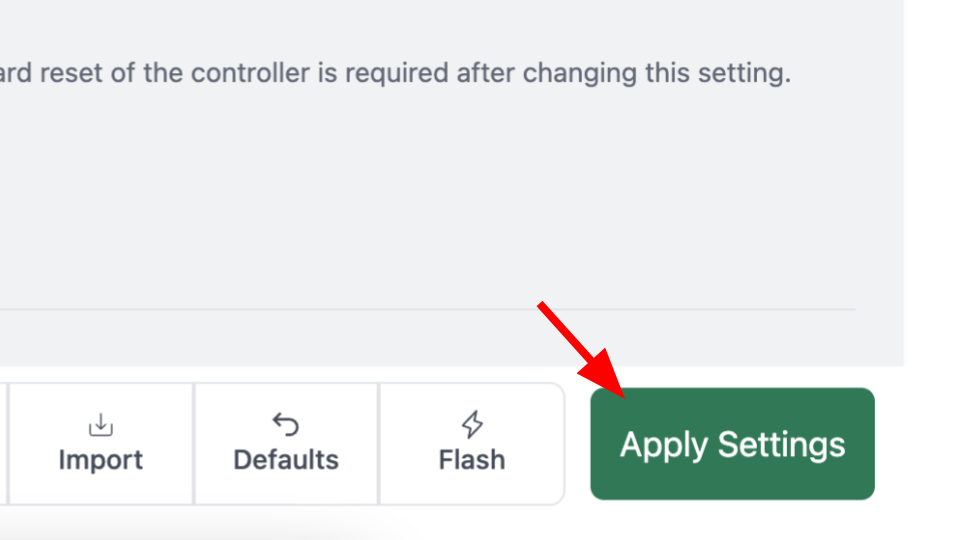
Press ‘Apply New Settings’ at the bottom right of the screen.
Testing
Now we will test that the AutoSpin is set up correctly.
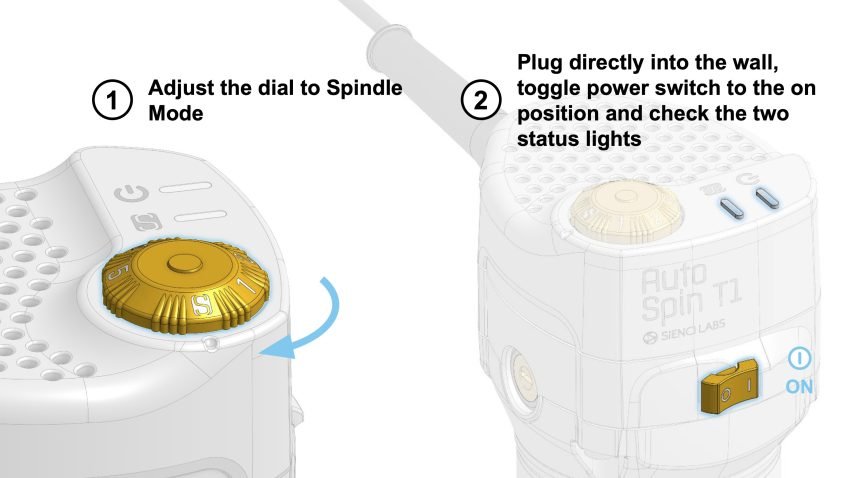
First turn the dial of the router to the “S” position.
Then plug in the router and flip the power switch to the “I” ON position.
The two indicator lights on the router, for the power and spindle mode respectively, should both turn ON.
On the main gSender screen, go to Spindle/Laser at the bottom right corner.
Ensure you are on Spindle Mode; use the toggle to switch to the mode.
- Use the speed slider and “CW (M3)” or “Forward” button to test the router at different speeds
- Press “Stop (M5)” when you are done.
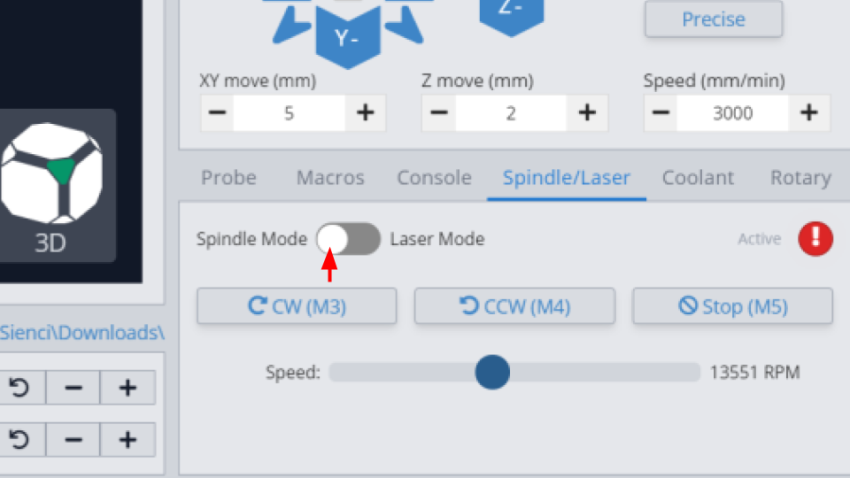
gSender 1.4.12 or older
Note that speed commands lower than 10,000 RPM may not be accurate – most likely the spindle will not spin up, or it will stutter. Cutting at those speeds can also damage your router. It is highly recommended to run the router between 10,000 to 30,000 RPM at all times.
