There has been a variety of table designs to pop up within our community as each CNC owner works to set up their machine to suit their cutting needs. Your table design will largely depend on how you plan on using your machine and your space constraints A big space can mean a big table, meanwhile, a small space might require a folding or retractable table. Knowing where you want your wires to run as well as drawers or shelves for storage, accessories, and your computer can all help make your final layout that much better.
Community Table Builds
On this page, we consolidated the most unique designs so that you can gain inspiration for your own table build by seeing what’s worked for others before you. Each example will link to the original post where the table was shown off so that you can readily follow up with the original table designers if you’d like to inquire about their design further.
Simple Table Design
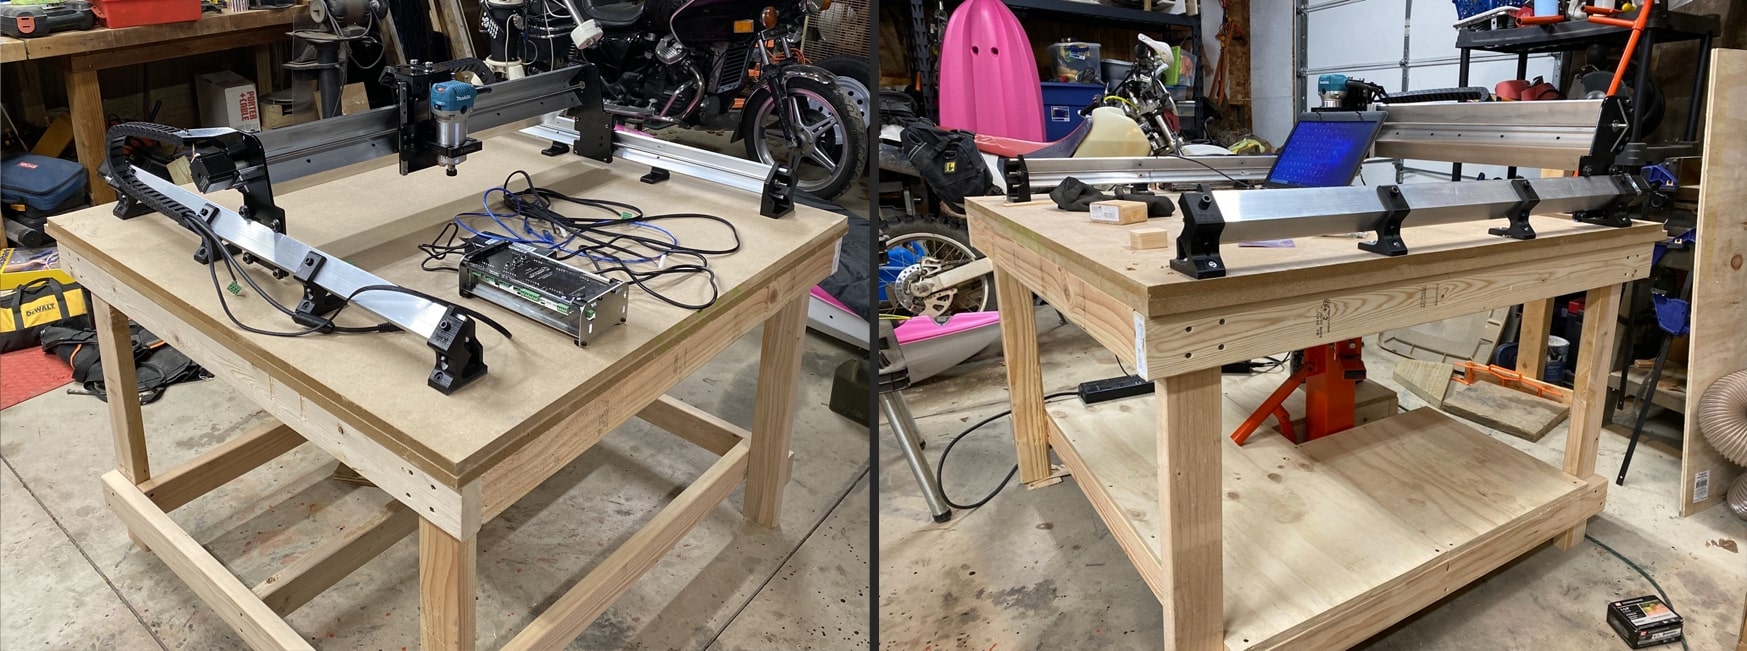
When beginning to prepare for the arrival of their machines: Kris, Mike, and many others started out with a simple table design that would be dedicated to holding their CNC rigidly at a good, working height. There are many approaches to this, the one pictured was done by Mike:
Original post: https://forum.sienci.com/t/what-are-your-plans-for-a-table/95/13
Similar post: https://www.facebook.com/groups/mill.one/permalink/857817714689561/
Threaded Insert Wasteboard
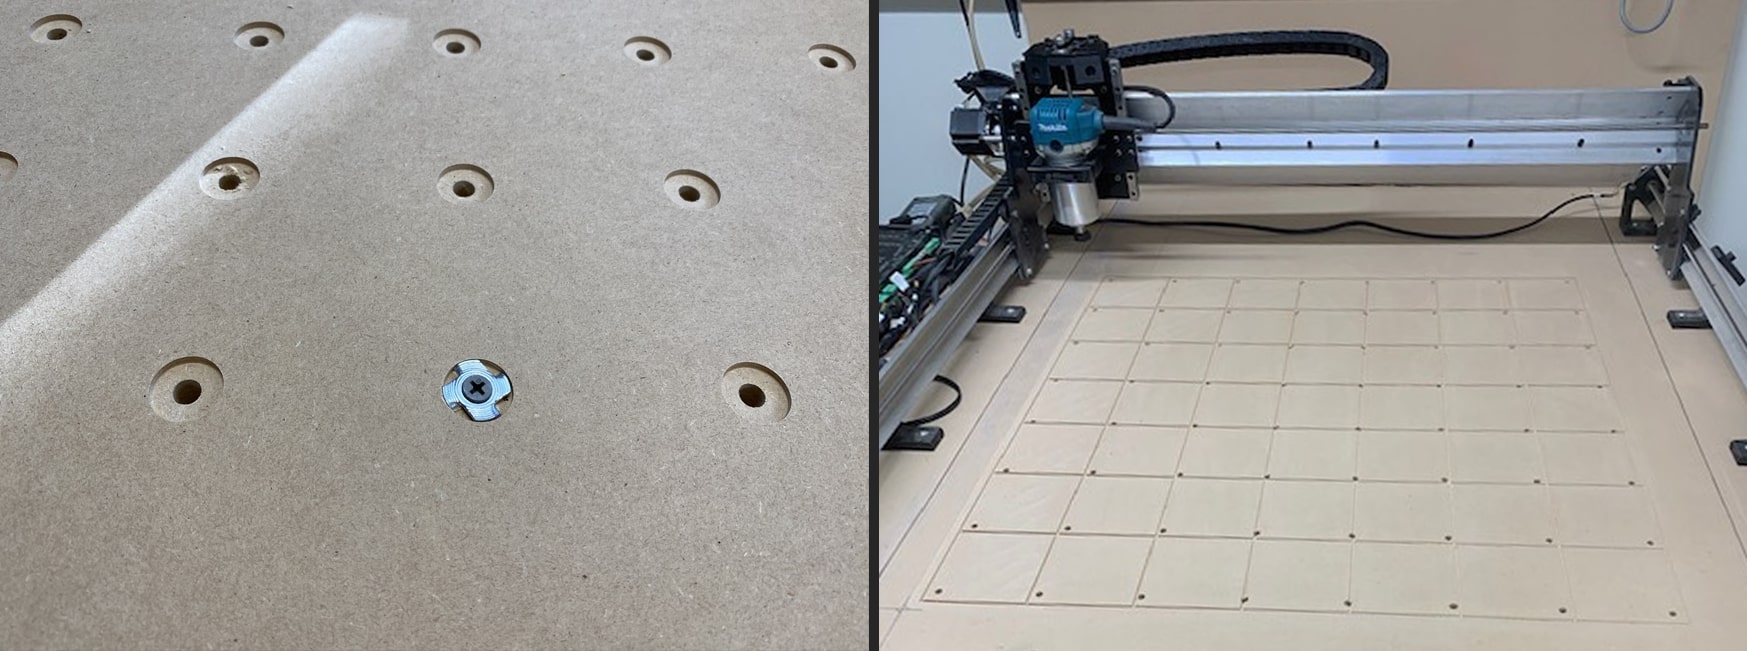
A cheap and straight forward mounting concept, shown off on our forums by both Mike and Frank. By starting with a simple sheet of MDF and running a drilling and boring operation on that sheet using a CNC, threaded inserts can be hammered into the sheet to form a mounting hole pattern for clamps and jigs which can be placed repeatably:
Original posts:
- https://forum.sienci.com/t/spoilboard-project/236
- https://forum.sienci.com/t/wasteboard-proof-of-concept/753/6
Dovetail-track Wasteboard (Dean)
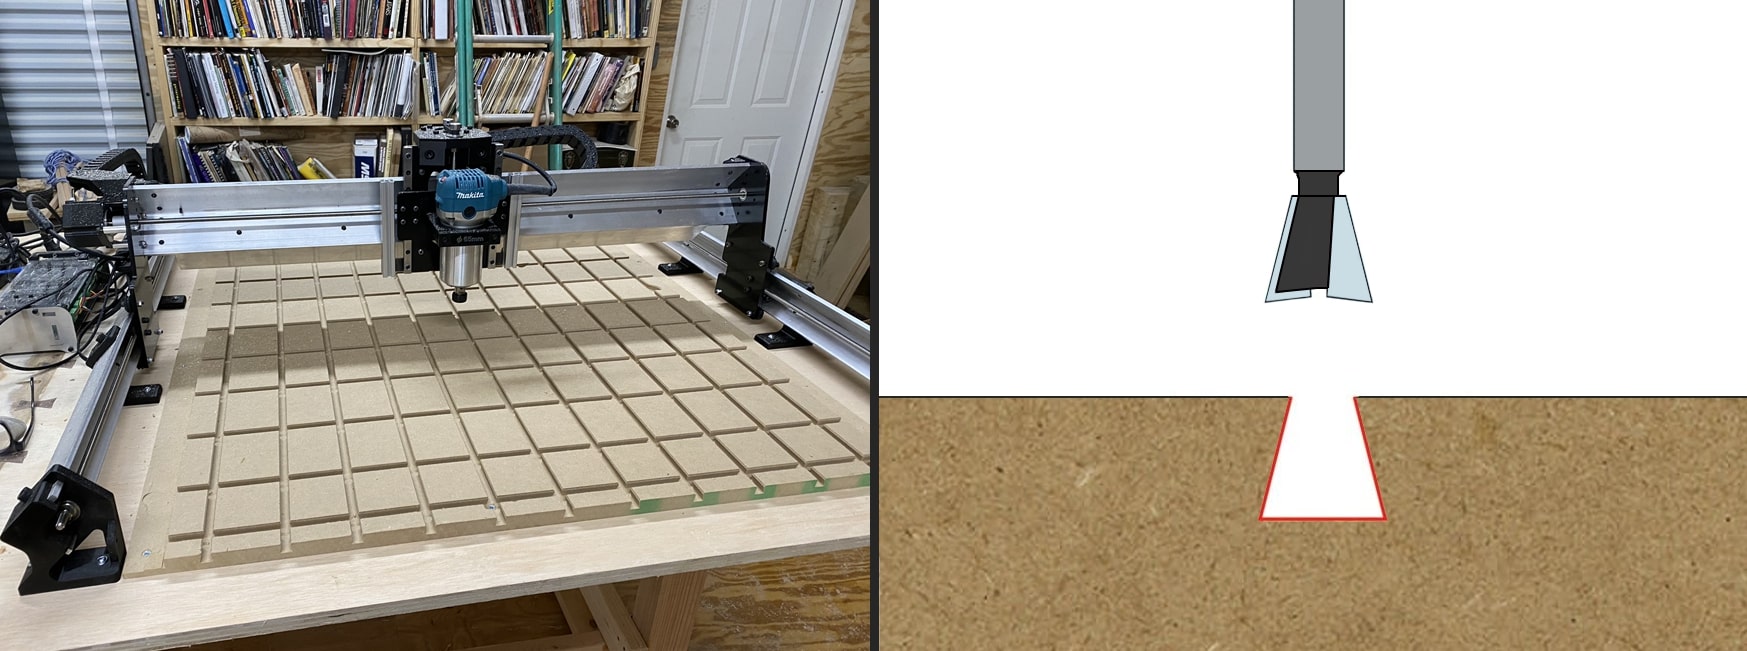
Dean took a similar approach to the threaded-insert setup by starting with a simple sheet of MDF, however he used a dovetail cutting bit to create a dovetail profile in the board in a cross-hatching design instead. This enables him to use special dovetail nuts as free-moving mounting points for his clamping hardware:
Original post: https://forum.sienci.com/t/what-are-your-plans-for-a-table/95/43
T-track Wasteboard (Keith)
Keith is one of our Beta testers who made a really cool T-track wasteboard design for his LongMill Beta unit. By spacing 7 t-track slots between 6 MDF strips, he’s able create a surface which is both consumable but also easy to mount to when using t-track clamps or other t-track compatible mounting hardware. The ¾” thick MDF strips were approximately 5.25” wide by 36” long for his particular setup:

Original post: https://www.facebook.com/groups/mill.one/permalink/584763838661618/
Similar post: https://forum.sienci.com/t/LongMill-up-and-running/187
Full T-track Tables
Many community members have combined the concept of the simple table design and Keith’s T-track wasteboard concept into a single unit. The resulting designs by Dave and John were well documented for future users to follow, and are shown below respectively:

Original posts:
- https://www.facebook.com/groups/mill.one/permalink/767608623710471/
- https://www.facebook.com/groups/mill.one/permalink/807686936369306/
- https://www.thissmarthouse.net/sienci-LongMill-our-first-cnc/
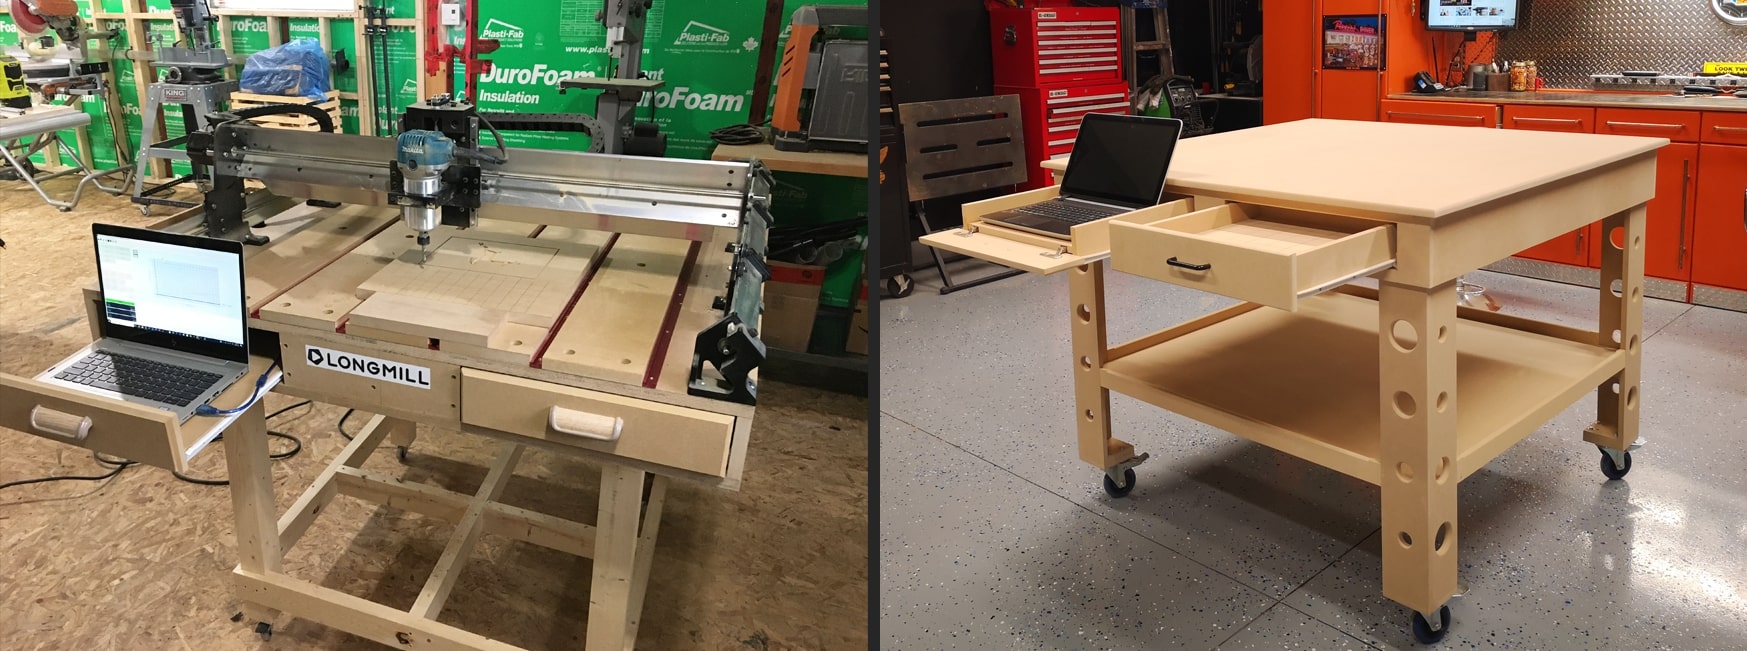
Drawer Storage
Another widespread concept is the idea to add pull-out drawers to the underside of the table in order to act as storage for the control box, a tethered laptop, or any of the dedicated tools or cutting bits. The designs shown were done by Derek and Robert respectively:
Original posts:
- https://forum.sienci.com/t/what-are-your-plans-for-a-table/95/18
- https://forum.sienci.com/t/what-are-your-plans-for-a-table/95/63
Similar posts:
- https://forum.sienci.com/t/waste-board-with-t-slots/225/2
- https://www.facebook.com/groups/mill.one/permalink/900949107043088/
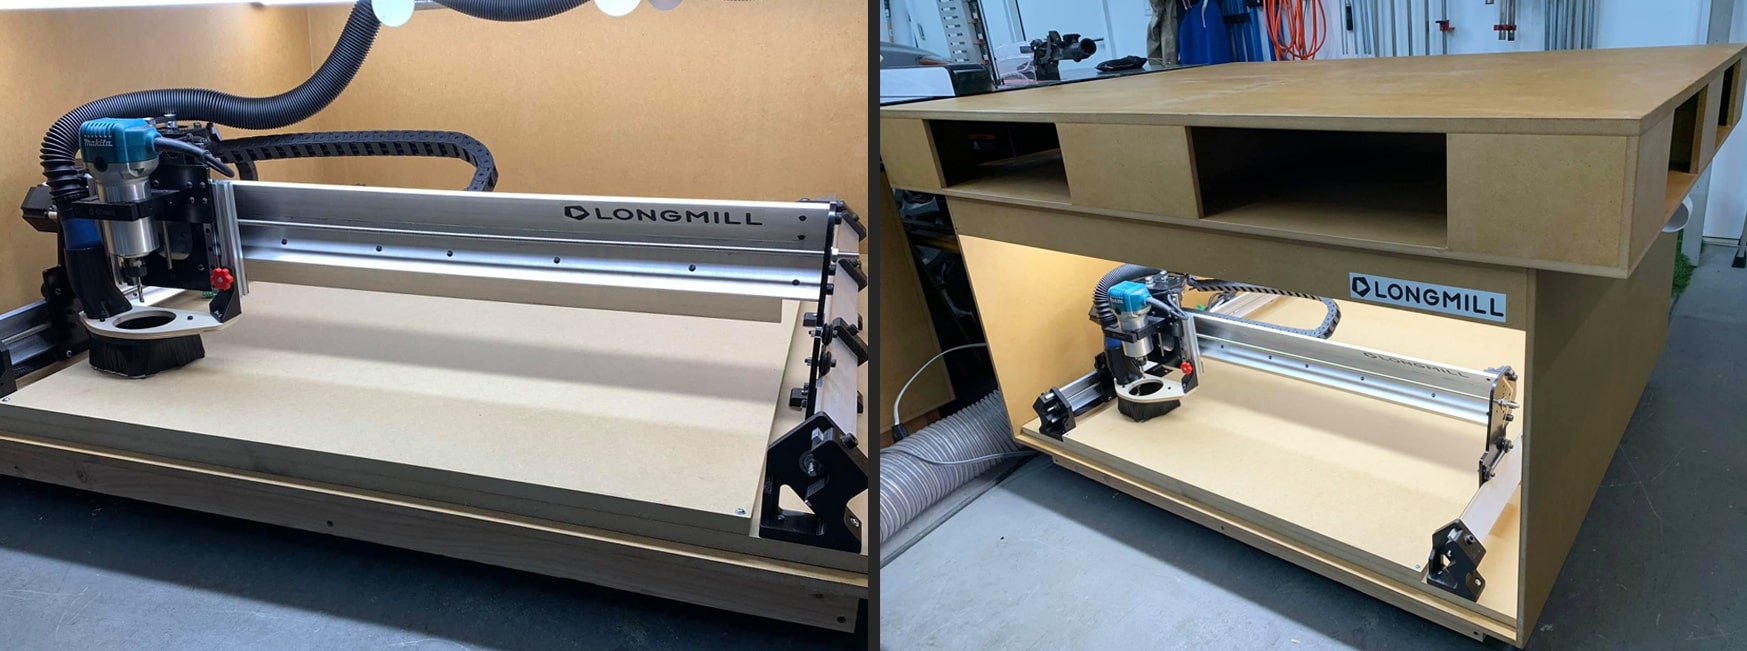
Under-table Table (Joseph)
Joseph was very limited on space in his shop so he instead opted to place his LongMill underneath his workbench. Enhancing this layout with outfeeding and under-lighting certainly makes the best of a shop which was already short on space:
Original post: https://www.facebook.com/groups/mill.one/permalink/842211146250218/
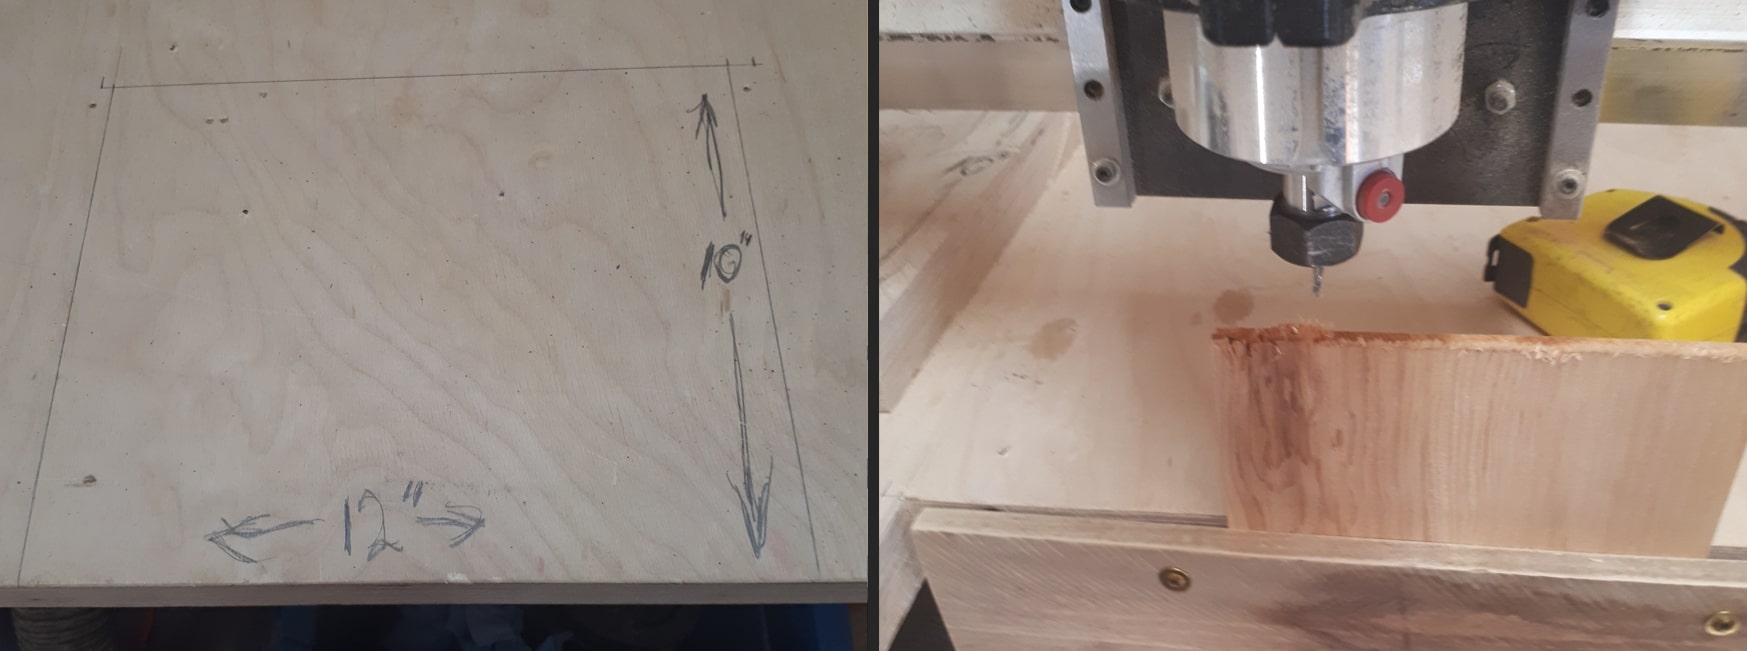
End Grain Cutout (Greg)
Greg had been commissioned some work and realized how beneficial it would be to orient any given board stock vertically so that he’d be able to machine the end grain. This especially comes in handy when using the CNC to create joinery. He modified his existing table to have a cutout portion for attaching boards, while maintaining the remaining surface for normal cutting (as he explains in his post):
Original post: https://forum.sienci.com/t/modification-for-end-of-board-machining-end-grain/235
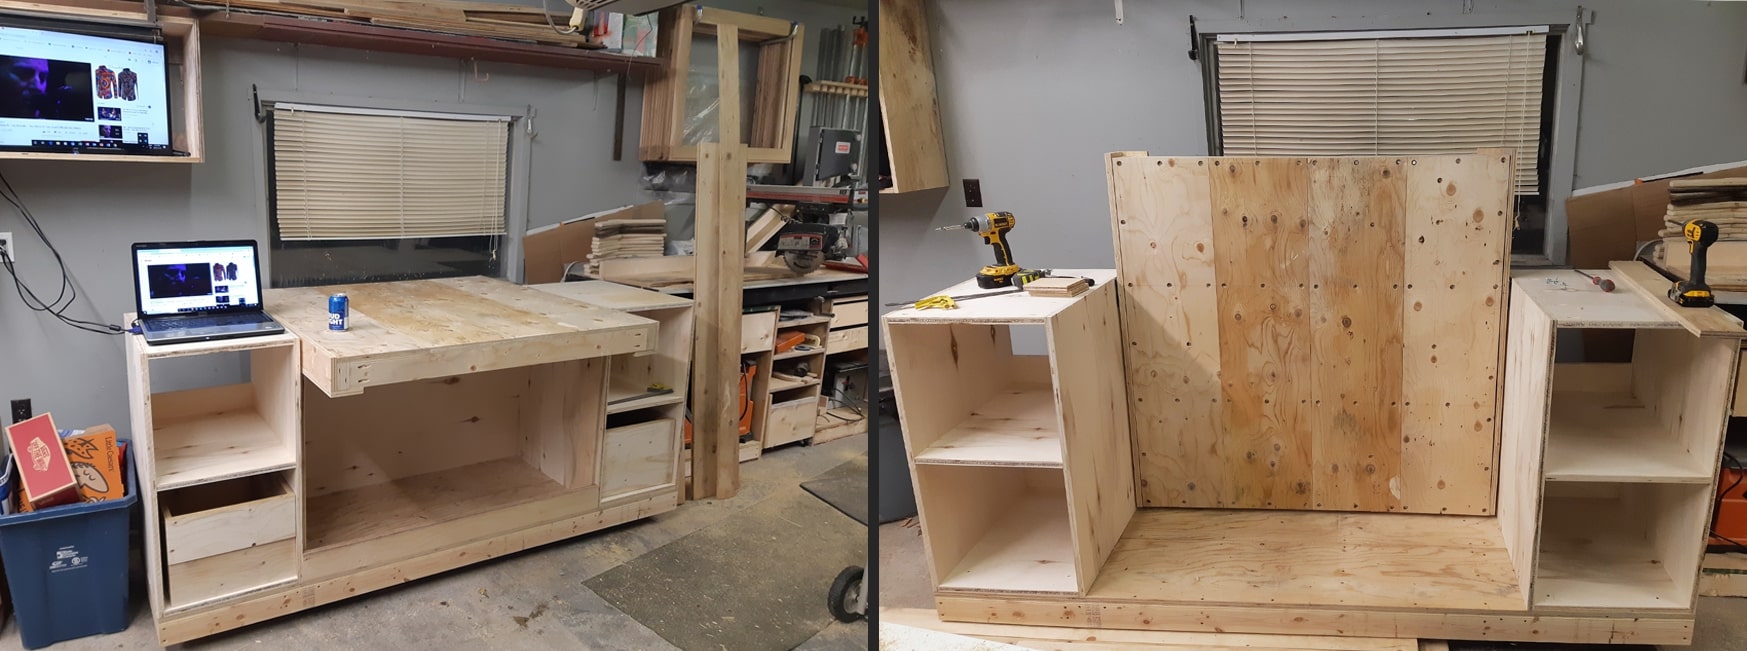
Pivoting Table (Kris)
Kris never mentioned much about his design, however it’s really well laid out to orient the CNC horizontally when attaching stock material or running the machine, while enabling him to rotate everything out of the way so that he can have more space to work in his shop when he needs it. The additional shelving is also useful for added storage and to act as an additional work surface:
Original post: https://forum.sienci.com/t/what-are-your-plans-for-a-table/95/49
Space-saving Lifter Table (Philip)
Another great concept for space saving came from Philip, who managed to claim the ‘air rights’ in his two-car garage so that he could hoist his CNC out of the way when not in use. When lowered, the shelf clamps onto his rolling workbench to give it the necessary stability while cutting:
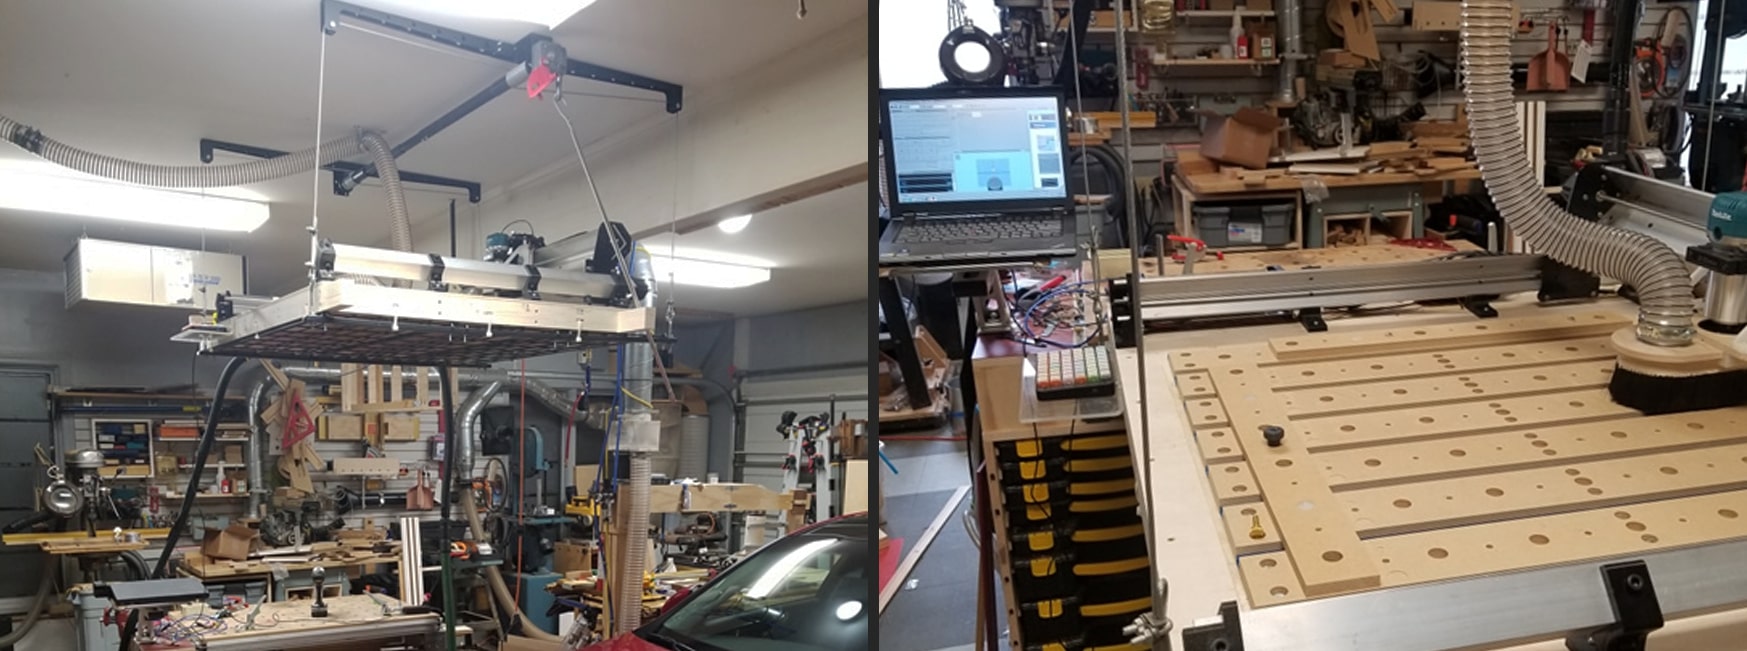
Original post: https://forum.sienci.com/t/what-are-your-plans-for-a-table/95/60
Machine Enclosure
Adding an enclosure to your CNC is a great way to reduce noise and dust in the shop. Here we are lucky to have Dave, Charles, and Paul show off their designs. They stuck to using readily accessible materials while ensuring a good view of their machine while in operation, sound dampening, and a great lighting setup. Charles has a well laid out guide on our community forum and Dave has made a video where he outlines the entire building process behind his enclosure:

Dave’s video – https://www.youtube.com/watch?v=SxiLNjUlw3c
Charles’ guide – https://forum.sienci.com/t/custom-cover-for-LongMill-mk2-30×48/10423
Paul’s post – https://www.facebook.com/groups/mill.one/permalink/835391973598802/
Other Modifications
There are even more great modifications that can be made to your CNC table to improve its usability and the usability of the machine itself. To see the full list of current modifications ranging from David’s dust collection hose boom and switching box, to Philip’s 3D printable laser diode centre-point locator, click the link here: https://resources.sienci.com/view/lmk2-open-source/
Wasteboard Surfacing
Surfacing is simply the process of ‘flattening’ your wasteboard setup. Flattening is in quotes because we’re not actually making a true flat surface with this process, instead we’re trying to make a surface that’s parallel to the CNC. This is important since when you tell it to cut a 1mm deep circle into your material you’d want it to me 1mm deep at all points along that circle, not deeper in some areas and shallower in others. Surfacing can also:
- Eliminate warps or bumps in the material being used as your wasteboard
- Be used for maintenance purposes to clean off old marks and scars and leave you with a new, clean surface to glue, clamp, and mount your material to
When surfacing, you’ll generally want to buy a purpose-made surfacing bit. These are made for light passes but are usually larger in diameter so they can cover a large area quickly and leave a good surface finish. Larger bits can also reach further outside the cutting area of the machine.
We tend to use the 22mm surfacing bit we sell on our store. If you don’t have one of these available it’s still possible to flatten your wasteboard with something as small as a 1/4″ but it’s going to take much longer to process your whole cutting area.
Making the G-code
There’s nothing fancy about surfacing g-code, it’s usually a simple spiral or zig-zag pattern that fills a rectangular space and usually takes 30-40 minutes to run. The only inconvenience is making it in the first place and ensuring that the finished surface comes out flat as expected. When making the g-code, keep in mind the following:
- Cutting width and depth: you’ll usually want to cut as much of the MK2’s area as possible so over-size your cutting job and consider disabling limit switches if you have them
- Step over: generally about 40% overlap, close passes will result in a longer cutting time but far passes might not make for a smooth finish
- Step down / layer depth: usually 1mm or less, cutting any deeper with a large bit can result in an uneven surface
- Feeds & speeds: setting the Makita between 3 and 4 (around 18,000RPM) works well on MDF and other woods and the MK2 can usually handle these at 2000mm/min (80ipm)
- Max / total depth: will repeat the surfacing pattern more than once if it’s larger than the step down value. This will cut deeper into your wasteboard if your board is very warped or you’re trying to eliminate deep cuts
With all these values in mind, you should be able to plug them into whatever program you typically use and create the surfacing code you need. Draw a rectangle, specify a ‘pocket’ cut out operation, and fill in the remaining settings.
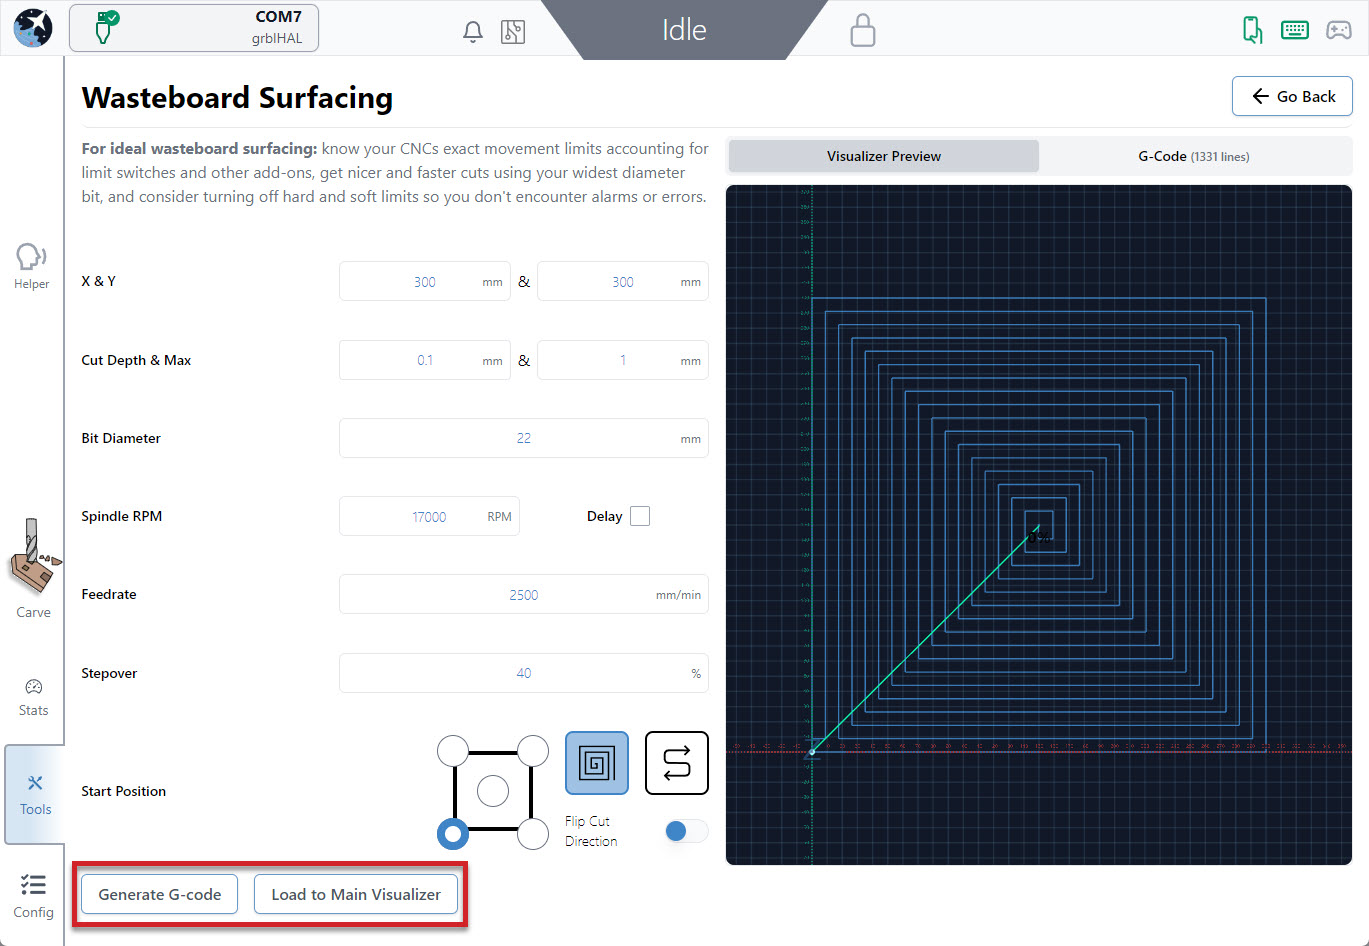
We also have a ‘Surfacing’ utility built into gSender that you can use for g-code generation with much less fuss. Once you decide on your settings you can ‘Generate G-code’ to view the path and then ‘Run on Main Visualizer’ to import the g-code to run it just like a regular g-code file.
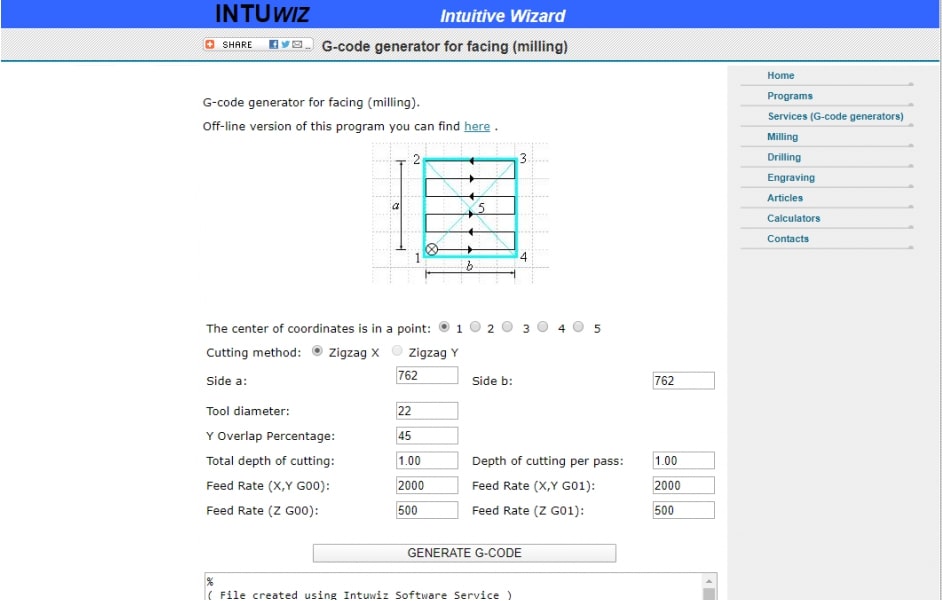
And there are still more options like INTUWiz, an online g-code generation program that is able to generate “facing” g-code (http://www.intuwiz.com/plane.html#.Xidt8sjYouV).