
One important thing to learn is how to properly secure material down to the bed of the machine.
Some clamping methods are strong but get in the way, while others keep a low profile but aren’t quite as strong. Play around with these methods to see which ones you can use individually or in combination for your ideal setup.
If you’re just starting out with building your machine and are unsure of the types of workholding/clamping setups you might need, it can be daunting making the first decision for how you’d like to set up your table/wasteboard. The good news is that it doesn’t have to be complicated at all! We’ll go through each of the common types of table/wasteboard setups below.
Why Workholding Matters
Securing your material properly to the bed of your CNC machine is one of the most important skills you’ll learn. Rigid workholding keeps your stock from moving, sliding, or crashing during a cut — protecting your project, your tools, and your machine.
Some methods are strong but bulky. Others are low profile but less powerful. The best setups often combine multiple methods to balance strength, clearance, and speed. The ultimate goals:
- Hold your workpiece safely and securely
- Make more projects in less time
- Avoid damage to your material or machine
Master Workholding Chart
Choosing the right workholding method is key to successful CNC projects. The table below provides a comprehensive reference, from low-cost, beginner-friendly options to mid-range flexible setups and advanced or specialized methods. Color-coding helps guide your choice: blue rows indicate beginner-friendly methods, orange rows show mid-range flexible options, and green rows highlight advanced setups. When deciding which method to use, always consider the material type, the style of cut, and the toolpath to ensure safe, effective, and accurate machining.
| Method | Best For | Avoid When | Setup Needed / Options |
|---|---|---|---|
| Screws 🔩 | Strong hold for large/thick stock Cutting parts/contours where screw placement avoids toolpaths |
Brittle materials, cosmetic surfaces, small parts Projects that can’t tolerate holes |
Any wasteboard (no specialized setup needed) |
| Tape + CA Glue / Double-Sided Tape 🩹 | Small/thin parts, no tabs needed Cutting parts without clamps or tabs Light materials, smooth surfaces |
Heavy cuts, uneven surfaces, tall stock Projects needing heavy-duty clamping |
None needed |
| Tabs & Bridges 🪚 | Holding cutouts in place until job ends Small parts during profiling Cutting parts from sheet stock without clamps in the way |
Jobs where tab cleanup is hard Thick/hard materials needing heavy retention |
CAM software setup for tabs Flush trim tools/chisels for cleanup |
| Top Clamps 🔧 | General cutting, engraving, surfacing Securing thin sheets Cutting pockets/engraving where edges don’t need machining |
Clamps block toolpath Delicate materials without padding |
T-slot / T-tracks Threaded inserts Screws into wasteboard |
| Side Clamps / Toe Clamps 🔧 | Surfacing slabs, odd shapes Machining top surface without hitting clamps |
Thin sheets needing even pressure Projects needing consistent flat pressure |
Threaded inserts T-tracks |
| Fence 🚧 | Straight/repeat cuts Holding long materials Repeatable setups |
Projects needing flexible placement High lateral cutting forces |
Fixed or adjustable fence secured to wasteboard |
| Dog Holes 🐶 | Repeat woodworking setups Positioning stops Woodworking projects |
Non-wood, heavy down-force cuts Jobs needing heavy downward pressure |
Pre-drilled dog hole grid in wasteboard |
| Vise 🗜️ | Small or hard materials Aluminum or repeated jobs needing quick clamping |
Thin sheets, delicate or irregular shapes | Mounted vise on wasteboard |
| Vacuum Table 🌬️ | Thin sheet goods needing flatness High-speed machining with full surface hold-down |
Porous materials Very small parts with limited surface area |
Vacuum pump or shop vac with plenum Gasket tape or dedicated wasteboard |
Types of Workholding
Before diving into each method, it’s important to understand that CNC workholding isn’t a one-size-fits-all solution. Each technique has its strengths, limitations, and setup requirements. Some options like screws or tape, can be used right away with almost no prep, while others like T-tracks, threaded inserts, require more planning and additional parts to install. To help you explore your options, we’ve outlined the most common workholding methods below. Use this as a quick reference to mix, match, and build the best setup for your projects.
Checkout this large thread of our community chatting about different table setups they have or are planning to build! What are your Table Plans?
Screws
Screws

If you don’t mind a few extra holes in your wasteboard, screws can be a simple, no-fuss way to secure your material. Often first time users will stick to this method to learn, and then replace their wasteboard once they get the hang of this new hobby. Just grab some screws and fix your material directly onto the wasteboard. Avoid tool collisions by planning out your screw placement, and add extra screws where there will be loose cutouts in your project. To minimize screw holes in your projects, consider using Tabs.
Screw Gotchas
| Issue | Description | Fix |
|---|---|---|
| Raised Areas 🔄 | Screws can tear out wasteboard material, leaving bumps that interfere with future projects. | Scrape flat with a paint scraper or surface the wasteboard. |
| Splitting Material 📏 | Driving screws directly into your project can split wood, especially near edges. | Pre-drill holes to prevent splitting. |
| Screw Length Matters 😱 | Screws that are too long can punch through the table or damage the machine. | Use screws short enough to stay within the wasteboard. |
| Bowed Material 📐 | Large sheets only screwed at the corners may bow upward in the center, causing uneven cuts. | Add screws or clamps across the middle to keep material flat. |
| Router Bit Collision ⚠️ | Hitting a screw with the router bit can break the bit, damage the spindle, and ruin the project. | Plan screw placement carefully, keep them clear of toolpaths, and double-check in CAM. |
| Stripped Screw Heads 🔧 | Screws can strip easily if reused or overtightened, making removal difficult. | Use good quality screws, avoid over-tightening, and keep a screw extractor handy. |
| Wasteboard Wear 🪵 | Repeated screwing into the same spots weakens the wasteboard and reduces holding power. | Rotate screw locations or replace/resurface your wasteboard periodically. |
| Metal-to-Metal Contact ⚡ | Driving screws into hidden T-tracks, threaded inserts, or hardware under the wasteboard can cause damage. | Know your wasteboard layout and avoid those areas. |
| Vibration Loosening 🔩 | Cutting vibrations can slowly back screws out, loosening the hold. | Re-check screws before long jobs and use coarse-thread screws for MDF. |
| Limited Repositioning 🚫 | Once material is screwed down, it’s harder to adjust alignment or squareness. | Double-check placement before tightening all screws. |
While this method is quick and easy, it does mean your wasteboard will get a bit of wear and tear over time. But if that doesn’t bother you, it’s a solid, cheap and easy option!
Tape & Glue
Tape & CA Glue or Double Sided Tape
Painter’s tape on both surfaces (wasteboard and stock material) with CA glue in between. Strong, temporary hold that leaves no residue on your material.
Apply minimal glue, keep glue centered to avoid spill-out , and clean tools with acetone if needed.
Tape Gotchas
| Issue | Description | Fix |
|---|---|---|
| Surface Prep Matters 🧽 | Dust, oil, or uneven surfaces weaken the bond, causing parts to shift mid-cut. | Clean both surfaces and use painter’s tape or sand lightly before applying. |
| Difficult Removal 🪛 | Strong adhesives can tear fibers from wood or leave sticky residue. | Use a heat gun, scraper, or adhesive remover to release cleanly. |
| Material Thickness 📏 | Thin or flexible parts may bow or warp if tape is the only hold. | Add extra tape coverage or use auxiliary clamping. |
| Heavy Cuts ⚡ | Aggressive passes or large bits can overcome tape’s holding power. | Use lighter passes, smaller step-downs, or combine with clamps. |
| Residue on Tools 🧴 | CA glue squeeze-out or tape adhesive can gunk up bits. | Apply minimal glue, keep it centered, and clean tools with acetone if needed. |
| Temperature Sensitivity 🌡️ | Adhesives can fail in cold shops or soften in heat, reducing hold strength. | Keep materials at room temp and avoid extreme environments. |
| Wasteboard Damage 🪵 | Over-aggressive removal can lift fibers from the wasteboard. | Use painter’s tape under the CA glue method so only tape peels away. |
| Alignment Issues 🎯 | Once taped down, parts can be hard to reposition without re-taping. | Dry-fit and mark positions before committing with adhesive. |
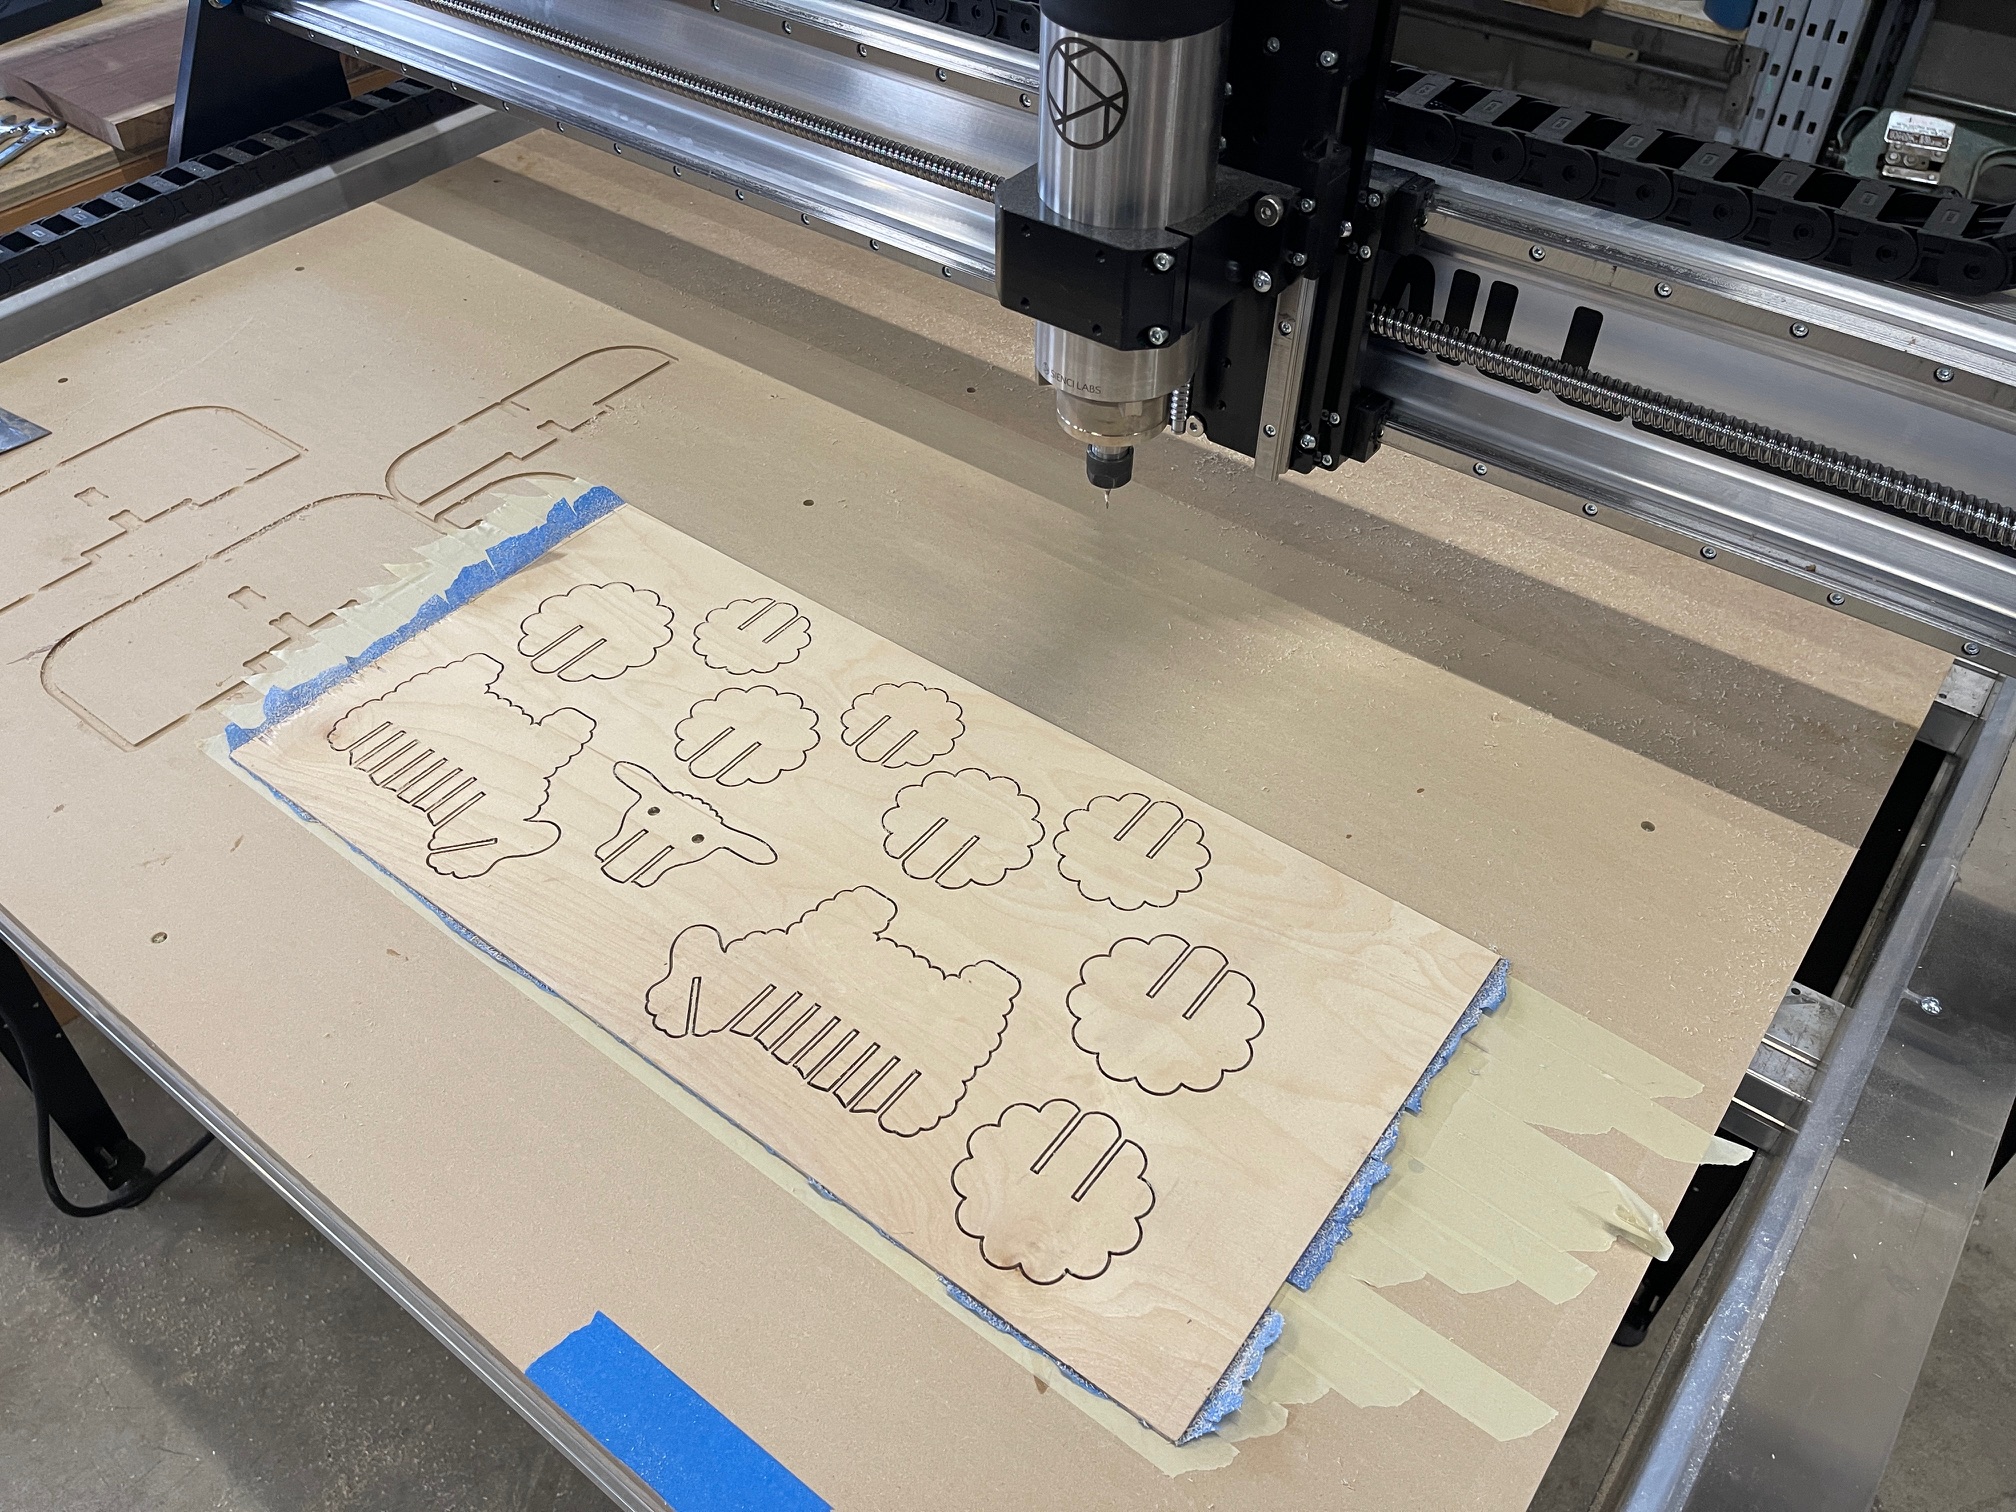
Hot Glue
Hot Glue Workholding
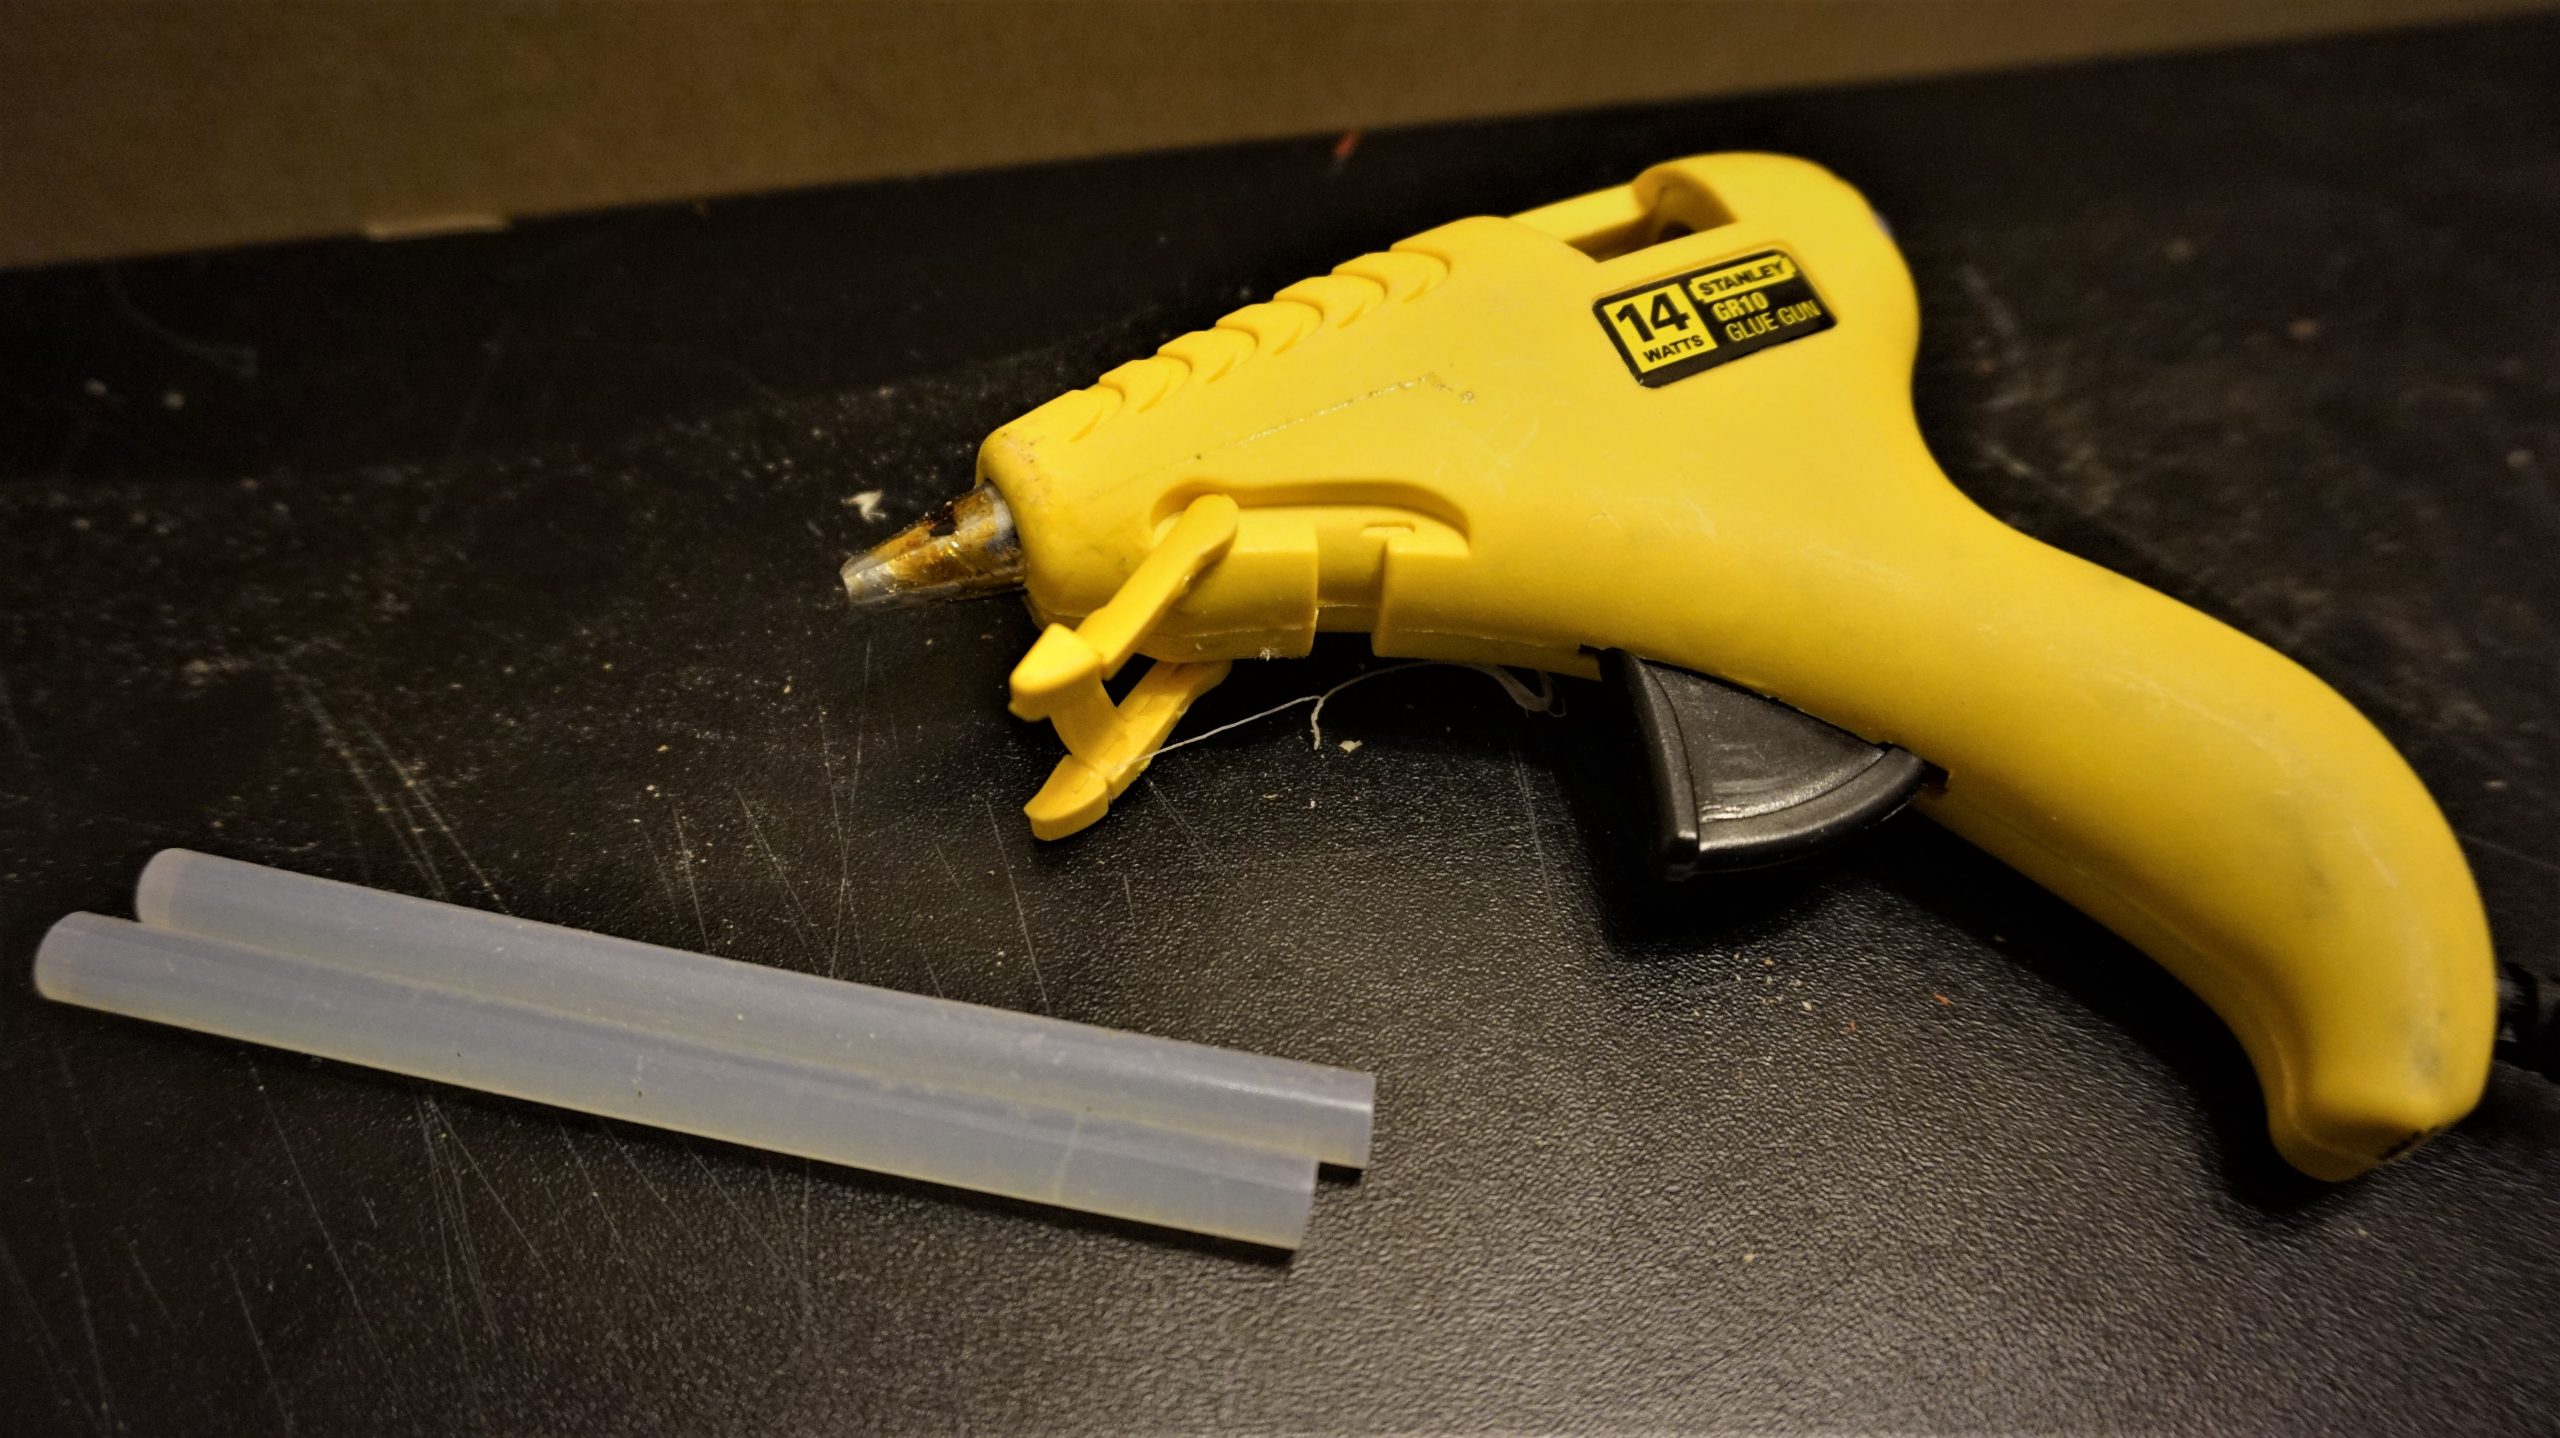
A quick and versatile option, hot glue can be applied directly between the stock and the wasteboard, or used as “glue tabs” at the edges of your material. It sets fast, is easy to remove, and works best for flat-bottomed parts with light to medium cutting forces.
Apply glue in small beads or spots, press firmly until it sets, and avoid excess glue that may lift your material.
Hot Glue Gotchas
| Issue | Description | Fix |
|---|---|---|
| Bond Strength Limits 🧩 | Hot glue works best for small or medium pieces. Larger/heavier stock may break free under cutting loads. | Use multiple glue points or combine with clamps for added security. |
| Heat Sensitivity 🔥 | Glue joints can soften under heat from aggressive cuts or warm shop environments. | Take lighter passes and avoid overheating the material. |
| Uneven Surfaces 🪚 | Gaps or warped stock reduce contact, weakening the bond. | Flatten surfaces beforehand or use more glue to fill gaps. |
| Residue on Wasteboard 🧴 | Glue can stick stubbornly and pull up wasteboard fibers. | Use a thin barrier (painter’s tape) between the glue and wasteboard. |
| Quick Setting Time ⏱️ | Glue hardens in seconds, leaving little time for repositioning. | Dry-fit your material and mark placement before applying glue. |
| Removal Difficulty 🪛 | Thick glue spots can be hard to pry off without damaging thin parts. | Apply thinner beads and use isopropyl alcohol or gentle heat for easier release. |
| Limited Reusability ♻️ | Once removed, glue cannot be reused like clamps or fixtures. | Keep a hot glue gun nearby for quick reapplication when needed. |
T-Tracks
T-tracks/T-slot mounted to the table
T-Tracks are a tried-and-true favorite among hobbyists and pros alike. These handy tracks let you position clamps anywhere along the wasteboard, making it easy to secure odd-shaped materials and quickly rearrange clamps for different-sized projects. You can find aluminum t-track and compatible clamps online, on our store, and at your local woodworking store.
Check out this great video on building a bench and installing T-tracks Watch Video
T-Tracks Gotchas
| Issue | Description | Fix |
|---|---|---|
| Incorrect Track Placement 📏 | T-tracks that aren’t perfectly parallel can misalign clamps or material. | Measure carefully and mark lines before installing. |
| Track Clearance ⚠️ | Clamps can hit screws, wasteboard edges, or the machine if tracks are too close to the sides. | Plan track layout and ensure sufficient clearance around all clamps. |
| Loose Hardware 🔩 | Bolts or T-nuts can loosen over time with vibration, reducing clamping strength. | Use lock washers, thread locker, or periodically check tightness. |
| Compatibility Issues 🔧 | Some clamps may not fit your track profile or may slide unexpectedly. | Confirm clamp size/type matches your T-track before buying. |
| Track Obstructions 🛑 | Debris or dust in the T-slot can prevent smooth movement of clamps. | Keep T-slots clean and vacuum regularly. |
| Upfront Cost & Setup 💲 | T-tracks are more expensive and require mounting, unlike screws or tape. | Invest in proper installation; it’s a long-term solution. |
| Cutting Near Tracks ✂️ | Cutting too close can damage the track or clamps. | Plan toolpaths to avoid the area directly above the track. |
| Warped or Uneven Wasteboard 📐 | Clamps may not sit flush if the table surface isn’t flat. | Surface the wasteboard or use shims under clamps as needed. |
Tips:
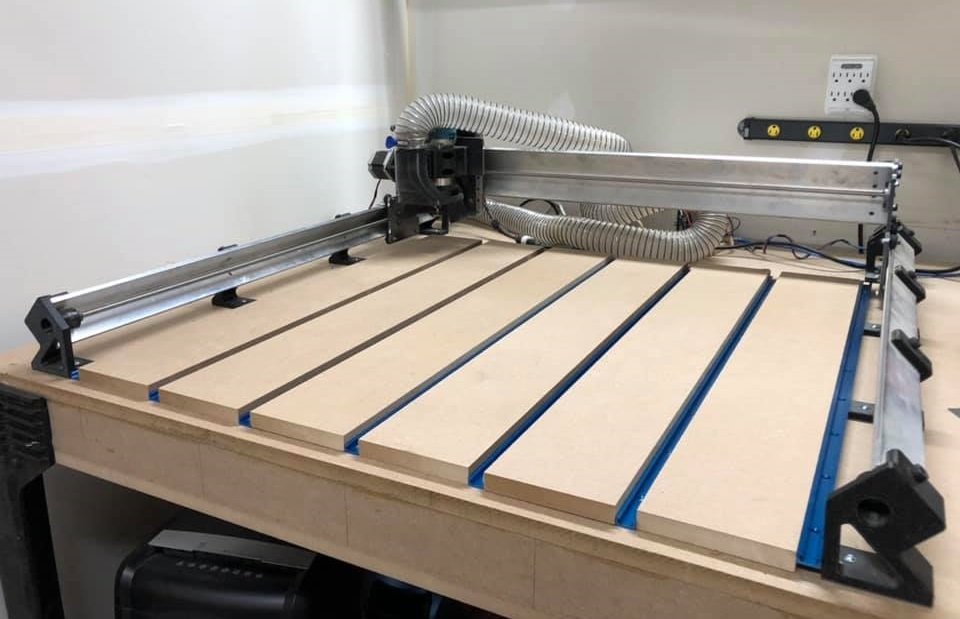
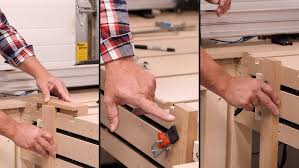
- Putting t-tracks in between thicker MDF slats, like in the photo, will allow you to mill off the surface of the MDF to get a perfectly flat surface relative to your machine. Furthermore, instead of replacing the whole wasteboard, you could replace smaller sections of it at a time
- If you have a thick enough waste bed, you can use your machine to cut the grooves for your t-track, just size the grooves to be the width of your t-track
-We designed a custom t-track system that works with hex-headed 1/4″-20 hardware that you can see in our store here , with the setup guide here: Installing the T-Track set
T-Tracks work best with top clamps, though some side clamps can also be used. Keep in mind that certain side clamps may have a limited range or might slip when aligned with the track direction.
Why Use T-Tracks?
Super Flexible: Position clamps anywhere along the track for max versatility. 🔧
Quick Adjustments: Easily reposition clamps when switching between projects. ⏳
Great for Odd Shapes: Perfect for securing irregularly shaped materials. 🛠️
While T-Tracks require an upfront investment and a bit of setup time, they’re a reusable, long-term solution that’ll save you time and money compared to one-time-use options like double-sided tape. If you find yourself working on a variety of projects, this system may be right for you. Check out our community chatting about building a t-track table Community Link.
T-tracks are available for purchase on our store page here, or can be found in other sizes/variations from other sources depending on your needs. Full instructions for installing T-tracks can be found Instructions.
Threaded Inserts
Threaded Inserts
Threaded inserts are a good budget alternative to t-tracks. These little gems let you secure clamps anywhere on your wasteboard, giving you plenty of flexibility in positioning. You can space them out further apart for general use or pack them closer together for fine-tuned adjustments.
Threaded inserts work well with both top clamps and side clamps. Just be careful when tightening your clamps—overdoing it can pull the inserts out.
Threaded Inserts Gotchas
| Issue | Description | Fix |
|---|---|---|
| Pull-Out Risk 🔩 | Over-tightening clamps can pull inserts out of the wasteboard. | Pre-drill proper-sized holes, countersink if needed, and don’t over-tighten. |
| Misaligned Inserts 📏 | Inserts not perfectly vertical can tilt clamps and cause uneven pressure. | Use a guide or jig to keep inserts straight during installation. |
| Wasteboard Damage 🪵 | Screwing inserts into a weak or thin board can crack or compress the MDF/plywood. | Use thick, stable wasteboards and consider gluing inserts for extra strength. |
| Spacing Errors 📐 | Inserts too far apart can limit clamp placement or reduce flexibility. | Plan a layout in advance for your typical projects. |
| Insert Type Mismatch ⚠️ | Different thread sizes or types may not match your clamps. | Confirm thread size (e.g., 1/4”-20) and clamp compatibility. |
| Difficulty Removing Inserts 🔧 | Some inserts can get stuck or cross-threaded when removing hardware. | Take care during installation and use proper tools for removal. |
| Debris in Threads 🧹 | Sawdust or chips can get stuck in insert threads, making clamp installation difficult. | Blow out or clean threads before use. |
| Time Investment ⏳ | Installing multiple inserts takes more effort than simpler methods like screws or tape. | Install once, then enjoy long-term flexibility. |
Why Use Threaded Inserts?
Affordable & Effective: A cost-efficient way to add clamping flexibility. 💲
Customizable Layout: Space them how you like for your specific projects. 📏
Great for Clamping Options: Works with both top and side clamps. 🔩
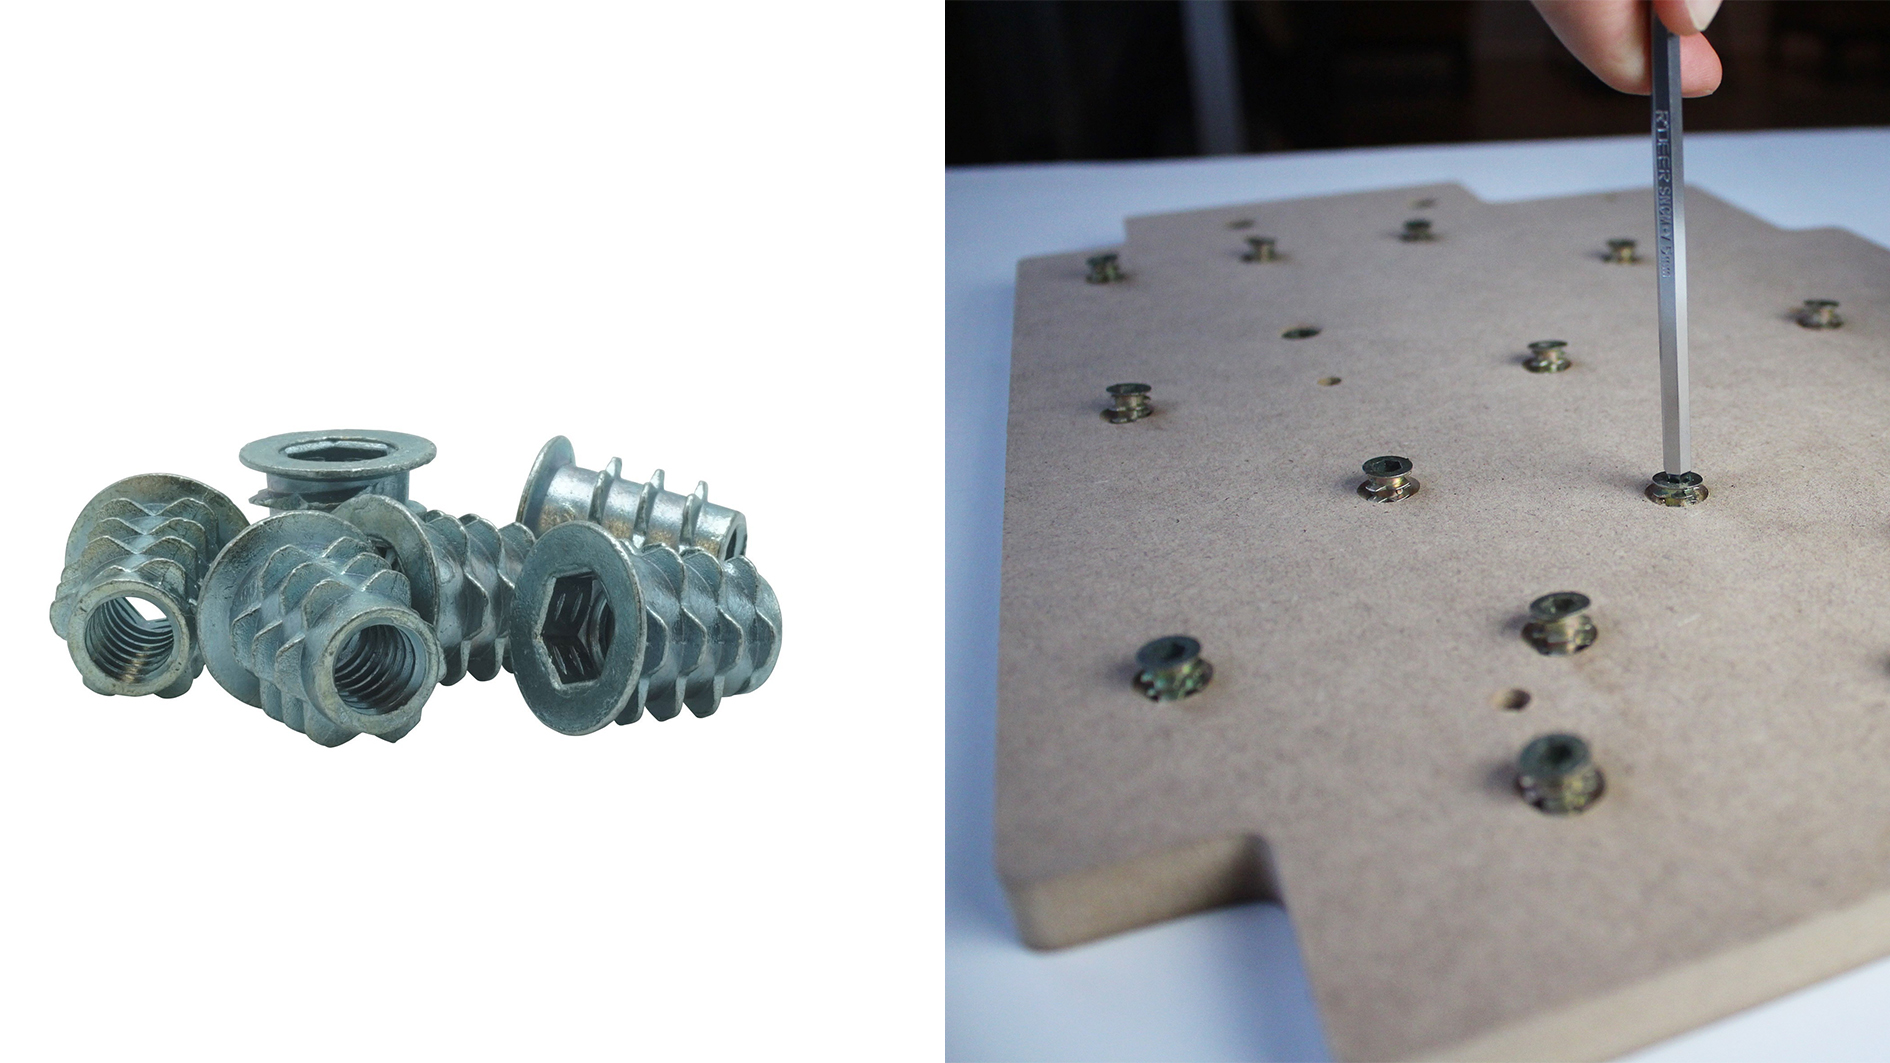
Setting Up Threaded Inserts
To install these, you’ll first need to pre-drill a pattern of 5/16” (8mm) holes in your wasteboard.
Include a small ½” diameter, ¼” deep counterbore so that these inserts sit below the top of the wasteboard out of the way for surfacing. Install the inserts securely—some types screw in, while others press in.
Threaded inserts can also be used to secure other add-ons like the Vortex shown in the picture below.
Though not as quick to adjust as T-Tracks, threaded inserts are reliable, durable, and won’t break the bank. A solid choice for any CNC setup!
Threaded inserts are available for purchase in packs of 25 or 100 pcs on our store page Buy A Pack. These use a ¼-20 internal thread to interface with any clamp you might be using.
Clamps
Clamps
Clamps are versatile and come in various types, including CAM clamps, low profile clamps, and hold-down clamps. They are suitable for general woodworking, sign-making, and soft metal projects, providing a secure hold for materials of different sizes. Their adjustable nature makes them reusable and adaptable for various setups.
However, clamps may interfere with cutter paths if not positioned correctly and can damage softer materials unless padded. Attention to clearance and material protection is crucial when using clamps. Let’s explore some of the commonly used clamps and their applications.
Top Hold-Down Clamps

Apply pressure from above — ideal for flat workpieces, engraving, and general cutting. Easy to adjust but can interfere with toolpaths if not placed carefully.
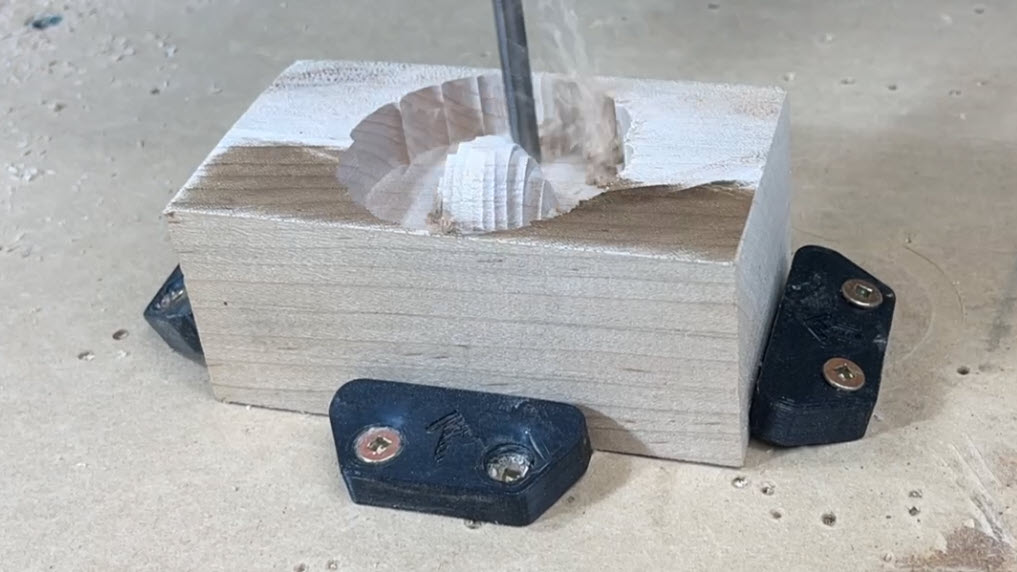
Toe Clamps
Toe clamps apply pressure from the side, pulling the material down and towards a fixed surface. This makes them perfect for securing materials without obstructing the top surface—ideal for machining tasks requiring full access to the top of the workpiece, like surfacing.
Want to make your own clamps? Click Make My Own!
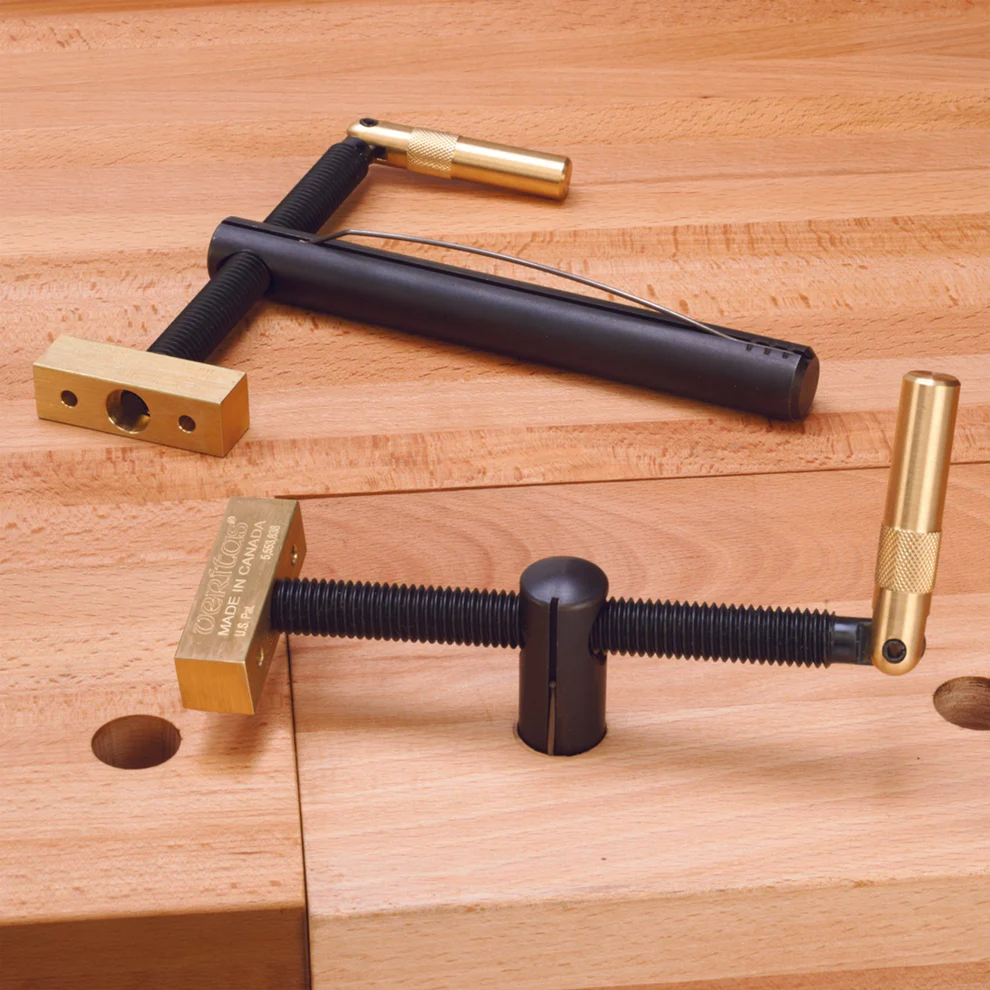
CAM Clamps

CAM clamps use a rotating CAM mechanism to apply quick, strong pressure. They’re great for projects where you need to clamp and release material frequently. Just a small twist, and you’re locked in.
Low Profile Clamps

Low profile clamps keep a low clearance, making them perfect for setups where vertical space is limited. They help avoid interference with cutting tools while still keeping material firmly in place. A great option for precision work.
Step Clamps

Step clamps have adjustable steps that allow for height variations, making them great for uneven or varying thickness materials. They offer flexibility for holding down irregularly shaped workpieces without excessive force.
Side Clamps
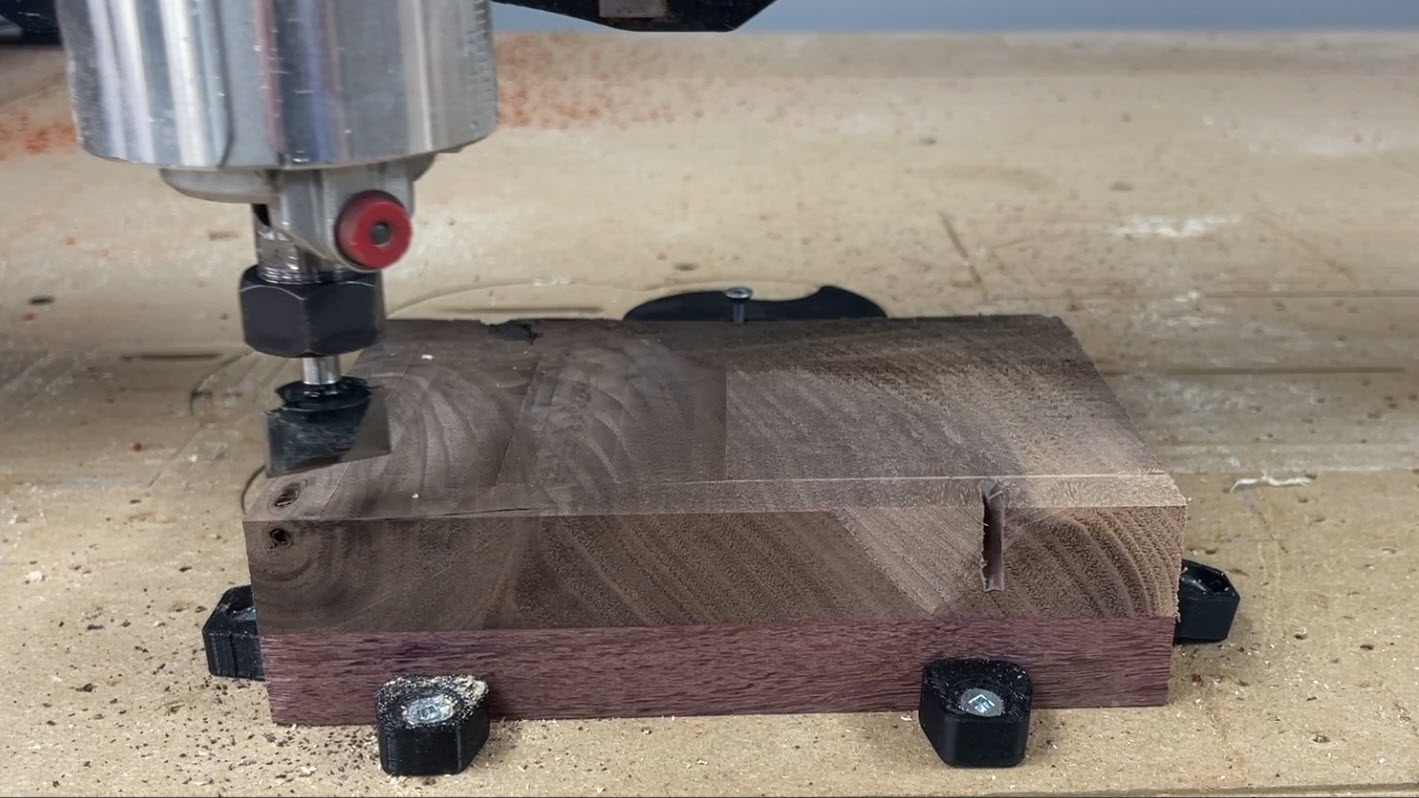
Pull the material down and inward from the side, keeping the top surface clear. Perfect for surfacing or when cutting across the entire top face.
Clamp Gotchas
| Issue | Description | Fix |
|---|---|---|
| Toolpath Interference ✂️ | Clamps can block the router or spindle if placed too close to the cut. | Plan clamp positions outside the toolpath; simulate in CAM software. |
| Uneven Pressure ⚖️ | Uneven clamping can warp or lift the workpiece. | Tighten clamps evenly and use multiple clamps if needed. |
| Material Damage 🪵 | Metal clamps can dent or mar soft materials. | Use padded or soft jaw clamps. |
| Slipping Clamps ⚠️ | Clamps can slide along T-tracks or inserts if not tightened properly. | Double-check torque and use locking hardware if available. |
| Vibration Loosening 🔩 | CNC vibrations can loosen clamps during long cuts. | Recheck clamp tightness before starting the job. |
| Over-tightening 💪 | Too much pressure can crack or distort the material. | Apply only enough pressure to hold the material securely. |
Vise
Vise
Vises come in all shapes and sizes for hundreds of applications. Because of it’s parallel facing jaws, a vice is perfect for holding square or rectangular items, but can be used to hold just about anything. Vises offer extremely high clamping forces, which are needed when milling tough materials. A low profile, 4-inch, cast iron drill press vise like the one shown below works well for firmly holding materials.
Vise Workholding Gotchas
| Issue | Description | Fix |
|---|---|---|
| Jaw Lift & Deflection 📐 | The movable jaw can lift slightly when tightening, pushing the part upward instead of clamping flat. | Use toe-down style vises, parallels, and tap the part down with a mallet before final tightening. |
| Part Not Seated 🧹 | Chips, dust, or debris under the workpiece or parallels keep it from sitting flat, causing taper or uneven cuts. | Clean jaws, parallels, and bed thoroughly before clamping. |
| Over-Tightening 💪 | Too much force can deform thin or soft parts, bowing them upwards. | Apply only the clamping force needed, especially with aluminum, wood, or plastics. |
| Vise Misalignment 🎯 | If the fixed jaw isn’t trammed parallel to the machine axis, cuts will be skewed. | Tram the vise regularly, especially after moving it. |
| Limited Tool Access 🚫 | Jaws may block cutting paths, especially for contouring or chamfering near edges. | Use soft jaws cut to shape or plan toolpaths to avoid the vise body. |
| Small Part Issues 🔎 | Tiny parts may not hold securely or may collide with jaws during cutting. | Use soft jaws, sacrificial stock, or a fixture plate. |
| Surface Damage 🪵 | Hard jaws can mar softer materials like wood, plastic, or aluminum. | Use soft jaws, padding, or inserts. |
| Cutter Clearance ✂️ | End-mills, drills, or surfacing bits can accidentally hit the jaws. | Simulate toolpaths, verify clearance, and plan safe Z heights. |
| Workpiece Pull-Out ⚠️ | Aggressive climb milling can lift or pull the part upward. | Ensure enough jaw engagement and plan machining order to reduce stress. |
Dog Holes
Dog Holes
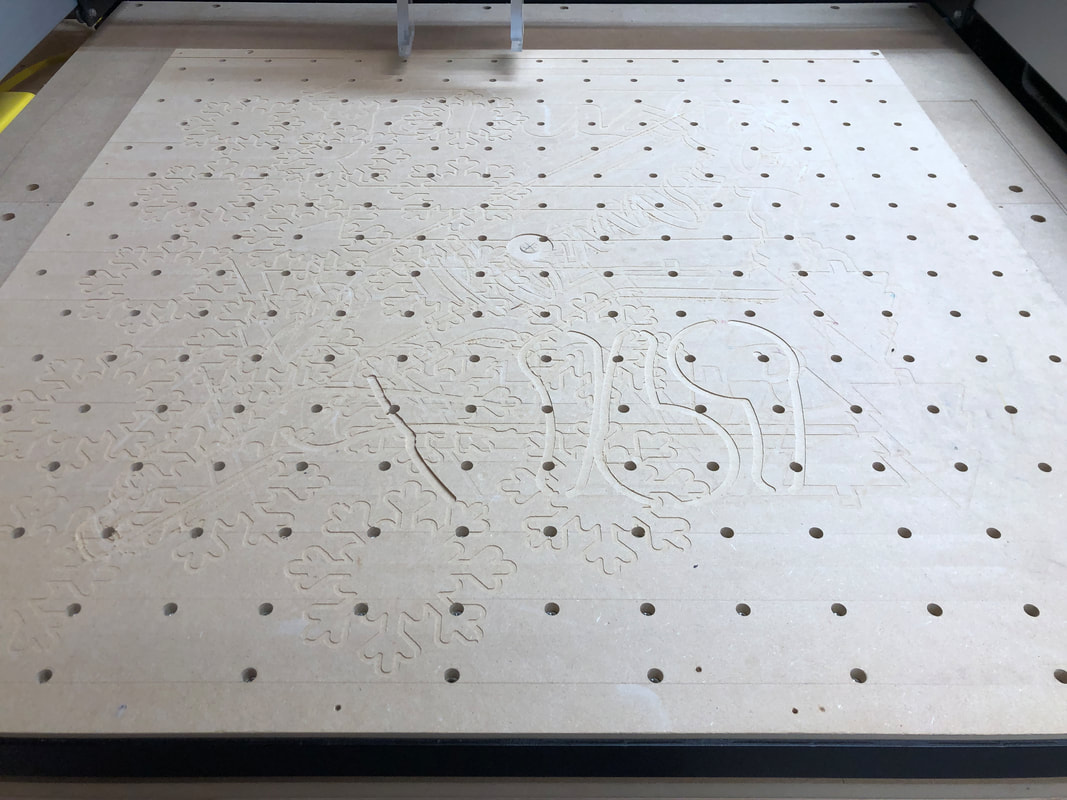
Dog holes are a simple and versatile way to hold material on a CNC bed. By drilling a grid of holes (often 3/4″ or 20 mm) directly into your wasteboard, you can use bench dogs, CAM clamps, and hold-downs to secure workpieces. This system is especially popular in woodworking and hobby CNC setups because it provides quick clamping without bulky hardware getting in the way. Dog holes allow clamping from multiple directions, making them ideal for sheet goods and irregular shapes while keeping the surface clear for cutting.
Dog Hole Gotchas
| Issue | Description | Fix |
|---|---|---|
| Wasteboard Wear 🪚 | Over time, repeated use can enlarge or damage holes, reducing accuracy and clamping strength. | Resurface or replace the wasteboard as needed; use inserts or sleeves to prolong hole life. |
| Clamping Pressure Limits ⚖️ | Dog hole systems generally provide less clamping force than a vise. | Use multiple dogs/clamps for even pressure, and avoid heavy milling forces. |
| Workpiece Lift 📐 | Thin or flexible material may bow upward between clamps. | Add more hold-down points or use a caul to keep the workpiece flat. |
| Interference With Toolpaths ✂️ | Dogs or clamps can stick up above the surface and collide with the spindle or bit. | Plan toolpaths carefully and place dogs/clamps outside the cut area. |
| Hole Placement 📍 | Poorly planned hole spacing limits clamping flexibility. | Use a regular grid (like 2″ or 96 mm spacing) to maximize clamping options. |
| Dust & Debris 🧹 | Holes can fill with chips and dust, preventing clamps or dogs from seating properly. | Vacuum or blow out dog holes frequently during jobs. |
| Material Damage 🪵 | Dogs or clamps pressing directly on wood may dent or mar softer materials. | Use pads, soft jaws, or sacrificial scrap between the dog and the workpiece. |
Fence
Fence
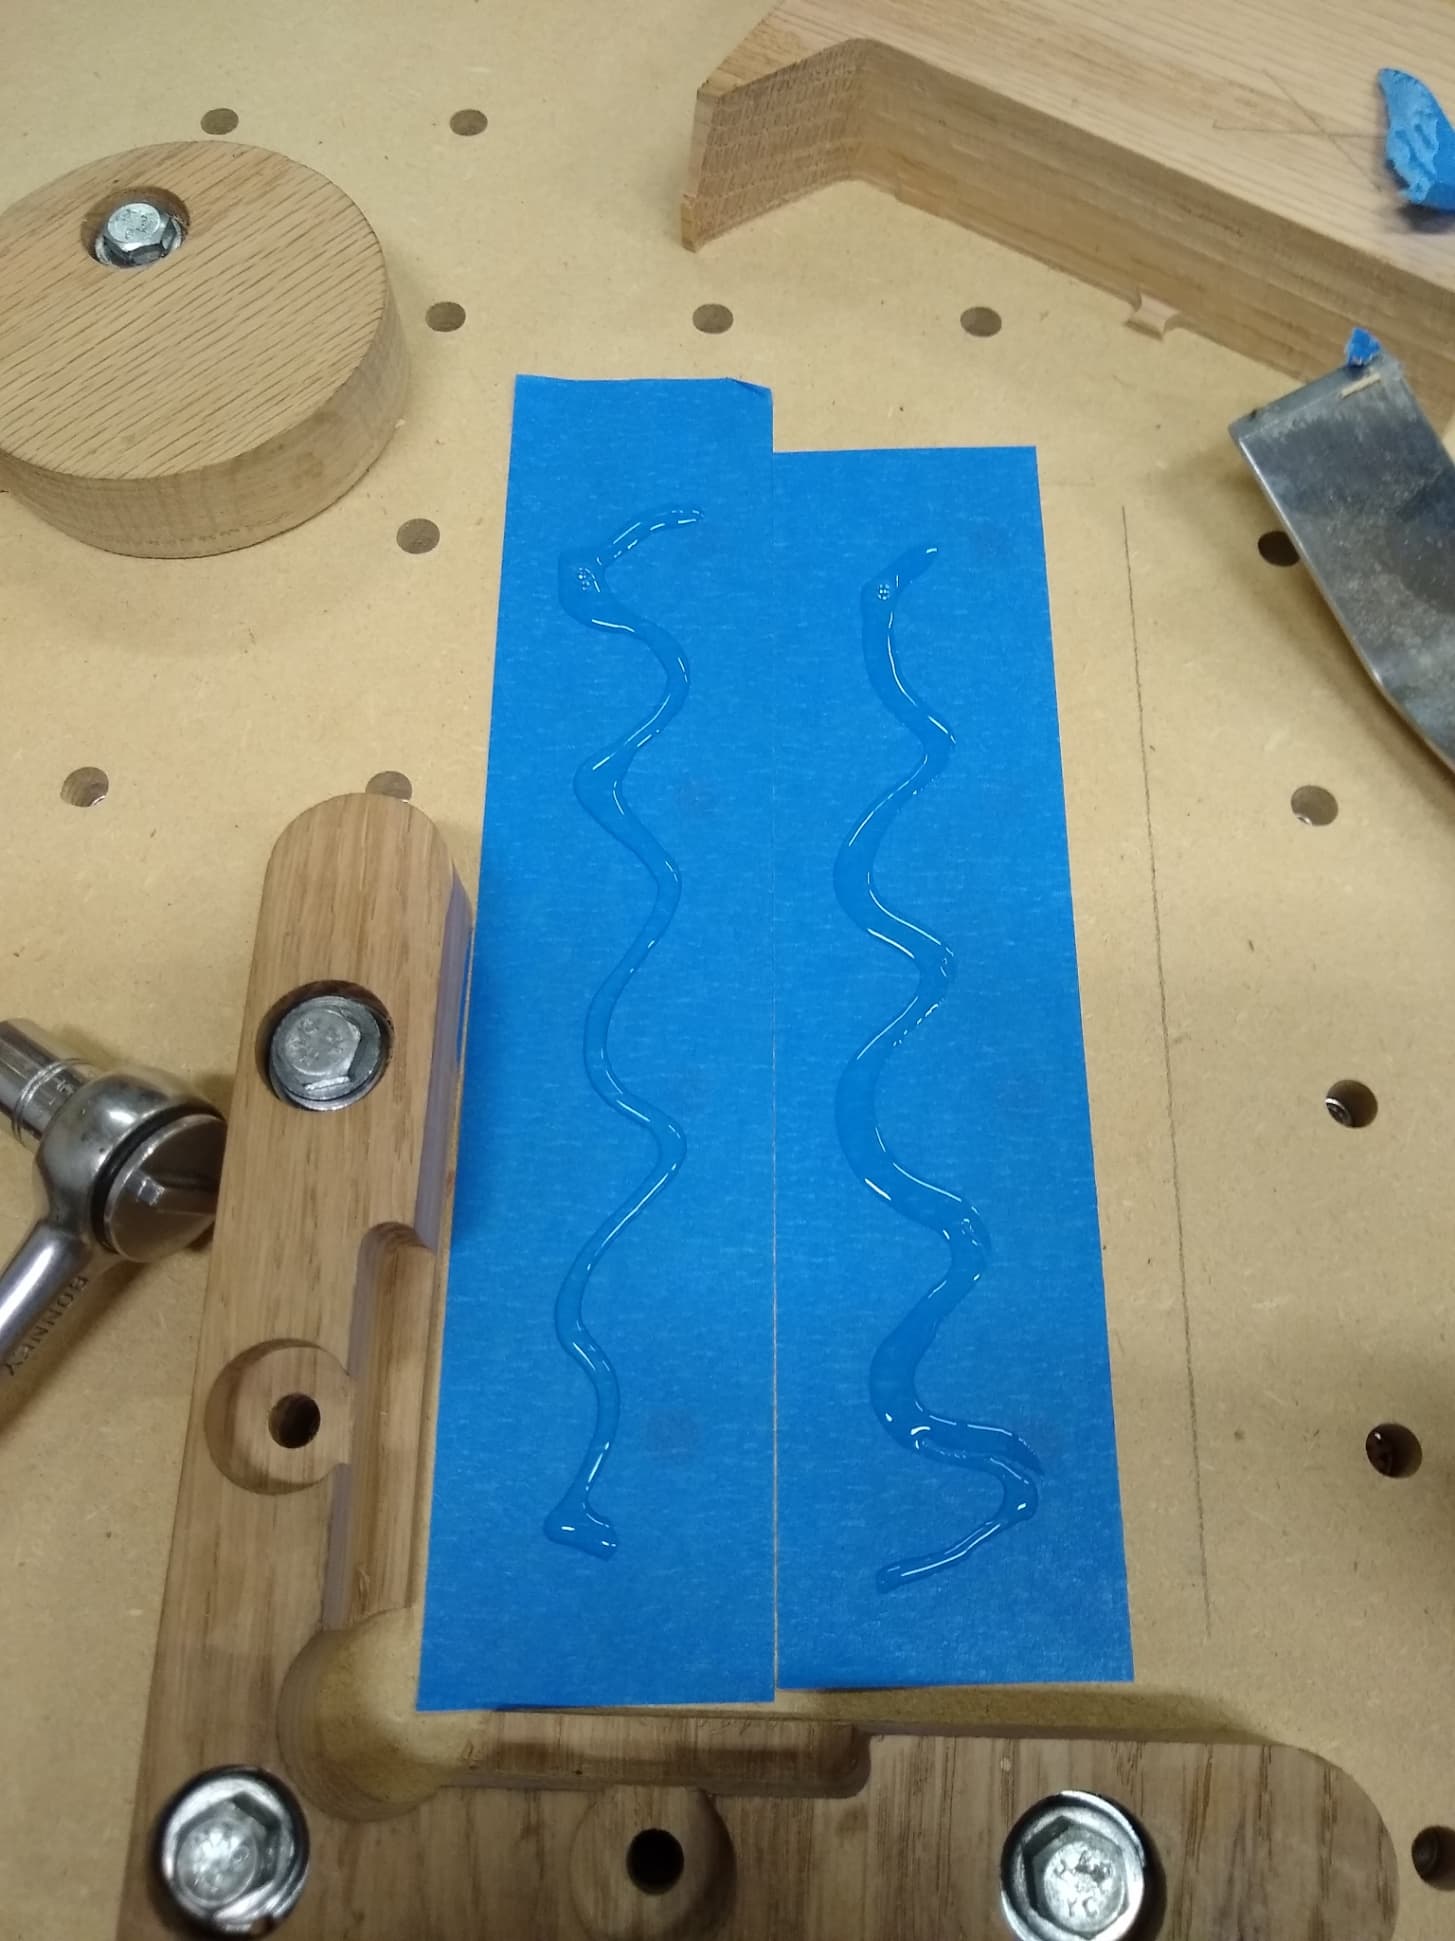
 are used along with a toe clamp (top) and eccentric clamp (right)")
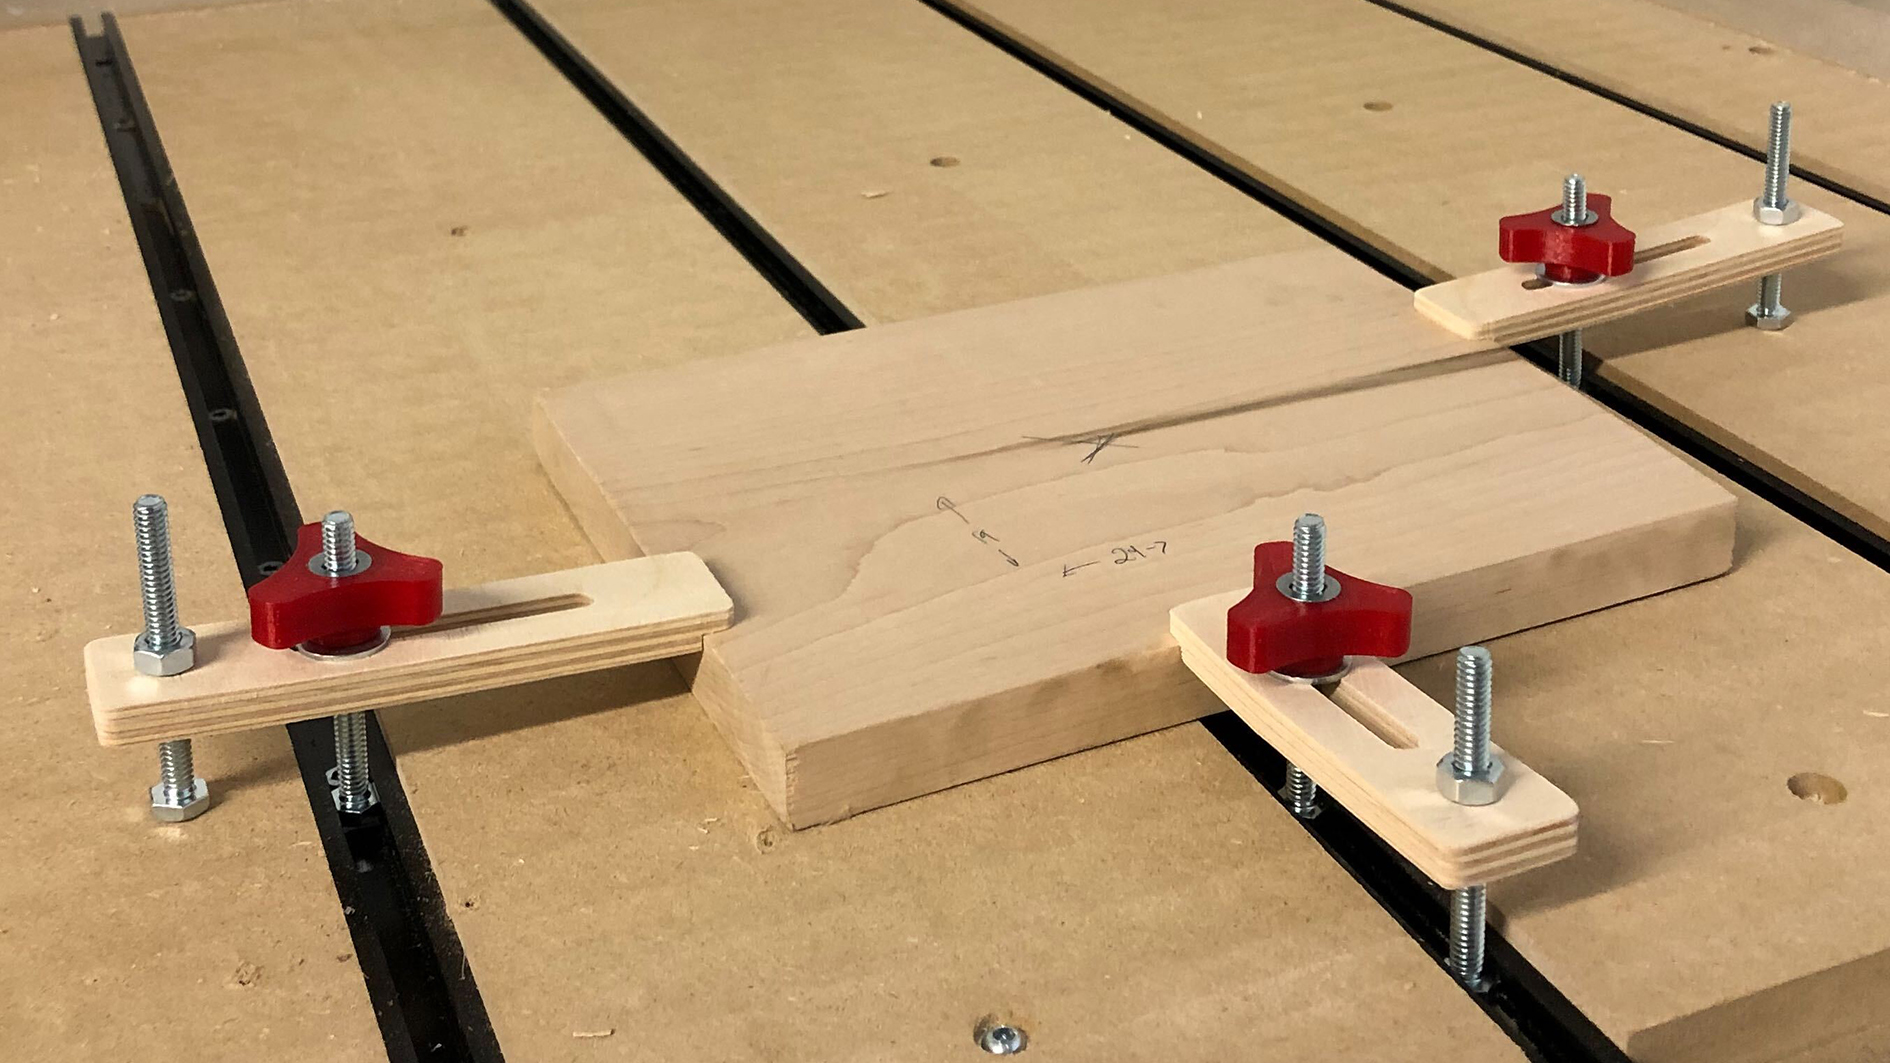
If you want an easy and reliable way to keep your material in place, a fence is a great option. A fence is simply a straight edge attached to the wasteboard, giving you a solid reference point for aligning your workpieces. It’s often added on the bottom left side of your workspace, but can be placed anywhere. It’s especially handy if you’re doing repeat jobs—no more constant measuring and repositioning. 🎯
There are different ways to add a fence to your setup:
Fixed Fence: Screw it down or use threaded inserts for a permanent, rock-solid setup. Great for projects that require precise, repeatable alignment. 🔩
Adjustable Fence: Use T-tracks or clamps to move the fence around when working with different-sized materials. More flexibility, but still keeps things steady!
Fence Workholding Gotchas
| Issue | Description | Fix |
|---|---|---|
| Fence Misalignment 🎯 | If the fence isn’t square to the machine axes, parts will cut out of square. | Tram or measure the fence carefully before each job; use dowel pins or stops for repeatable alignment. |
| Limited Clamping Force ⚖️ | A fence by itself doesn’t apply pressure, it only locates the part. | Combine the fence with clamps, dogs, or hold-downs to keep material secure. |
| Workpiece Shift 🚧 | Cutting forces can push the workpiece away from the fence if not clamped tightly. | Always clamp material against the fence, never rely on the fence alone. |
| Cutter Clearance ✂️ | Bits and spindles may accidentally hit the fence if toolpaths get too close. | Double-check toolpaths and keep the fence clear of the cutting area. |
| Obstructed Toolpaths 🚫 | A tall fence can block travel of the router or dust shoe. | Use a low-profile fence or mount it outside the toolpath range. |
| Dust Buildup 🧹 | Chips collecting between the fence and material can prevent square alignment. | Keep the fence line clear with vacuuming or air blast before clamping. |
| Repeatability Errors 🔄 | If the fence shifts or flexes between jobs, repeatable setups will be lost. | Lock the fence securely in place, or use T-track / dowel pin locating systems. |
Why Use a Fence?
Better Accuracy: Keeps your material square to the machine’s axes, reducing cutting mistakes. 🎯
Saves Time: Speeds up setup time for repeat jobs—no more fiddling around to get things aligned. ⏳
Prevents Movement: Helps stop material from shifting when the machine is doing its thing. 🚀
Setting Up a Fence
Pick a straight, sturdy material like aluminum or MDF.
Secure it to the wasteboard using screws, threaded inserts, or clamps. 🔧
Align the fence parallel to the X or Y axis so your cuts are precise. 📏
For extra repeatability, add alignment pins or dowel holes. 🎯
A fence works great alongside other hold-down methods like clamps or tape. Just remember, for heavier cuts, you might need some extra securing power! Keep your projects locked in and running smooth!
Fixed or adjustable straight edge for aligning material and repeating setups. Saves time and improves accuracy.
Tabs & Bridges
Tabs & Bridges
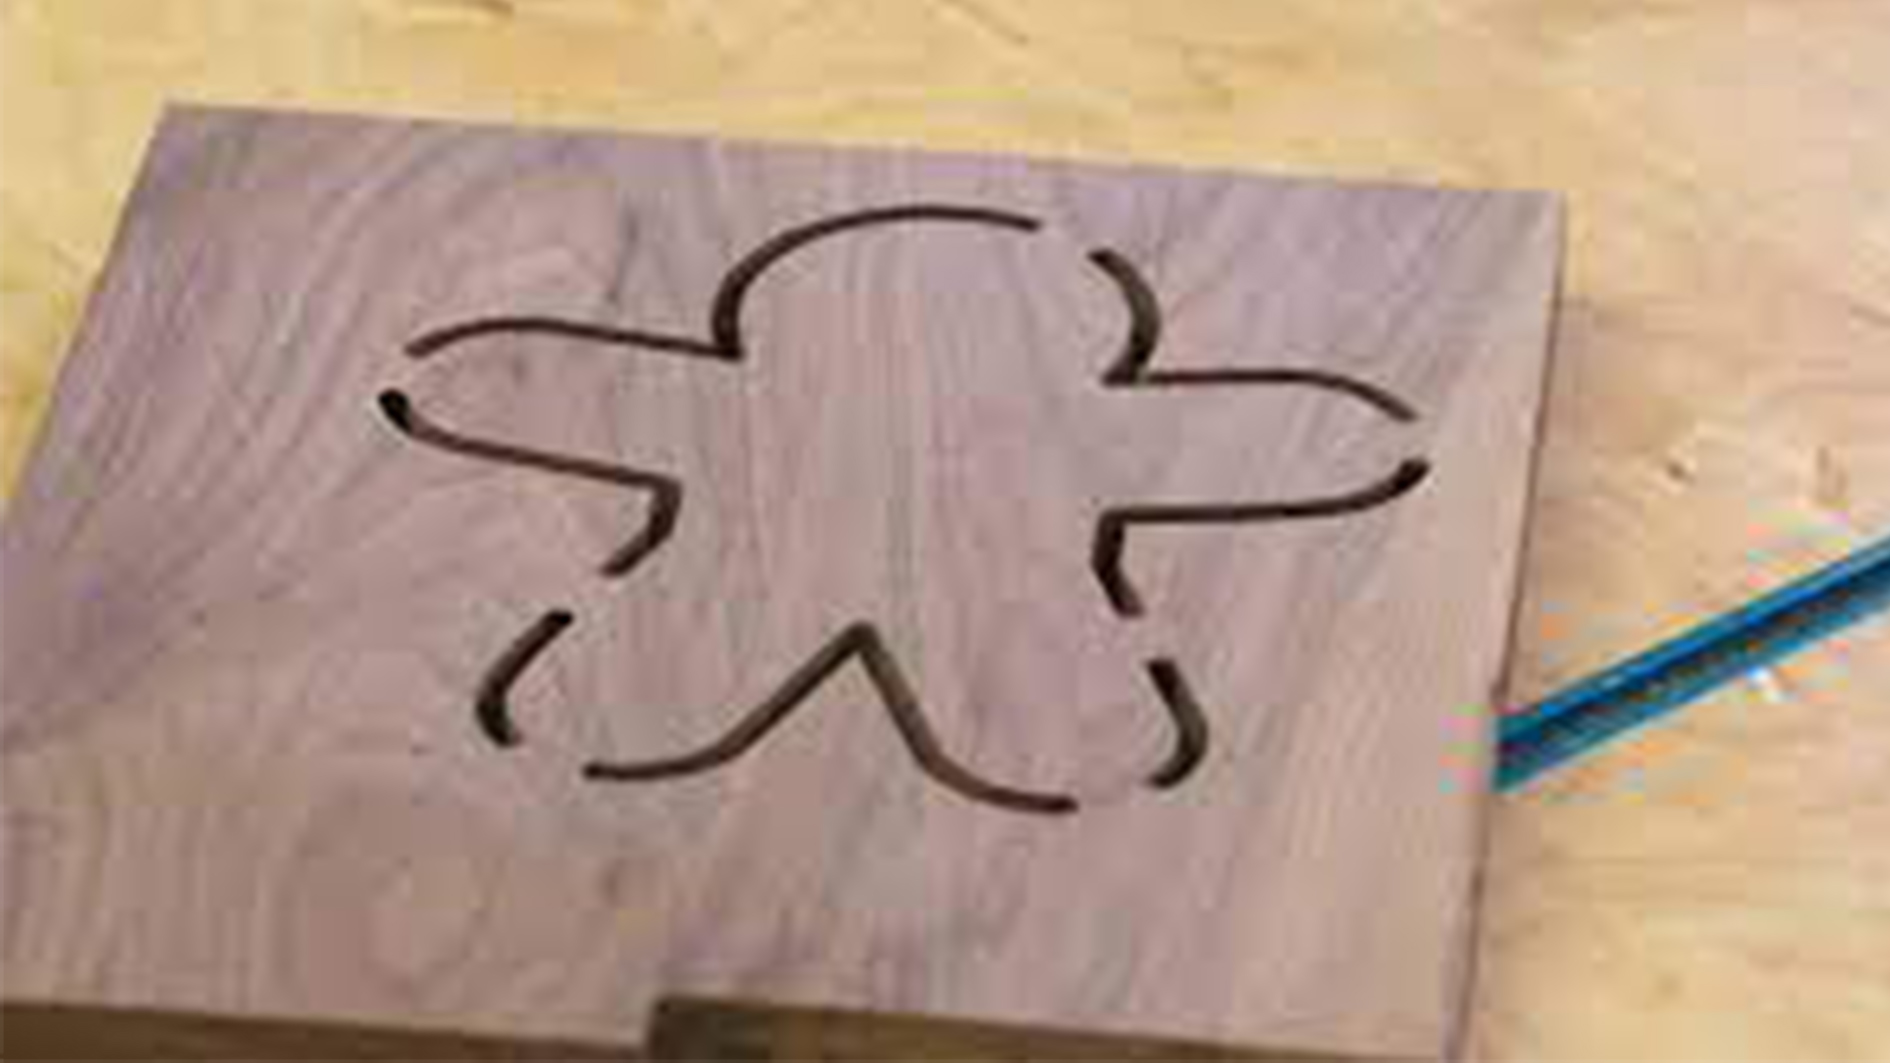
Tabs and bridges are software-based solutions that work in tandem with physical workholding methods. During toolpath design, small tabs of uncut material are left in place to prevent pieces from shifting once they’re cut free from the main stock. These tabs are easily removed after machining and require minimal cleanup.
Tabs & Bridges Workholding Gotchas
| Issue | Description | Fix |
|---|---|---|
| Tabs Breaking Too Early ⚡ | If tabs are too thin or too short, the workpiece can break free during cutting. | Use taller/wider tabs, increase the number of tabs, or adjust feed rates. |
| Difficult Cleanup 🪚 | Thick tabs leave a lot of material to sand or saw off after cutting. | Balance tab size with strength; use a flush trim bit, chisel, or sander for removal. |
| Surface Tear-Out 🪵 | Breaking tabs by hand can splinter wood or chip soft materials. | Cut tabs cleanly with a saw or chisel instead of snapping them off. |
| Excessive Vibrations 📐 | Too few tabs can let the workpiece vibrate, causing chatter or poor cut quality. | Add more tabs, or strategically place them near thin/weak areas of the part. |
| Toolpath Collisions ✂️ | If tabs are placed in the wrong areas, they can interfere with finishing passes. | Place tabs in non-critical areas (like waste edges or hidden faces). |
| Time-Consuming Removal ⏱️ | Removing many small tabs slows down post-processing. | Use fewer but stronger tabs, or plan a finishing contour pass to remove them efficiently. |
| Insufficient Holding Power ⚖️ | Tabs may not provide enough resistance for heavy or deep cuts. | Combine tabs with other workholding methods like double-sided tape, vacuum, or clamps. |
This method is highly reliable for projects with intricate designs but requires additional post-processing to remove and sand the tabs.
Software Tools for Tabs:
- VCarve
- Fusion 360
Vertical Clamping
Vertical Clamping
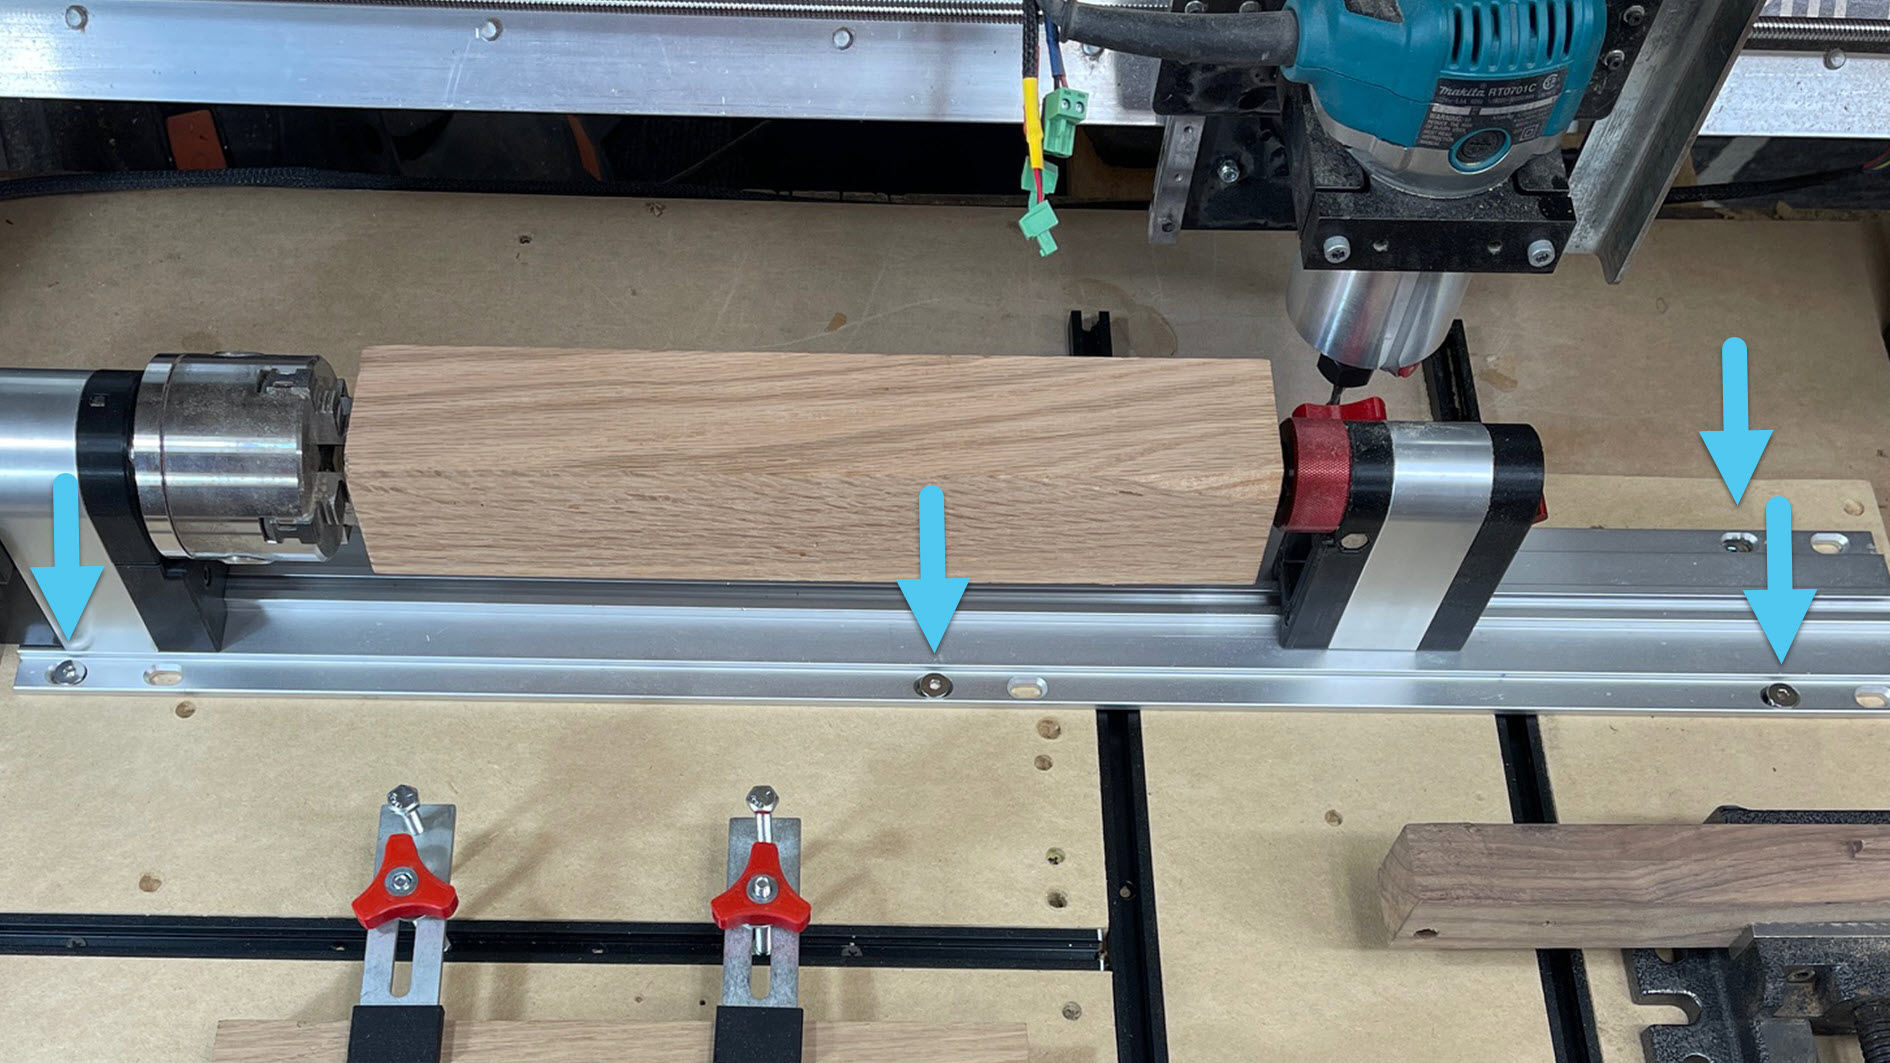
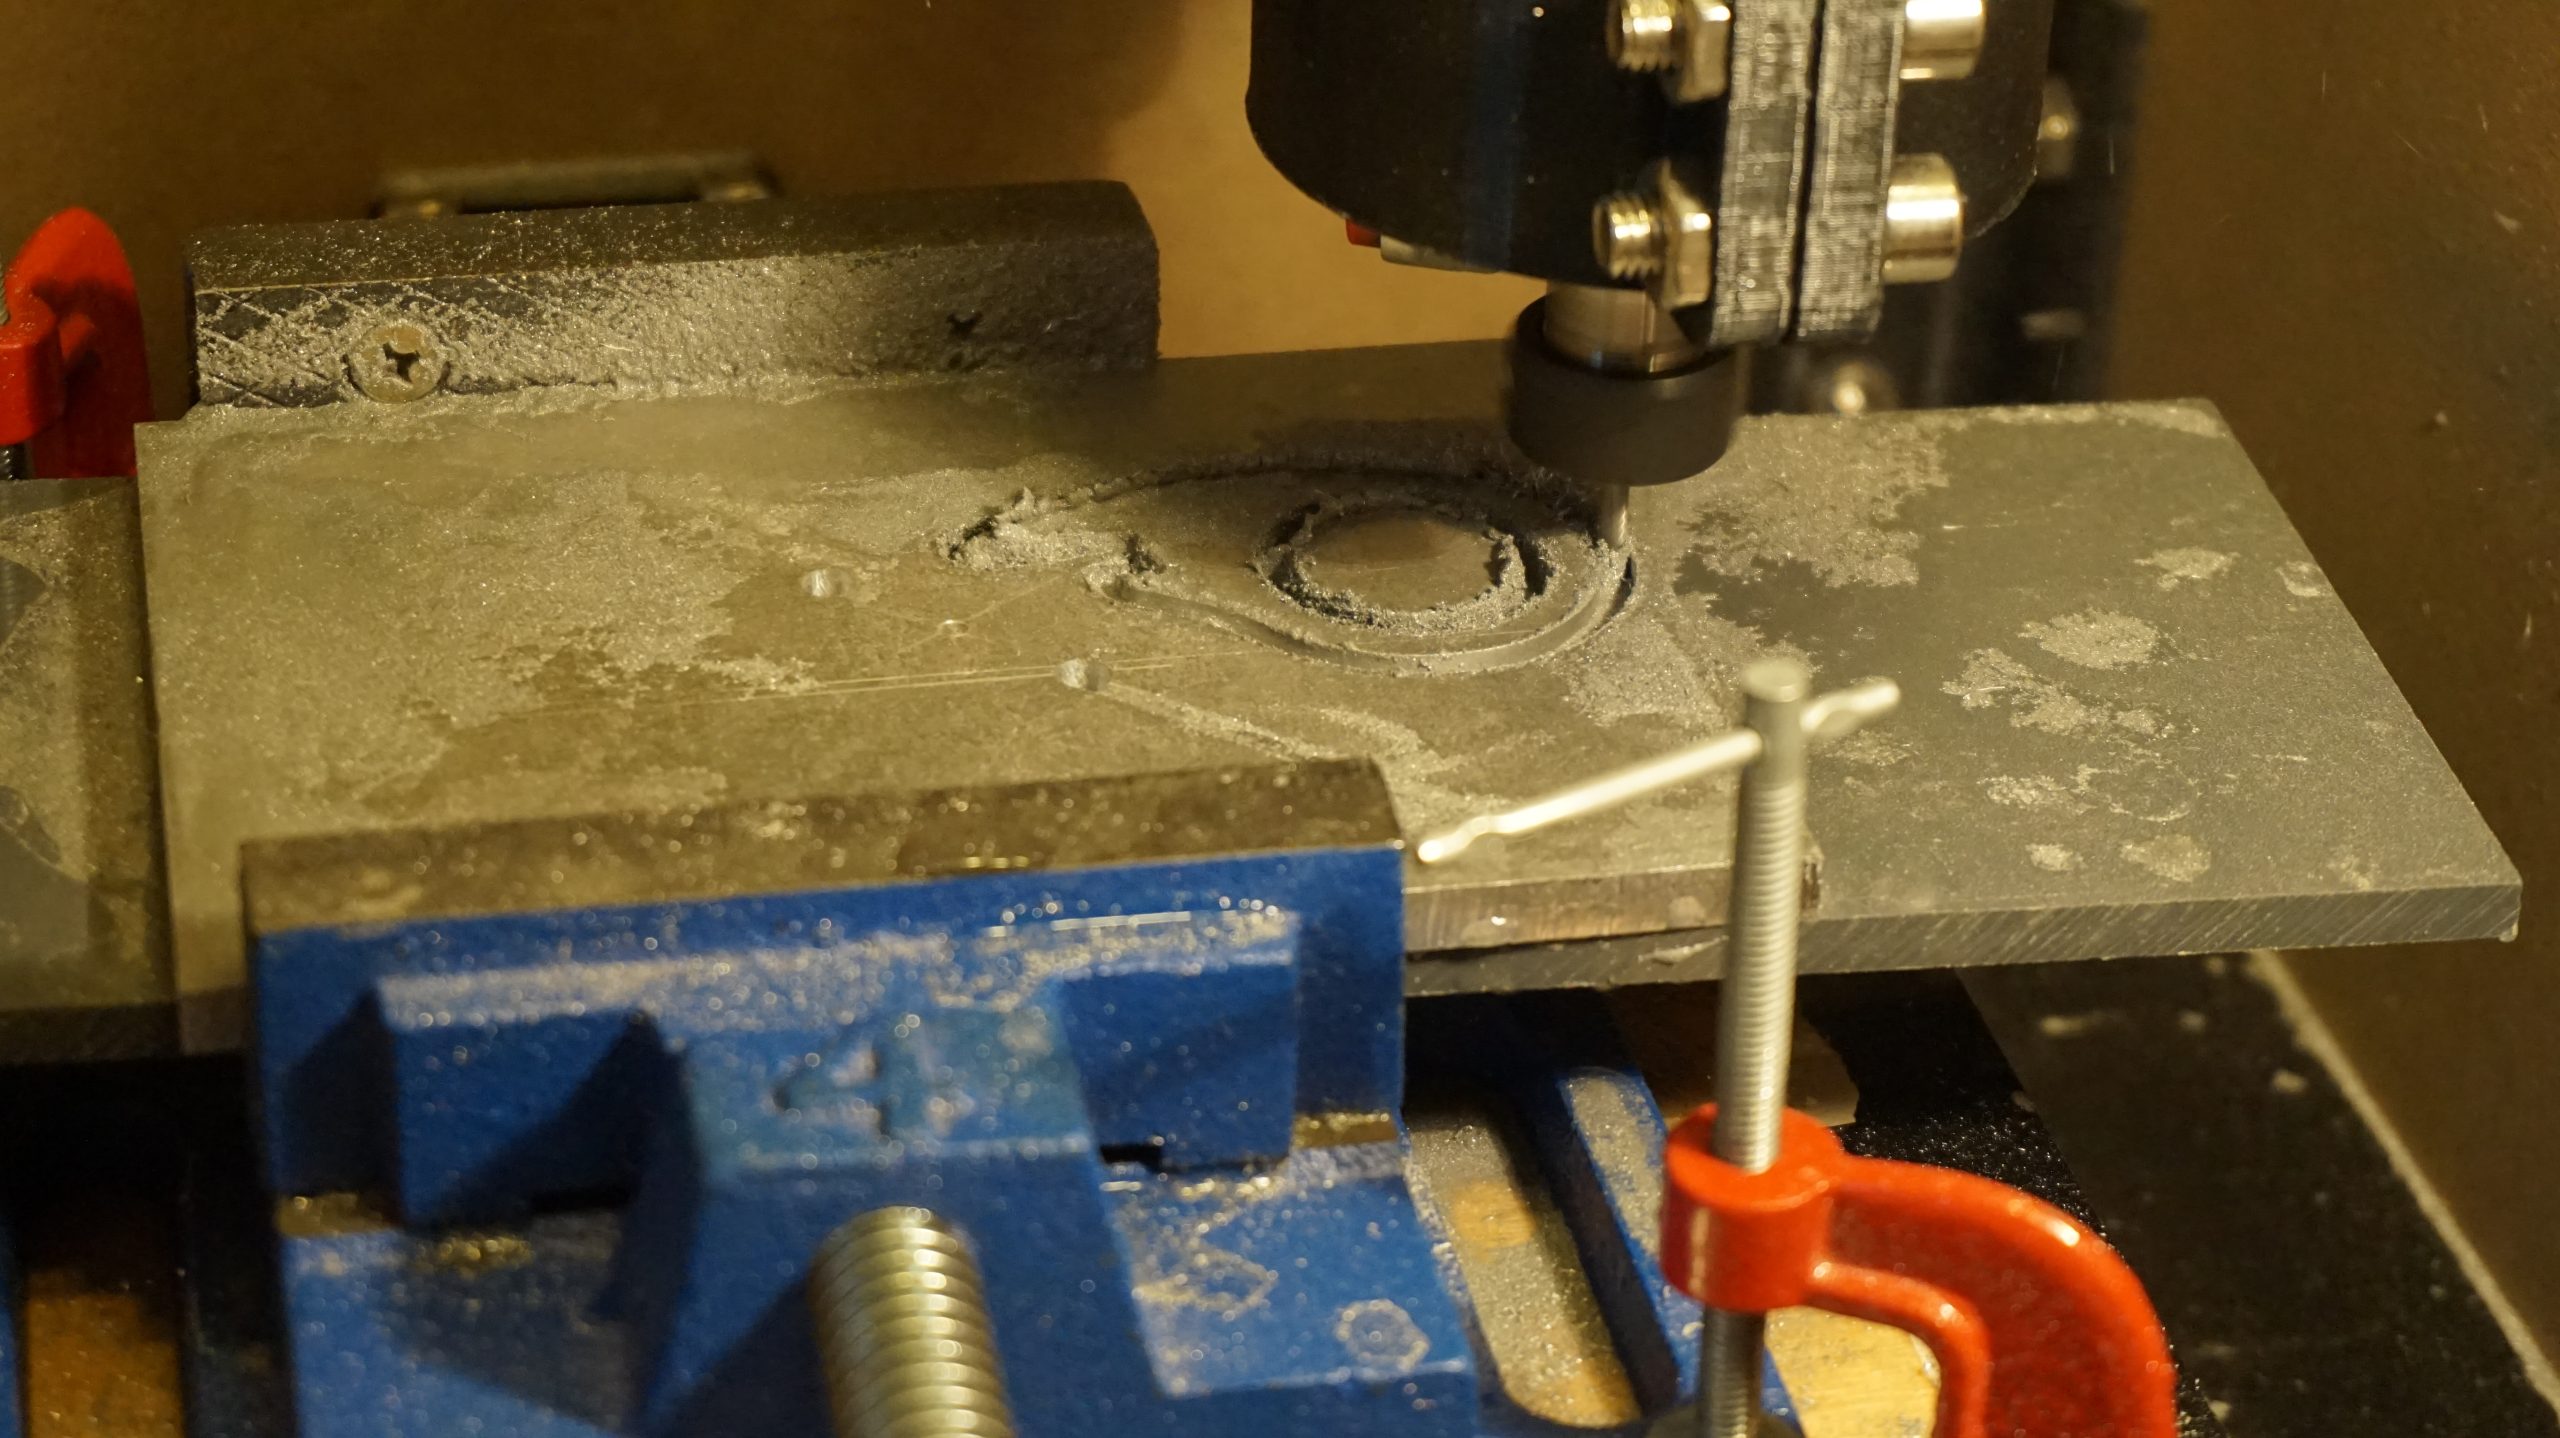
Most hobby CNC setups focus on flat work, but adding vertical clamping opens a whole new world of possibilities. By cutting a slot in your CNC router bed and mounting a vise underneath —perpendicular to the table— you can secure boards on edge for precision machining. This setup doesn’t just let you work the edge of a board; it enables advanced joinery like dovetails, box joints, and even angled variations. It’s a simple modification that transforms your machine from a flat-surface cutter into a versatile joinery powerhouse.
Best for: Engraving, side machining, and creating joinery like dovetails on projects.
Considerations: Ensure even pressure to prevent material shifting. Using multiple vertical clamps can improve stability. 🔧
Vertical Clamping Workholding Gotchas
| Issue | Description | Fix |
|---|---|---|
| Vise/Fence Misalignment 🎯 | If the vertical clamp (like a Moxon vise or fence) isn’t square to the machine axes, joints and edges will cut out of square. | Carefully tram and square the vertical fixture to the CNC bed. |
| Limited Clearance 📏 | Tall stock clamped vertically may interfere with the gantry, spindle, or dust shoe. | Check Z-axis clearance and dry-run toolpaths before cutting. |
| Insufficient Clamping Force ⚖️ | Edge clamping can allow the workpiece to vibrate or shift under cutting forces. | Use strong, even pressure and add backup clamping if needed. |
| Workpiece Flexing 🪵 | Thin or tall boards clamped vertically can flex, leading to angled cuts. | Use cauls or backer boards to stiffen the setup. |
| Chip Evacuation 🧹 | Chips fall into the slot or vise, preventing proper seating or damaging surfaces. | Keep the slot clean with vacuuming or compressed air during cuts. |
| Toolpath Collisions ✂️ | Clamps or the vertical fixture itself can block the toolpath or crash into the cutter. | Plan toolpaths carefully and keep the clamping system clear of the spindle. |
| Repeatability Issues 🔄 | Re-clamping boards can lead to inconsistent positioning. | Use registration stops, pins, or reference blocks for repeatable setups. |
Journey along with Dennis as he reviews his vertical clamping setup!
Checkout these threads below to see our community members chatting about the benefits of a vertical setup, and showing off their own.
| Topic | Link |
|---|---|
| Community chatting about advanced joinery with vertical setups | Community Link |
| Examples of vertical setups (1) | Community Link |
| Examples of vertical setups (2) | Community Link |
Vacuum Tables
Vacuum Tables
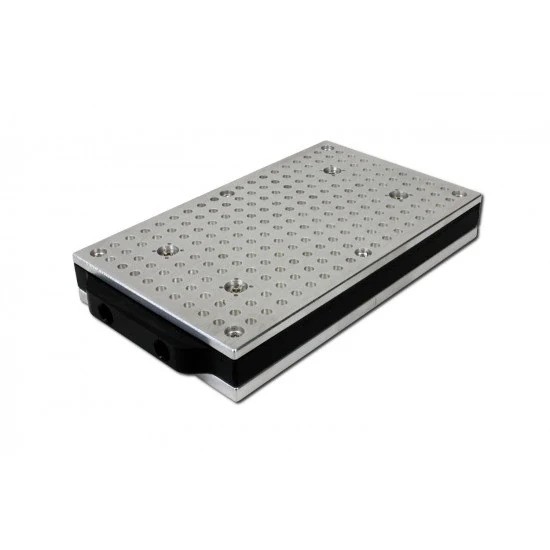
A vacuum table is an advanced workholding solution that provides excellent material support while eliminating the need for mechanical clamps. This method is especially useful for securing thin or delicate materials that could be damaged by traditional clamping methods. Vac tables work by creating suction that holds the material securely in place. This makes them ideal for projects requiring a completely unobstructed top surface, such as engraving or through-cutting applications. One of the biggest advantages of a vac table is its speed and ease of use. Since there are no physical clamps to adjust, material changes can be done in seconds. Additionally, vac tables provide even pressure across the entire workpiece, reducing the risk of warping or lifting during cutting.
Vacuum Table Workholding Gotchas
| Issue | Description | Fix |
|---|---|---|
| Air Leaks 🌬️ | Gaps around the workpiece or through-wood grain reduce holding force. | Use gasketing tape, wasteboard surfacing, or seal porous materials with tape or finish. |
| Insufficient Holding Power ⚖️ | Small parts or narrow stock may not have enough surface area for suction. | Combine vacuum with tabs, tape, or clamps for extra security. |
| Pump Noise & Heat 🔊🔥 | Vacuum pumps can be loud and generate heat during long jobs. | Place pumps in a separate enclosure or add cooling/ventilation. |
| Chip/Dust Contamination 🧹 | Dust and chips can clog the vacuum system and reduce suction. | Use filters, a cyclone separator, and regular cleaning. |
| Warped Material 📐 | Bowed or uneven stock may not seal properly, leading to weak hold. | Surface one side flat, or use gasket zones to isolate flat areas. |
| Toolpath Pull-Up ✂️ | Aggressive climb cuts can lift the workpiece off the vacuum bed. | Reduce depth of cut, use multiple passes, or add tabs for safety. |
| Power Failure ⚡ | If the pump shuts off mid-cut, the workpiece will come loose immediately. | Use backup clamping on critical jobs or a check valve/reservoir system. |
Vac tables are best suited for flat sheet materials like acrylic, MDF, plywood, and aluminum. If you frequently work with these materials and require fast setups with a clean top surface, a vac table can be a worthwhile investment.
Make your own vac table following THESE instructions!
Final Tip:
No single method covers every project. The most efficient CNC setups use a combination of techniques — picking the right method for the material, cut type, and clearance needed. Experiment, adjust, and keep your wasteboard maintained for the best results.