

In this section we will be assembling the tailstock. This will take around 20 minutes.
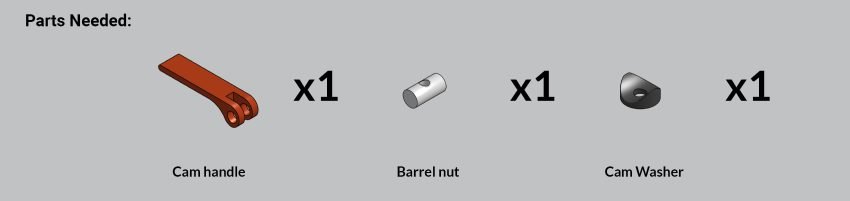
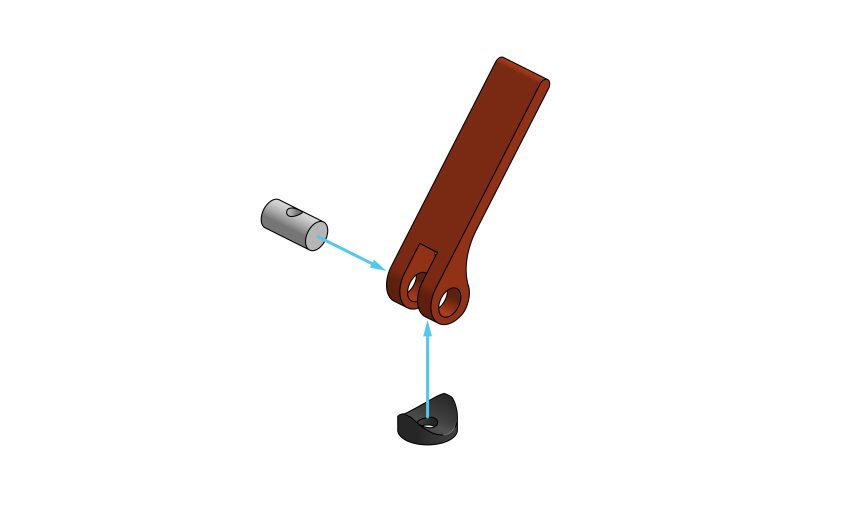
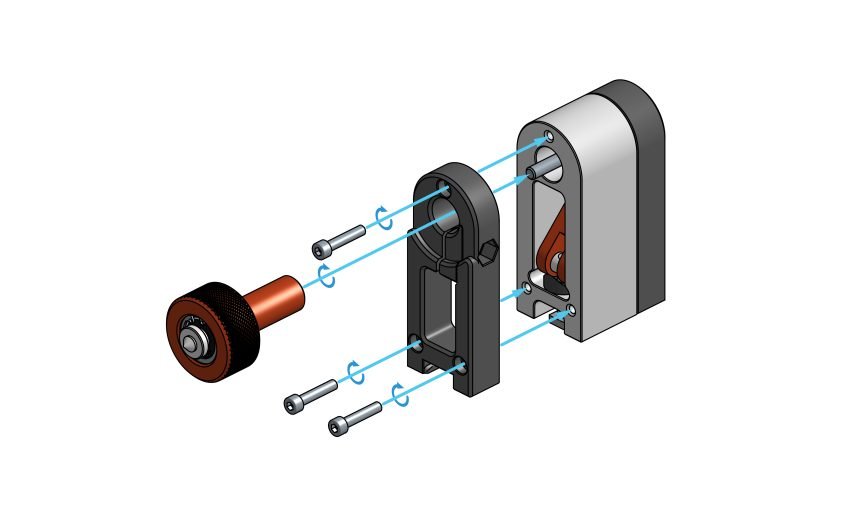
Insert the barrel nut into the cam handle, then place the cam washer underneath the cam lever.

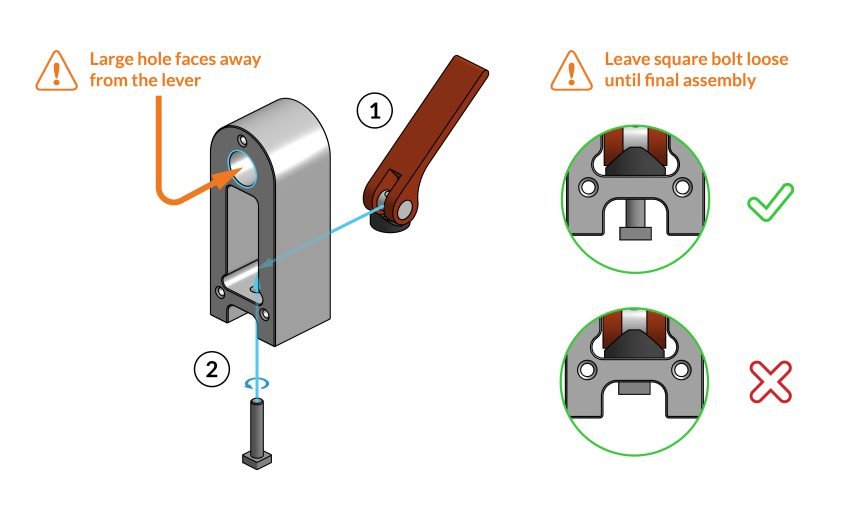
Position the cam handle sub-assembly from the last step into the large rectangular gap in the tailstock body. Make sure the end of this lever faces opposite the large hole.
Pass the M6 bolt through the hole in the bottom of the tailstock body and thread the bolt into the barrel nut of the cam handle sub-assembly. We will adjust this bolt later to slide onto the track, so there is no need to tighten it right now.
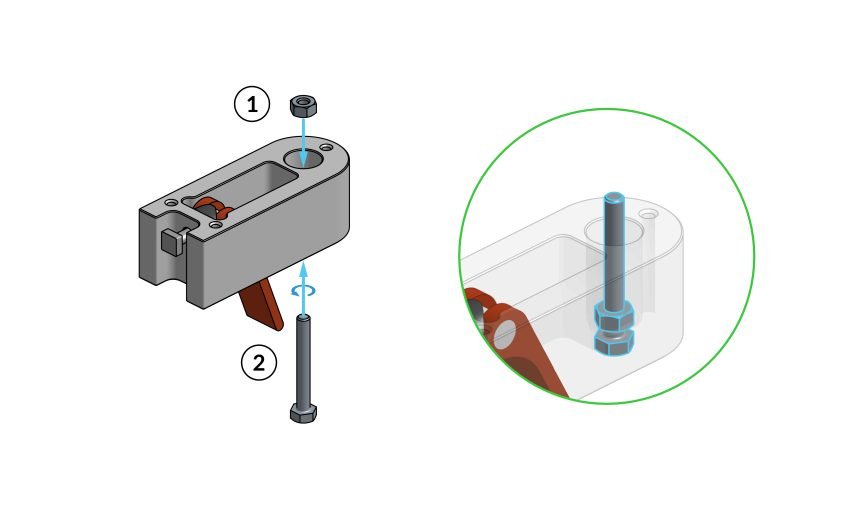
Drop the hex nut into the large hole at the top of the tailstock body. The nut should snuggle into the slot inside the hole.
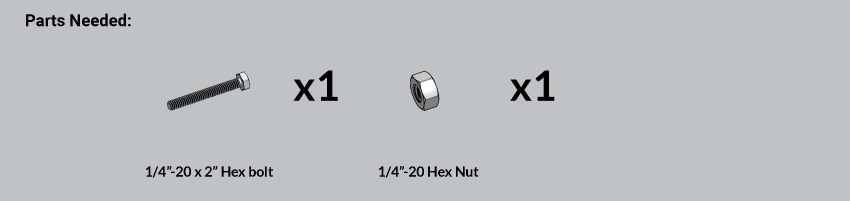
Thread the 2” bolt into the nut. Make sure that the nut hasn’t fallen out of the hole cutout.
To tighten the nut, you can pull the bolt down and use the tailstock body as a wrench. You should just use your hands to tighten it, no tools.
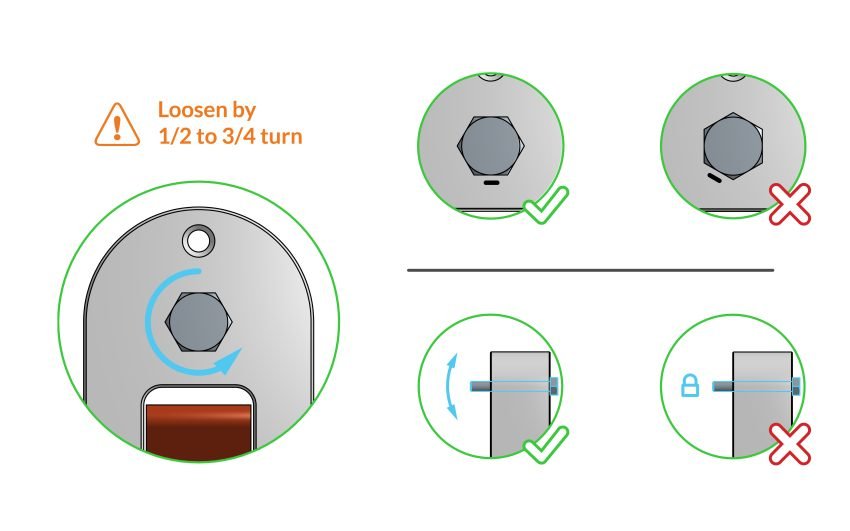
Loosen the 2” bolt by 1/2 to 3/4 of a turn before moving to the next step.

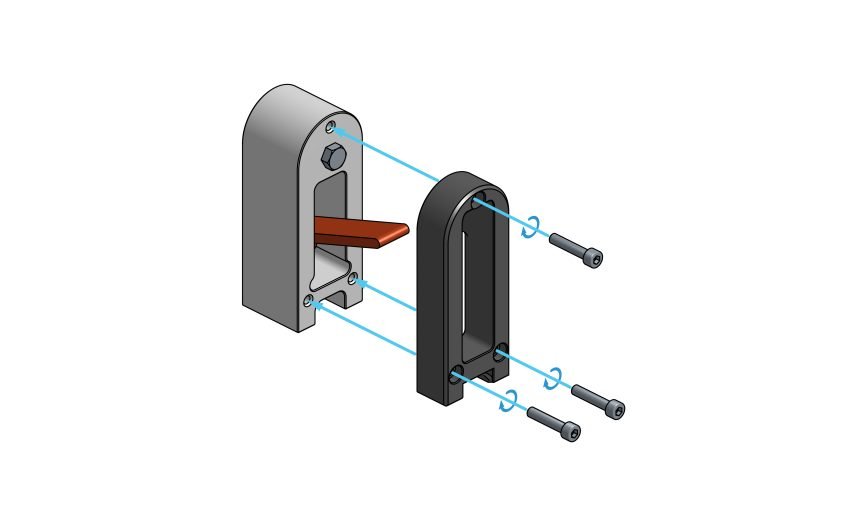
Secure the cover to the tailstock body with the three M5 bolts. The hex nut will nest in the matching recess of the cover.
Wriggle the 2” bolt from the last step, from the other side and make sure that it feels very loose. If it feels very tight, remove the cover and loosen the screw by ½ – ¾ turn and re-install the cover.
Secure the front cover onto the tailstock body with the three M5 bolts.
Thread the tailstock live center on to the loose 2” bolt until it is flush with the front cover.

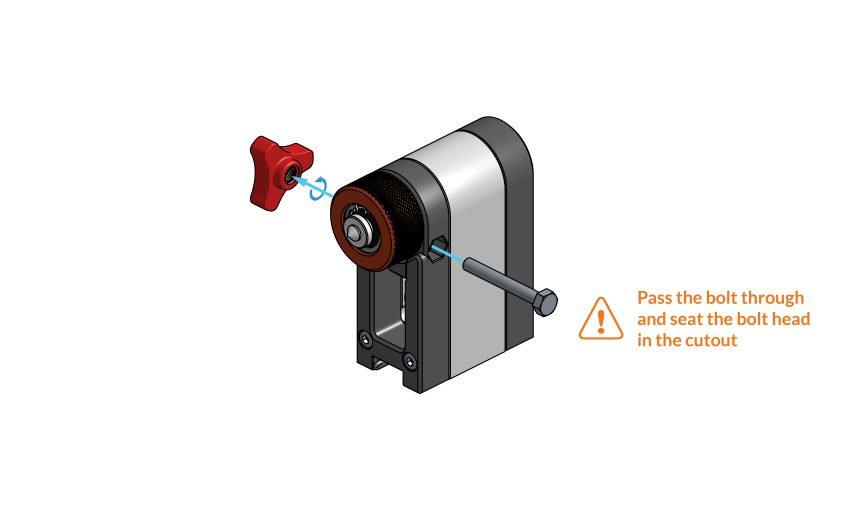
Pass the 2” bolt through the side of the front cover then thread the knob on and tighten gently. You can keep the bolt in place by pressing it with your finger