
Before You Begin
If you’re installing the ATC on a new machine, please complete the machine assembly first before following this guide.
The expected ATC assembly time is 2–4 hours, so be sure to allot enough time and pace yourself to avoid errors, damage, or injury during the process.
Software Upgrade
Before we dive in, we will need to make some changes on the software side. You will need to:
-
Download the post processor(s) for your CAM software – this are essential for creating g-code that works with the ATC.
-
Upgrade gSender to 1.6.0 or higher, then come back for the next step.
-
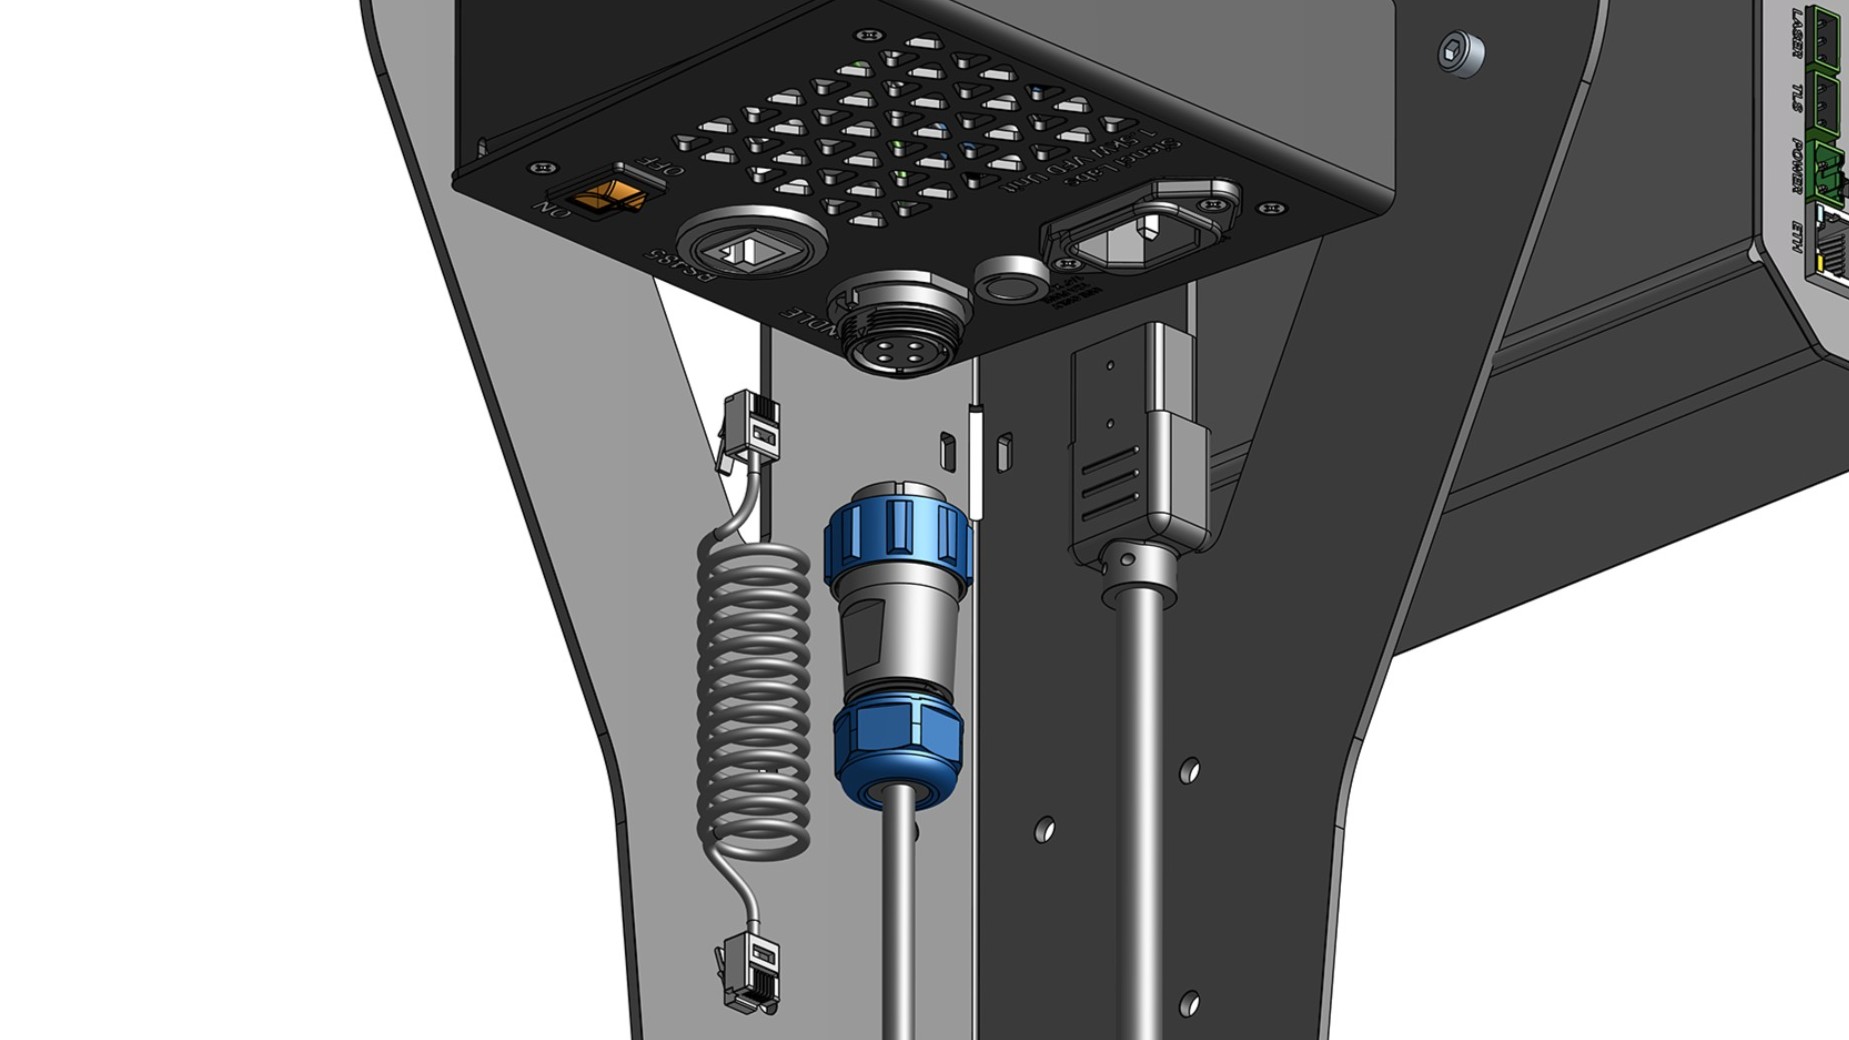
Unplug your spindle cable, VFD power cable, and RS485 (control) cable if they are plugged in.
-
Check your controller firmware by clicking on the machine information icon, and verifying version 20260318 is installed.
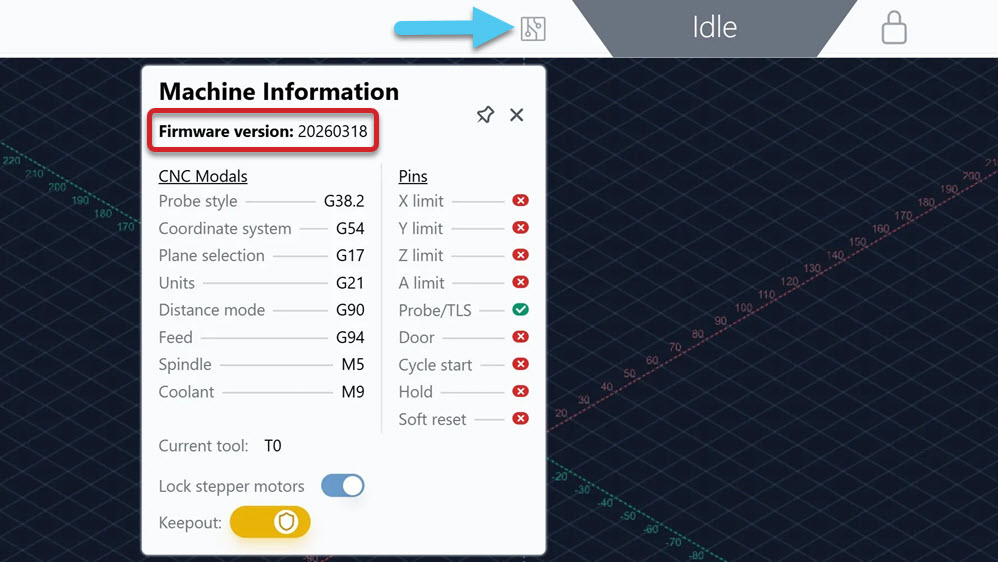
If not, please update by following the instructions here, or watch the firmware update video below, then come back for the next step.
-
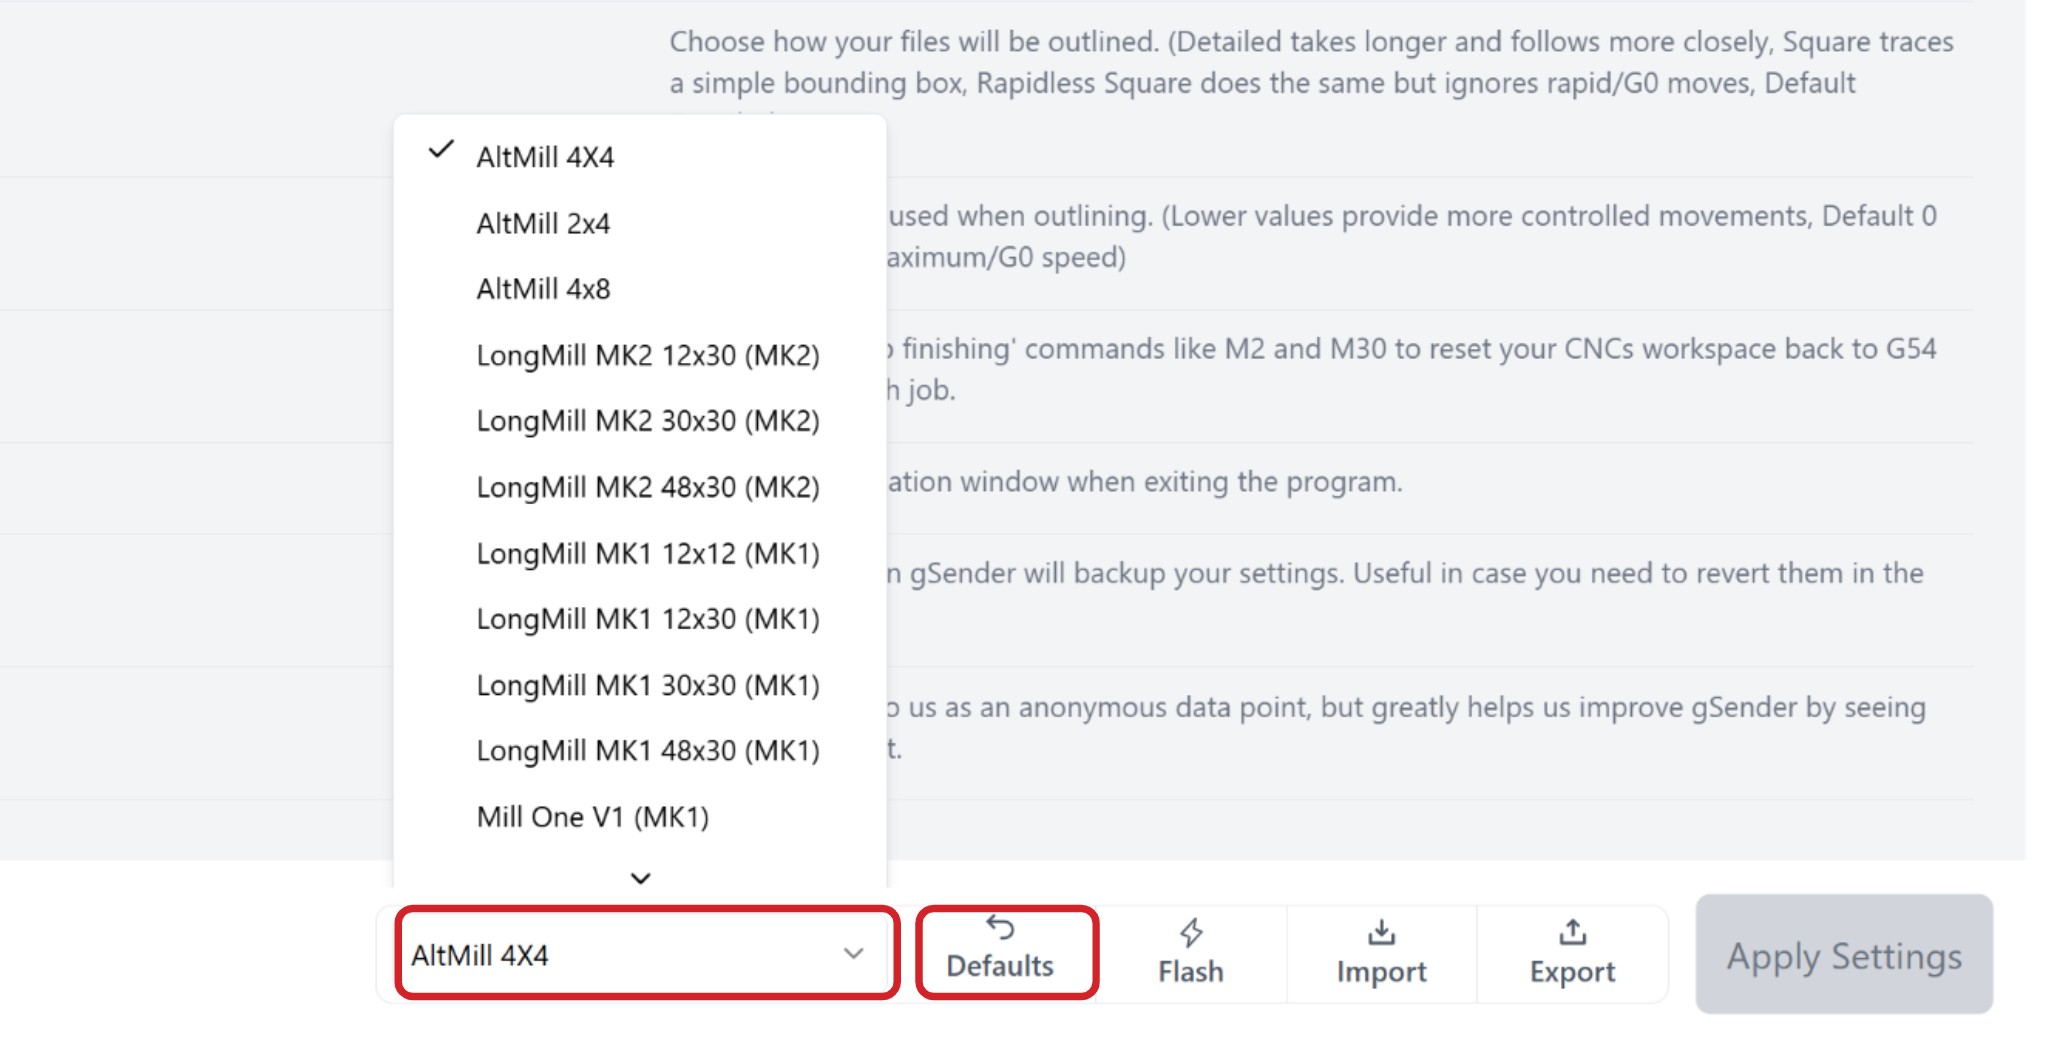
Apply the appropriate machine profile in gSender. Make sure you turn OFF/ON the controller to have any changes take effect.
Assembly Tips
-
The articles are listed in the order they should be followed, make sure you don’t skip a page.
-
We strongly recommend having a second person available at the Spindle Setup and Tool Rack & TLS sections, due to the weight of the subassemblies.
-
Grab a set of metric Allen keys, as well as use the provided Allen keys. You can use a regular drill for screws that are M5 or larger, but do not use impact drills as they can strip the holes. Begin threading each screw by hand first to prevent cross-threading.
-
Keep components in their original bags and boxes until they are needed. The labels will help you quickly identify the correct parts.
-
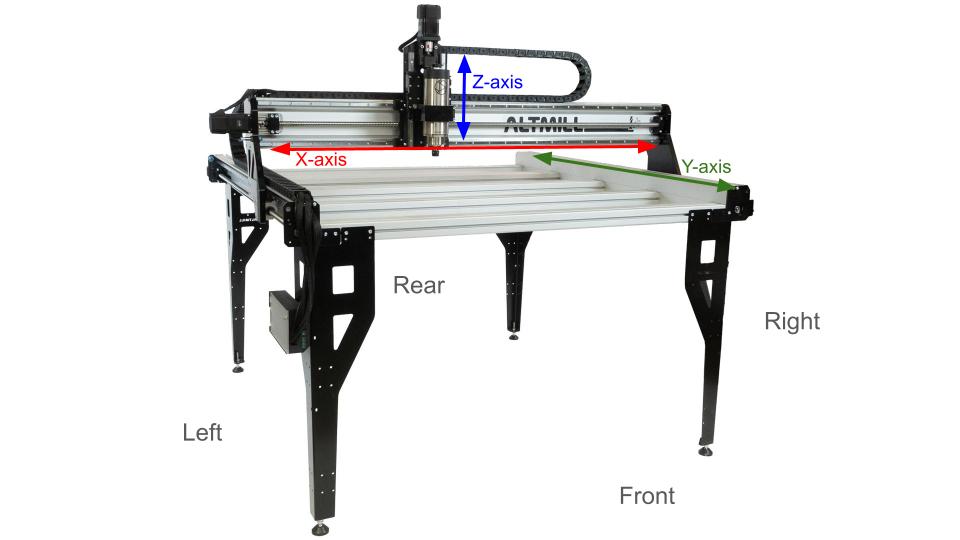
Machine orientation follows this photo:
Machine Preparation
We need to get your AltMill to a "blank state," so that regardless of its size, version, and build journey (i.e. existing or new build), we can easily install your new ATC system! Completing these prep steps beforehand will make the process much smoother and help avoid unnecessary disassembly later.-
Jog the machine towards the front for easier access during assembly.
-
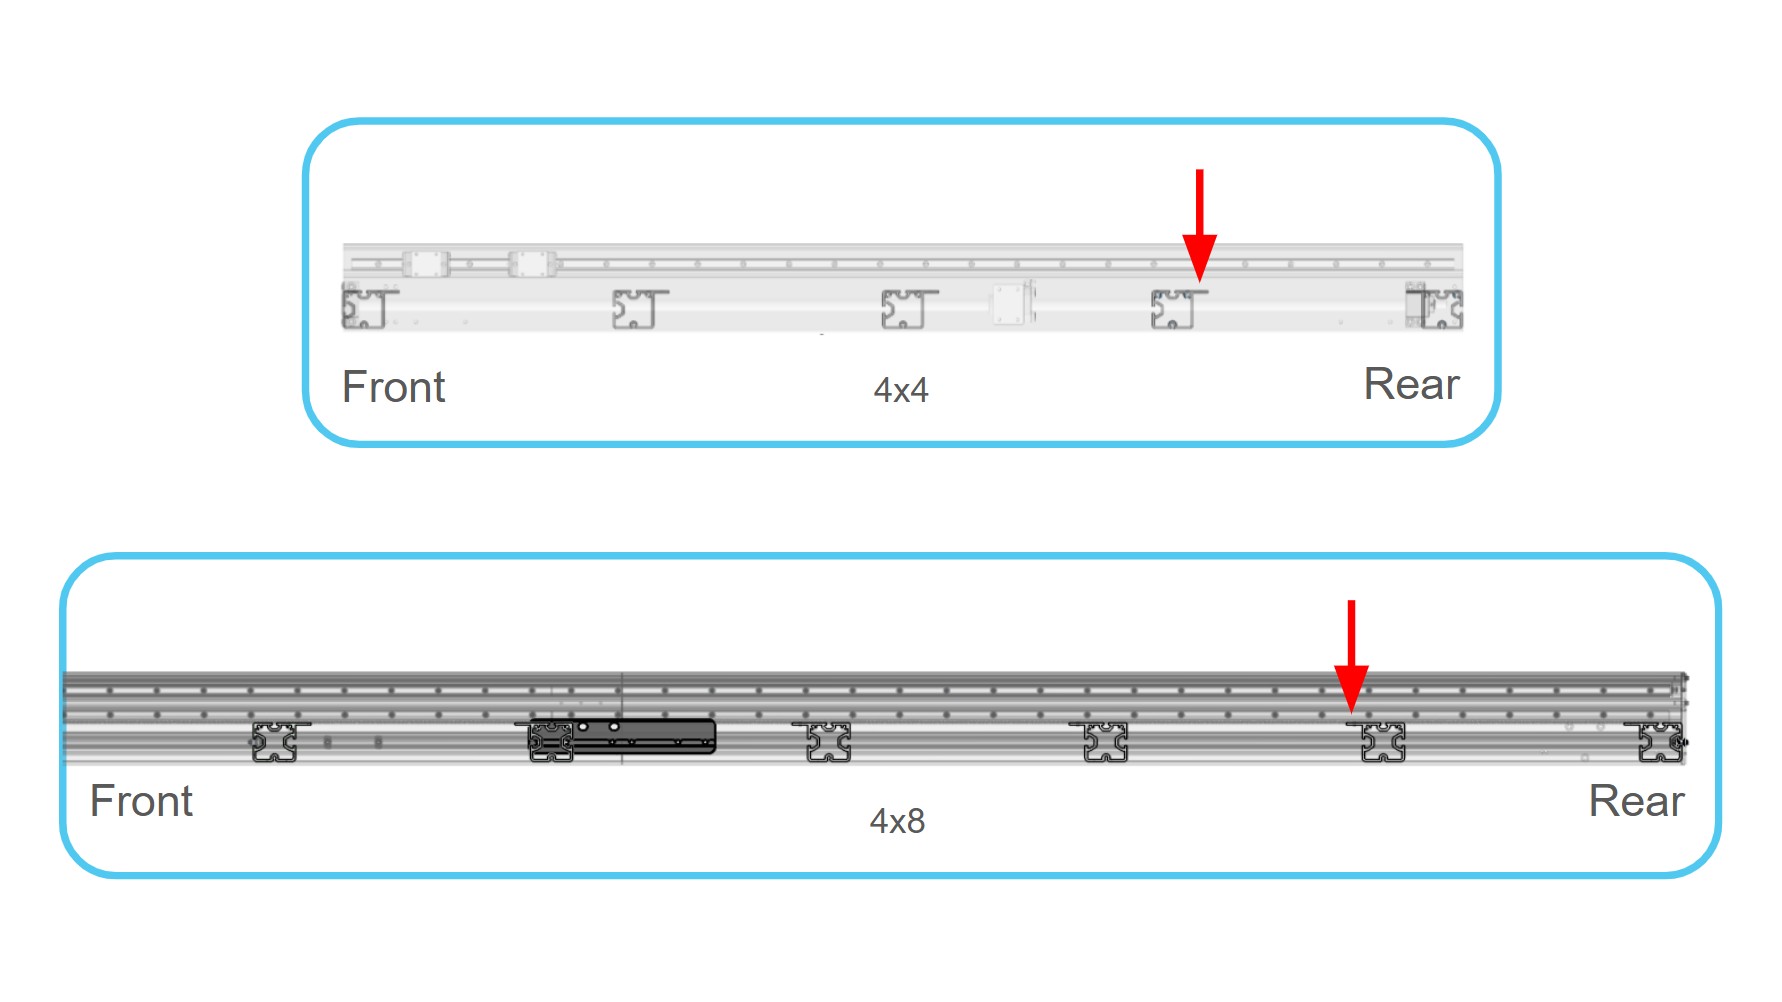
Verify that the second-to-last crossbeam on your AltMill is oriented correctly. The flange should face the rear of the machine, unless you have a 4×8 machine, in which case it should face the front.
-
Power off your SLB-EXT controller, and unplug it from power.
-
Got a wasteboard installed?
- Ensure the last 13 inches at the back of the machine is not covered. You can cut it now, or remove it entirely for the duration of the ATC installation.
-
Got a gControl panel installed?
- Unplug it from power, and remove the gControl and its mounting bracket.
-
Got a Z-Plus Drag Chain Arm installed?
- Remove it from the Z-axis gantry, it is not needed for the ATC. Keep the end links on the drag chain.

-
Got a non-ATC spindle installed?
i. Unplug connections at the spindle and VFD (the spindle cable, VFD power cable and RS485 cable).
ii. Free the existing, non-ATC spindle cable from the drag chains. Once the cable is removed, leave approximately 1 in 10 clips in place to keep the existing wiring organized.
iii. Remove the spindle and spindle mount from the Z-axis.
iv. Remove the VFD from its mount and store it safely.
From the above list, double check that you’ve done everything that applies to your AltMill. Then you can continue with Unboxing!