ATC Basics
Here are a couple tips on how to operate your ATC.
Tool Changes
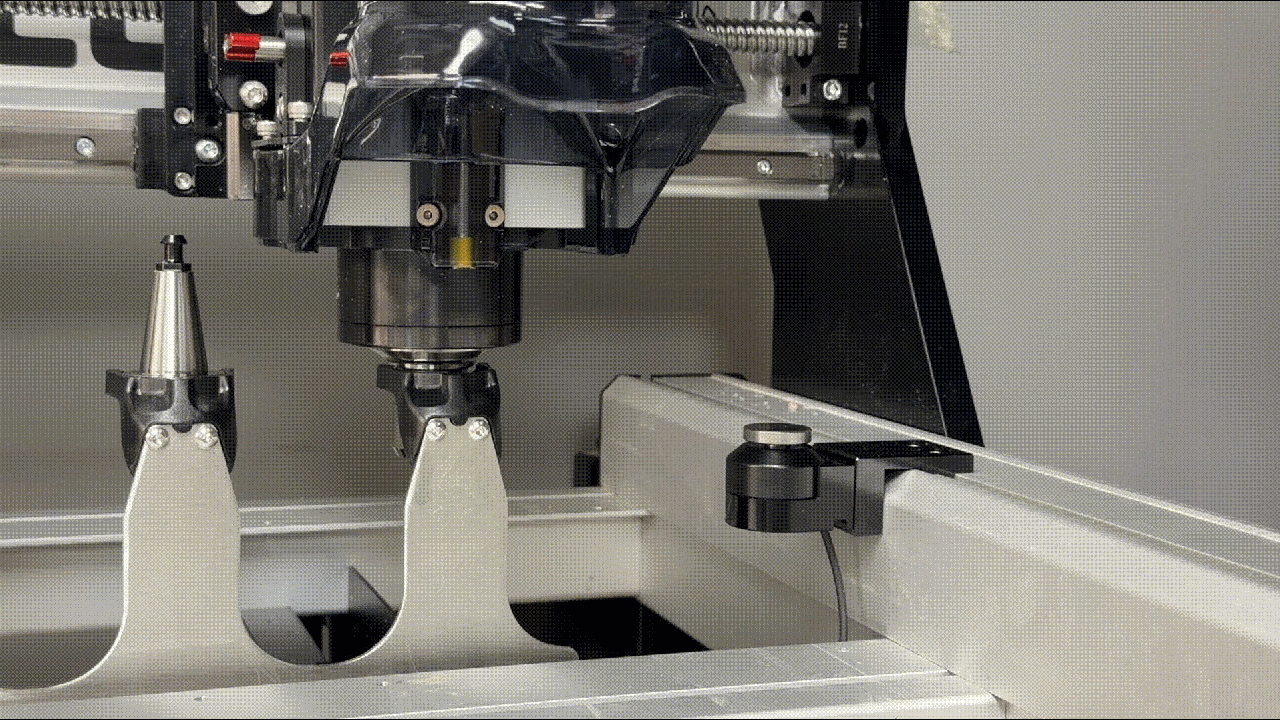
Tools in your ATC system are referred to by a tool number, ranging from Tool 1 to Tool 32. A single rack will have 6 tools, while a double rack will hold 12. Any tools above number 12, will be changed out manually. The system detects that the tool number exceeds the rack capacity and moves to the tool rack position so you can replace it manually.
If you didn’t purchase a tool rack, all of your tool changes will be done manually.

Tool Length Sensor
The system is setup to automatically probe each tool immediately after it’s been loaded. This is an automatic process, where the spindle will move over the tool length sensor, and move downwards to touch off on the TLS.
Your zeros are stored, so there is no need to re-zero after each tool change!
Tool Paths
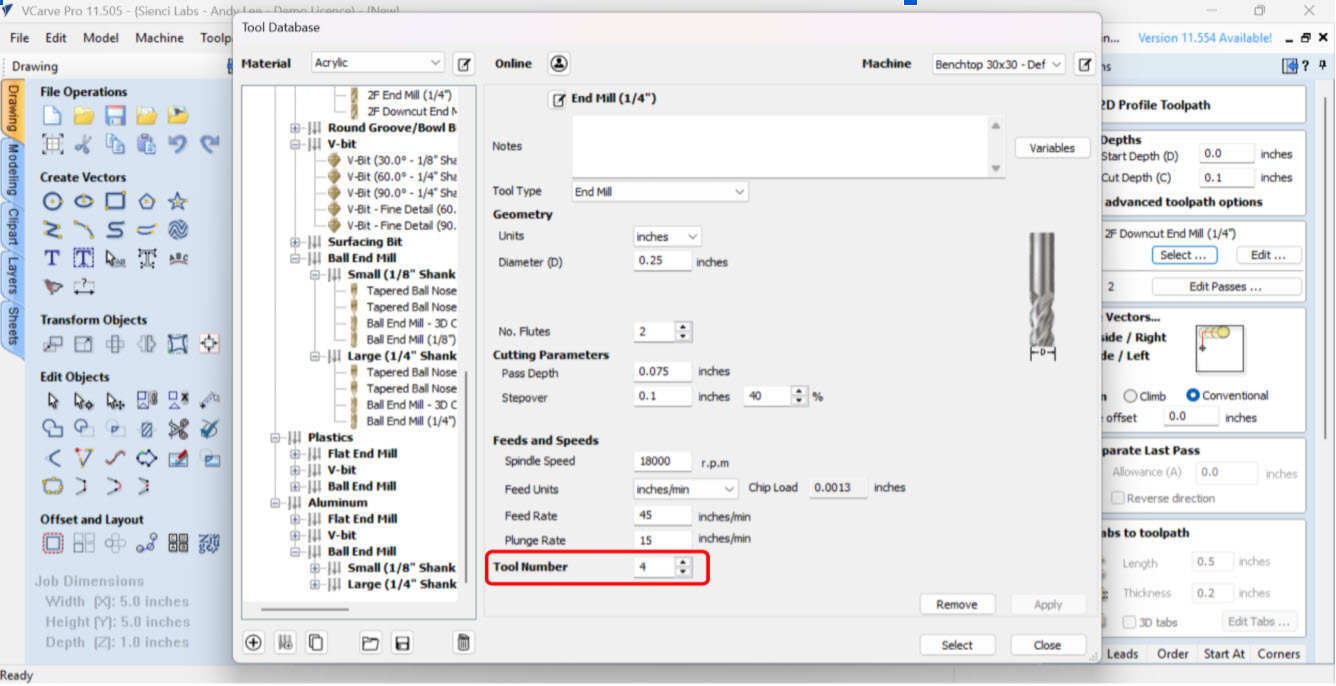
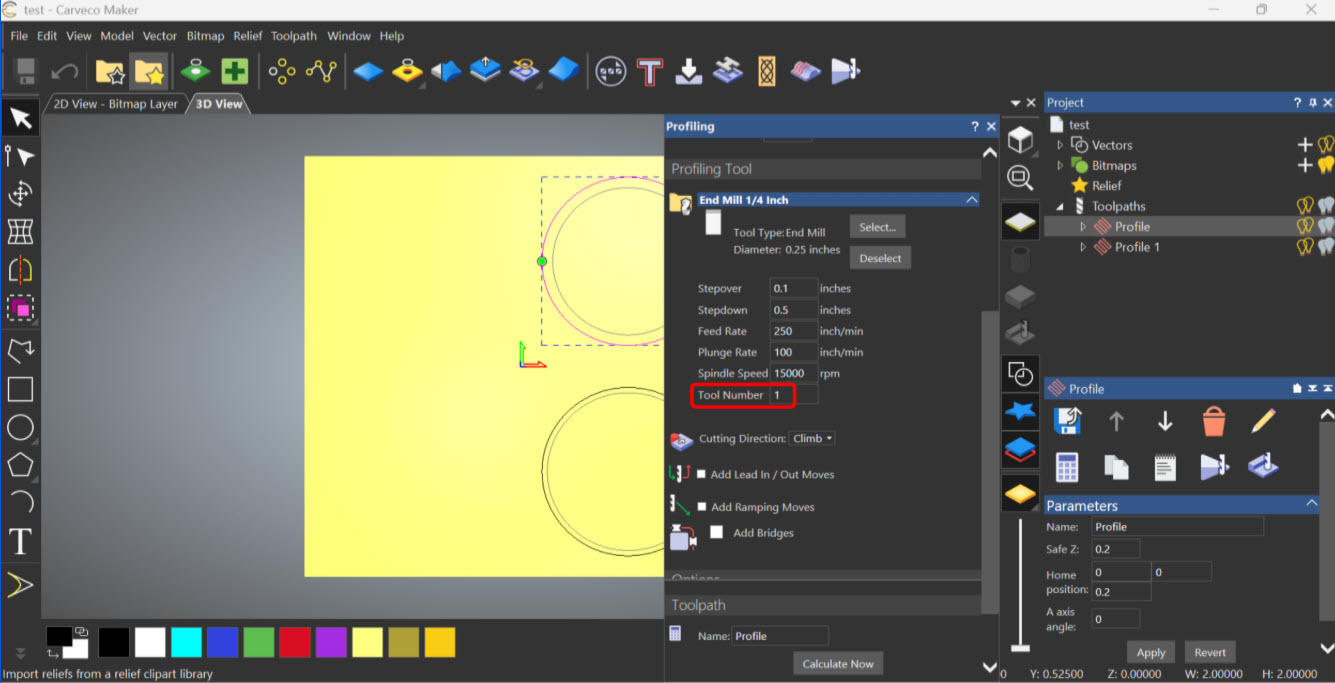
Creation – When making tool paths, the tool number associated with the selected tool is used by your ATC to determine the physical tool to load.
Tool #1 will be picked up at rack slot 1. Tool #2 will be picked up at rack slot 2. Etc. There is an option to remap which tool is picked up for a specific tool number, so you don’t have to arrange your tools to match the order they are in the rack.
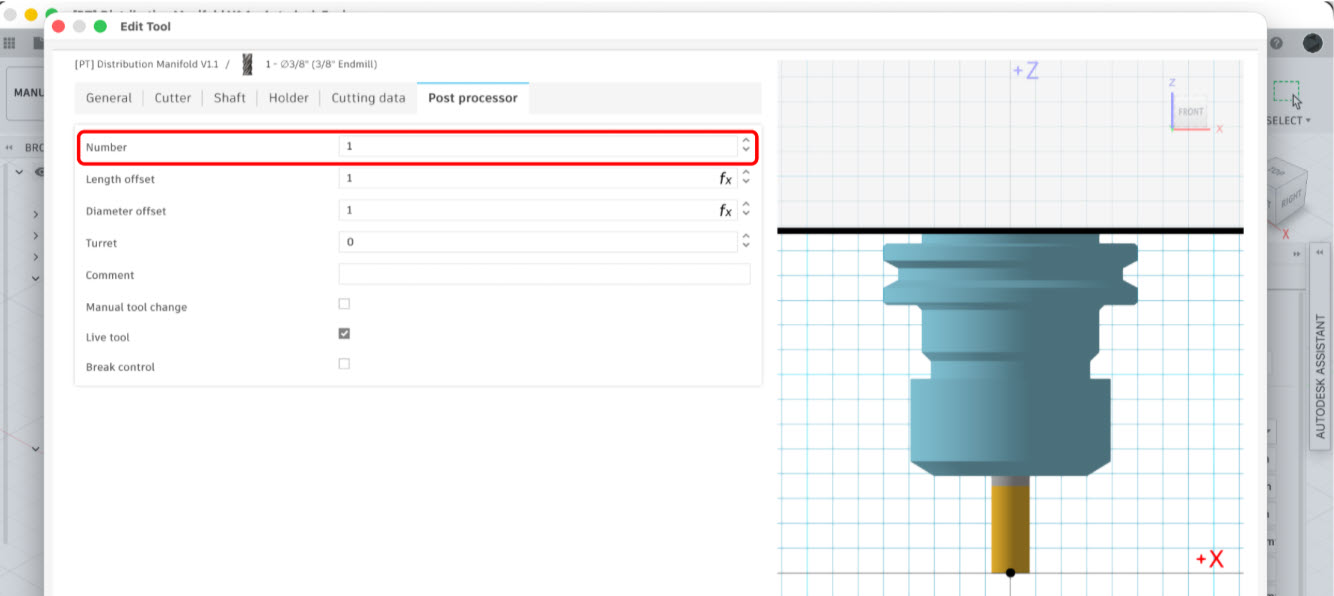
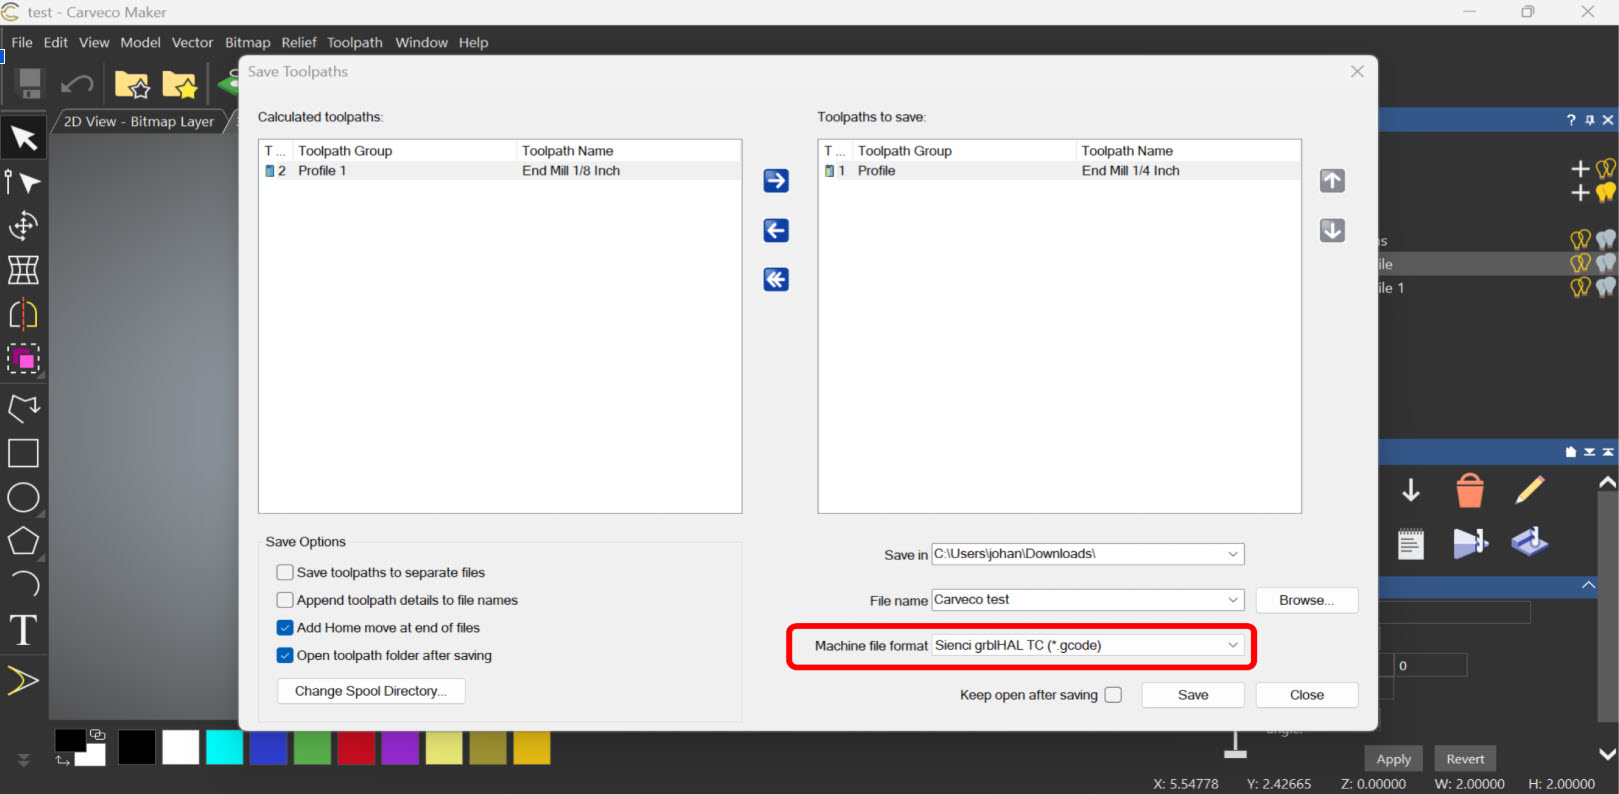
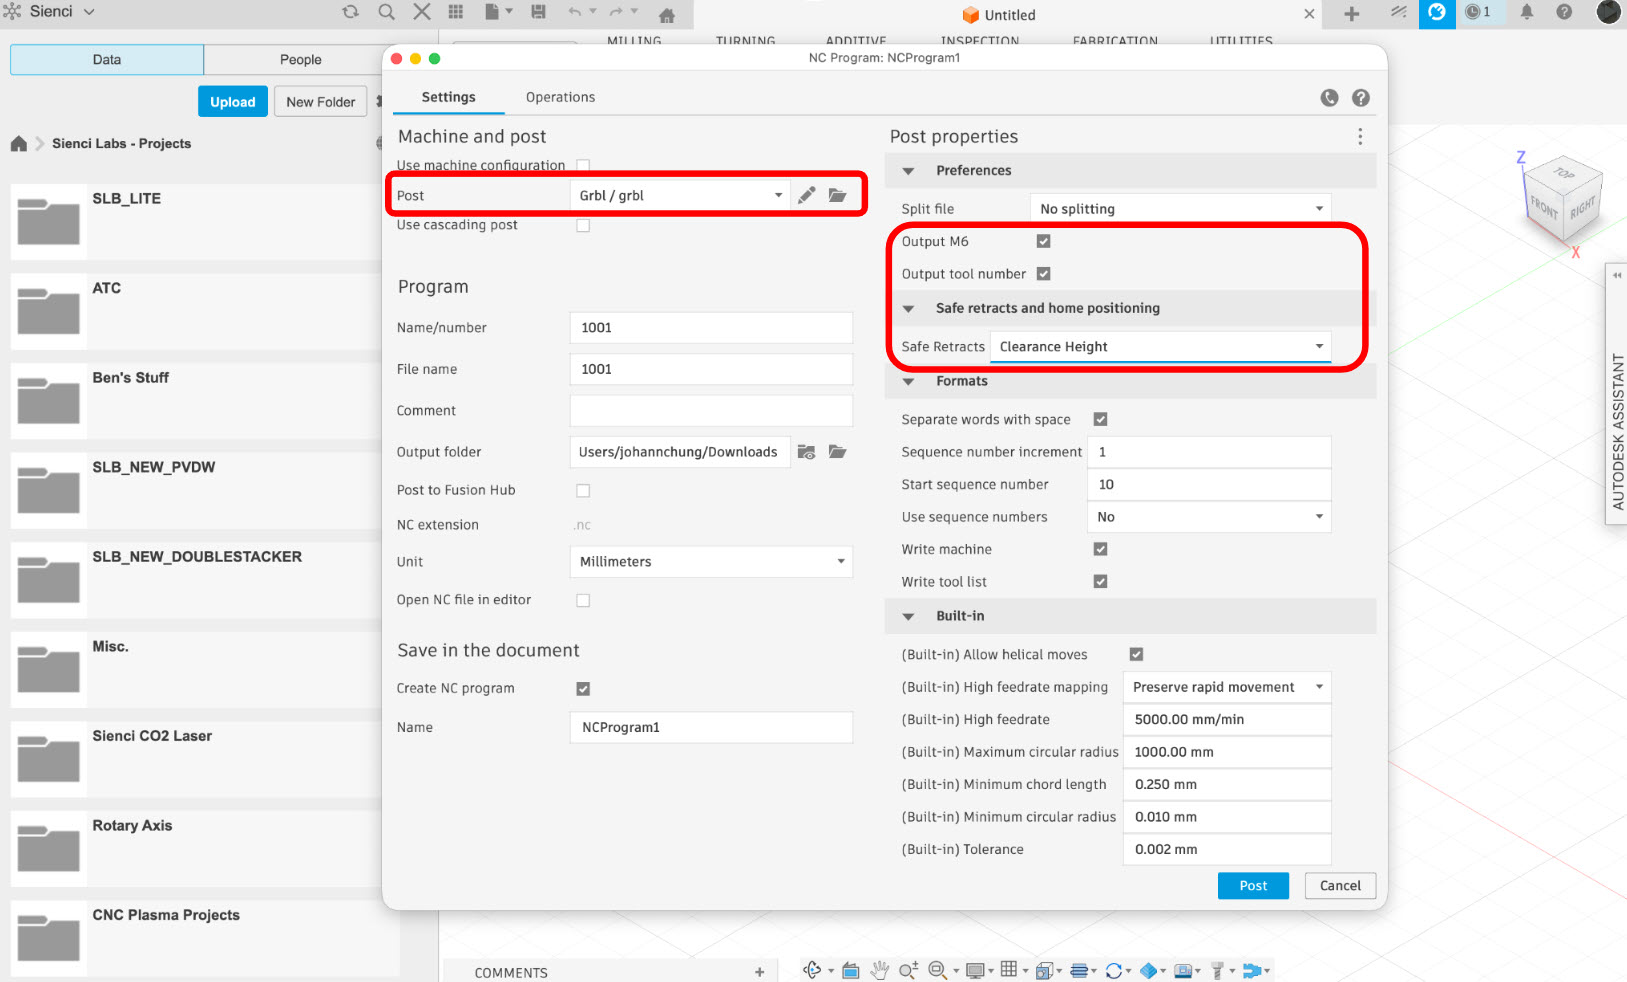
Exporting – You will need to install the post-processor provided to enable the ATC to export your toolpaths correctly. Check out the Before You Begin section to download your appropriate CAM software post processor.