
If you haven’t yet, go through the Software Setup to initialize your ATC system. You cannot use your ATC until this process is complete.
First ATC Project: Engraved Rounds
Now that our Automatic Tool Changer is installed and configured, it’s time to run a real project.
In this exercise, we’ll cut circular wooden rounds and engrave short phrases on them. The goal is to confirm that our tool numbers, rack positions, and g-code formatting all work together in a multi-tool job.
By the end, we should have finished parts—and confidence that your ATC is running as expected.
Design File
If you want to change the bits we are using, tweak the speeds/feeds, use a different material size/thickness or change the wording on the cookies, you can! Simply open up this file with VCarve Pro and you can change any of the details on the file. Vectric VCarve Pro file
Toolpaths File
If you have material that is 451 mm (17.75 in) width, 380mm (15 in) height and 6.35mm (0.25 in) thick, you can simply load up this file in gSender. Set your zero starting point, and begin the carve! Here are the g-Code toolpaths all saved to one file.
Project Overview
We’ll machine a set of 70–80 mm (3–4″) diameter wooden rounds from 6.5 mm (1/4″) thick stock. Each piece will include a short engraved phrase. We are keeping the design simple for this first run, — the focus is on verifying smooth, reliable tool changes.
Tools for This Project
We’ll load the following end mills into the tool holders, then place them into the rack. Confirm their positions are correct once loaded. Feel free to swap out different bits if you don’t have the ones we’ve selected for this project. Just make sure you tweak the tool and toolpaths in the files found above before running your project!
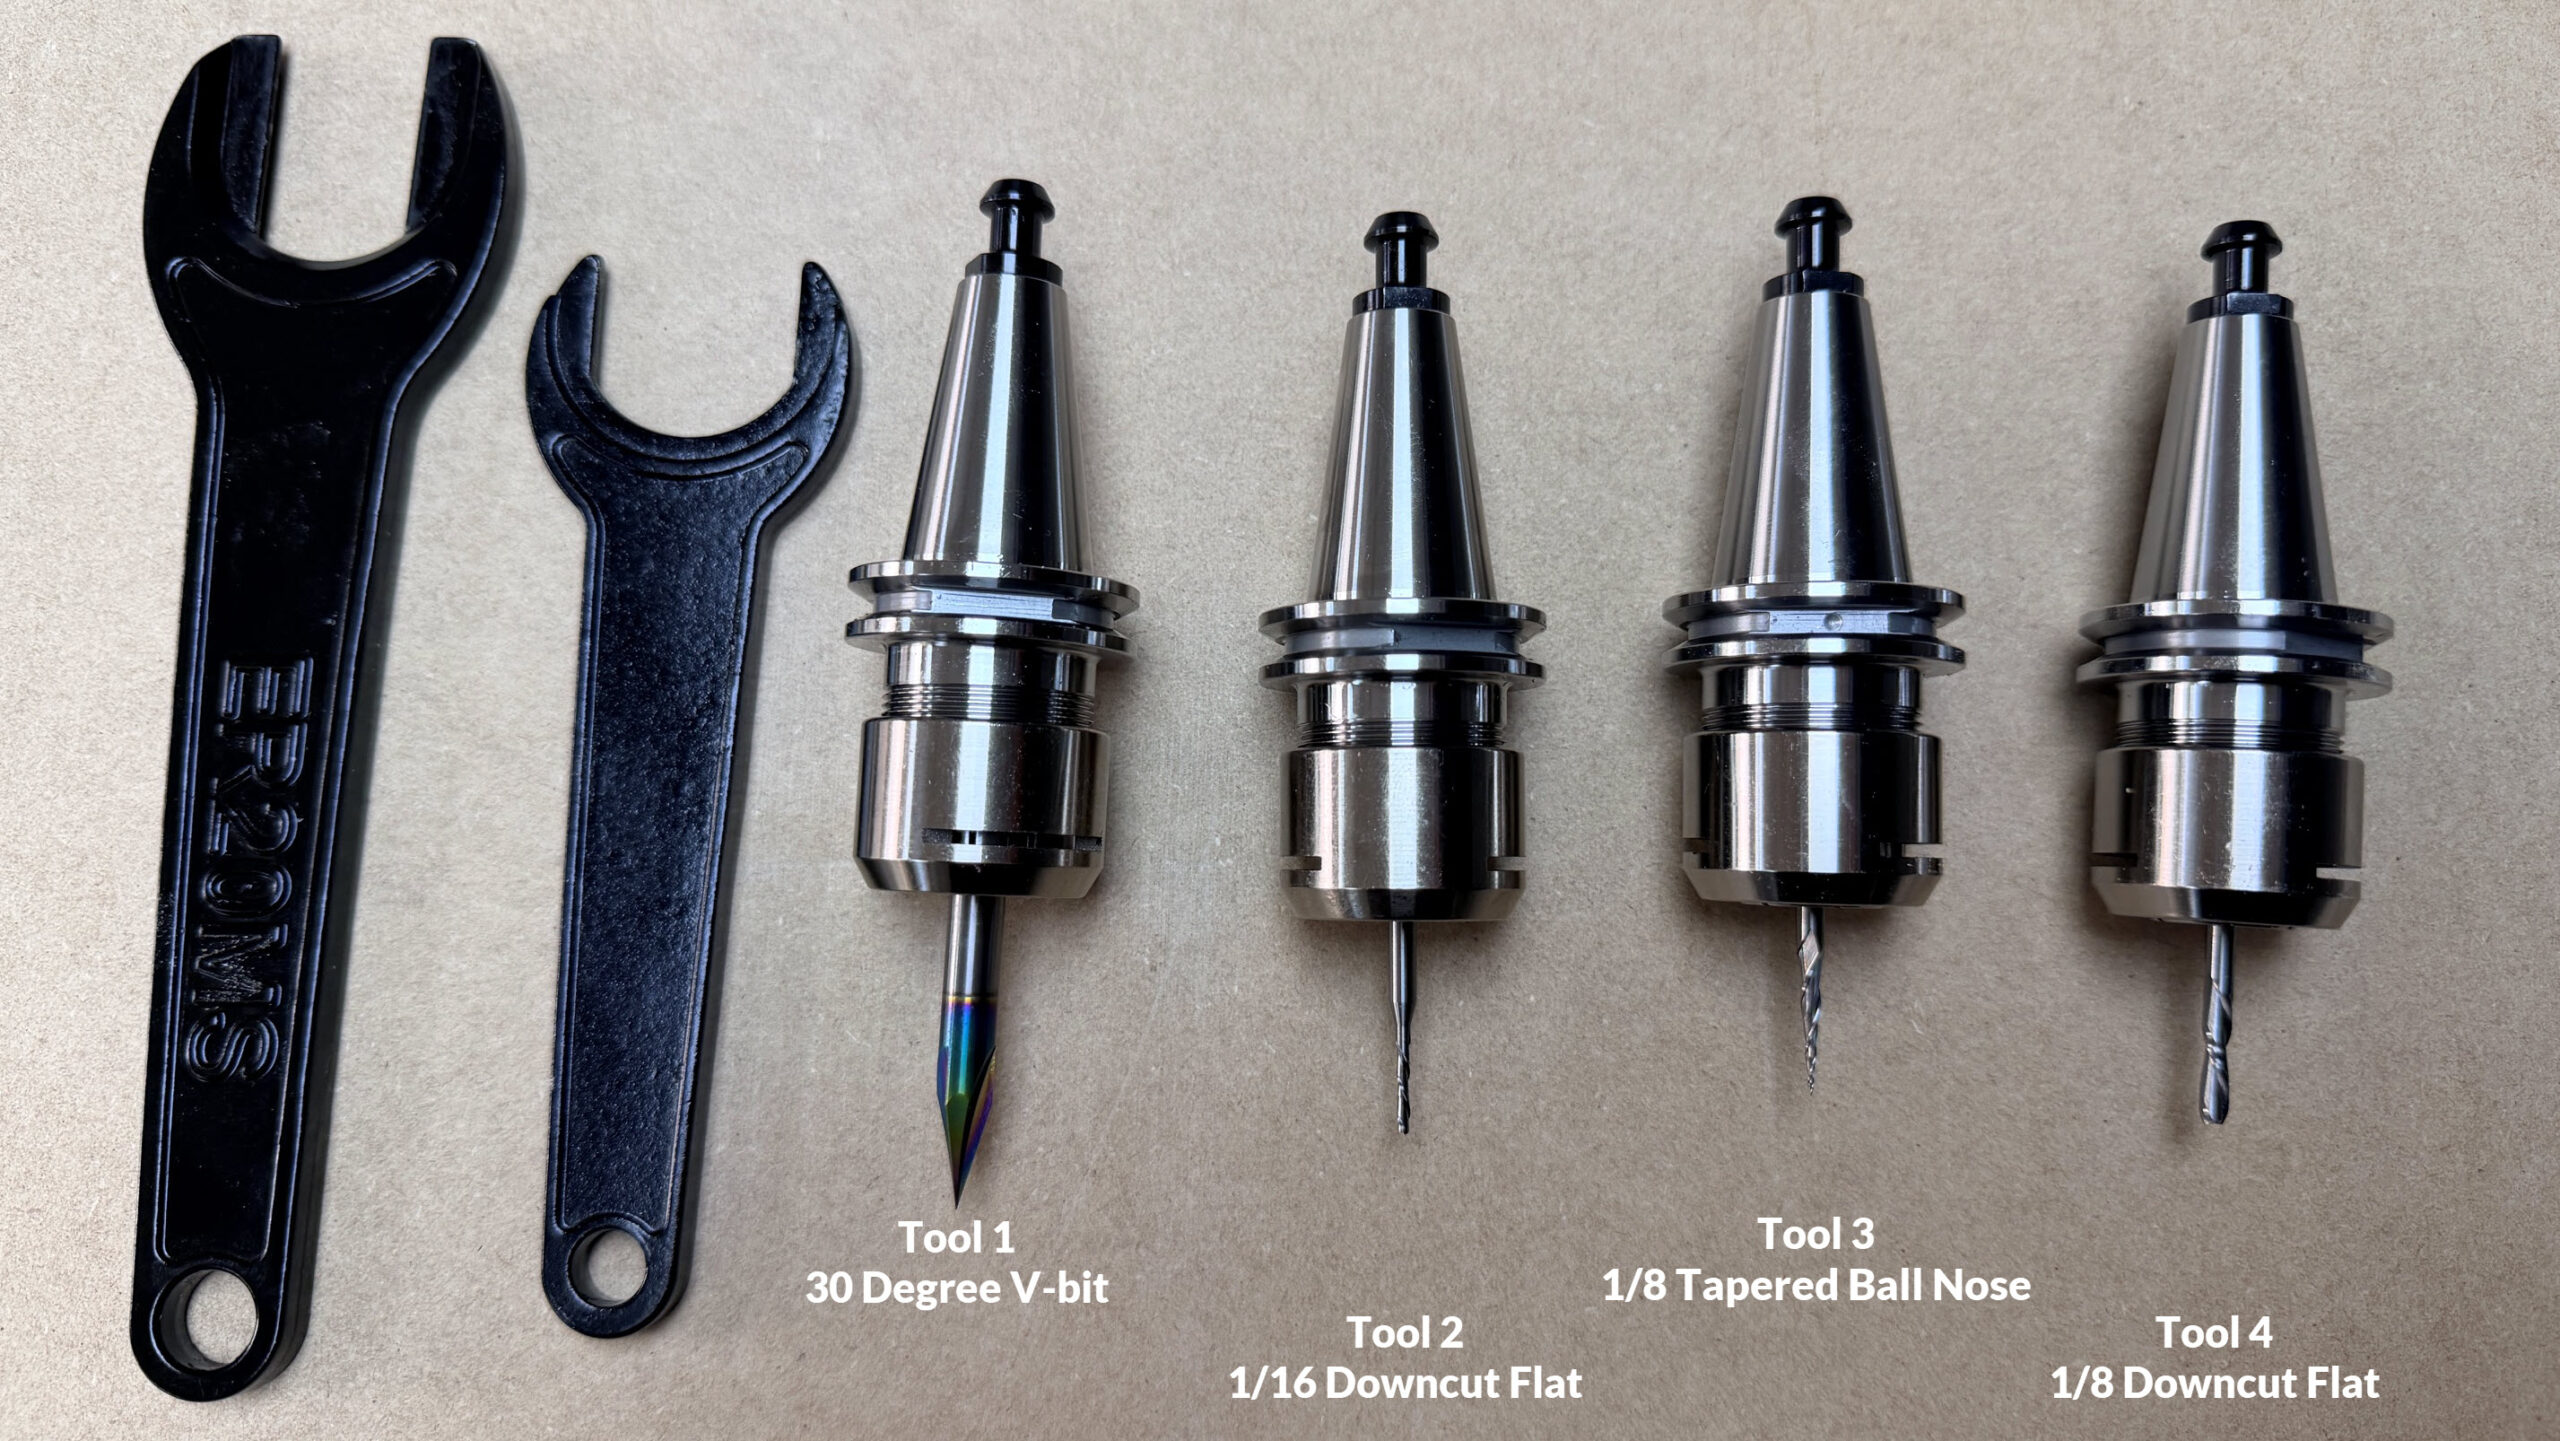
Tool 1 (leftmost position)
1/4 30° V-bit for engraving the fine text
Tool 2
1/16″ downcut end mill for pocketing large blocky text (1/8 shaft)
Tool 3
1/8 Tapered Ball Nose for fun times and fine text
Tool 4
1/8″ downcut end mill to cut out the cookies
Material and Workholding
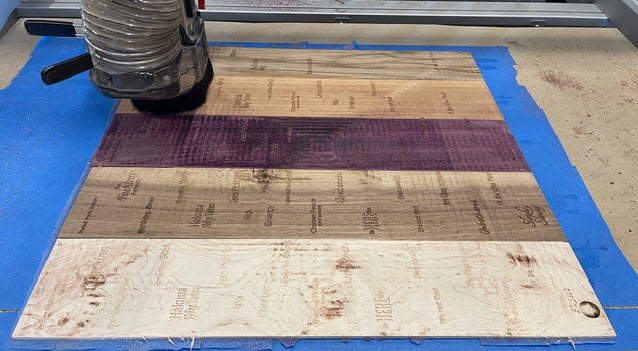
We are being a bit ambitious with this project, by using 3 different types of wood, all at one time. Instead of carving one board at a time with manual tool changes, we’re combining three separate carves into one.
We’ll use the tape-and-glue method for workholding in this project. If you’re unfamiliar with this approach, see the Fundamentals of Workholding for a quick overview.
Designing the File
We are using Vetric’s V-Carve Pro for the design and toolpath sections of this project. We’ve lined up the boards and placed offsetting circles (cookies) into the design. Next we added our text, sized it down and rotated it 90 degrees to fit our cookies.
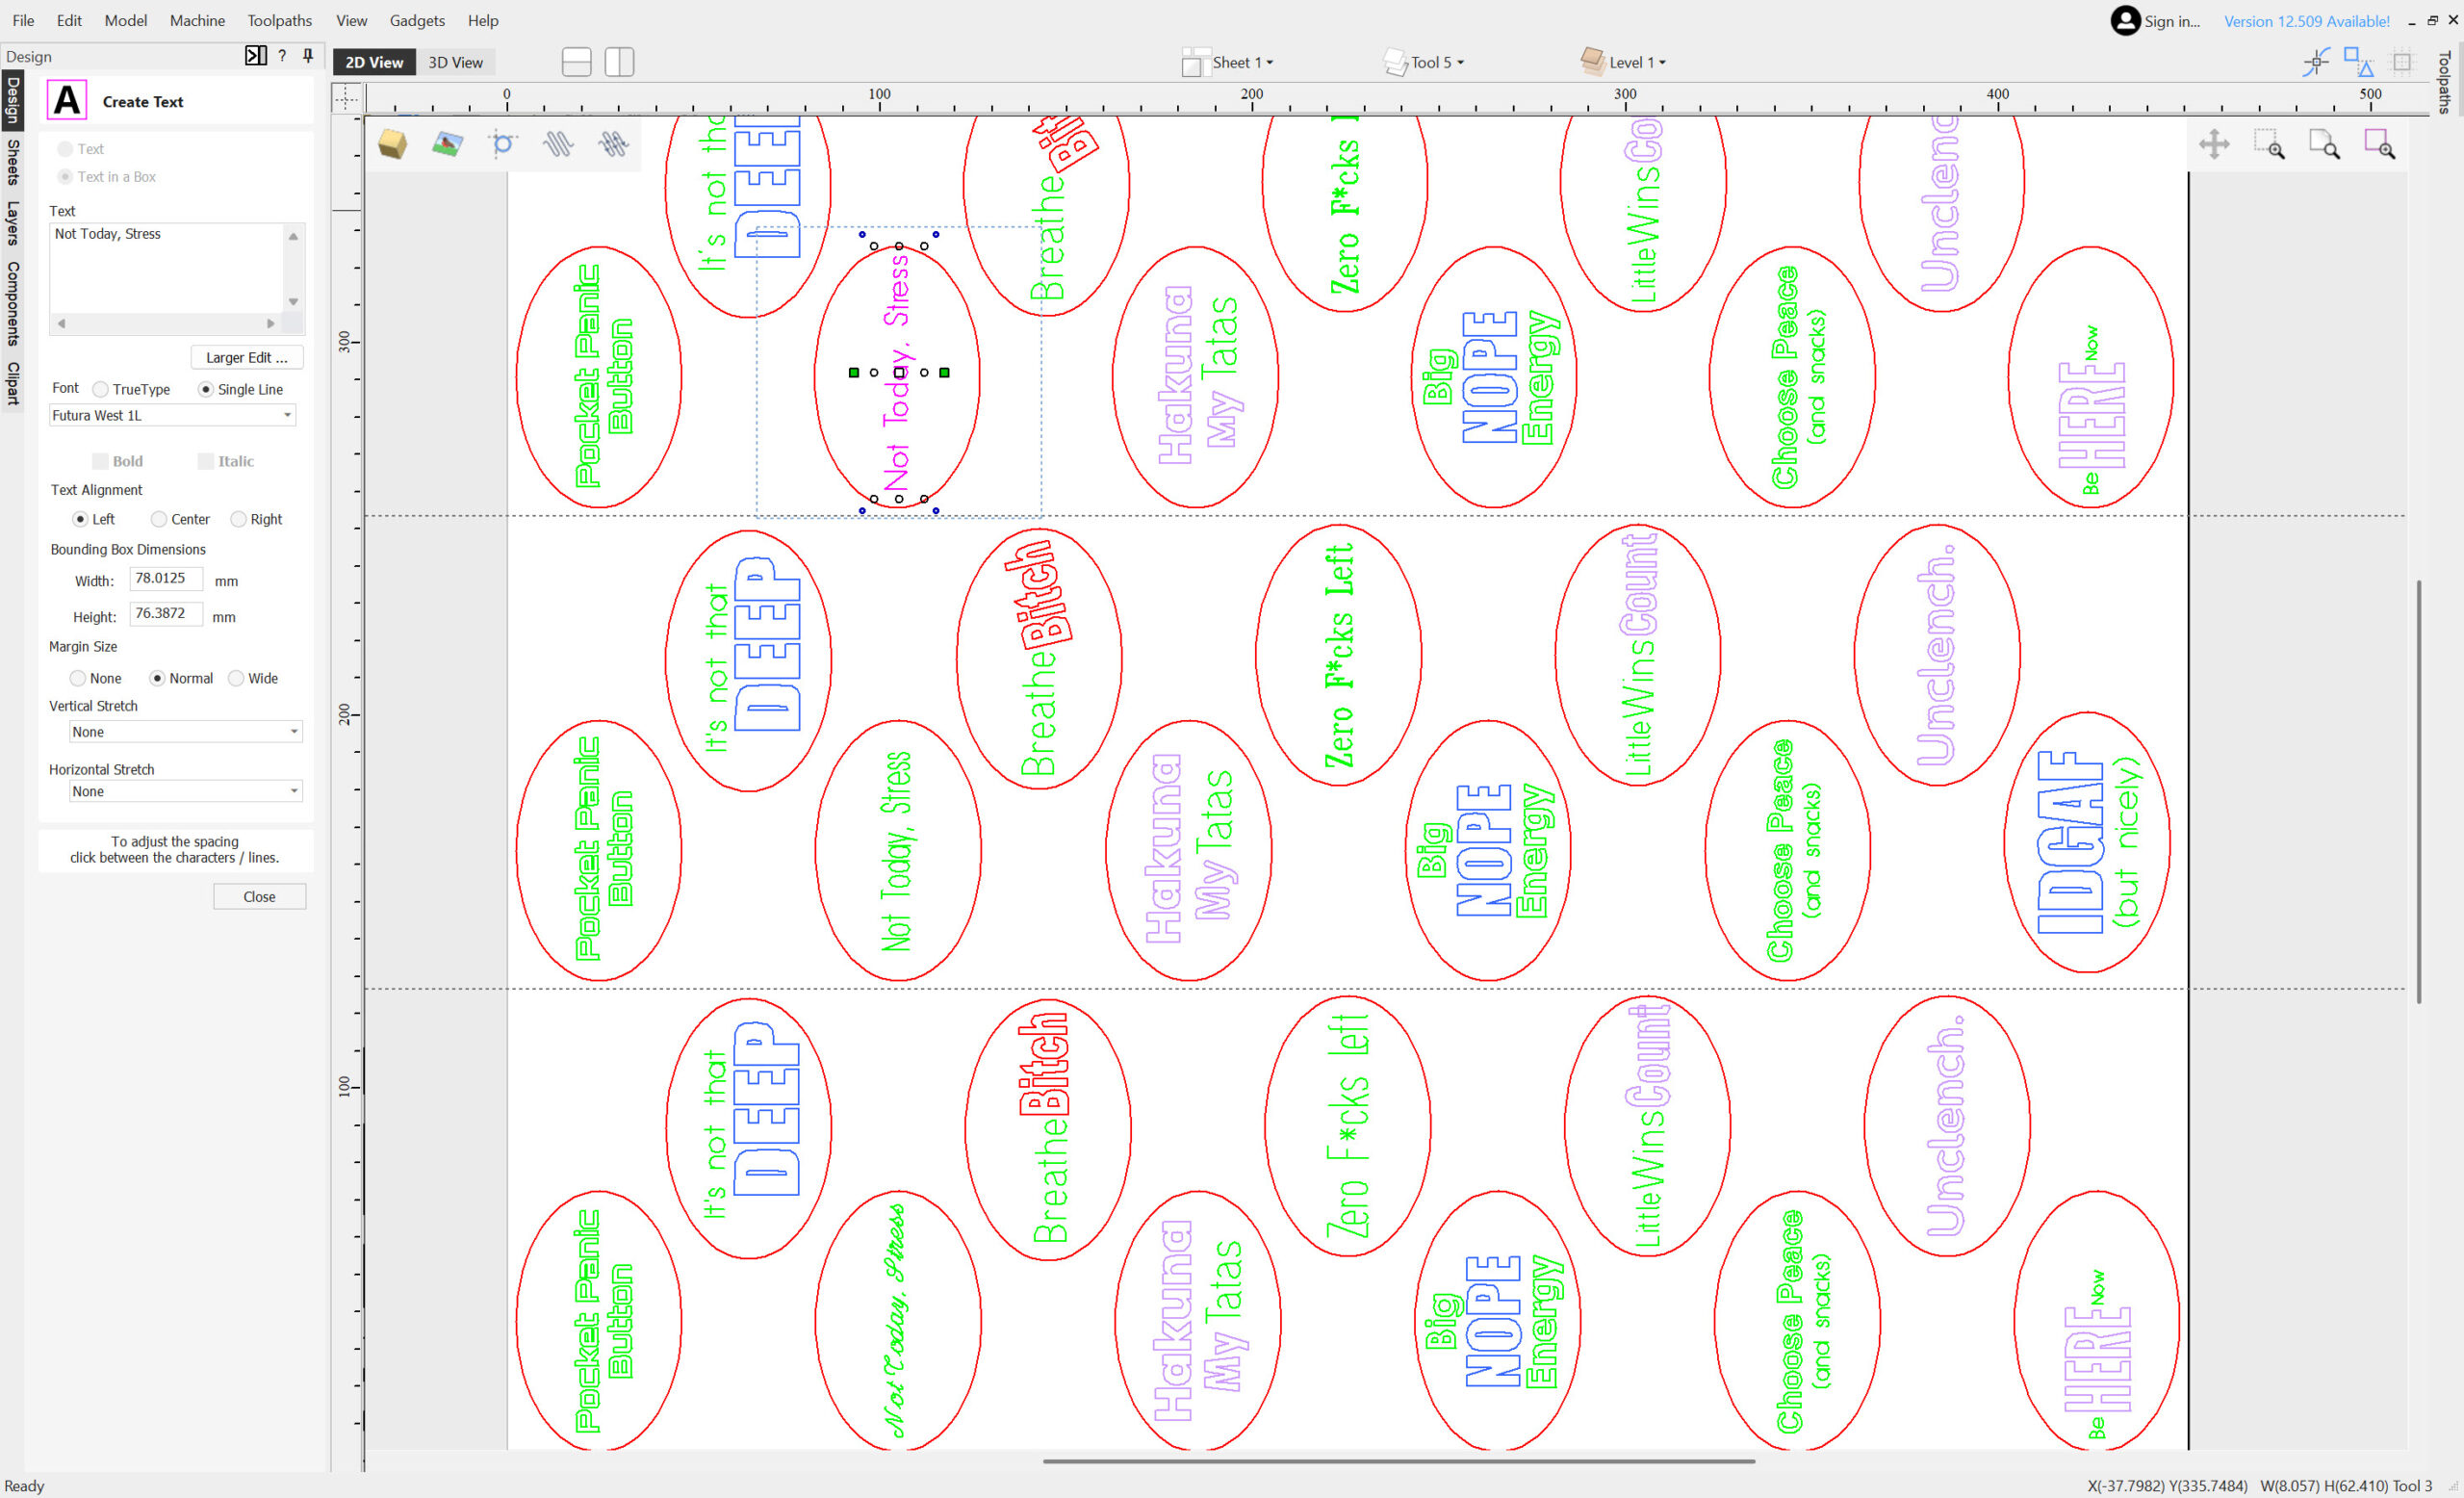
We’ll keep everything simple and clean. This is a function test, not a design challenge.
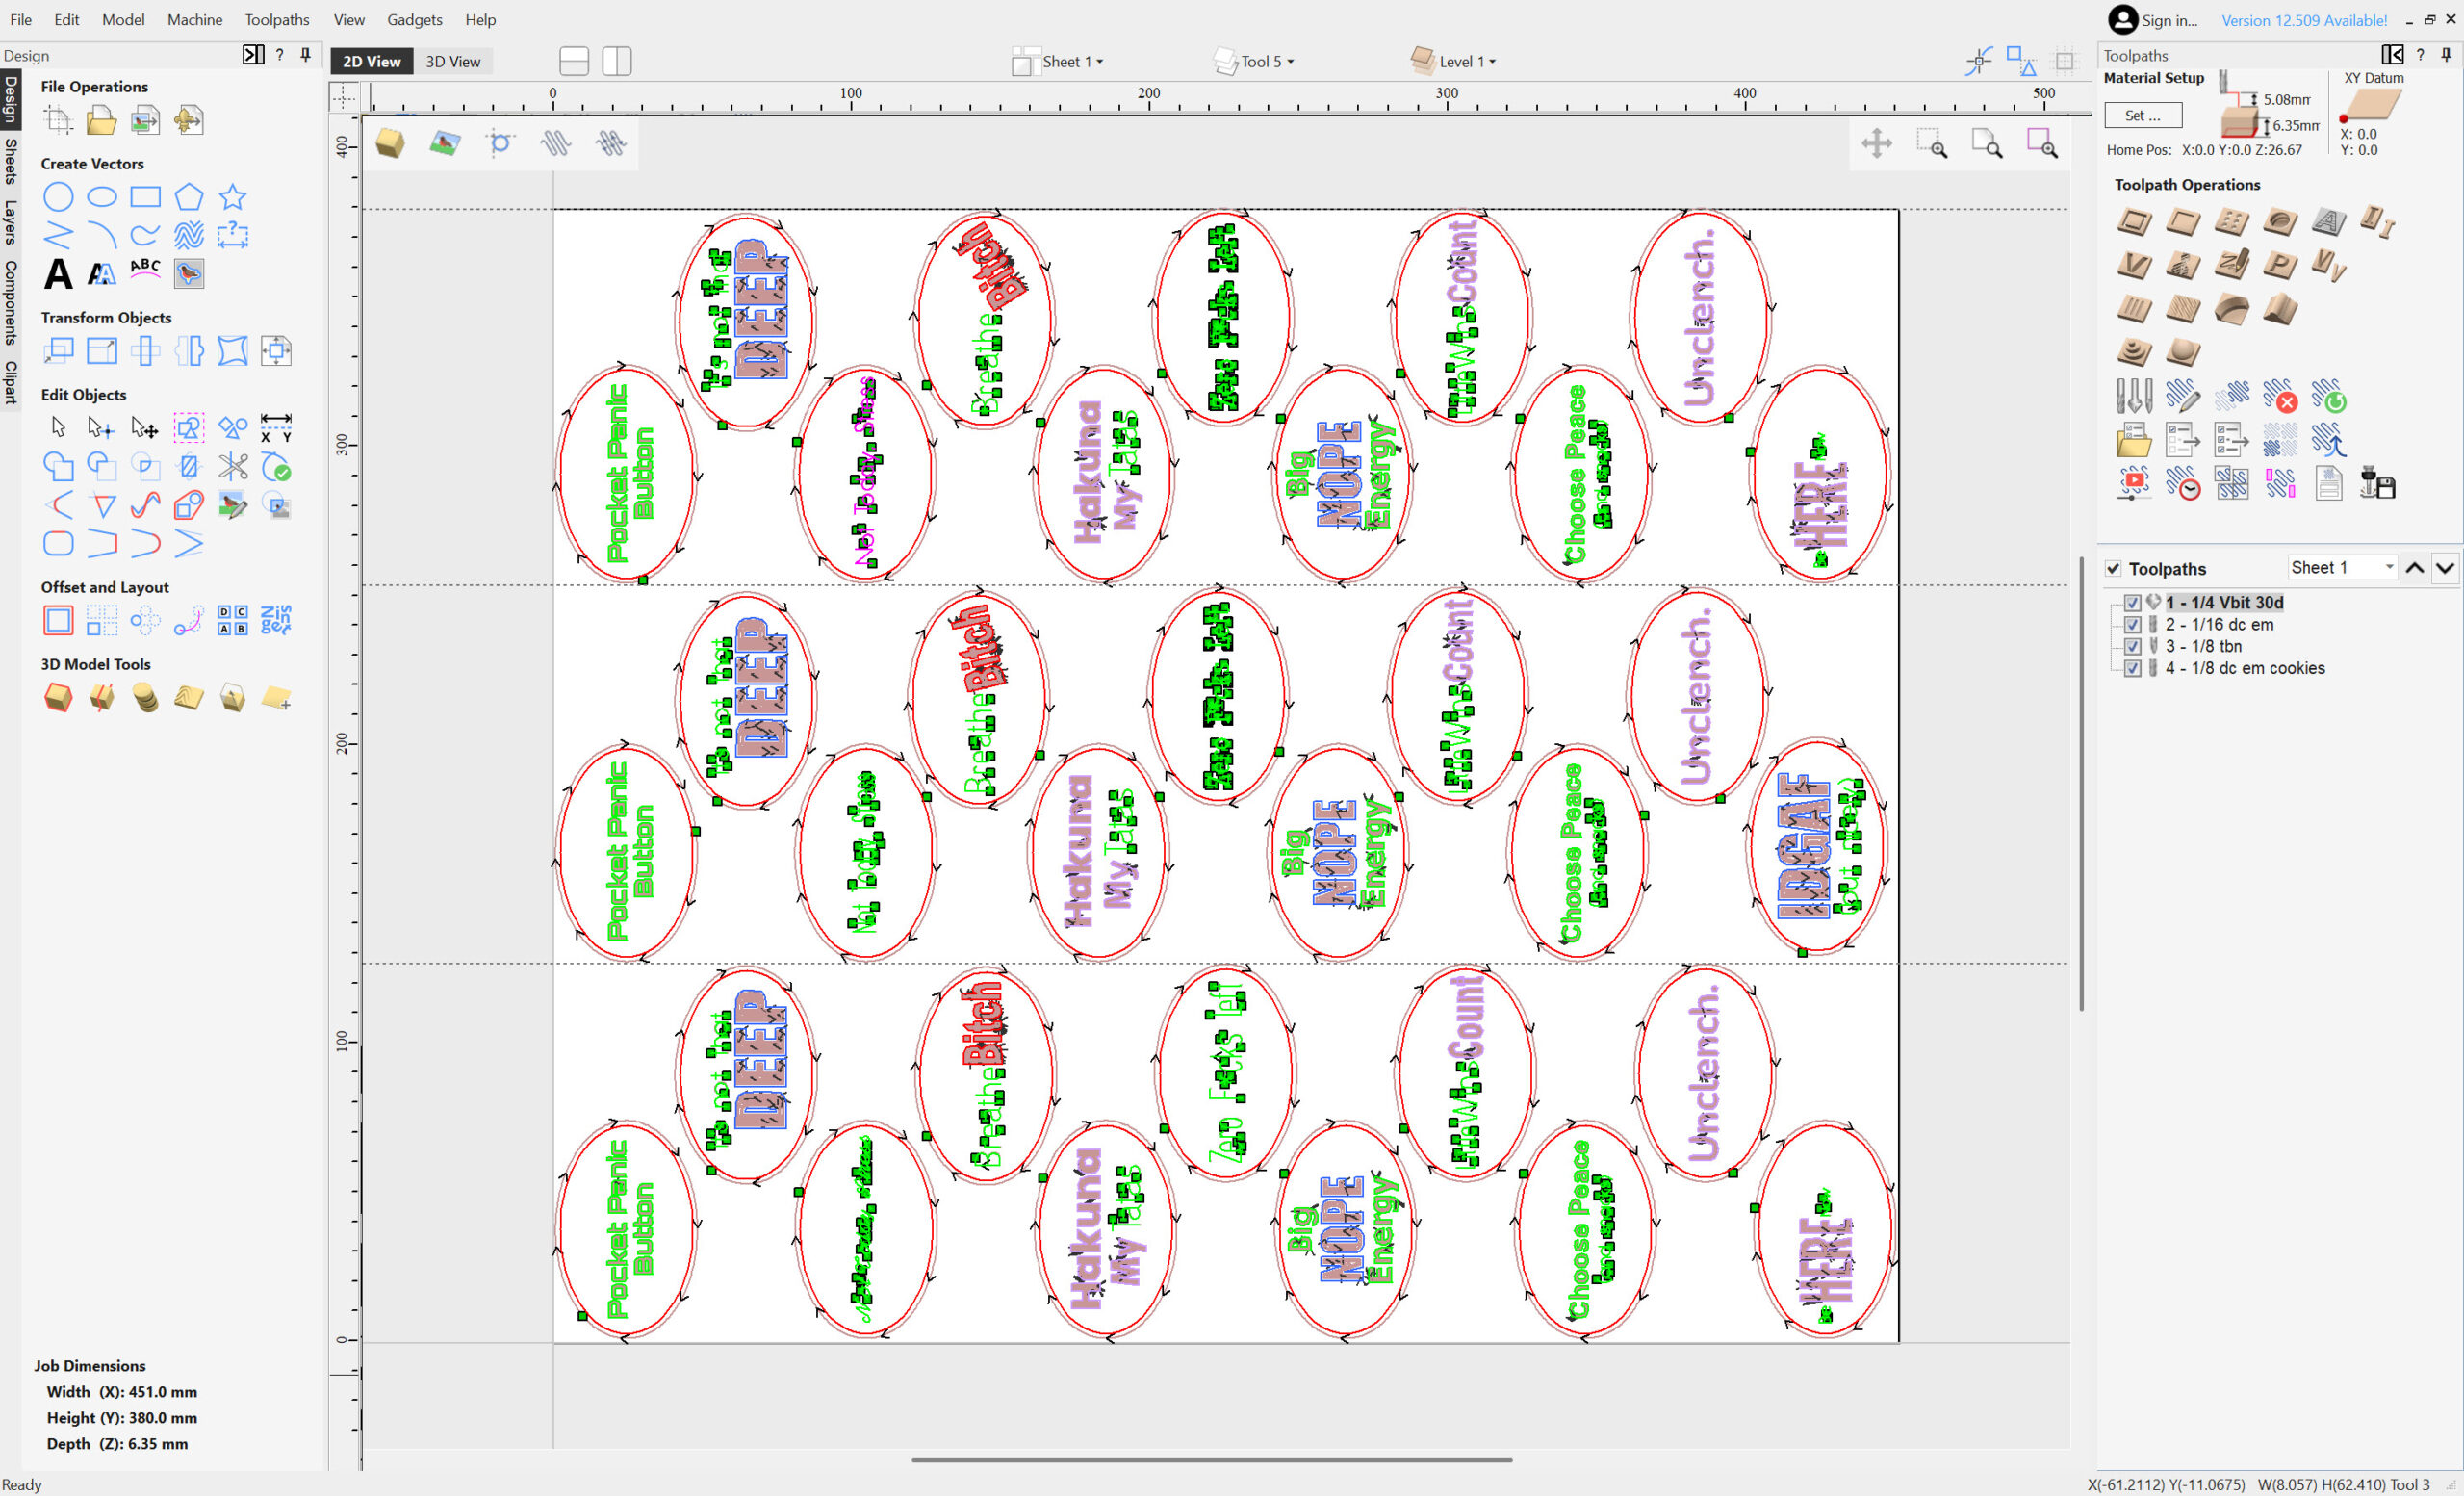
Creating Toolpaths
This design incorporates more tools and toolpaths than you would usually use. Remember, we are testing out the new ATC system, not being as efficient as possible here. We have 4 toolpaths planned, let’s check them out.
-
We’ll select the single line text and create a profile toolpath using Tool 1. We’ll set a conservative depth. Light engraving is ideal for this first run. Ensure you have the Machine Vectors set to ON.
-
Select the large text and the 1/16th bit with a pocket toolpath.
-
Use the 1/8 tapered ball nose bit for the smaller text with a pocket toolpath.
-
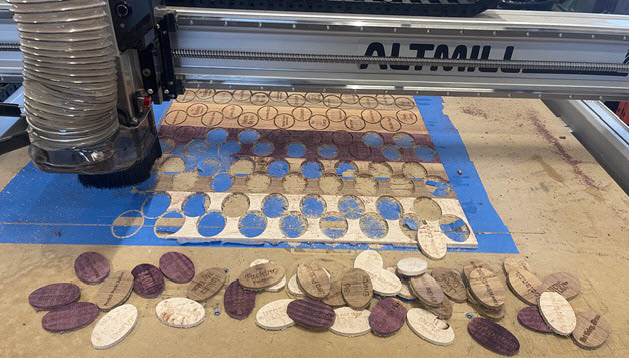
Finally, we’ll create the profile toolpath for the cookie circle using Tool 4. We’ll cut outside the vector and through the full material thickness. We’ll be using the tap/glue method, so no need to add tabs to hold the parts in place.The engraving should run before this profile cut.
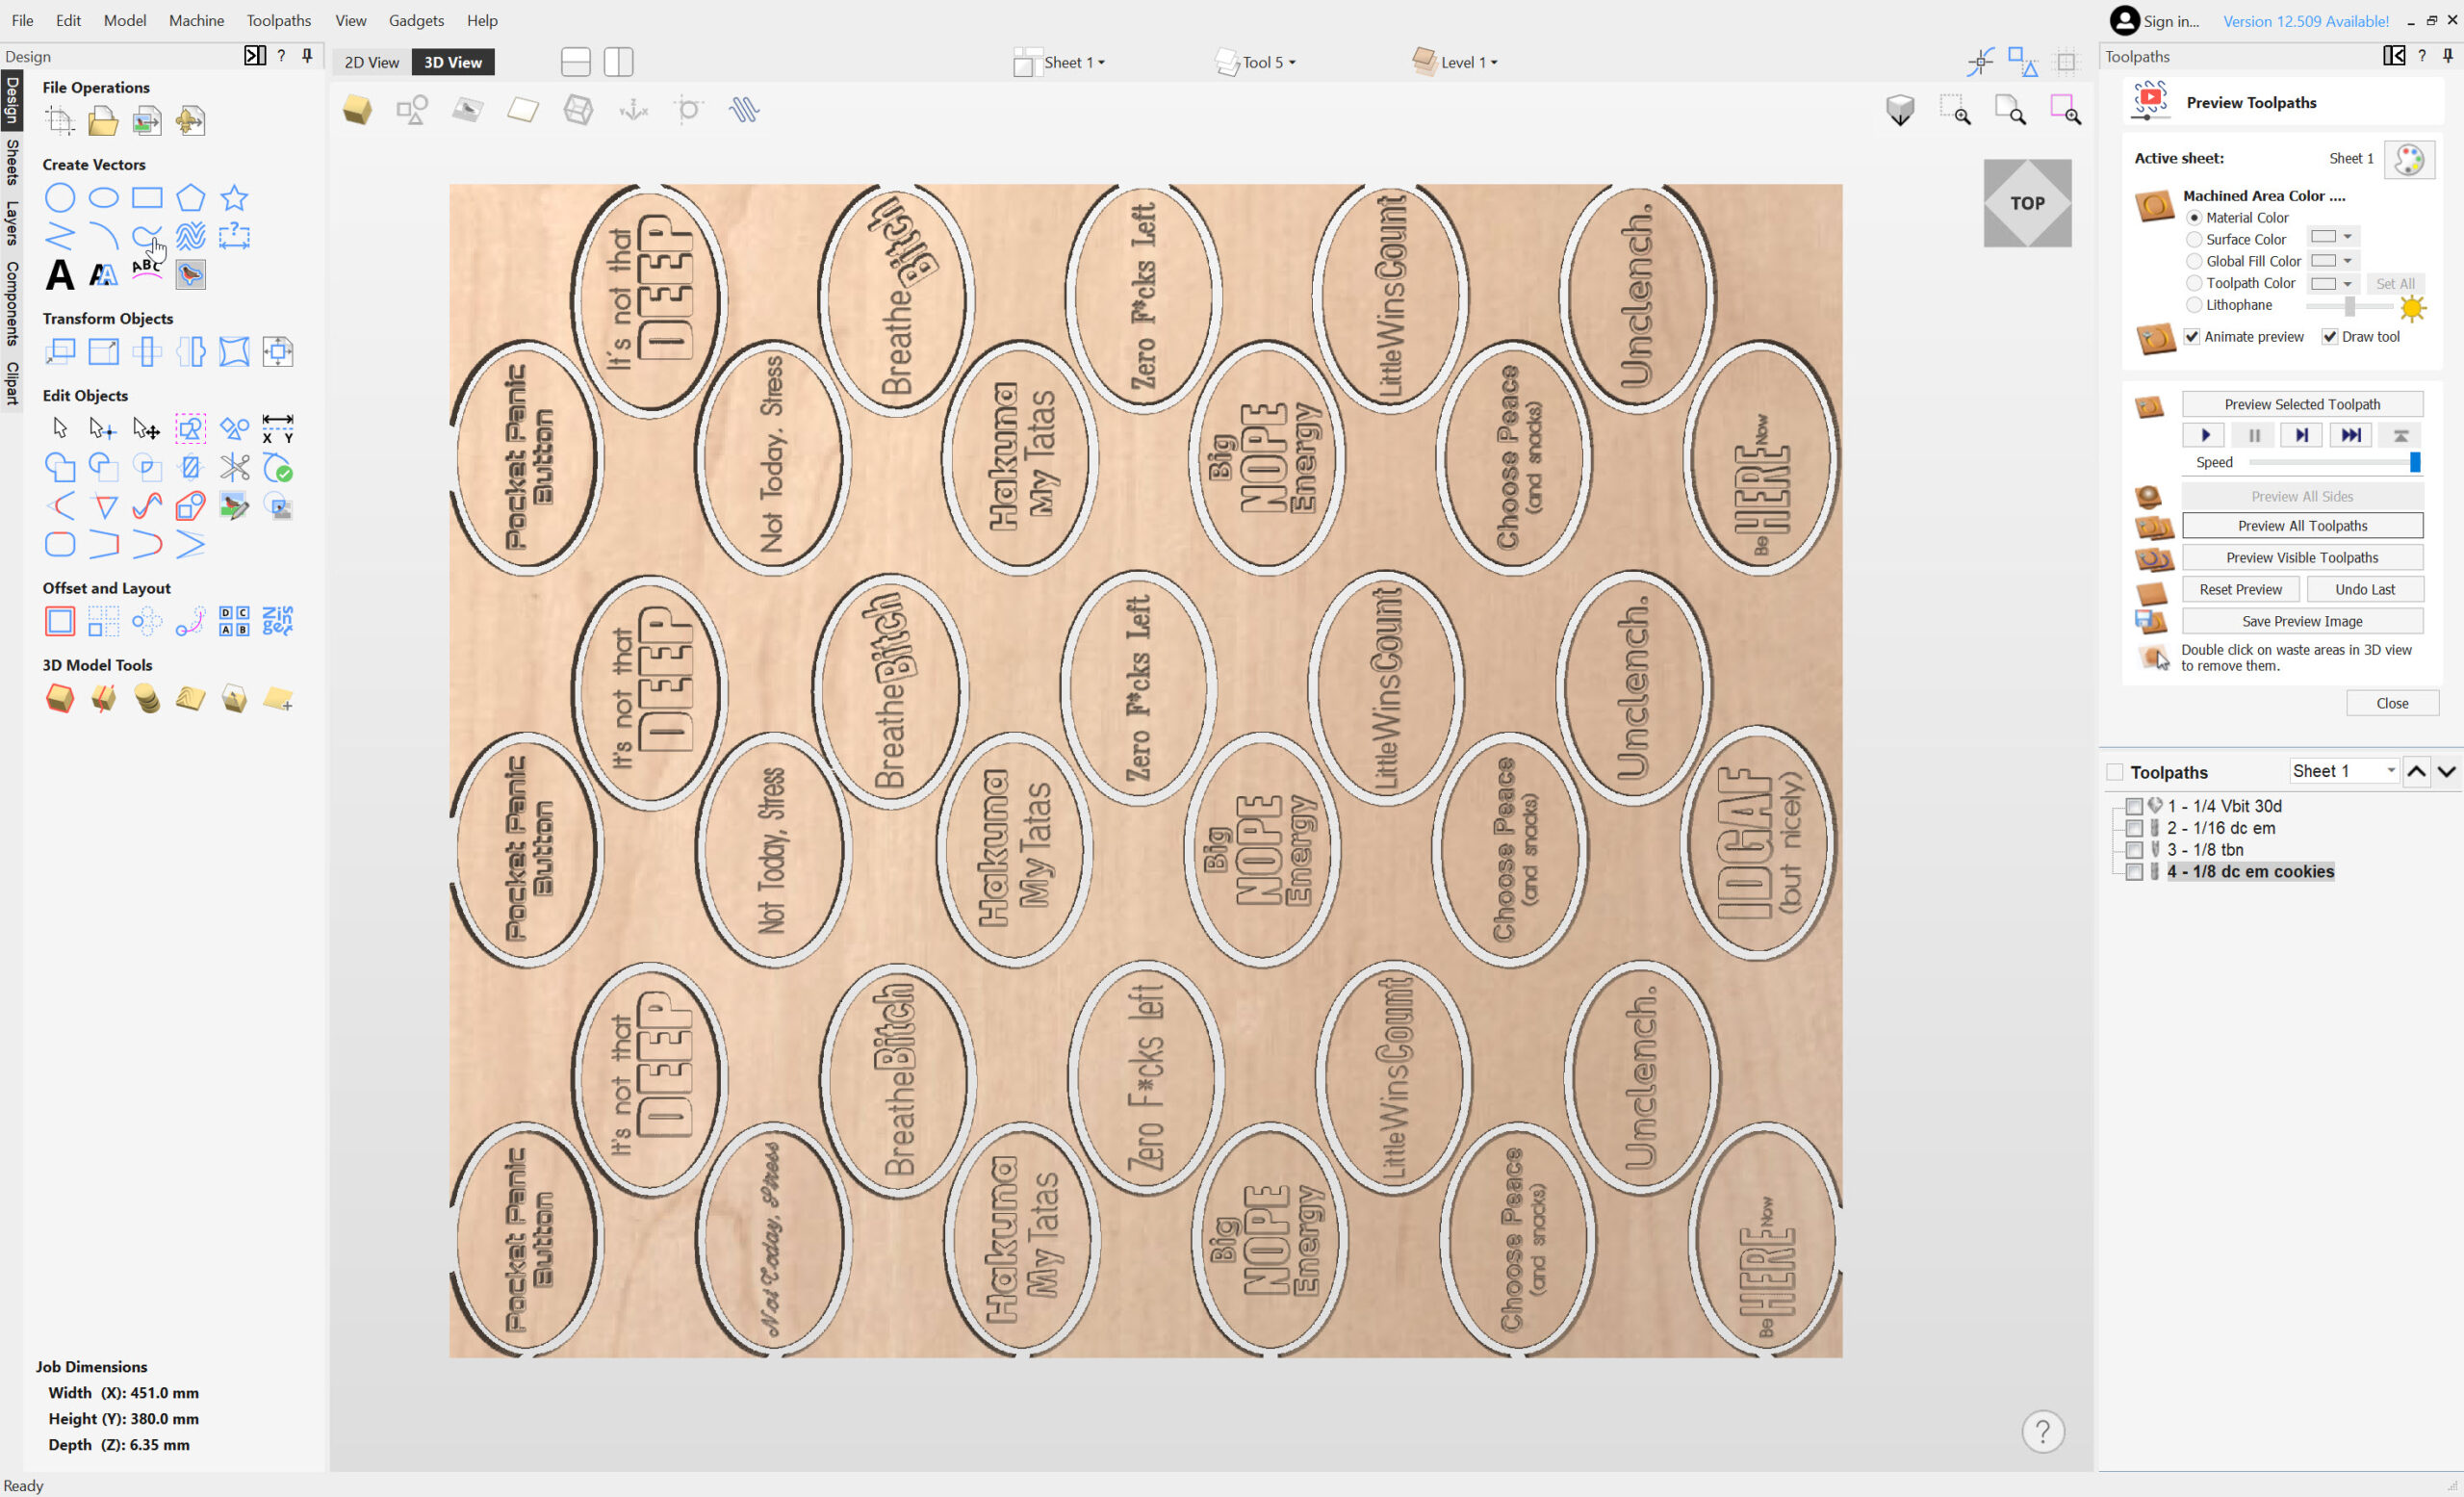
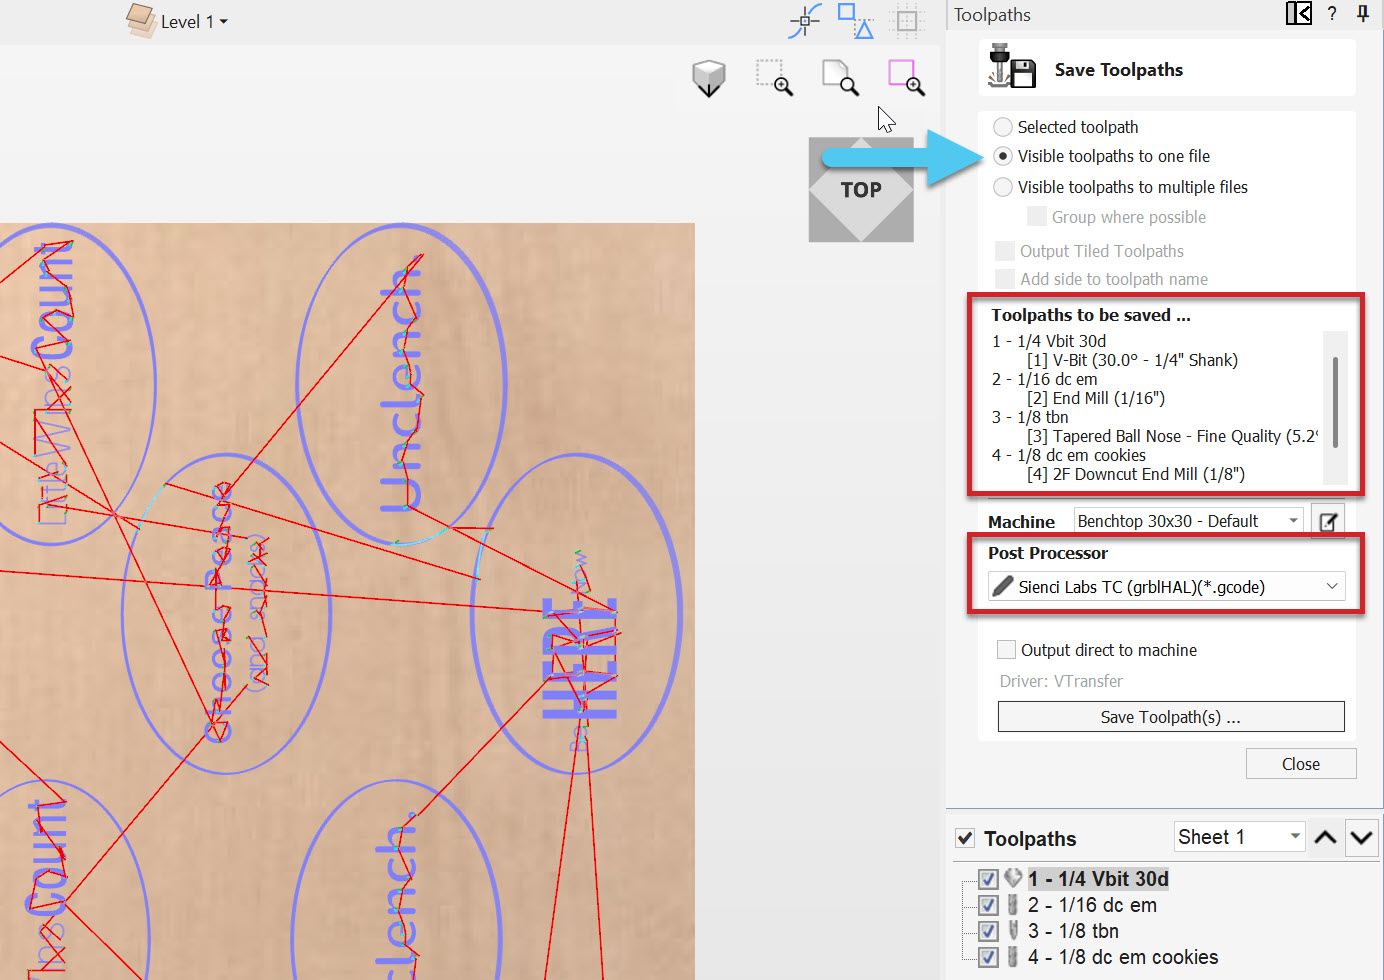
I’ve named each toolpath with the corresponding tool number, in the order I’d like them to carve. Let’s preview all of the toolpaths!
Tools & Numbers
We have all of our toolpaths created and our tools chosen, so let’s ensure the tools are setup with the correct tool numbers. Double click on your toolpath, then hit the edit button to bring up your tool. You can select the tool number you want in the bottom of the edit tool section.

Repeat this for each tool/toolpath, 1 through 4.
Now that we’ve confirmed each tool has a unique tool number, we can save all toolpaths to one file. Then we’ll export using the Sienci post-processor.
Running the Job
We have the g-code, and we installed the tools in the correct order. Now we can move on to running the job!
-
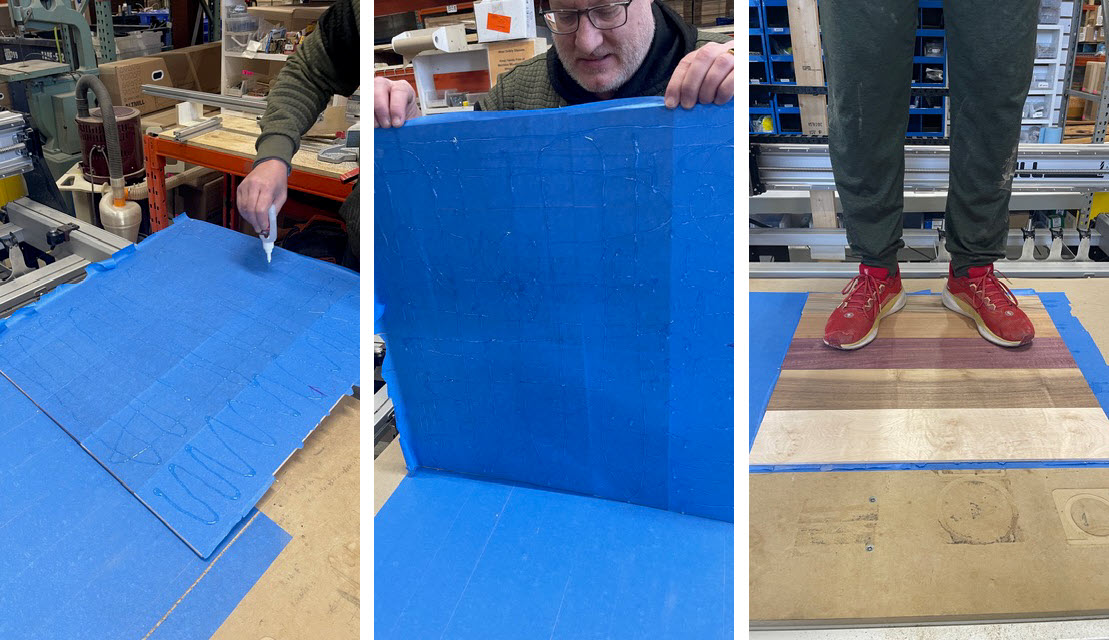
Set up any workholding to secure your material on the wasteboard. In these pictures we are using the tape/glue method, with 5 boards! Read more about Workholding.
-
Connect to gSender via USB.

-
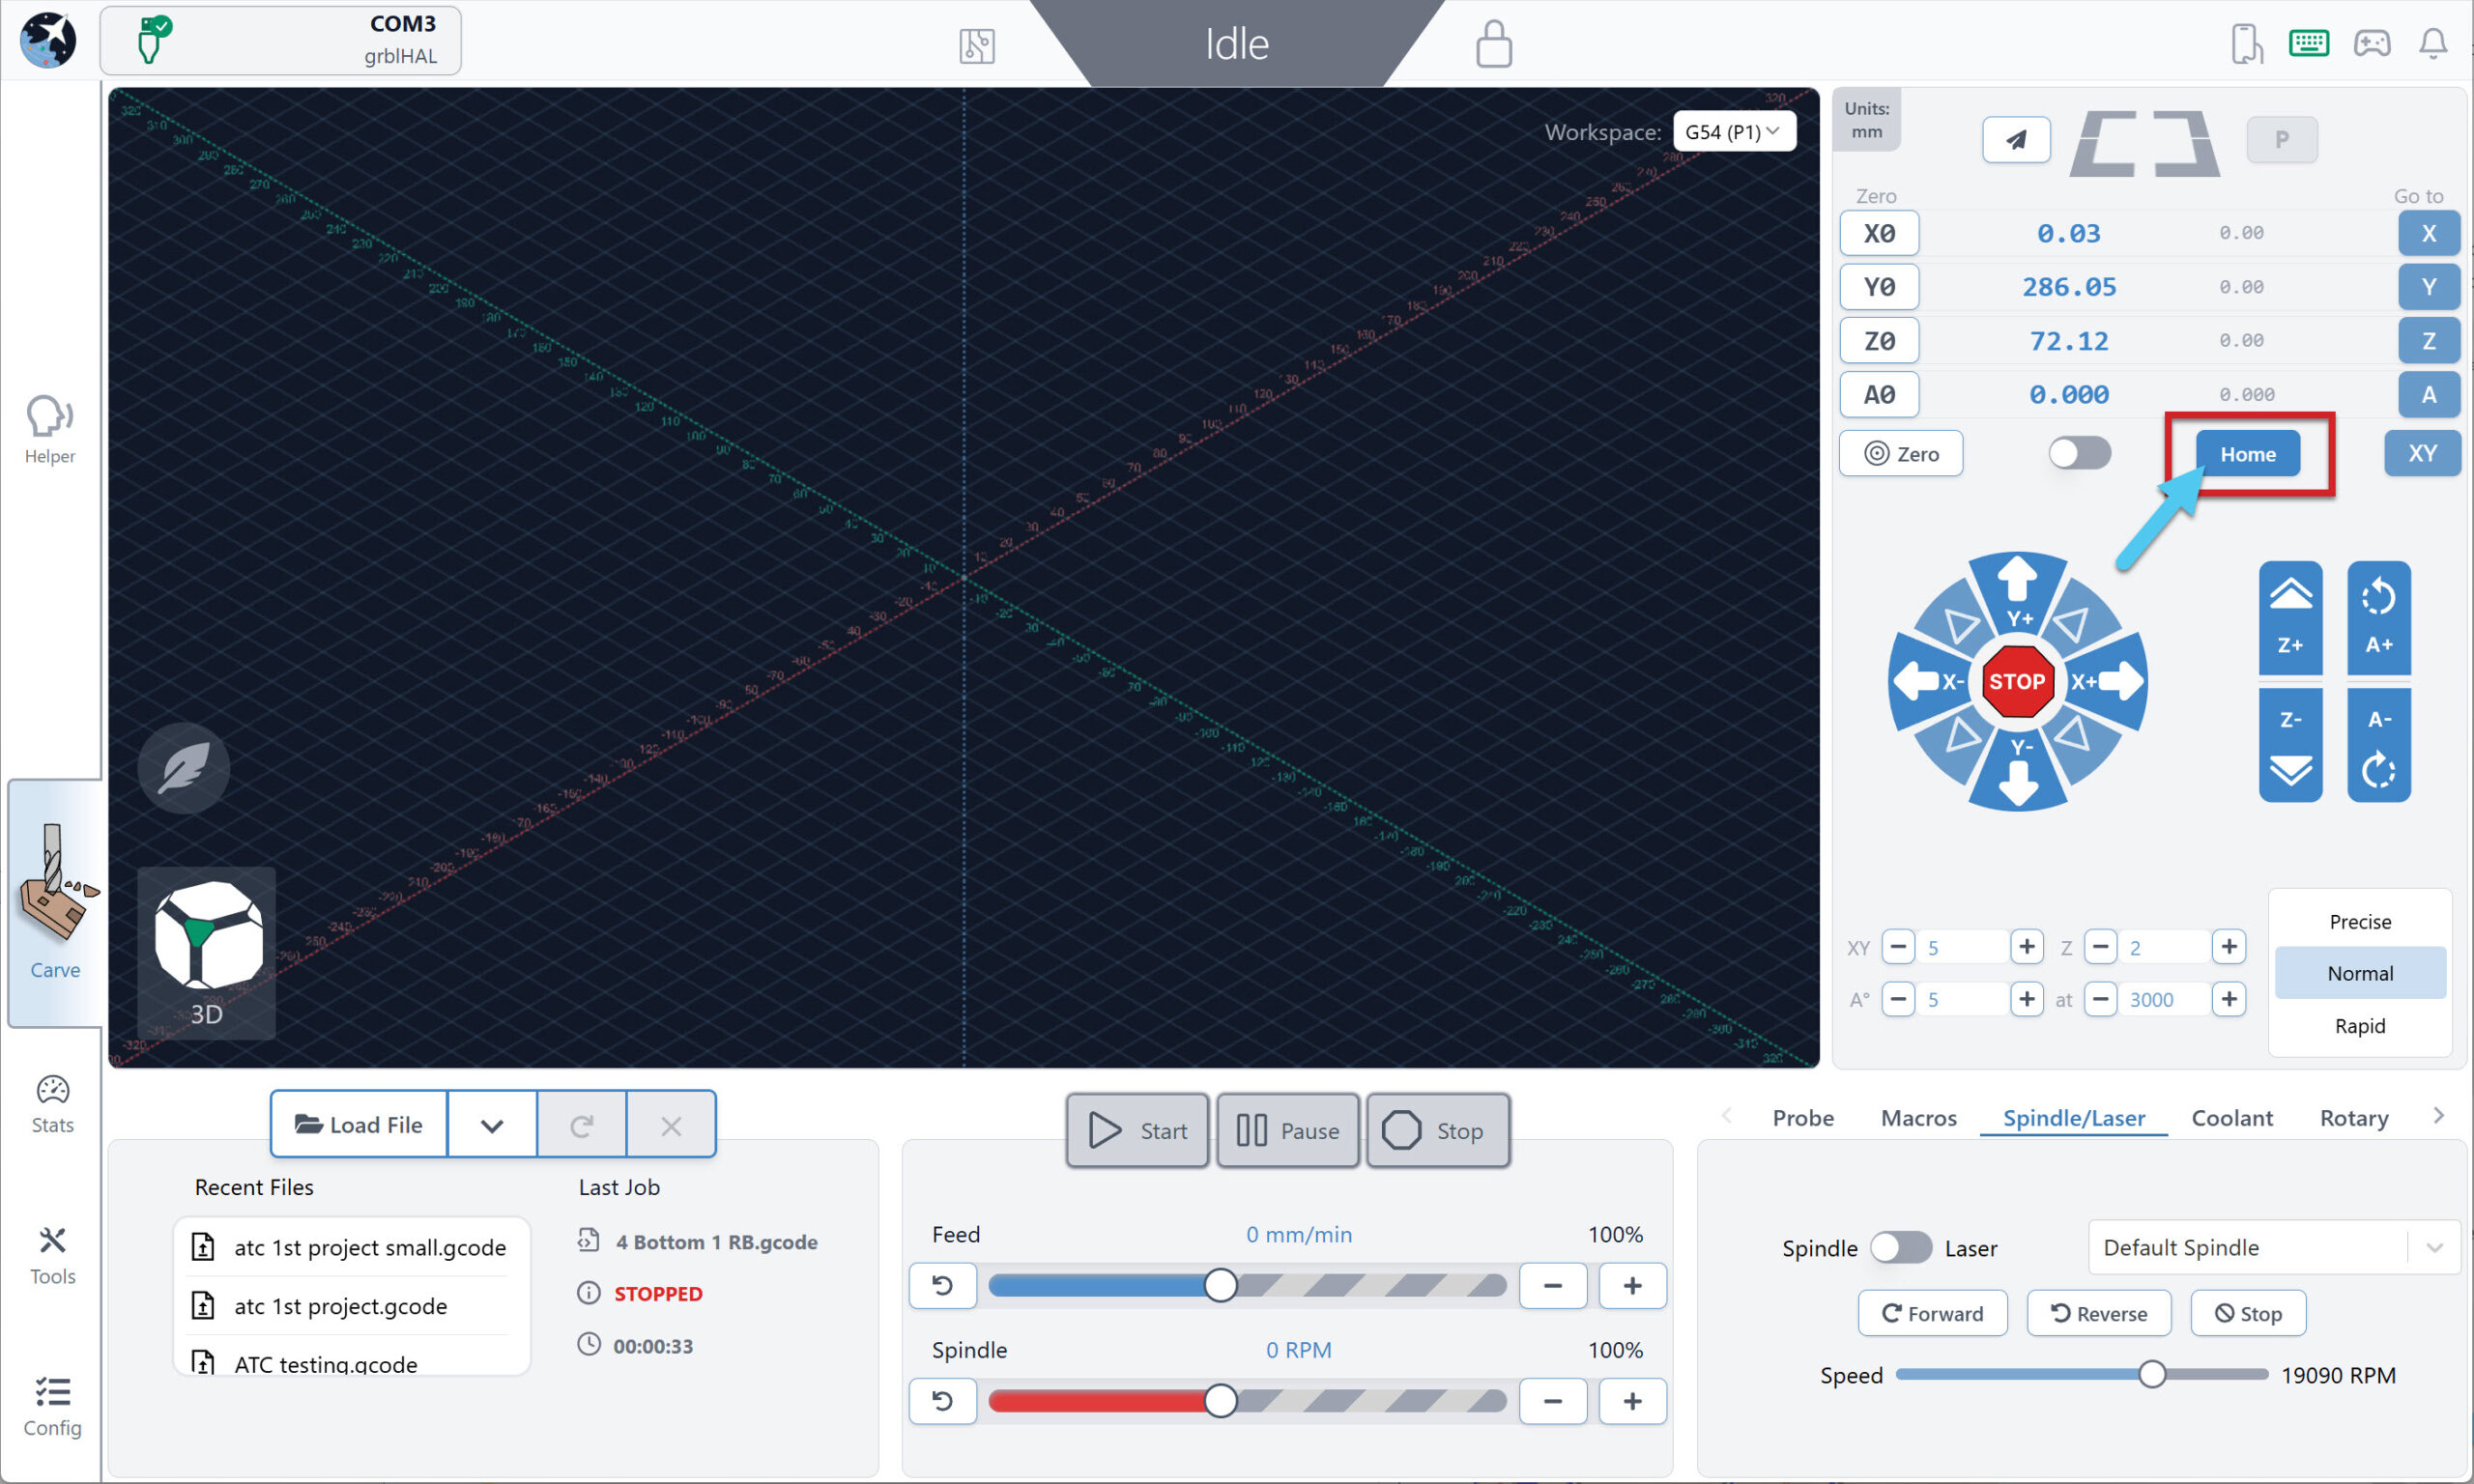
Home the machine.
-
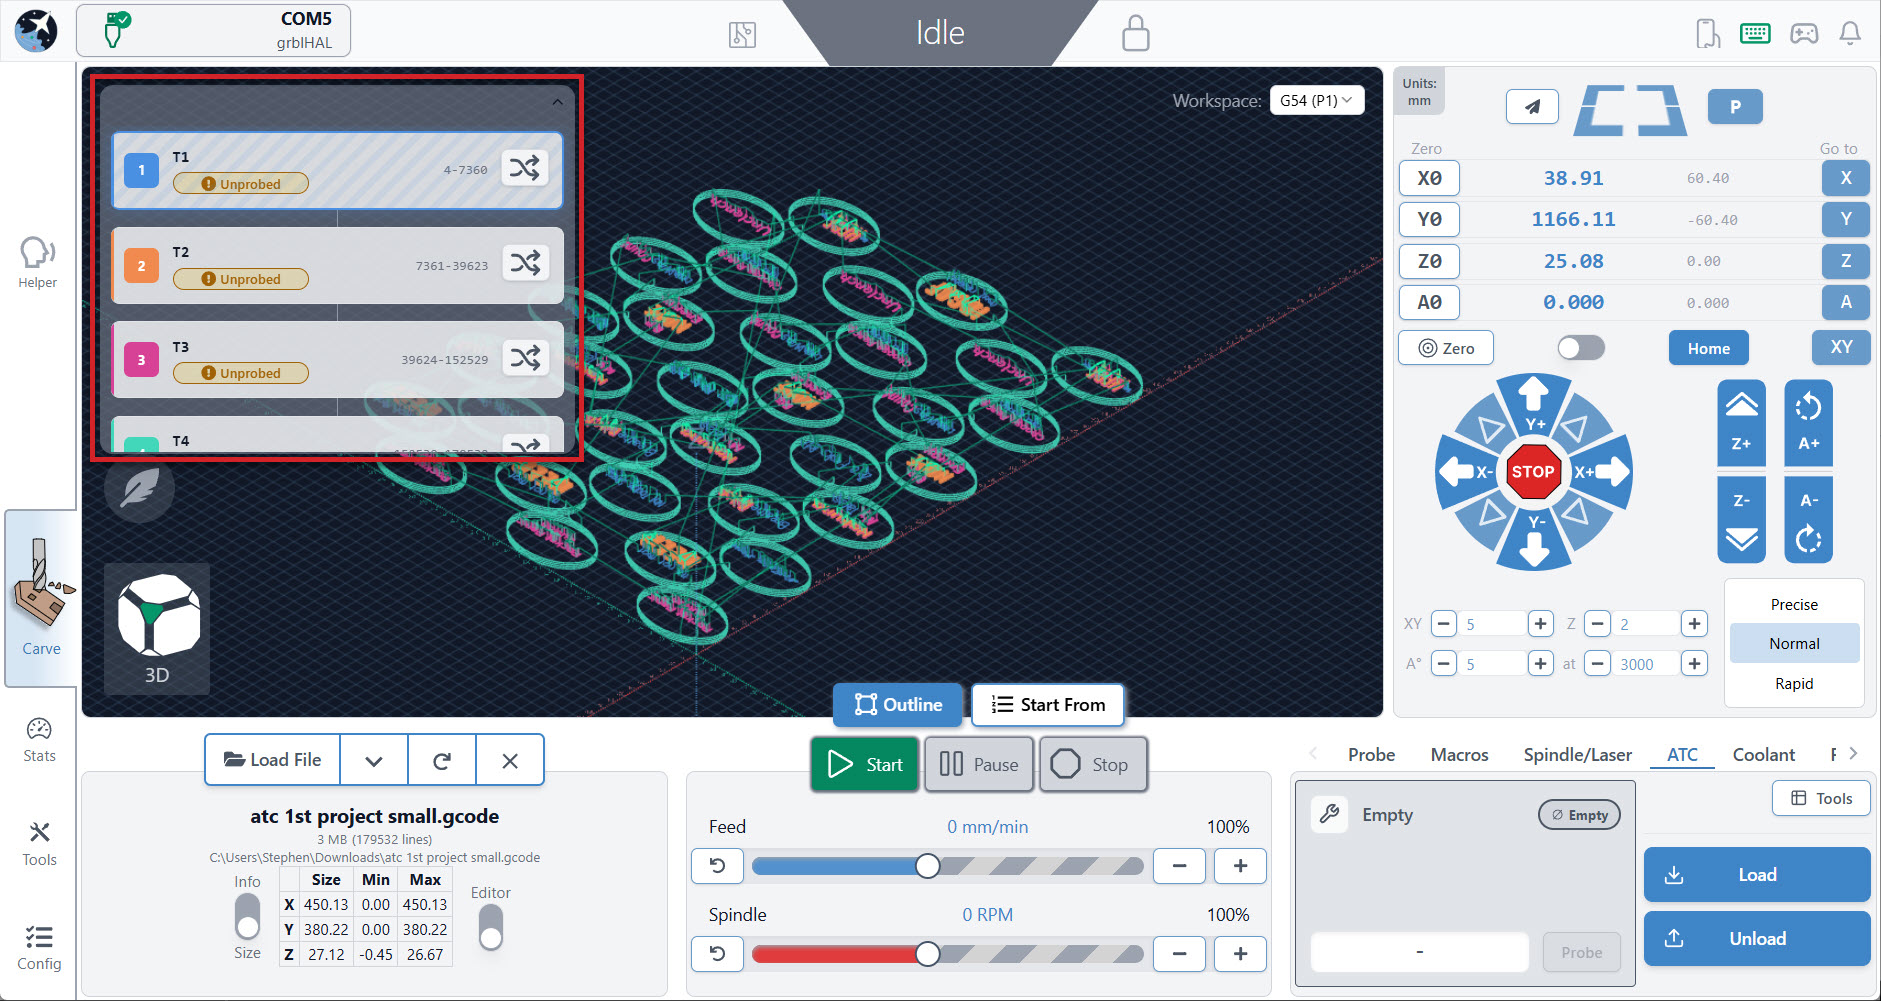
Load your job onto gSender.
-
Use the Load File button to select your g-code file
-
You should see a “Tool Timeline” with the different toolpaths highlighted in various colours, corresponding to the toolpath colours on the visualizer
-
-
Navigate to the carve page and the ATC tab on the far right corner. Hit the Tools button.
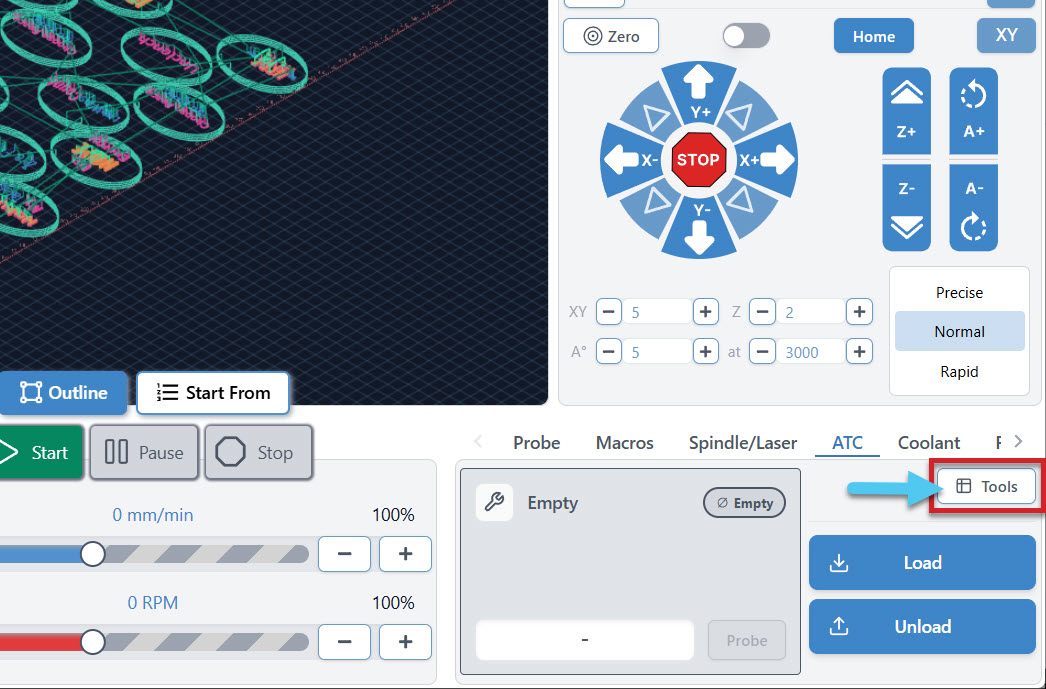
-
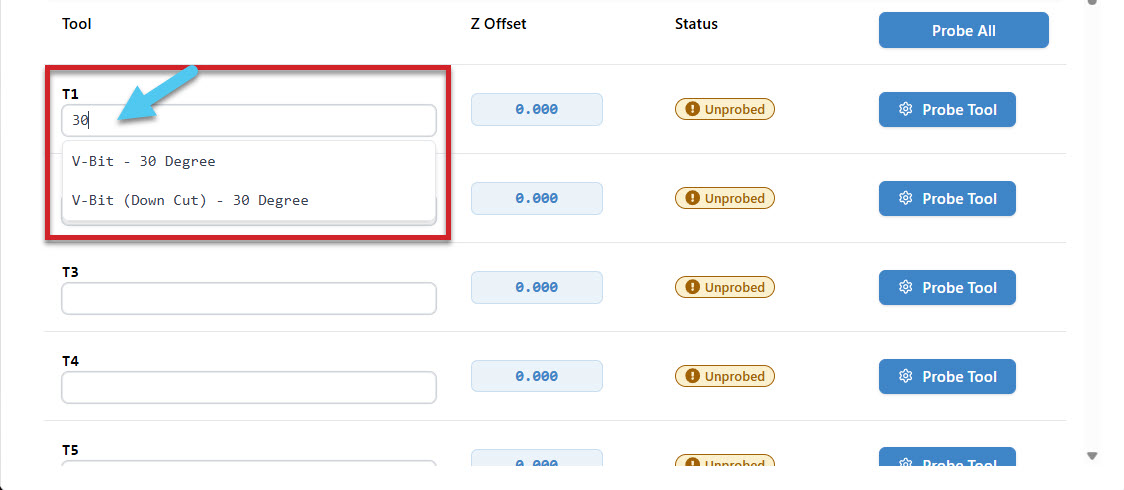
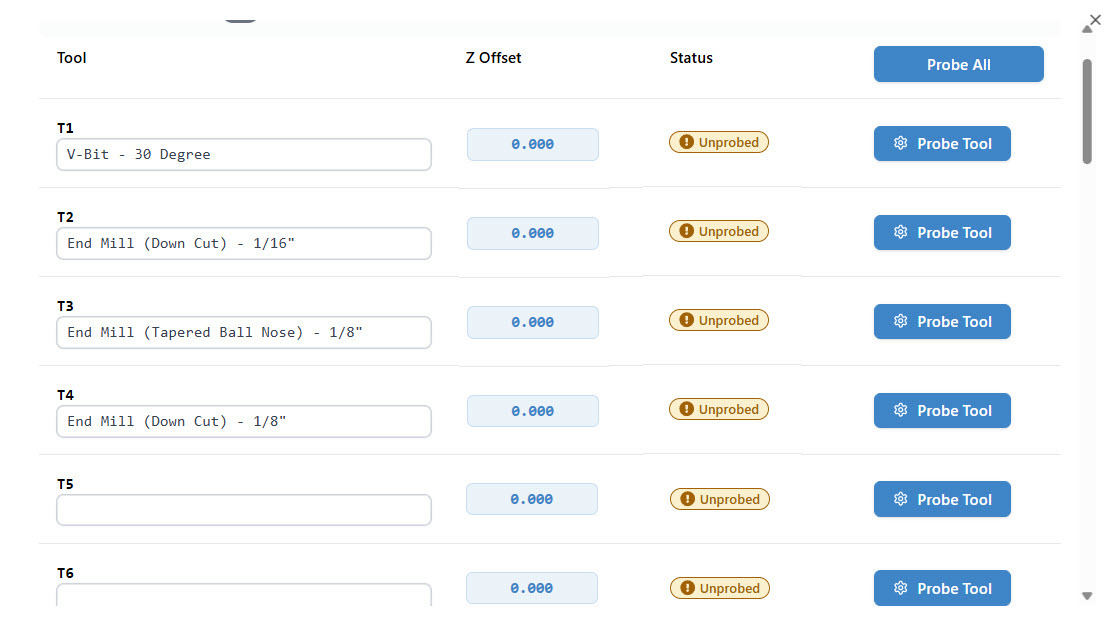
This brings up the Tool table that allows you to specify each tool name by typing it in, or selecting one from the drop down menu.
-
Once the tool name is complete, you can hit the probe tool button on the right side, and run a probe of the tools length, but you don’t need to! For now, your default settings are setup to probe each tool after it’s been picked up, so you don’t need to probe them all now. The probe measurements will all be stored, to be used later once we set our project zero. We have named all 4 tools and can now exit this screen.
-
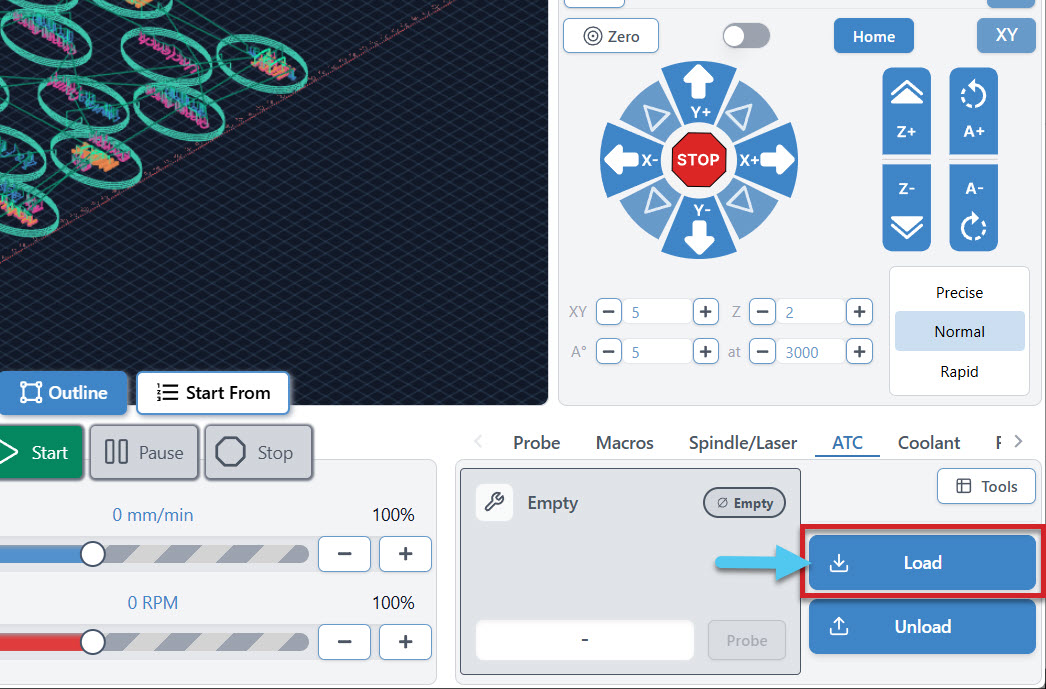
Load a tool onto the spindle to set our project zero with.
-
Choose a tool from your rack that has a symmetric, flat end, like a standard flat end mill
-
Press Load and select the correct tool number
-
Note: You can hold the load button down to trigger a manual load. You will see the button scroll loading up, once complete you are in manual load mode!-
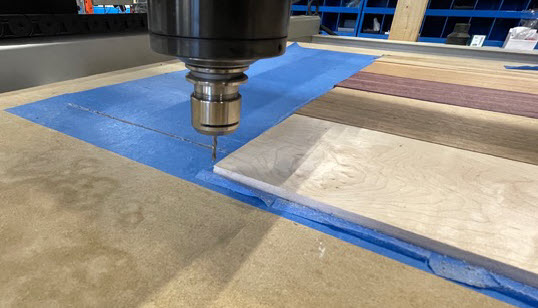
Remove the bottom of the dust shoe so you can see the end mill and Jog the machine to where you want the job to start on your material, then use the X0 and Y0 buttons to zero each axis. We’ve set the design file to zero on the wasteboard, as we are cutting through material. Ensure you set your Z0 to the wasteboard, not the top of the project. If you don’t, you will be cutting in air!
- Jog upwards then reattach your dust shoe bottom (you do NOT need to re-zero the Z-axis after jogging)
We are about ready to start cutting! Check the Tool Timeline to see if the order of toolpaths and their tool number are correct.
-
Press Start!
Friendly reminder to turn on your dust collection at this point! When we start the program, the machine will begin with the V-bit. Once complete, the spindle will stop, return to the rack, perform the tool change, and pick up the 1/16 downcut end mill, tap on the tls then, continue the cut.
We’ll watch the first tool change closely. We should see a smooth release and pickup with no hesitation or vibration. We won’t interrupt the process unless something clearly goes wrong. Pictured is our test run of 5 boards!
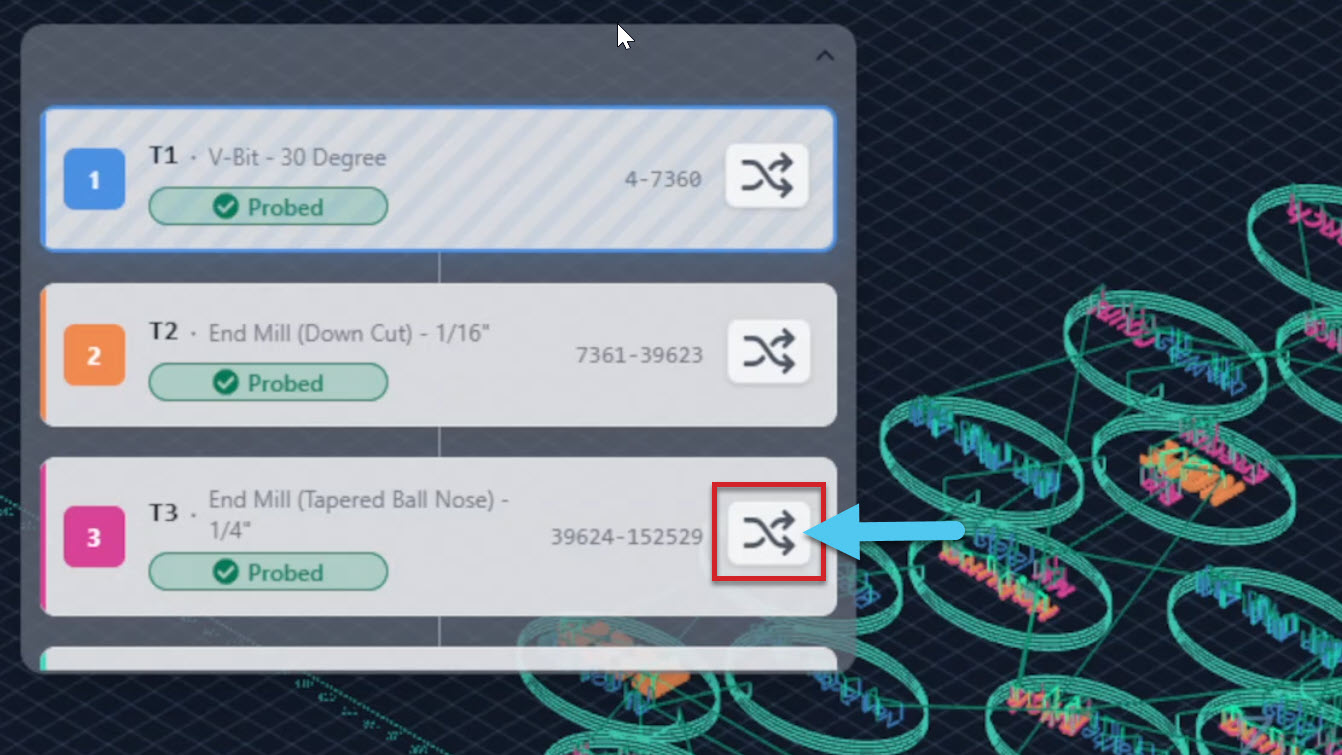
Remapping Tools
You may find that you have made a mistake with your tool numbers/placement in the tool rack. If you want to swap out a tool, without manually changing the placement, you can remap on the software side!
-
On the tool timeline, press the remapping button for the tool you want to remap. In the image below we are remapping tool 3.
-
This will bring up a popup that allows you to select a new tool in the dropdown menu.
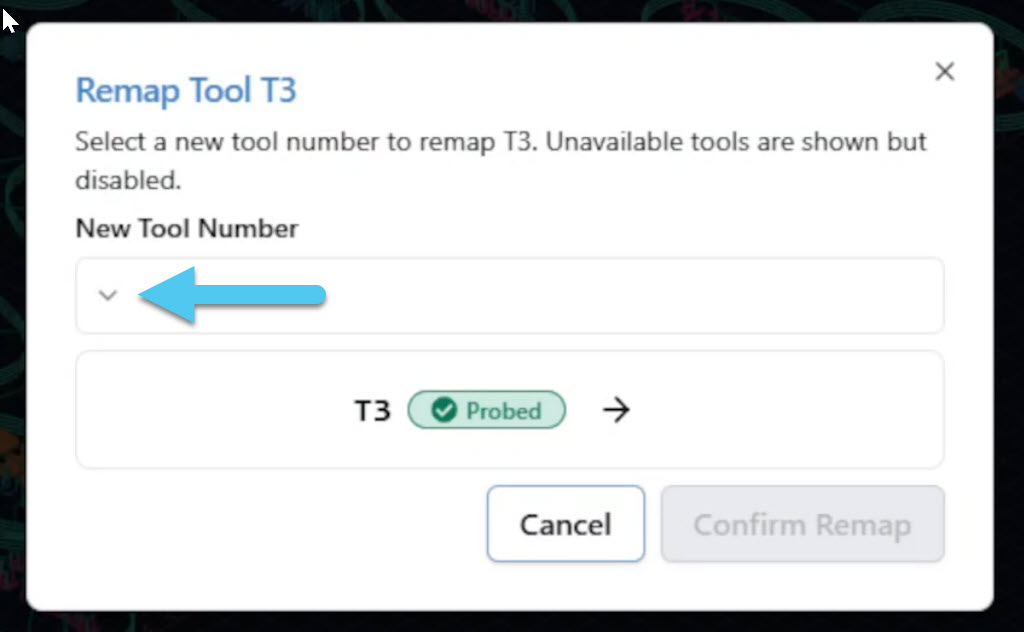
-
Select the tool you want, and you will see it ready to confirm your selection.
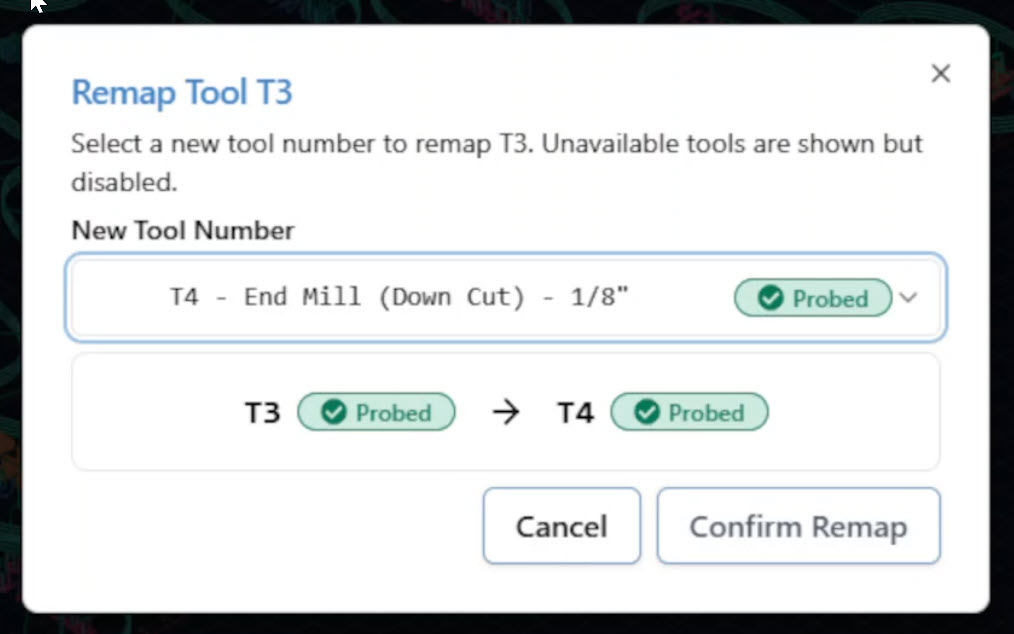
-
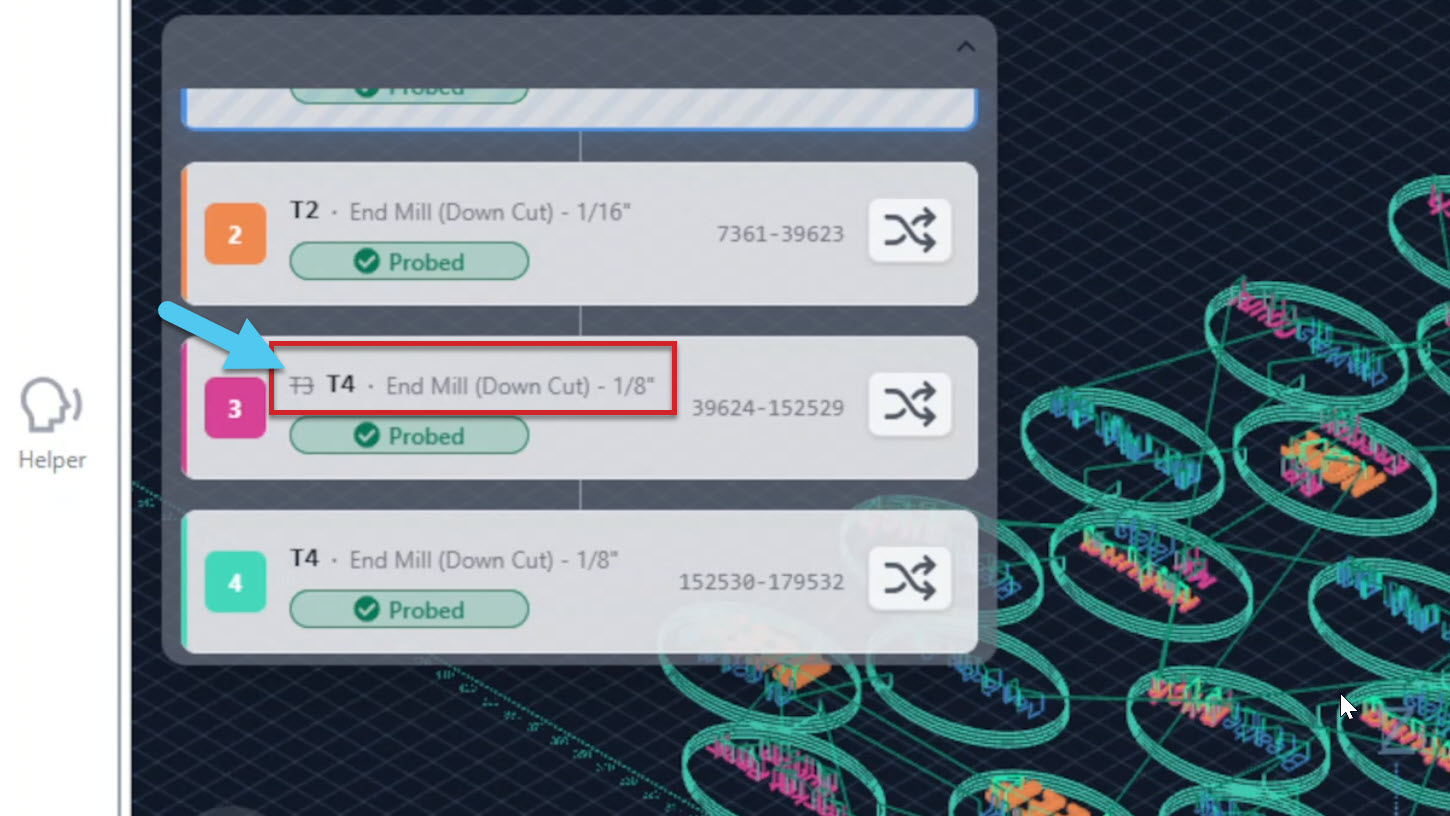
Once successfully remapped, you can see the edit in the tool timeline is reflected and now tool 3 is using tool 4, without swapping out the tool holders physically.
After Cutting
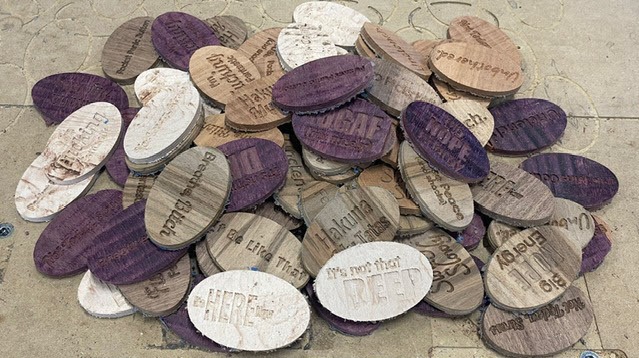
Once the job is complete, we’ll lightly sand the edges. We can leave the cookies natural, paint-fill the engraving, or apply a clear finish.
The final look is up to you. What matters here is that all tools ran correctly and the tool changes happened automatically.
What This Project Confirms
If everything completed as expected, we’ve successfully verified:
- Tool numbers match rack positions
- Multi-tool g-code post processor is correct
- The ATC performs clean, reliable tool changes
- Your Altmill ATC is ready for more advanced multi-tool jobs
From here, we can move on to more complex projects that combine pocketing, profiling, chamfering, and engraving in a single automated workflow.