
Now that you have the ATC assembled, let’s make sure the system is functional. We will go through the basic ATC processes that should be done each time you run a new job:
Any issues you have with these processes may indicate there is a mis-assembled or faulty part, we would recommend going back to previous pages to check the assembly.
Load Tool Rack
-
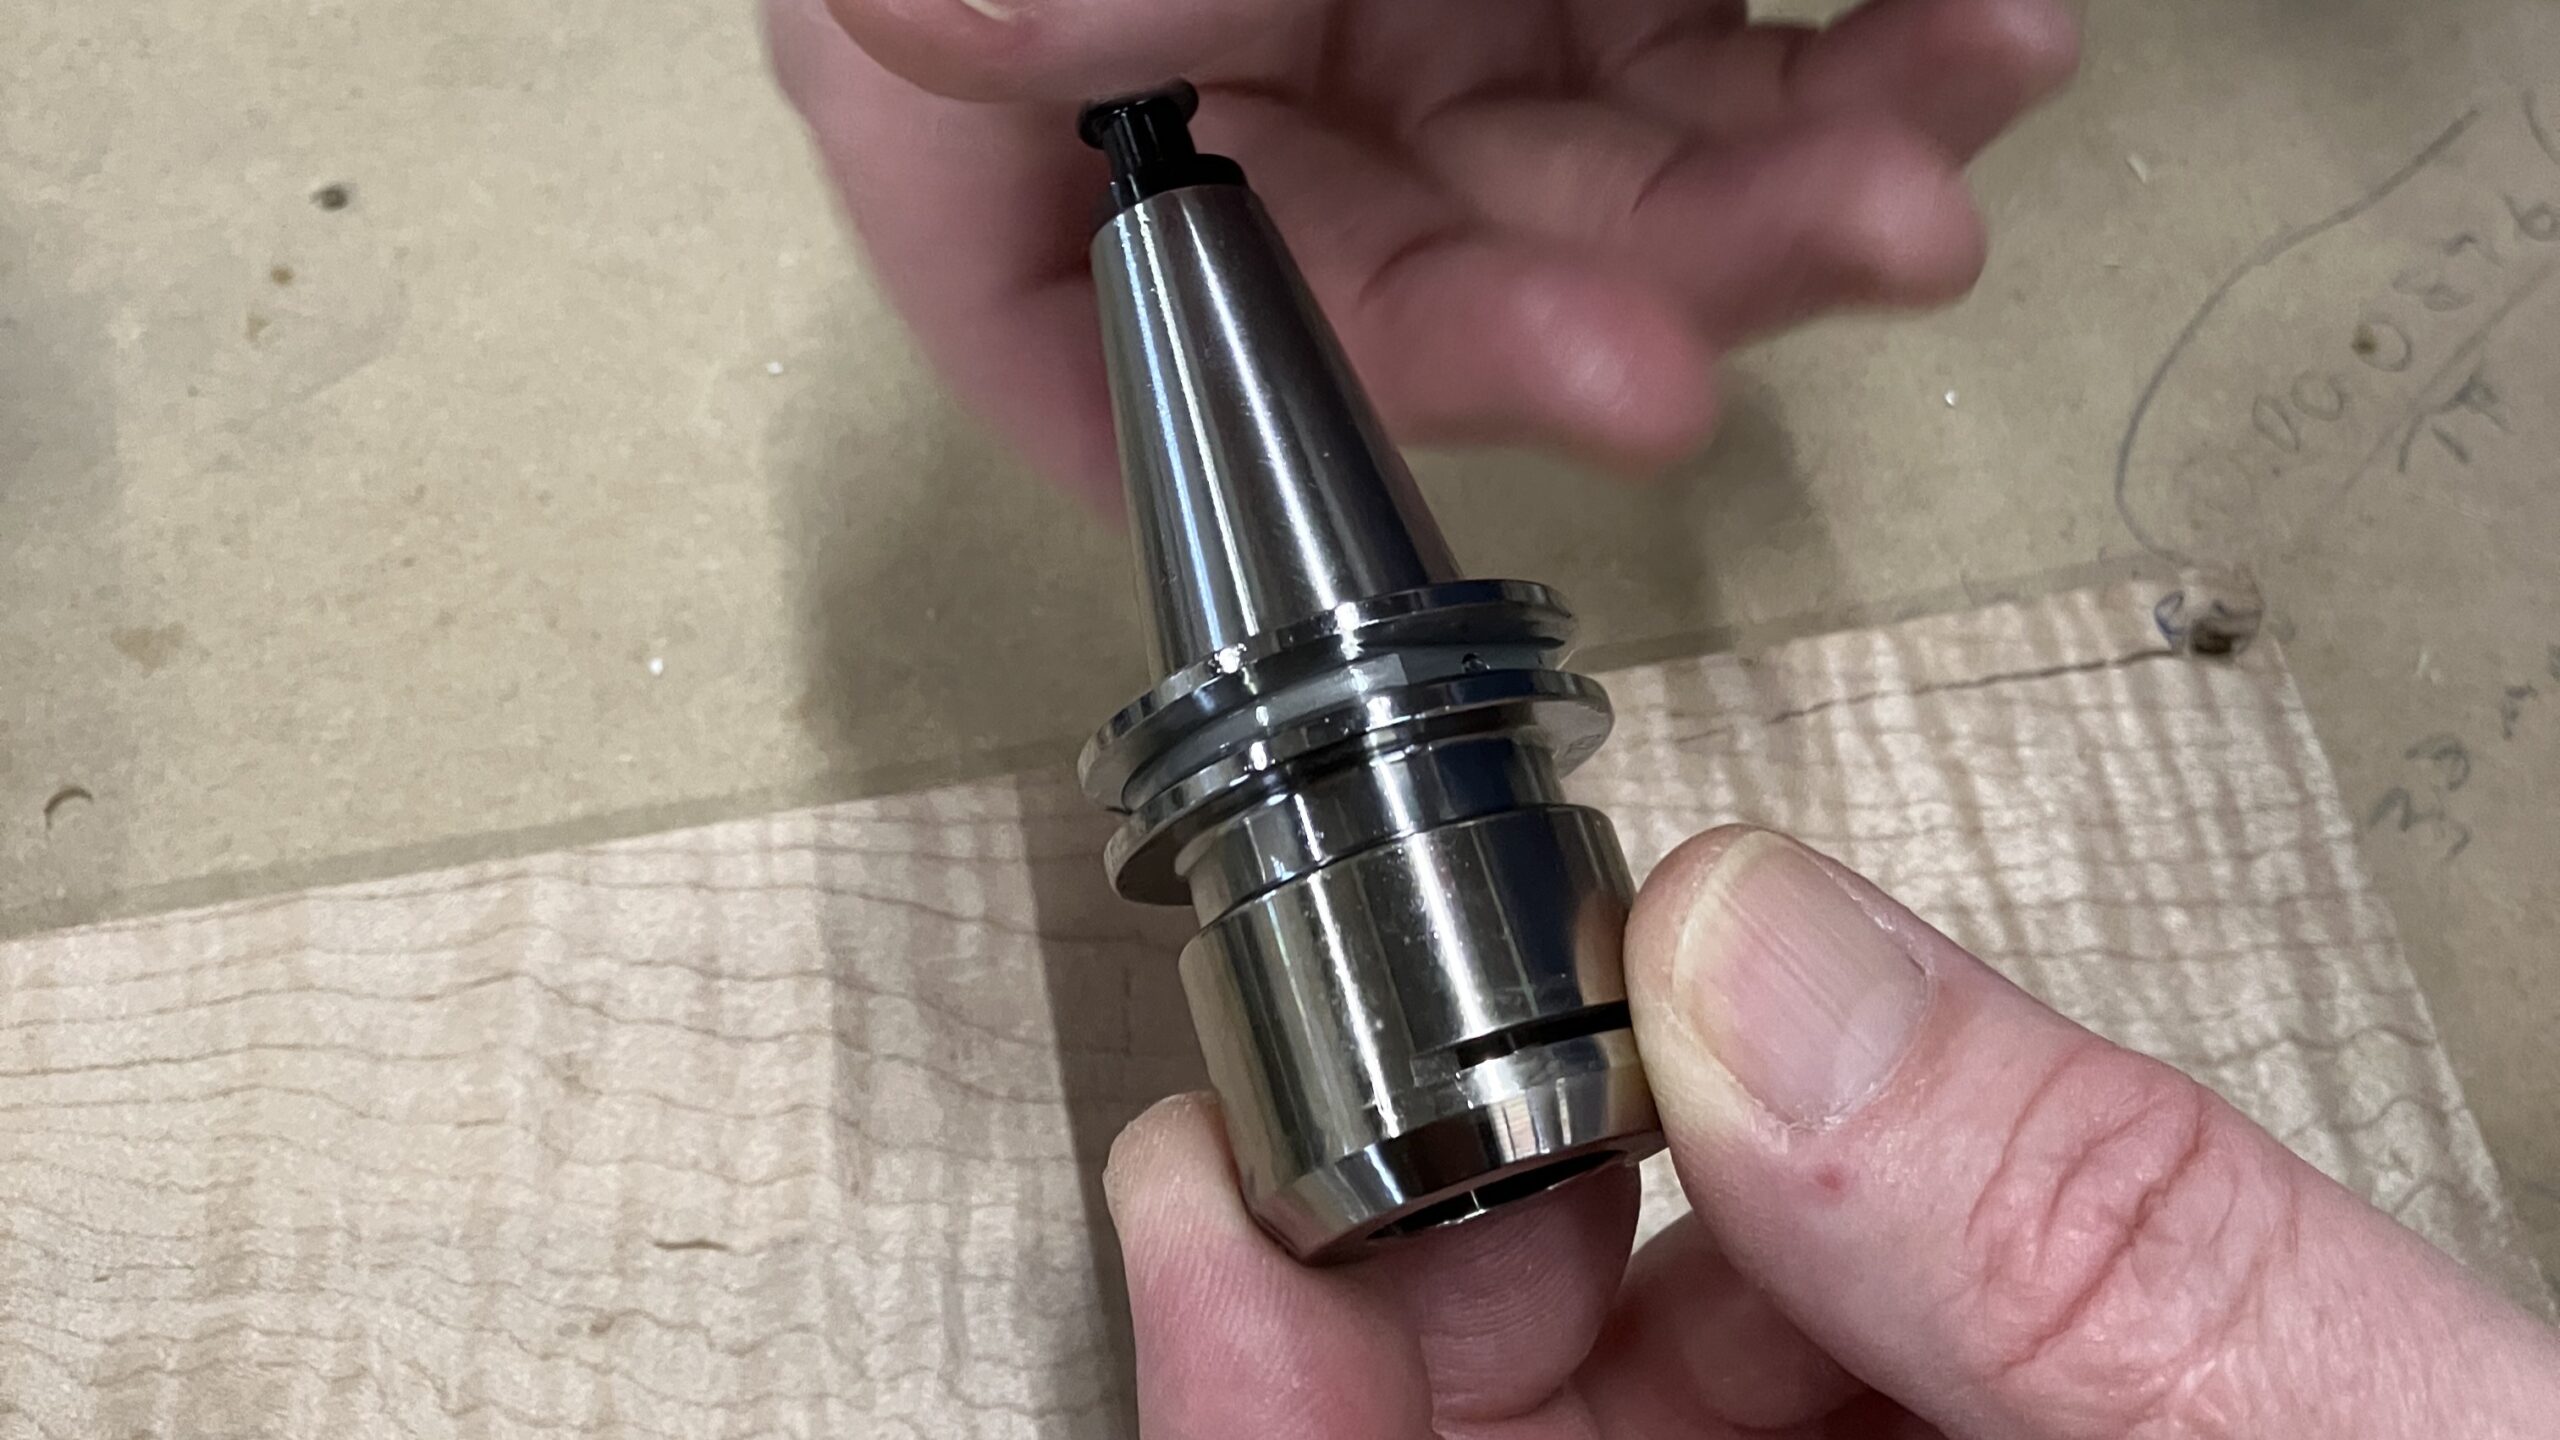
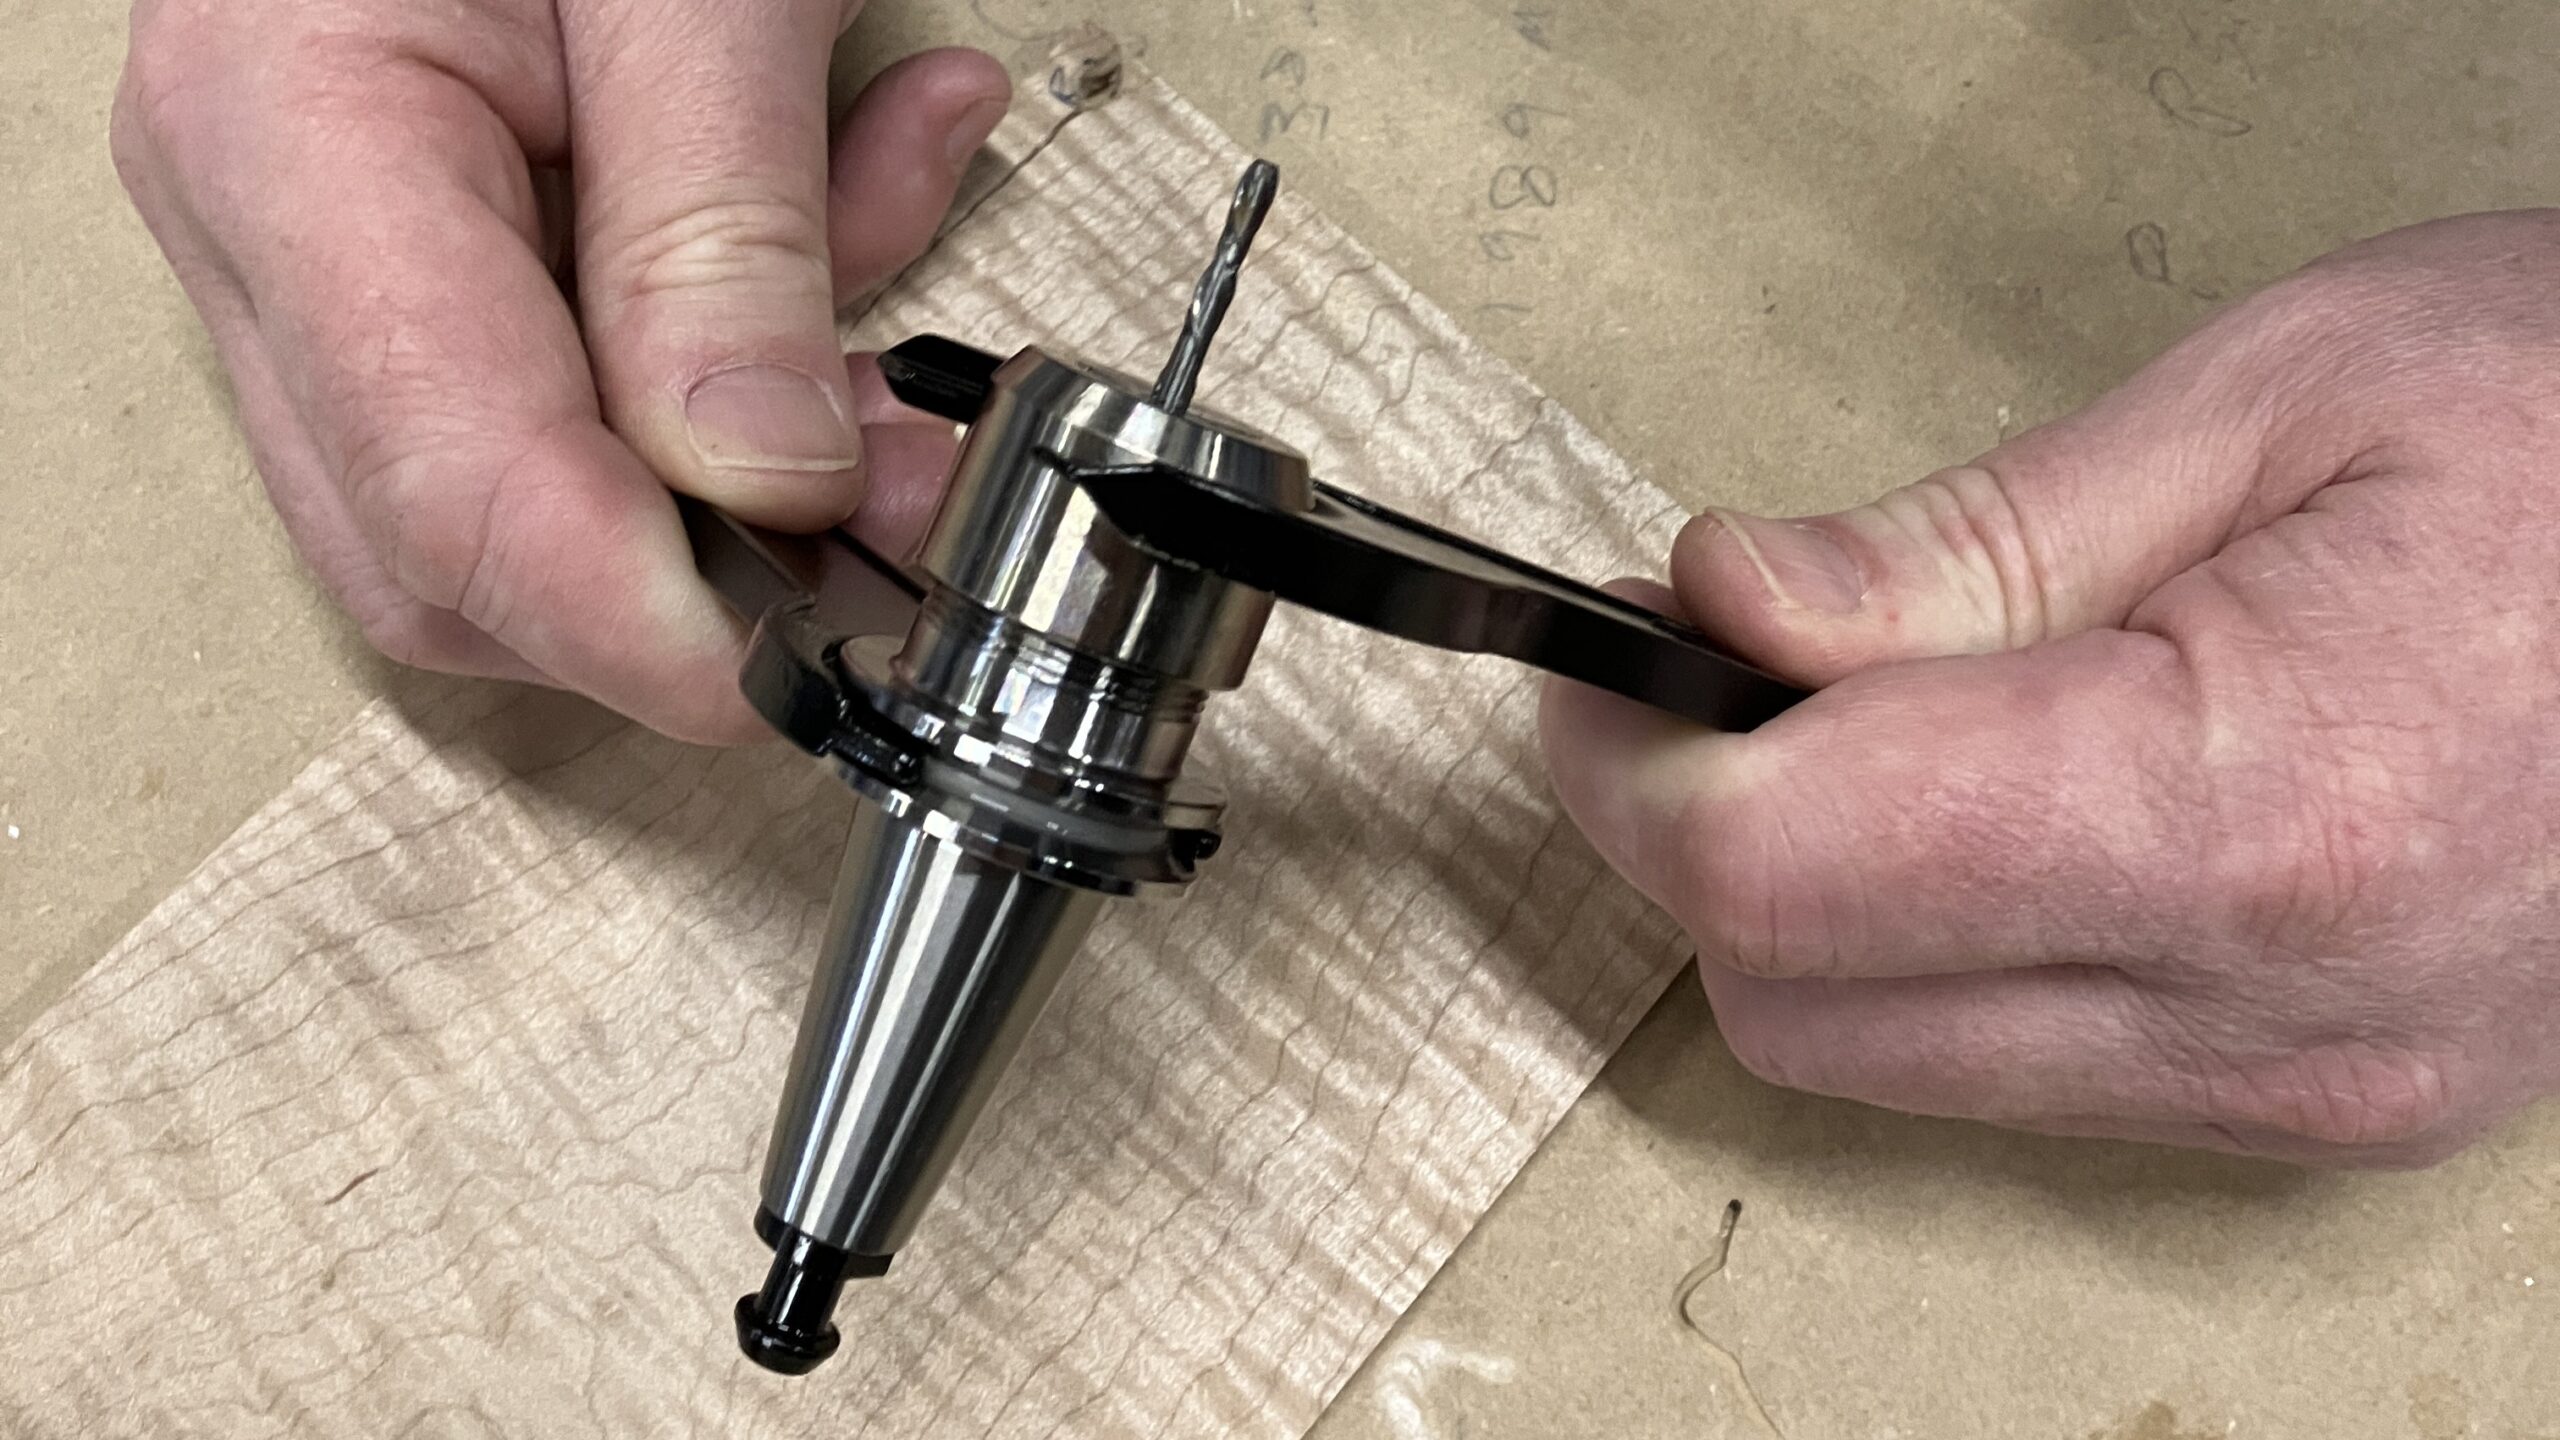
Let’s get some tools loaded! Loosen the collet nut from each tool holder you are using. If secured tightly, use the set of wrenches that come with the ATC kit.
-
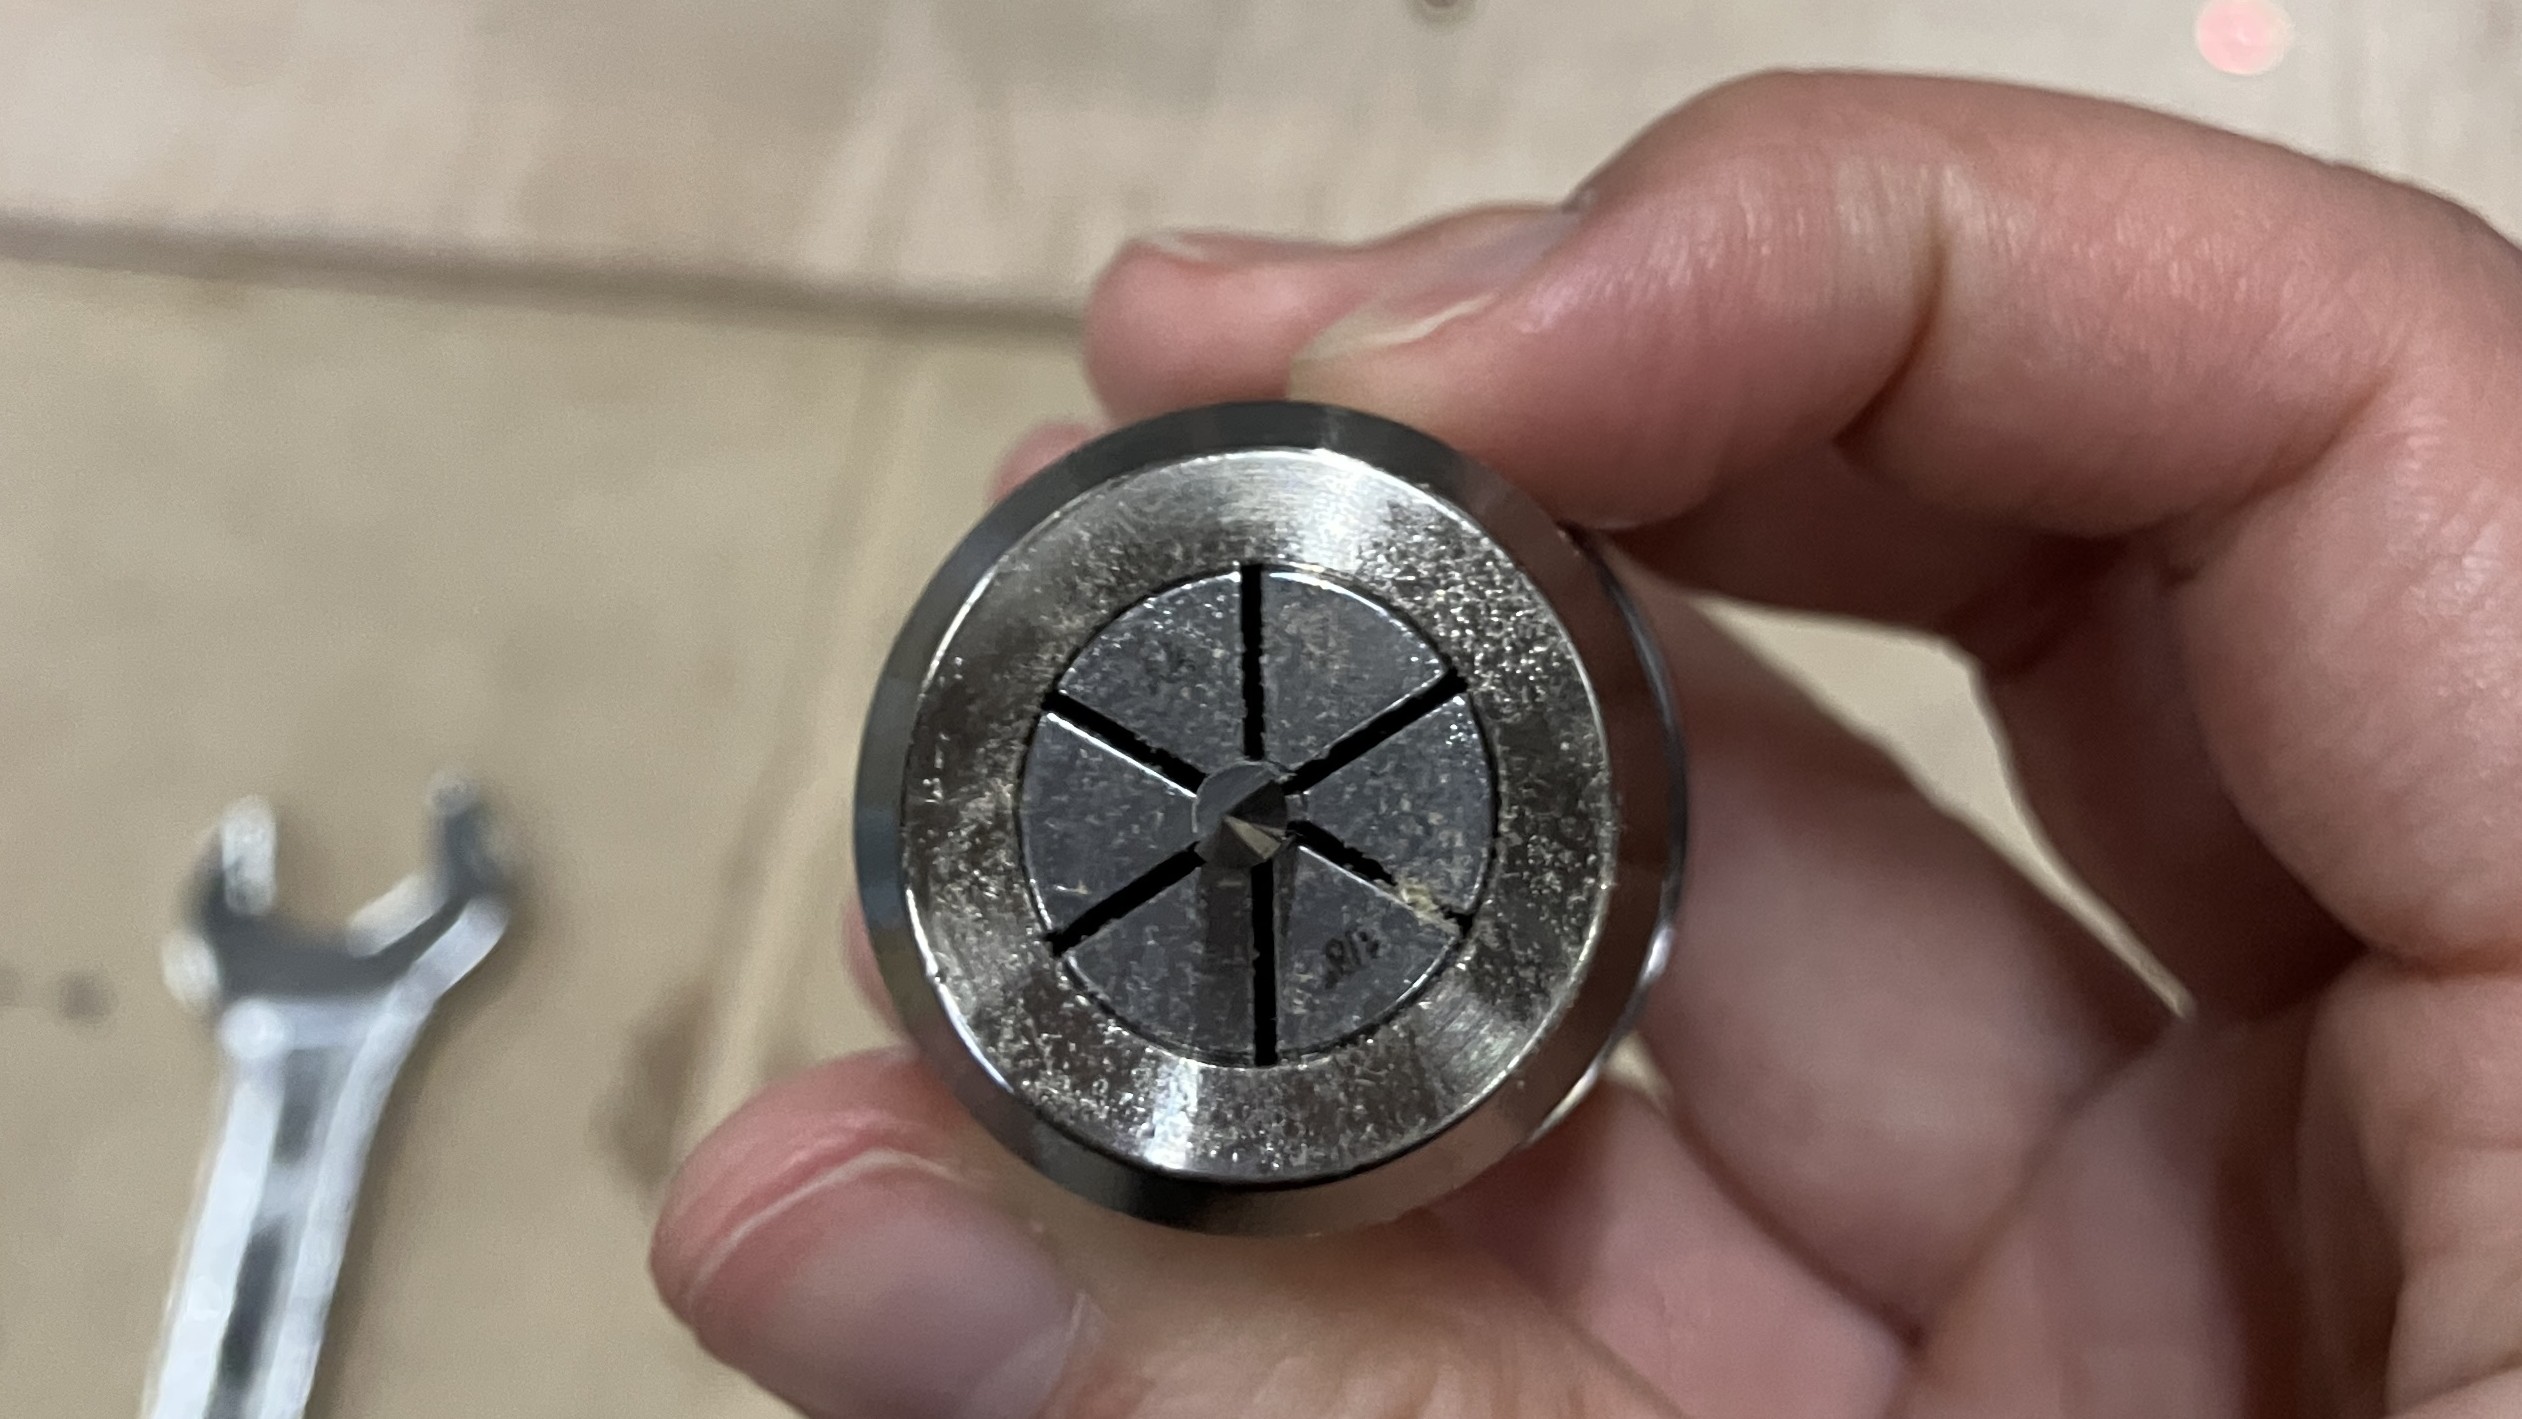
Grab the bits that you plan to use for your first project. Insert them into ER20 collets. Your kit comes with ER20 collets that fit 1/8″, 1/4″, 3/8″, and 1/2″ tools.
-
Seat the collet and bit into a collet nut, then secure them to a tool holder using the set of wrenches provided. Ensure the face of the collet is flush with the tool holder. Repeat for the remaining bits.
Do not tighten collet nut without a tool
-
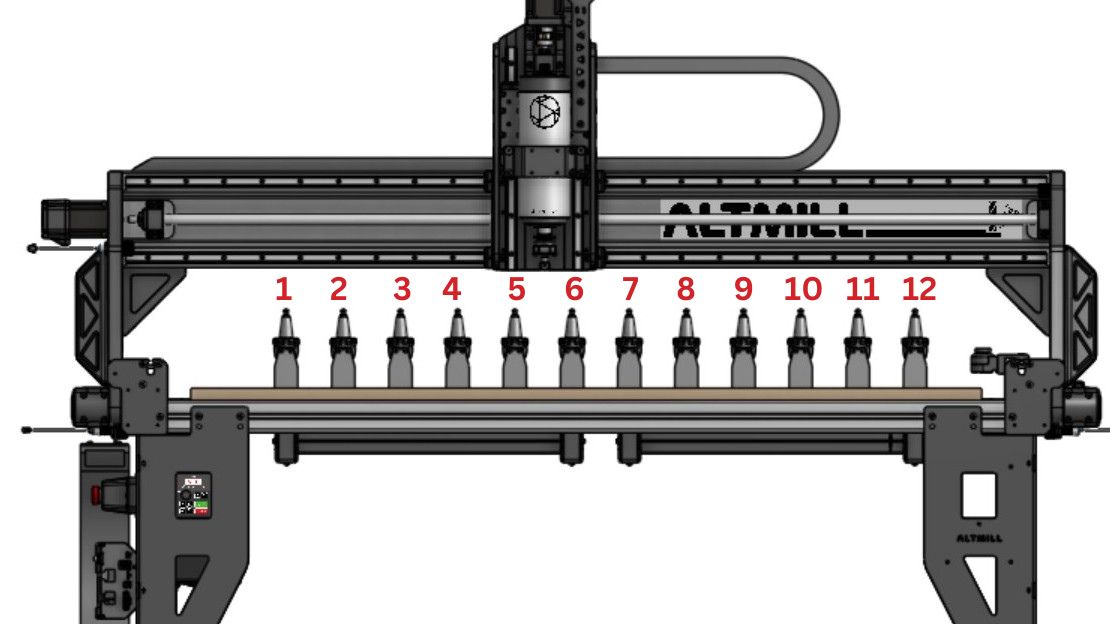
Slide the assembled tools onto the rack, the bits should be facing down.
-
To keep track of what tools you have on your rack, we suggest writing them down in a list, on a piece of paper. For example:
Tool 1: 1/4" Flat End MillTool 2: 1/16" Compression BitTool 3: 22mm Surfacing BitTool 4: 1/8" Flat End MillTool 5: 30 Degree V-BitTool 6: 1/8" Tapered Ball Nose Bit⚠️ Please note, Tool 1 is at left-most position on the rack, we count from left to right.
Run Homing Cycle
After connecting to gSender, home your AltMill – this is required to use your ATC.
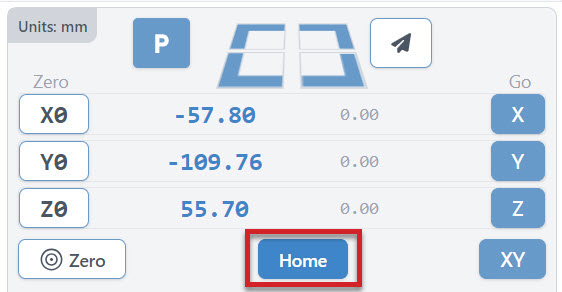
If the limit switches are set up correctly and undamaged, you should be able to home successfully.
Set Up Tool Names
-
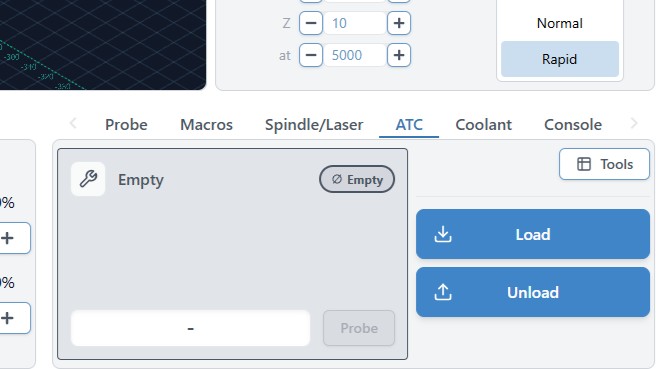
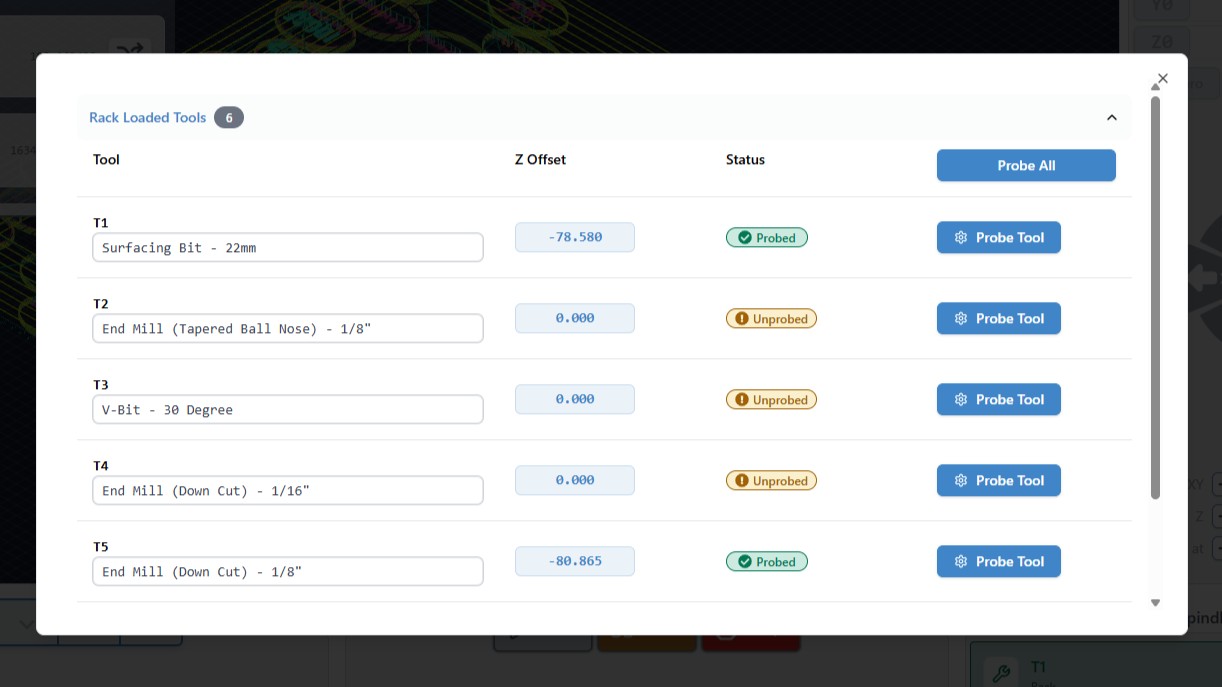
You should see the ATC tab on the bottom right of gSender. Select the Tools button with the chart icon.
-
Rename the tools to match what is on your rack, using the written list you have made. Renaming does not impact tool changing functionality. It is only there to remind you of what tools are on the rack.
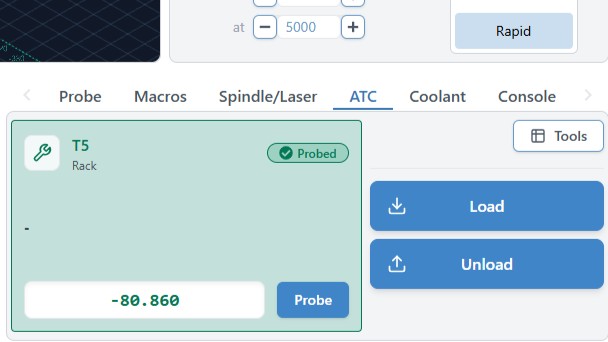
Load a Tool
Now we have done all the preparations, let’s try changing out a tool!
-
Under the ATC tab, select Load.
-
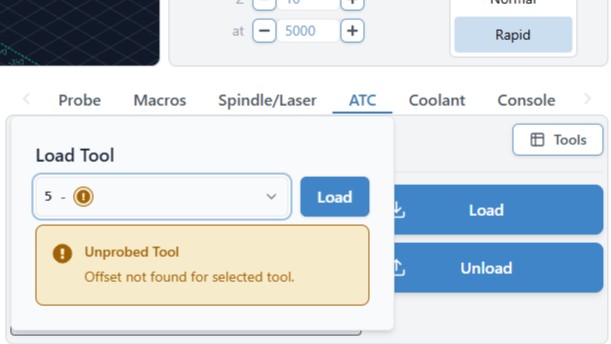
Using the dropdown, choose the tool number. In this example we want to load Tool 5 (T5) — the 5th tool on the rack, starting from the left. Press Load.
-
The machine will move to Tool 5, grab it, then probe the bit using the TLS. You should now see T5 loaded on the ATC tab.
Congrats on your first successful tool change!
To learn how to generate compatible g-code and run a job with automated tool changing, head over to 1st Projects page.
Spindle Break-in
The grease inside the bearings may have shifted during transportation, it is recommended that you run a “break-in” cycle to redistribute the grease before using your spindle. To do this, you can download and run the g-code file below on gSender, which should take 1 hour 40 minutes to run.
To run the file connect to gSender and press ‘Load File’ at the bottom left corner. Select the file and you should see a ‘Start Job’ button appear, go ahead and click that.
For regular maintenance of your spindle, we recommend running a shorter “warm up” g-code.
Troubleshooting
If you were unable to load the tool successfully, or saw errors during the process, see below for potential resolutions.
Machine loaded the wrong tool
- Check the tool numbers again, remember the left-most position on the rack is Tool 1 (T1)
- Check the rack, you may have installed the wrong tool
There is a constant, air hissing/leaking sound
- Make sure you have gone through the ATC Software setup page.
Stopped a tool change using the E-stop, machine cannot jog or load tool now
- Turn off/on the controller, reconnect to gSender, press/release E-stop, then press Click to Unlock Machine on the screen. Home the machine, then try loading a tool again.
Getting a “keep-out” error
- This is normal, it is to prevent the machine from jogging into the rack. Ensure the machine is away from the rack area.