

This setup guide will show to swap out your router for the Sienci Labs 1.5KW spindle.
Before we begin, make sure that:
- gSender 1.6.3 or above is installed on your computer
- Machine is connected to gSender and powered ON
Spindle Kit Setup
Machine Setup
Cable Routing
-
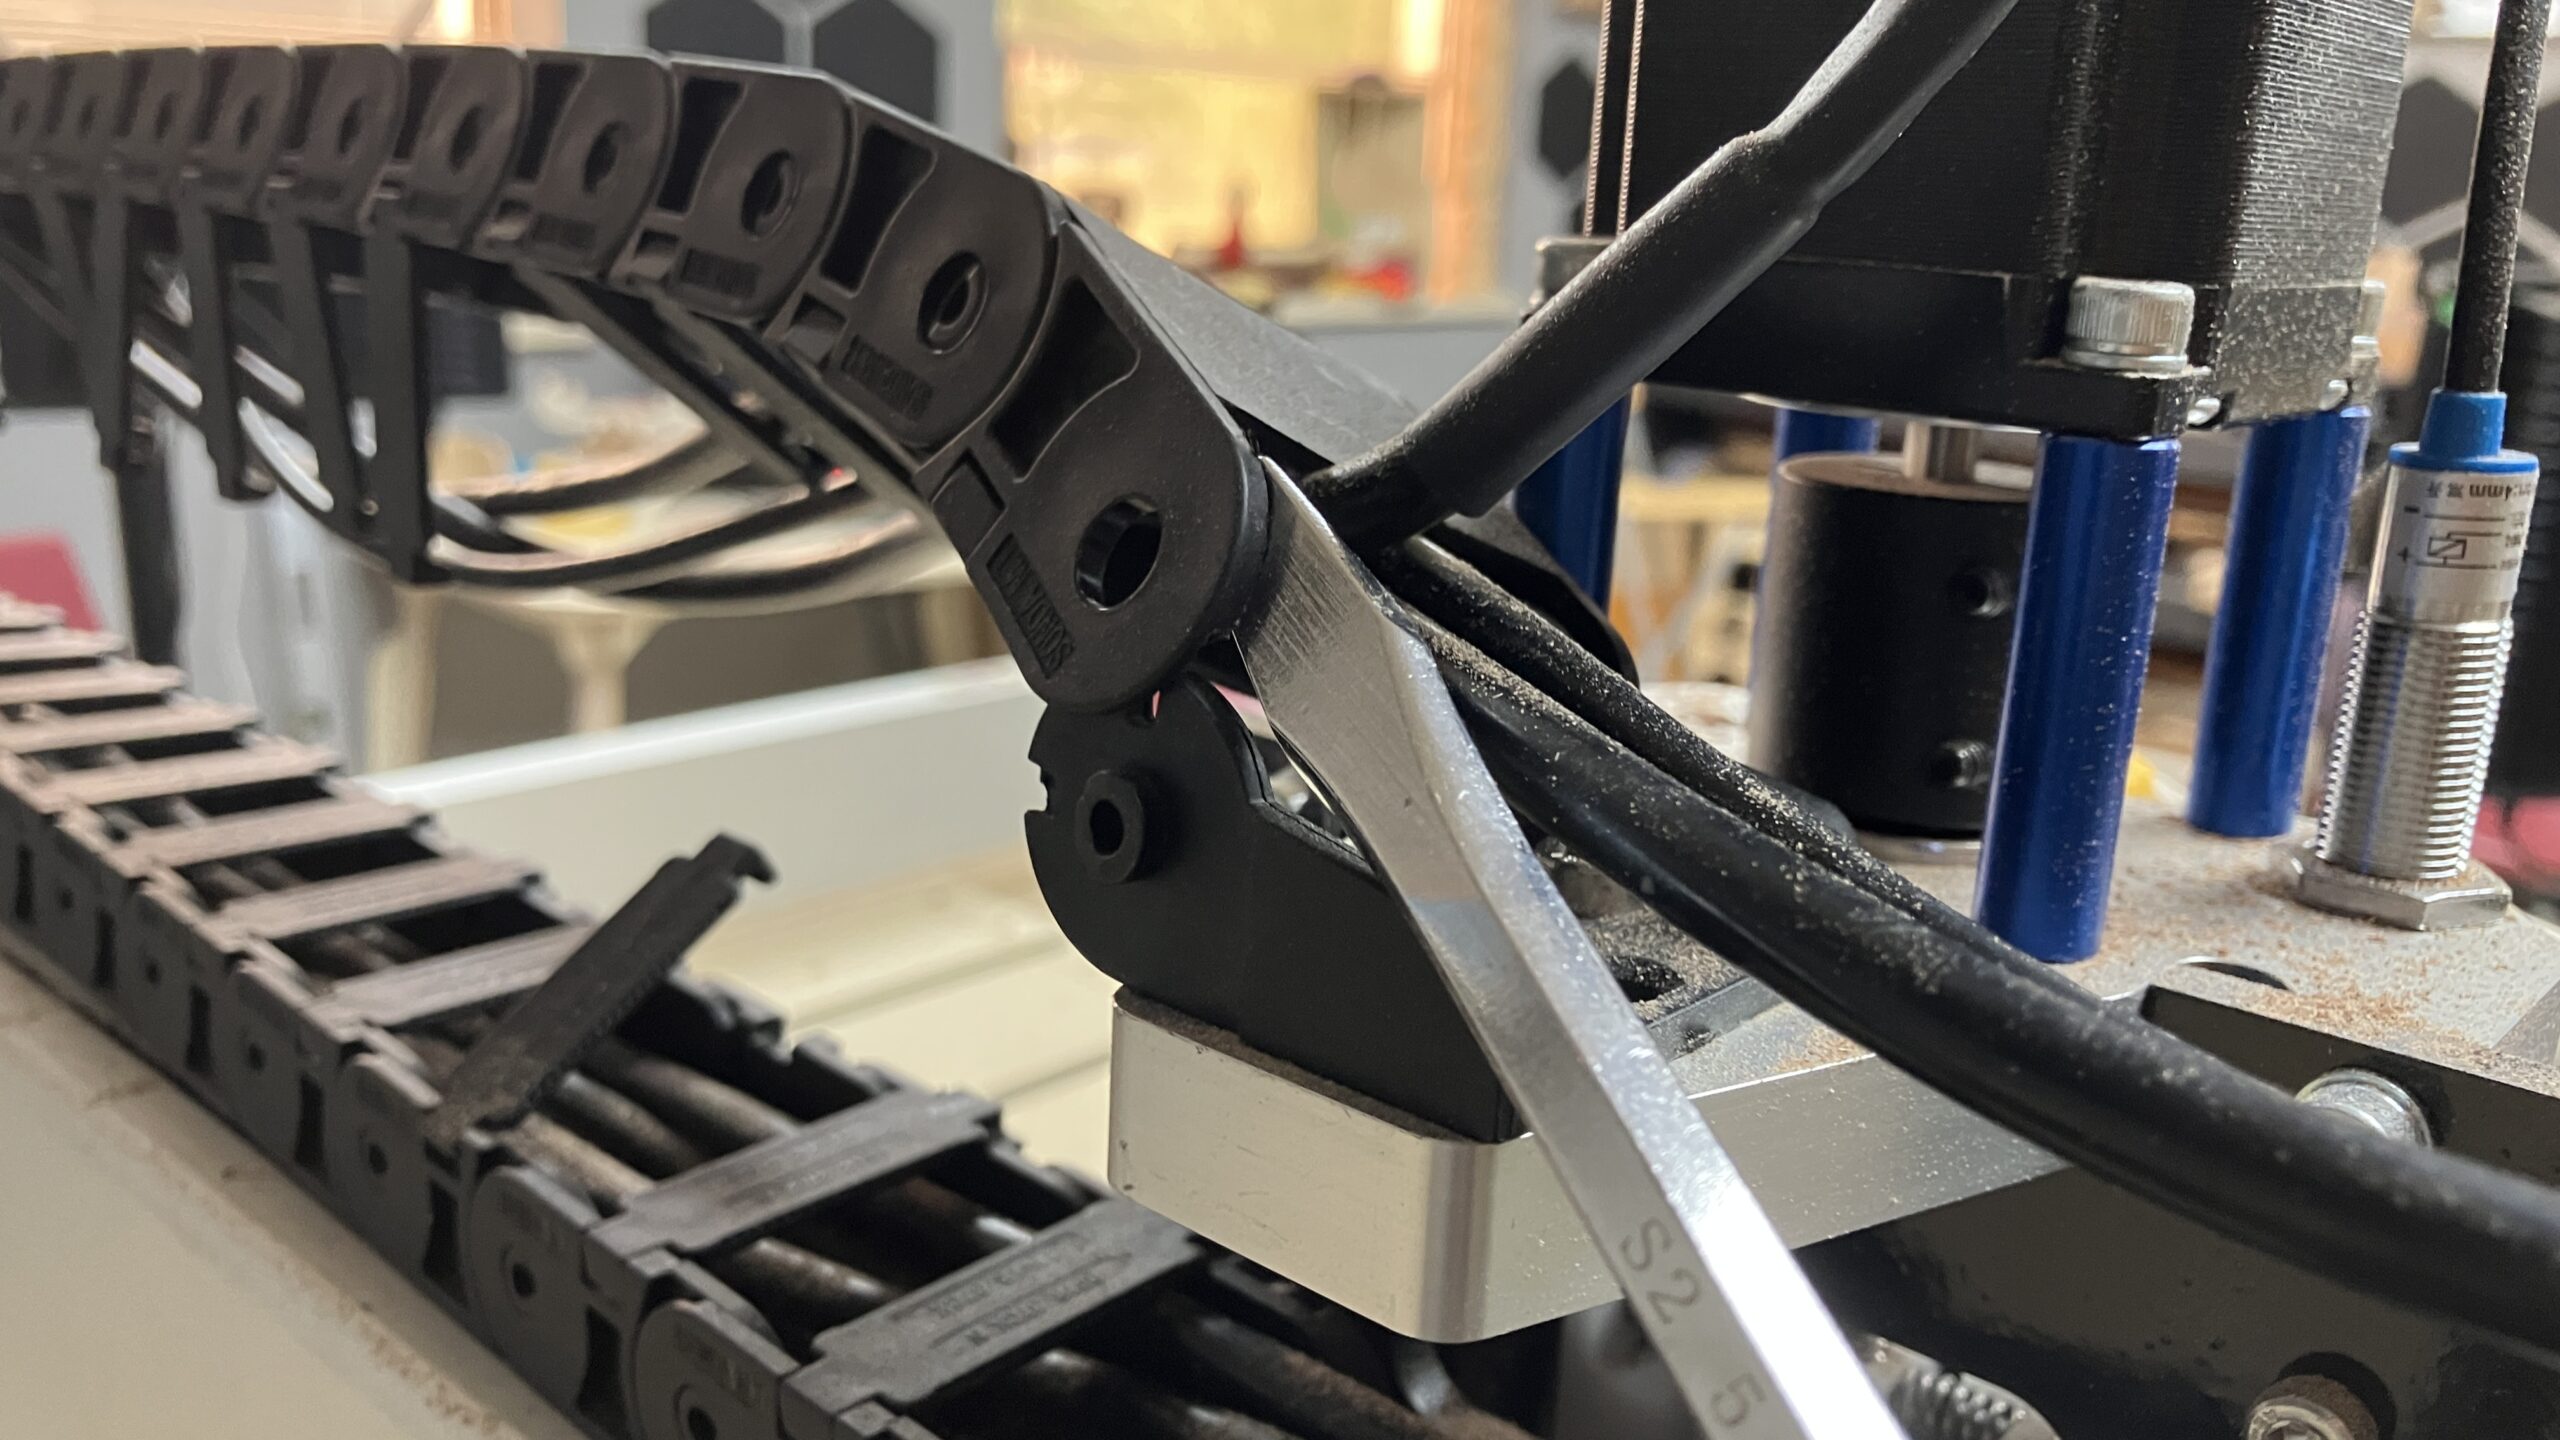
Undo all drag chain clips and detach the drag chain from the end links, using a flathead screwdriver.
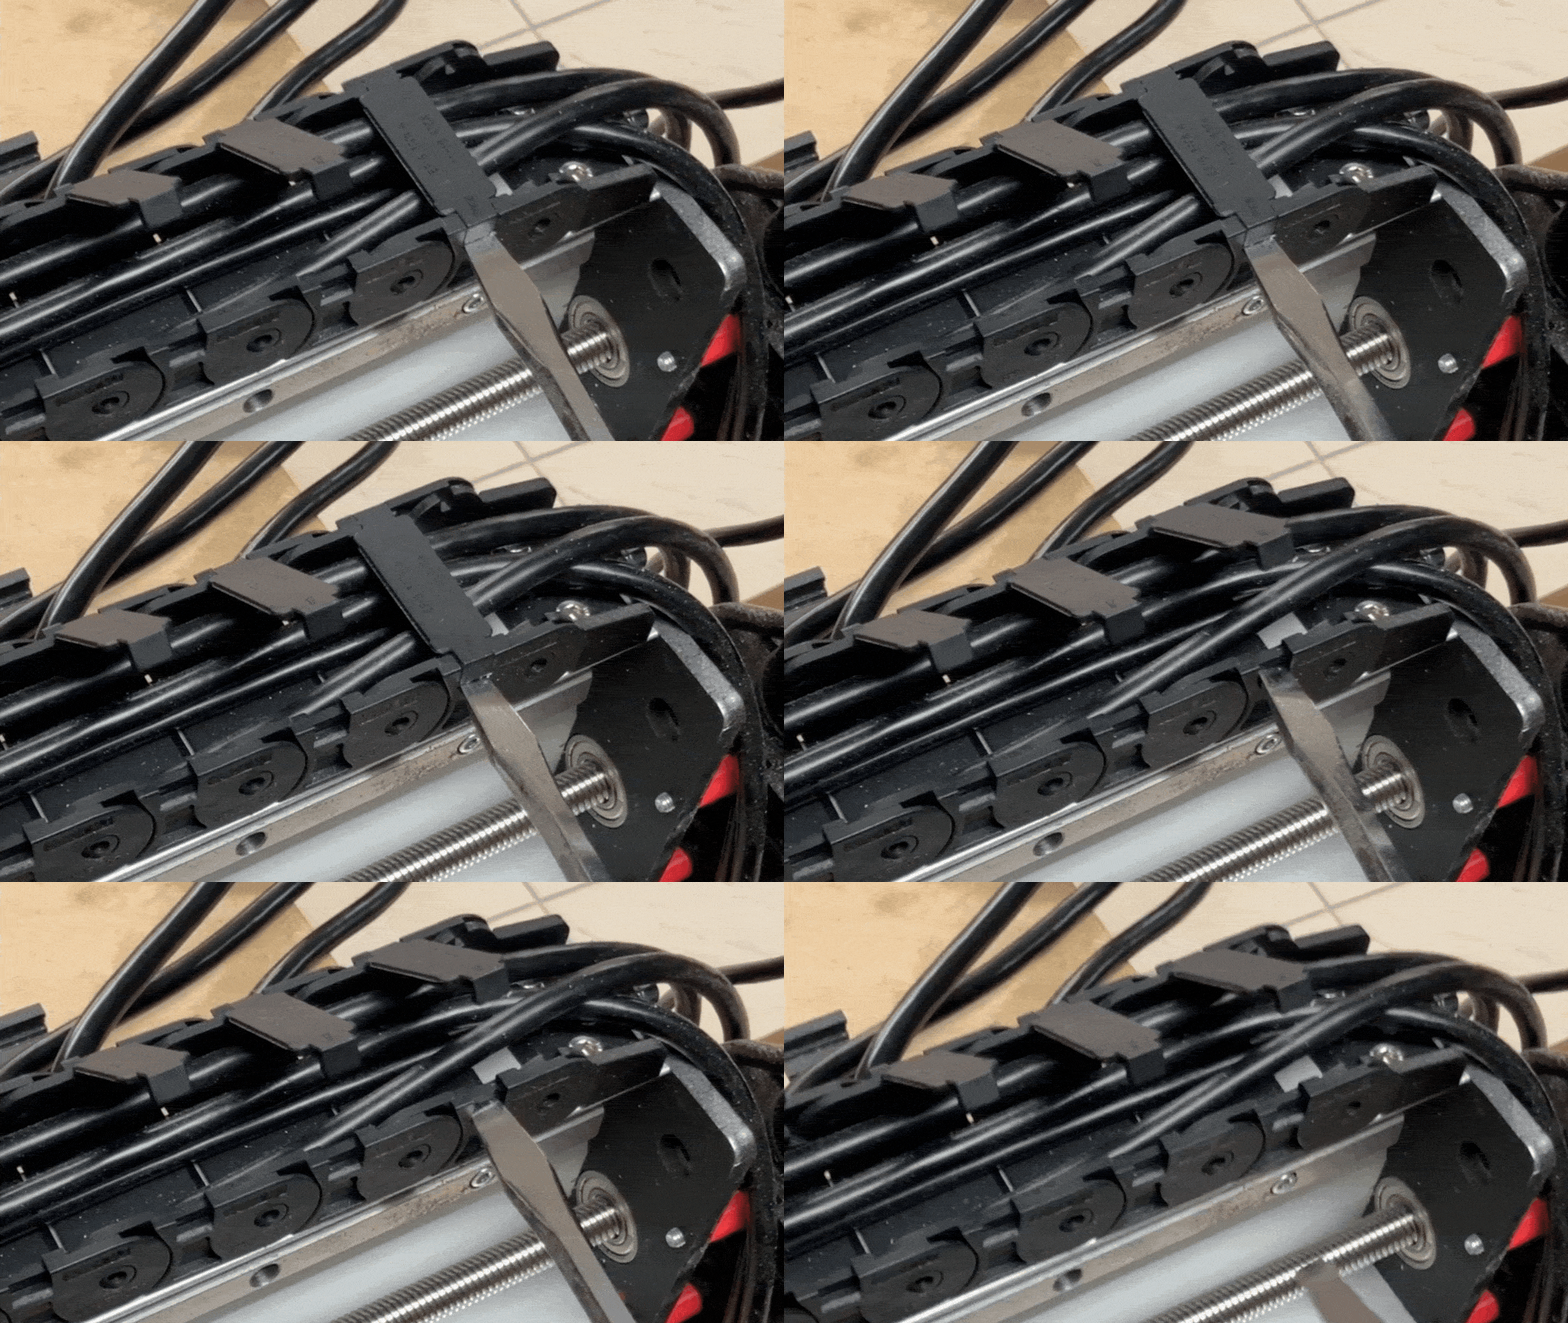
You can pop off the drag chain from the ends by wedging the screwdriver between the connecting tabs.
-
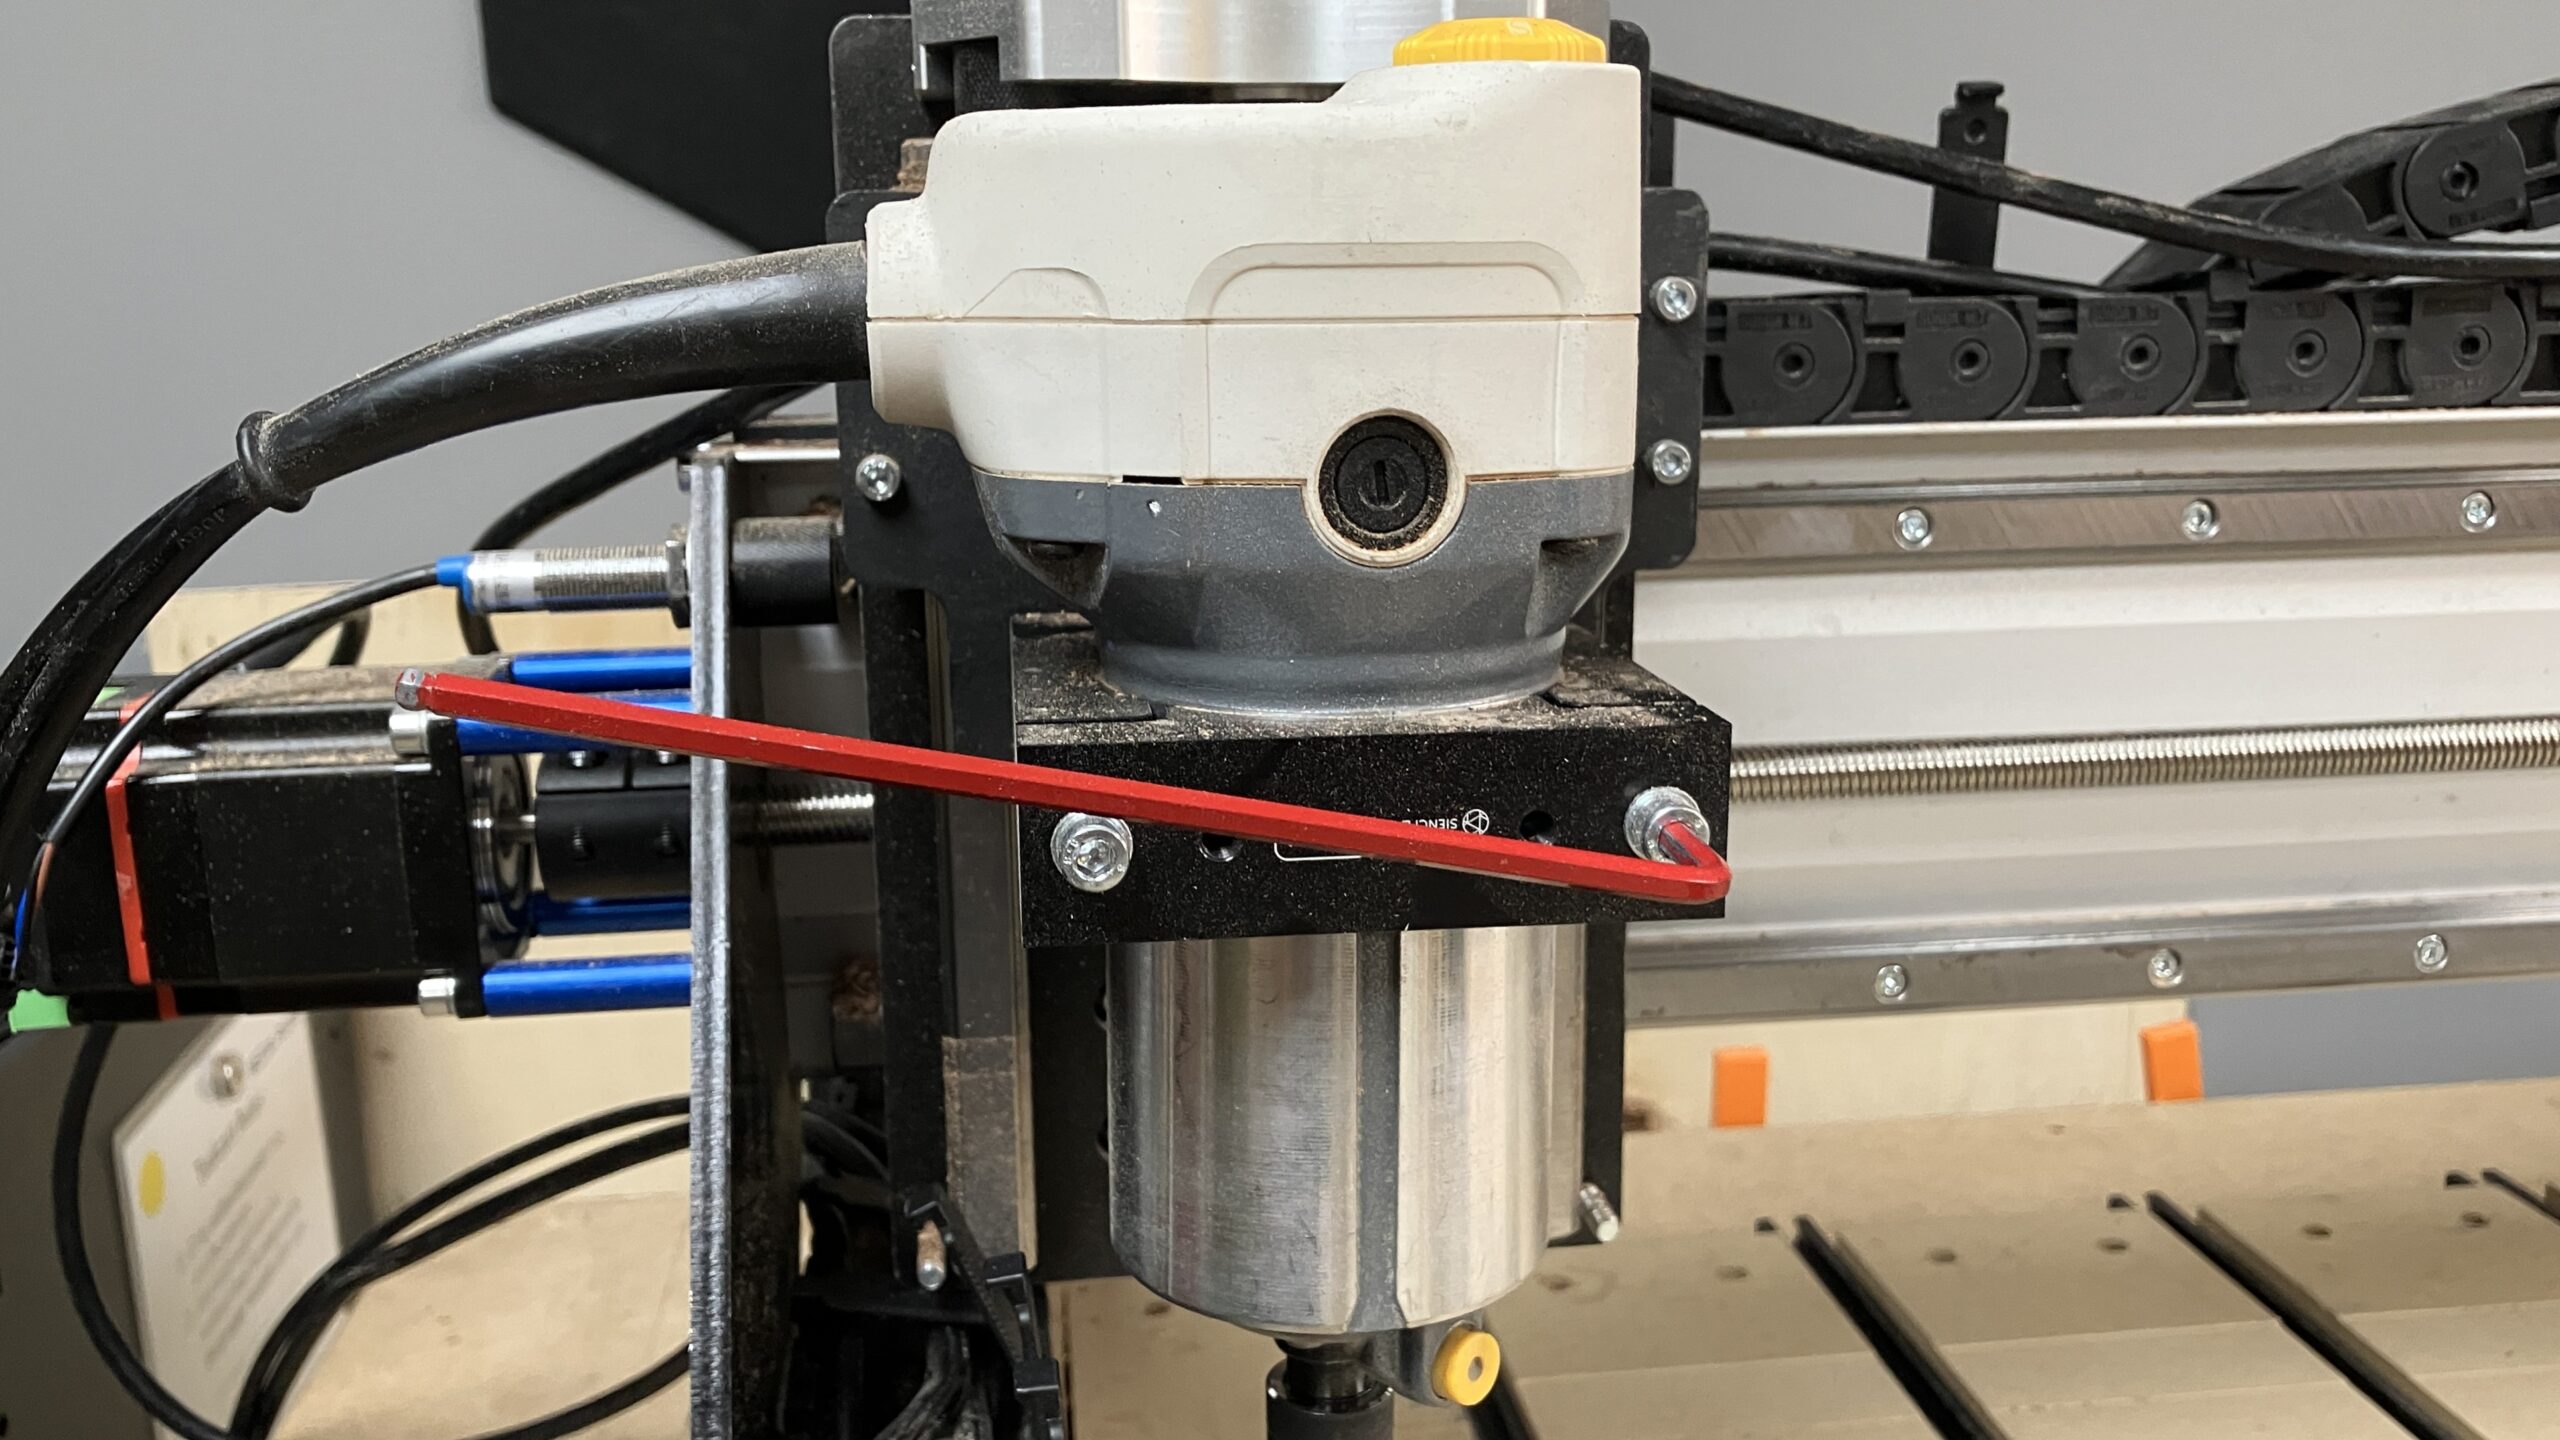
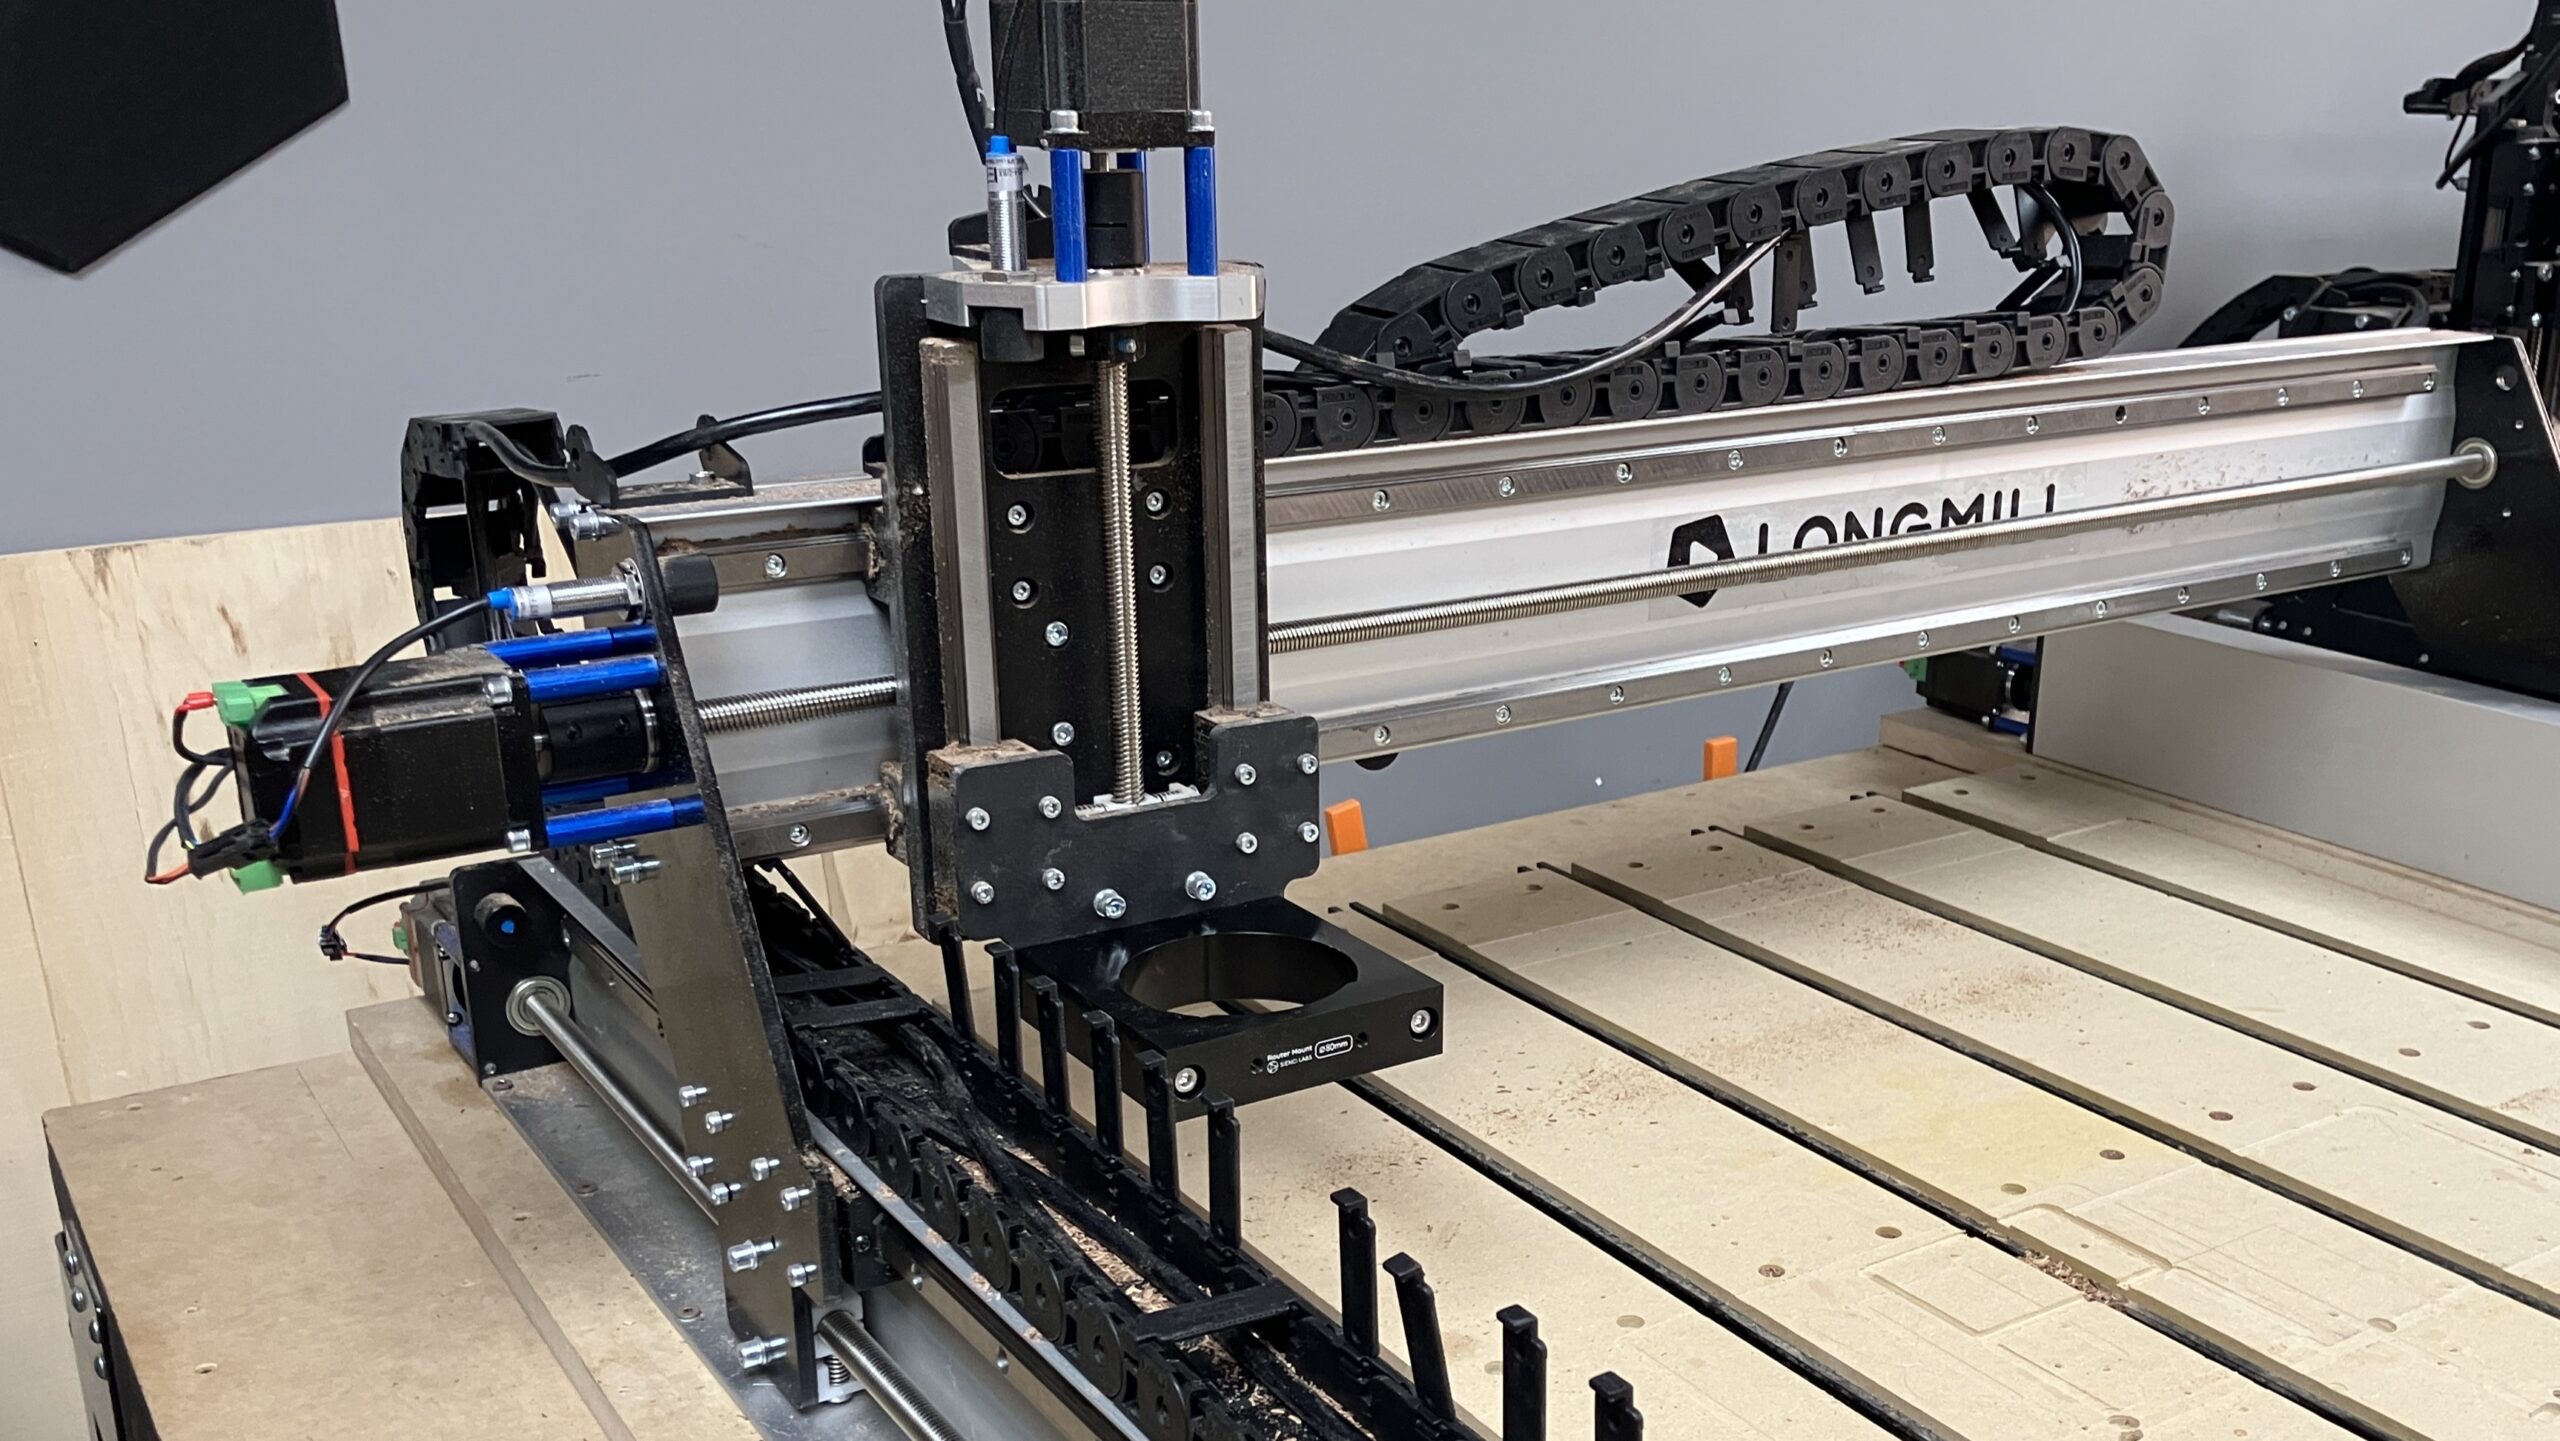
Remove the router’s power cable from the drag chain. Then remove the router from the mount, by loosening the front two (2) M5 screws with an Allen key. Unplug the router from power, and from the controller.
-
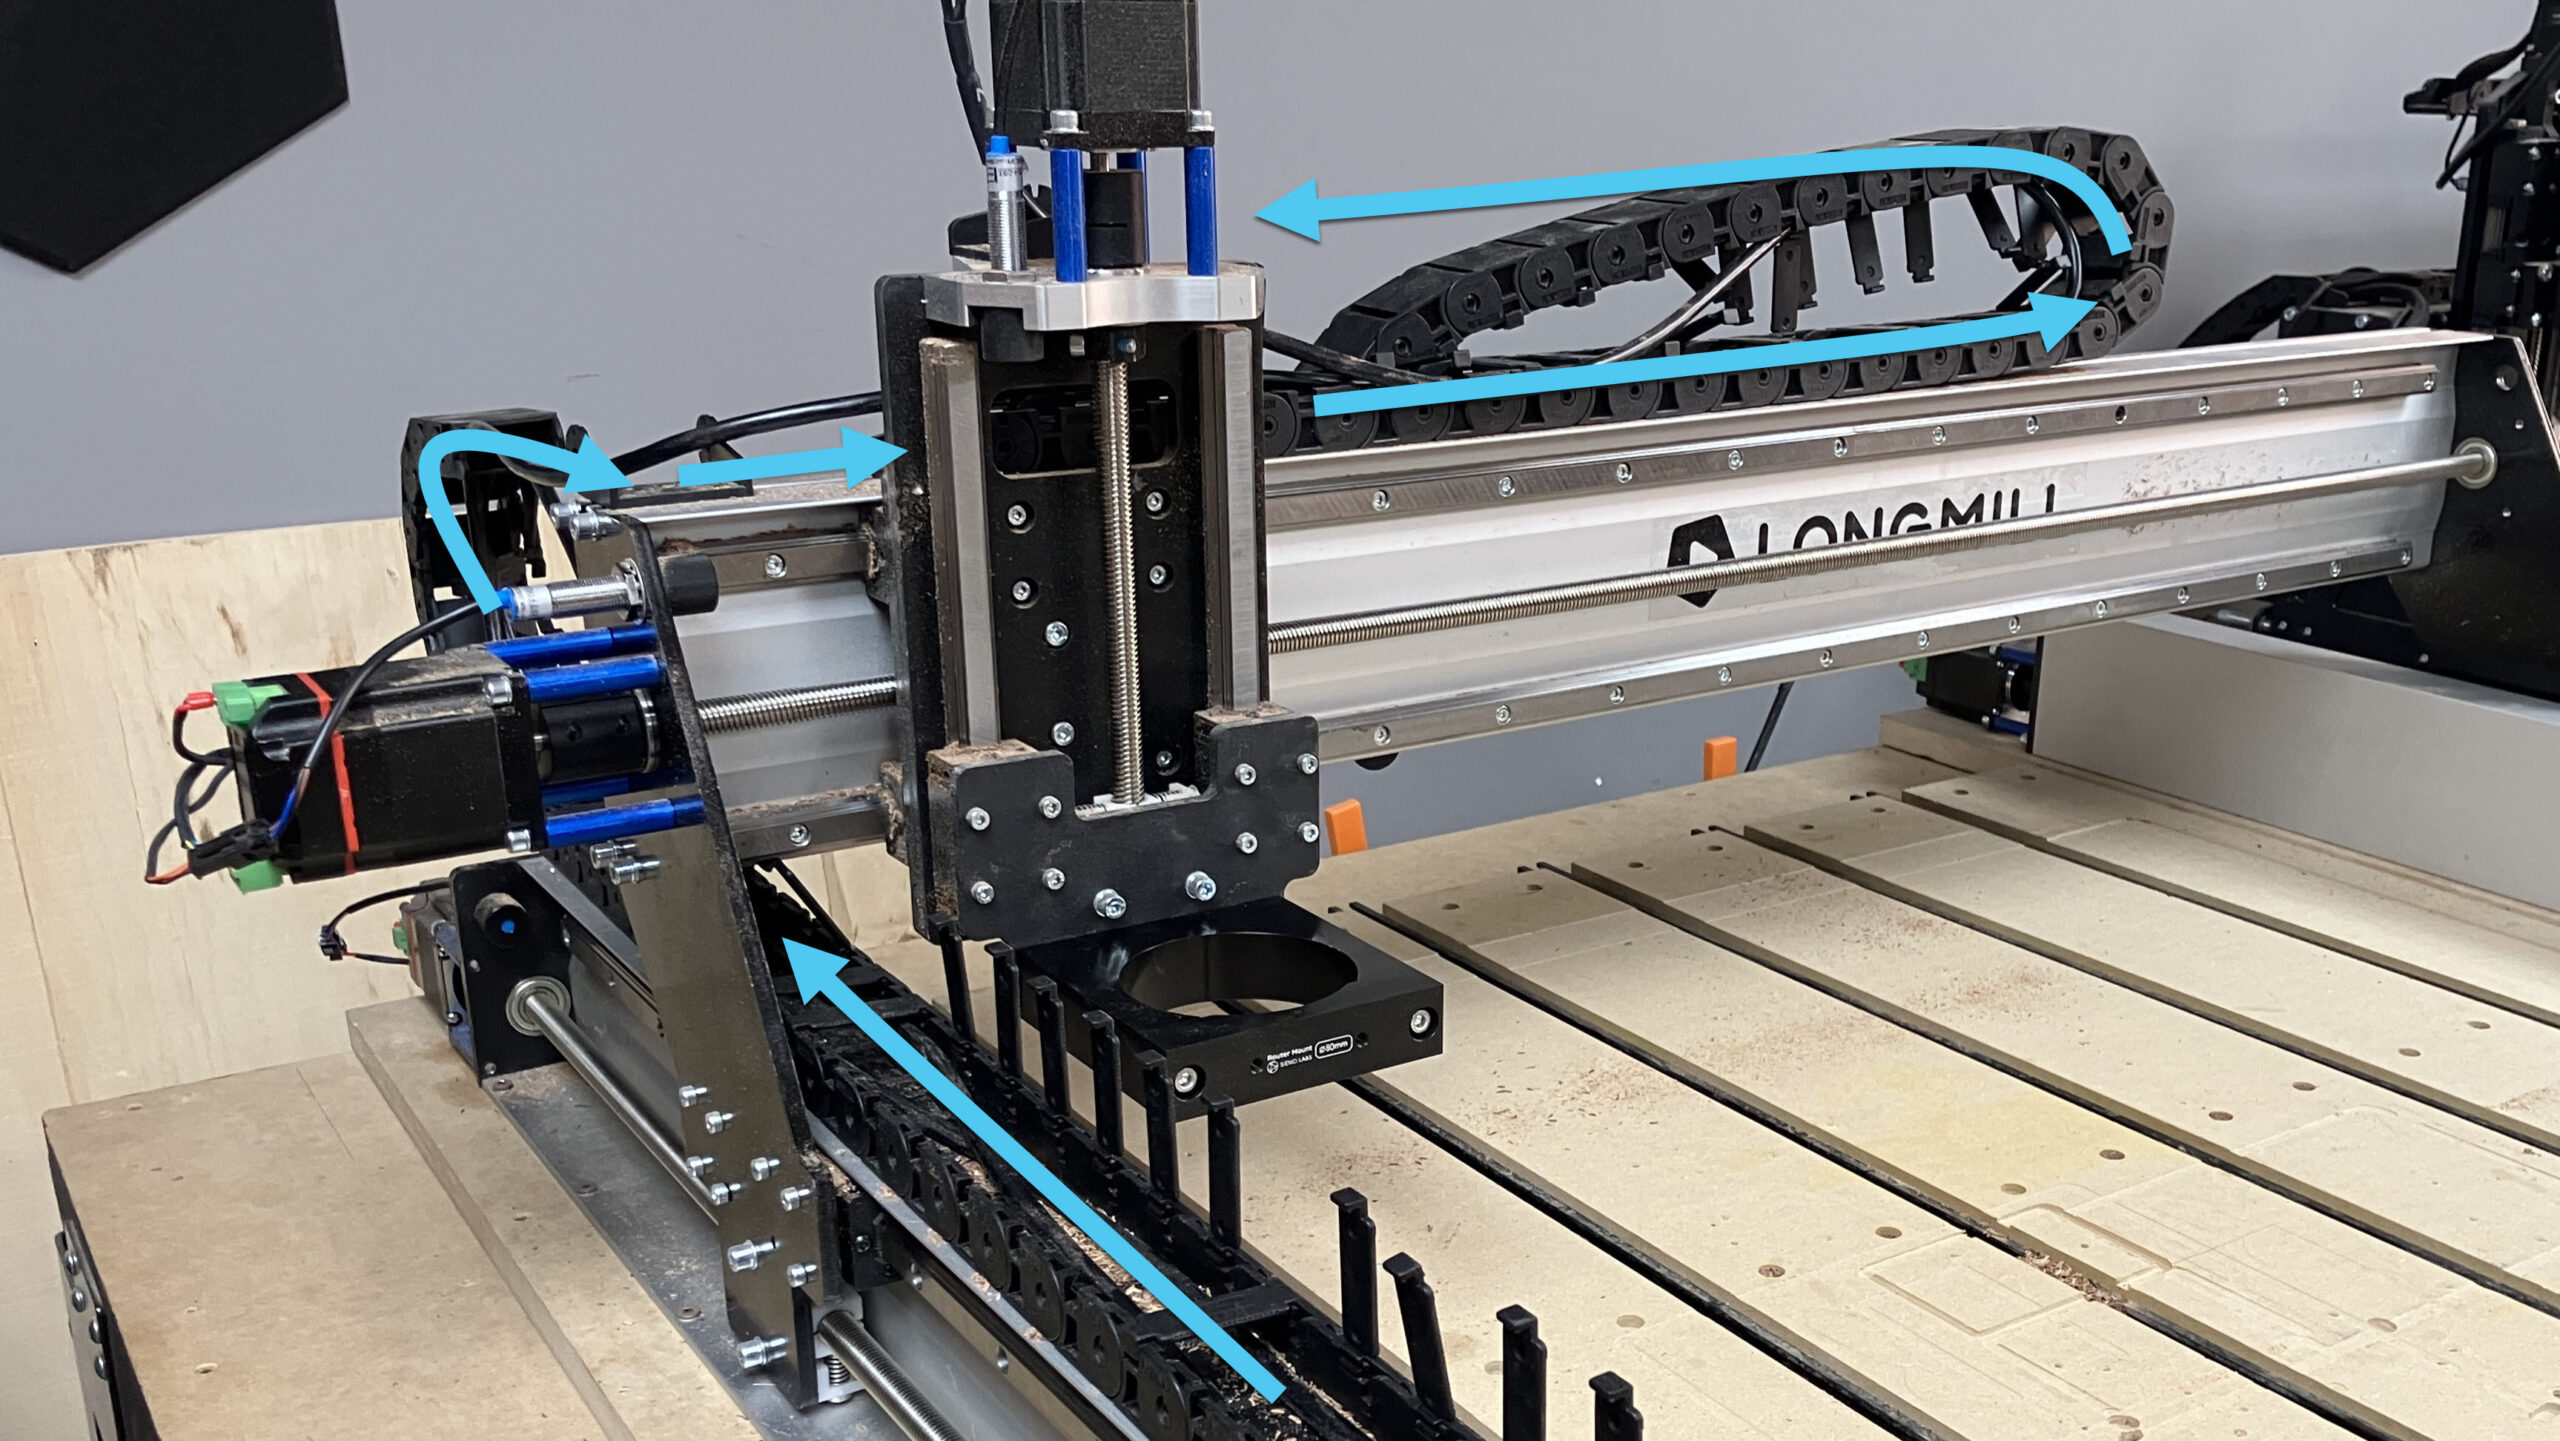
Route the spindle cable through the drag chains, so that the blue/black connector end is at the front of the left Y-axis, and the metal connector end is at the Z-axis.
-
Re-attach the drag chain clips and end links, securing the spindle cable and the existing motor cables in place.
Router Mount
-
With the machine connected to gSender, jog the Z-axis all the way down to gain access to the four (4) M5-25mm screws at the back of the XZ gantry.
You can also turn OFF the SLB-LITE and rotate the coupler by hand to move the Z-axis down.
-
Using an Allen key, unfasten the four (4) back screws with an Allen key to remove the mount.
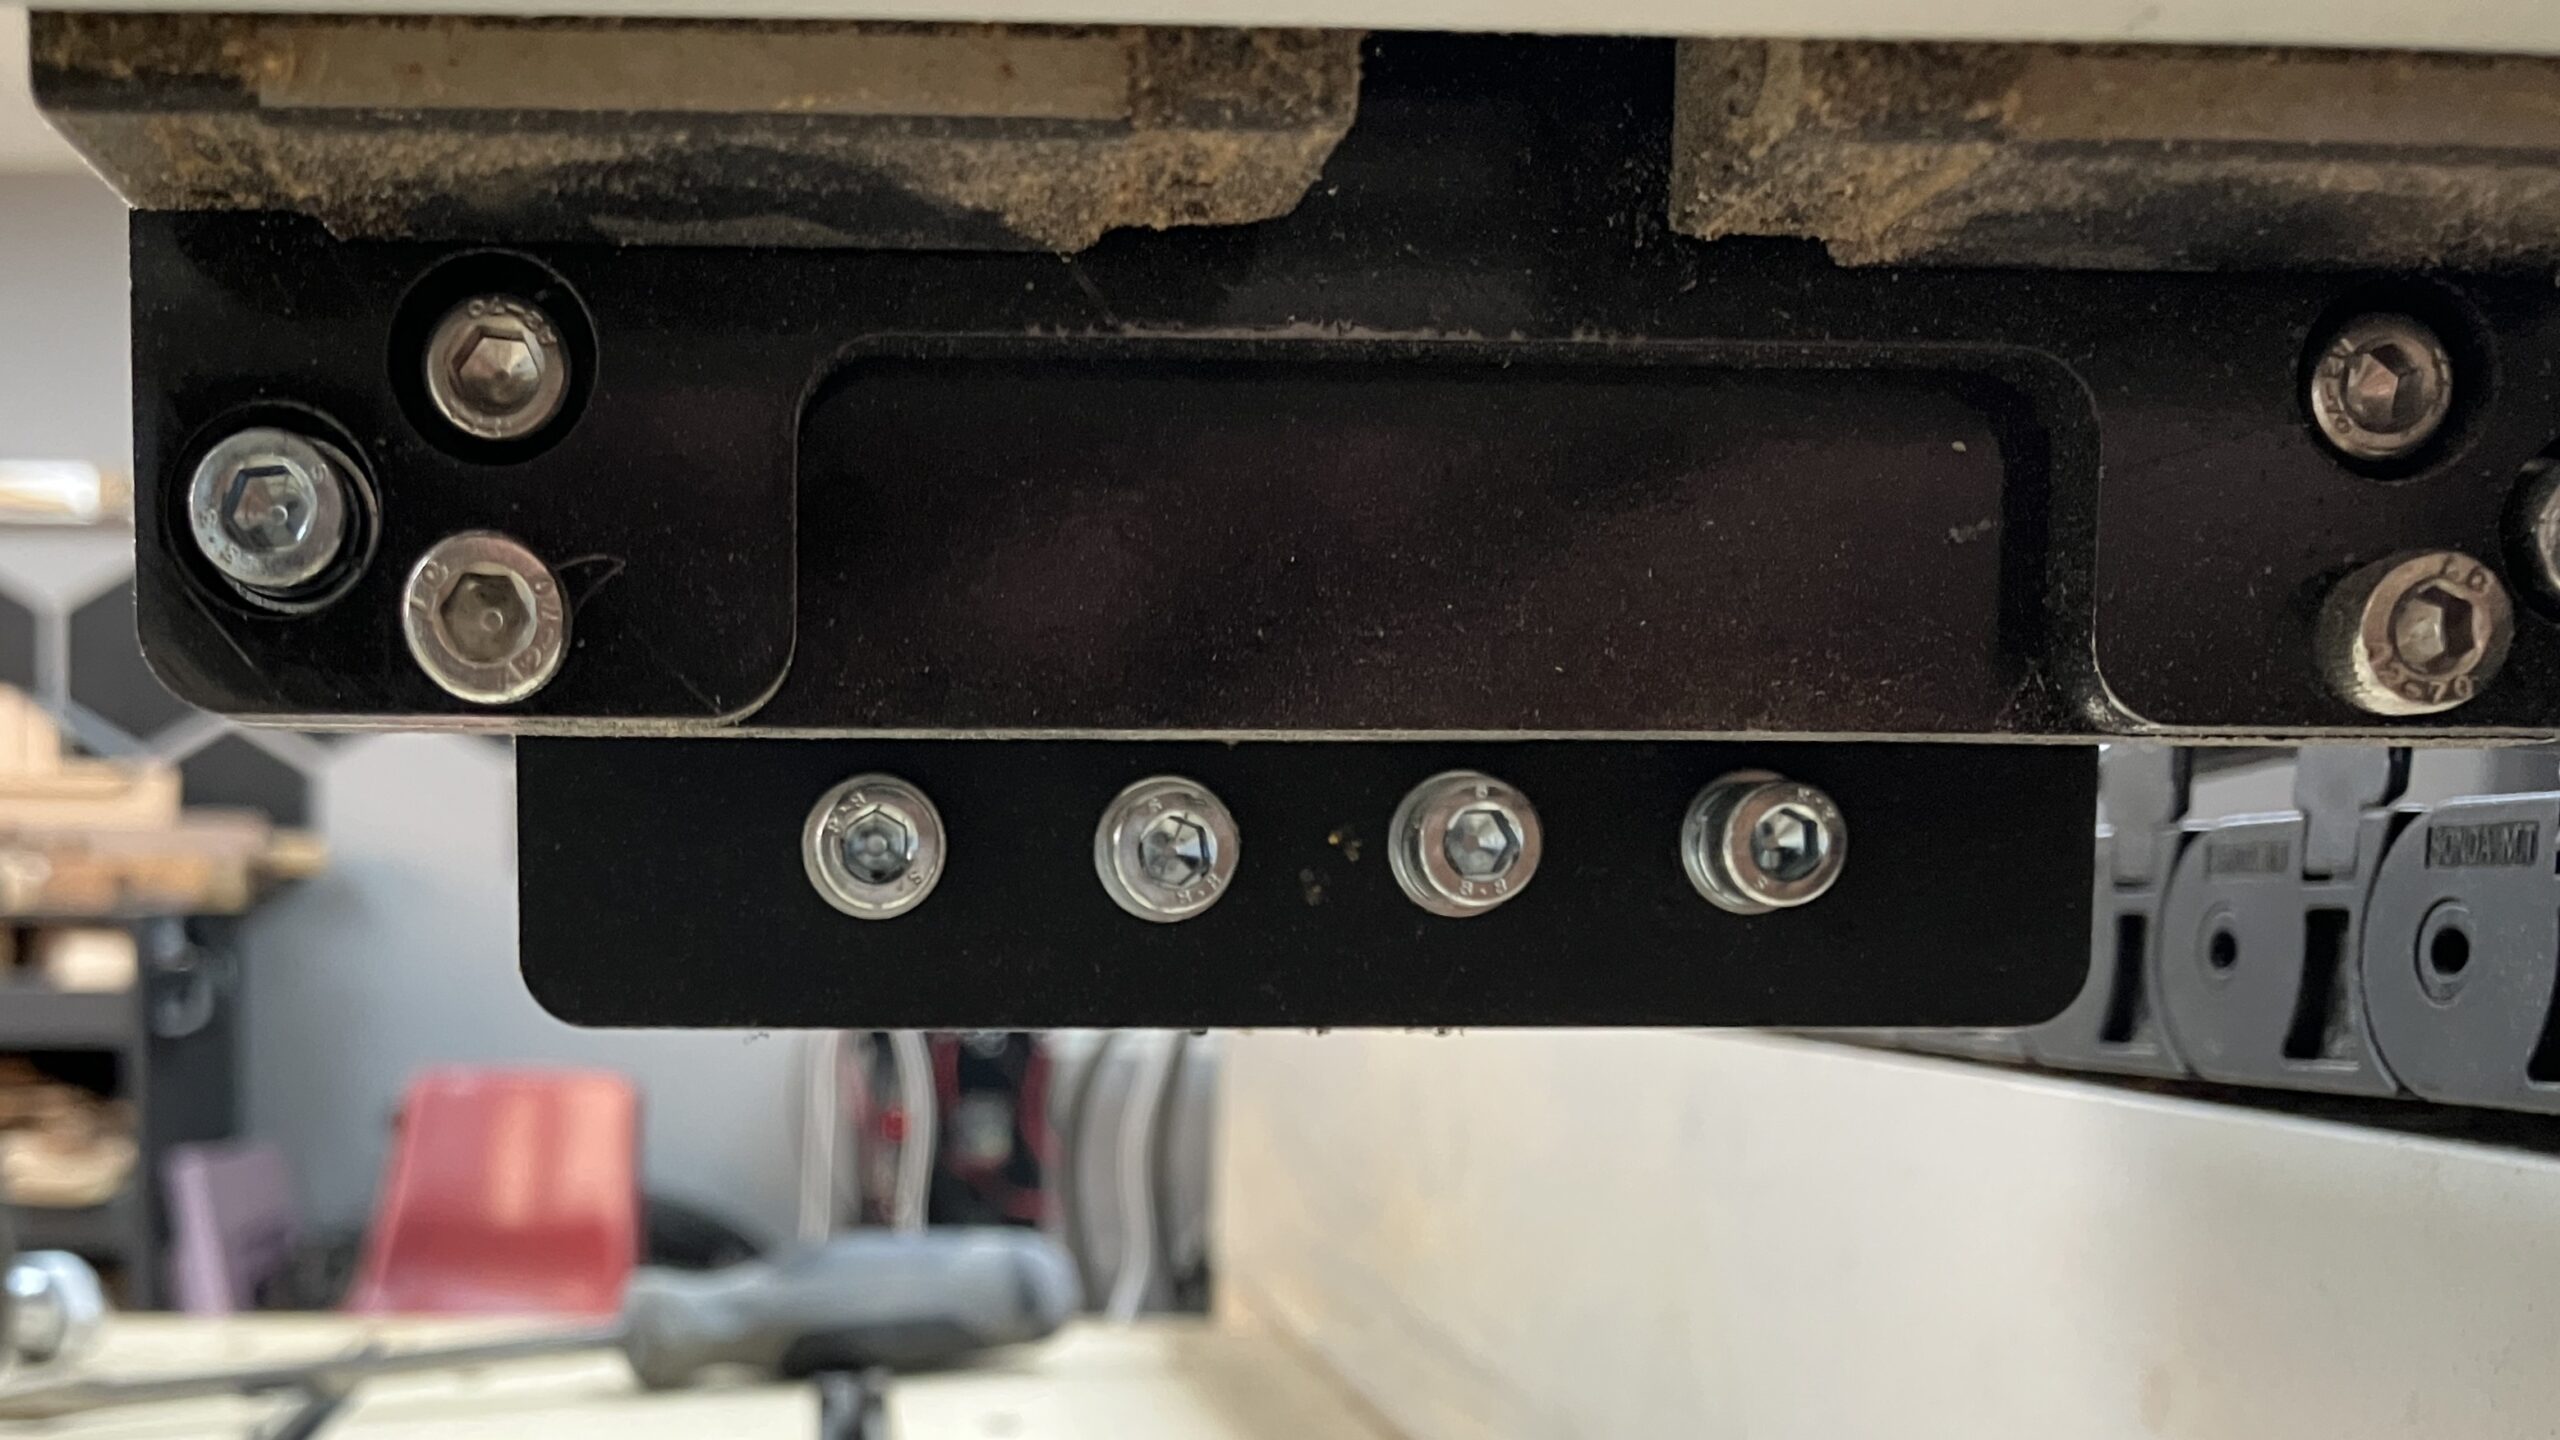
-
Take the new 80mm spindle mount and secure it using all four (4) screws at the back of the XZ gantry.
-
Loosen the front two (2) screws on the 80mm spindle mount.
-
Place the spindle through the mount, and fasten the clamping screws to secure the spindle in place. You can adjust the height later.
VFD Connections
-
Plug in the VFD power cord, spindle cable and controller cable (coiled) into the bottom of the VFD.
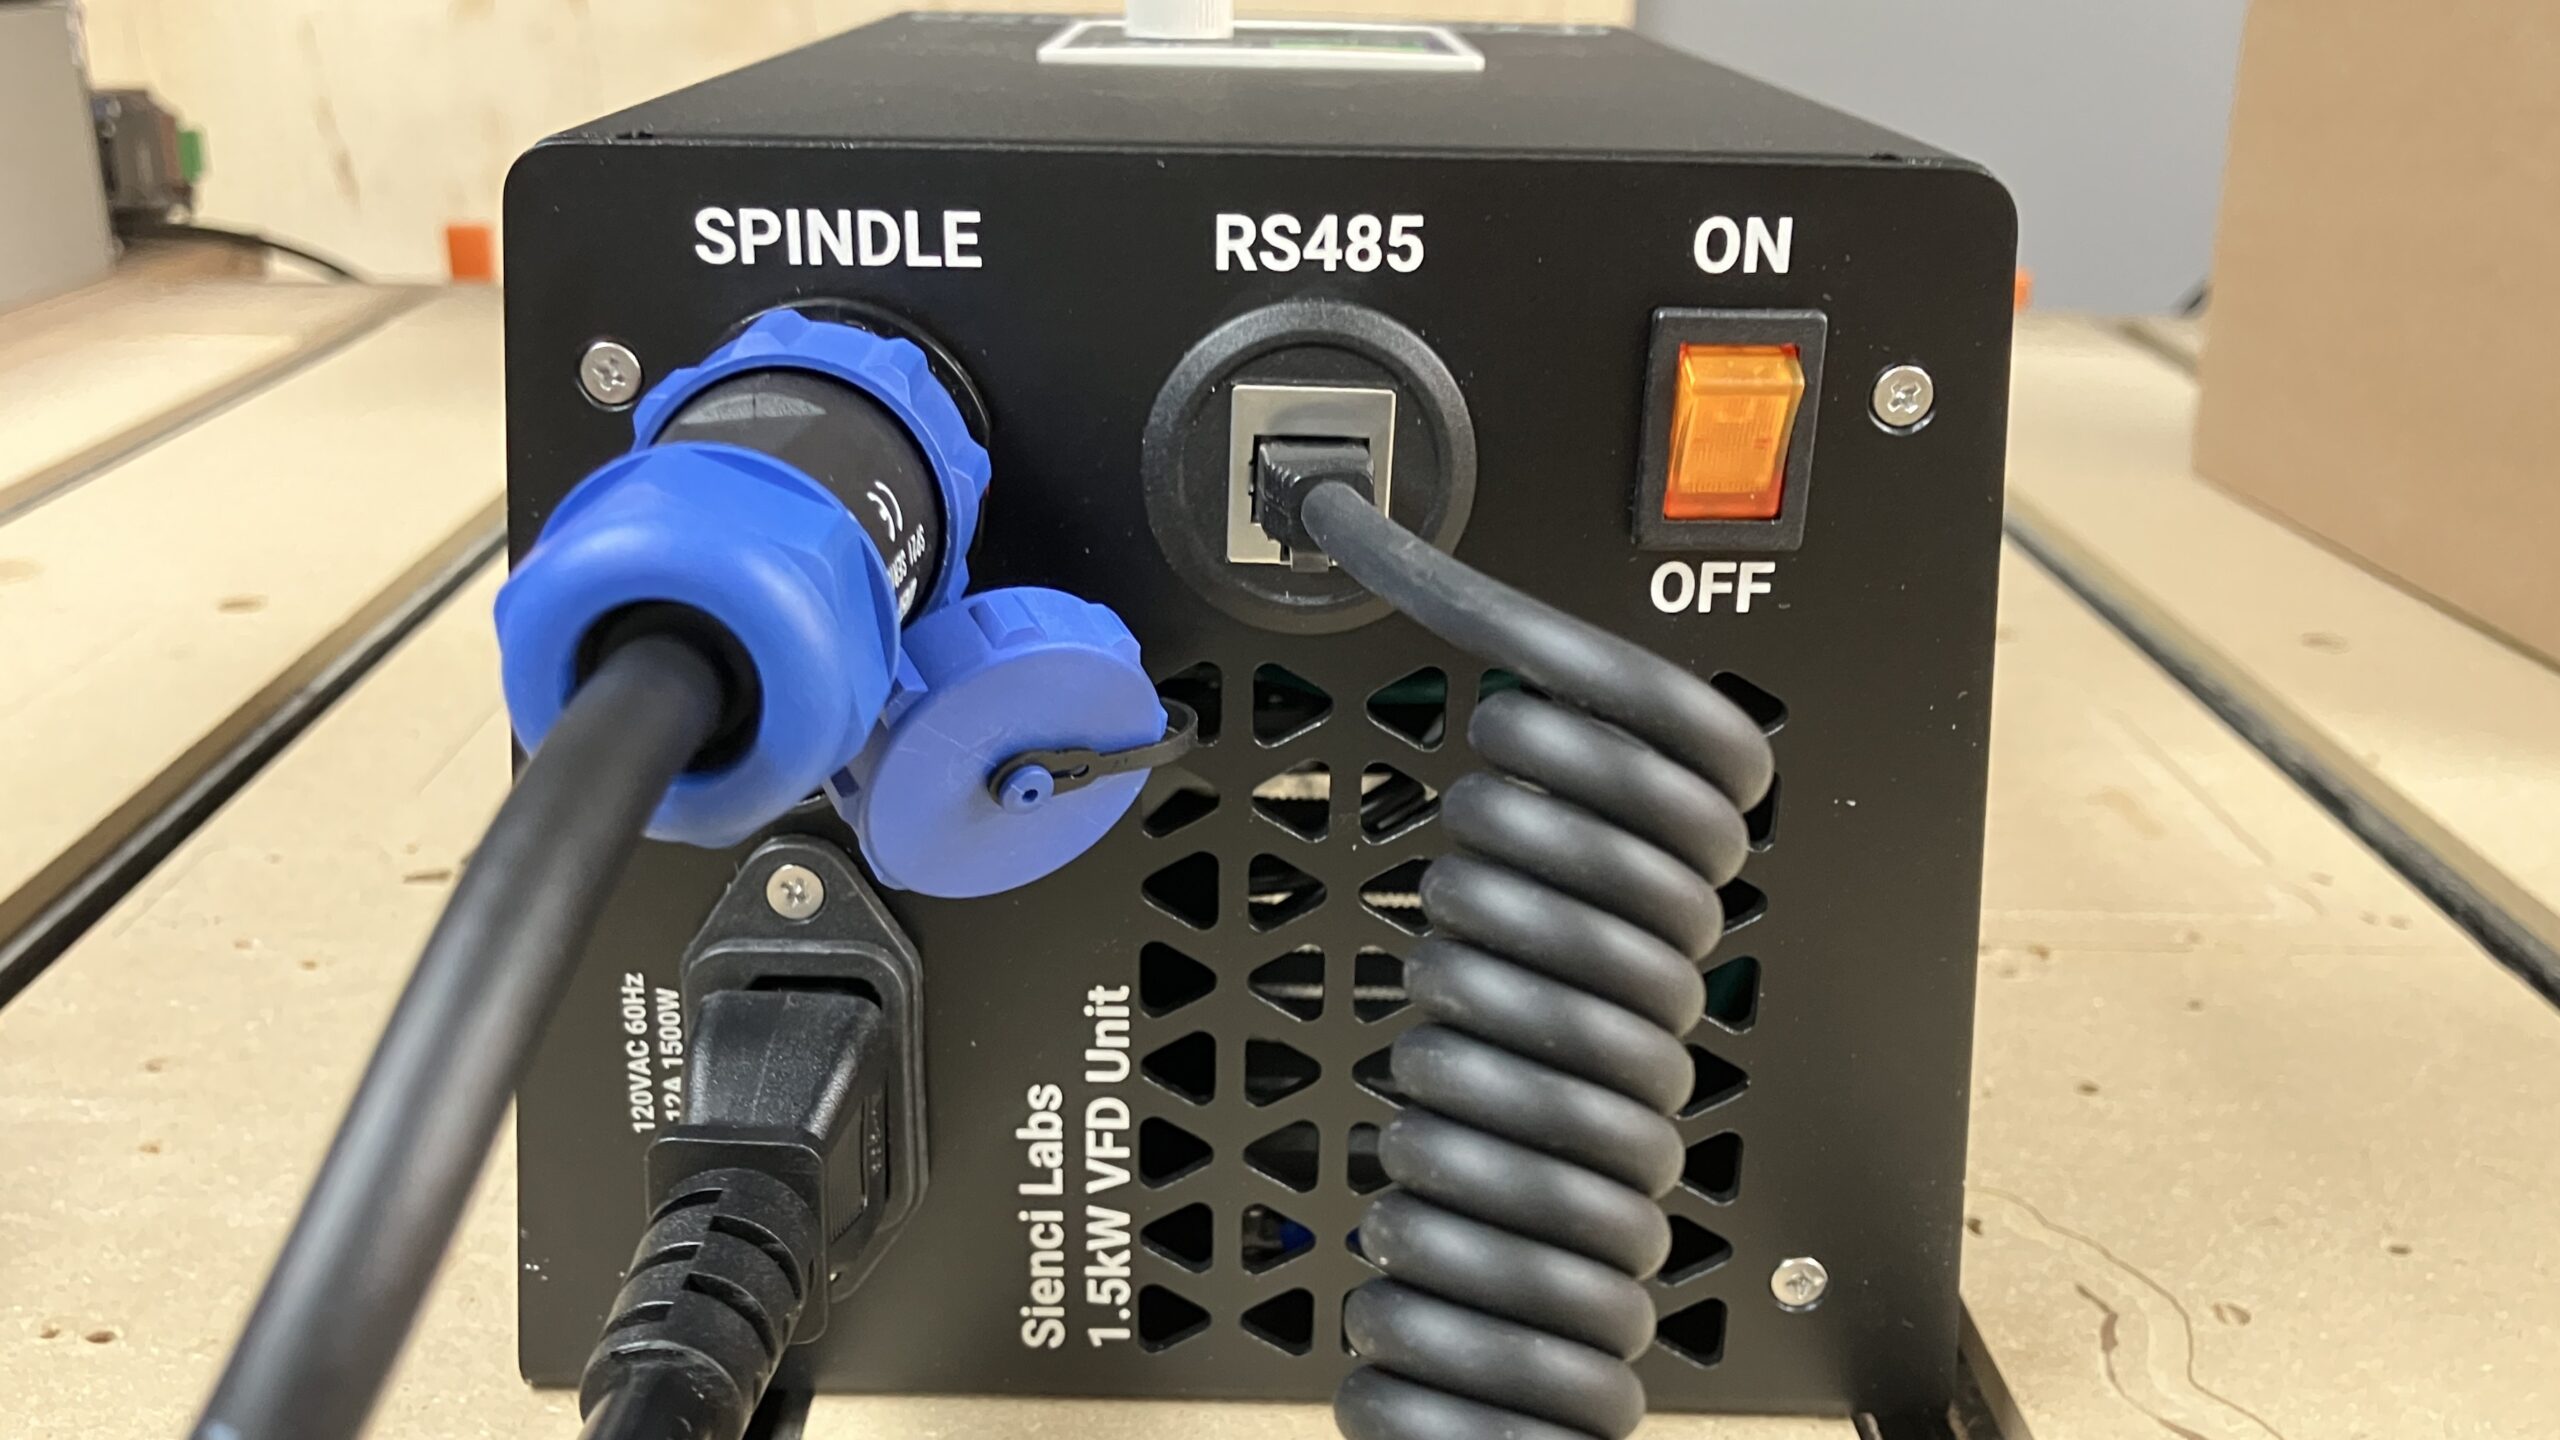
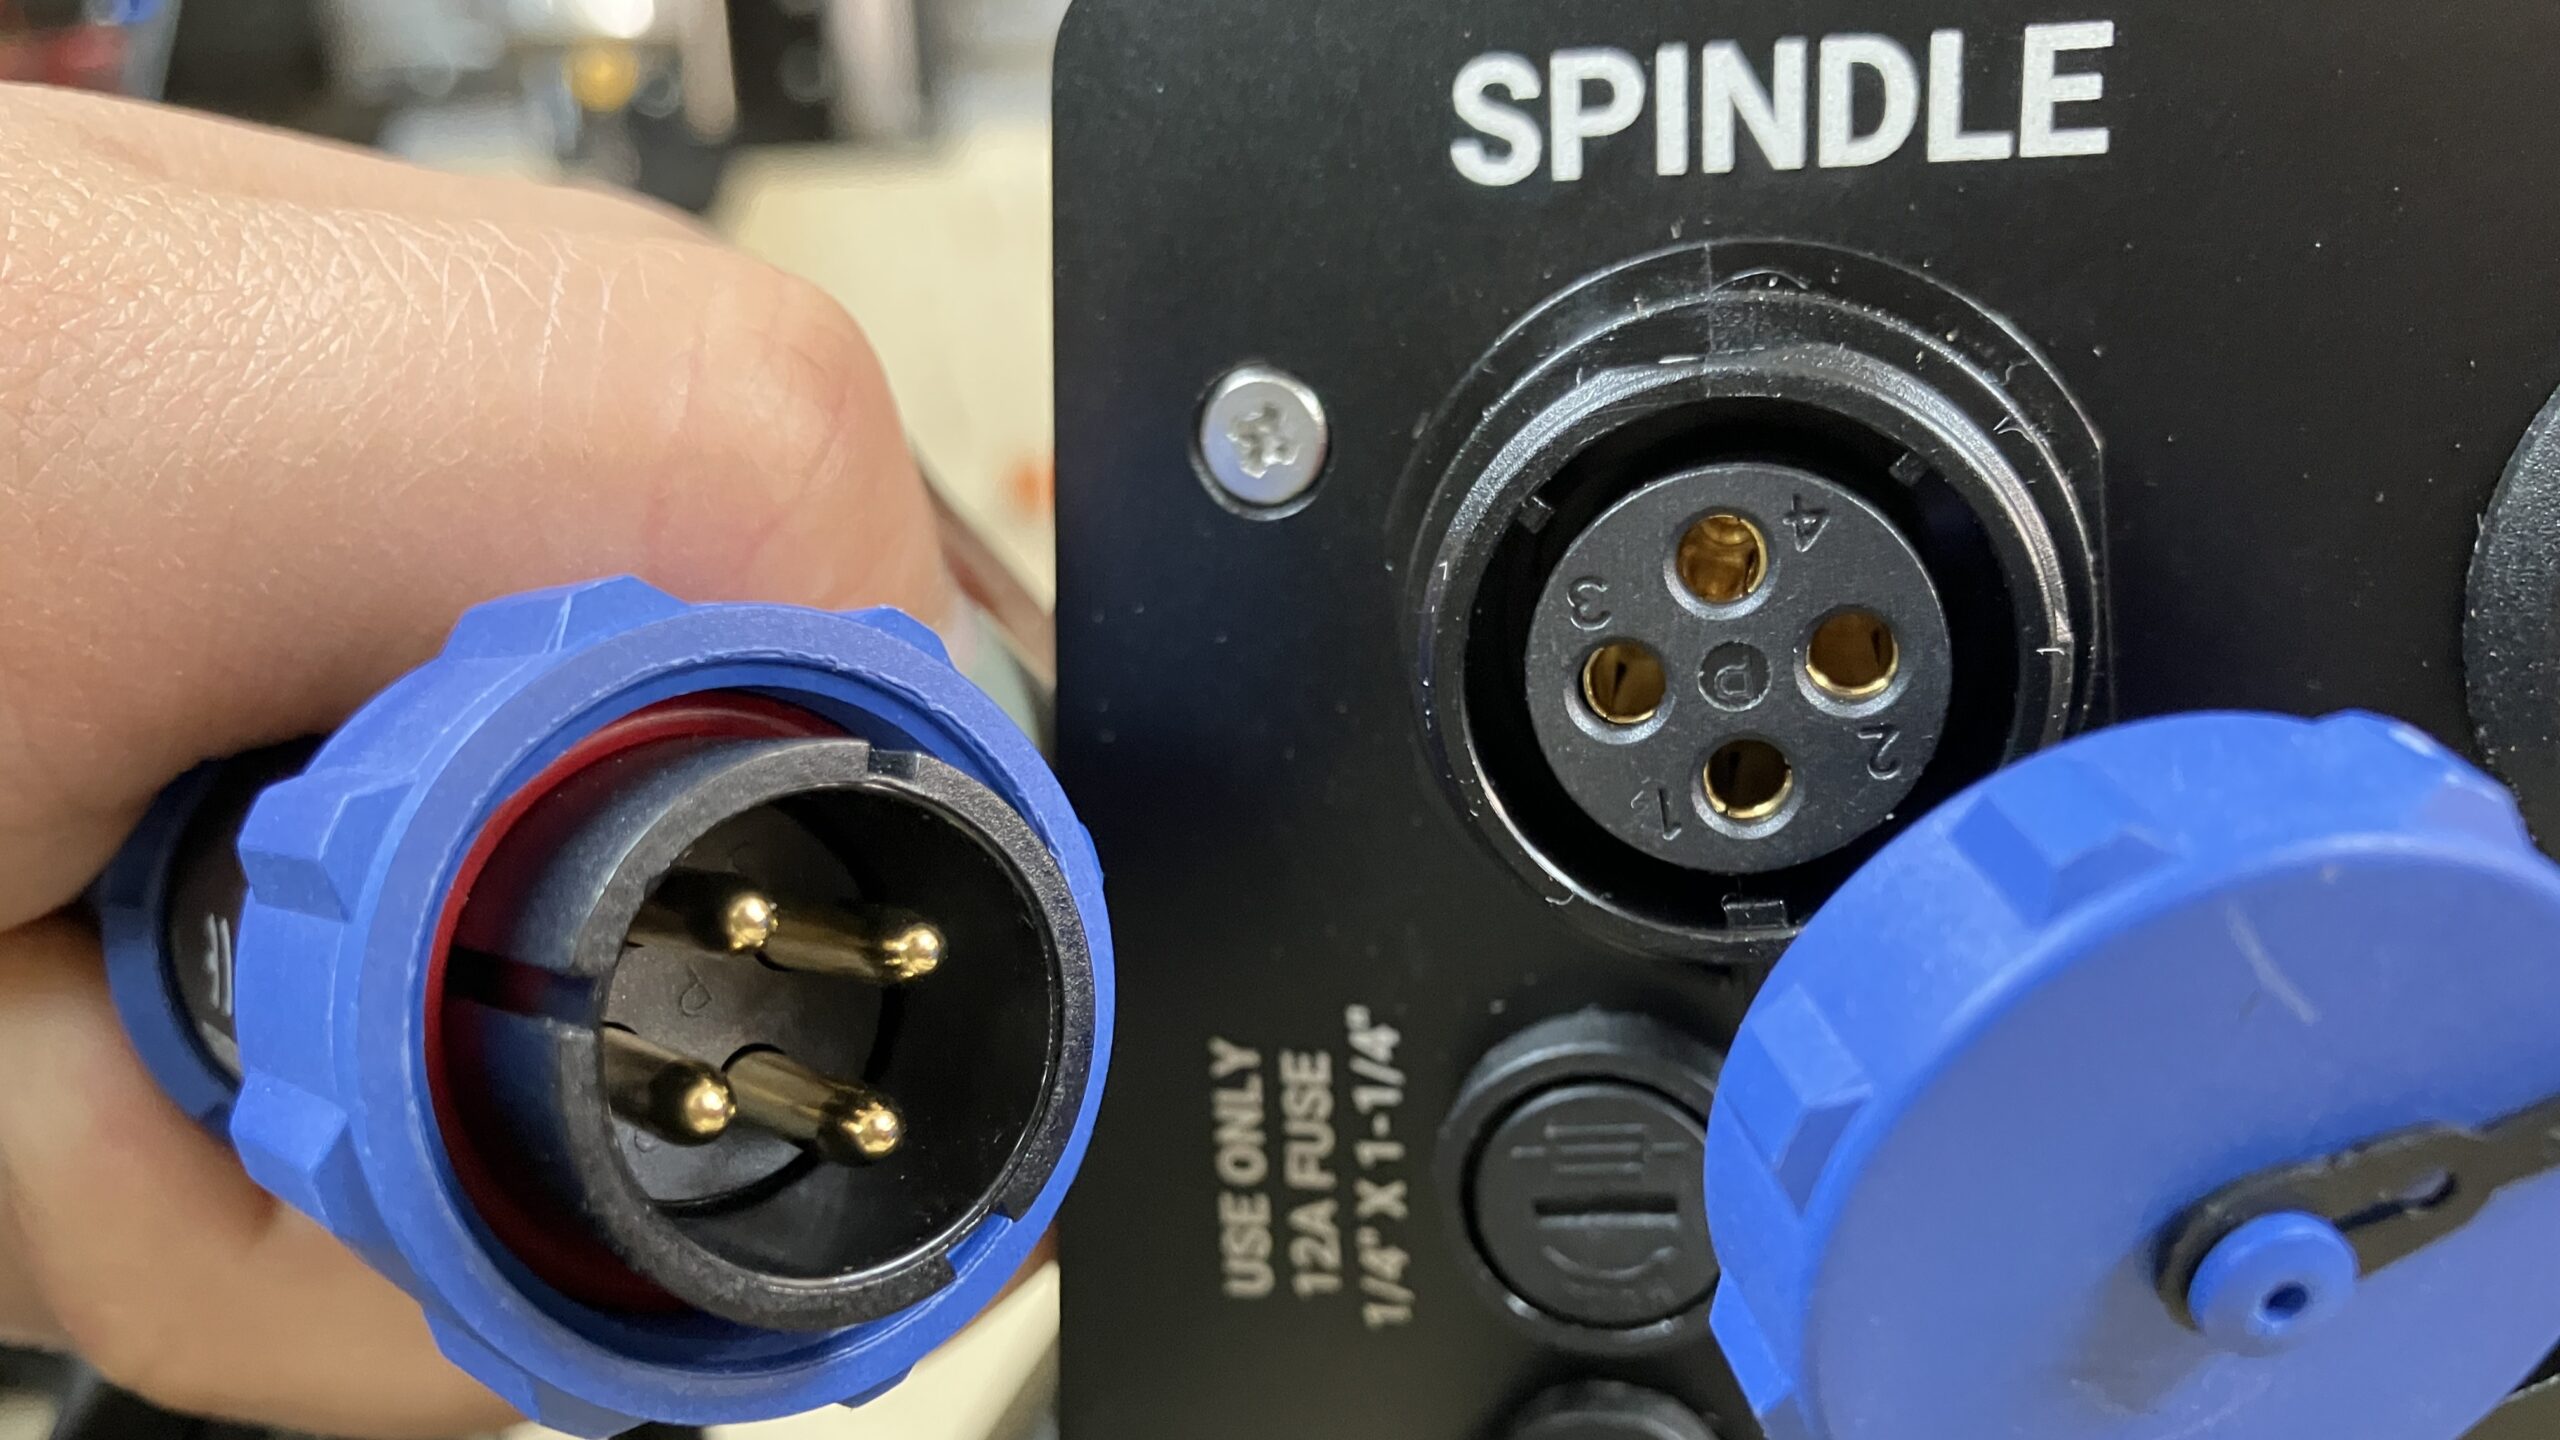
Make sure the spindle cable is oriented correctly, matching the slots with the small tabs on the VFD. Once plugged in, fully secure the spindle cable by turning the blue ring clockwise.
-
Fasten the VFD to your table or a flat surface. Make sure the bottom of the VFD is accessible, so you can toggle the power switch. Use the four (4) mounting points on the back panel to fasten the VFD in place.
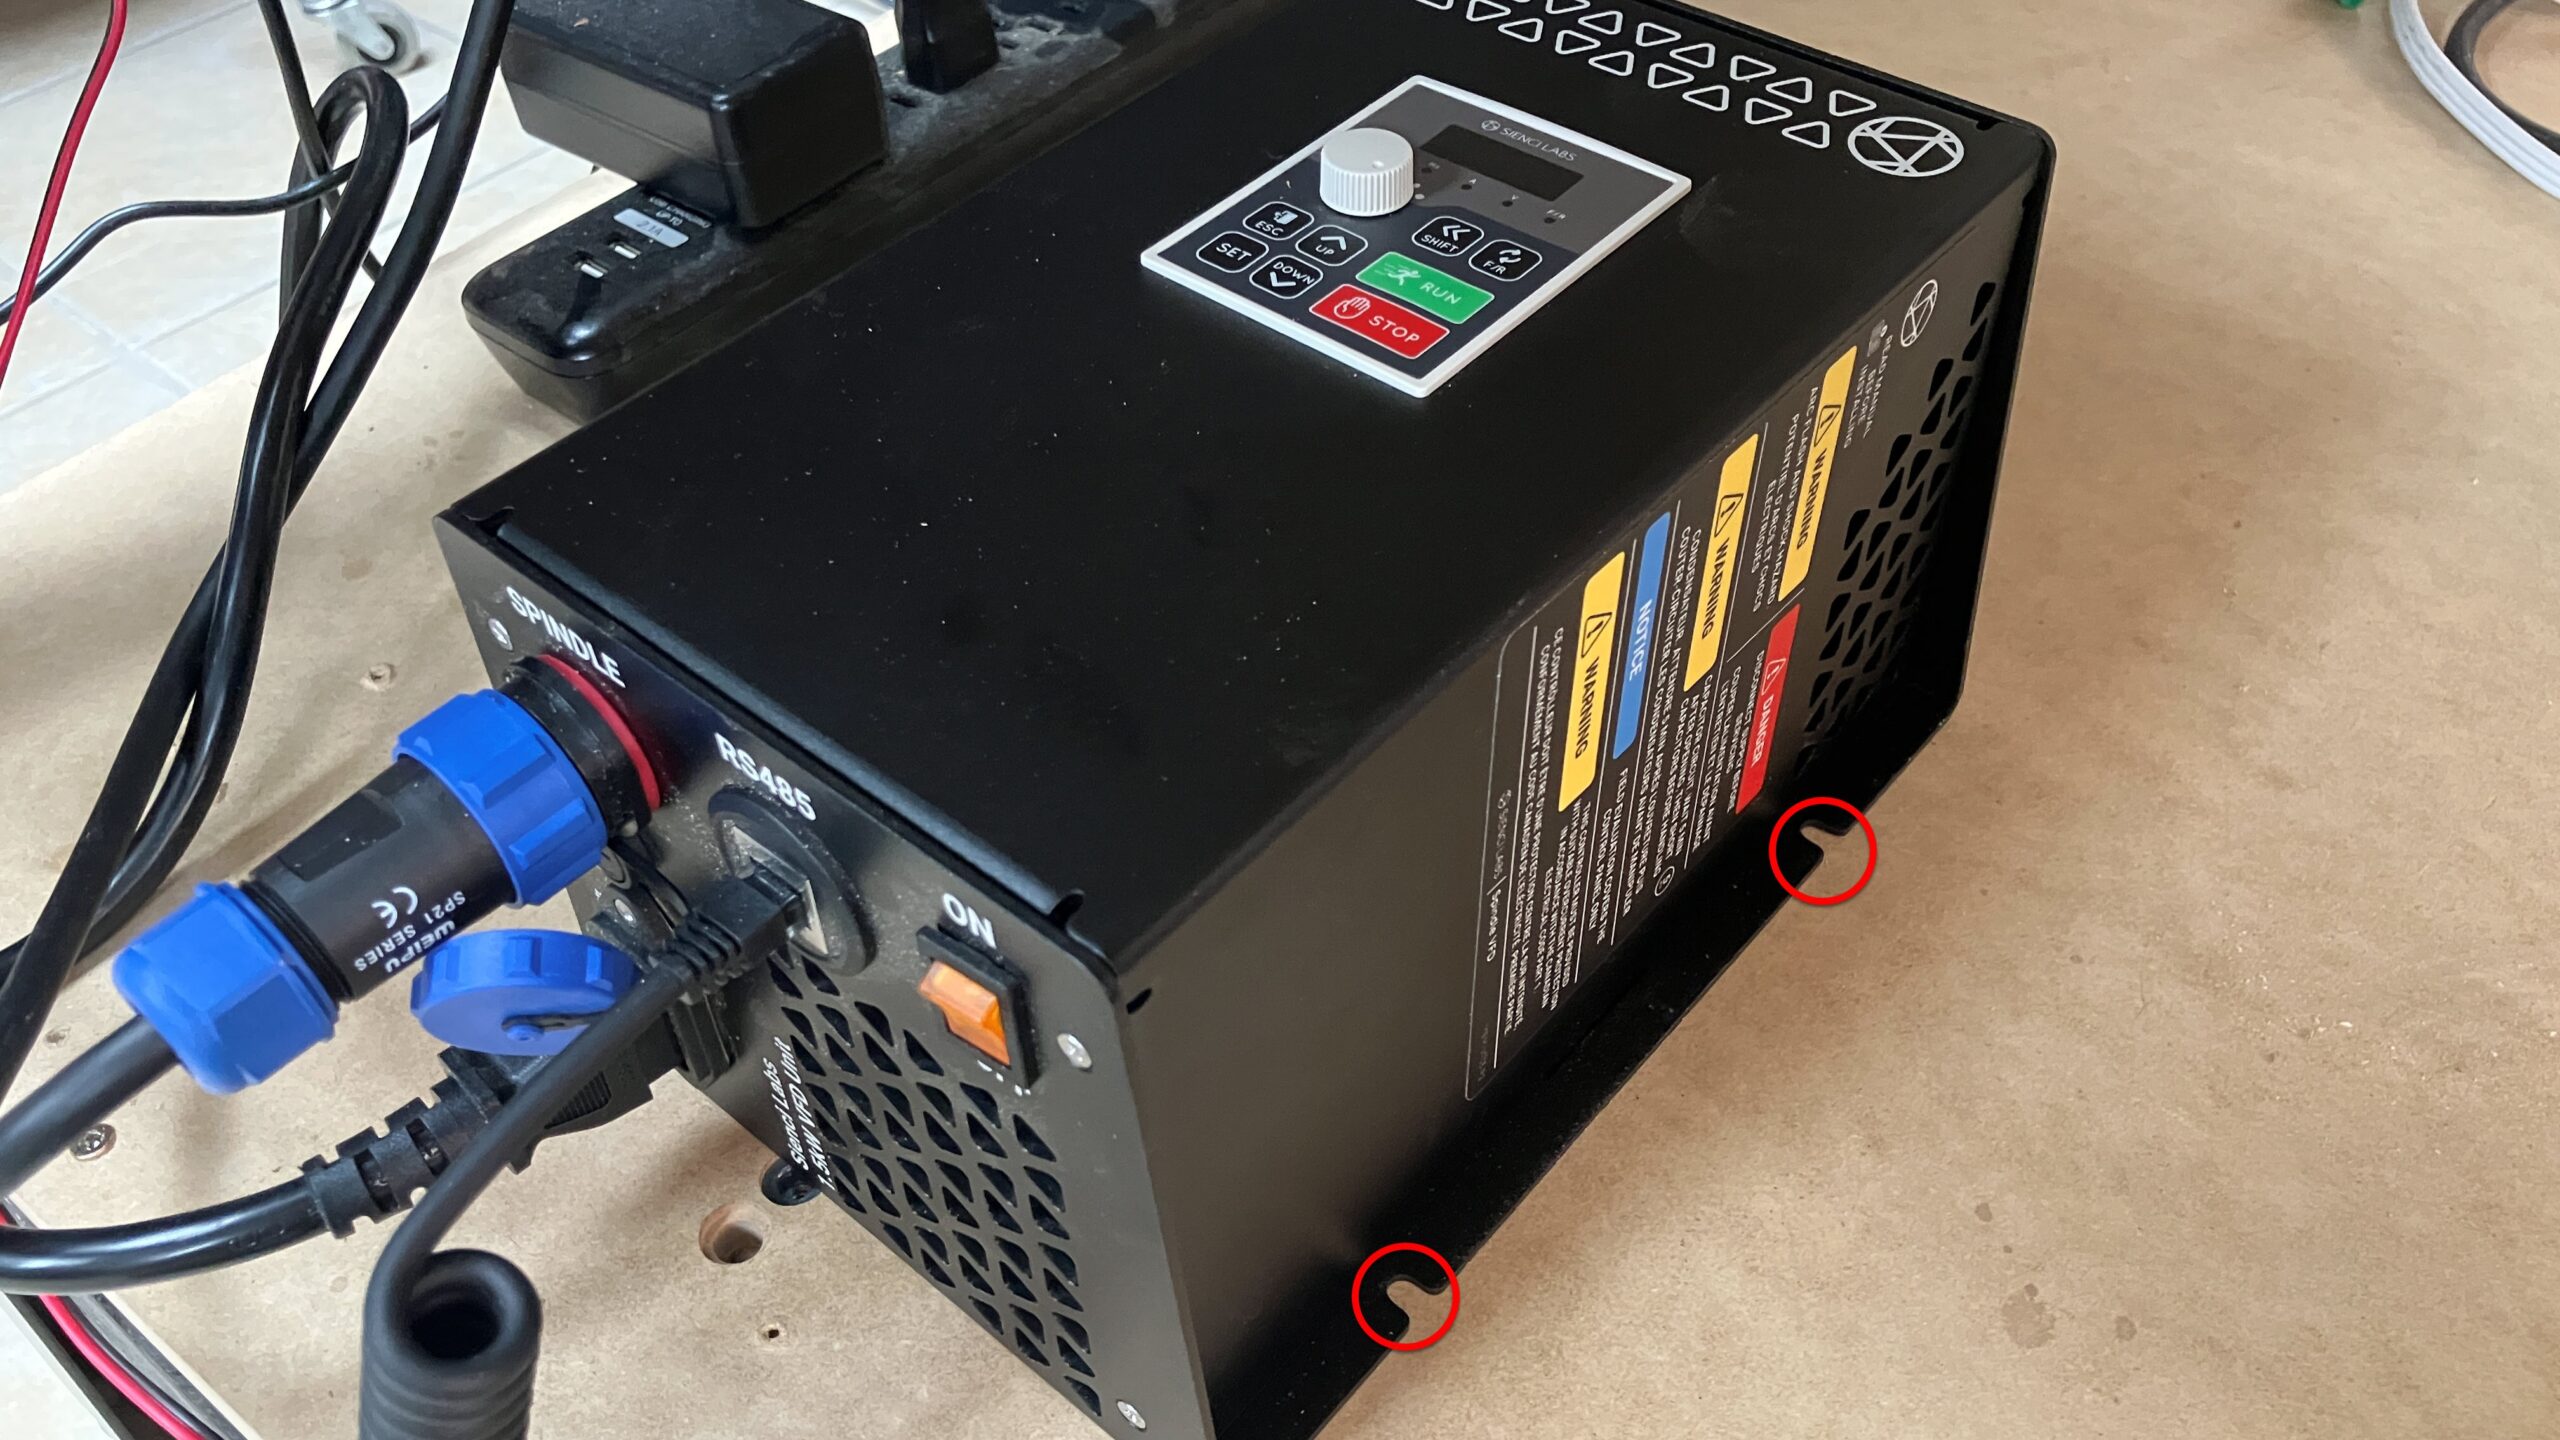
-
Plug in the spindle cable into the top of the spindle, again aligning the connector and then fastening the ring.
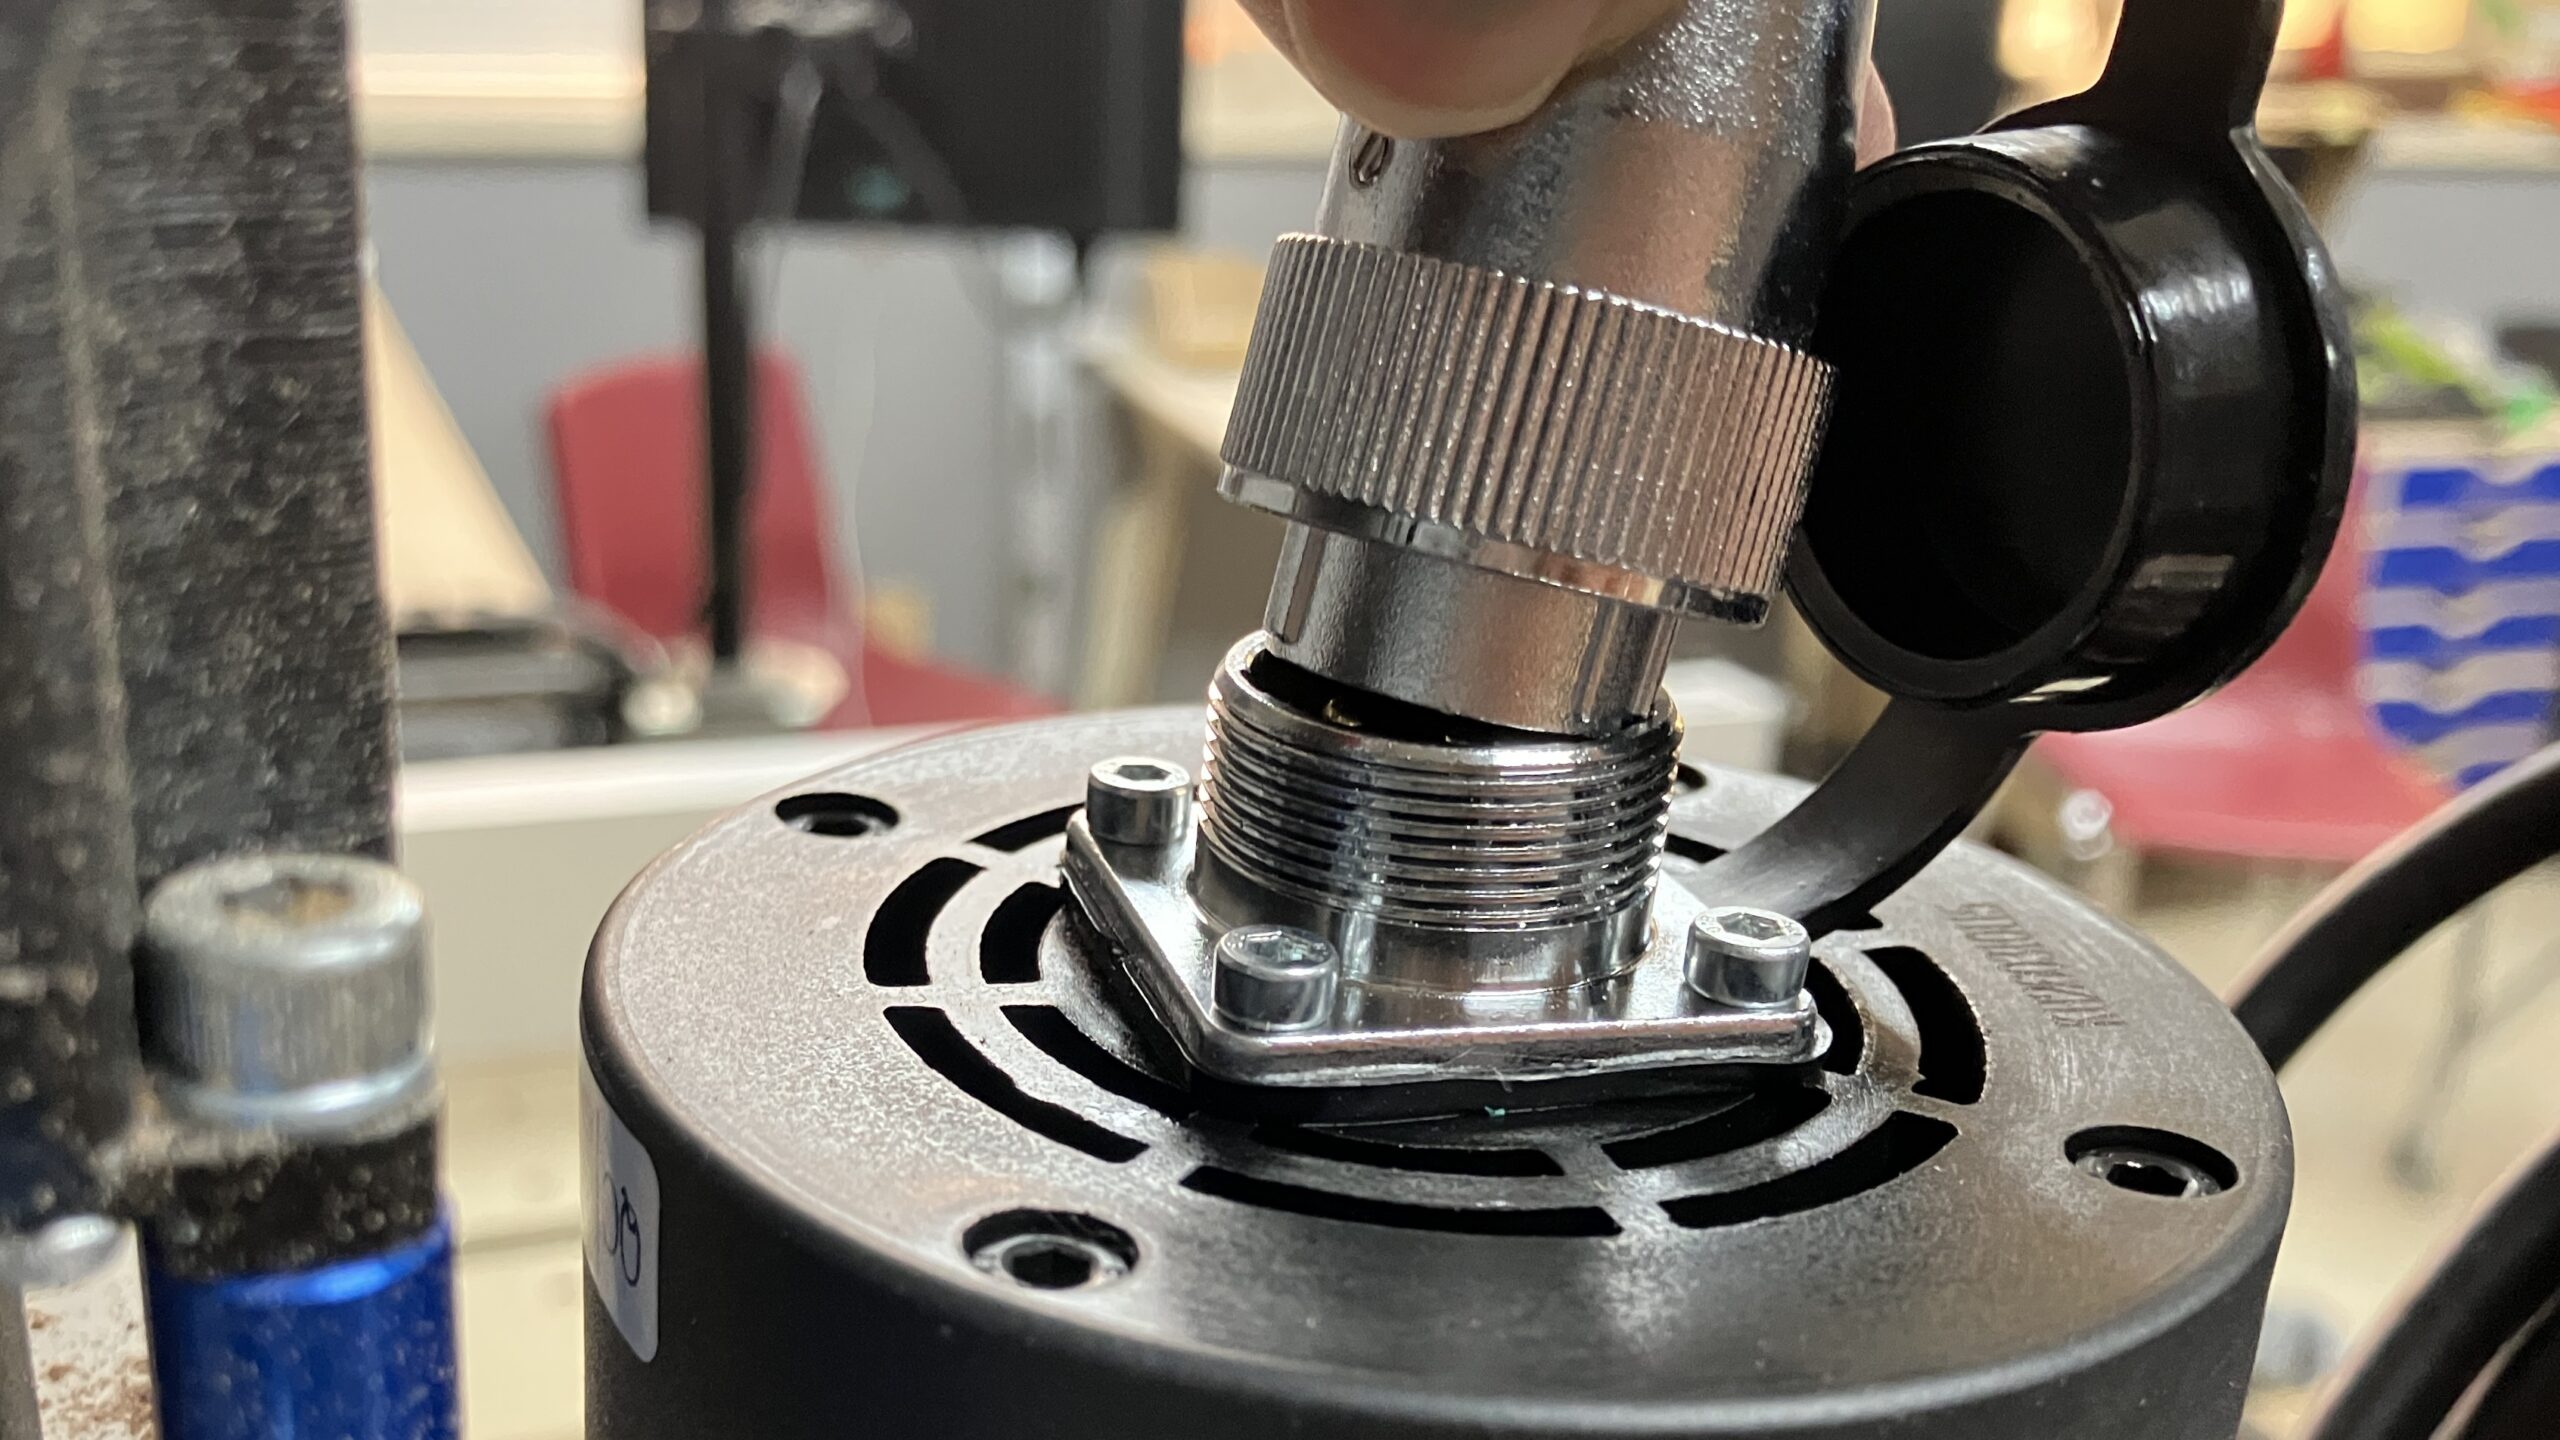
-
Plug in the controller cable into the SPINDLE port of the SLB-LITE controller.
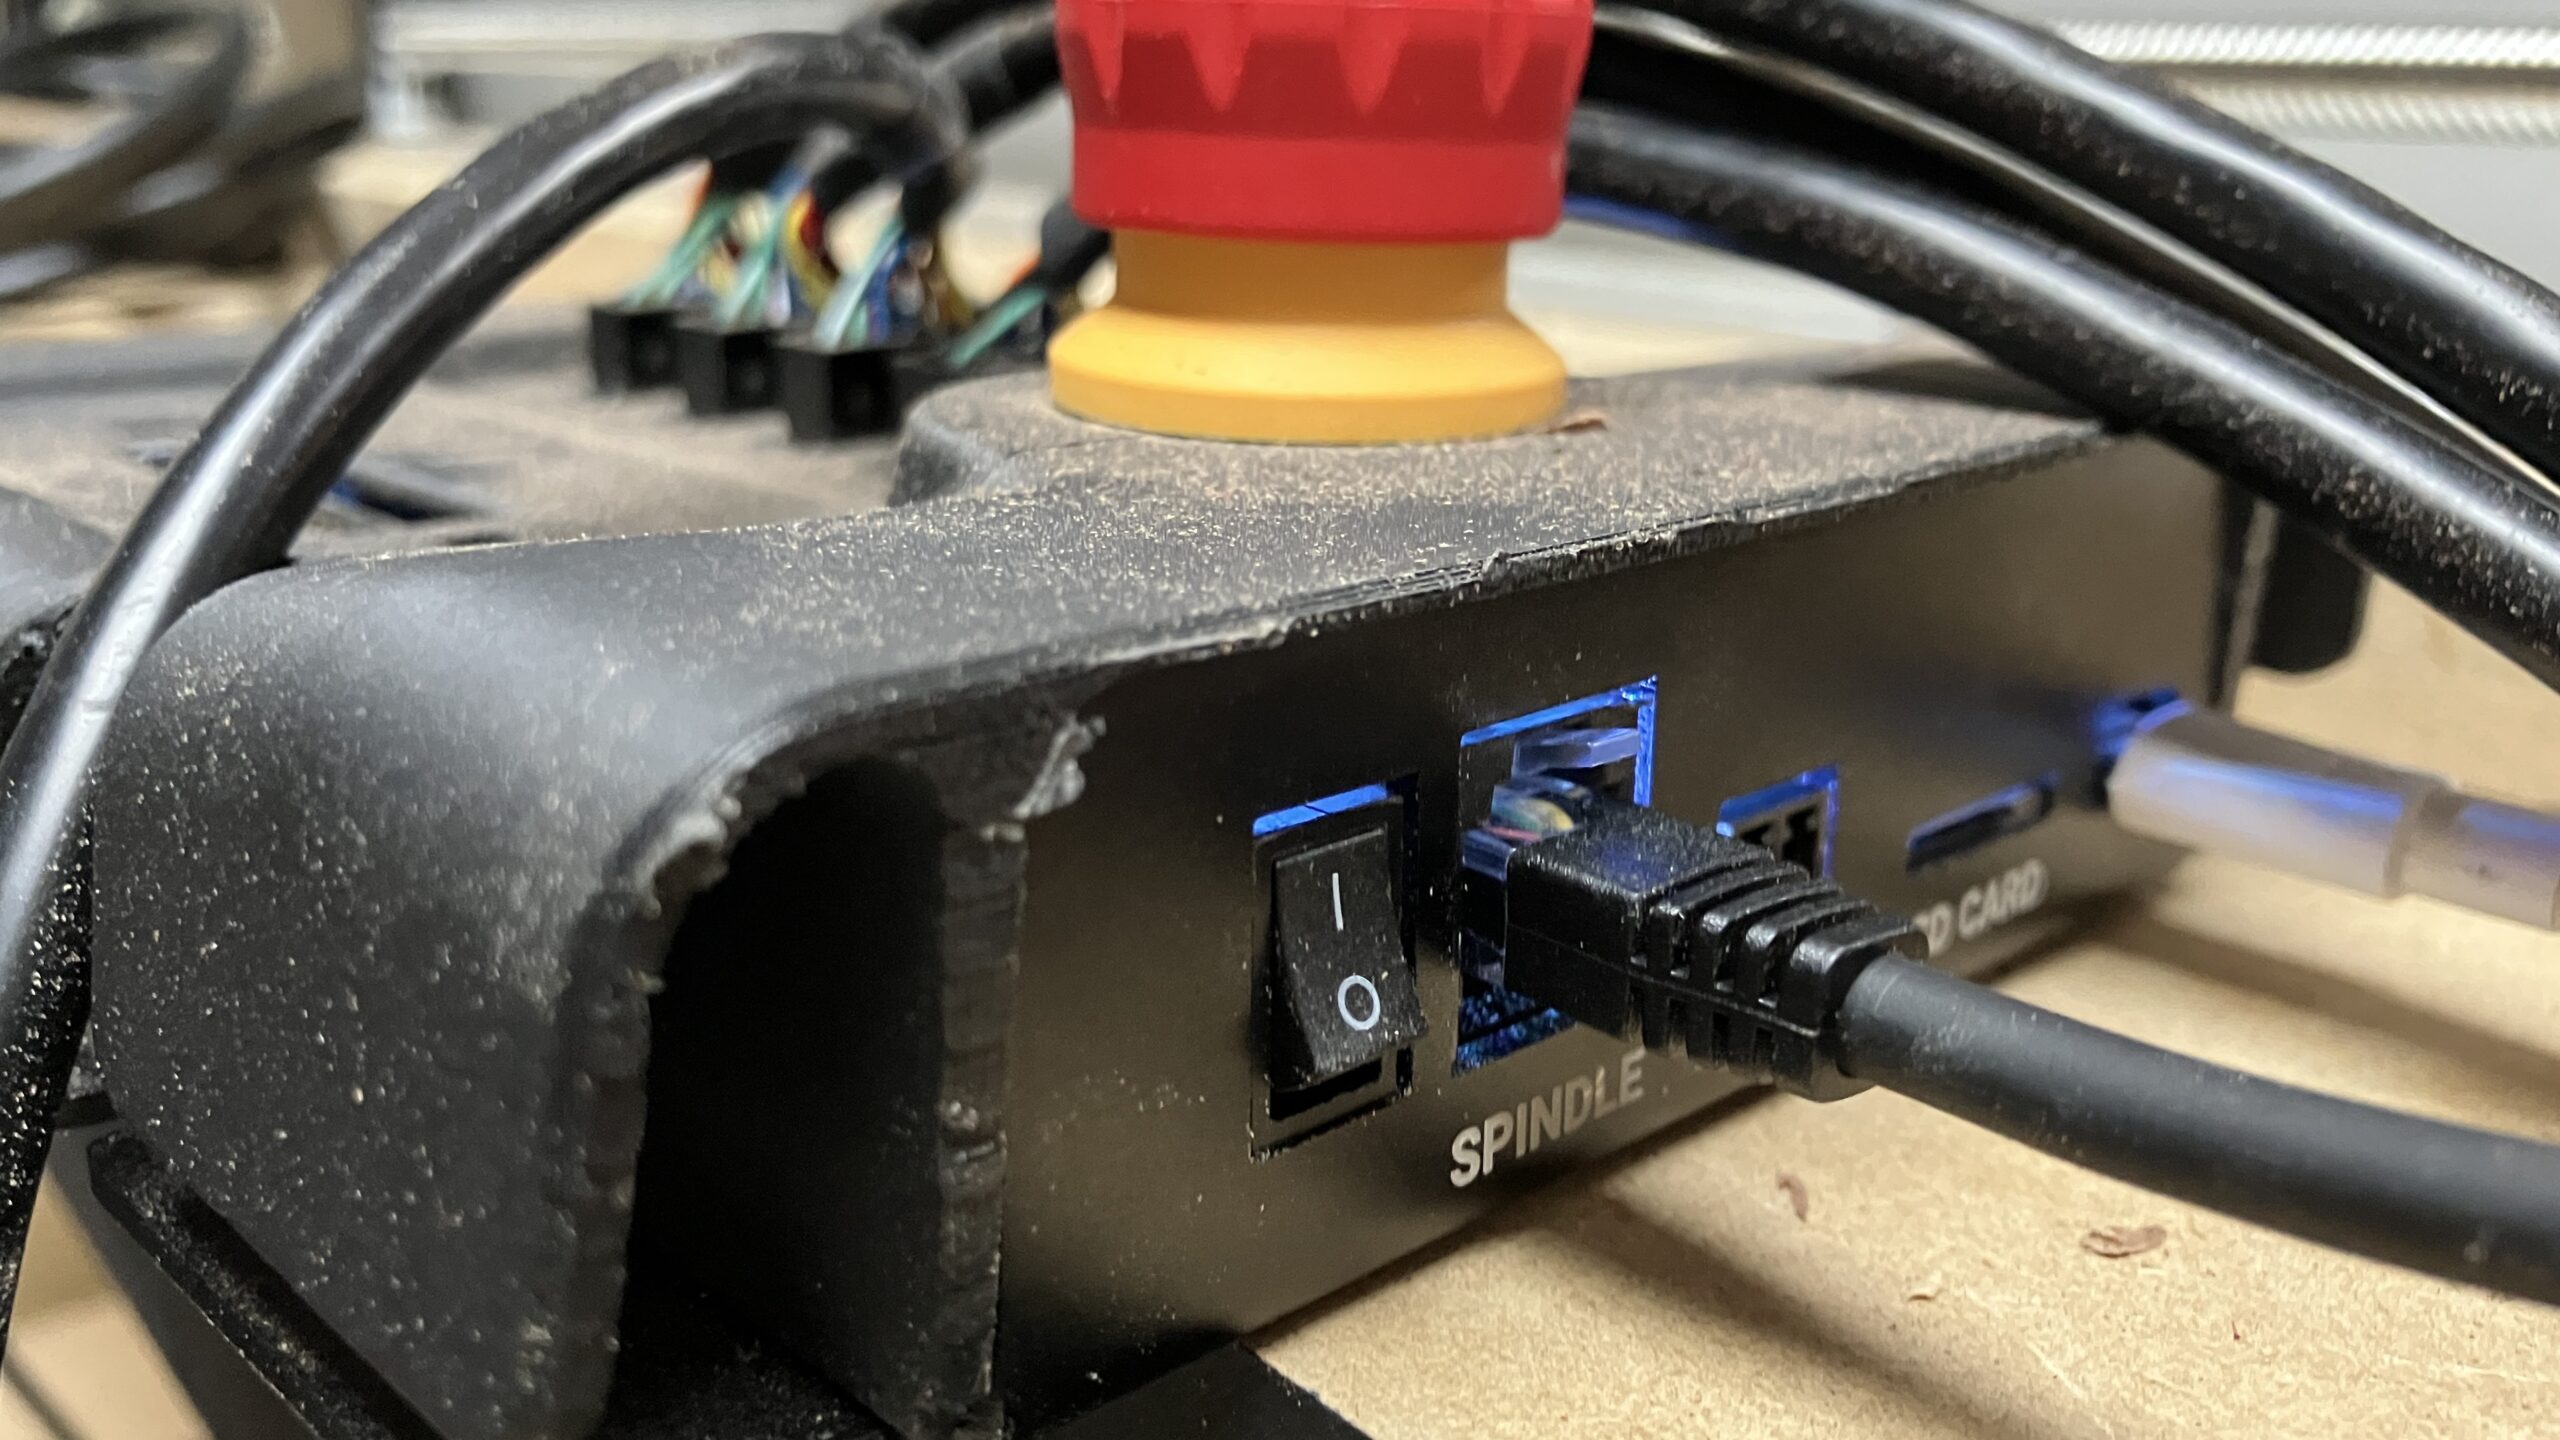
-
If your SLB-LITE is powered on, please turn it OFF now.
-
Plug the VFD power cord into your outlet, and turn on the power switch at the bottom of the VFD. The VFD screen should turn on and show H 100 then blink 0000.
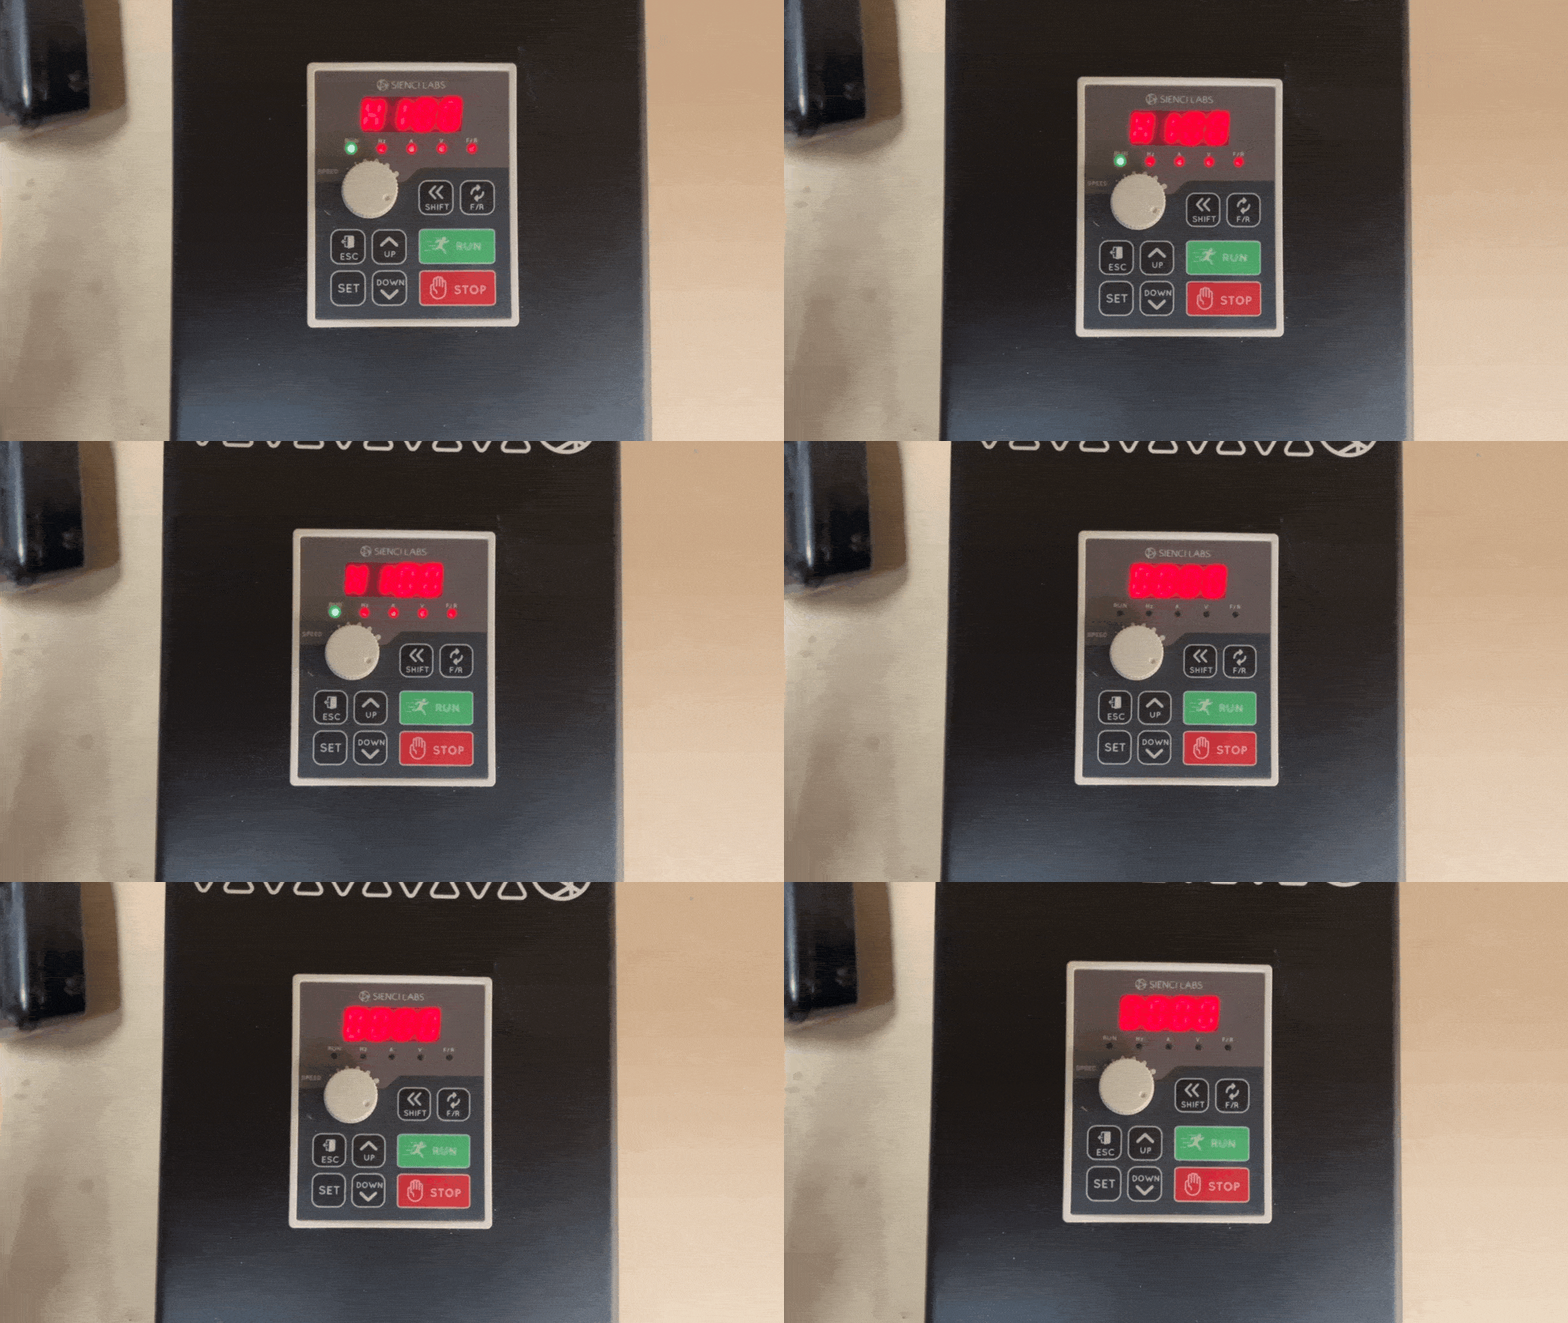
-
Now turn ON the controller using the power switch.
gSender Settings
-
Connect to the machine in gSender.
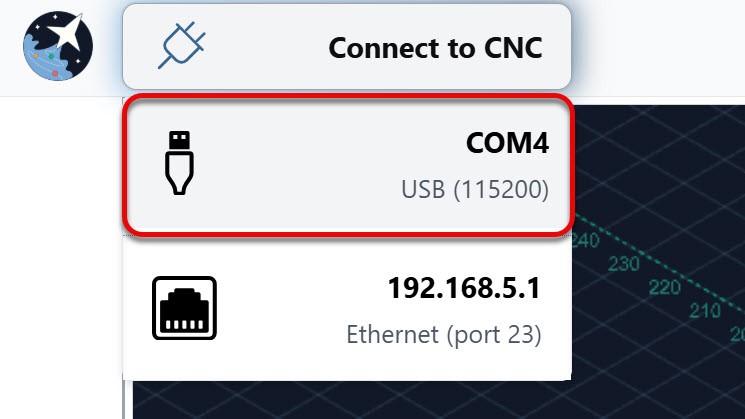
-
Go to Tools, then select Accessory Installation.
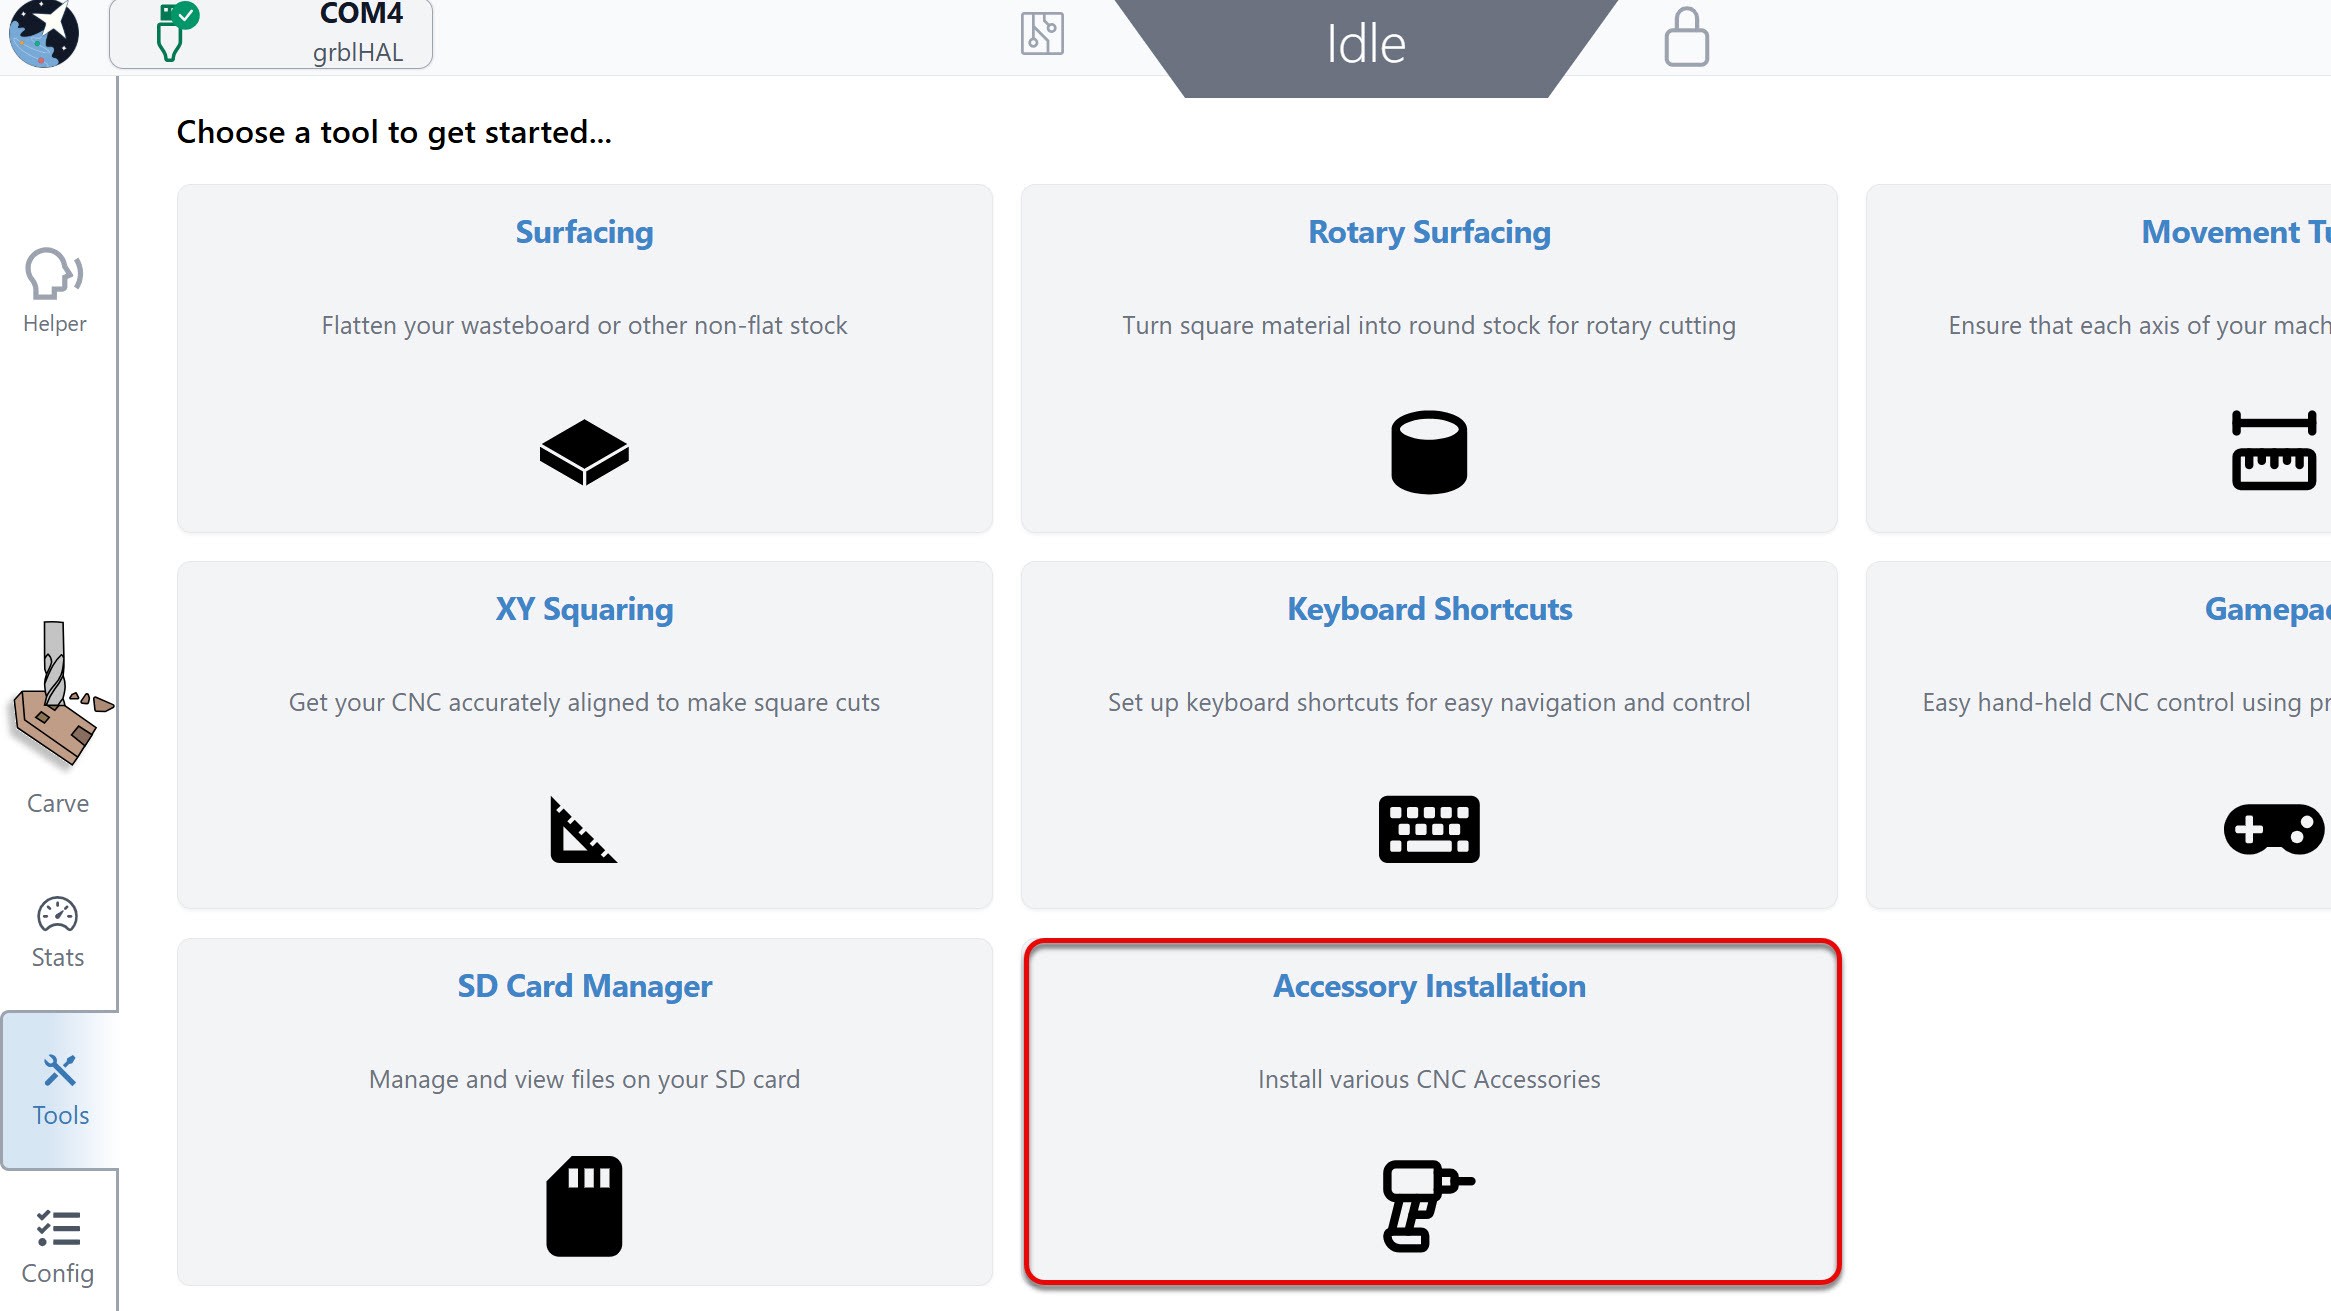
-
Select Sienci Spindle, then go through the installation wizard to finish setting up.
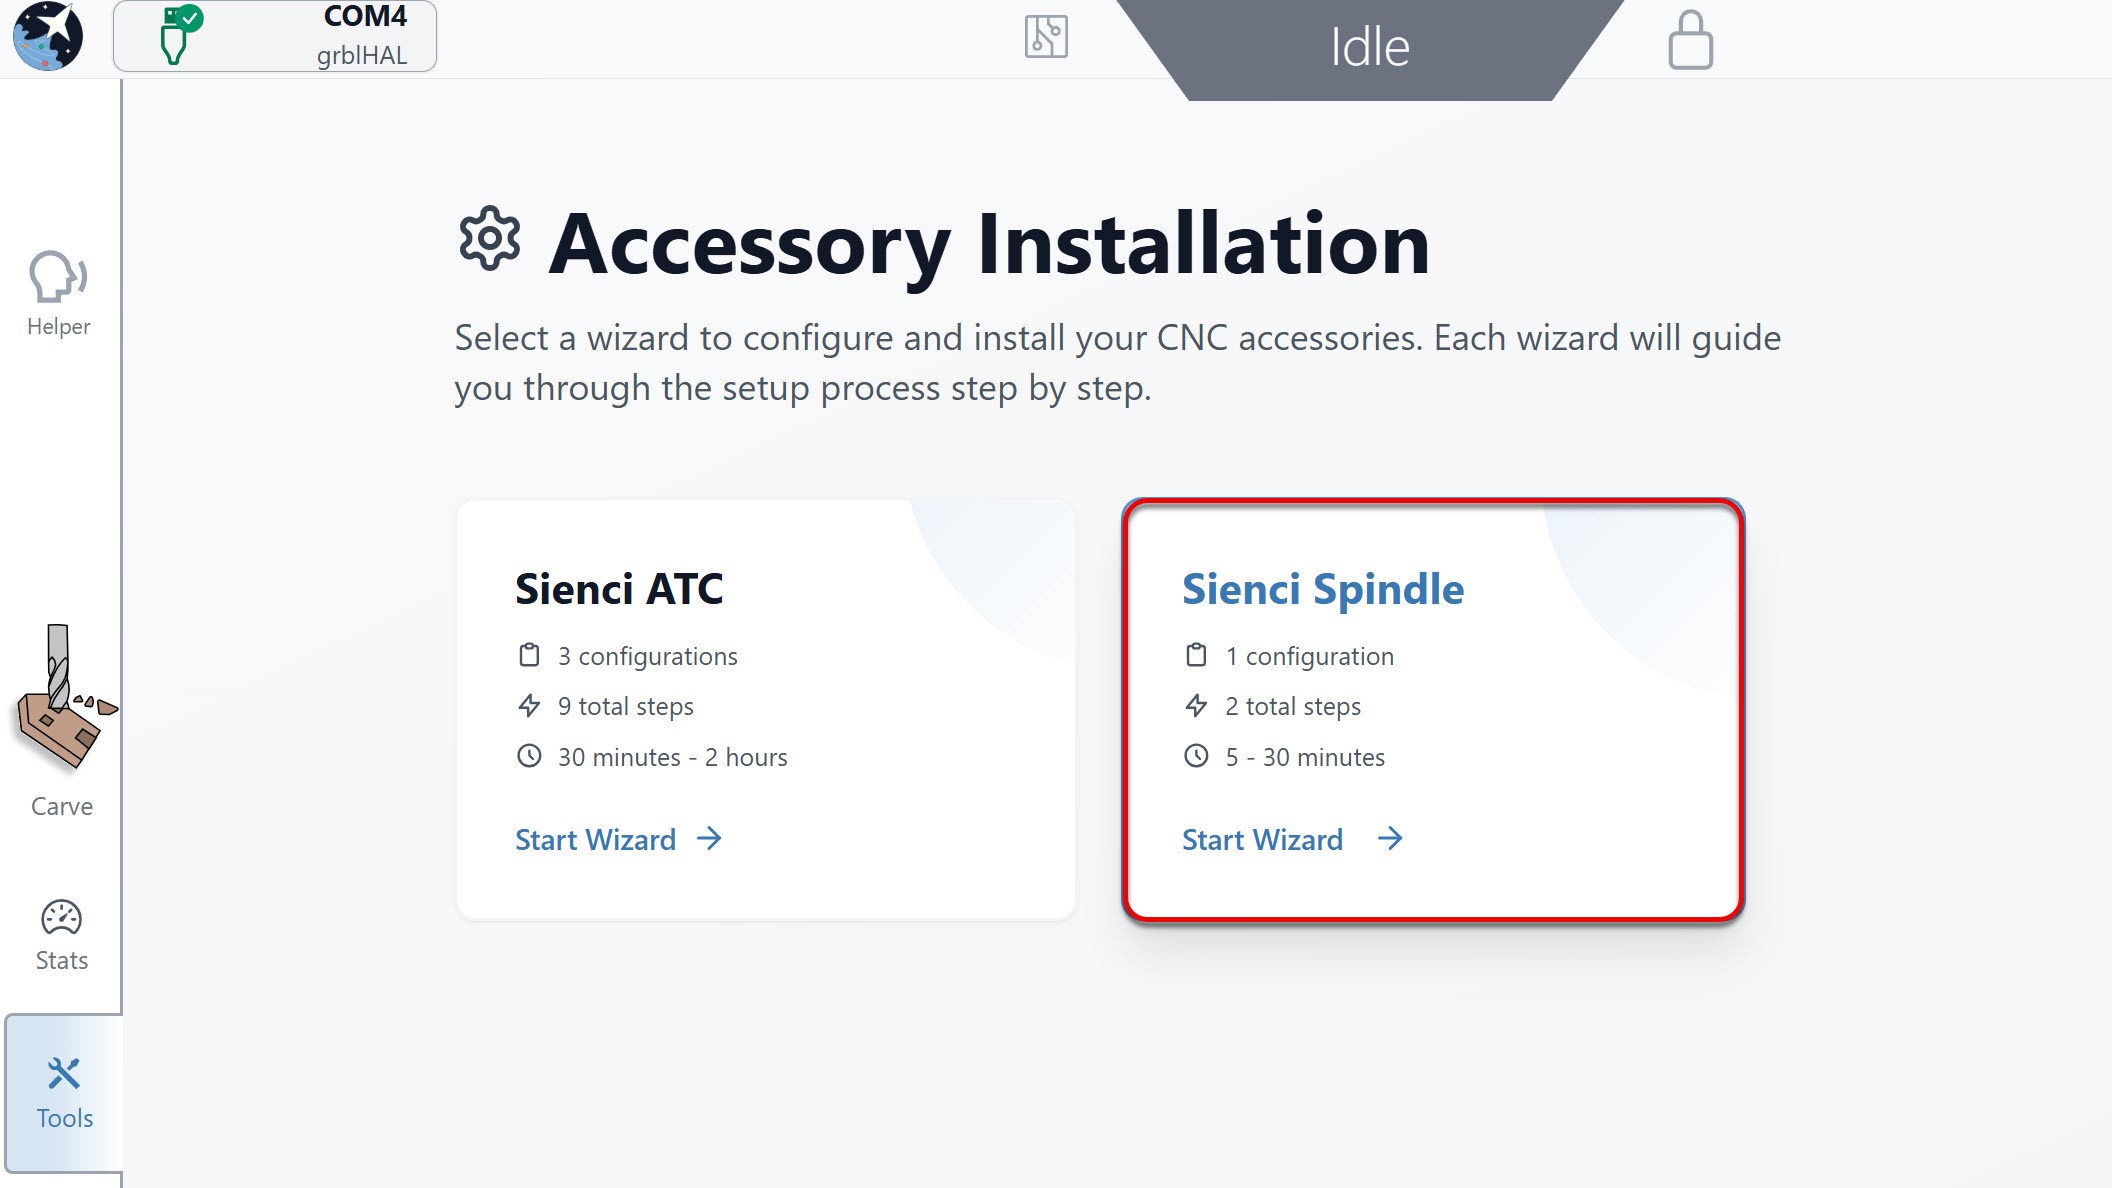
-
Once you completed the steps in the installation wizard, go to Config, to the Spindle/Laser section, and enable these functions by flipping the enable Spindle/Laser toggle to turn them ON. Don’t forget to apply your new settings!
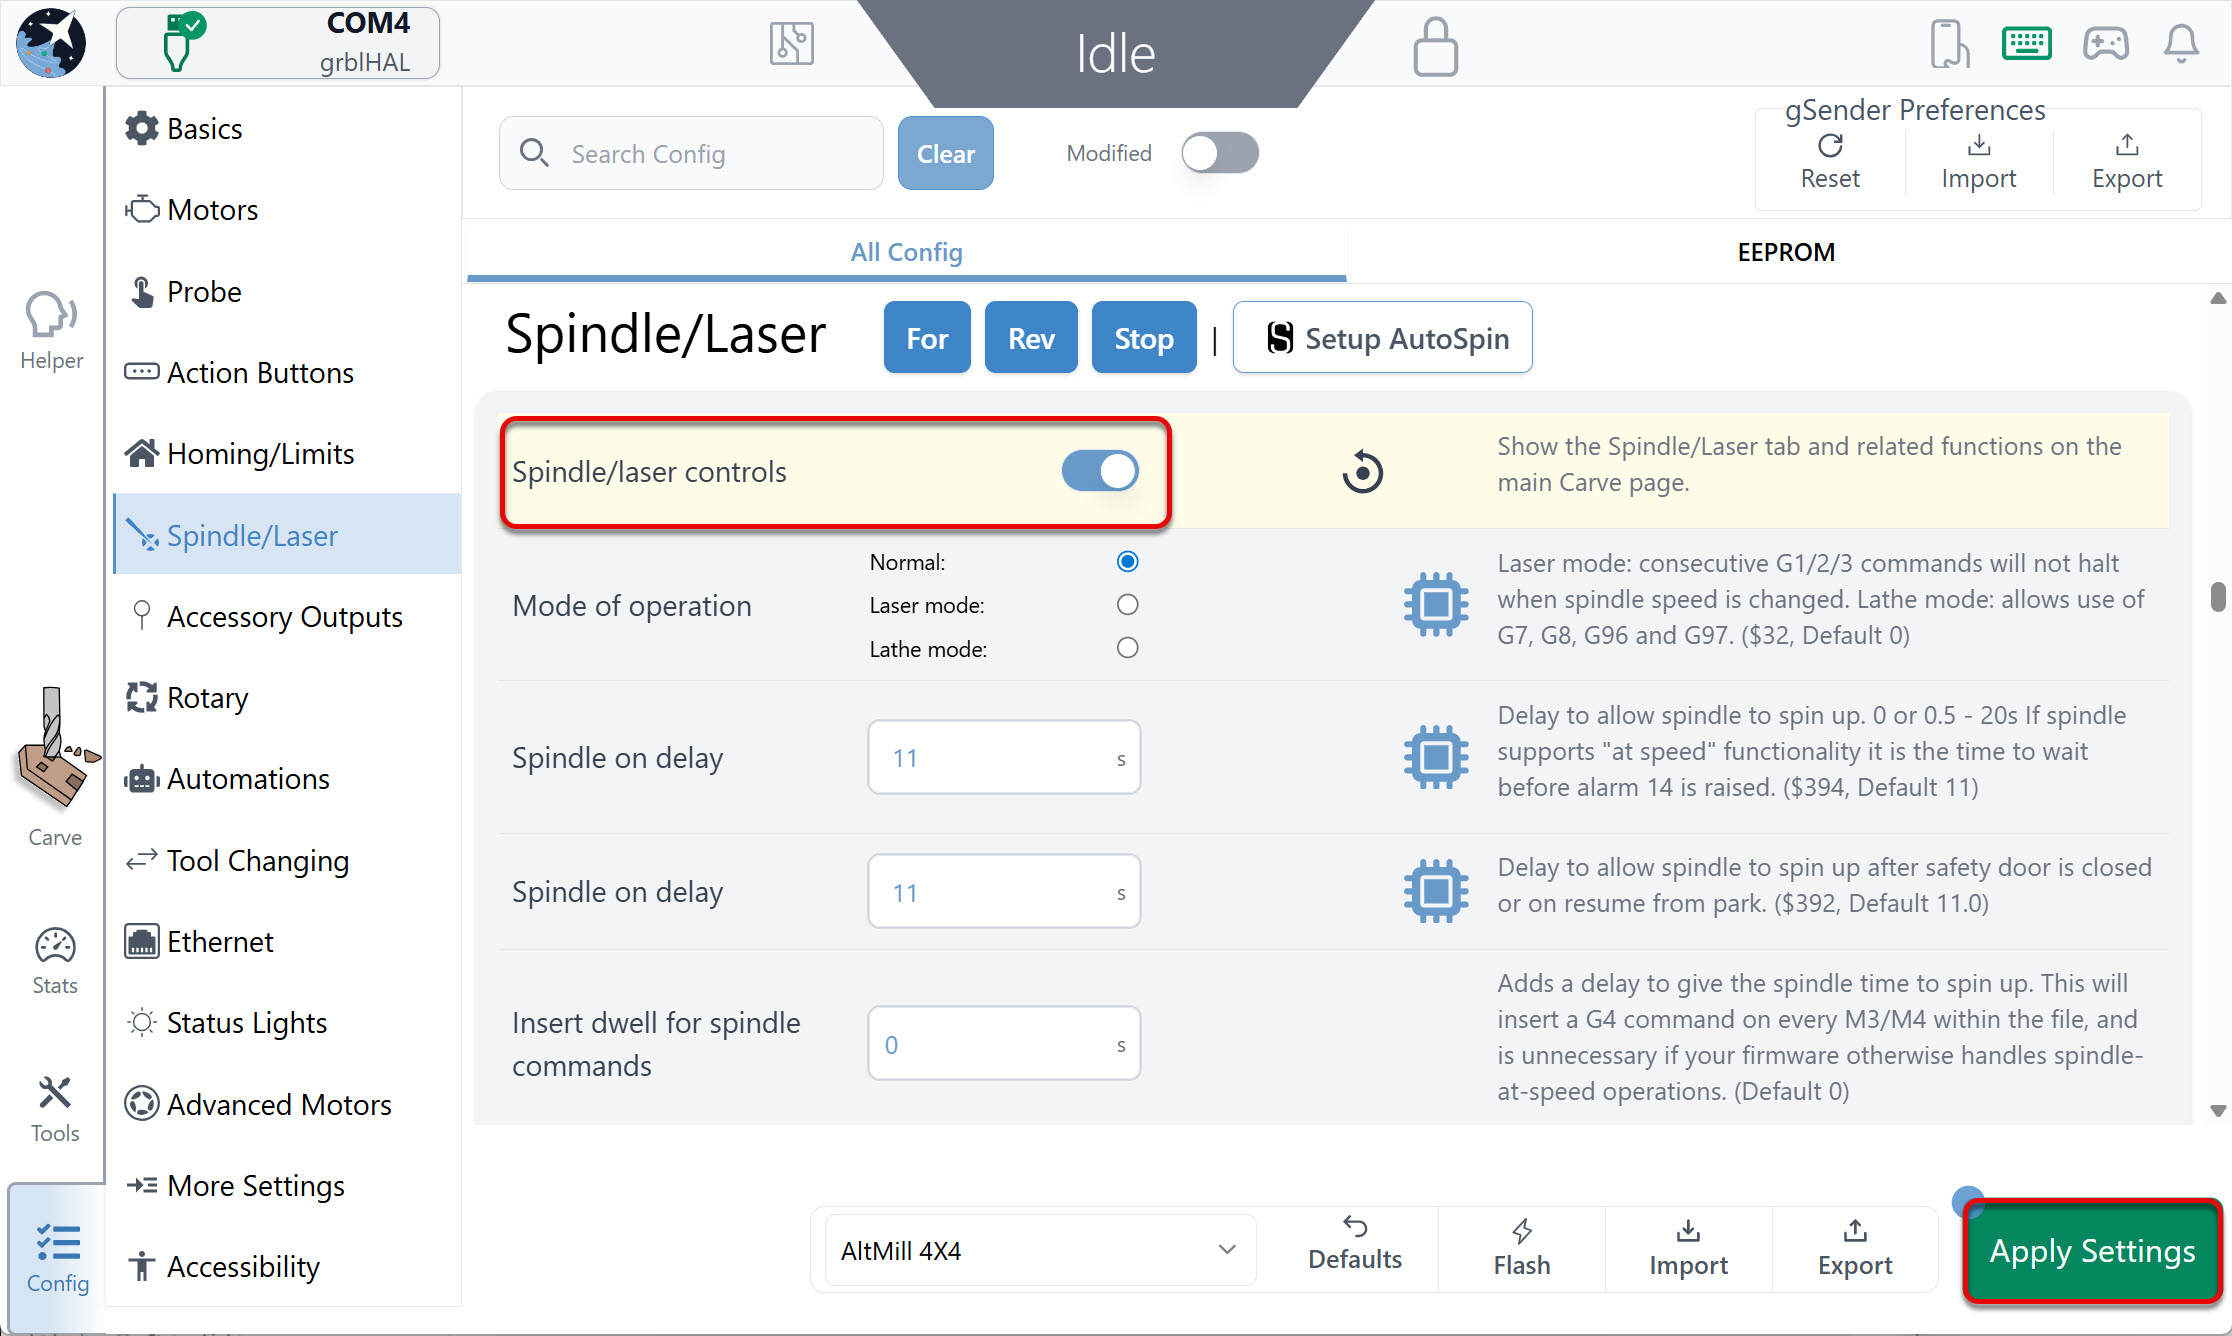
-
We will now reset everything so our changes can successfully take effect. Turn OFF the controller at the power switch.
Unplug the VFD from power.
Close gSender.
Then, turn ON the controller, plug the VFD back into power, open gSender and reconnect.
-
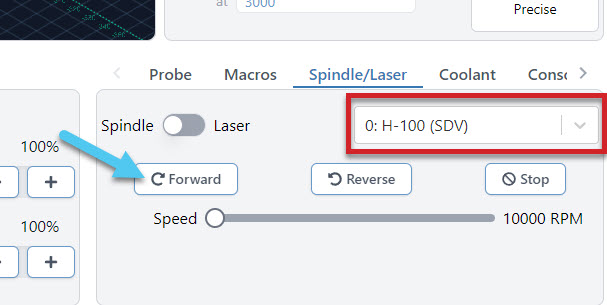
At the ‘Spindle/Laser’ tab, check that ‘H-100’ is selected. Then use the slider to the lowest speed, and press the ‘Forward’ button to test out the spindle. Check that it is spinning in the correct direction. Press the ‘Stop’ button to stop the spindle. You are almost ready to start CNCing with the spindle!
Finishing Up
Break-in Cycle
The grease inside the bearings may have shifted during transportation, it is recommended that you run a “break-in” cycle to redistribute the grease before using your spindle. To do this, you can download and run the g-code file below on gSender, which will take 1 hour 40 minutes to run.
Sienci 1.5kW Spindle Break-in gcode
To run the file connect to gSender and press ‘Load File’ at the bottom left corner. Select the file and you should see a ‘Start’ button appear, go ahead and click that.
Further Learning
For more information on how to change your collets and run a job with your spindle, check out our quick start guide!