
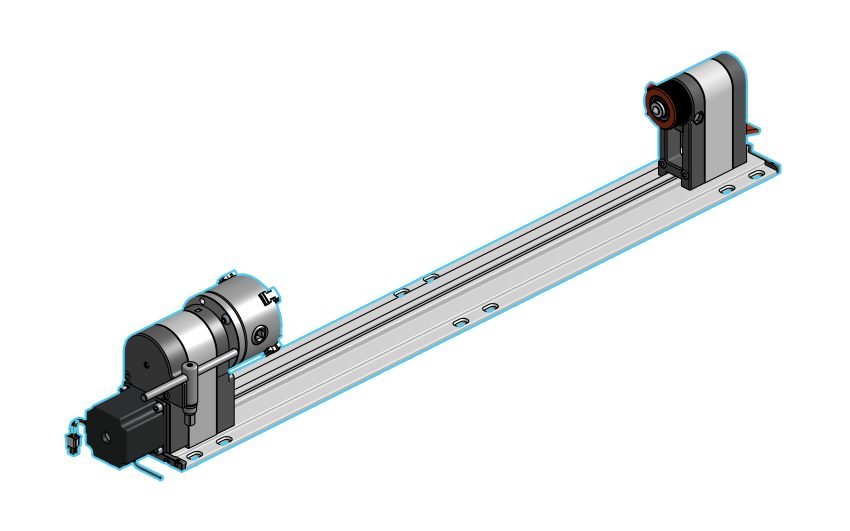
Now it’s time to mount both the headstock and the tailstock onto your track(s). This will take about 10 minutes.
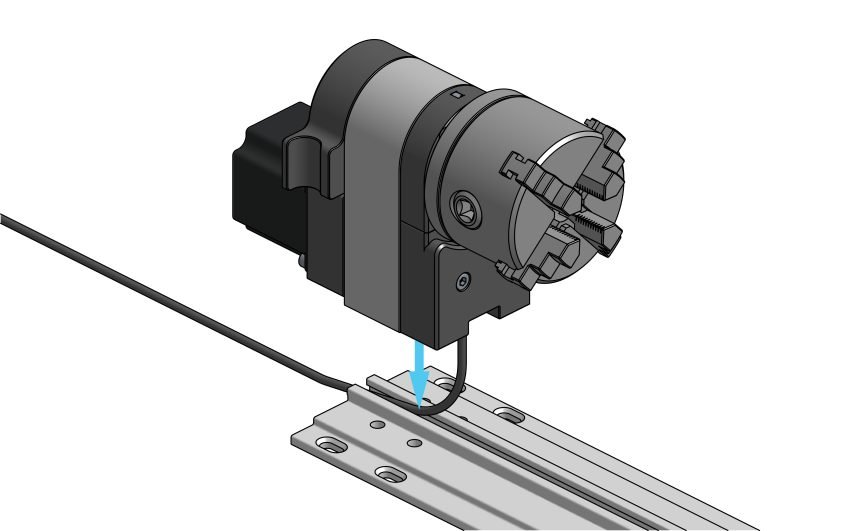
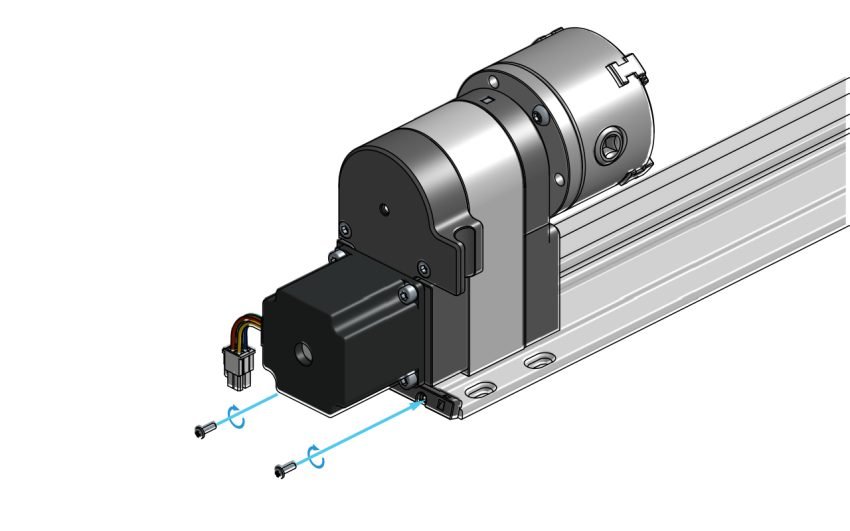
Find the side of the main track with the four machined holes (not slots) on top. Ensure that you seat the wire in the track groove before mounting the headstock. The headstock is simply pressed onto the track to be seated, you don’t need to slide it on.
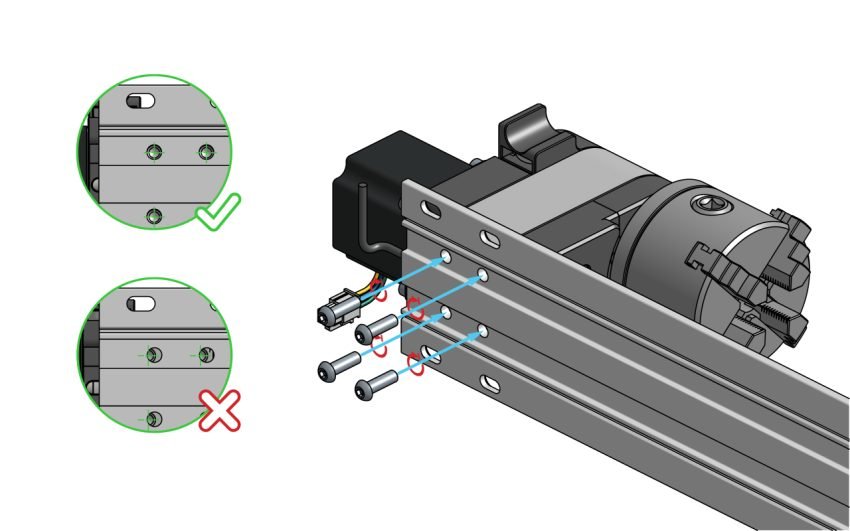
Align the holes on the track with the four mounting holes at the bottom of the headstock.
Use the four M6 bolts to secure the headstock onto the track.
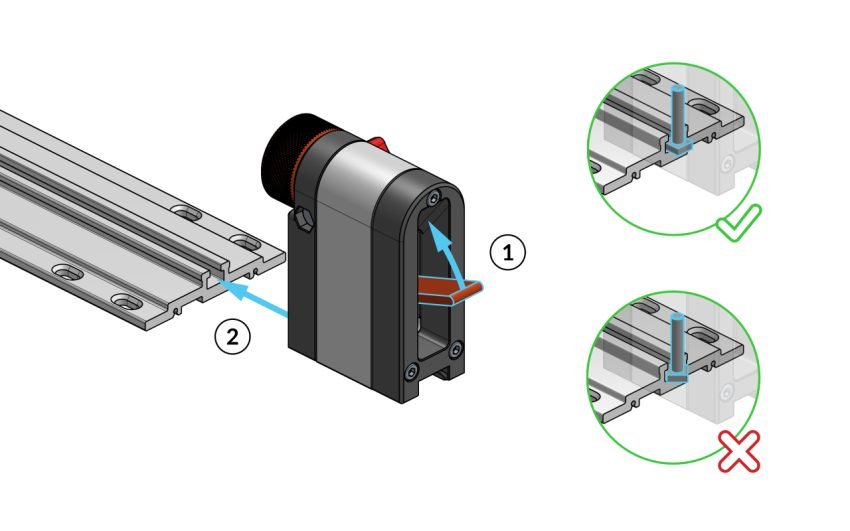
Hold the cam handle up and adjust the M6 square head bolt so that it’s sticking out slightly past the bottom of the tailstock and square to the track. Try sliding the tailstock onto the track with the lever up. This will be a bit tight when first installed, but will slide smoothly over time.
Ensure that the head of the bolt properly aligns with the slot in the track. If it doesn’t slide on make sure it’s square to the track and has enough space to fit under the rail.
This can be a tricky step, so hang in there!
Final Check
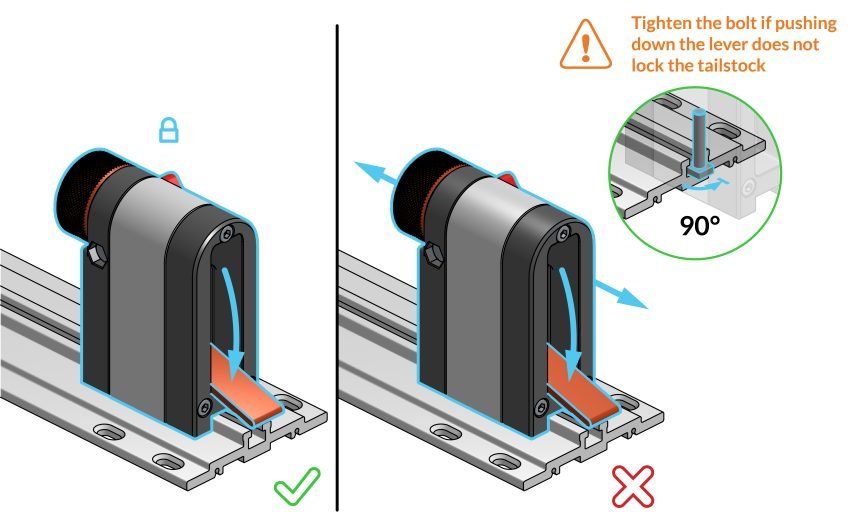
Once the tailstock is on the rail, push the lever down to tighten it. If pushing the lever down doesn’t secure it firmly, tighten the bolt.
Alternatively, if the lever doesn’t go all the way down, loosen it.
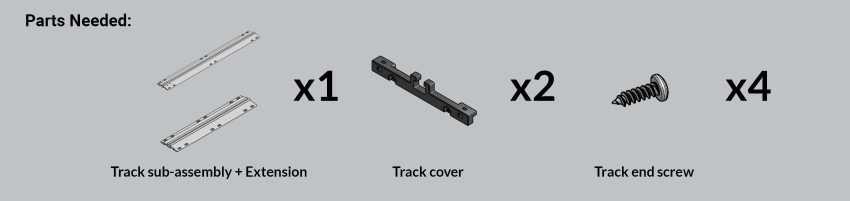
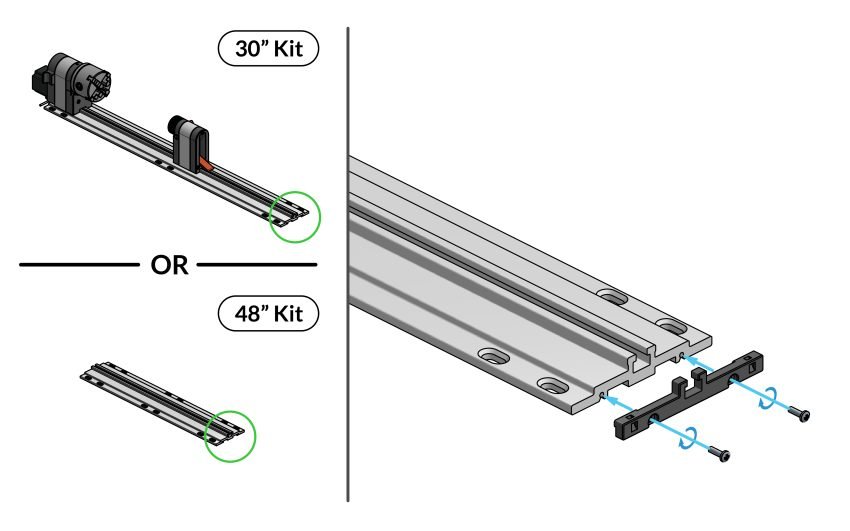
Secure the track cover onto the tailstock side of the track using two track end screws
If you have the extension track, secure the track cover onto one side of the extension track.
Secure the final track cover onto the headstock side of the track using two track end screws. If you find difficulty fitting the cover in between the track and the motor, loosen the four bolts underneath the headstock and reposition the headstock further to the left (away from the tailstock) before trying again.