Your Mill One occupies a volume of approximately 17″ x 17″ x 11 ⅞” (430mm x 430mm x 300mm) and has a cutting area of approximately 9 ¼” x 7 ¼” (235mm x 185mm) in the x/y axes. The cutting depth that you can expect in the z-axis will completely depend on the length of the bit that you install in the router, with the maximum height between the cutting platform and the router being about 4″ or 100mm.
Assembly instructions for the Mill One can be found here: Mill One V3 assembly manual (revised 10/10/2018).
Contact us or consult the Mill One Facebook group if you need any assistance along the way. The tools required to assemble your machine are:
- 8mm wrench
- Small, flat head screwdriver
- Size M3, M5, and M8 Allen keys
If you need a more visual guide on how to assemble the Mill One, we created assembly videos for version 1 of the machine. Some steps in the assembly will differ due changes in design between versions 3 and older versions of the Mill One. The assembly manual for older versions are here (Version 1), and here (Version 2).
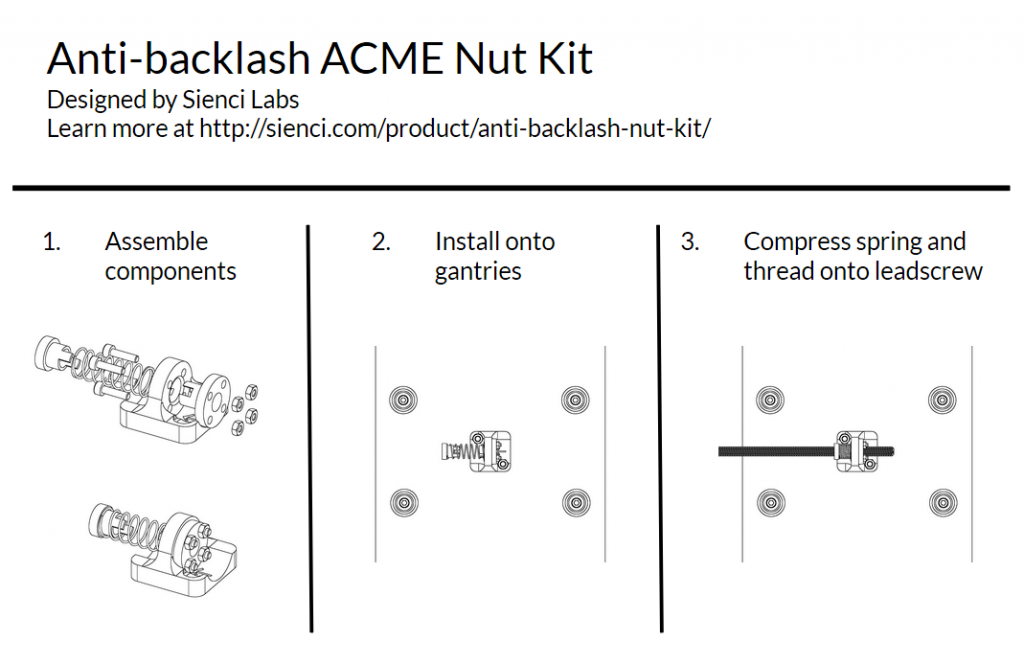
If you ordered an Anti Backlash Nut Kit with your Mill One, instructions on assembling them can be found on the sticker on the package, and substitute them for the stock nuts found on Steps 1-3 in the assembly manual.

We hope that you enjoy following through our manual as much as we enjoyed making it.
