
The LongMill project is at its core an open source project. Many of its design choices, from sourcing as many off the shelf parts as possible to our choice in CAD software, comes down to making this project as replicable and well-supported as possible.
We believe that by making this design open source, we will be able to drive the CNC community forward through sharing and improving CNC technology. The idea is for:
- Users to modify and improve their machines to fit their needs
- Machine owners to share their designs with the community to help others that have similar needs
- Makers to use our design ideas and design philosophy to create other types of machines, such as laser cutters, plasma cutters, and 3D printers
- Us to gain inspiration from the community to help us guide our development of current and future products and features
License
This is accomplished by putting the project under a Creative Commons BY-SA license:
- The entire mechanical design of our LongMill Benchtop CNC available in a range of 3D file types and as drawings where applicable
- Any internal assembly jigs and other supporting hardware for the LongMill
- Documentation of general manufacturing techniques used to produce the LongMills various custom components including general 3D printing settings
- All educational information provided within the LongMill Resources area including machine assembly instructions and modifications
- The mechanical BOM which documents all the components required to build a LongMill
- Every aspect of the electrical design behind our custom LongBoard CNC controller including BOM, schematics, gerber file, etc.
and by sharing the LongMills modified firmware profile, a small modification of the grbl open source project, under the GPLv3 license just as the original project is.
All this information is continually updated as the LongMill project continues to be revised, with more openly shared shared information being made available at each new major revision and licensing continuing to be applied to all previous major versions. By making this information available, the LongMill project fulfills the Open Source Hardware Association’s definition of open source hardware, and we think that’s pretty cool 🙂
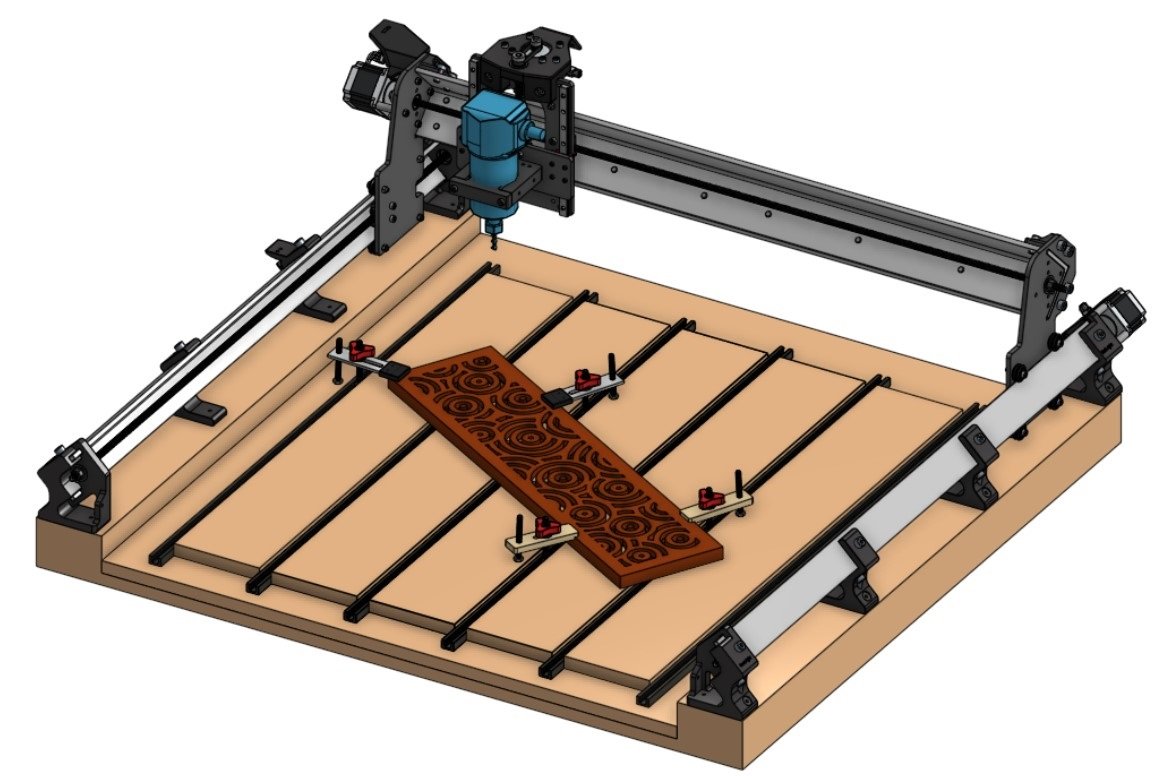
LongMill CNC
The LongMill has gone through four major iterations of its design:
- V1 was our Kickstarter batch which was shipped from September 2019 to mid-January 2020.
- V2 came with some additional improvements and shipped March 2020 to August 14th, 2020. These changes were mostly process/QA related or were fixes that we implemented to make assembly and packaging easier on our end. The only noticeable improvements made for the end user is the steel vs. plastic ‘arm’ (which really only comes into play during assembly), the longer motor cables, the improved control box (where the primary improvement is the ability to now fasten it down easily), a new LongMill wrench shipped with the machine and better hole clearances.
- V3 introduced even more quality of life improvements such as packing more spare hardware, changing to a new motor connector that ensures more reliable connectivity between the stepper motors and the LongBoard controller, and adding mounting holes for our new dust shoe design. The biggest change with this version were the tweaks to the LongBoard controller which brought a detachable E-stop switch to control power to the box, a top-mounted LED to better indicate power to the board, and some tweaks to the input circuitry so that it could be run a bit more reliably. V3 shipped August 14th, 2020 to November 3rd, 2020.
- V4 was a smaller step in development. Other than introducing the new motor connector as a carry-over from V3 and making a number of small tweaks to hole placement, sizing, drawings, slotting, and removing some legacy features there was nothing too exciting noticeable to LM users, as most changes were made to benefit manufacturing reliability. V4 shipped November 23rd, 2020 to January 11th, 2021.
- V4b has been our step towards a more scalable manufactured LM, bringing along some new parts being sheet metal rather than 3D printed (shoulder brackets and drag chain mount) as well as more improvements to process/QA for more reliable production and easier assembly. Later V4b machines also came with improved hardware bagging and a new, thicker 65mm router mount for added rigidity holding onto the router body. V4b began shipping January 11th, 2021.
You can find the designs of every part and assembly of every version of the LongMill Benchtop CNC in the linked Onshape documents below:
BOM of every version: https://docs.google.com/spreadsheets/d/1MqOwPg3VSUTMtn3ff6rXjfvliAWnFqg8ez2eZasJLCE/
LongBoard CNC Controller
The LongBoard CNC Controller is the control system and brains of the LongMill. This board was designed by our friend Chris Hadjuk and the Sienci Labs team with KiCAD and has gone through many internal iterations resulting in the release of four major public revisions: 1.2, 1.3, and 1.4.2/1.4.3. The reason for combining 1.4.2 with 1.4.3 is that they are the same design but with a redundant trace removed. You can find the designs of every version in the form of gerber, assembly, schematic, and BOM files in their respective zip files below as well as a link to a more readable BOM for every board version if you’d like to source your own components.
BOM of every version: https://docs.google.com/spreadsheets/d/10HOJIfVh_pb41V6eJ3zf50yBgs8vmk5MnvHfNH4q9_Q
Other Add-ons
We also share a record of every part and assembly of every version of add-on that we’ve released alongside our LongMill CNC since the projects conception. Each of these designs can be found in the linked Onshape documents below:
Custom T-track can uniquely fit common 1/4-20 hardware, clamps can be cut from wood, and clamp ends can be 3D printed to replace them when damaged.
⭳ CNC the Wood Clamps (STL)
⭳ 3D print the End Caps (STL)
View, Copy, or Edit in Onshape
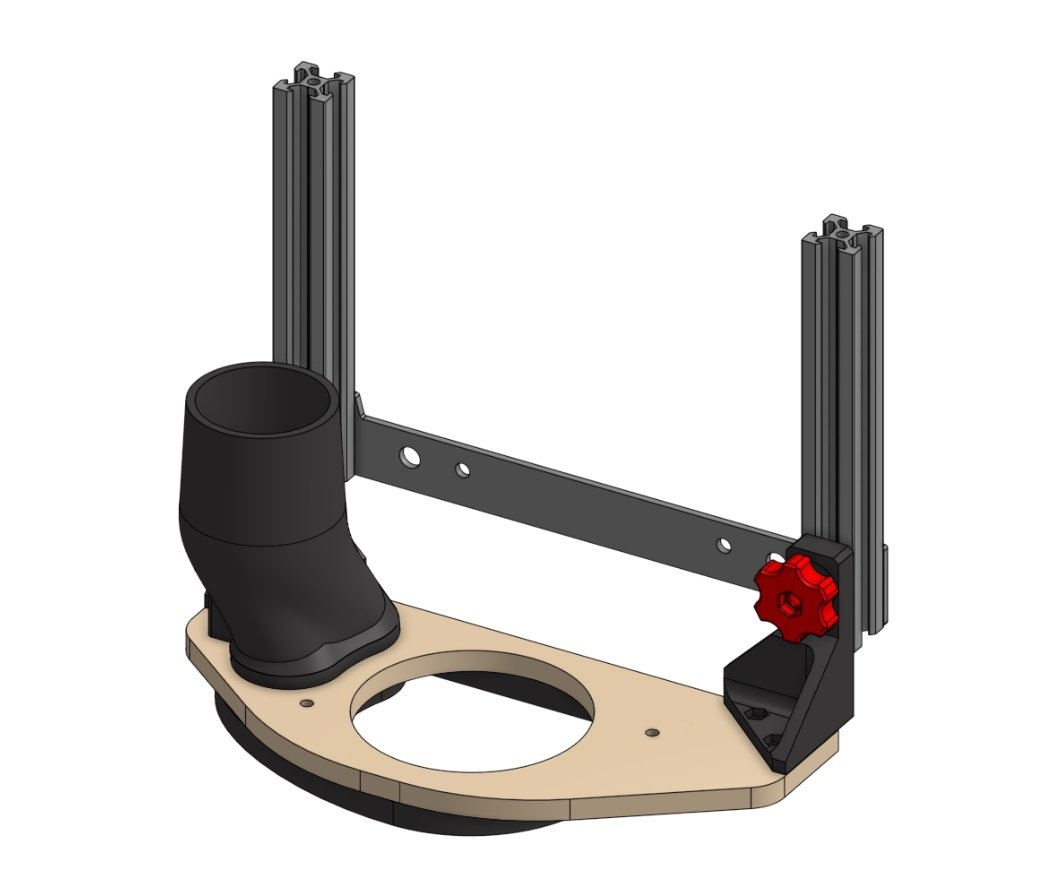
Adjustable-style dust shoe that allows for height adjustment and removal with the same set of magnets, just grab from underneath and twist off.
⭳ 3D print the Shoe Body (STL)
⭳ 3D print the Bristle Track (STL)
View, Copy, or Edit in Onshape

Uses 2020 extrusion and knobs to be able to set the height of your shoe based on the material you’re cutting.
⭳ 3D print the Hose Piece (STL)
View, Copy, or Edit in Onshape
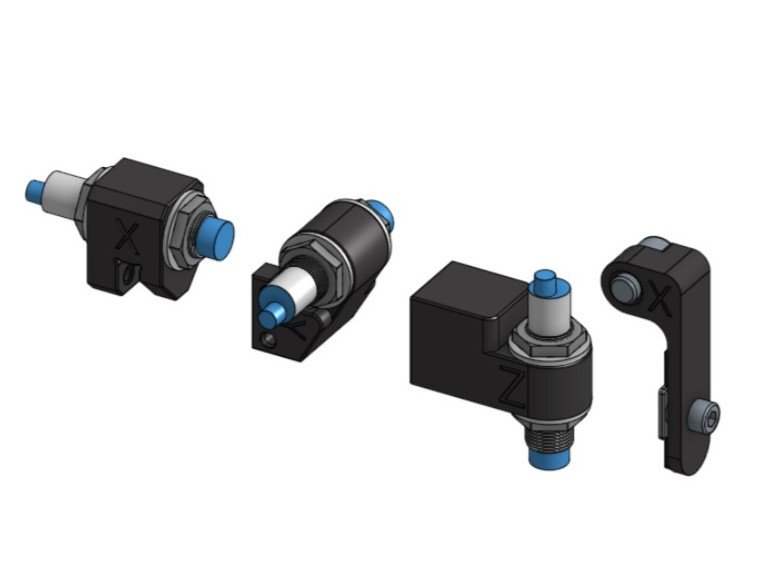
A typical block-style, 3-axis touch plate we designed for finding X, Y, and Z-zero on 3-axis CNCs, and our novel AutoZero touch plate designed to work with far more bit types and more accuracy than typical block-style plates.
5V inductive barrel sensors for reliable homing in any environment. Take measurements in Onshape if you want to make your own mounting setup.
BOM of all add-ons: https://docs.google.com/spreadsheets/d/1-wWrsgTZU89hhSgYjCSs-IisSey4unI6lo25_mKFzHw/edit#gid=1028766194
3D Printing
To read more about our print settings to help you print your own parts, read this post here: https://sienci.com/2019/11/11/3d-printing-settings-for-LongMill-parts/
STL files can be directly downloaded from the Onshape document. You may need to make an account to download STL files.
Modifications
If there are any known noteworthy designs or modifications made to the LongMill, they will be posted here. This is to make the information needed for modification more accessible and to also thank and recognize users and community members who have made an impact on the LongMill CNC project.
General
- mcol82’s limit switch mounts: Thingiverse
- coogle’s Control box feet mounts: Thingiverse
- coogle’s CNC table design: Thingiverse
- sysimgrp‘s limit switch mounts: Thingiverse
- David‘s switching box: Thingiverse and Onshape
- sysimgrp‘s redesigned touch plate magnet cover: Thingiverse
- sysimgrp‘s 3D printable laser diode centre-point locator: Thingiverse
- Mike‘s CNCable keyboard and monitor shelf: Forum post
- Grant‘s Y-axis plastic bumpers: Forum post
- Grant‘s CNC control keypad: Forum post
- Dave’s 3D printable Makita router under-light: Facebook post
- Michael’s 3D printable T-track stops: Facebook post
- Jeff‘s CNCable dust shrouds: Forum post
- Brian’s 3D printable bit length sensor: Facebook post
- Kris‘s laser setup: Forum post
- Frank‘s 3D printable touch plate holder: Facebook post
- Dave’s LED lighting setup: Facebook post
- Michael’s touch plate holder: Printables
- BillKorn‘s drag knife: Forum post
- BillKorn‘s 3D digitizer probe: Forum post
- Keith’s controller box mounting feet: Facebook post
- Spike’s control panel: Facebook post
- Chris‘ vertical stand design: Forum post
- coreyker’s pen/pencil spring mount: GitHub
- DustinTheMaker’s power supply mount: Thingiverse
- JimAlex’s Makita speed stop: Thingiverse
- JimAlex’s Tramming bar: Thingiverse
- SimtechBen’s touch plate holder: Thingiverse
Dust Shoe Mods
- sysimgrp‘s alternative dust shoe design: Thingiverse
- Keith’s alternative dust shoe design: Facebook post
- Xavier’s alternative dust shoe design: Printables
- Stewart’s alternative dust shoe design: Onshape
- Stephen’s alternative dust shoe design: Facebook post
- Matt’s alternative dust shoe design: File download. Attaches magnetically with a high-powered LED. Use 2 pieces of plywood cut with up to 1/4″ end mill, 8x3mm magnets, and Indus star LED cluster.
- Buebeli‘s “dustshoe2shopvac” adapter: Onshape
- David‘s dust hose boom: Thingiverse and Onshape
Onshape
You may notice that many of the 3D models we share in our open source documents link to a 3D file on a website called “Onshape”. This is the browser-based software that the engineers and designers on our team use to design and iterate on all the products we produce at Sienci Labs. The fact that it’s online has the great advantage that anytime we make an update or release a new product, you are able to see them live or download them for yourself. We feel this is a great way to keep our company open and make our designs easily accessible to others.
Interact with Designs
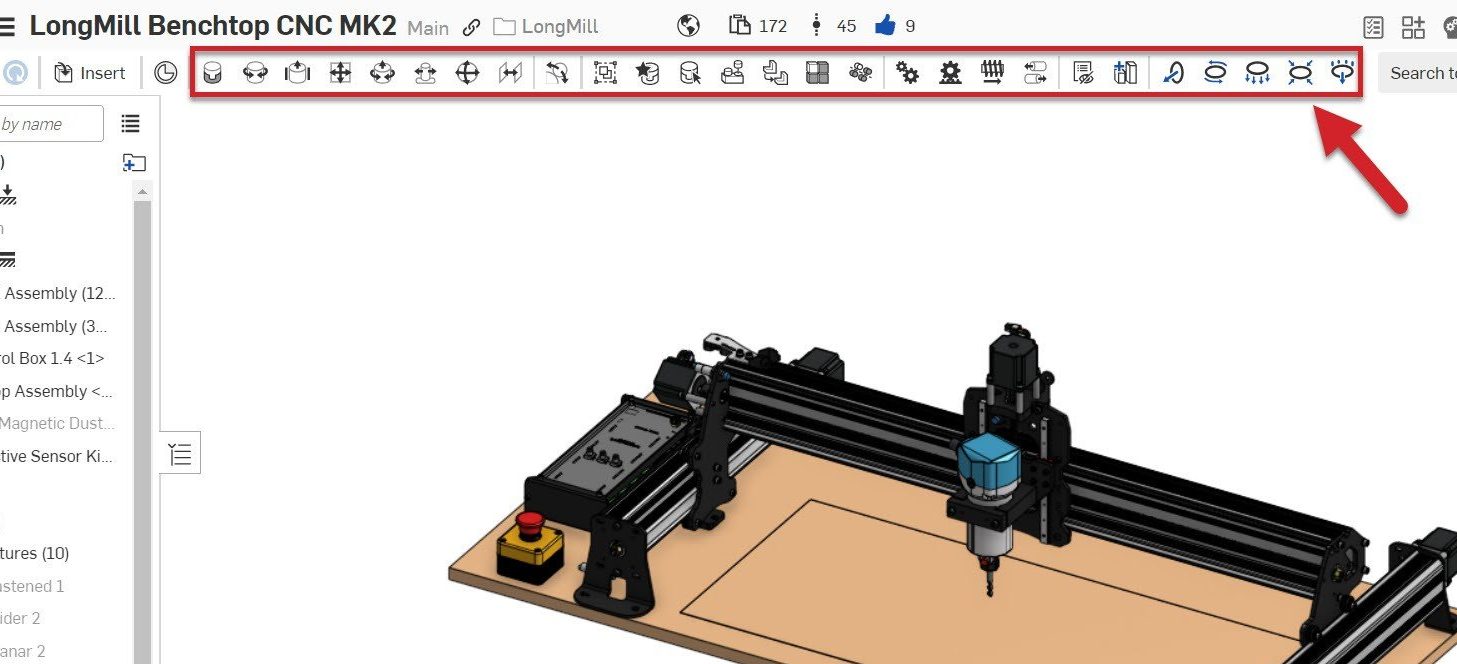
Let’s cover a couple things you can do with the open source Onshape files:

- Look at the design from all sides
- Rotate around by right-clicking on your mouse and dragging around on the screen, or clicking the ‘rotate’ tool on the toolbar and left-click dragging on the screen, or clicking the buttons on the cube at the top, right of the screen
- Zoom in and out by scrolling on your mouse or clicking the down arrow next to the magnifying glass on the toolbar and then left-click and drag up-and-down to see closer and further
- See a list of all the parts in the design
- This shows up on the left-hand side of the window, where if you click the name it’ll highlight the 3D model
- This makes it easy to know the names and parts of everything that makes up the full design
- Measure different parts of the design
- After selecting the measuring tape on the toolbar and selecting the units you’d like to measure, you can click anywhere on the model to get length of a line, distance between two points or faces, angle between two lines or faces, surface area, and more
- If you want to measure something else, just click somewhere in the blank space or hit the spacebar and then select the new spots you want to measure
- This is especially useful for quickly verifying dimensions, checking clearances, and ensuring design accuracy. Feel free to save measurements by writing them down or taking screenshots as a reference for your own purposes
- Even see the Mass and Volume of the parts!
- This uses the right-most Mass tool on the toolbar where after selecting the tool and selecting a part you can get even more information on its properties
- This can be useful is you’re working on a modification and need to decide how strong to make it based on the weight of some other parts
- We try to make sure these values are all as accurate as possible but there still might be some discrepancy
Export or Modify
If you want to Export our Onshape designs as either a 3D model (STL, IGES, STEP) or a 2D drawing (DWG, DXF) for your own tweaks or accessories, then:
- Open the link to the design you’d like to download.
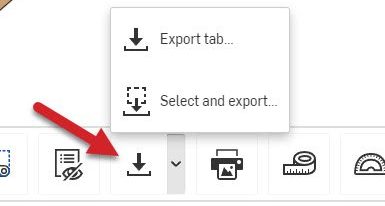
- Use the ‘Export’ option in the toolbar to either export the whole design or use the down arrow to allow you to export only individual parts or assemblies. You can select these parts by clicking on the 3D model or by clicking on the parts list on the left-hand side of the window.
- When you’ve selected all your parts, you’ll be given more options to choose the file type you want to download as and other options based on your selections. Typically STLs are used for 3D printing, IGES and STEP are good for importing to other design software to modify the files, and DXF or DWG are used for laser or plasma cutting. Typically the other files defaults tend to be good to use.
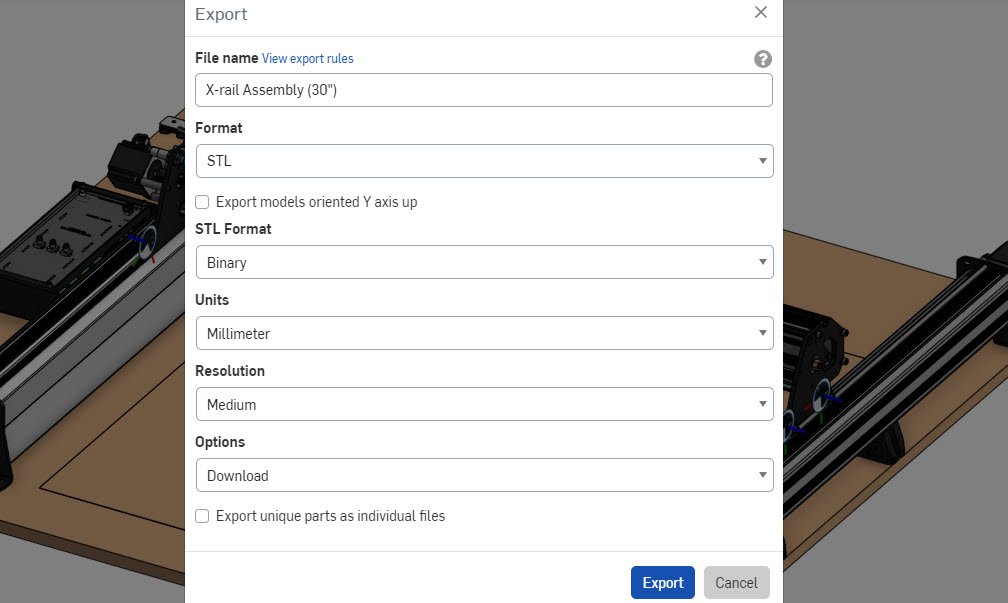
- After configuring the settings, click “Export” and you should find the file appears in your typical download location.
If instead of Exporting the files, you’d like to use Onshape as your main design software to make and publish modifications, then you’ll need to make an account first; though luckily it’s free to make one:
- Open your web browser and go to the Onshape Sign up page.
- Enter your Name and Email Address, then Onshape will ask for some other information that you might need to fill out and some Terms & Conditions.
- Once you get to the end, you’ll be sent a verification email which you can click through to set up your password. You don’t need to enter a Company name but you do need to agree to some more Terms & Conditions.
- Once you’re set up, feel free to set your default units and controls – or get straight to downloading the models since you can always change these later in your settings.
Once you’ve successfully created an account and you’re logged in:
- Copy our entire design file into your own workspace by clicking the button with three lines at the top, left corner of the window, and select Copy workspace.
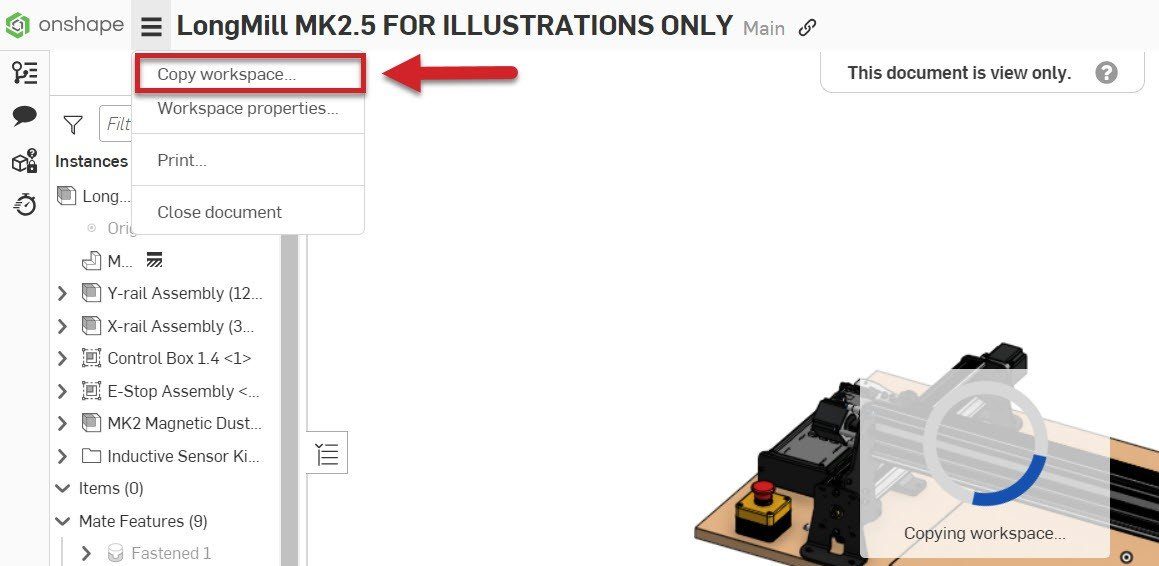
- Give the copied version its own name.
- You can now make changes to the file using Onshape’s various editing tools! These tools allow you to add or remove features, adjust dimensions, edit sketches, modify assemblies, and more.
- As you make modifications, Onshape will automatically save your progress, and if you’re unfamiliar with what the features do there are plenty of guides out there on how to use Onshape.
- Once you’re done, remember to share your work with us and the community by sharing the link to your Onshape designs so everyone can see your cool stuff!
The sky’s the limit now that you can measure, export, copy and modify all of your CAD projects! Remember to share your learnings and collaborate with others to continue the spread of open source ideas.