
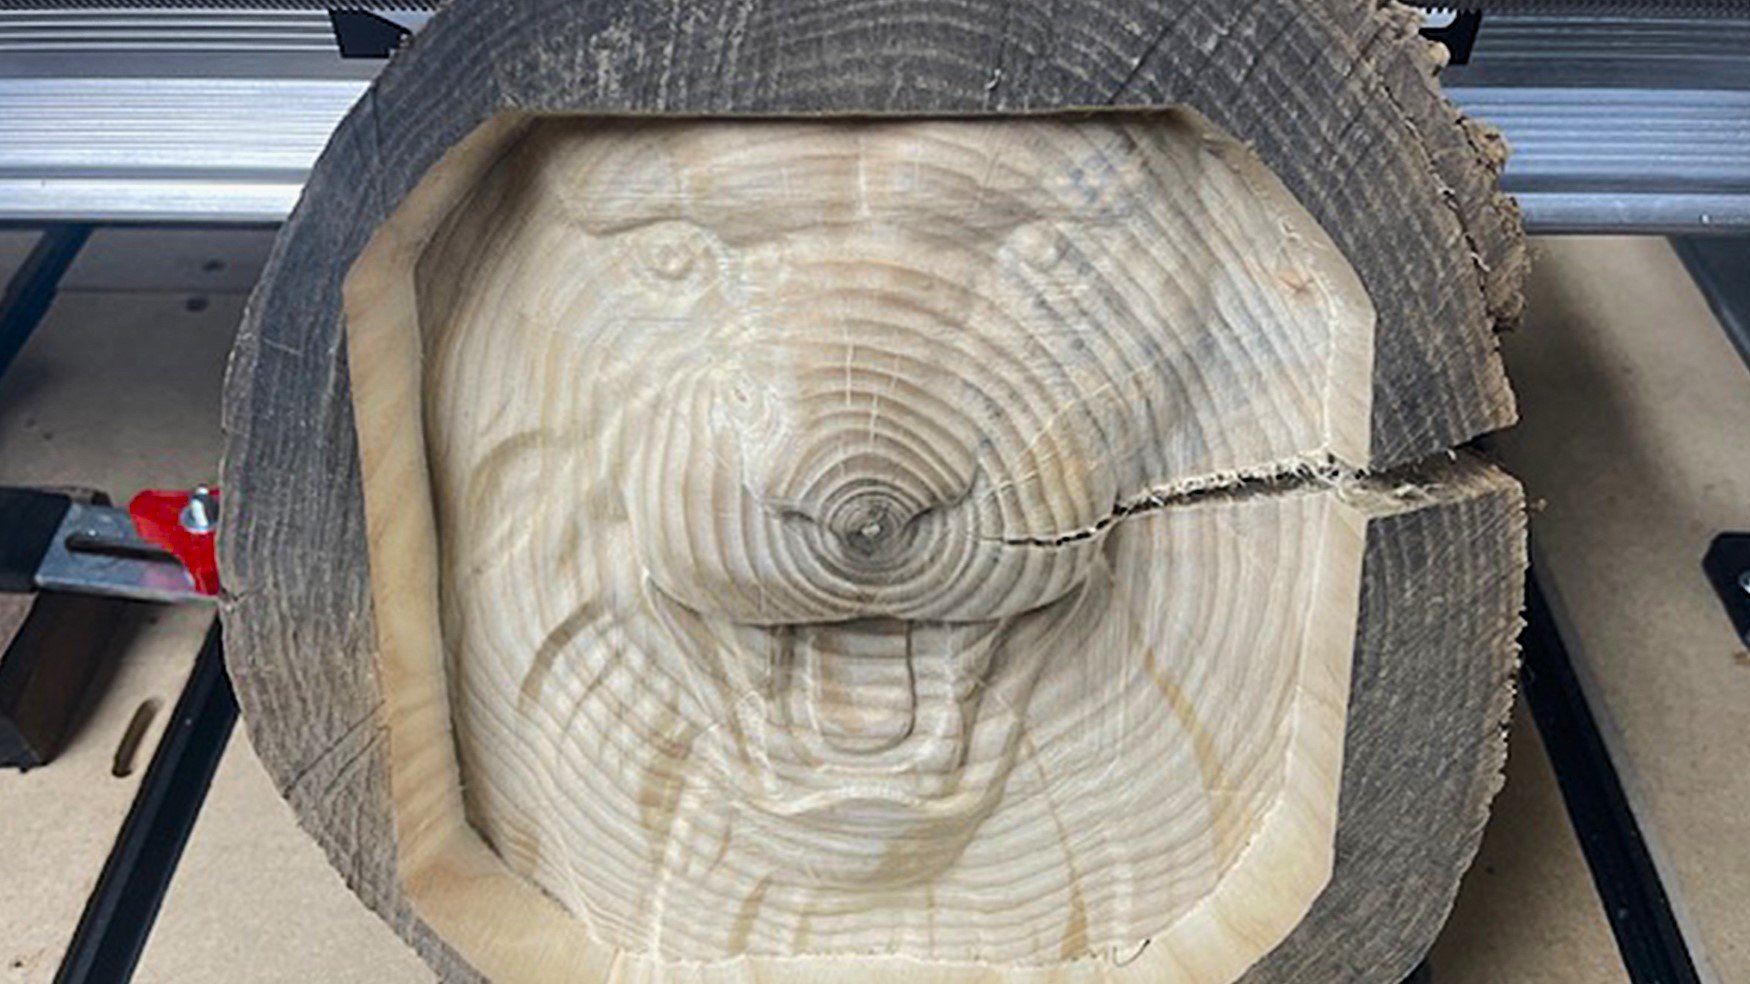
If you’re successfully making projects on your CNC, congrats! 🎉
Sometimes projects can come off your machine looking exactly how you want, but other times you might want to make small improvements or protect them so they last longer. That’s where this page comes in. Below is packed with information on “finishing” mostly wooden projects off a CNC (because plastics and metals don’t tend to need the same level of protection). Every journey begins with the first step, or page in this case, so be curious and let us know if we missed anything by sending us a message at the bottom of the page!
Guide
Below is an overview of the three main ways for you to finish off your projects: sanding, sealing and colouring. Click on the links to get step-by-step directions on how to apply the techniques for what best applies to your situation. You can also use the Table of Contents to navigate to each section manually.
Sanding
Improve the appearance of your projects by removing fuzz off edges or smoothing rough surfaces left by the CNC. Sanding is also a necessary step to prepare for painting, colouring, or sealing wood.
| Goal | |
|---|---|
| 🖐️ General Cleanup Small fuzzies and sharp edges usually only need simple hand sanding to get the project looking right. |
 |
| ⛰️ 3D or V Carves Clean up fuzz in hard-to-reach spaces using a sanding mop on a drill or Dremel. |
 |
| 💪 Tool Marks If you see deep ridges or scars left over from cutting, start off using power tools to save time sanding. |
 |
| 🛠️ Other Methods Consider “raising the grain” to give wood faces a smoother, more professional finish. |
 |
You can also Read More, Learn the Steps, or see Tips and Videos on Sanding.
Sealing
Protect your project from wear, moisture, and environmental damage, while also adding a subtle sheen to highlight the wood’s natural beauty. You worked hard to get this far, so why not finish it right?
| Goal | |
|---|---|
| 🖐️ General Steps Any type of finish on your project will go a long way toward preventing long-term cracks and degradation. |
 |
| 🪧 Outdoor Use Compare common finishes to see which ones are best at protecting outdoor projects long-term. |
 |
| 🍴 Food Safe See what types of sealant you can choose from if you’ve made something for your kitchen or to be handled by children. |
 |
You can also Read More, Learn the Steps, or see Tips and Videos on Sealing.
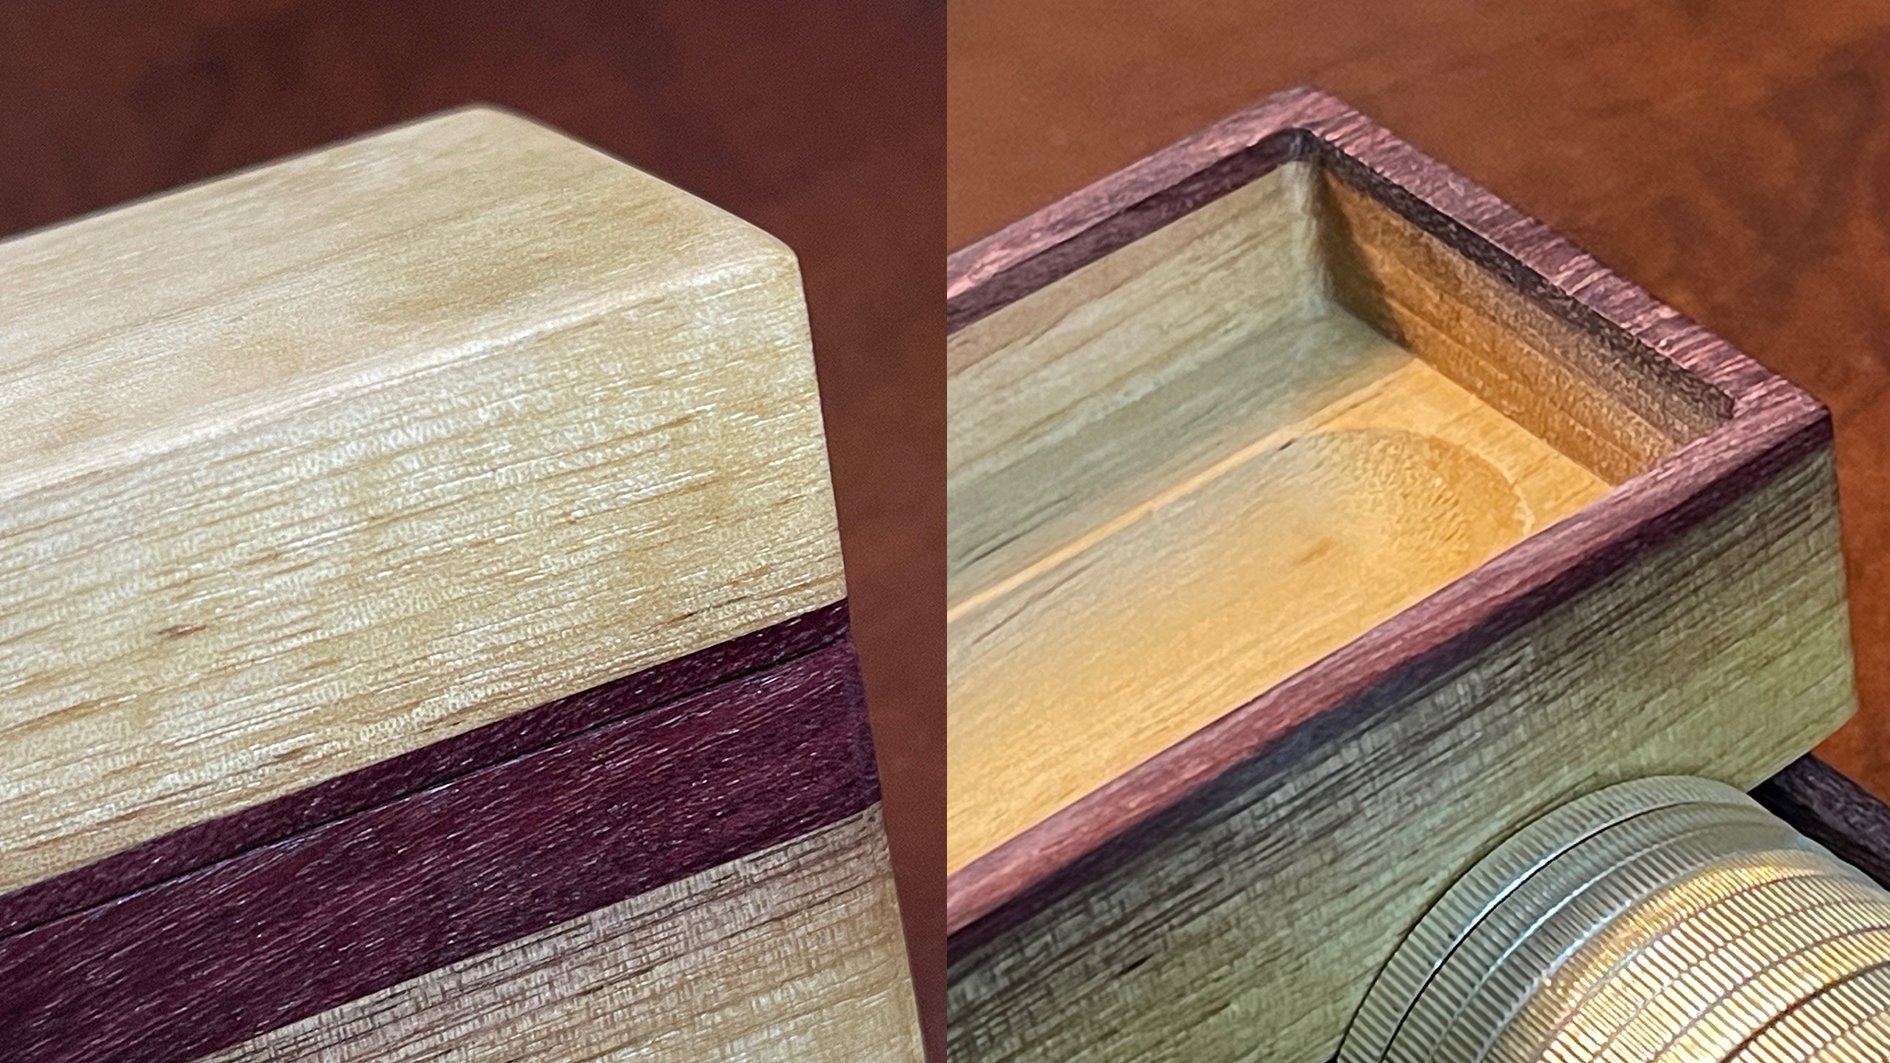
Colouring
Painting and staining not only protect your wood, but they allow you to get more creative with your projects by enhancing their appearance or colouring and highlighting the wood grain.
| Goal | |
|---|---|
| 🎨 Get Painting Even one simple colour can really make projects pop! |
 |
| 🖌️ Staining Enhance the grain and color of your wood while still providing protection and durability. |
 |
You can also see Tips and Videos on Painting and Staining to get more comfortable with them.
Learn Sanding
Sanding is essential for smoothing rough surfaces left by the CNC process, removing imperfections, and preparing wood for finishing. When it comes to cleaning your projects, you can use different hand tools or power tools depending on the task, but no matter the approach you’ll want to start with the correct grit.
The “grit” rating on sandpaper describes if it uses larger, sharper particles or smaller, smoother ones and can range from “extra-coarse” to “ultra-fine” (30 to 1000+). The reason for these ratings is that sharper “coarse” sandpaper can make deeper scratches which helps to remove material faster to clean up large cuts or gashes, whereas using smoother “finer” sandpaper makes sense to use once you want the surface to start to look smoother and less ‘scratched’. This creates a process where you should:
- Look at your material and decide how much touching-up it needs.
- If it needs a lot, start with coarse sandpaper, if it needs a little use only fine sandpaper, and if you don’t know then choose a medium-grit sandpaper.
- If you started with coarse or medium grit, then consider sanding the whole material again but with a finer grit to continue to clean it up. For best results don’t skip grits, so if you were on coarse go to medium, and on medium go to fine.
| Sanding Level | Grit Range | Purpose |
|---|---|---|
| Rough / Coarse | 60-100 | Removes imperfections the fastest, like large burrs and rough edges, and great for further shaping the material. |
| Medium | 120-150 | Good for smoothing small bumps and dents and a good stopping point if you’re only aiming for a general-purpose sanding. |
| Fine | 220-320 | For detailed touch-ups, and also necessary if preparing for decorative coating staining, smoothing, or polishing. |
Sanding Steps
- Get Equipped:
Select your sanding tools based on your project. Pull out the power tools if you have lots of material to remove or many projects to sand, or just use hand tools if you’re project is smaller or only needs a couple touch-ups. - Rough Sanding (80-100 Grit):
Use this grit to remove any visible tool marks or uneven surfaces created by the CNC machine on your material. You can also shape the wood a bit or break the edge if desired. - Break the Edges (medium or fine grit, optional):
Make a couple passes over any sharp edges at a 45-degree angle either now or at the end of sanding using a flat sanding tool like a sanding block or even a metal file. This can give your project a more refined look by softening the profile, make the edge less likely to splinter or chip off during handling or finishing which also gives it a longer durability, and help paint, stain, or varnish adhere better and more evenly where sharp edges tend to accumulate excess finish. The amount of rounding can be done to your preference. - Medium Sanding (120-150 Grit):
Smooth out any remaining roughness, ensuring an even surface. An orbital sander or sanding block can be quick and easy to use for flat surfaces. - Smooth Details on 3D and V Carves (medium or fine grit, optional):
See the Power Sanding section on the sanding attachments available for drill and rotary tools which will save you lots of time clearing out the nooks of intricate carves. If you don’t have these available, sometimes a less-aggressive bristle brush or even a toothbrush can help release fibers that were left behind. - Fine Sanding (220-320 Grit):
This grit is for a silky-smooth finish, ideal before applying paint, stain, or sealant. Do be aware that the higher the grit you use at this stage, will reduce the ability of stains and finished to penetrate the wood. If you are using 1000 grit for example, you are no longer cutting the wood, but packing sawdust into the wood pores, burnishing it. The surface will become shiny and very smooth, but not allow stain or seal to penetrate fully. - Raise the Grain (optional):
Do this to further improve to surface finish on woods that you plan on finishing. This technique prevents wood fibers from lifting when applying water-based finishes.
Sanding Tips & Videos
- It’s important to move through the grits and not skip from a rough one, straight to a fine one.
- Move the sandpaper in the same direction as the wood grain. This reduces visible scratches and results in a smoother finish.
- To protect your lungs while sanding, wear protective gear (safety glasses, dust mask) alongside a dust collection system, or sand in a well-ventilated area.
- For curved or intricate designs, consider using sanding sponges, soft pads, or hand sanding to access tight spaces. Sanding mops in higher grits can also help since they can get into the details without ruining the design by removing too much material.
| Video Title | Description | Duration | Link |
|---|---|---|---|
| Move up the Grits!! | Explains how to move up the grits when sanding. | 3 minutes | Watch Video |
| Top 5 Tips for Orbital Sanding | Pro tips for orbital sanding. | Under 1 minute | Watch Video |
| Filling a Crack or Gap with Sawdust and Glue | Shows how to fill cracks or gaps with sawdust and glue to match. | 3 minutes | Watch Video |
| Mini Mops? Like a sanding mop just smaller? | Great explanation on small detail sanding. | 3 minutes | Watch Video |
| Breaking the Edges to Preserve Them | A short video explaining why and how to break your edges during sanding. | Under 1 minute | Watch Video |
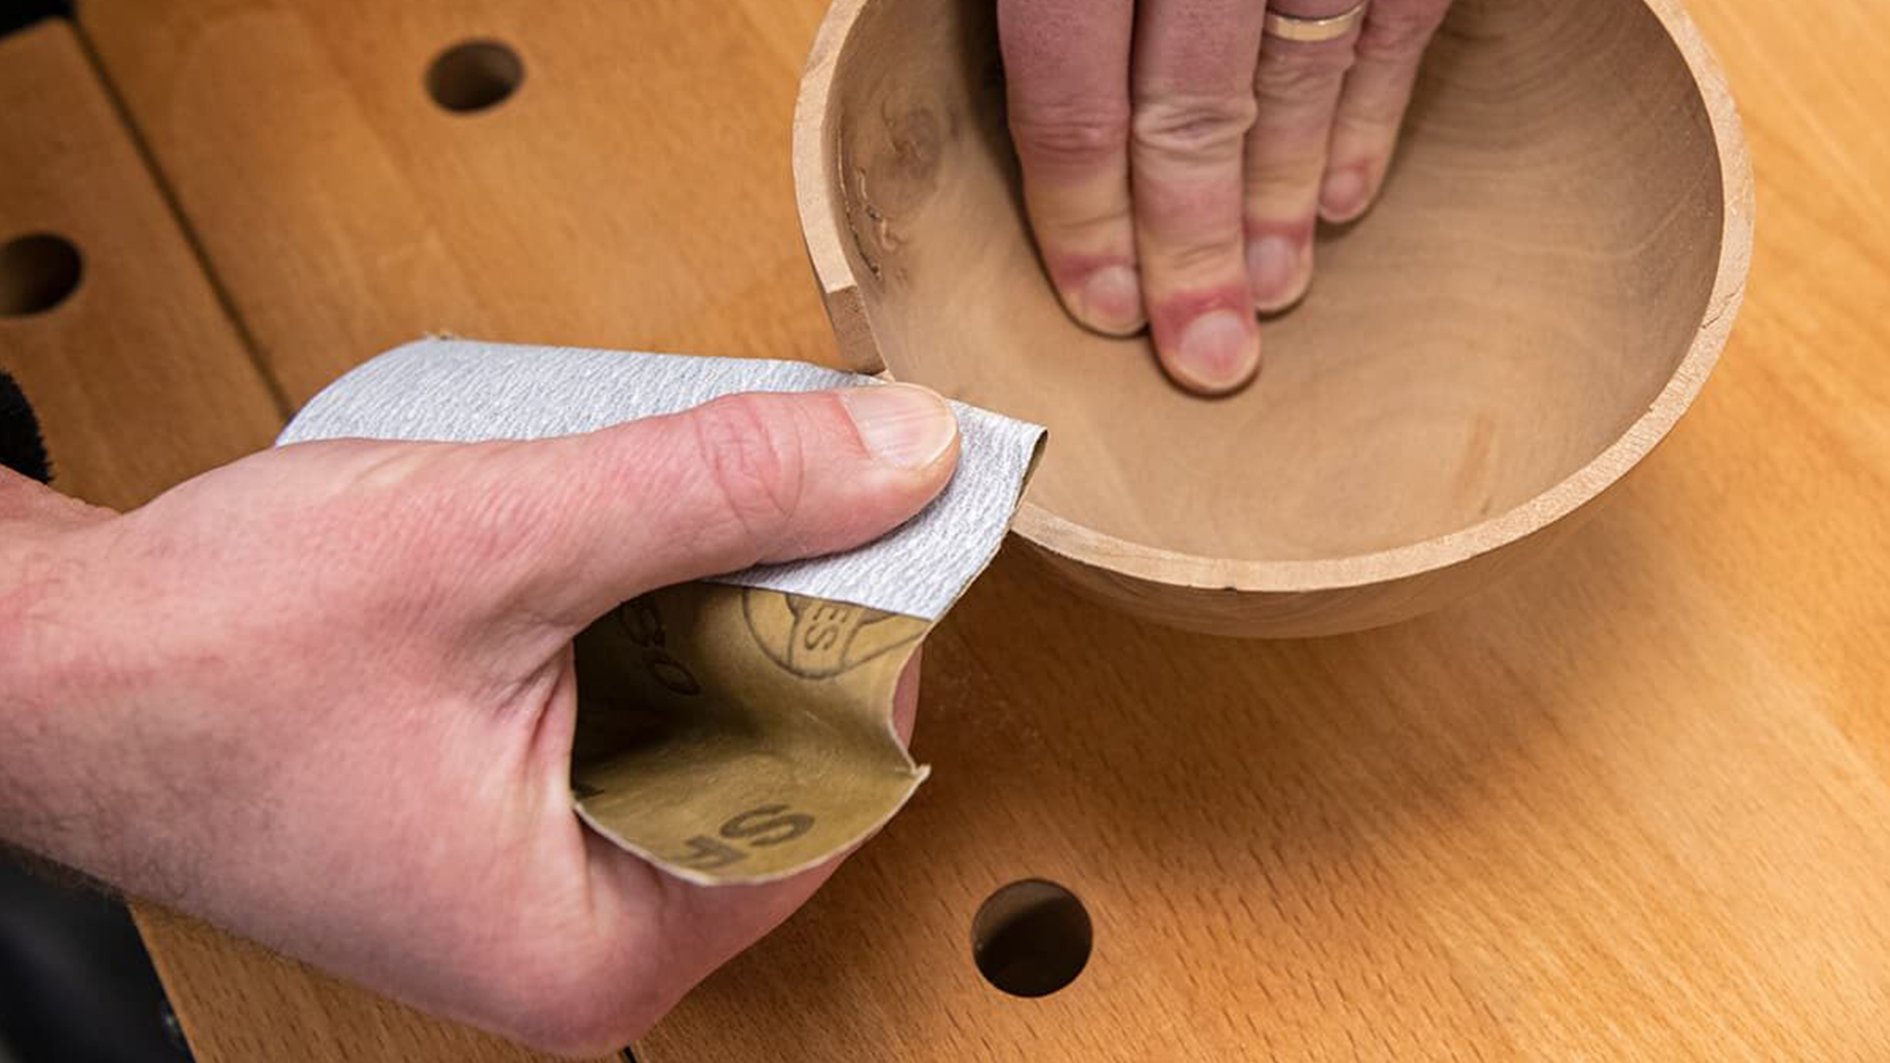
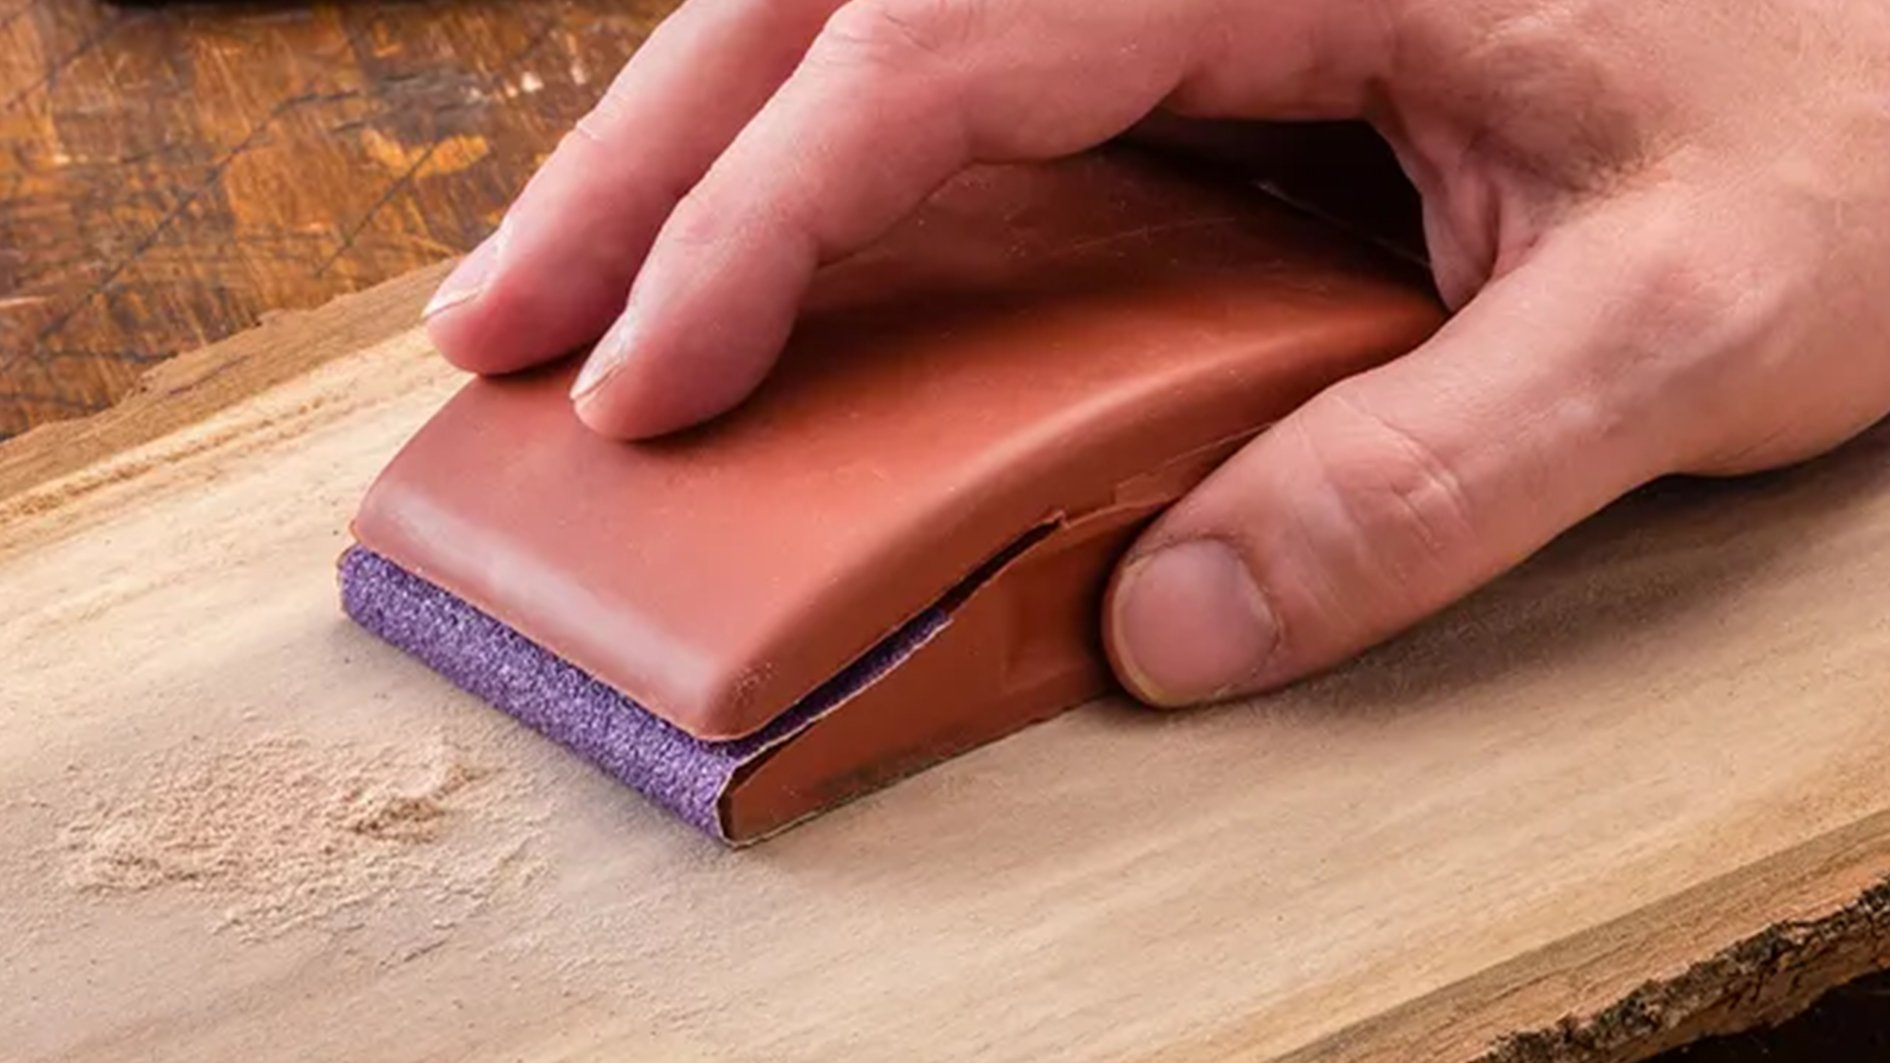
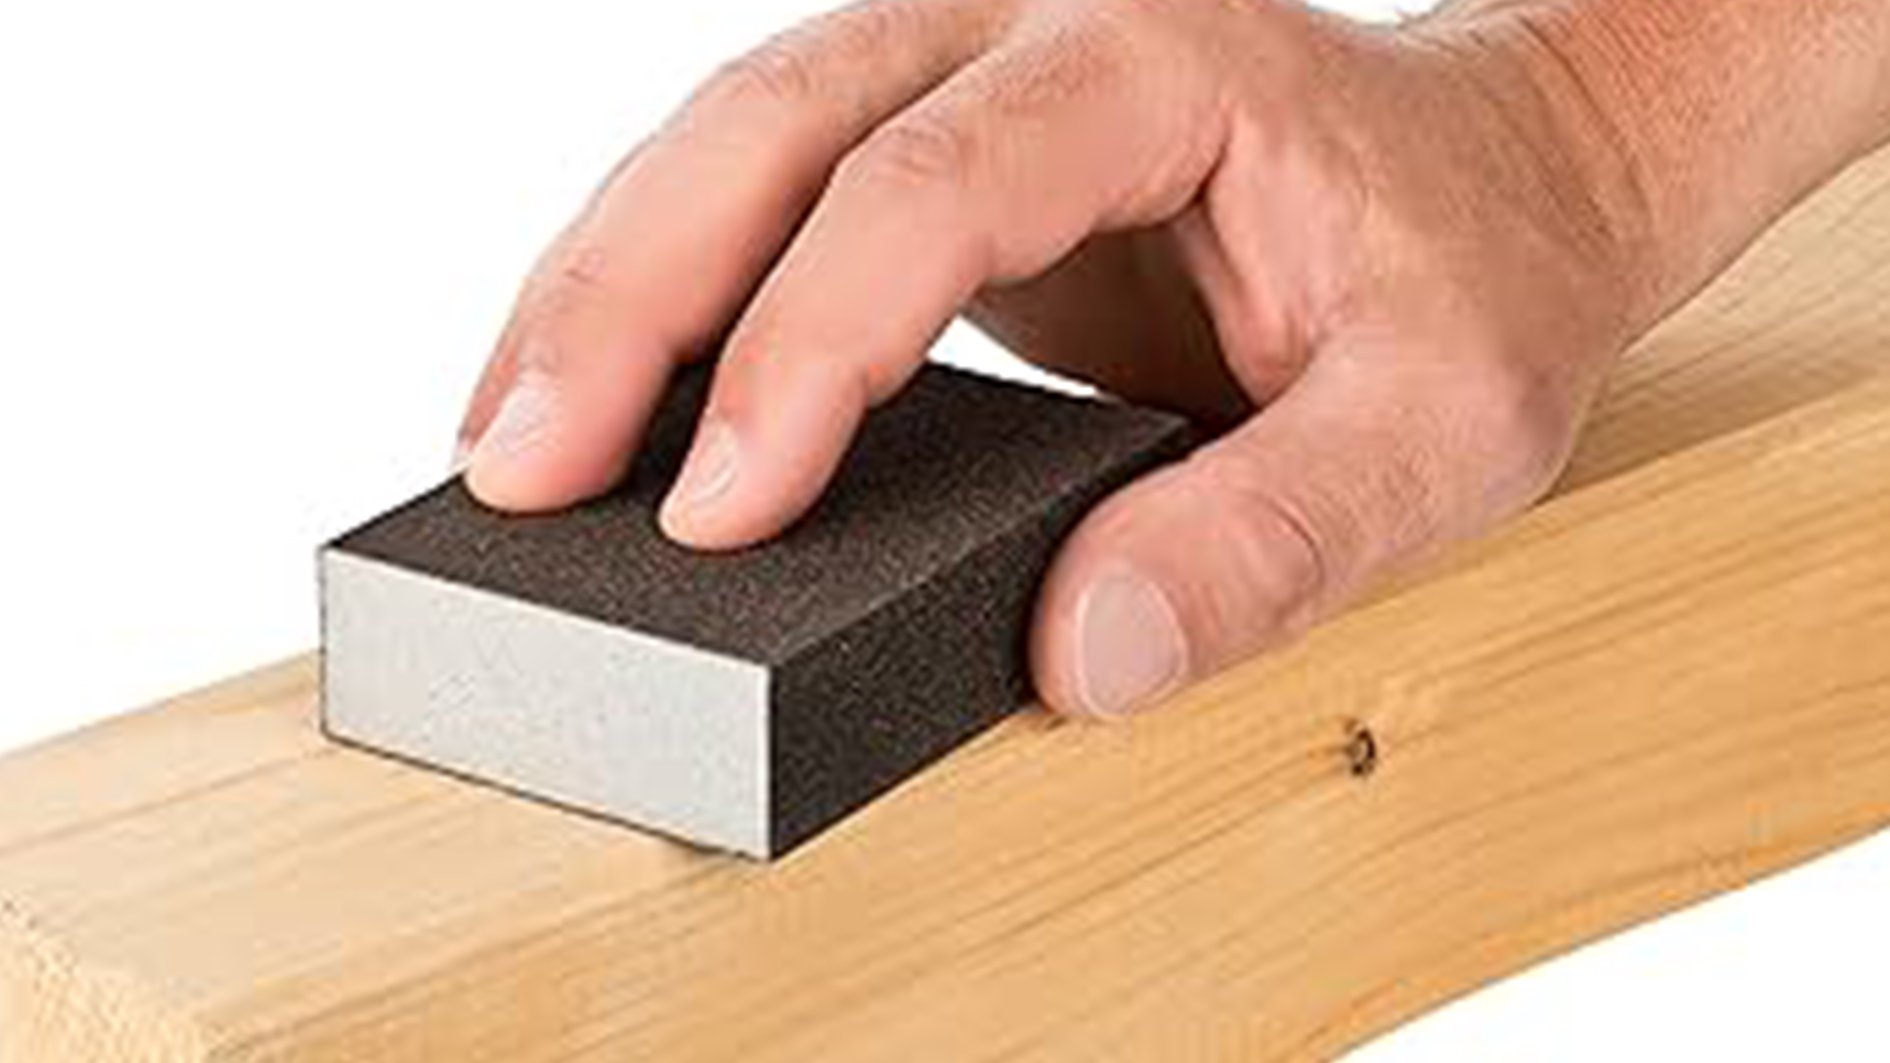
Hand Sanding
Hand sanding tools are ideal for precision work, tight spaces, or when you want more control over the sanding process.
Sandpaper: coated abrasive paper available in different grits. Comes in many shapes and sizes from sheets to discs to loops. You can fold it or cut it into smaller pieces to use by hand. Check out the grit guide for more.
- Usage: use lower grit for aggressive sanding and higher grits for finishing
- Types: aluminum oxide (general use), silicon carbide (wet/dry), garnet (fine finishing)

Sanding Block: a block used to hold sandpaper flat for even sanding. Cut a strip of sandpaper and attach to the sanding block. Fast & comfortable to use.
- Usage: prevents uneven sanding and helps apply uniform pressure
Sanding Sponge: flexible sponge coated with abrasive material. No sandpaper needed as it’s already on the sponge!
- Usage: ideal for contours, curves, and irregular surfaces
Power Sanding
Power tools are more ideal and make the sanding process faster for larger surfaces or more intensive sanding tasks. For instance roughing out larger pieces of furniture or signs, a project that has many cutting scars or stubborn ridges left over, or increasing efficiency on batch jobs.
Orbital Sander: a handheld sander that moves in small circles. You can also get a random orbital sander, that moves randomly instead of in circles which makes for an even better finish.
- Usage: general-purpose sanding, producing a fine finish with minimal swirl marks

Detail Sander: small triangular-shaped sander that vibrates.
- Usage: designed for tight spaces, corners, and detailed work

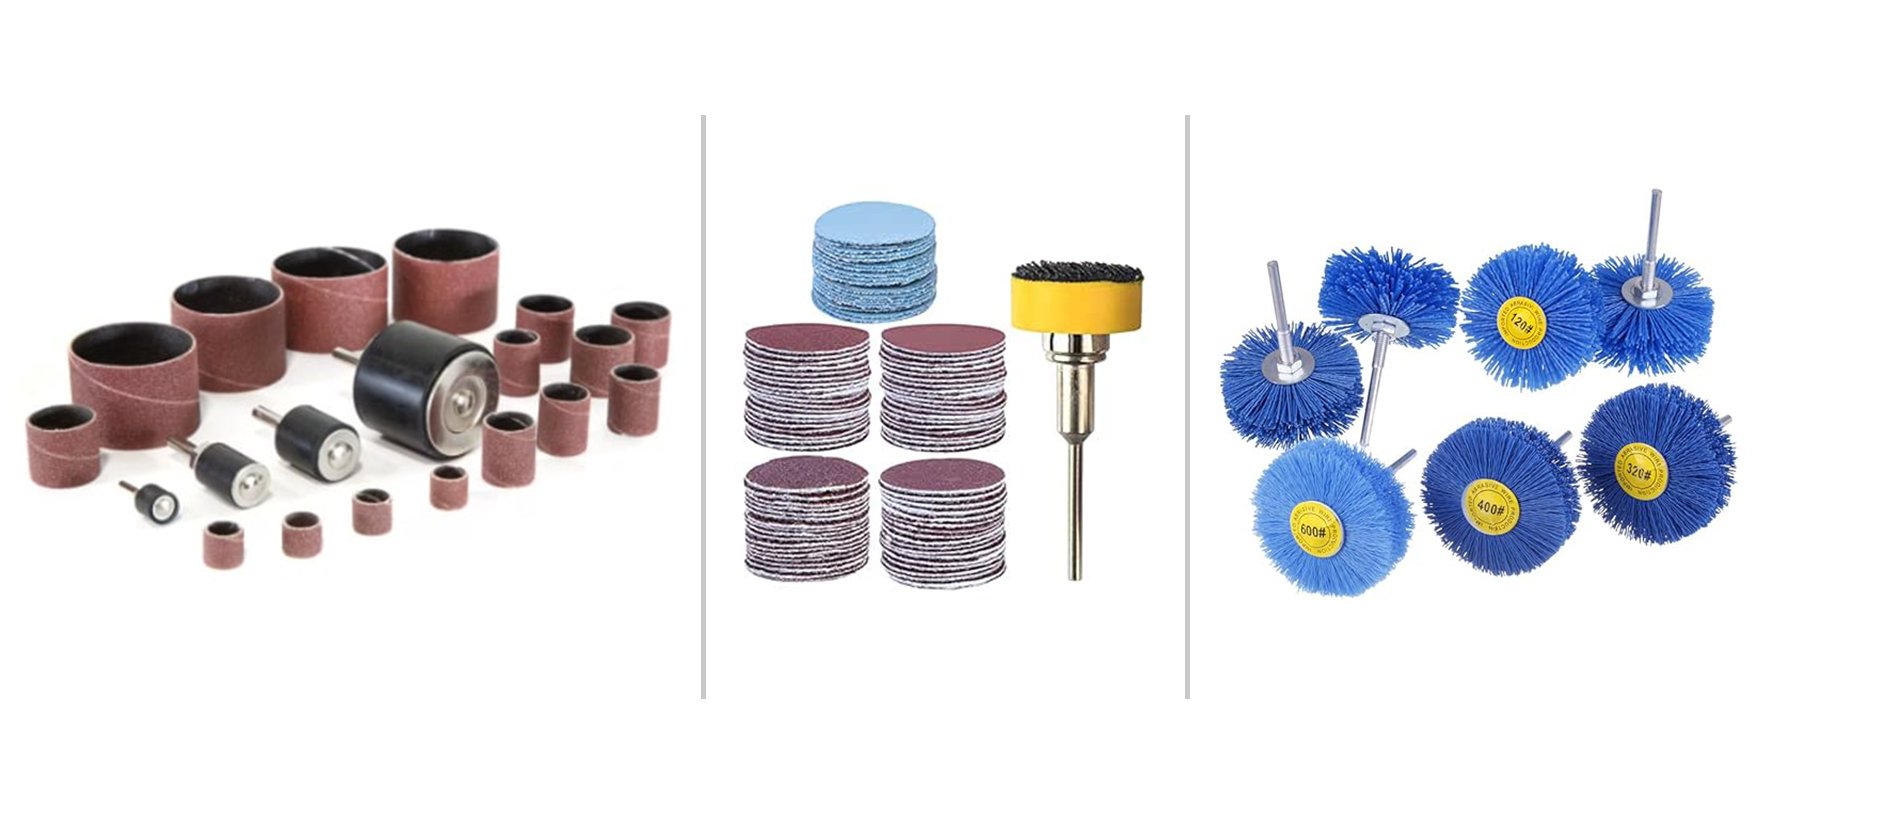
Dremel or Hand Drill: can use a drum, disc, or mop sanding attachment that fits into the Dremel or drill. These can be found online.
- Usage: use when light sanding is required or the surface is quite soft. Mops are great to get into tight spaces to remove wood fuzz.

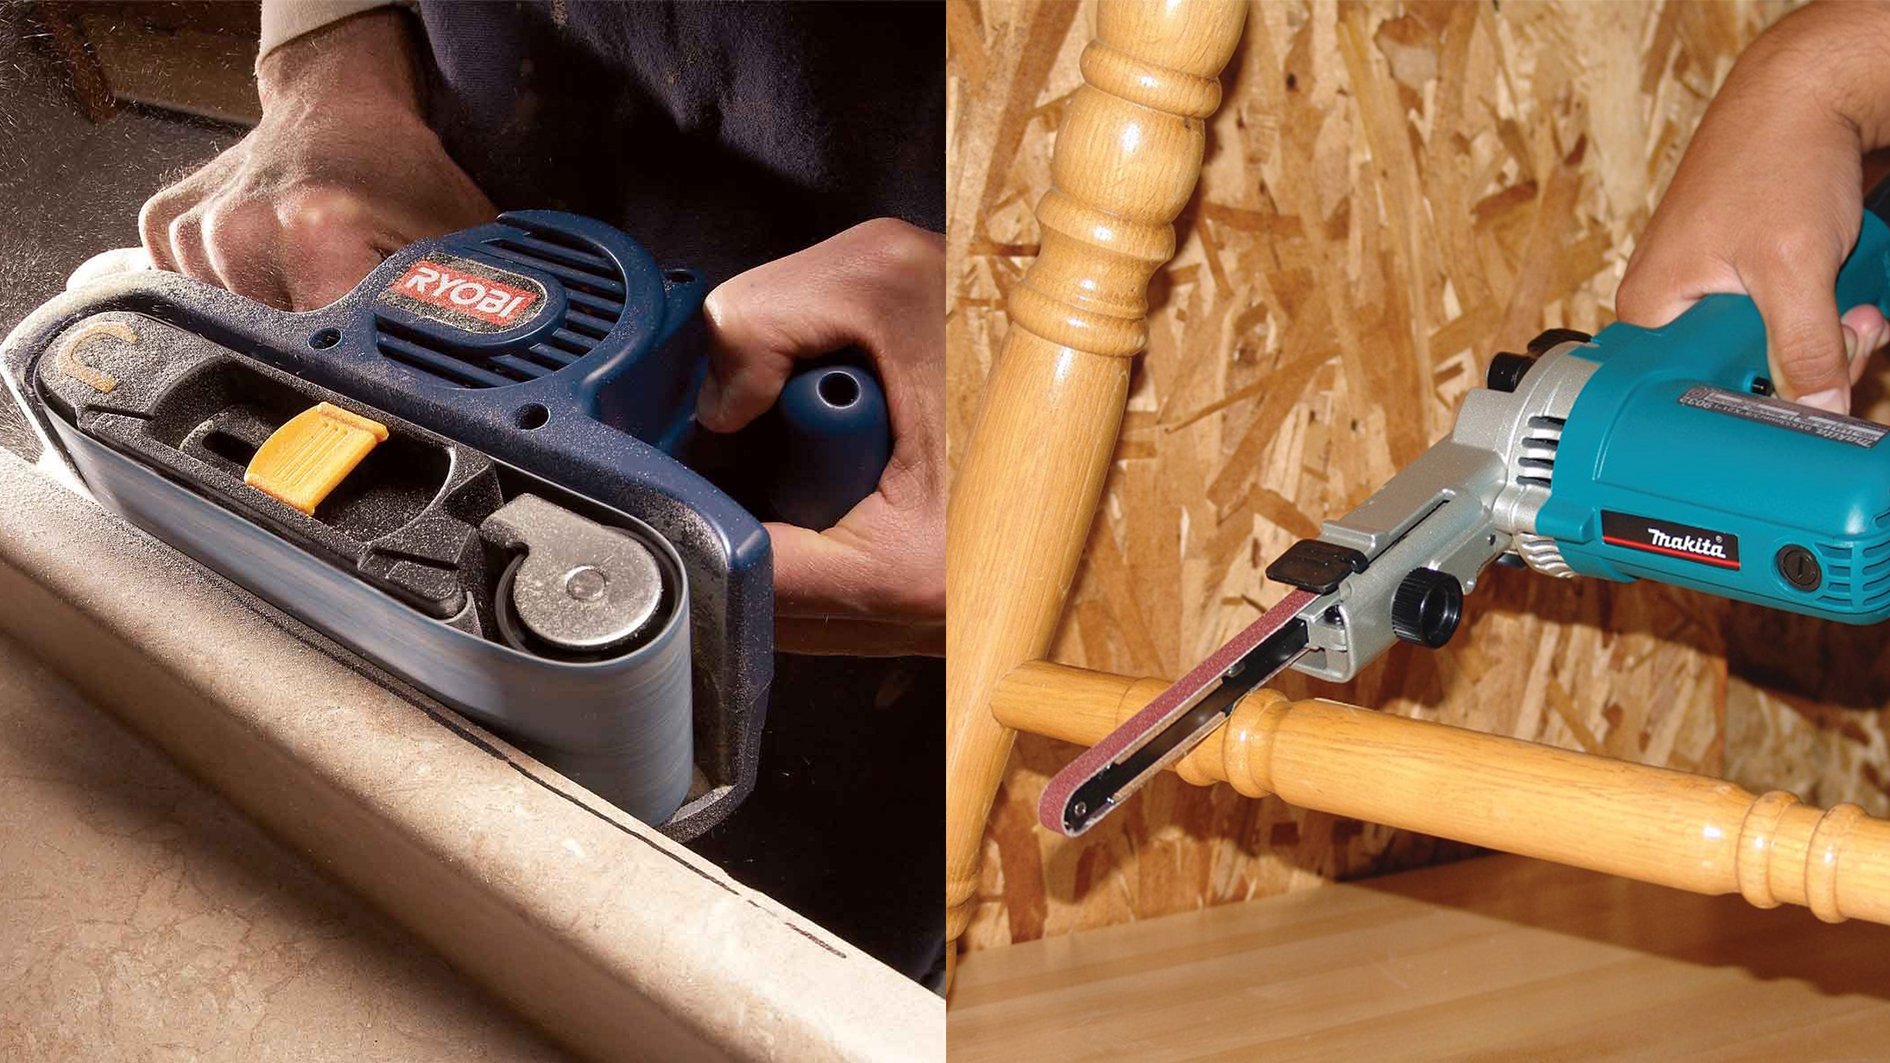
Belt Sander: uses a continuous loop of sandpaper. Can be a wide strip or thin wand unit.
- Usage: best for removing large amounts of material quickly and levelling surfaces
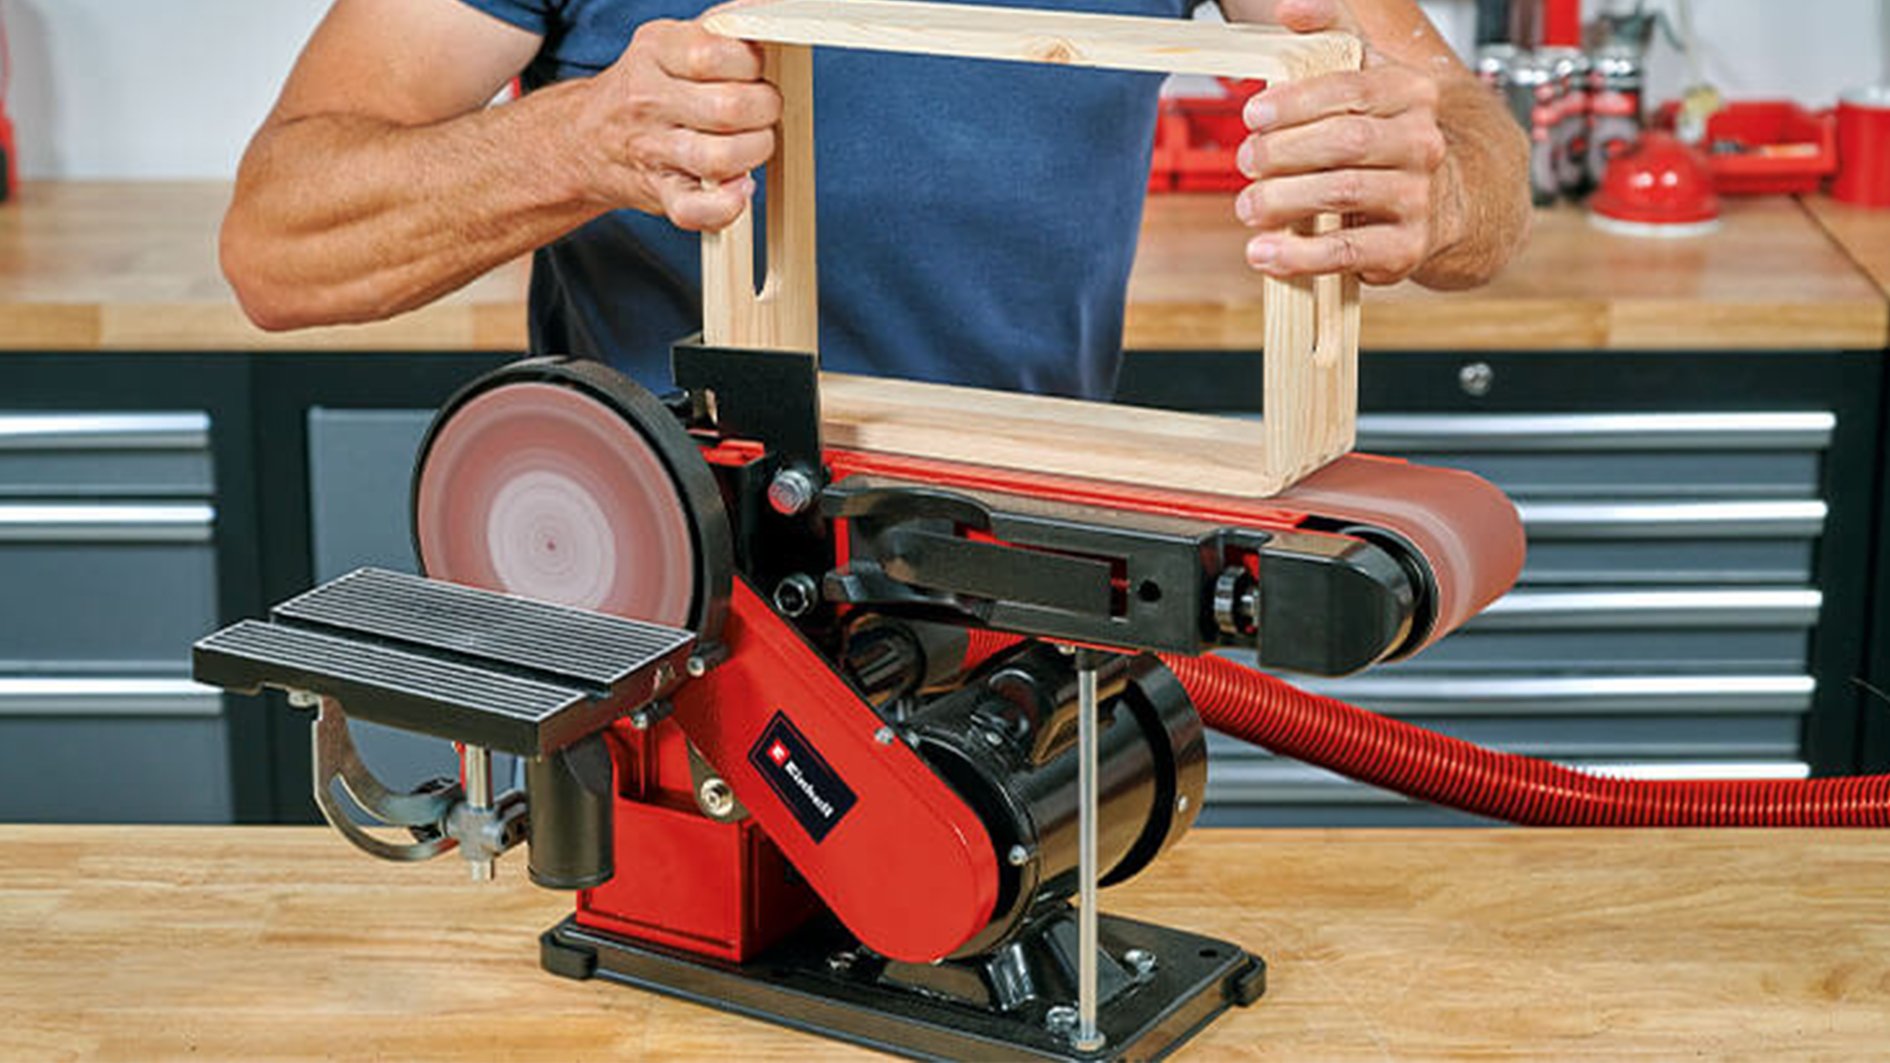
Stationary Disc / Belt Sander: uses a spinning disc of sandpaper, or a combo of belt and disc sandpaper. Can be mounted on a workbench or table and permanently hooked up to a dust collection system.
- Usage: suitable for rough sanding or shaping edges
Drum Sander: a large, stationary sander with a rotating drum. Typically more expensive and used for more professional applications.
- Usage: ideal for sanding large surfaces such as wooden floor boards. Great for removing old paint, varnish, or discolourations and for levelling and smoothing large surfaces

By choosing the right tool for each stage, you can achieve a high-quality finish on your woodworking projects.
Advanced Sanding
Raising the Grain
Raising the grain is an essential step, especially when working with water-based finishes, if you want a professional-looking finish. The process involves initial sanding, wetting the wood, sanding again, then moving on to other finishing steps.
- Prepares the wood: especially important when applying water-based stains, paints, or sealers.
- Prevents rough surfaces: stops the grain from rising after the finish is applied, ensuring a smooth final result.
When you apply water-based finishes or stains to wood, the wood fibers absorb moisture and swell, causing the grain to rise, which results in a rough texture. By raising the grain beforehand and sanding it smooth, you prevent this from happening after the finish or stain is applied, ensuring a smoother final result. The general steps are:
- Sand the Wood
Sand your wood project to a smooth finish using progressively finer grits of sandpaper (start with 120 grit and work up to 220 grit or finer). Make sure the surface is free of any visible scratches or rough spots. - Moisten the Surface
Lightly moisten the surface of the wood with a clean, damp cloth. You don’t want to soak the wood, just enough moisture to slightly wet the surface. Make sure the water is spread evenly across the entire surface to raise the grain equally. - Allow the Wood to Dry
Let the surface to air-dry completely. This usually takes 1-2 hours, depending on the humidity. As the wood dries, the fibers will rise, creating a rough texture on the surface. - Sand the Raised Grain (220-320 Grit)
Once the wood is completely dry, lightly sand the surface with fine-grit sandpaper (320 or higher). The goal is to knock down the raised fibers without removing too much material or damaging the wood. Use light pressure and sand with the grain to avoid scratches. Feel the wood to ensure it’s smooth again. - Continue with the Next Finishing Steps
After raising the grain and sanding it smooth, you can proceed to apply your stain or finish. Since you’ve pre-raised the grain, the finish or stain will go on smoother and result in a more even texture. Keep in mind:- Water-Based finishes tend to raise the grain more than oil-based finishes, so it’s especially important to raise the grain beforehand if you’re using water-based products.
- Oil-based stains and finishes don’t raise the grain as much, but it’s still a good practice to prepare the wood properly.
By raising the grain and sanding it smooth before finishing, you’ll end up with a much smoother and more professional finish, especially when using water-based products.
| Video Title | Description | Duration | Link |
|---|---|---|---|
| Raise the Grain | A quick video on raising the grain of wood. | Under 2 minutes | Watch Video |
| Raise the Grain! Wait, what? | A more detailed explanation of the process of raising the grain of wood. | Longer video | Watch Video |
Learn Sealing
Finishing generally involves evenly applying a sealant, allowing it to dry, and lightly sanding between coats until it’s smoothed to your preference. Proper finishing not only improves aesthetics but also helps protect your project from cracks and splits, or fading with time. Once the sealant seeps into the exposed wood grains it becomes a barrier against dirt and moisture getting in and stops the inside of the wood from getting too moist or cracking from drying out.
The easiest way to seal wood is to simply coat it with an oil, even something simple like a food safe mineral oil or tung oil, but there are also many purpose-made sealants to choose from in the form of waxes, urethanes, and laquers. Paint and Stain can also protect wood, but these usually require that you colour the wood in some way whereas sealers are clear or semi-transparent, preserving the wood’s original color and grain. Read the table comparing different finishes to help you decide what approach you want for your project, since you might decide you prefer paints or stains over sealants.

Finish Comparison
This chart helps you compare different finishing options for your project by comparing durability, drying time, appearance, and if it’s suitable for the outdoors.
| Finish Type | Durability | Indoor/Outdoor | Drying Time | Appearance |
|---|---|---|---|---|
| Polyurethane | High | Indoor | 6-24 hours | Glossy, durable |
| Spar Urethane | High | Outdoor | 2-4 hours per coat | Flexible, durable, glossy/satin |
| Lacquer | High | Indoor | 30 minutes – 1 hour | Glossy, professional finish |
| Shellac | Moderate | Indoor | 30 minutes – 1 hour | Warm, high-gloss, rich depth |
| Beeswax | Low | Indoor | Immediate | Soft, natural matte |
| Oil-Based Stain | High | Outdoor | 4-6 hours | Enhances wood grain |
| Water-Based Stain | Moderate | Indoor | 1-2 hours | Lighter color, easy cleanup |
| Acrylic Paint | Moderate | Indoor | 1-2 hours per coat | Colorful, matte/satin/glossy |
Sealing Types
If you’ve chosen to move forward with using a sealant, double-check the table below to help you choose between different finishes like oil-based, water-based, or lacquer depending on the desired effect and durability.
| Sealing Type | Finish | Best For | Food Safe |
|---|---|---|---|
| Polyurethane | Gloss/Satin/Matte | High-traffic areas, durability | No |
| Lacquer | High gloss, fast drying | Professional-quality finish, easy to repair | No |
| Shellac | High gloss | Easy to apply, traditional wood finish | Yes (once fully cured) |
| Beeswax | Soft, matte finish | Low durability, but smooth, natural look | Yes |
| Mineral Oil | Low sheen | Cutting boards, bowls, and utensils | Yes |
| Walnut Oil | Low sheen | Food-safe finish for cutting boards and utensils | Yes |
| Tung Oil | Matte/Natural | Penetrates wood well, durable natural finish | Yes |
| Food-Grade Linseed Oil | Matte/Natural | Butcher blocks, cutting boards, wooden bowls | Yes |
Sealing Steps
- Get Equipped:
Select your sealant as well as brushes and other tools based on your project. - Clean the Surface:
Remove any dust and debris from the CNC process using a soft brush or vacuum. Make sure you’ve also sanded the piece to remove rough edges, burns, or tool marks otherwise you won’t get an even, protective coat. - Apply Sealer with a Brush or Rag:
Start with a thin layer. Apply evenly, following the wood grain. - Allow to Dry Fully:
Drying times vary depending on the product (typically 4-24 hours). - Sand Lightly Between Coats (320+ Grit):
This removes any dust or imperfections, ensuring a smooth final finish. - Apply 2-3 Coats for Maximum Protection:
More coats provide better durability and water resistance, especially for surfaces exposed to moisture.
Sealing Tips & Videos
- Always work in a well-ventilated area to ensure proper drying and avoid inhaling harmful fumes.
- Care for your brushes if you want them to last a long time.
- Test finishes on scrap wood before applying them to your main project.
- Follow the manufacturer’s instructions for all products to ensure the best results.
| Video Title | Description | Duration | Link |
|---|---|---|---|
| Unlock the Secret to Bleed-Free Projects! | Learn techniques for bleed-free woodworking projects. | 11 minutes | Watch Video |
| Beer Sign with Oramask: Super Crisp Lines | Create a beer sign with crisp, clean lines using Oramask. | 32 minutes | Watch Video |
| Start-to-Finish Sign Using Oramask | A quick guide on making a sign using Oramask, from start to finish. | 5 minutes | Watch Video |
| Using Spray Paint and Masking for Signs | Tutorial on using spray paint and masking techniques for making signs. | 5 minutes | Watch Video |
| Sanding Techniques for Finishing Signs | Learn why a sanding block may be better than a random orbital sander when finishing signs, with Mark Lindsay. | 14 minutes | Watch Video |
Finishing Tools
Foam Brush: a foam pad on a wooden handle used for applying paint or varnish with minimal brush strokes. Ideal for smooth finishes and water-based products.
- Usage: great for spreading thin, even coats without leaving bristle marks.
- Types: disposable foam brushes are available in different sizes, typically ranging from 1 to 4 inches.
Stain Brush: a thick, wide brush designed for applying wood stains and varnishes. Has a high bristle density to hold more product and provide good coverage.
- Usage: apply stains and varnishes evenly over large surfaces.
- Types: available in various sizes and bristle materials, often 3–4 inches wide.

Spray Paint: an aerosolized paint that allows for quick, even application over a wide area. It is convenient for both small and large-scale projects where speed and ease of use are essential. You can get a grip attachment that helps hold the can better and dispense the paint smoothly.
- Usage: ideal for covering surfaces evenly, sign letters, stencils, or projects requiring multiple light coats.
- Types: available in various finishes such as matte, glossy, and metallic. Comes in different formulations, including general-purpose for wood/plastic/metal, primer, and paint+primer.

Tack Cloth: a sticky, lint-free cloth used to remove dust, dirt, and debris from surfaces before painting. It ensures a smooth, clean surface to help achieve a professional finish without imperfections.
- Usage: gently wipe the surface with the tack cloth to pick up fine dust and particles before applying primer or paint.
- Types: available in various sizes and tackiness levels for different surface types. Some are designed for light-duty cleaning, while others are more robust for larger projects.

Brush Care
- Cleaning: use water for water-based paints and mineral spirits for oil-based products.
- Storage: wrap the brush in plastic wrap or use a brush cover to keep bristles straight and prevent drying.
- Maintenance: comb out bristles to keep them aligned and store brushes hanging or flat.
Learn Painting
The obvious aspect of painting is that it provides many ways to customize the look of your projects. Whether you’re masking, blending, or layering, paint offers lots of versatility with its design possibilities. Less well known is that painting wood can also seal the surface against warping and mold, and create a more durable coating to prevent prevent chipping and cracks.
The most important thing to a successful paint job is surface preparation which is covered quite well in the sanding section. Depending on the material, you may also want to use a primer before painting, since these are designed to help the paint stick better to the surface you’re painting. Once the surface is prepared, simply apply the paint in thin layers, allowing it to dry and sanding in between coats.

Paints & Primers
| Primer Type | Finish | Best For |
|---|---|---|
| Acrylic Primer | Matte/Satin | General indoor and outdoor surfaces, wood, drywall, and plaster. |
| Oil-Based Primer | Smooth | Wood, metal, and surfaces prone to stains or rust. |
| Shellac Primer | Glossy/Matte | Sealing in odors and stains, providing a strong barrier on wood, metal, and plaster. |
| Paint Type | Finish | Best For |
|---|---|---|
| Acrylic Paint | Matte/Satin/Gloss | Small to medium projects, easy application. |
| Spray Paint | Smooth, Glossy | Large areas, quick coverage. |
| Latex Paint | Matte or Gloss | Projects requiring durability and flexibility. |
Step-by-Step Painting Process
- Get Equipped:
Select your paint as well as brushes and other tools based on your project. - Prepare the Surface:
Remove dust left after sanding by vacuuming or wiping it down with a tack cloth. Also, apply tape if you want to mask off any areas you don’t want painted. - Prime the Surface (optional but recommended):
- Choose the Right Primer: use a stain-blocking primer if the wood is knotty or has discolorations
- Apply an Even Coat: use a brush, following the wood grain
- Allow it to dry according to the manufacturer’s instructions
- Light Sanding: once dry, sand lightly with 220-grit paper and wipe away dust
- Apply Paint in Thin Layers:
- Mix the Paint: stir the paint thoroughly with a stir stick or shake the can
- Apply the First Coat: use a brush for detailed areas and a roller or spray paint for flat surfaces. Apply thin, even coats
- Let it Dry: allow the paint to dry completely (usually 4-6 hours or per instructions)
- Sand Between Coats: lightly sand with 220-grit sandpaper for a smooth finish, then wipe away dust
- Apply Additional Coats: repeat the process until you achieve the desired opacity and finish (typically 2-3 coats)
- Final Sanding (320-400 Grit):
- This helps smooth any imperfections or raised grain caused by moisture in the paint before applying the final coat
- Apply Final Coat:
- After applying the desired number of layers (typically 2-3), let the project dry completely before moving on to sealing
- Finishing Touches:
- Remove Painter’s Tape: carefully peel off the tape to reveal clean edges
- Cure the Paint: allow the final coat to cure fully (up to 24 hours) before using or moving the piece
Painting Tips & Videos
- If you want to paint the inside of your carves, like painting a signature black while leaving the rest of the wood grain exposed, then you can either apply a mask before carving (like Oramask) or consider sealing the wood before cutting it on the CNC. Either technique can really help leave crisp lines where paint would normally “bleed” around the edges.
- Always paint in a well-ventilated area.
- Use quality brushes and rollers to avoid streaks and brush marks.
- Avoid applying thick coats to prevent drips or uneven coverage.
| Video Title | Description | Duration | Link |
|---|---|---|---|
| Which Spray Paint is Best on Wood Furniture? | This video explores different types of spray paints and their effectiveness on wood furniture. | 20 minutes | Watch Video |
| Using a Flat Roller to Paint a V-Carved Sign | A quick tutorial on how to use a flat roller for painting a V-carved sign. | 4 minutes | Watch Video |
Learn Staining
Staining wood offers a natural and elegant way to enhance the grain and color of the wood while still providing protection and durability. Wood stain penetrates the surface, allowing the texture and beauty of the wood to remain visible, unlike paint, which covers it. Stains come in a variety of shades, offering plenty of design options while preserving the wood’s organic appearance.
The most important thing when staining is to properly prepare the surface by sanding to get an even and smooth result. The remaining process involves applying the stain evenly, letting it soak into the wood, and wiping off the excess. Multiple coats can be applied for a richer finish, and pre-stain conditioner can be used for softwoods to ensure even absorption.

Stain Types
| Type of Stain | Description | Best Used On |
|---|---|---|
| Oil-Based Stain | Deep penetration, rich color | Hardwood projects |
| Water-Based Stain | Easy cleanup, less odor, quick drying | Softwood and general projects |
| Gel Stain | Sits on top, great for vertical applications | Complex, detailed surfaces |
| Varnish Stain | Combines stain and varnish for protective finish | Furniture & picture frames |

Step-by-Step Staining Process
- Get Equipped:
Select your stain as well as brushes and other tools based on your project. - Pre-Stain Conditioner (optional):
Use a wood conditioner on softwoods (e.g. pine, maple) to ensure even stain absorption. - Apply Stain with a Brush or Cloth:
Work the stain into the wood, following the grain. Wipe away excess after 5-10 minutes. - Let the Stain Dry:
Allow at least 4-6 hours (oil-based) or 1-2 hours (water-based) before applying a second coat or moving to the sealing stage. - Apply Additional Coats (optional):
If you want a deeper color, you can apply multiple coats, allowing full drying between each.
Staining Tips & Videos
- Be careful trying to stain over any spots with left over wood glue, as the stain will not react the same as on the wood, and will expose a difference in colour.*
| Video Title | Description | Duration | Link |
|---|---|---|---|
| Cool Paint Tool | This short video shows exposing the grain with a cool tool. | 1 minute | Watch Video |
| Wood Staining Basics | Biggest wood staining mistakes and misconceptions | 8 minutes | Watch Video |
Brushes & other Tools
Paintbrush: a versatile tool with bristles made from synthetic or natural materials, used for applying paint, varnish, or stain. Brushes come in different shapes and sizes for various applications.
- Usage: best for cutting-in edges, detailed work, stencilling, and applying smooth coats.
- Types:
- Flat Brush: for large, flat surfaces and broad strokes.
- Angled Brush: for cutting-in and painting edges.
- Round Brush: for detailed or decorative work.

Chip Brush: an inexpensive, all-purpose brush with natural bristles. Not meant for fine finishes, but useful for rough surfaces or for applying glue and other adhesives.
- Usage: ideal for quick touch-ups, stains, or cleaning jobs.
- Types: disposable or reusable, usually made with natural hog bristles.

Detail Brush: a small, fine brush used for precise work, such as painting intricate patterns, corners, or detailed trim.
- Usage: best for fine detailing, small touch-ups, and tight spaces.
- Types: synthetic or natural bristles, typically round or angular in shape.

Foam Brush: a foam pad on a wooden handle used for applying paint or varnish with minimal brush strokes. Ideal for smooth finishes and water-based products.
- Usage: great for spreading thin, even coats without leaving bristle marks.
- Types: disposable foam brushes are available in different sizes, typically ranging from 1 to 4 inches.

Stain Brush: a thick, wide brush designed for applying wood stains and varnishes. Has a high bristle density to hold more product and provide good coverage.
- Usage: apply stains and varnishes evenly over large surfaces.
- Types: available in various sizes and bristle materials, often 3–4 inches wide.
Spray Paint: an aerosolized paint that allows for quick, even application over a wide area. It is convenient for both small and large-scale projects where speed and ease of use are essential. You can get a grip attachment that helps hold the can better and dispense the paint smoothly.
- Usage: ideal for covering surfaces evenly, sign letters, stencils, or projects requiring multiple light coats.
- Types: available in various finishes such as matte, glossy, and metallic. Comes in different formulations, including general-purpose for wood/plastic/metal, primer, and paint+primer.
Tack Cloth: a sticky, lint-free cloth used to remove dust, dirt, and debris from surfaces before painting. It ensures a smooth, clean surface to help achieve a professional finish without imperfections.
- Usage: gently wipe the surface with the tack cloth to pick up fine dust and particles before applying primer or paint.
- Types: available in various sizes and tackiness levels for different surface types. Some are designed for light-duty cleaning, while others are more robust for larger projects.
Painter’s Tape & Oramask: a specialized tape used to mask off areas that should not be painted, ensuring clean, sharp lines and protecting surfaces from unwanted paint. Painter’s tape is easy to apply and remove, leaving no residue behind.
- Usage: apply along edges, trim, or anywhere you want to create crisp lines or protect from paint splatter. Make sure to press down firmly to prevent paint from seeping underneath.
- Types: available in different widths and adhesion levels, designed for various surfaces like drywall, wood, or glass.

Advanced Techniques
French Finishing
French finishing, also known as French polishing, is a traditional wood finishing technique that’s highly regarded for creating a high-gloss, lustrous, and deep finish on wood surfaces. This technique dates back to the 18th century and is typically used on fine furniture and musical instruments, like guitars and violins.
Using shellac, alcohol, and a rubbing pad to build up multiple thin layers, the end result brings out the rich grain and natural warmth especially on high-quality woods. Surprisingly, the delicate layers also combine to create a surprisingly resilient finish. The general process is as follows:
- Prepare the Wood
Sand the wood to a very smooth surface, progressing through grits from 120 up to 320 or even finer. Ensure the wood is free of any dust, scratches, or imperfections, as French finishing will highlight these. - Create the Padding
Make a French polishing pad, or “rubber,” by wrapping a small ball of cotton in a soft, lint-free cloth. The pad should be shaped so that it has a smooth, even surface to glide over the wood without leaving marks. - Apply the Shellac
Start by saturating the pad with a mixture of shellac and alcohol (typically a 1:1 ratio). Apply the shellac in long, sweeping motions, working in small circular or figure-eight movements to evenly coat the wood. Be careful not to press too hard, as this can damage the finish. Work in thin layers, allowing each layer to dry before applying the next. - Build Up Layers
Continue applying layers of shellac until the desired depth and shine are achieved. This can take multiple sessions, as each layer should be allowed to dry for at least 30 minutes between applications. For a rich, glossy look, French polishers may apply 10-20 layers of shellac. - Lubricate with Oil
To prevent the pad from sticking to the wood as you build layers, add a few drops of oil (such as mineral oil) to the pad. This will act as a lubricant and help achieve a smoother finish. Be sparing with the oil, as too much can dull the finish. - Finish and Buff
Once you’ve built up a sufficient number of layers and achieved a deep gloss, allow the finish to fully cure (which may take up to a week). Then, lightly buff the surface with a clean, soft cloth to remove any residual oil and enhance the shine.- French finishing works best on fine woods like mahogany and walnut.
- Avoid using the finish in high-moisture areas, as shellac can be sensitive to water.
By following this process, you can achieve a stunning, professional-quality finish with a deep, luxurious sheen that highlights the natural beauty of the wood.
Tip: practice on a scrap piece of wood to perfect your technique before applying French finish to a larger project.
| Video Title | Description | Duration | Link |
|---|---|---|---|
| French Polishing for the complete beginner | A quick overview of the French polishing method. | 8 minutes | Watch Video |
| Wood Magazine | The centuries-old process of applying finish using a shellac-soaked cloth pad | 5 minutes | Watch Video |