
Now that you’ve put together your LongMill, you’re probably in a rush to run it for the first time! Well good news, we’ve put together two different projects for you to try out with minimal requirements and setup.
LongMill line writing
This is a very simple file which follows a line writing to spell out “LongMill”. The code that’s provided below has been made to make a very shallow cut at a low speed out of a 310x45mm piece of material. These conservative settings mean that the file can be run with almost any cutting tool out of almost any type of material. To set it up, mount your material in the cutting area so that it’s somewhat square to the machine. Using gSender or the control software of your preference, jog the tool over to the bottom left of where you’ve laid out a 310x45mm space where the tool can cut. Be sure that this space doesn’t have any screws or clamps in it which will interfere with the lettering and also make sure that it’s fully within the cutting area. Bring the tool down to the surface of the material (either manually or by jogging) and finally click “Reset zero” to confirm that you want to set this as the tool origin.
 in the bottom left-hand corner (visualized using CAMotics)")
Download the file above, ‘unzip’ or ‘extract’ it, then load it into gSender by clicking the “Load File” button. Once loaded, you’ll be able to see a visualization of the tools movements. If you’re satisfied, turn on your router (note this file doesn’t currently contain spindle control commands) then run the file!
CNSheep
This is the other one of our first projects, a sheep cut into foam that we call the CNSheep. The code was designed for cutting out of foam with a 2-flute, 1/8″ end mill but it should also work on soft woods as well. If you don’t have these tools or materials on hand, the .zip file also contains the 3D model of the sheep so that you can run it through your desired CAM software to set it up for another material or tool.
When you’re setting up to cut, follow the same setup procedure as outlined in the first project above except that the pre-built g-code starts in the middle instead of the front corner, so reset the zero point in the center. Any workholding method should be sufficient, you can reference these on the ‘Workholding’ page in ‘The Basics’ section of the resources. The sheep’s dimensions are 100mm wide by 70mm tall and will cut 6mm deep.
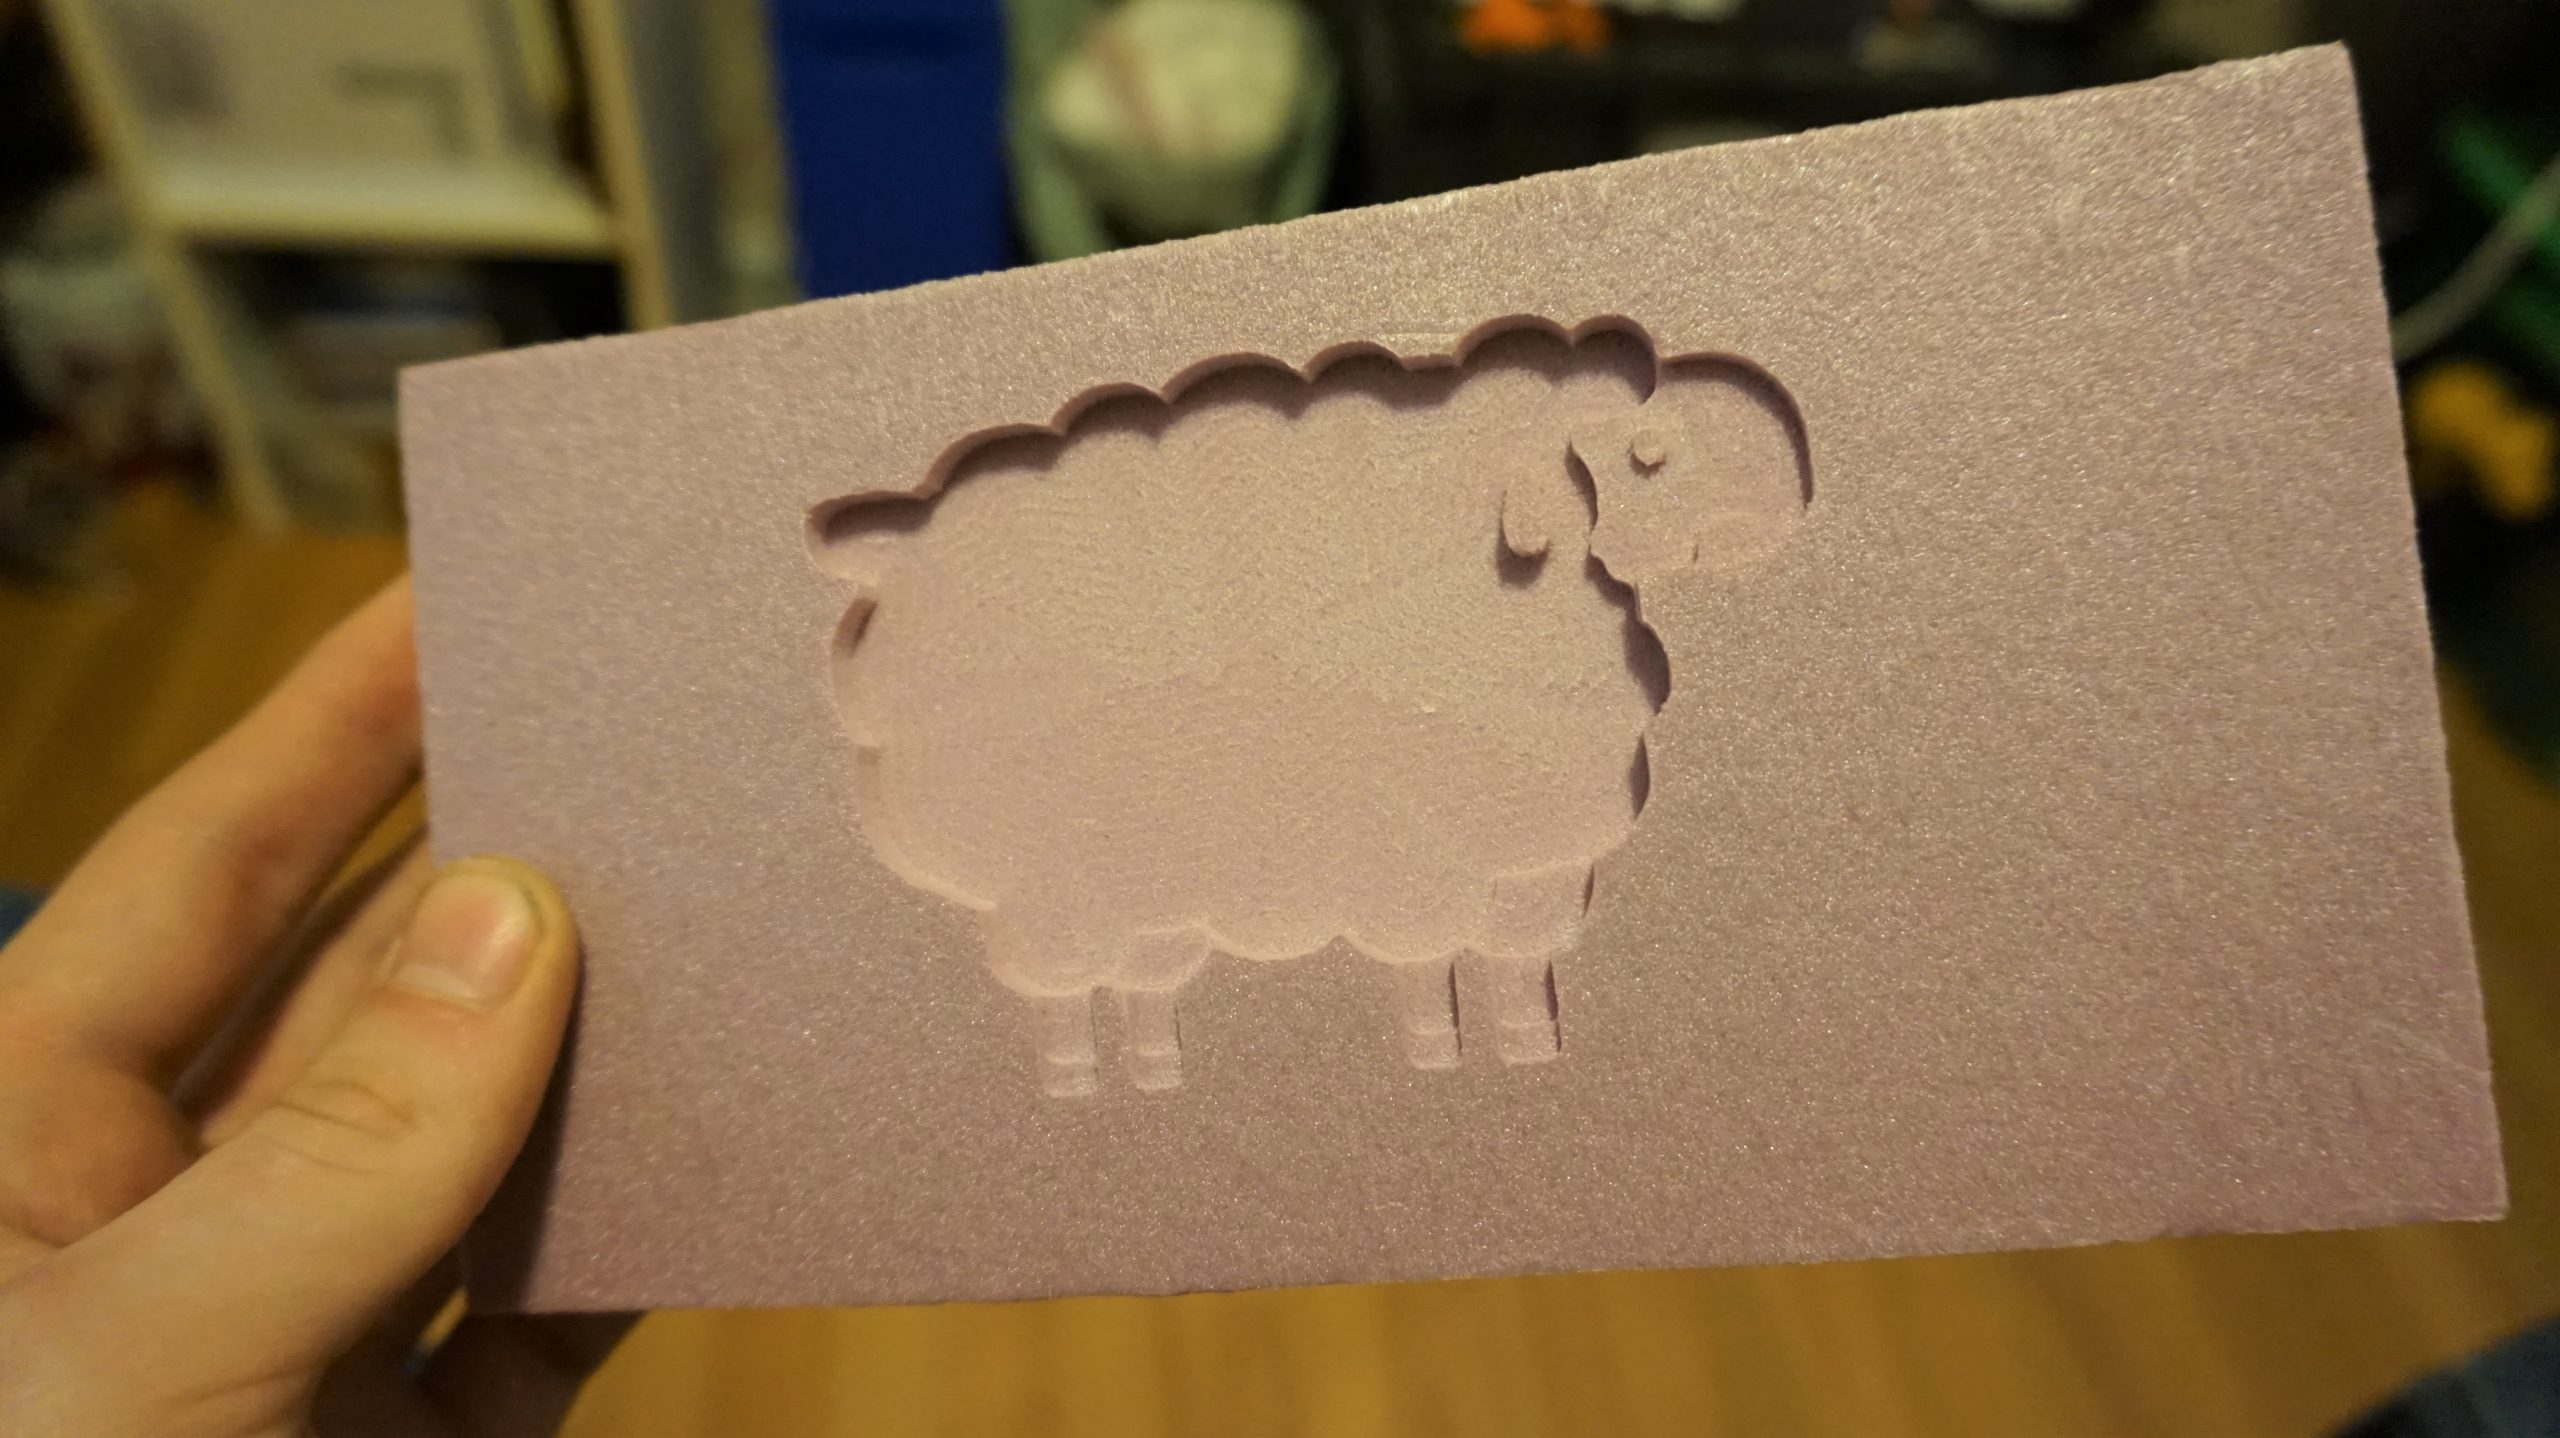
If all goes well, your final product should end up looking something like this!
The Final Steps towards starting with CNC
Now that you’ve got your machine running successfully, we’ve got a lot more information for you the check out that’s easily accessible on the left navigation bar:
| Page | Information you’ll find |
| Common Issues and Fixes | If you noticed an issue with your LongMill while table mounting it or during a starter project, check out this page to help point out some easy things you can check in case something went wrong during assembly. |
| Assembling Add-ons | If you ordered any add-ons alongside your LongMill, the instructions to assemble them are written here. |
| Wasteboard Surfacing | Learn how to prepare a flat surface for cutting projects more reliably. |
| More Projects | Try out some more starter projects or find inspiration for what to make next with your CNC by checking out our ideas list or seeing where to find projects online. |
| CNC Maintenance | Understand how to best maintain your LongMill so it can continue to carve reliably for whatever you use it for. |
| ‘The Basics‘ and ‘Software‘ sections | There are some of you who may have just completed assembling your LongMill but have yet to familiarize yourself with how your CNC operates or what software you’d like to use to run it, if that’s the case we highly recommend going back to these previous sections where we cover everything from cutting tool terminology to even a Toolchain Wizard we created which helps to you decide what software options are right for you. |
| Advanced section | If you start to feel really comfortable with your LongMill and want to start changing it to better suit your own needs, we’ve got even more information on changes and modifications here. |
Our YouTube channel
Did you know we have a YouTube channel where you can find videos and tutorials on using your LongMill? We cover things like:
- How to go from idea to completed project
- V-carving signs
- Carving 3D hills and terrain
- Live Webinars and Q&A sessions
- and more!
We really hope you enjoy using your LongMill Benchtop CNC in the days, weeks, and months to come. Remember that CNC routers are an amazing tool that you can use for whatever you like, and the point of the LongMill and it’s community is to offer you resources and support so that you can be confident in using your CNC to make what you imagine. Good luck and happy making!
-The Sienci Labs team