
Material chips and dust management isn’t a necessity on any CNC router (as long as you’re wearing dust protection gear), but it certainly doesn’t hurt. Some great benefits that you’ll notice with a proper dust management setup are:
- Less cleaning maintenance on your CNC
- Little need to clean up after your machine
- Keeps your cutting mess contained and shop air clean
The LongMill MK2 had two add-ons designed alongside it for added dust management: a magnetic dust shoe for active dust collection and Y-axis dust shields for keeping your Y-axis rails and mechanics spotless during regular use. Below we’ll be covering these add-ons and how to set them up on your MK2.
Magnetic Dust Shoe
From our store: https://sienci.com/product/LongMill-magnetic-dust-shoe-mk2/
To make dust collection easy on your MK2, we spent the time to create its own purpose-made magnetic dust shoe. With a tapered opening it’s able to accommodate a range of hose sizes from 2″ to 2-1/8″ on the outside and 1.5″ on the inside. You can even push this a little further with adapters or adding extra thickness with a couple loops of tape.

The design is adjustable, meaning that it’s built to work best on flat and sheet materials. Set the shoe height to the top of your material with the bristles pushed in slightly, then run your job and leave the dust shoe to sweep up the mess. Some other advantages of this shoe design are:
- No machine travel is used up
- No parts come out in front of the router and block your view of the cutting
- Viewing window provides added visibility of cut-in-progress
- The built-in release trigger means height adjustment is a breeze
- Magnetic attachment means easy removal for getting at your bits and easy re-attachment
Watch the assembly and installation video:
See more about how the shoe can be used for dust collection on your CNC as well!
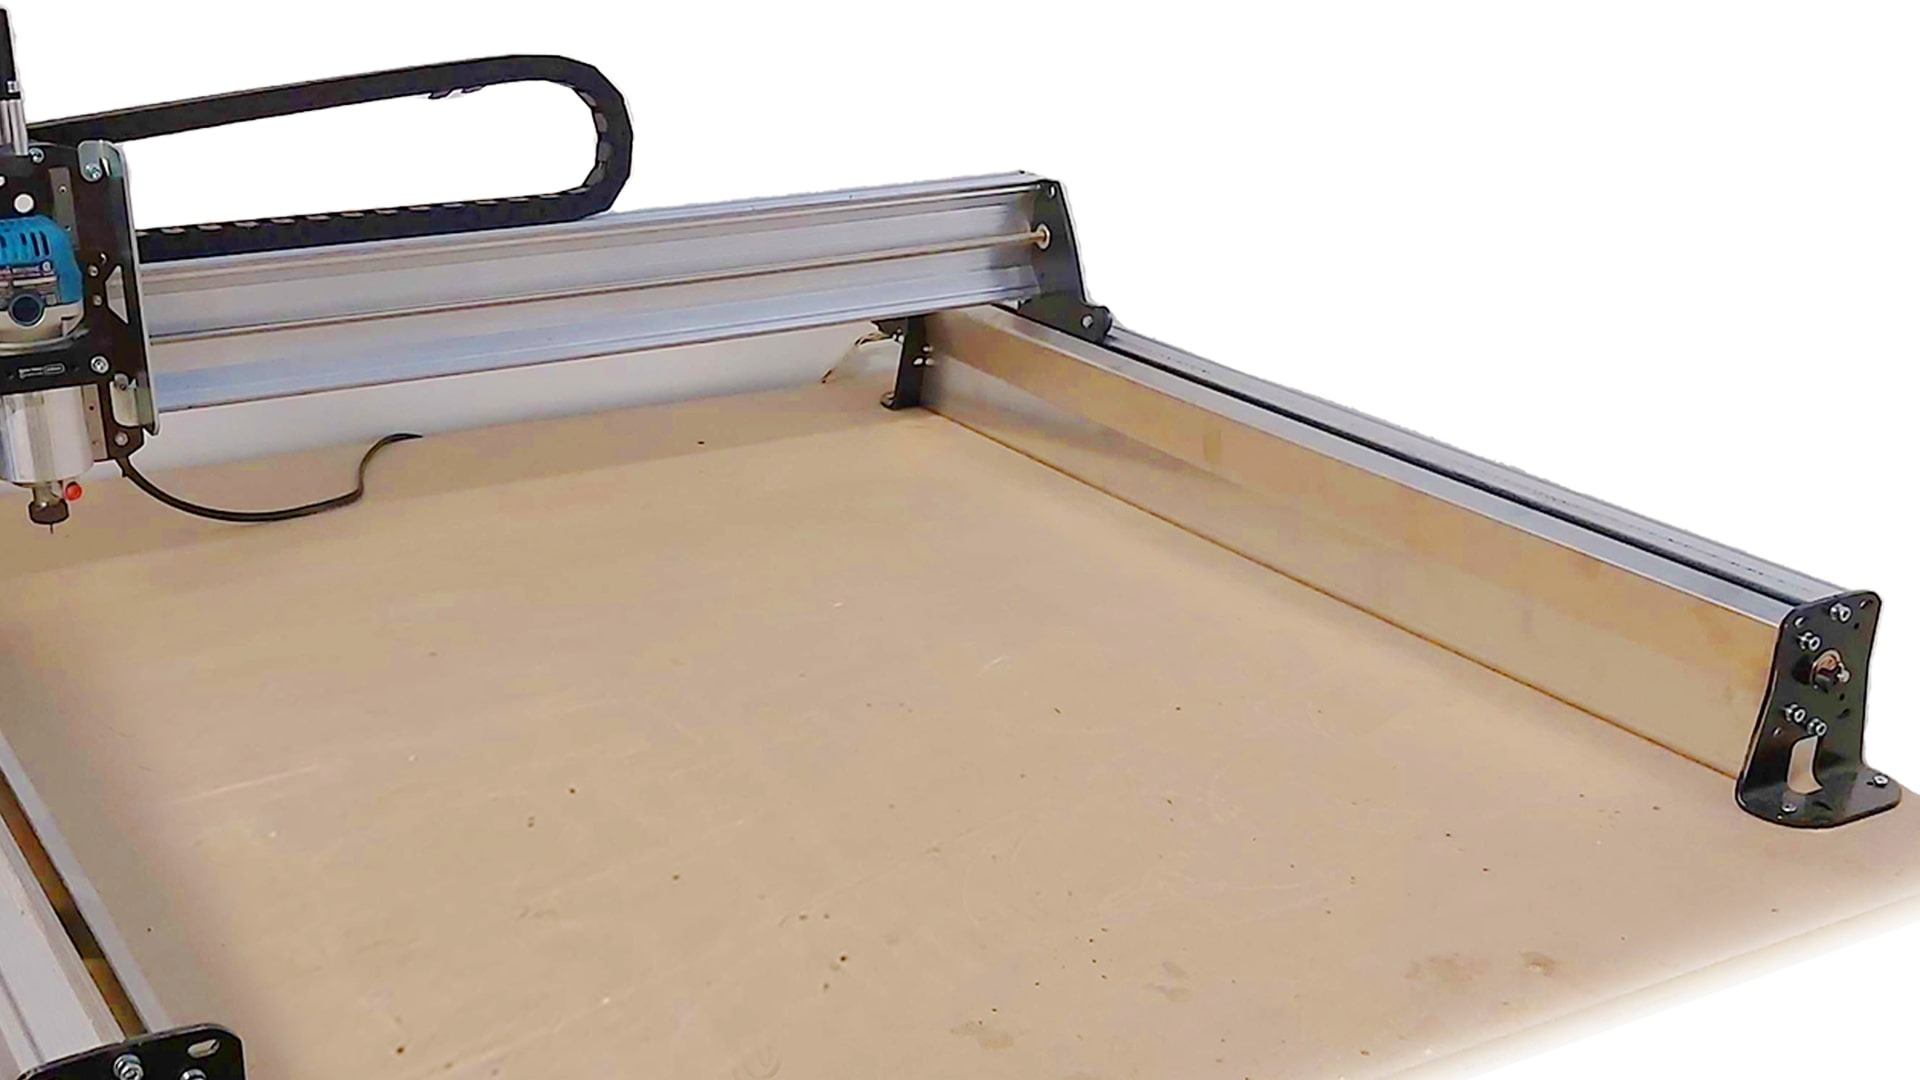
Dust Shields
From our store: https://sienci.com/product/LongMill-mk2-lead-screw-dust-shield/
The MK2 dust shields are stainless steel and are designed to be easily installed and removed in order to give you easy access to the LongMill’s mechanics for maintenance and cleaning. Dust shields come in many forms, this style isn’t ‘sealed’ but is instead meant to provide a reasonable barrier to dust entry in order to discourage build-up on the mechanical areas closest to the cutting action. Please Note: These shields aren’t compatible with the 12×30 MK2
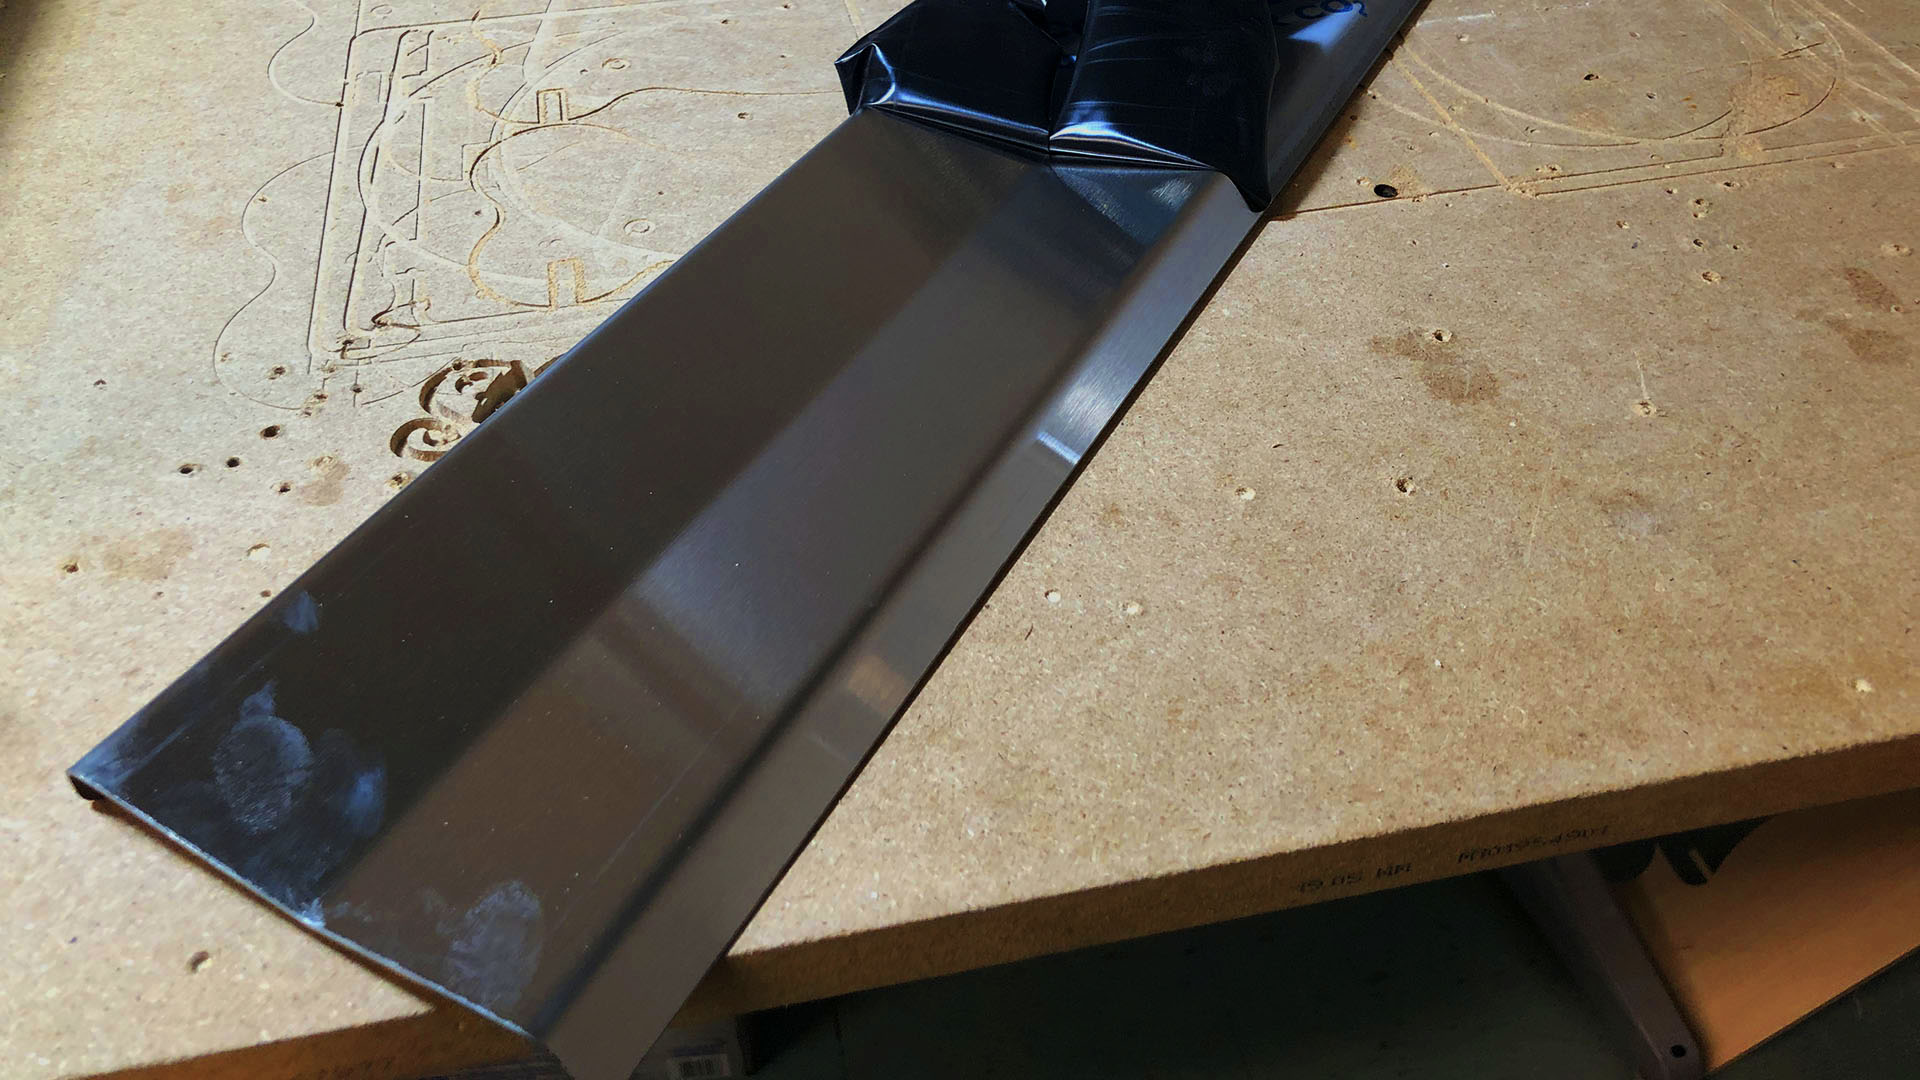
For assembly you should have:
- Stainless steel dust shields (x2)
- M5-10mm bolts from the main assembly hardware bag (x4)
To install the shields, your LongMill will need to be screwed down to a table or surface. Start by peeling off the protective film on the front of each shield.
Screw one M5-10mm bolt into the top, inner threaded hole on each of the front feet (left foot shown).
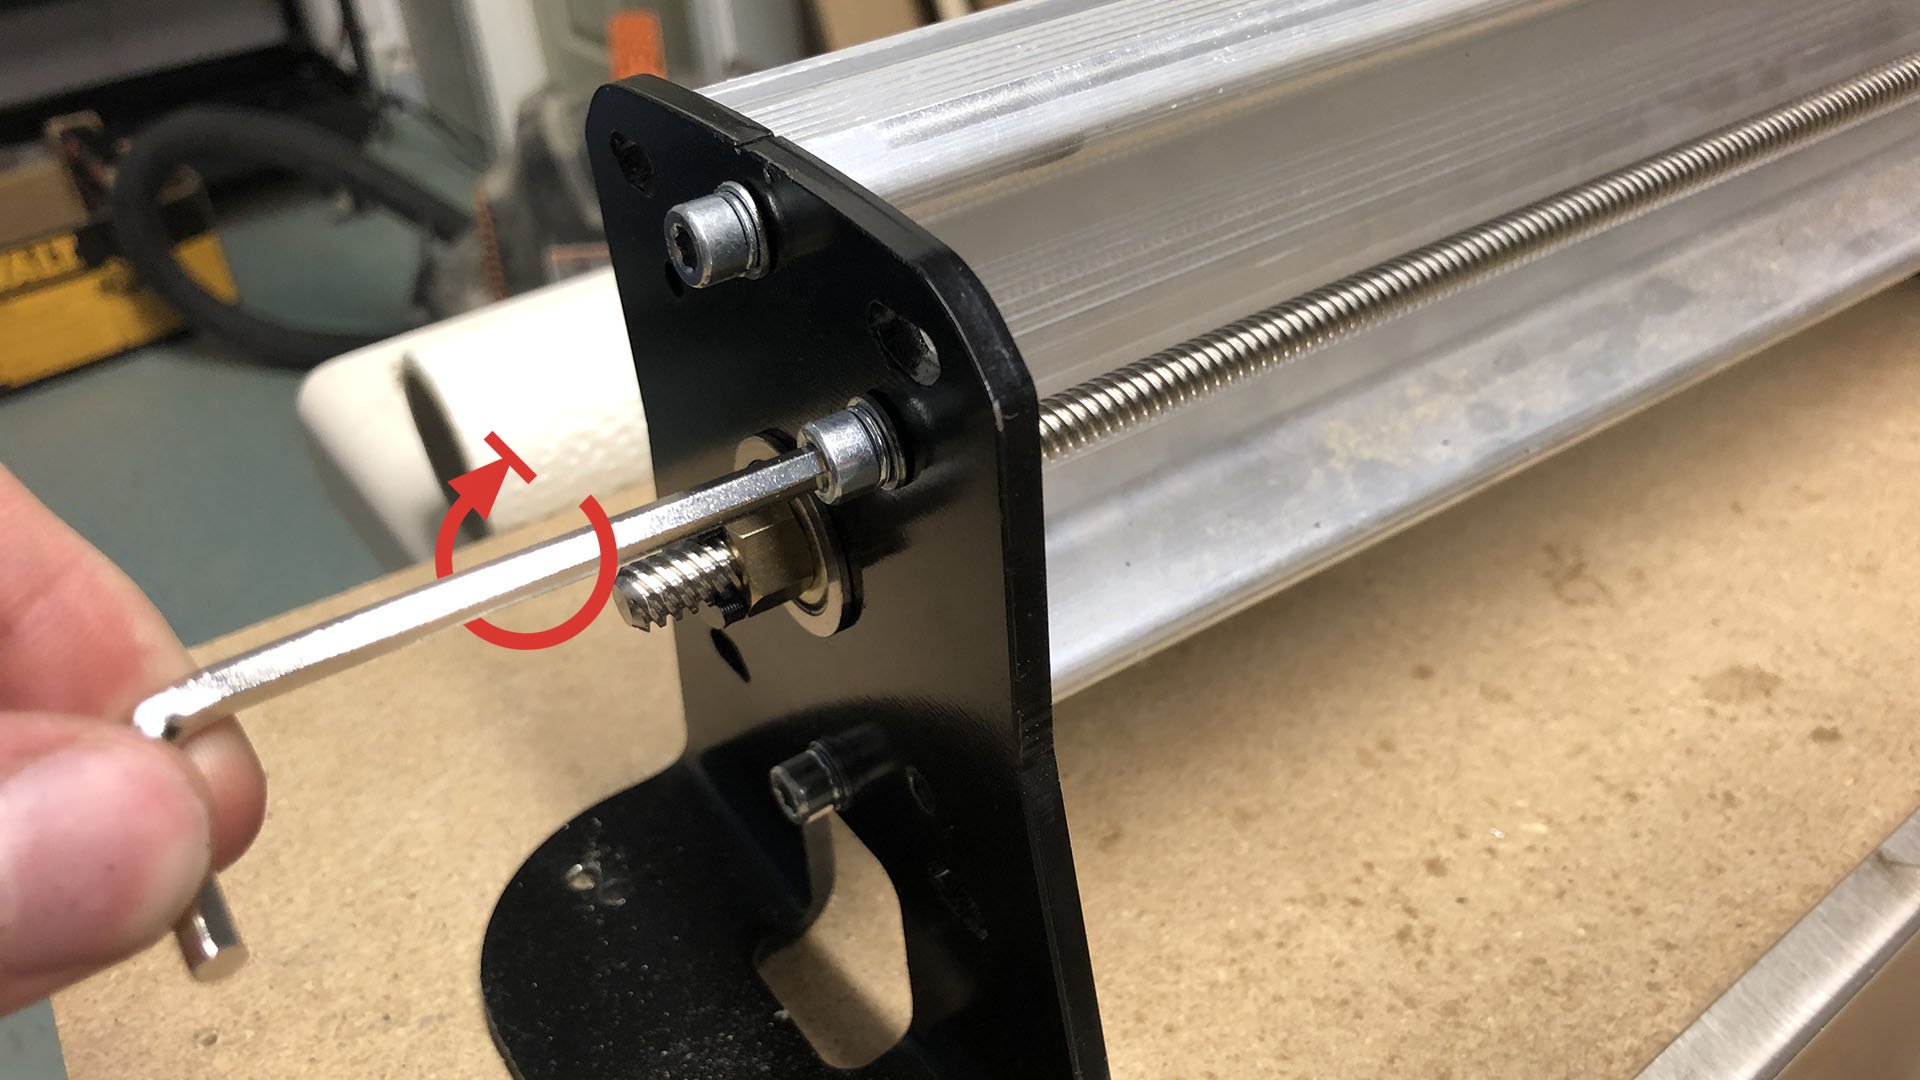
Installing each shield is now possible; the pictures show the left side installation and you can mirror these steps for the right side. Slide the shield in from the front of the machine with the shallow bend on the shield facing up (pictured).
The shield will fit into the protruding bolt threads, one on the inside and the other on the outside (pictured).
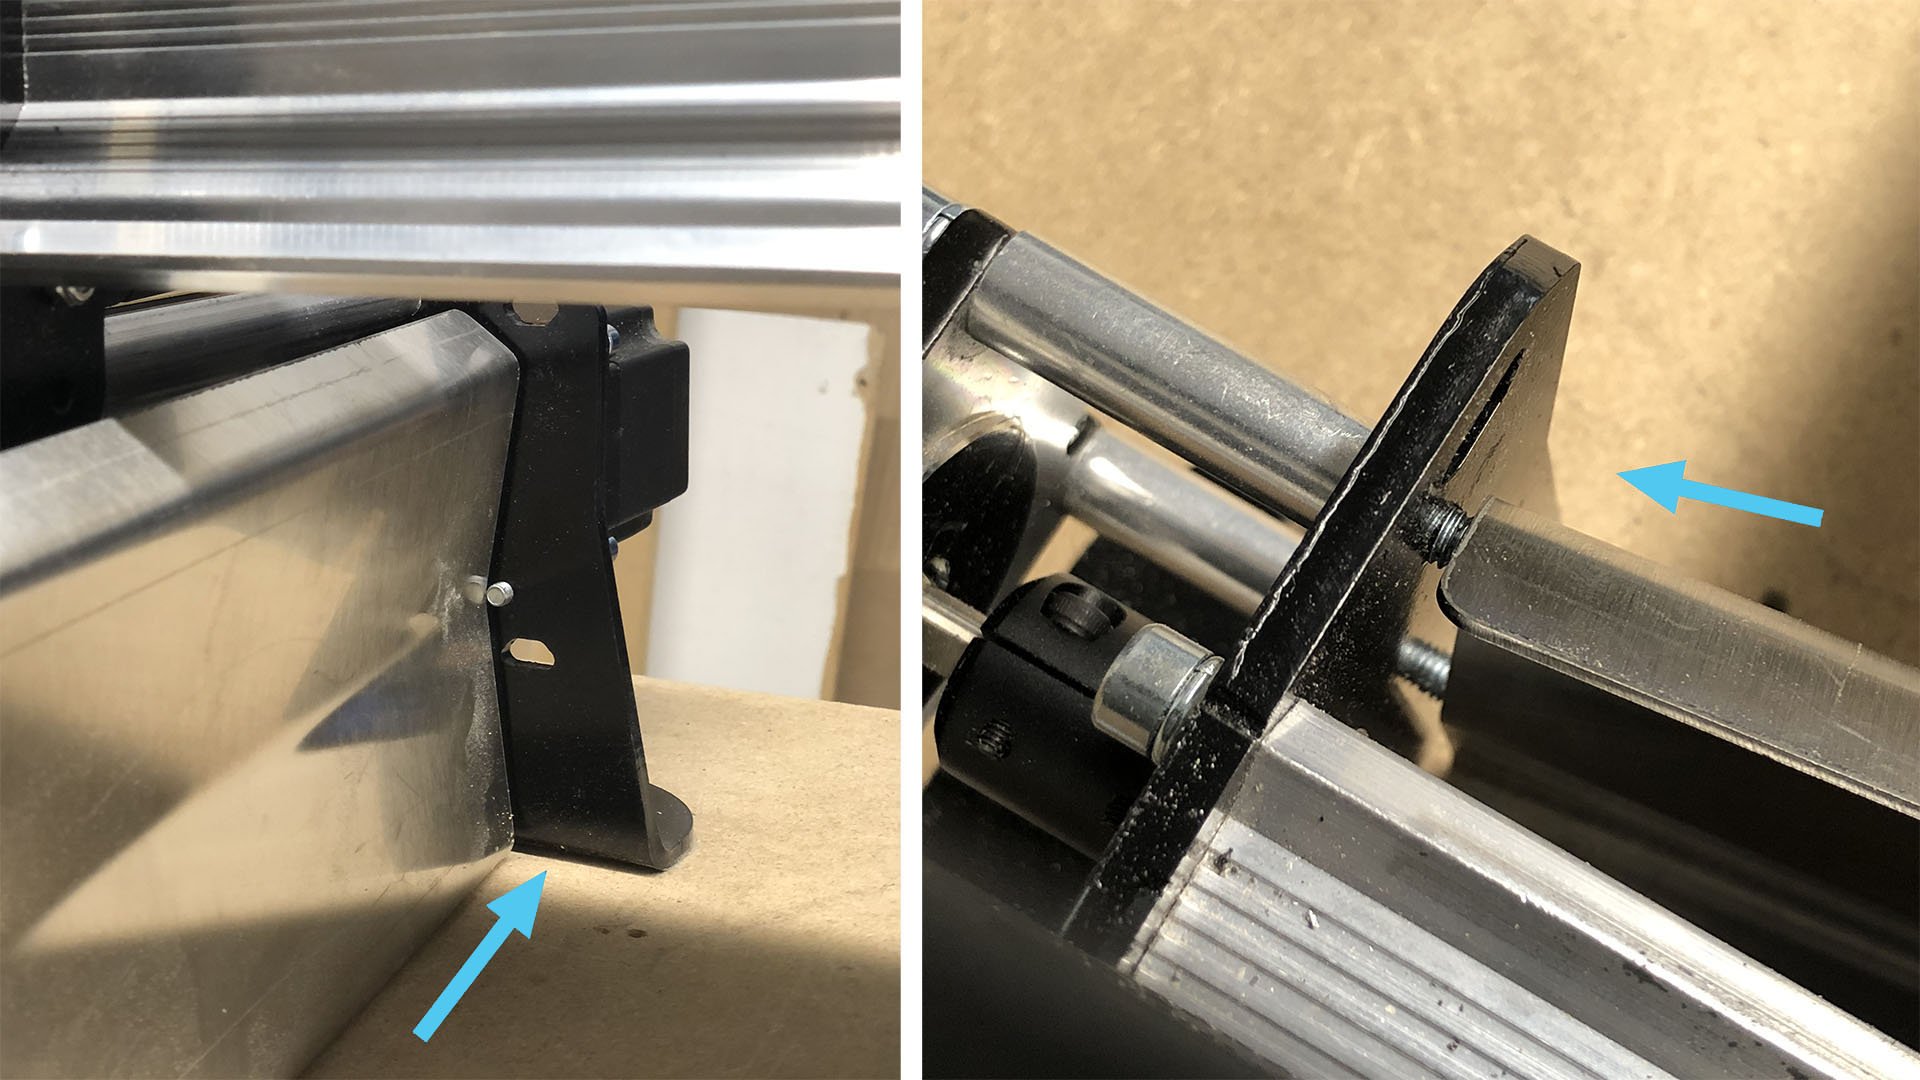
With this placement, you should be able to angle the front of the shield inward until it collides with the M5-10mm bolts you installed on the front feet. Once it does, push on the inner groove of the shield (pictured) and install the other M5-10mm bolt into the bottom threaded hole until it sticks out on the inside of the shield (pictured).
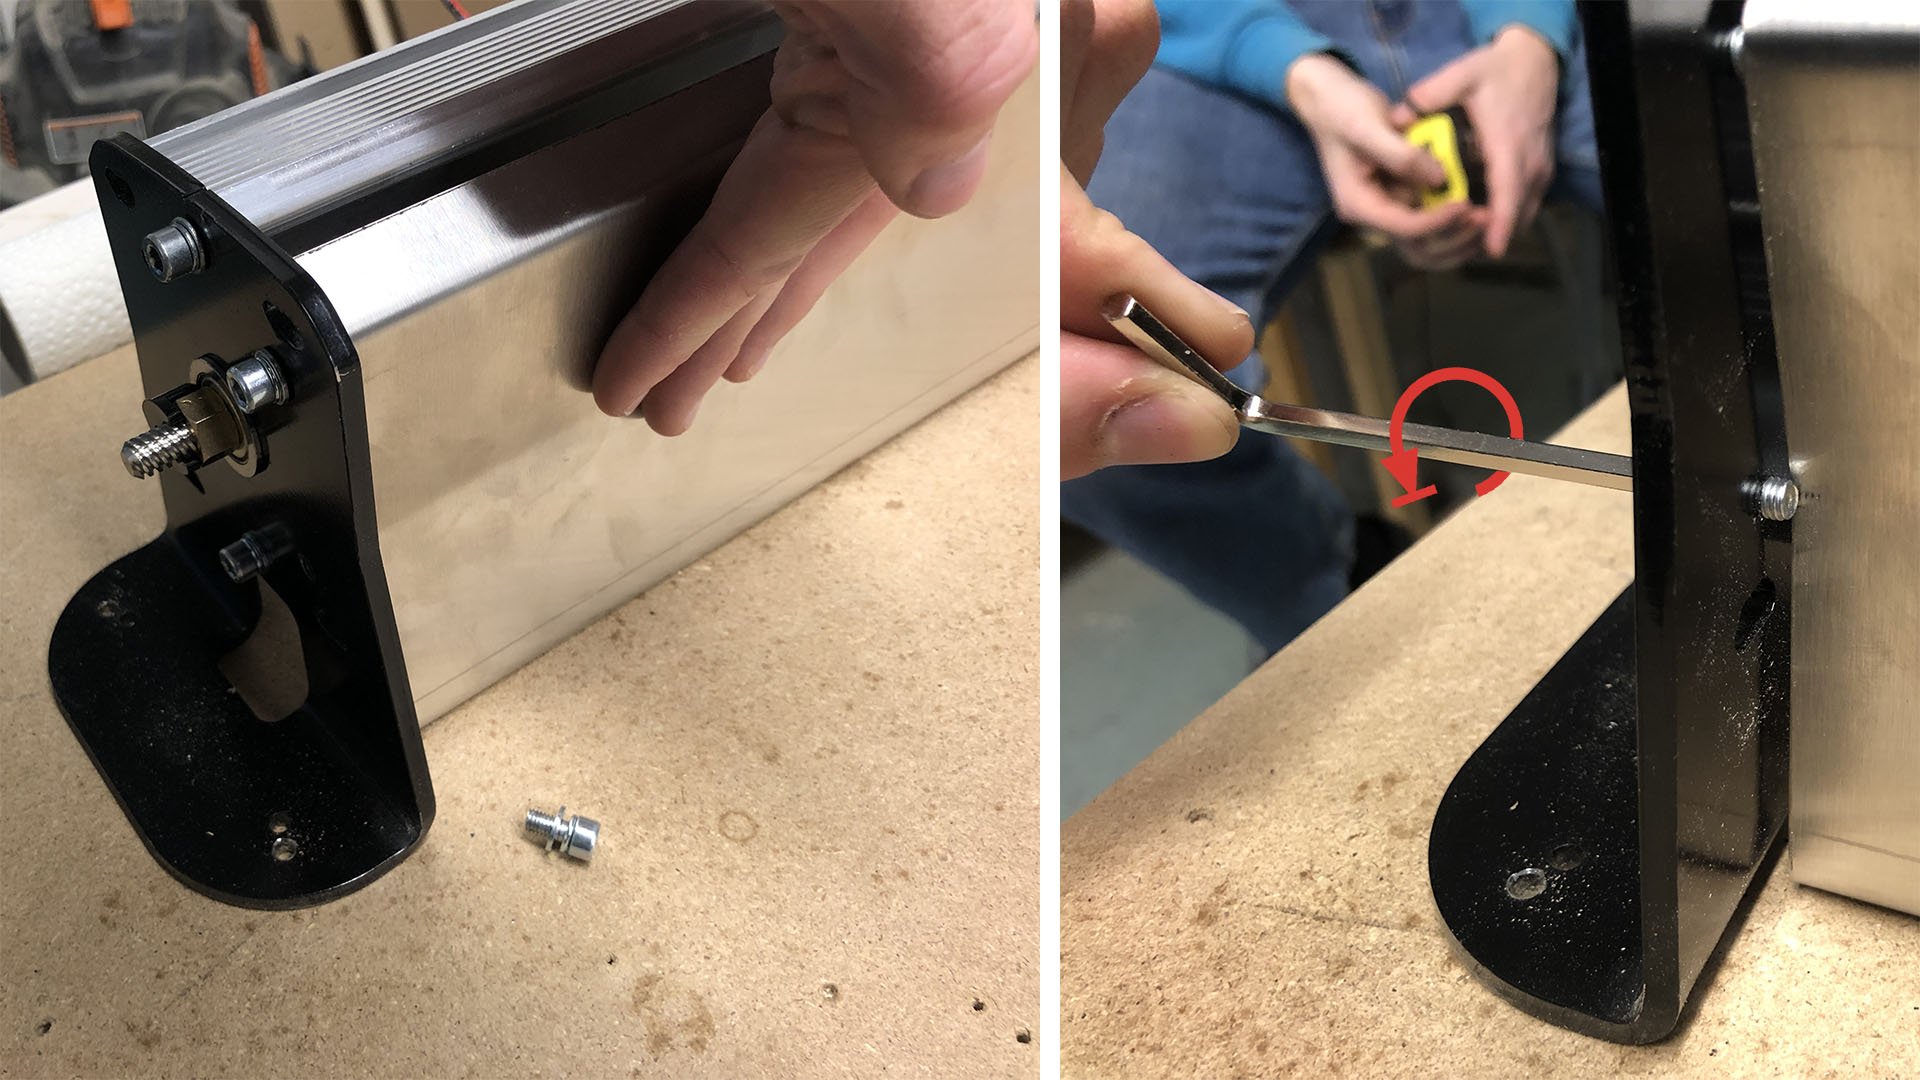
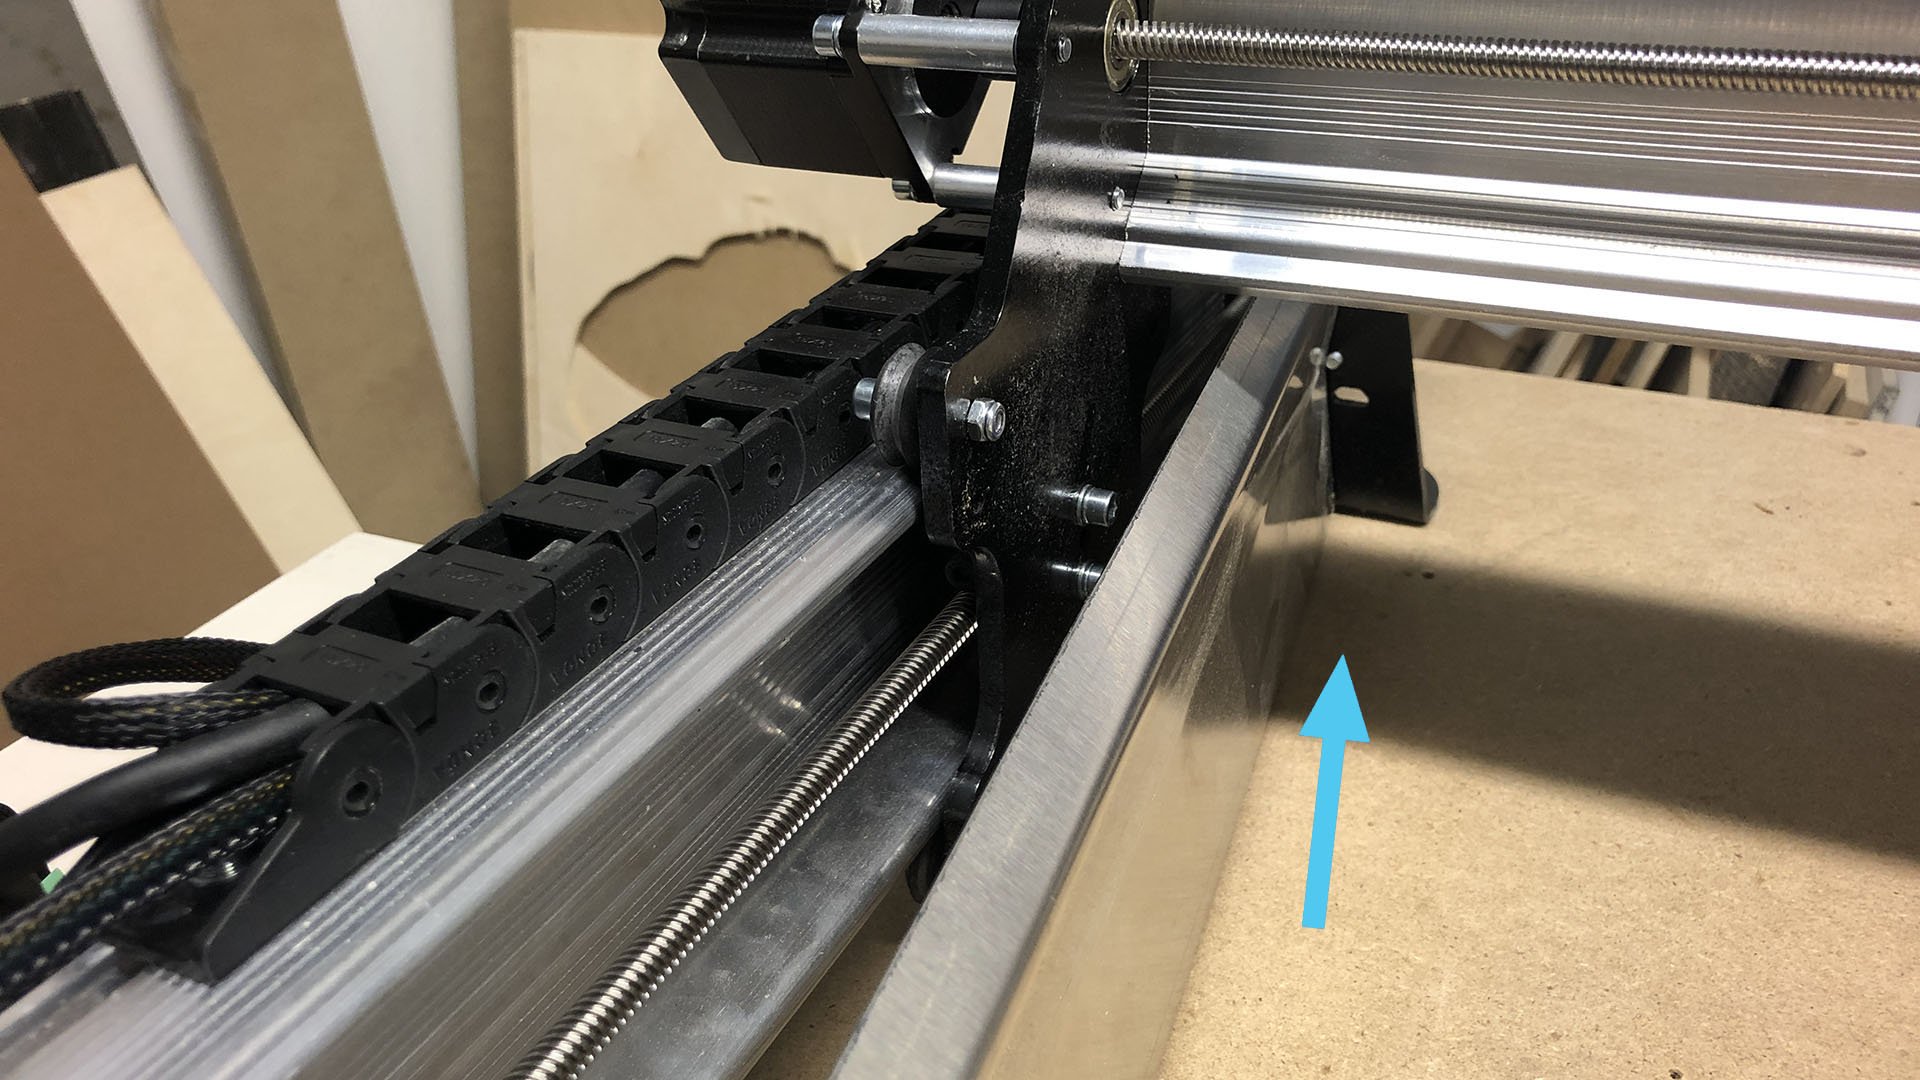
The shields should now be held securely in place between the three contact points of the front and back bolts as well as the middle feet. If there’s any looseness or rattling check to make sure all four M5-10mm screws are contacting/holding each point of the dust shield securely. Ensure the lower lip is caught by the two middle feet on each Y-rail.
The shields are done, how cool is that! For any maintenance just loosen the bottom M5-10mm bolts and slide the shields out, then replace them in reverse order.