
Now that you’ve put together your MK2.5 let’s get something cut out on it! Are you Team Fun or Team Functional?? You can see each project states the type and size of material it supports as well as the type of cutting tool you’ll need to cut it out so choose wisely. Once you choose your project and download the file, scroll further down the page to learn about how you’ll set your machine up and carve your first project.
Fun Projects
| Image | Description |
|---|---|
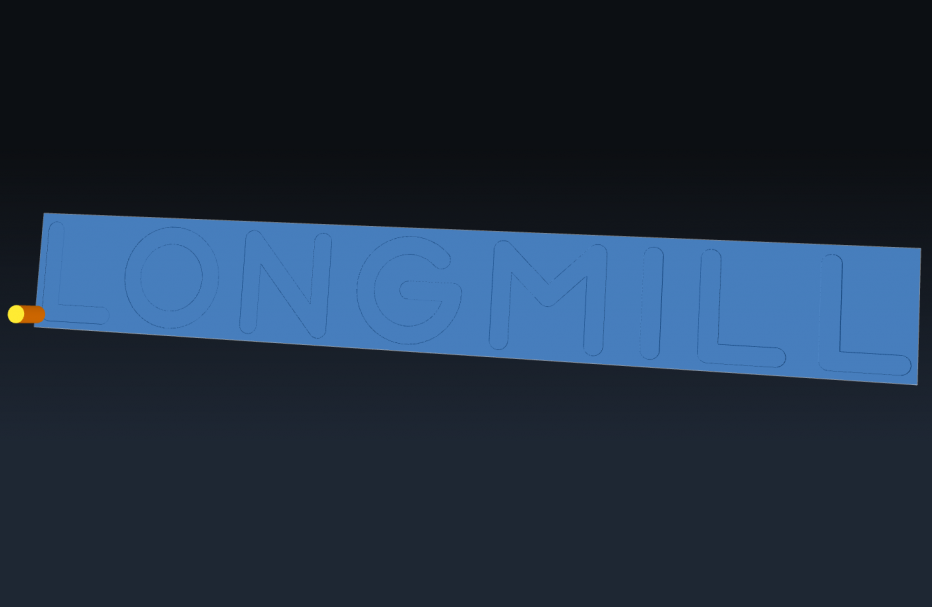 |
LongMill Lettering Download g-code Slowly spells out “LongMill” – a great way to christen your new CNC. • any material (302 x 35 x 2mm) • any cutting tool • zero at the front left corner • 3.5 router speed |
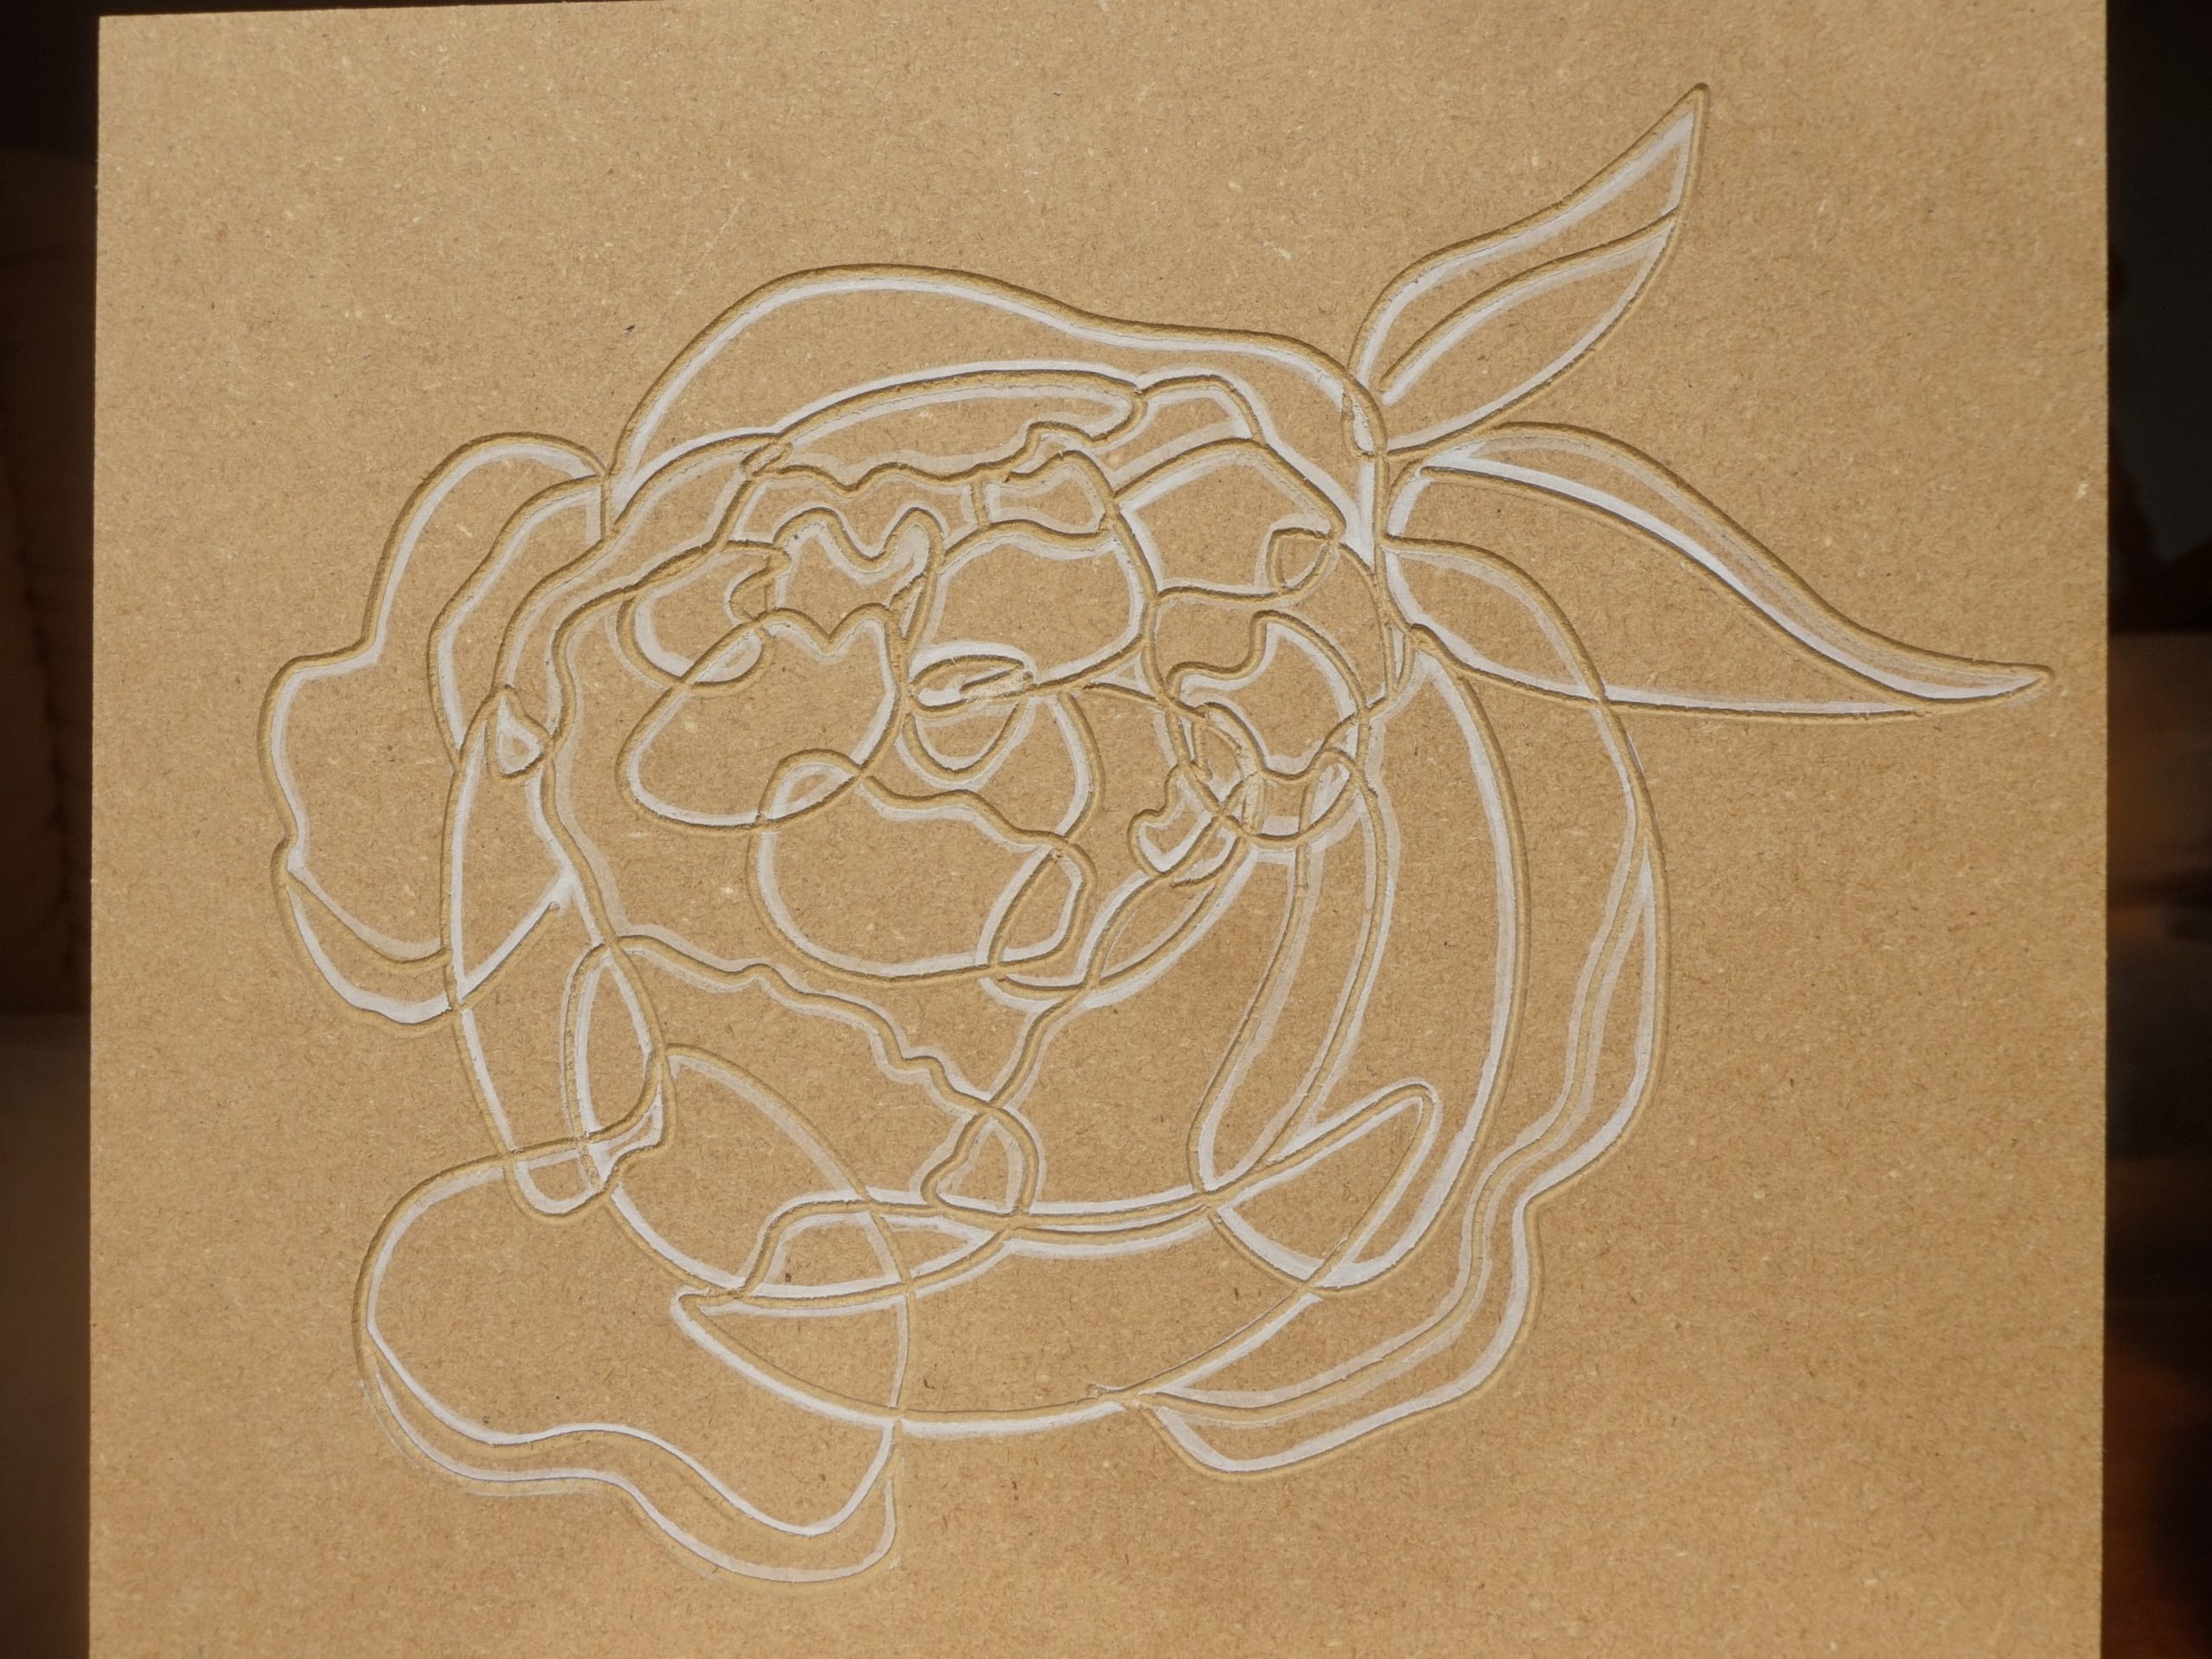 |
Kelly’s Peonies Download g-code Made by a Sienci team member when she was inspired to make a custom flowery carving. • any material (220 x 200 x 2mm) • v-bit or small ball or flat bit • zero at the front left corner • 3.5 router speed |
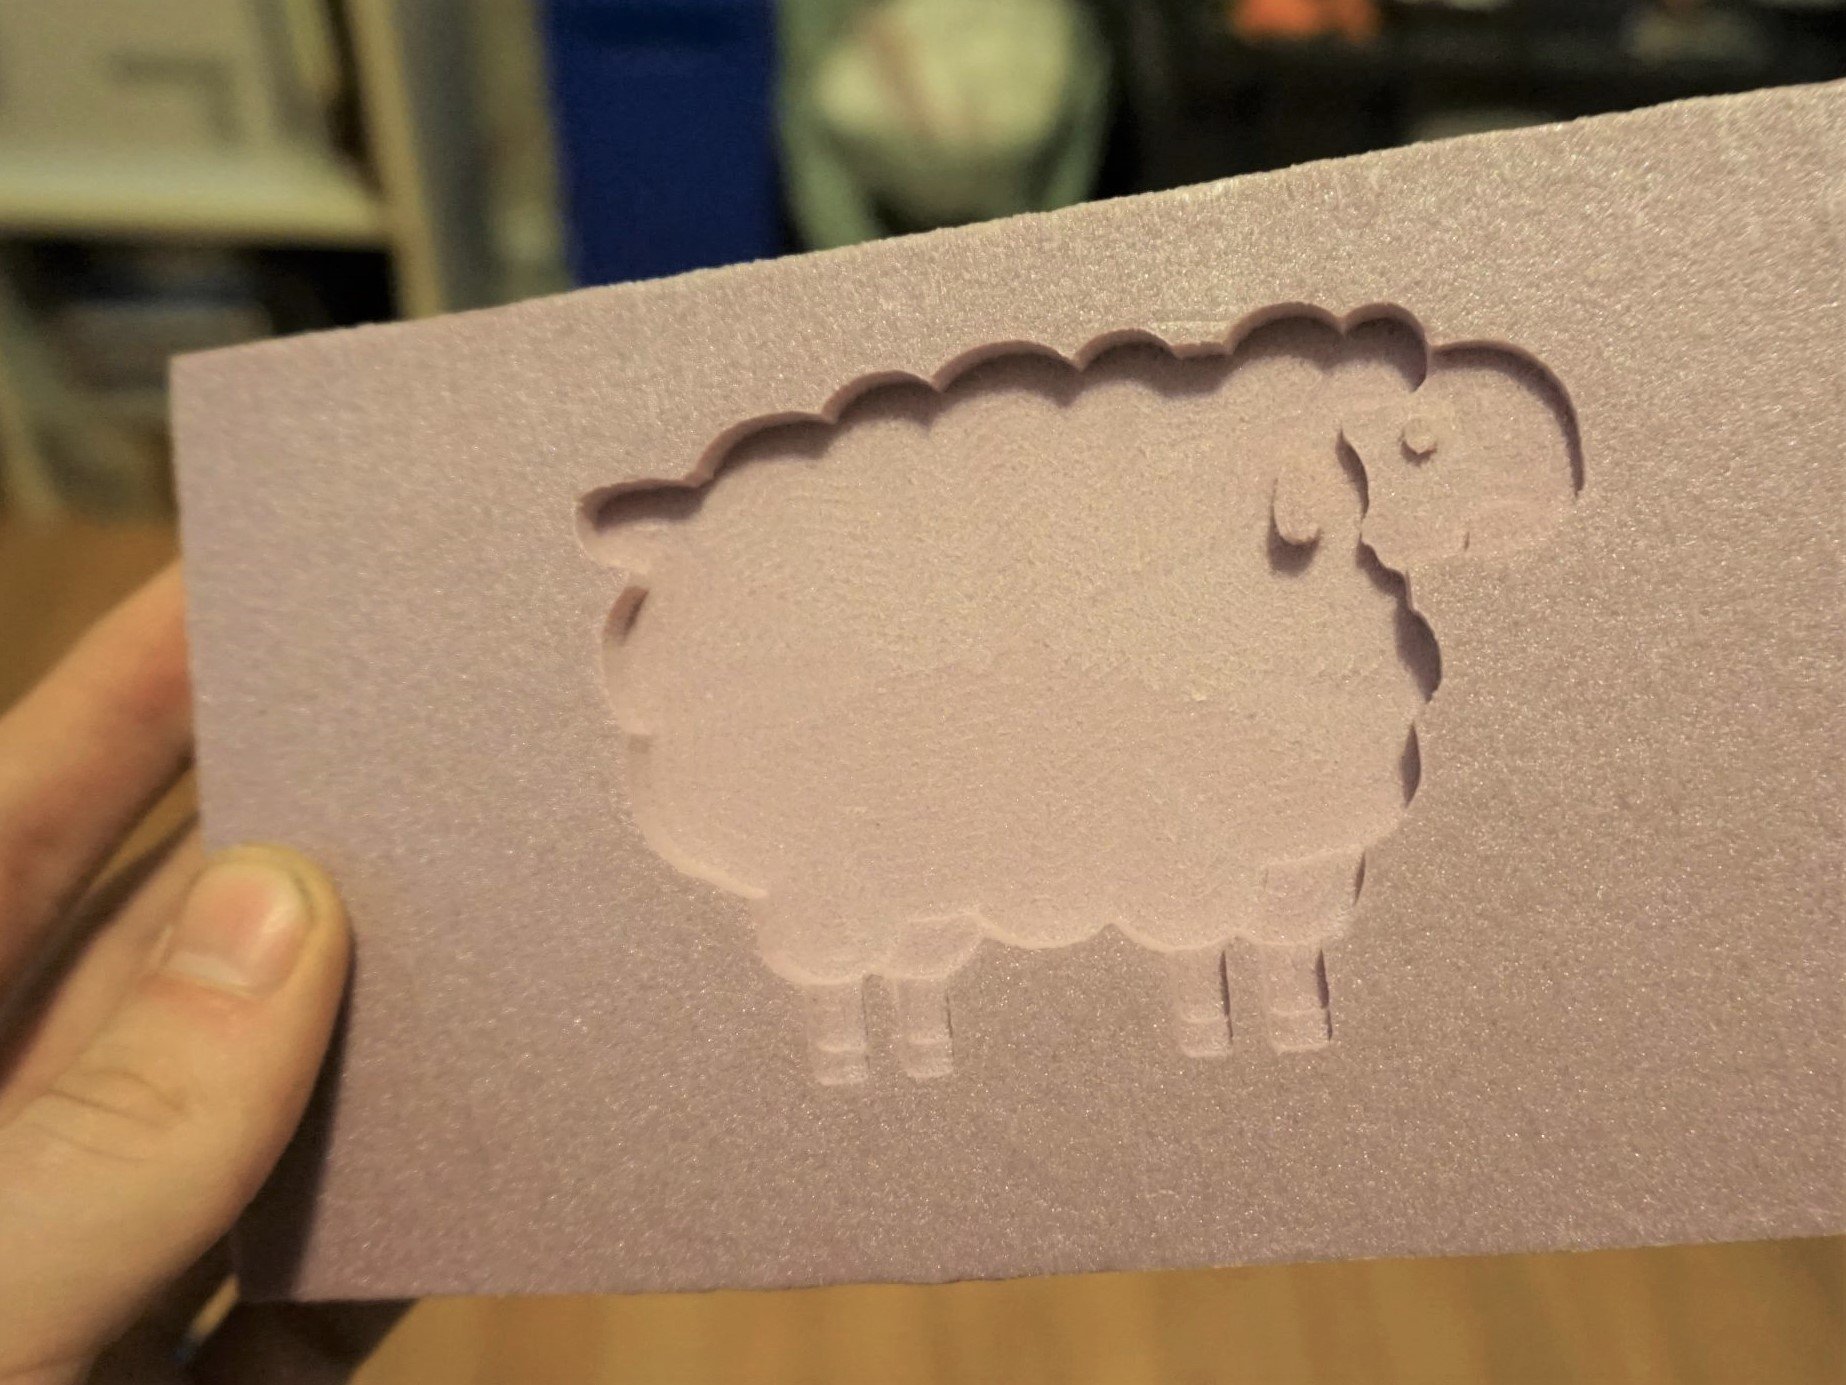 |
The Classic CNSheep Download g-code A fun “2.5D” carving of the classic CNSheep. This bleating companion will keep you company for years to come. • foam or soft wood (100 x 70 x 8mm) • 1/8″ flat end mill • zero at the center • 3 router speed |
Functional Projects
| Image | Description |
|---|---|
 |
Drink Coaster Download g-code Rest your beverage while admiring the rotational symmetry of the Sienci Labs logo. • any 1/4″ thick material (100 x 100 x 6.25mm) • 1/8″ flat end mill • zero at the center • 3.5 router speed |
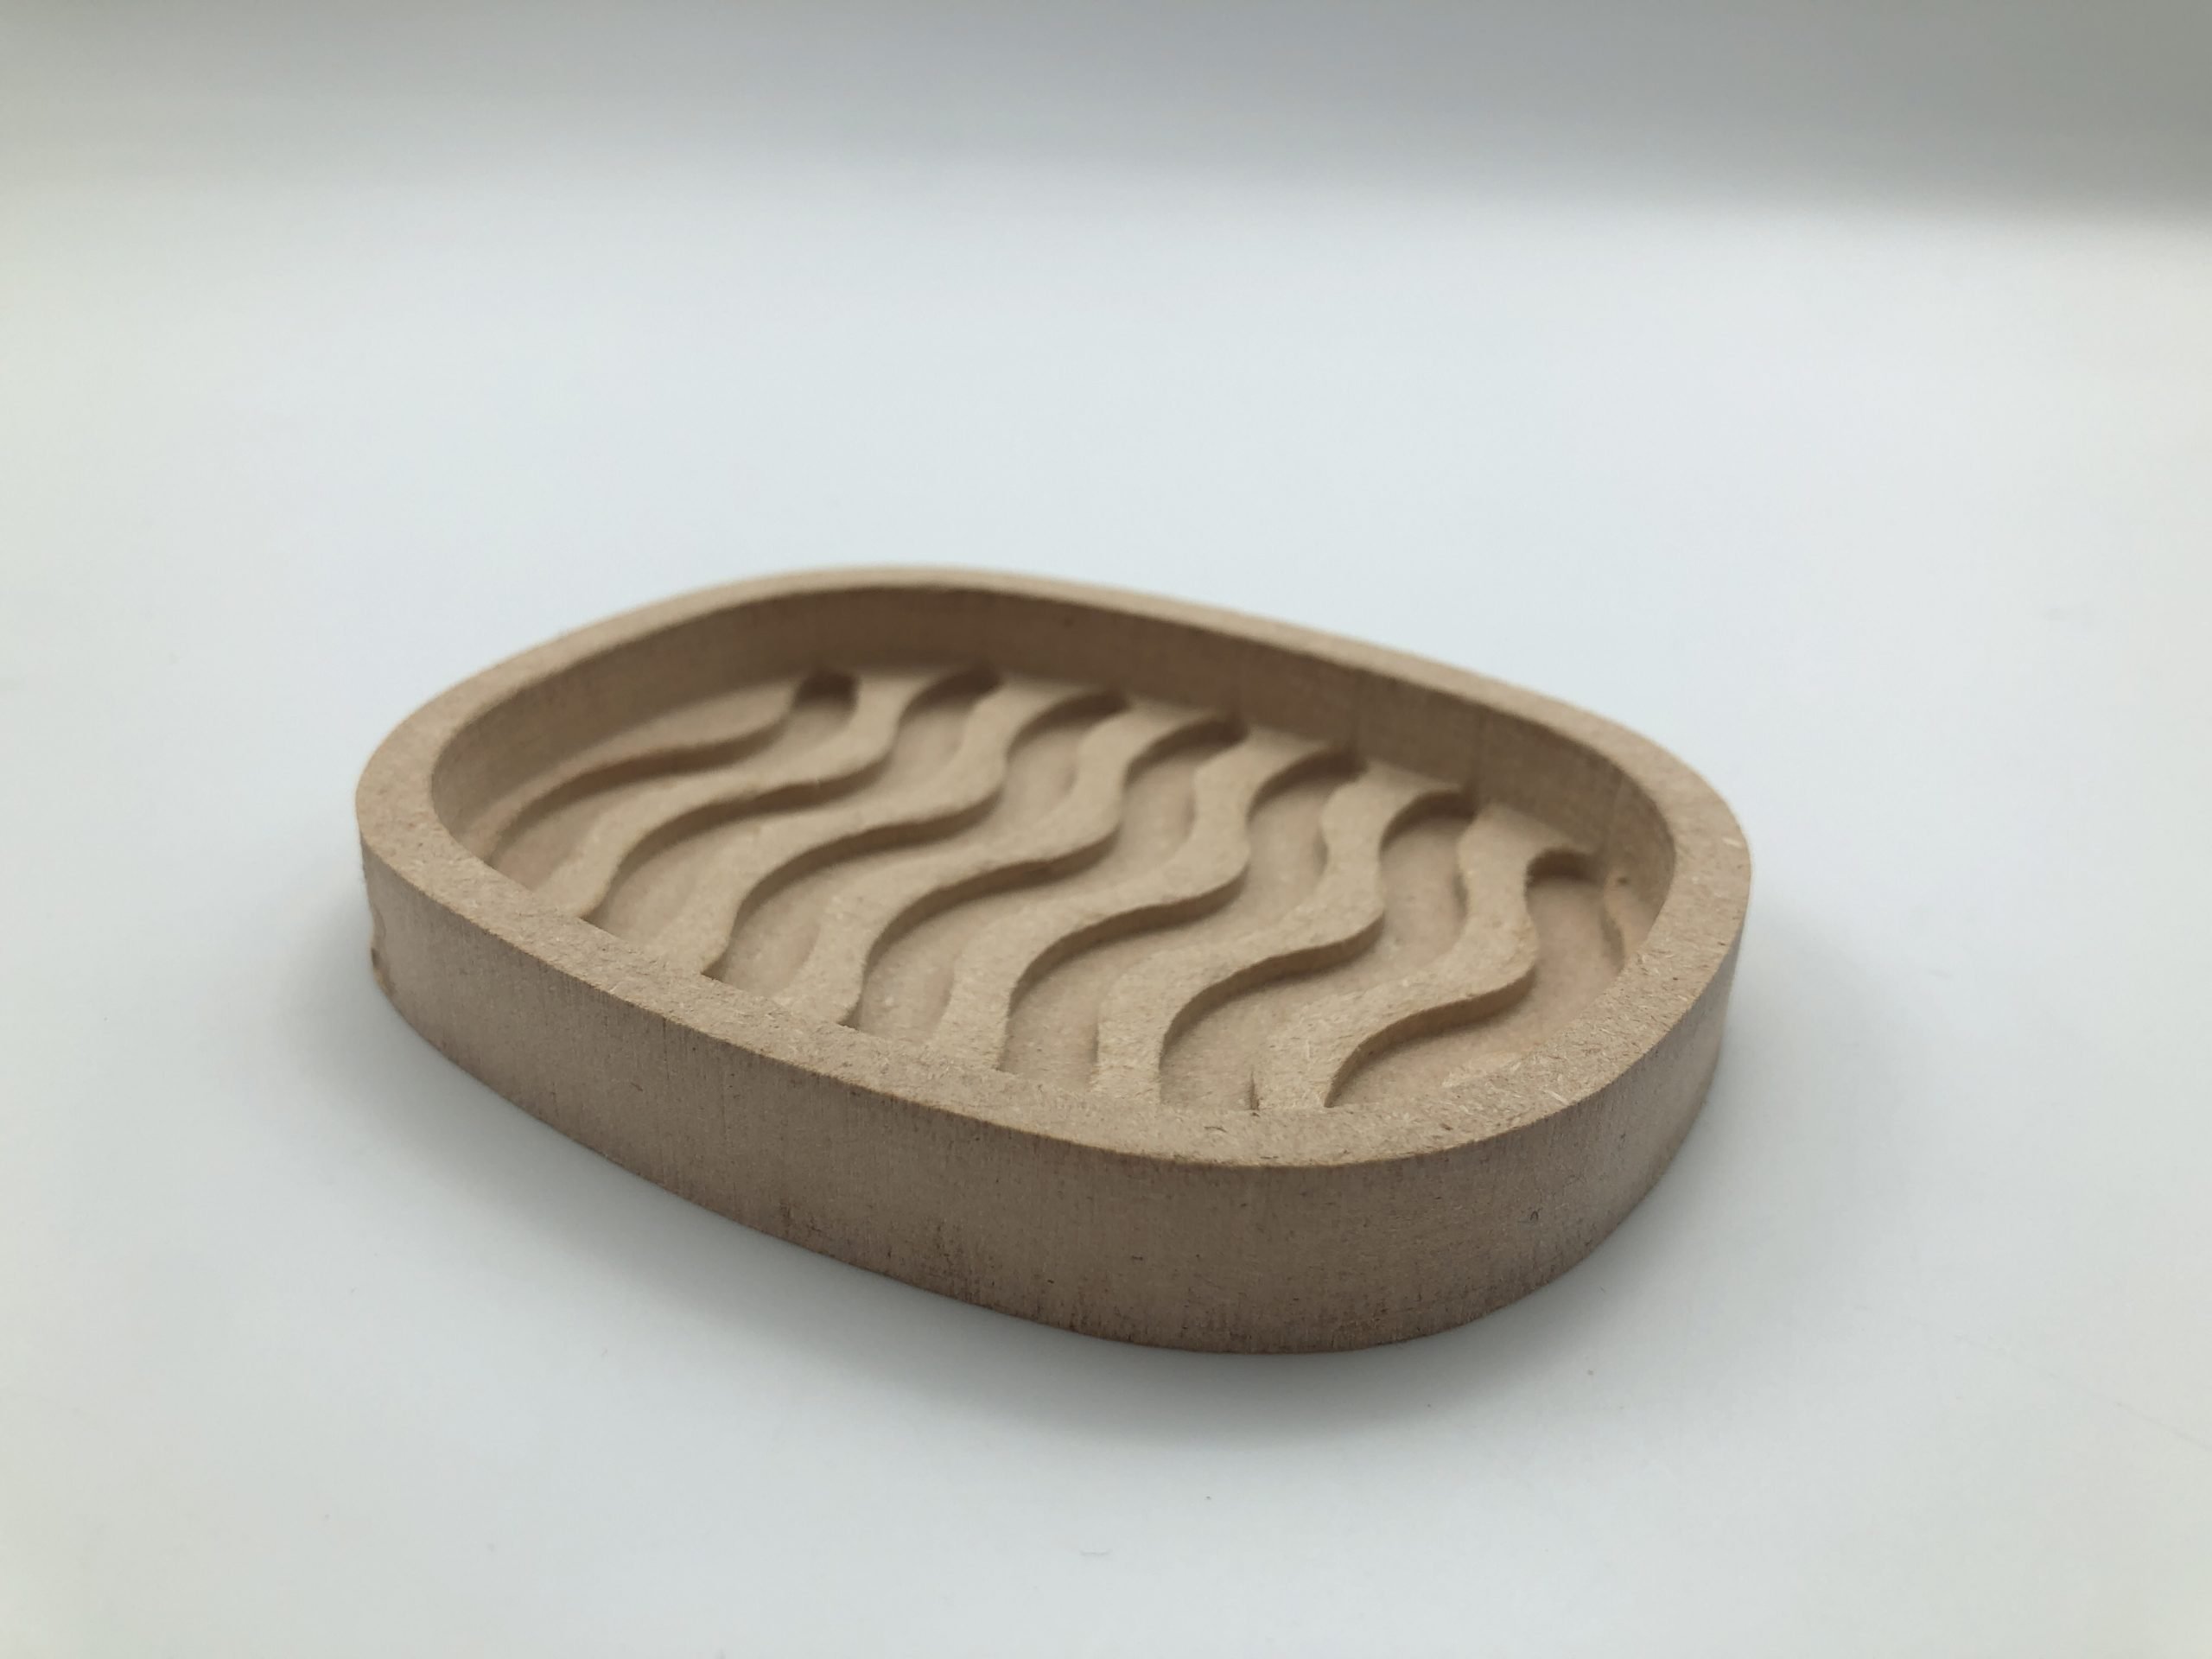 |
Soap Dish Download g-code A perfect place to put a bar of soap. Requires some form of finishing/sealing before use. • 1/2″ thick hardwood, softwood, or bamboo (100 x 80 x 12.7mm) • 1/4″ flat end mill • zero at the front left corner • 4 router speed |
 |
Bit Holder Download g-code Accessorize your MK2 early with a simple bit holder for 1/8″ and 1/4″ bits. • 3/4″ thick soft wood or MDF (130 x 50 x 19mm) • 1/8″ flat end mill • zero at the front left corner • 3 router speed |
Setting Up
Let’s start from Ground Zero. If you’ve done previous reading or watched videos about CNC you’ve likely heard about the stages of starting with a design, turning that design into a cutting program (a.k.a. g-code), and then running that program on your machine. This design, CAM, then send process is all that you need to keep in mind anytime you want to create something new; and luckily for this first project the design and CAM parts are already taken care of!
With the g-code ready for use, there are only a few steps remaining to cut your first project:
- Have a piece of material in-hand that matches the project you selected
- Secure that material within your LongMill cutting area
- Have a cutting tool (a.k.a. “bit”) in-hand that matches your project
- Secure that bit into the router
- Begin at the correct starting point for the selected project
- Turn on the router at the correct speed and then “Start Job”!
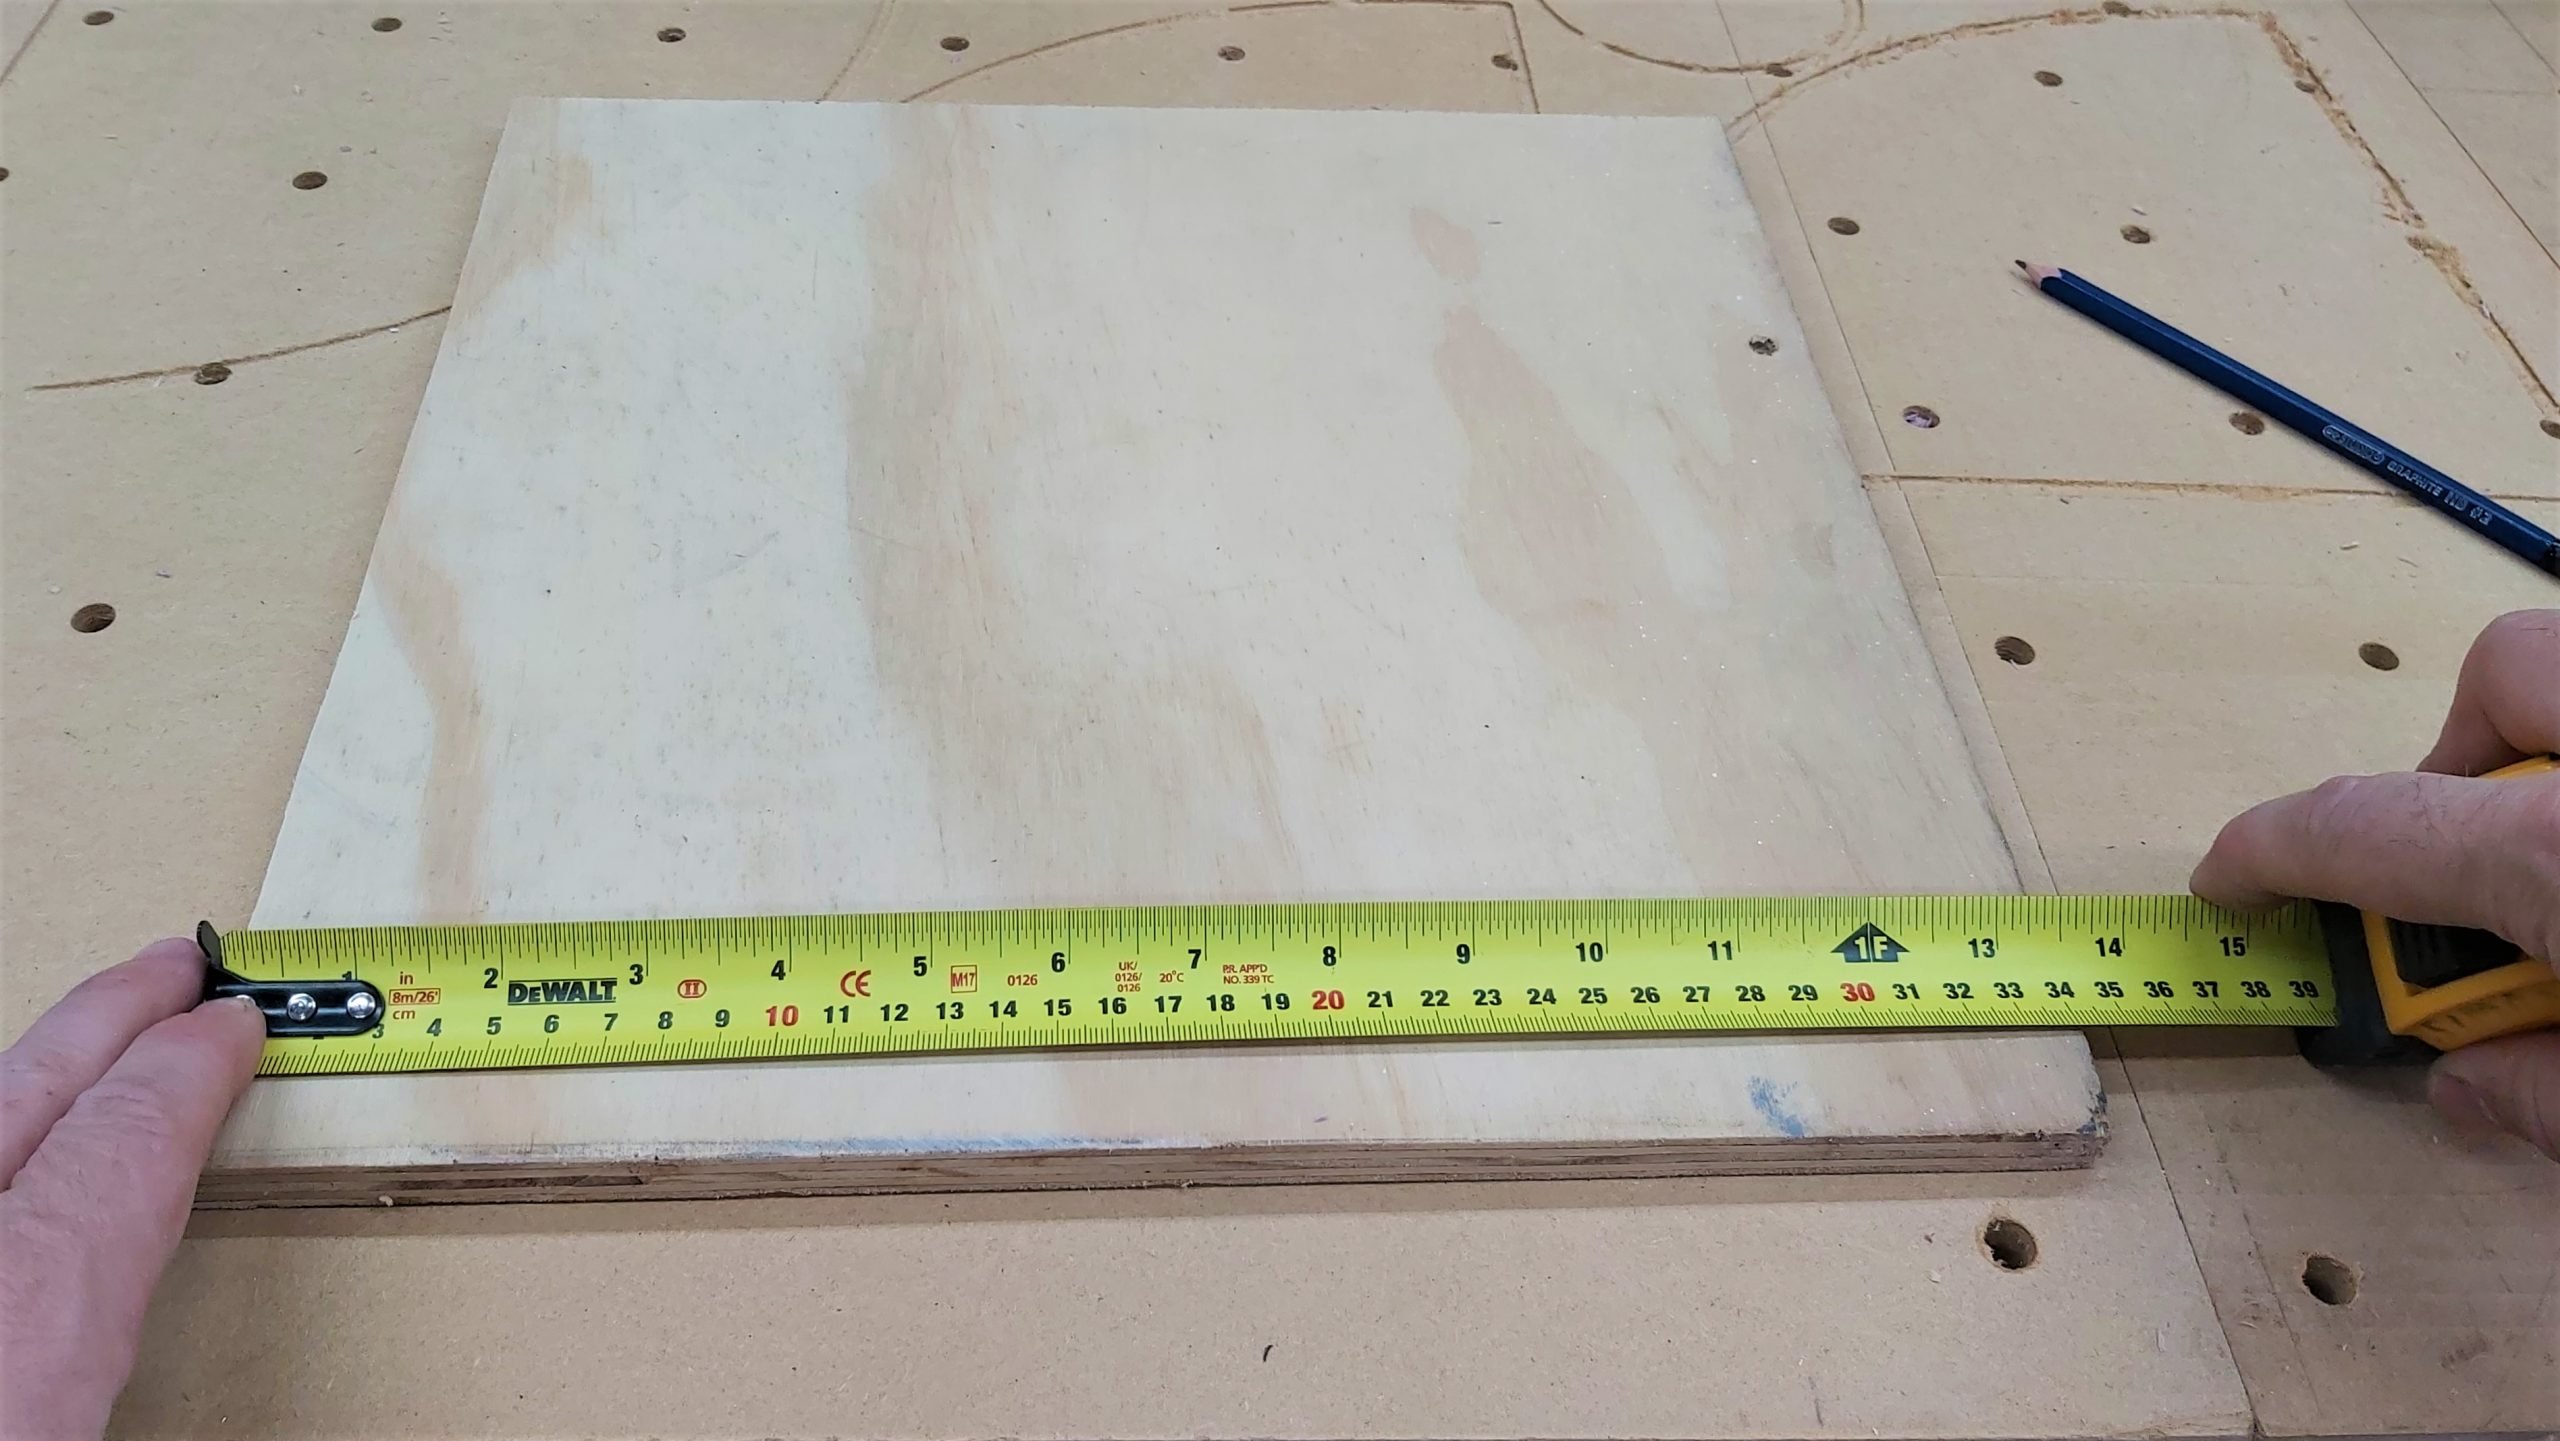
Project Material
Check the project you selected to see what type of material is suggested and the minimum size needed to cut the project out. Hard insulation foam and soft woods are ideal for starting out since they cut so easily. Once you find a piece of material that fits these requirements you’ve now obtained your ‘stock material’. This term is commonly used in the world of CNC and refers to any material that will act as the raw, blank canvas that you plan to carve into.
Securing it in Place
You can put your material anywhere you want inside the cutting area of your LongMill – if the machine can reach it, it can cut it. Some beginner tips when placing your material are:
- Place it closer to the front so you can access it more easily when you attach it at the start of a job or remove it at the end
- Don’t attach your material too crooked or wonky, if you can get it square and aligned to the machine then the cut will line up better
- If you attach your material using hardware like screws or nails, try to select material with some extra space around it or keep the hardware all the way at the edges to avoid running into them when cutting
If your machine is in the way, use the machine movement skills you gained on the previous page to jog away from the area you want to mount your stock. When mounting, don’t worry about getting fancy for your first project. Feel free to try something quick and easy using whatever you have on-hand so you can get to the fun part faster, cutting! Here’s some inspiration:
- Wood screws
- Hot glue
- Carpet tape
- Nails hammered in at an angle
Some projects cut slow and others cut faster so whatever you choose, just ensure you can get the material mounted securely. Give it a wiggle with your hands once mounted and it should feel properly stuck-on.
Cutting Tools
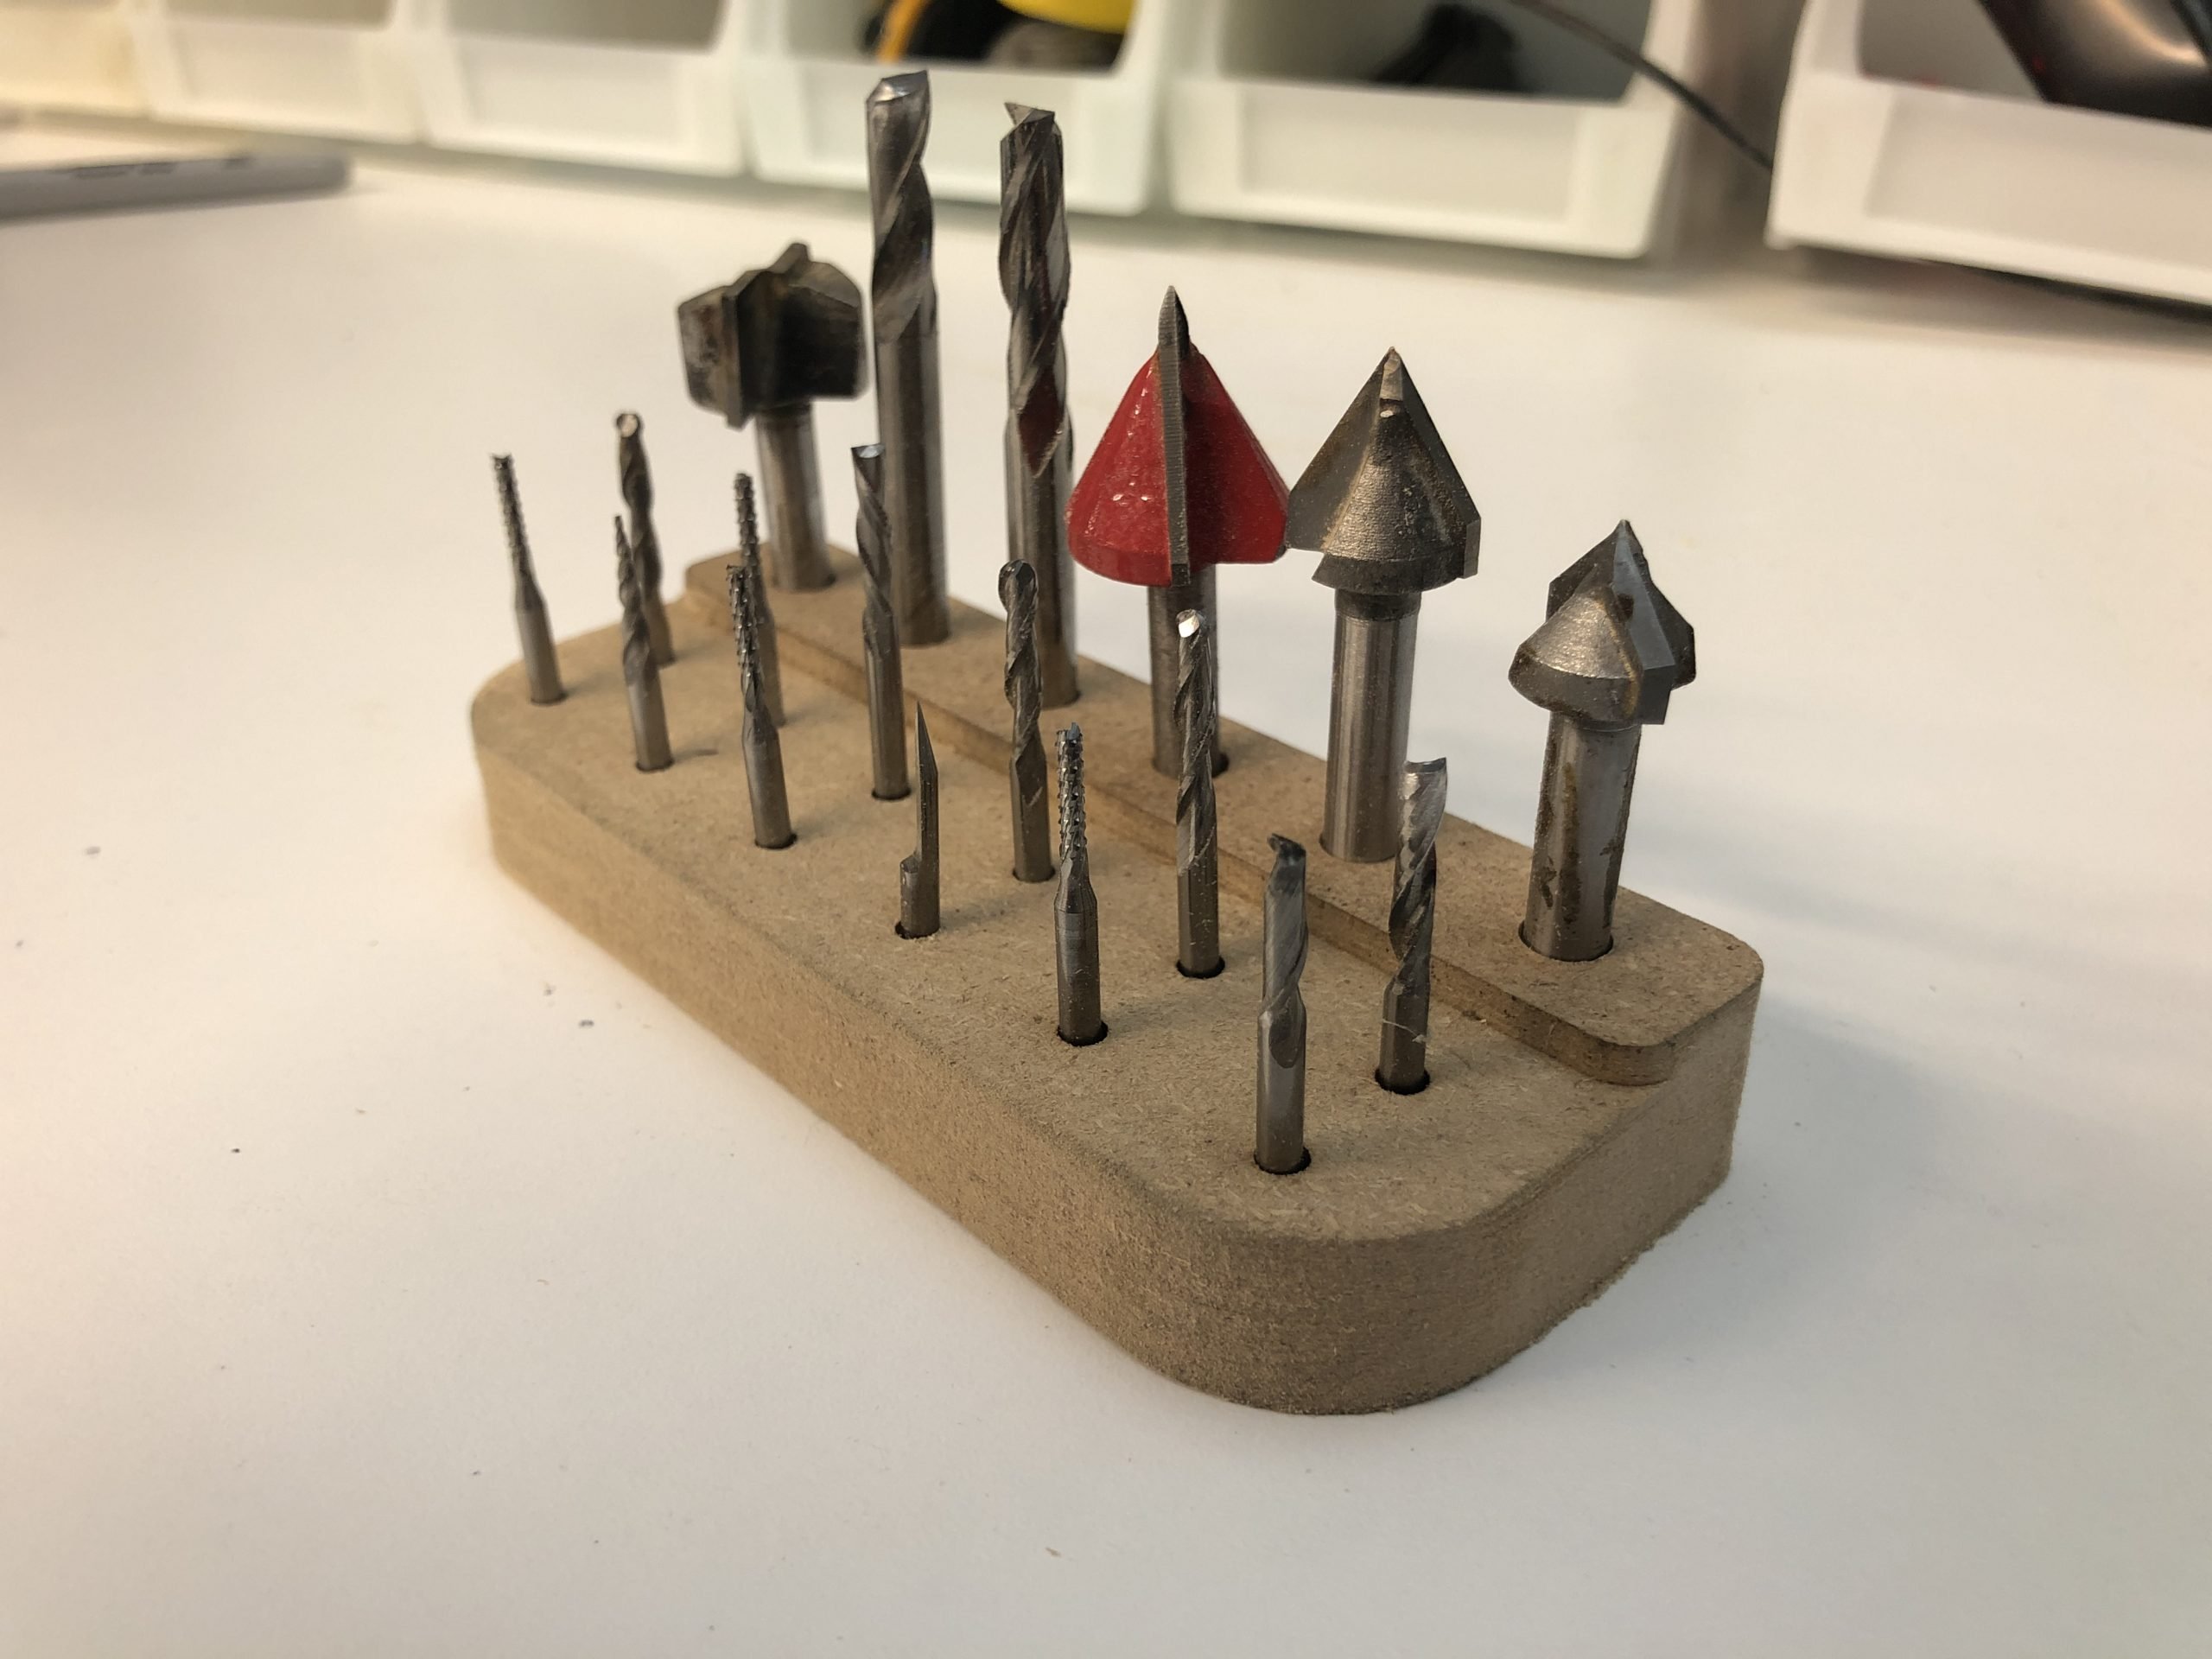
Scroll back up to the project you selected and this time check that you’ve got the right tool in-hand for the job. If you got a ‘Starter Pack’ with your machine then grab something from there or look around your shop or a local hardware store if you don’t have tools yet for your machine. Cutting tools come in all shapes and sizes. Machines like the LongMill tend to use purpose-made CNC cutting tools but can also use some of the more traditional and commonly available router bits.

The shape of the tool is usually the most important feature and will either be flat, rounded (a.k.a. ball ended or ball nosed), or v-shaped. The size of the cutting side of the tool is sometimes also important because if you need to carve small details you won’t be able to use a large cutting bit. If your selected project specifies a particular bit size then check the label on the packaging your bit came in to confirm it’ll be able to do the job.
Installing the Tool
Remember to be safe and mindful when a cutting tool is in or near your hands. Bits can be deceptively sharp and v-shaped ones can also be very pointy.
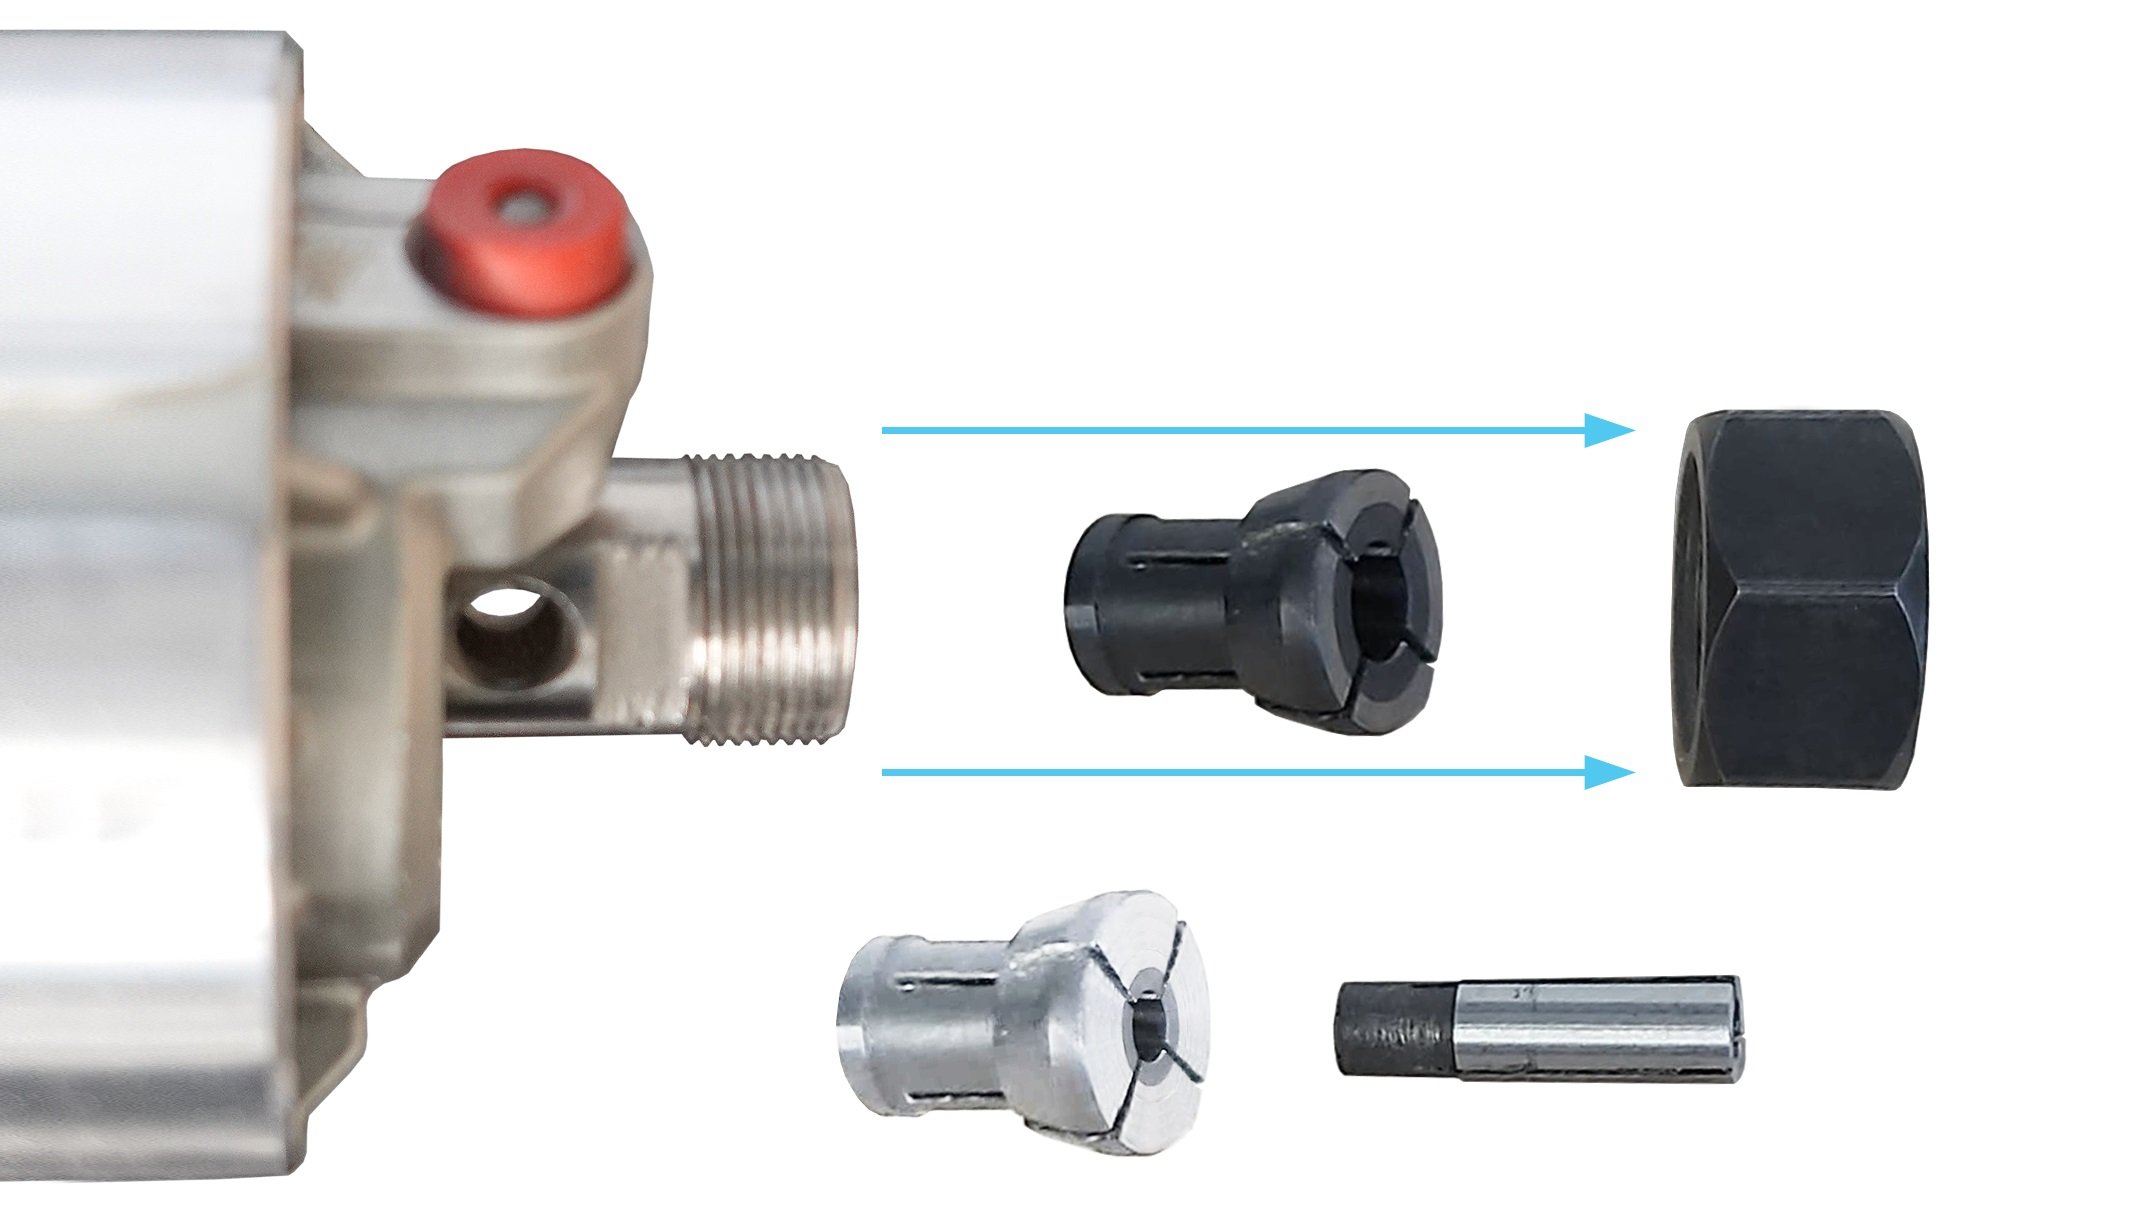
Bring the machine to the front so you have easy access to the router and collect the two wrenches that are included in the Makita box. If this is your first time using a router, look at the bottom where it has a large hex nut and notice just above this the two flats cut into the router shaft. You’ll be using the two wrenches here, one on the nut and one on the flats of the shaft, so the router can ‘clamp’ onto bits before cutting and then release them when you’re finished.
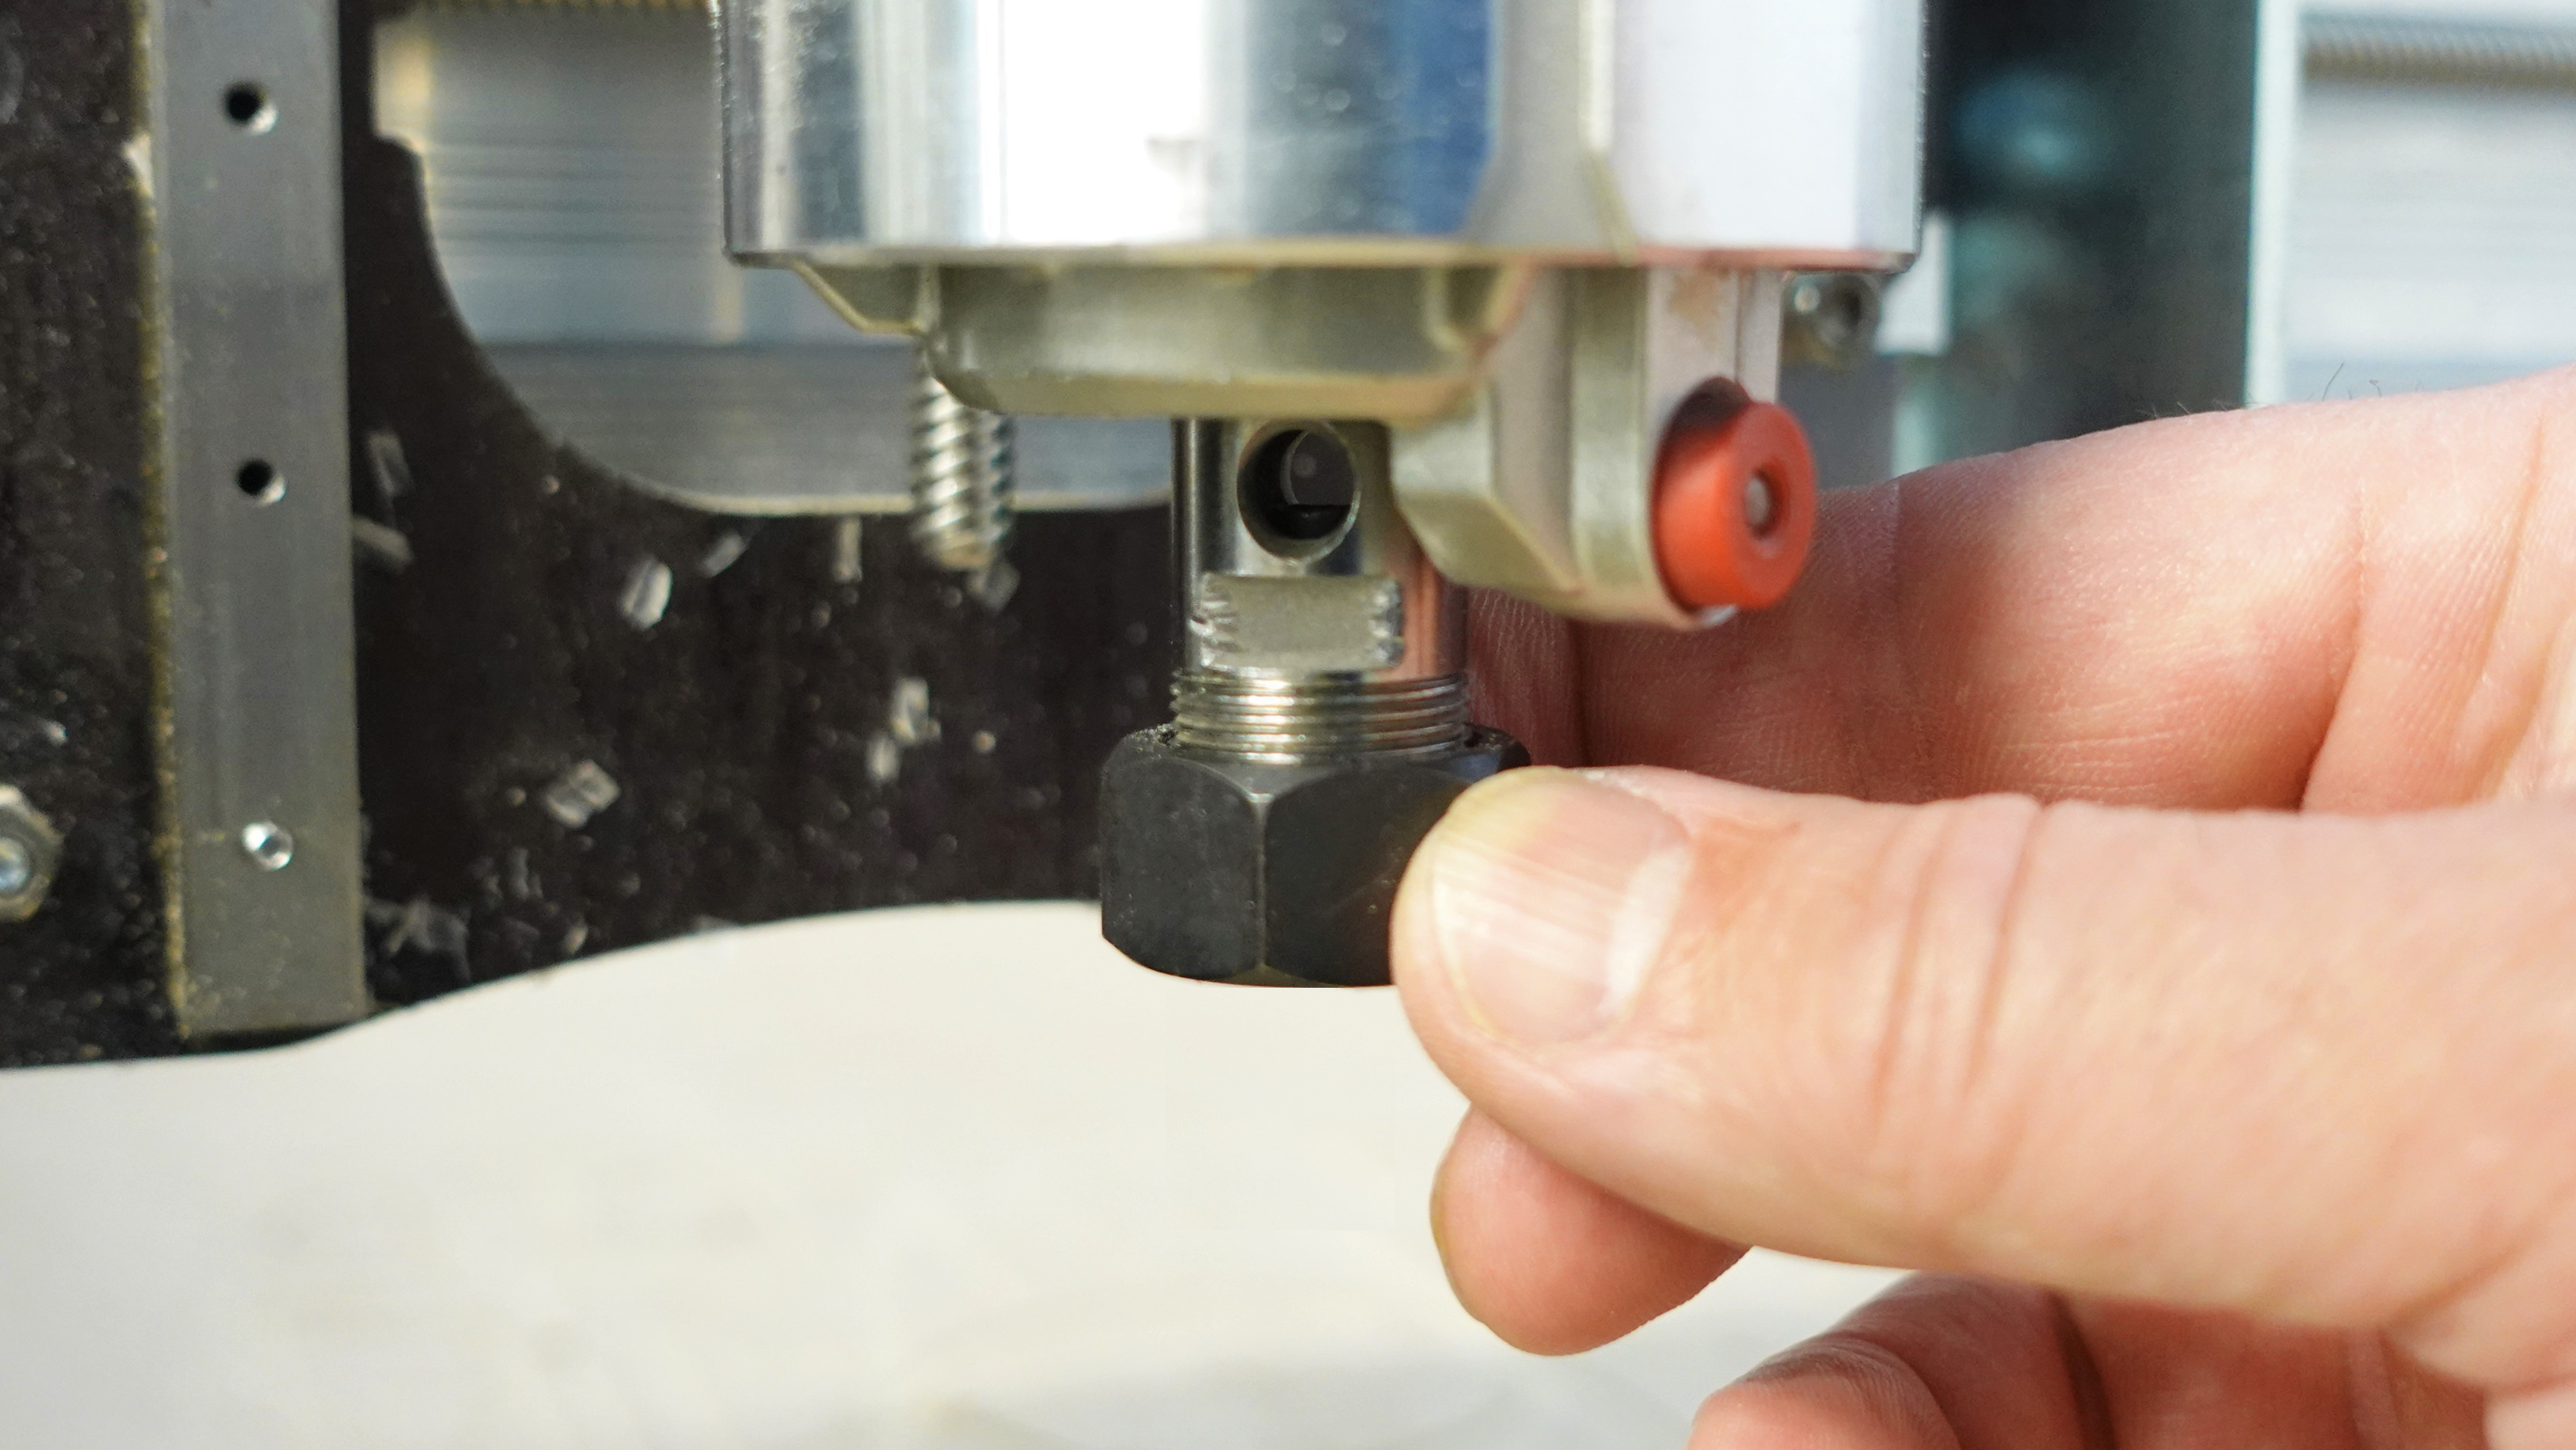
Disassembled you can see the router shaft, standard ¼” Makita collet, and the collet nut. By default the Makita can only hold onto cutting tools with a ¼” shank so also shown are an ⅛” collet and a ¼” to ⅛” adapter which you can use for ⅛” bits. The ⅛” collet is a direct substitute that can swap out the standard collet meanwhile the adapter sticks into the standard collet to adapt it to ⅛” bits. We sell these separately and in bit kits so you may already have one, otherwise they’re readily available online and in stores. Note the orientation of the parts is exactly how they go back together.
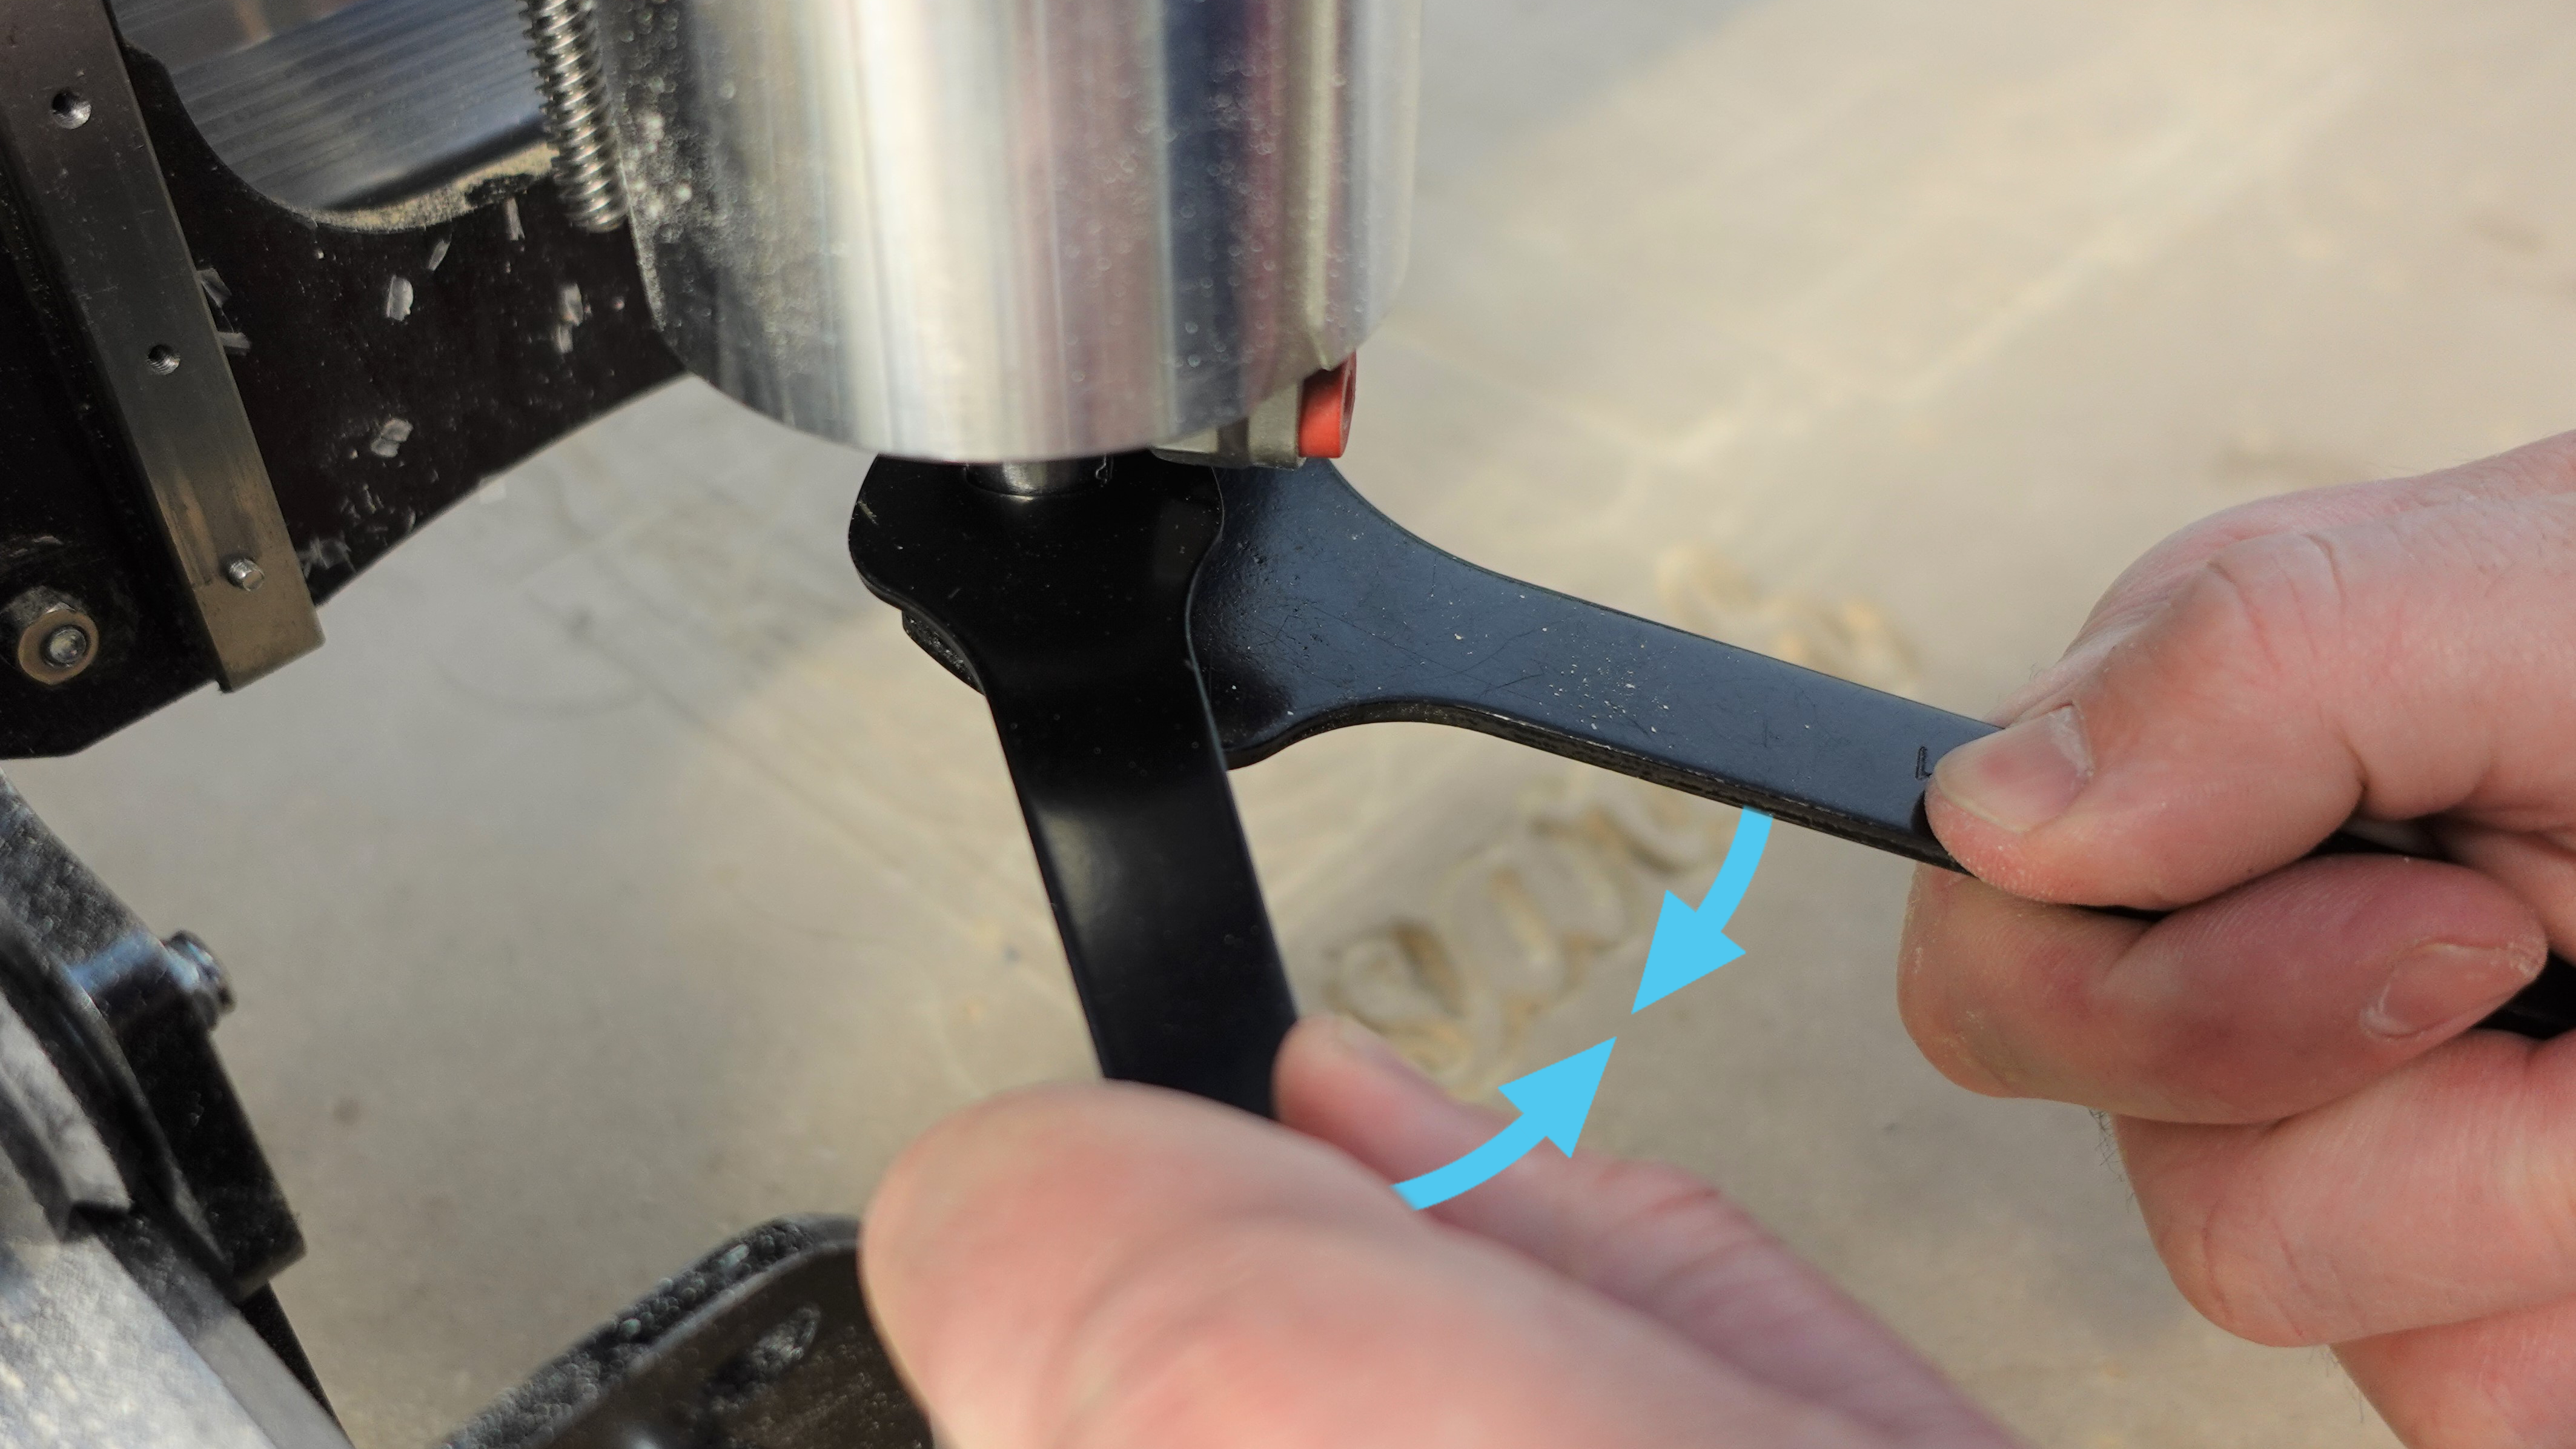
Loosen the collet nut with the small wrench on the left side and the large wrench on the right. Squeeze them together until the nut comes loose.
If you’re using an ⅛” bit, here is where you’ll either remove the nut entirely to swap out for the ⅛” collet, or you’ll slide the ¼” to ⅛” adapter over your ⅛” bit. Insert your ¼” bit or adapted ⅛” bit into the end of the router. Reference the earlier picture with the disassembled collet, collet nut, and adapter to ensure you orient the parts correctly. Push it as far up into the router as you can, if it bottoms out then pull the bit back out a couple millimeters. The more tool shaft that’s inside the router the better the router can hold onto the tool.
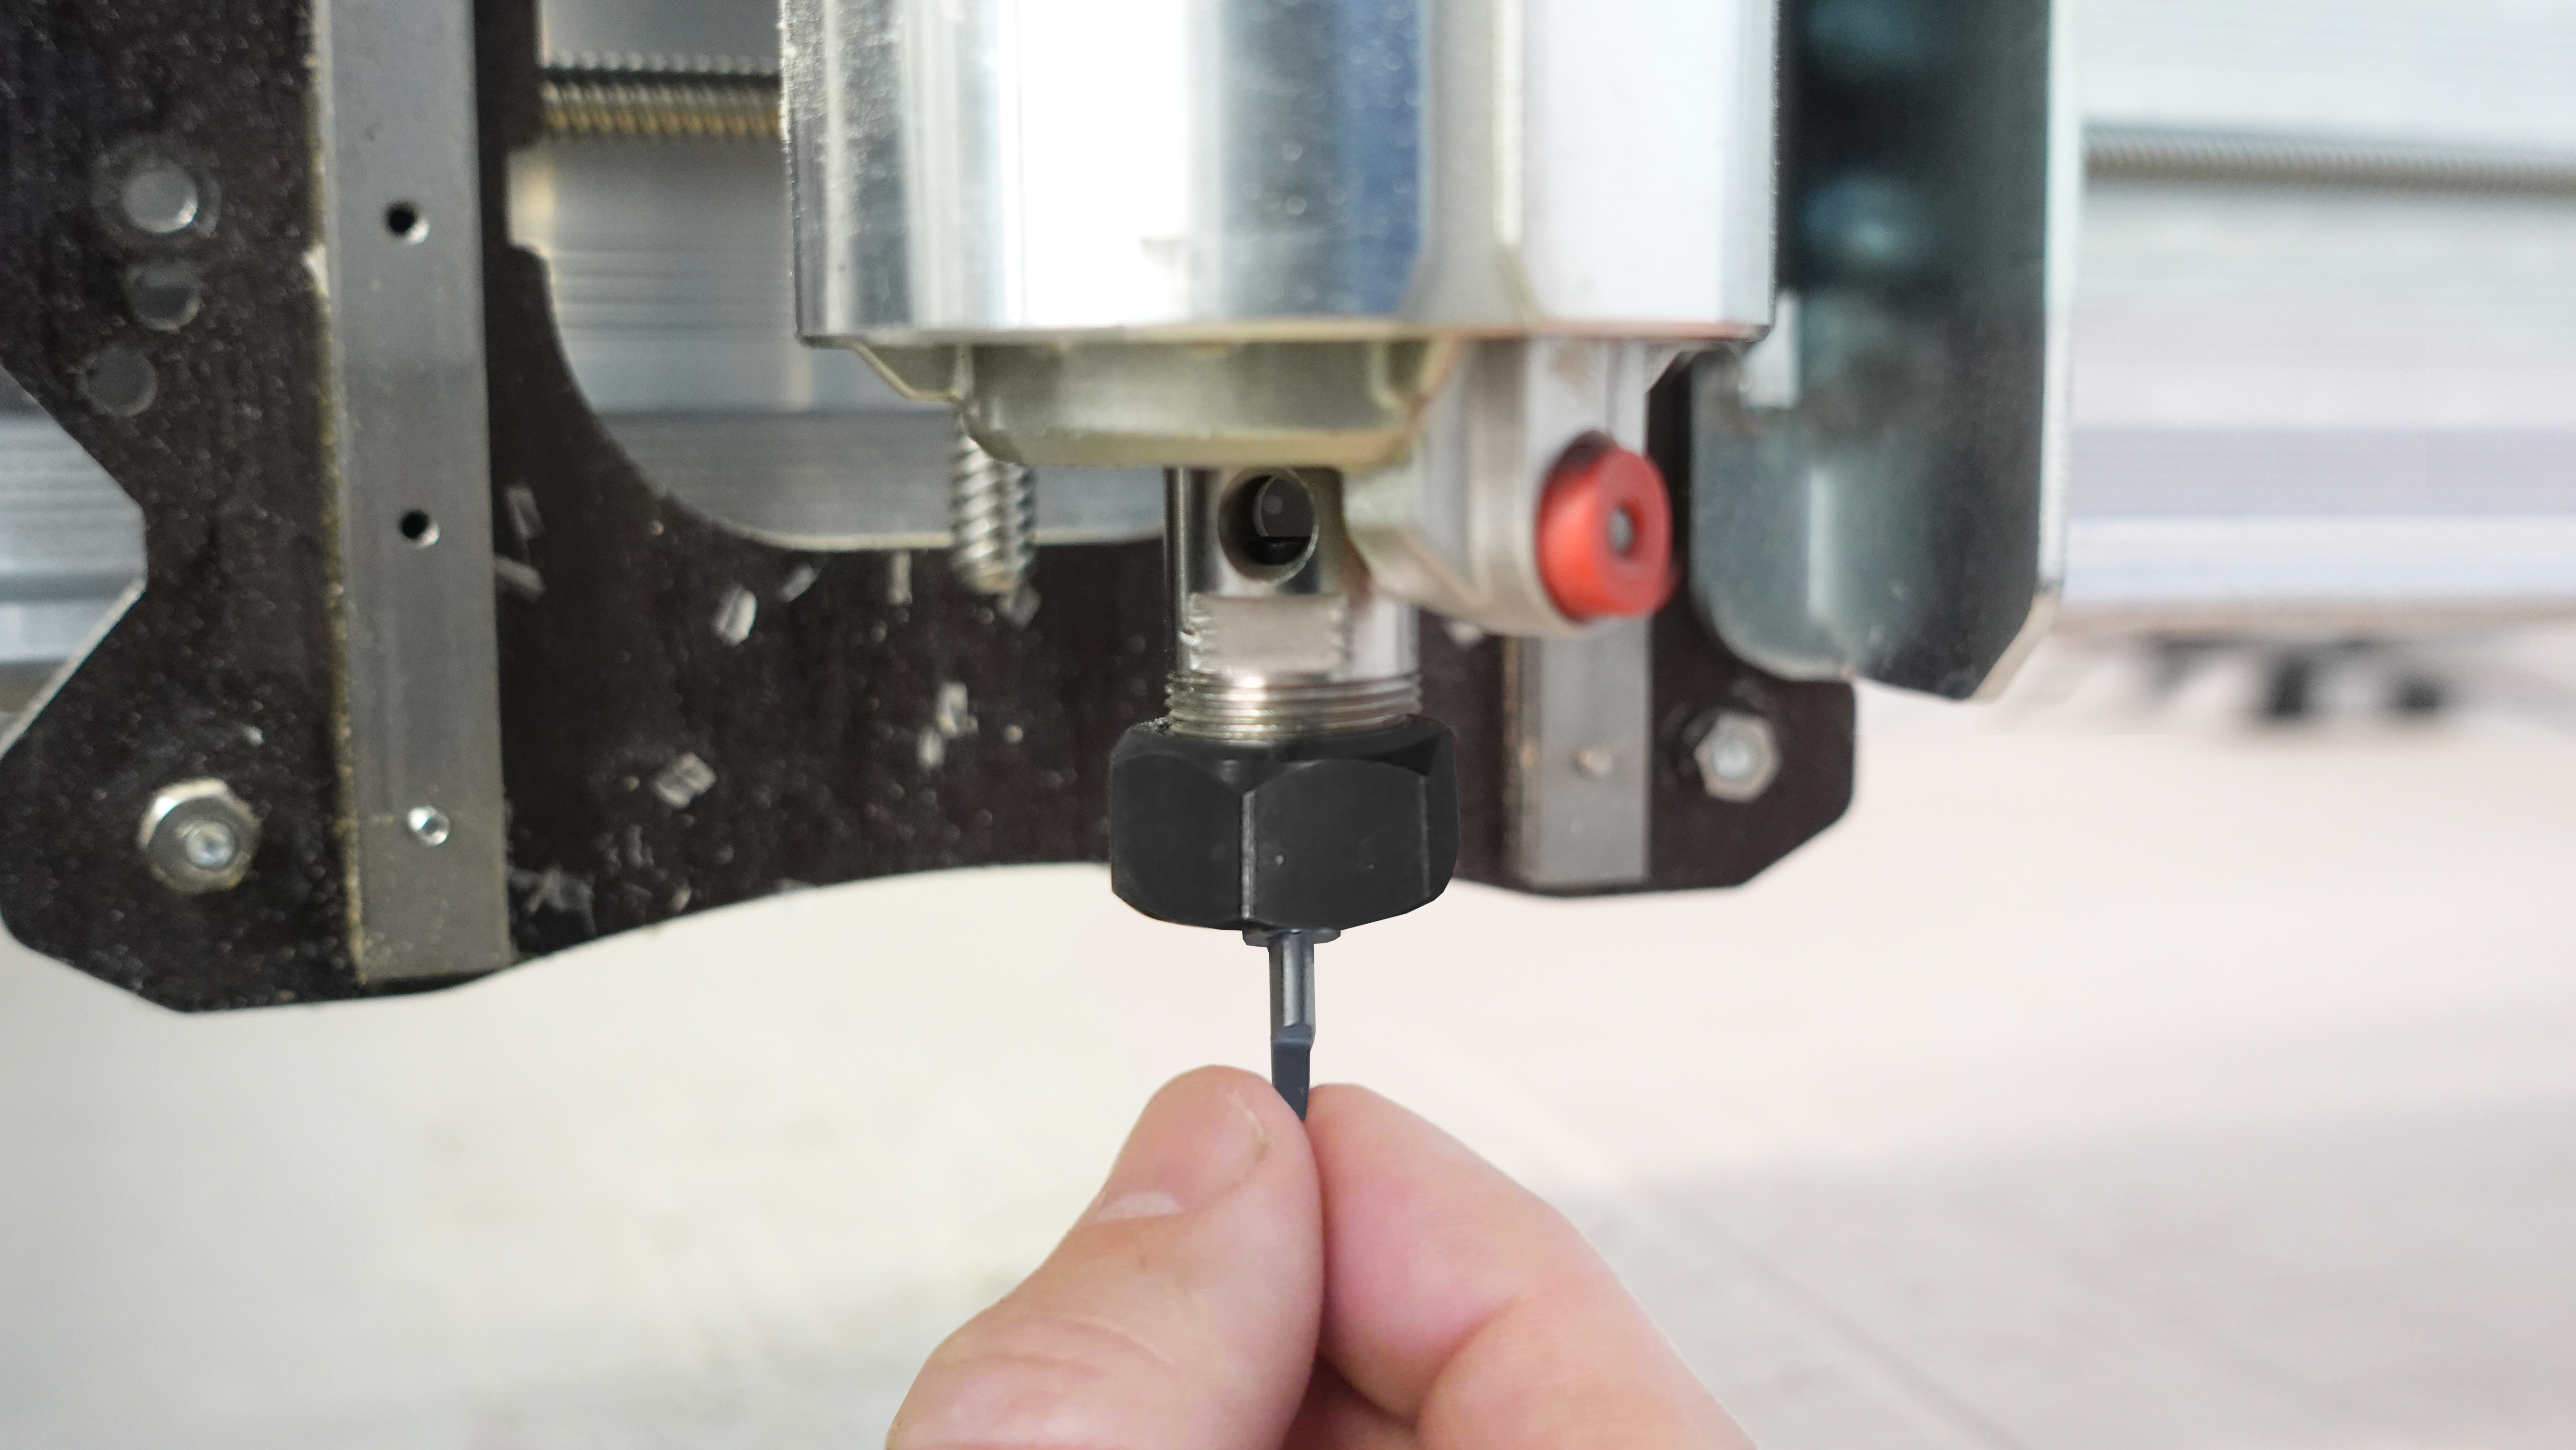
Once positioned, use the red button on the Makita to lock the shaft while you hand-tighten the collet nut to initially hold the bit in place. If the bit is falling out safely use a block or your finger to hold it in place.
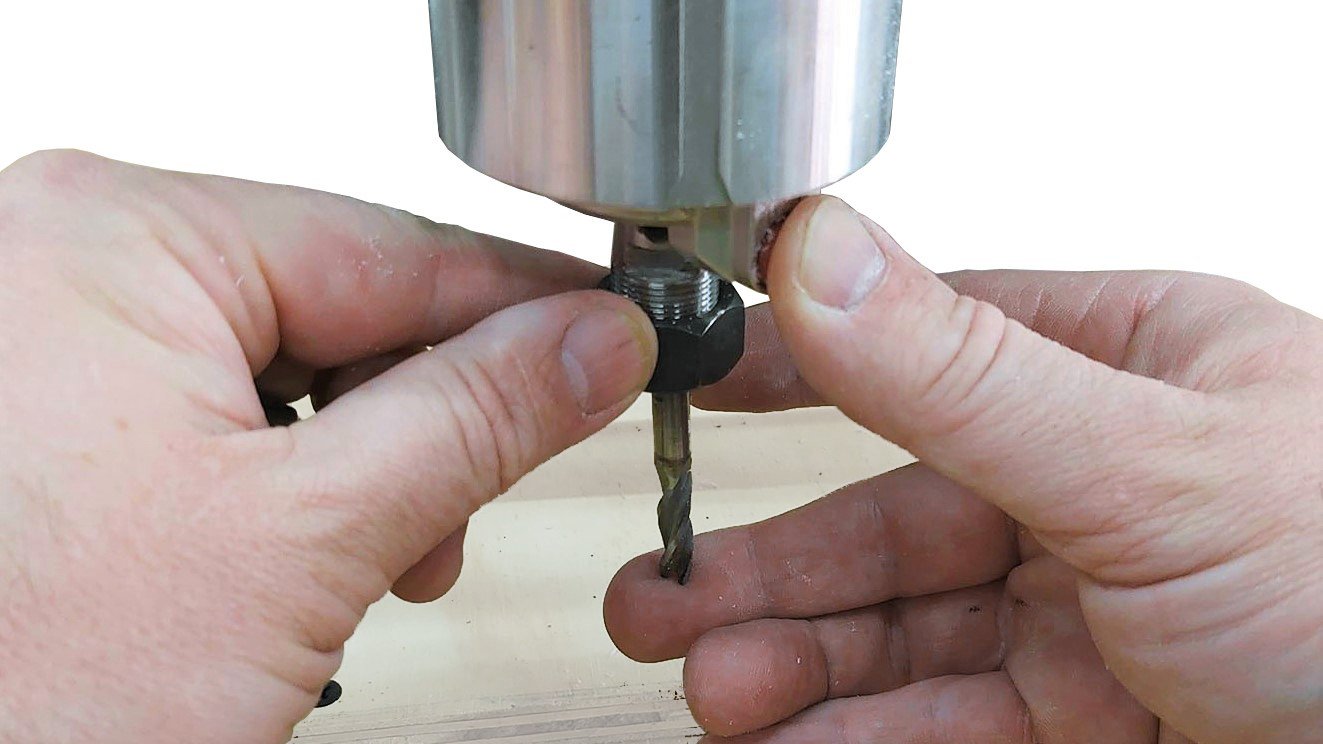
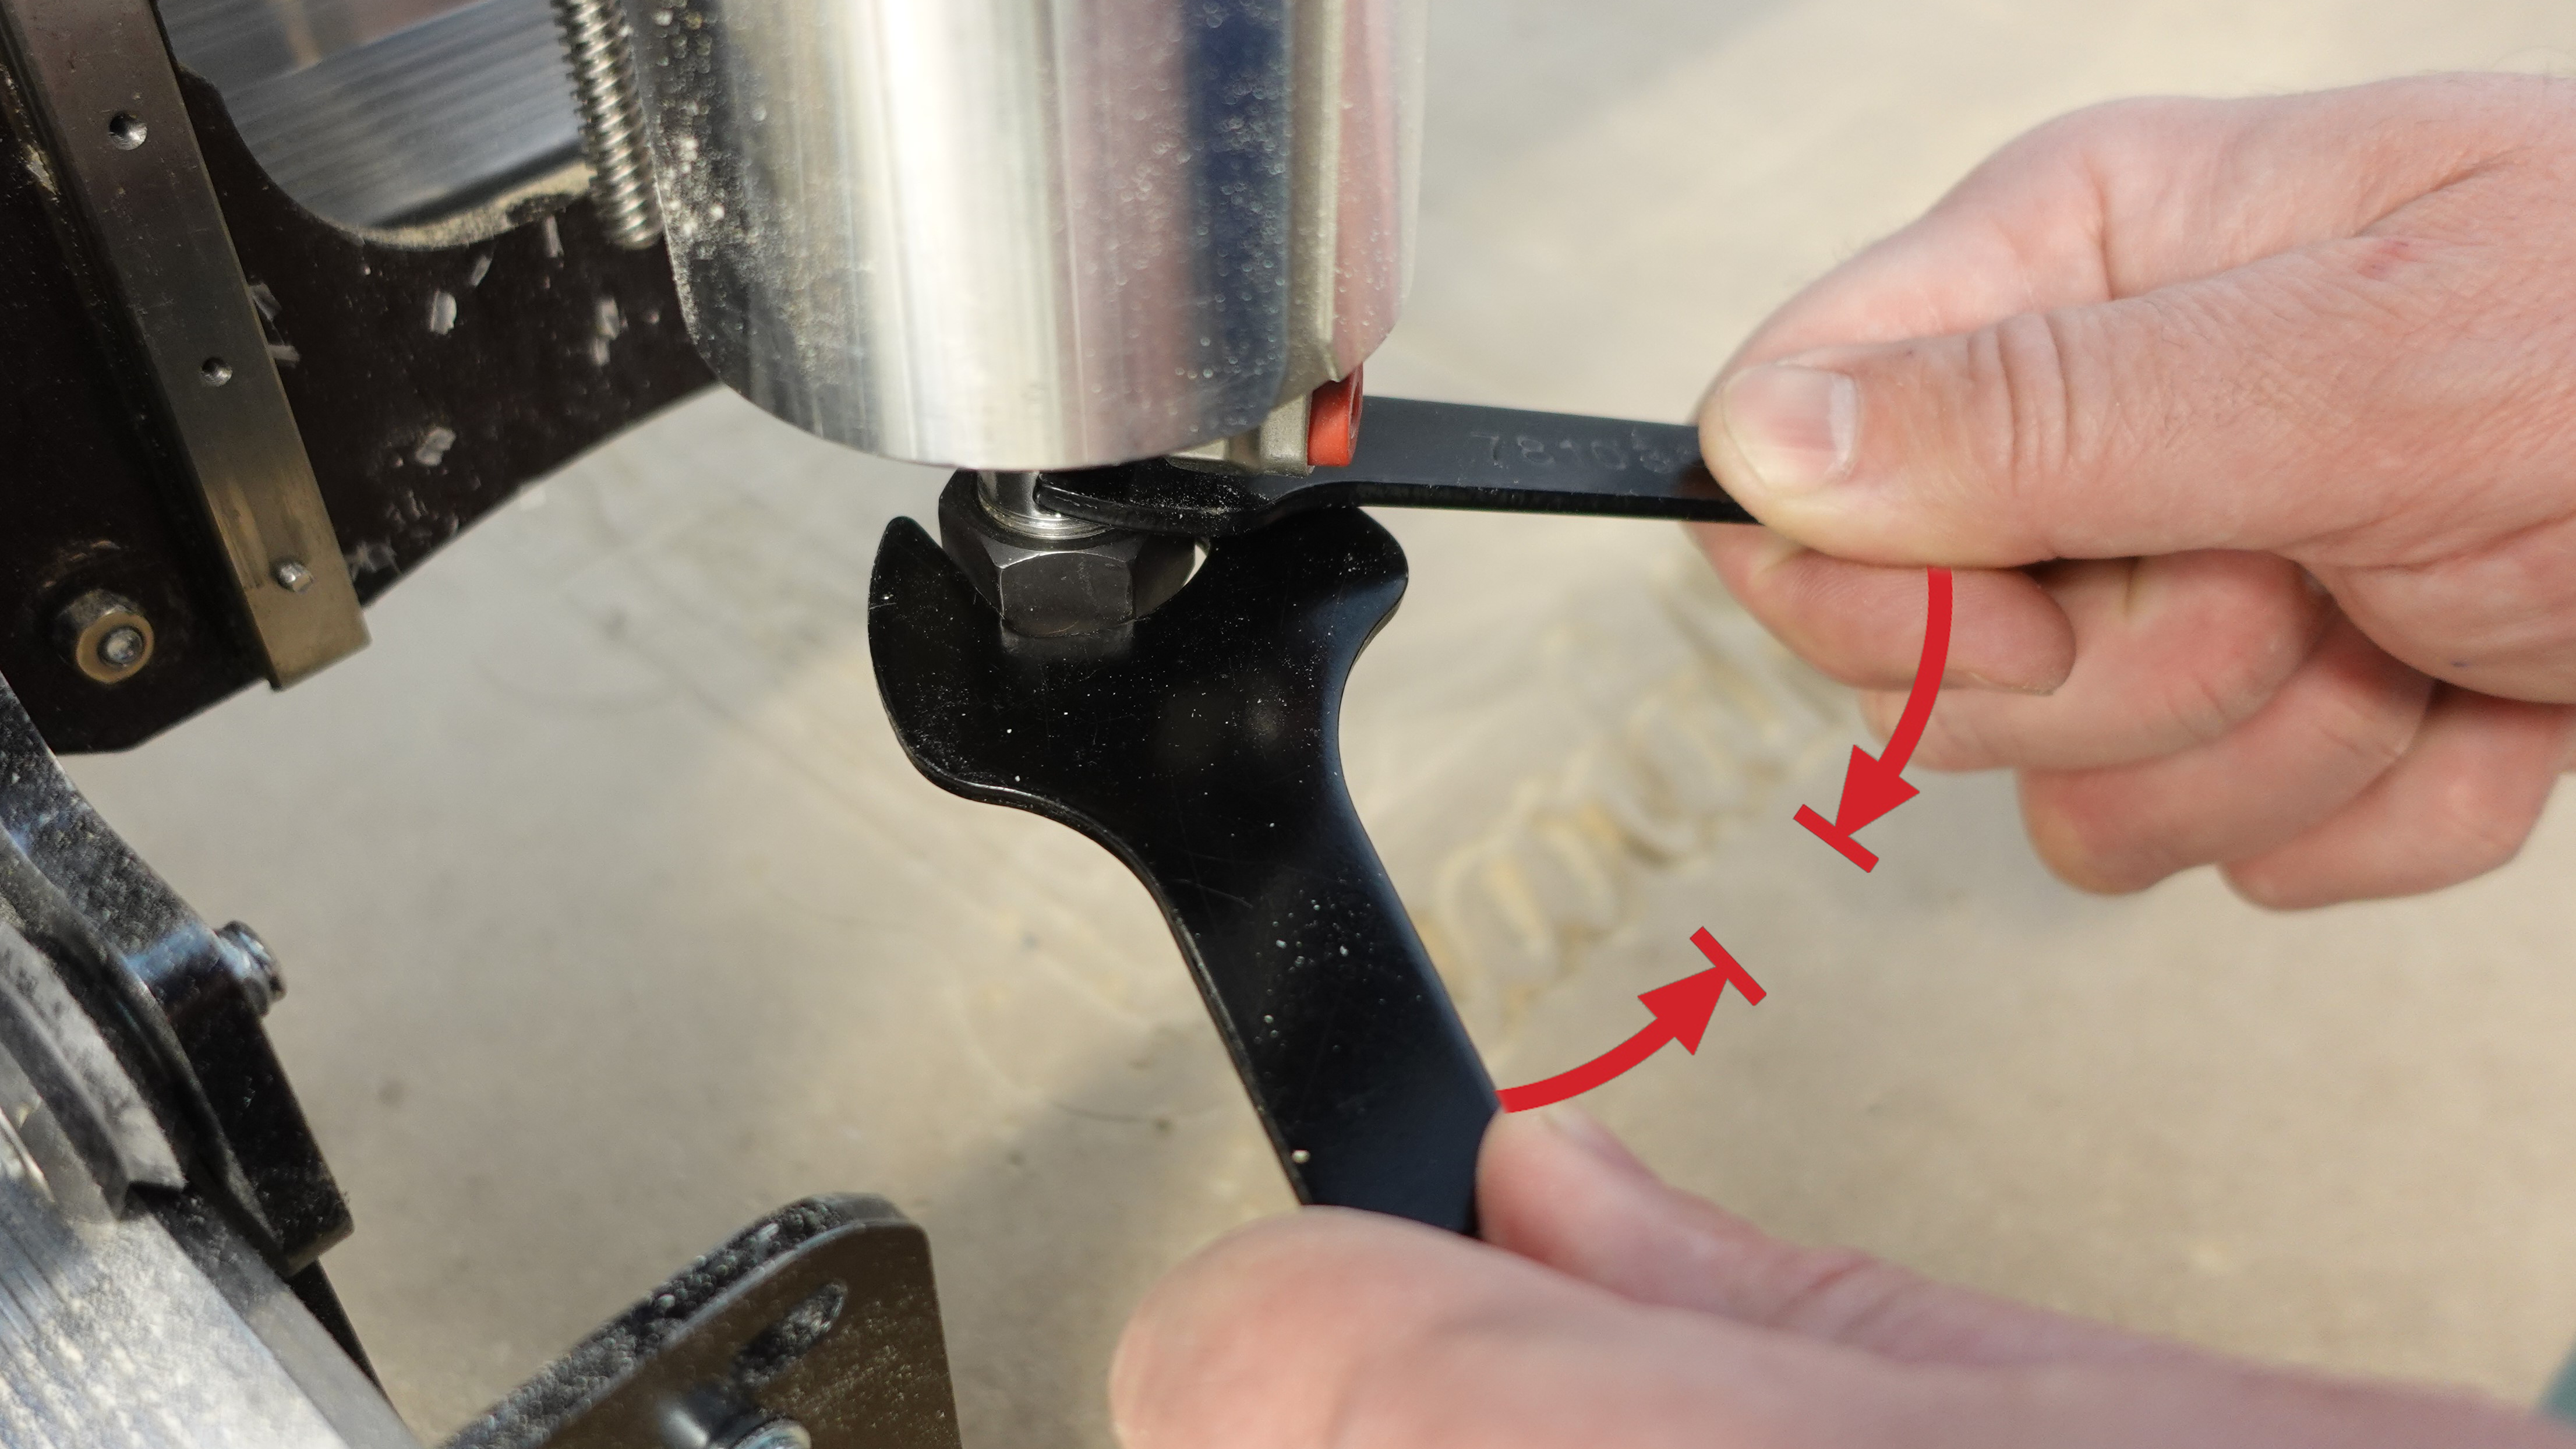
After finger tightening, use the wrenches to finish securing the bit. With the small wrench on the right and the large wrench on the left use pressure but don’t squeeze too hard, it shouldn’t take much before the bit feels firmly held in place.
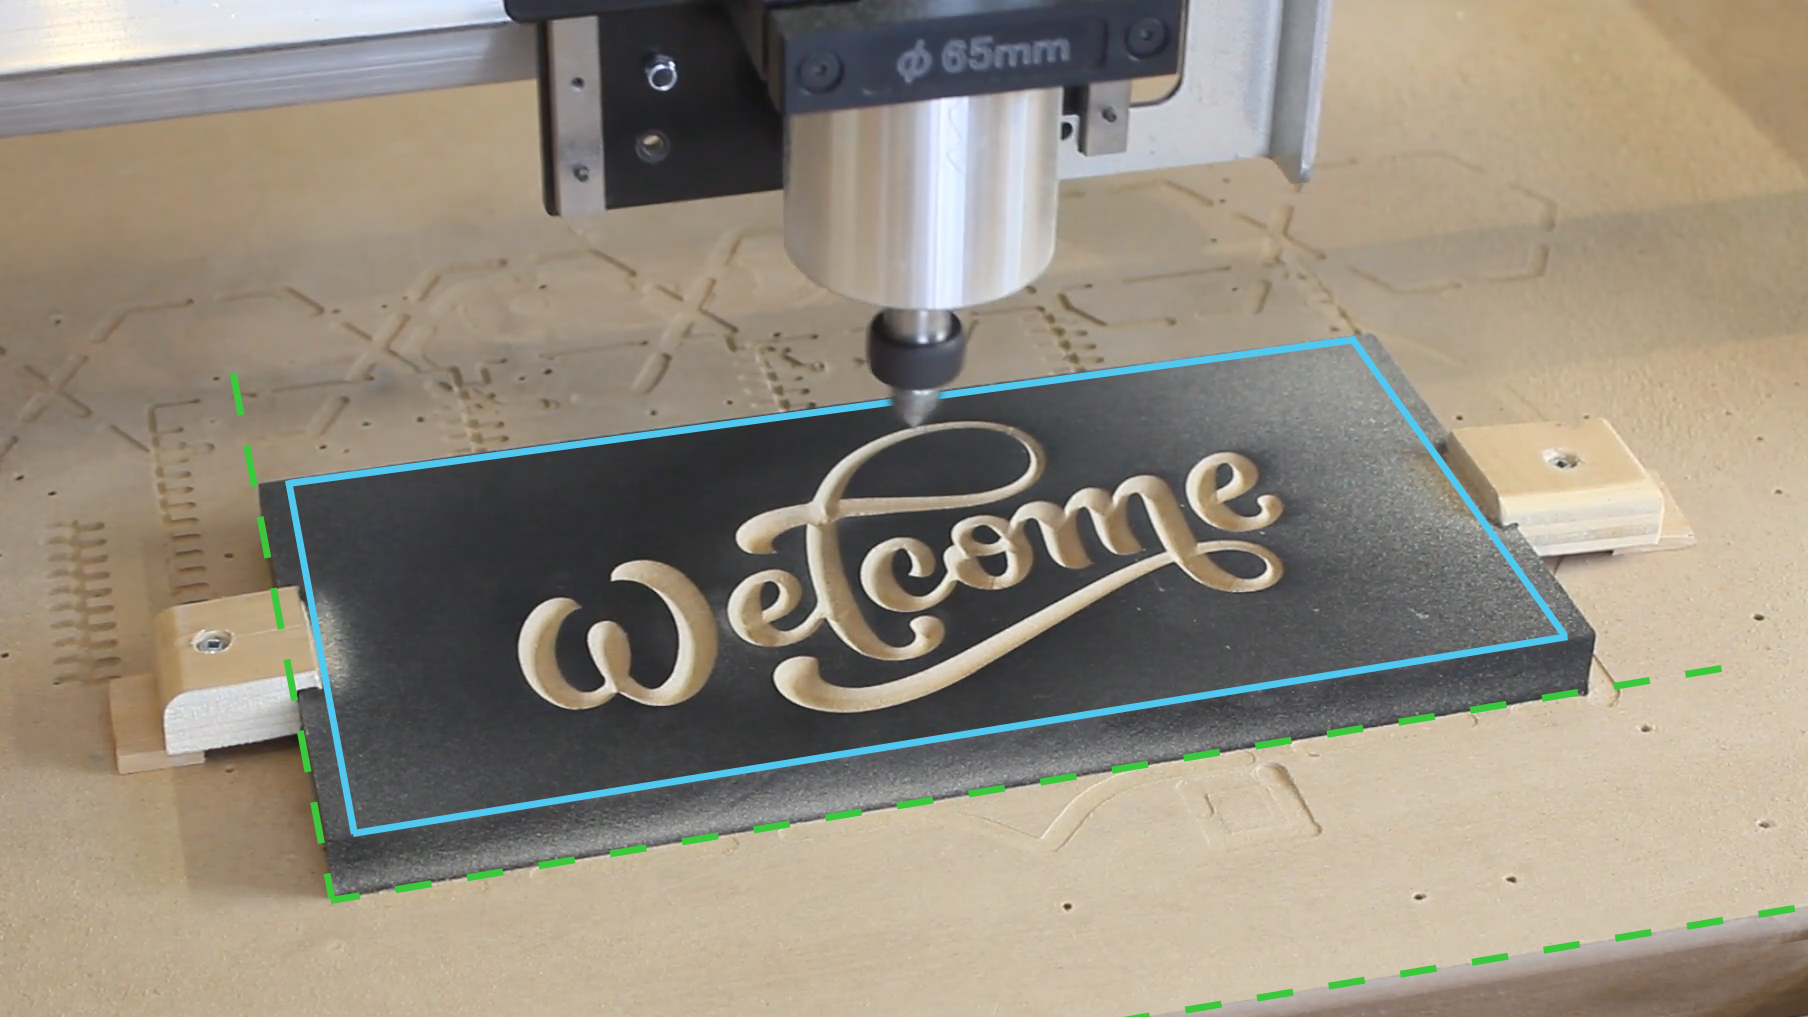
Get Located
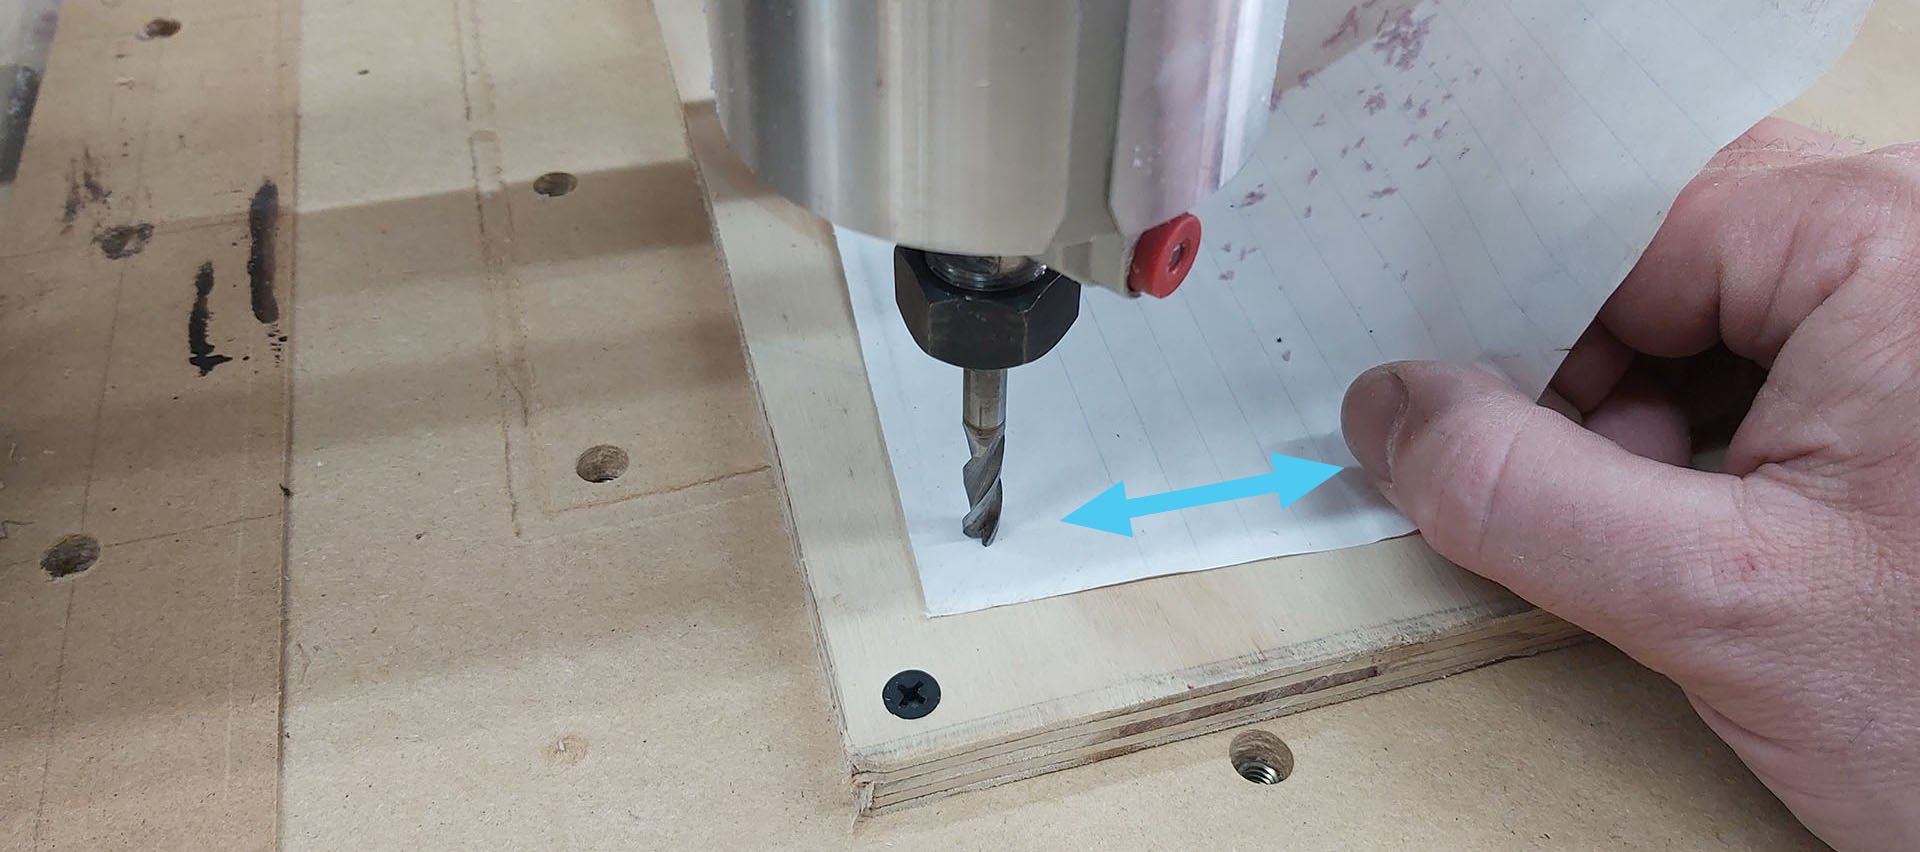
With the material in place and the bit installed the last step is to tell the machine where to start cutting. Each project will say what its starting point is so you can check this above. Jog your MK2 so that the location of your cutting tool matches the location for your selected project. For the Z-axis, jog most of the way down to the material then rotate the Z-axis coupler by hand to move the bit the rest of the way until it barely touches the surface.
The image below shows how you’d position for the ‘LongMill Lettering’ project as an example. This project starts at the front left corner but is moved inward in the picture to avoid cutting the mounting screws when the project gets run. A piece of paper is also used to see when the bit is about to touch the top of the stock material.
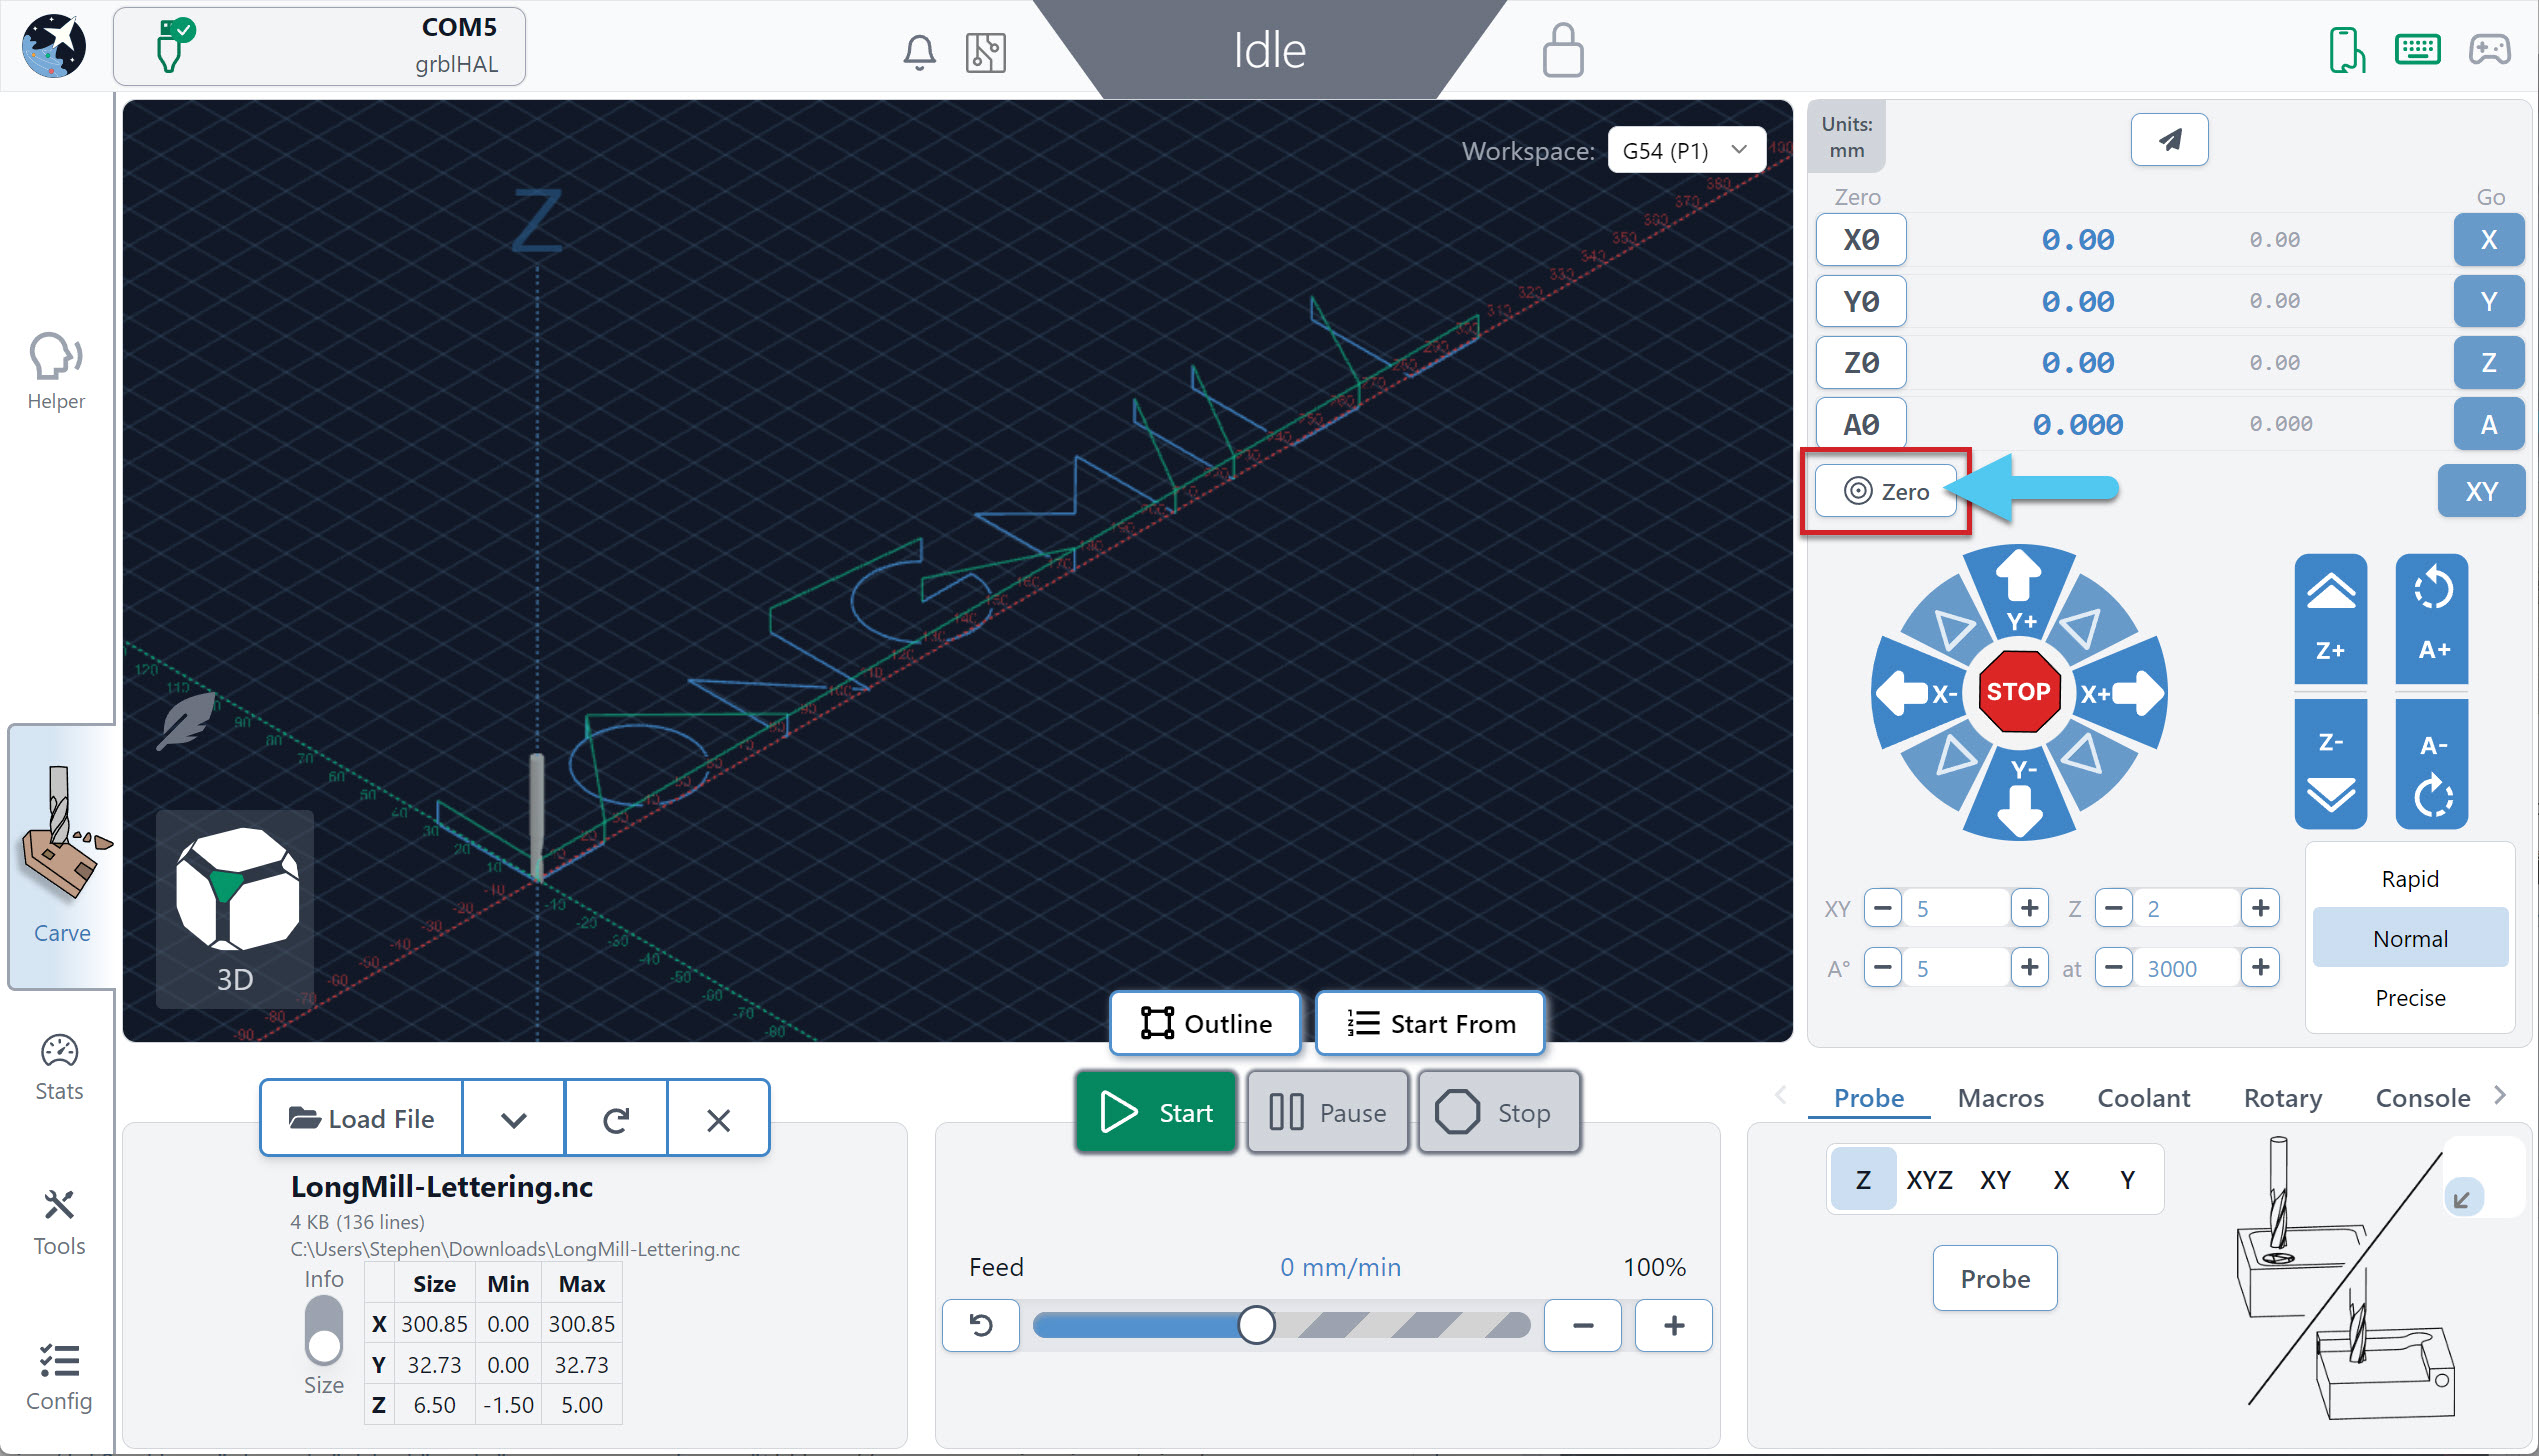
Current
With the bit in position, click the ‘Zero’ button and you’ll see that all the blue X, Y, and Z numbers reset to zero.
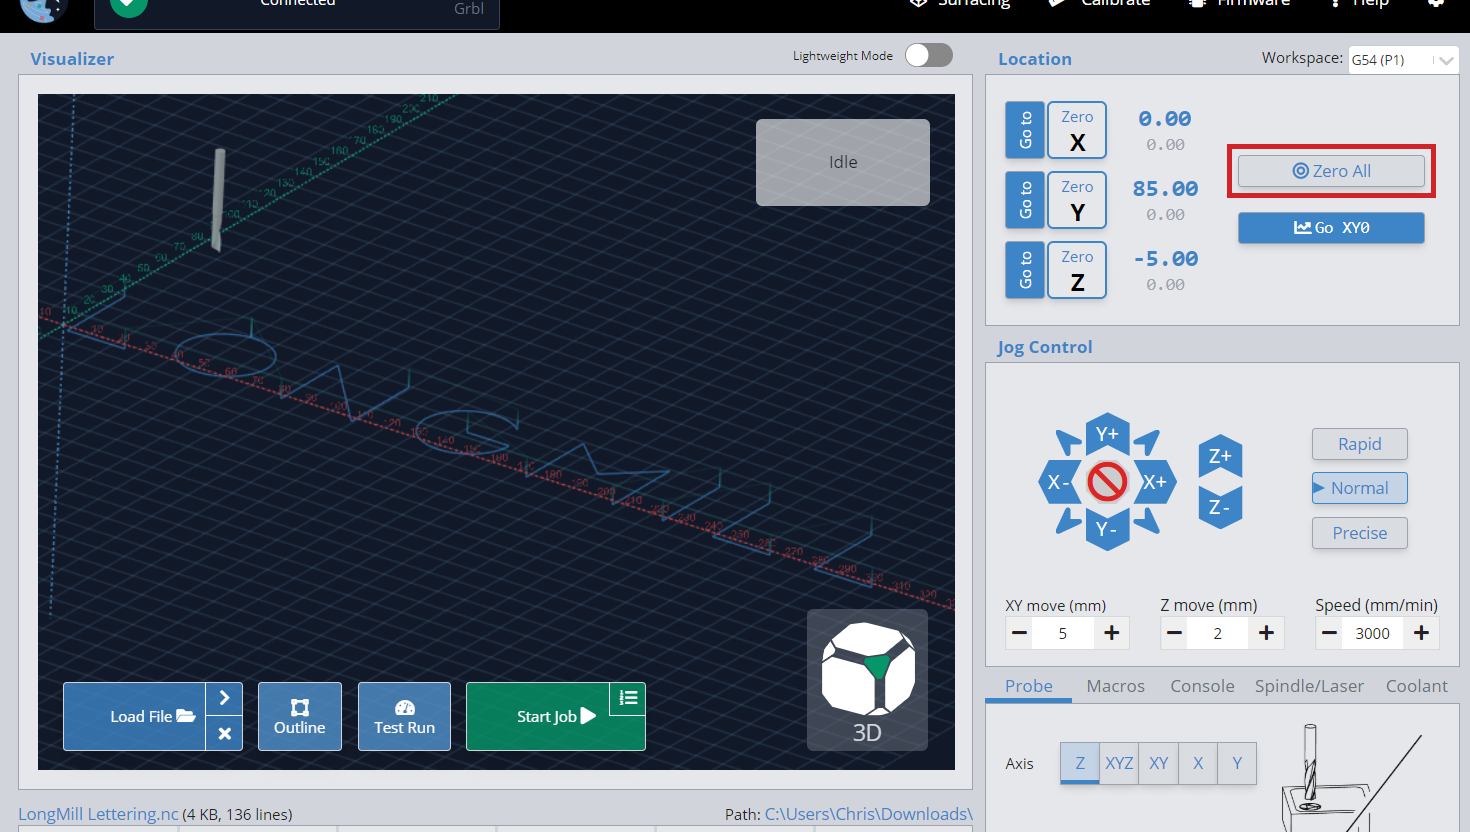
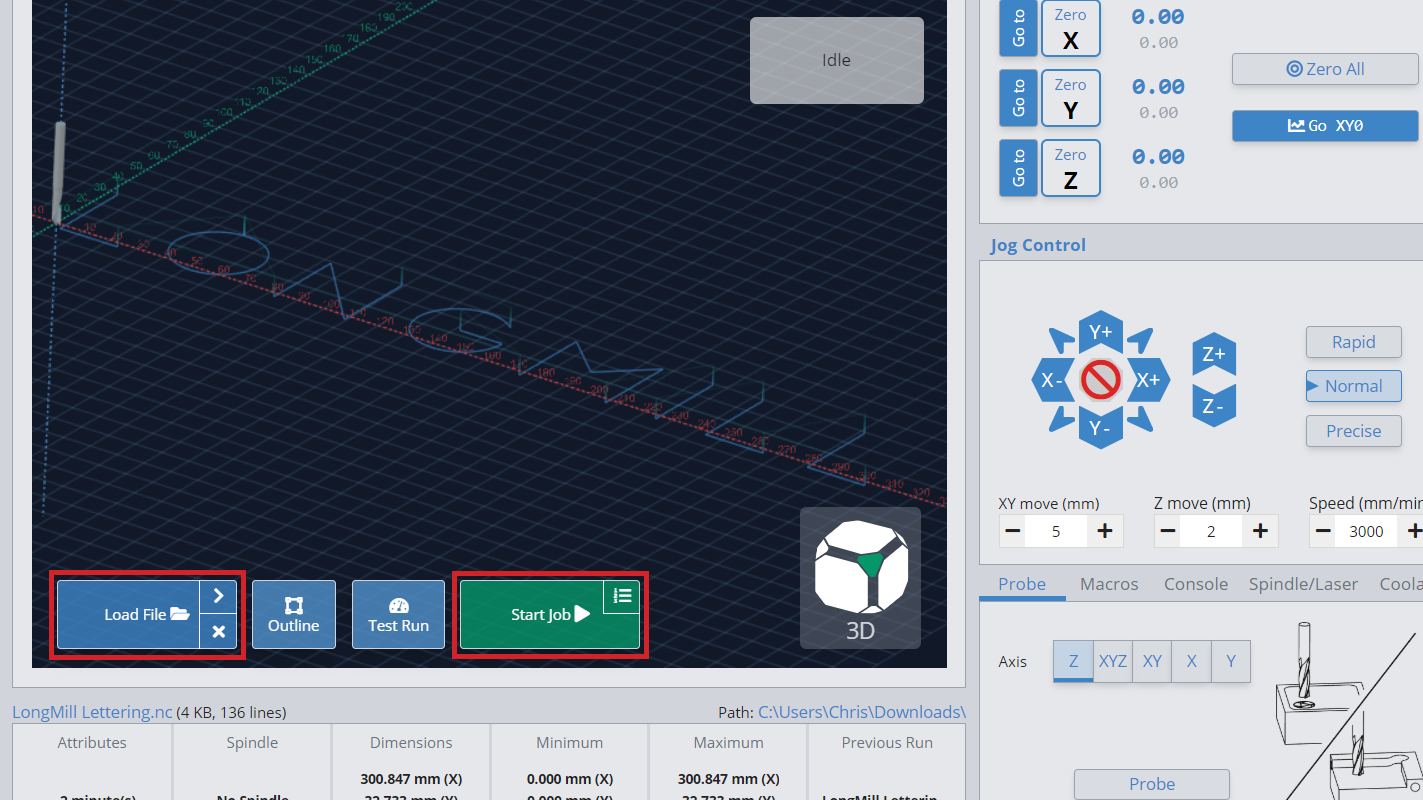
Classic gSender
With the bit in position, click the ‘Zero All’ button and you’ll see to the left all the blue X, Y, and Z locations reset to zero.
Start cutting!
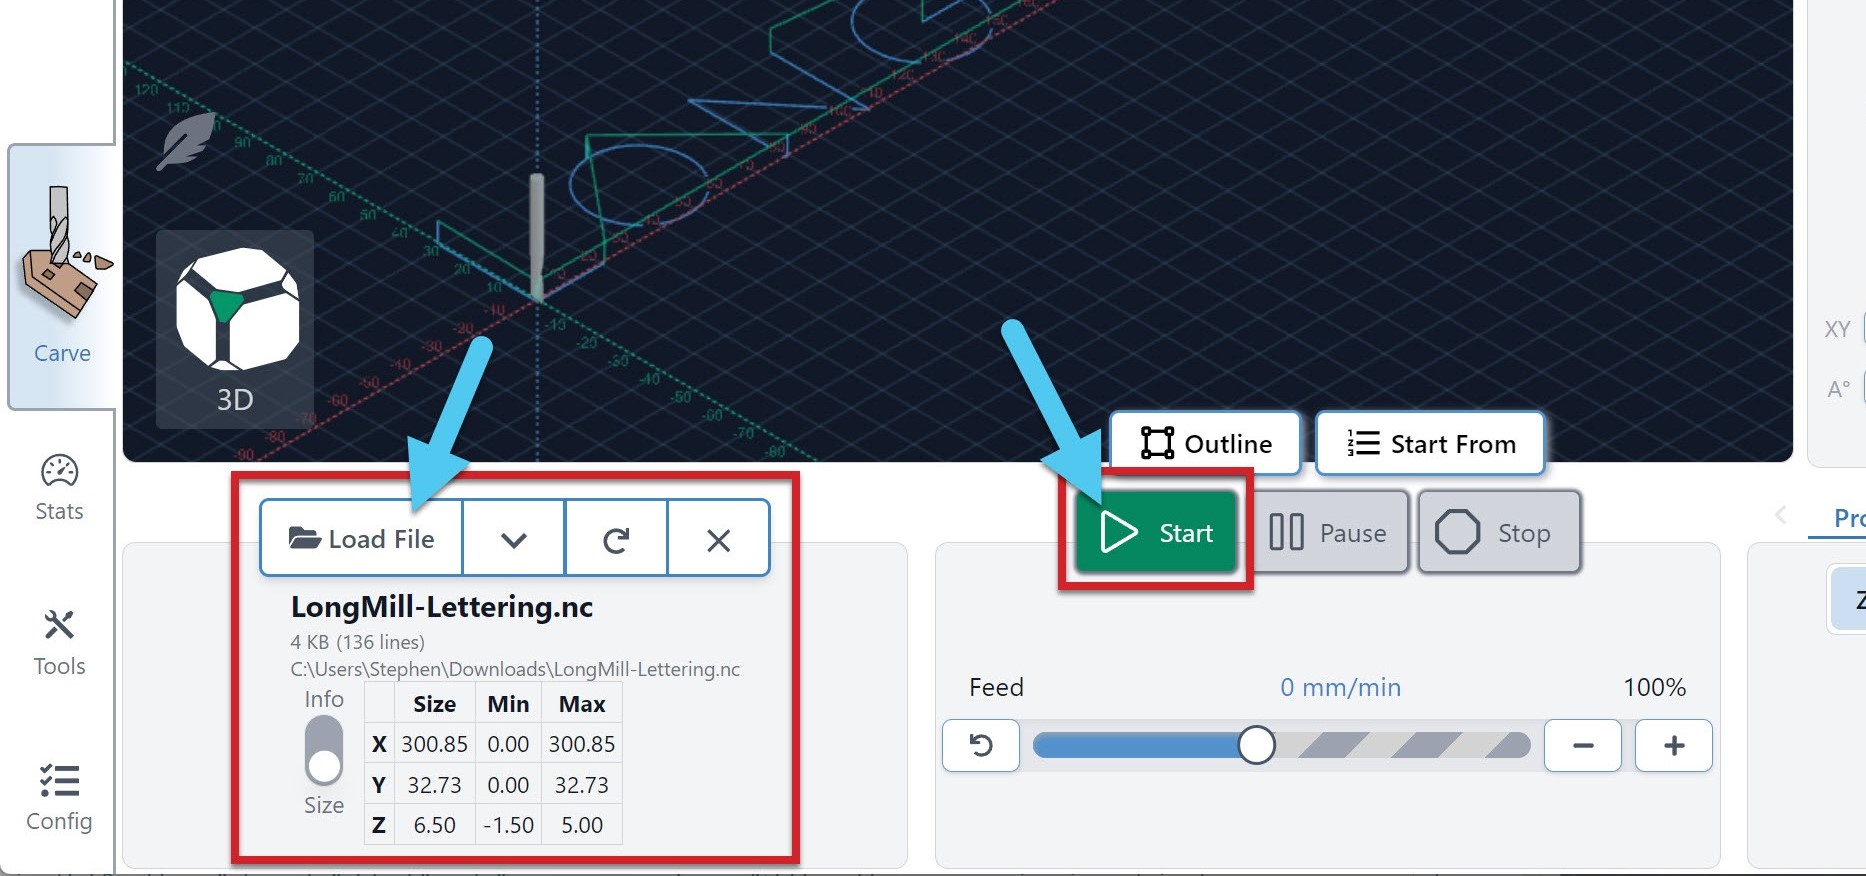
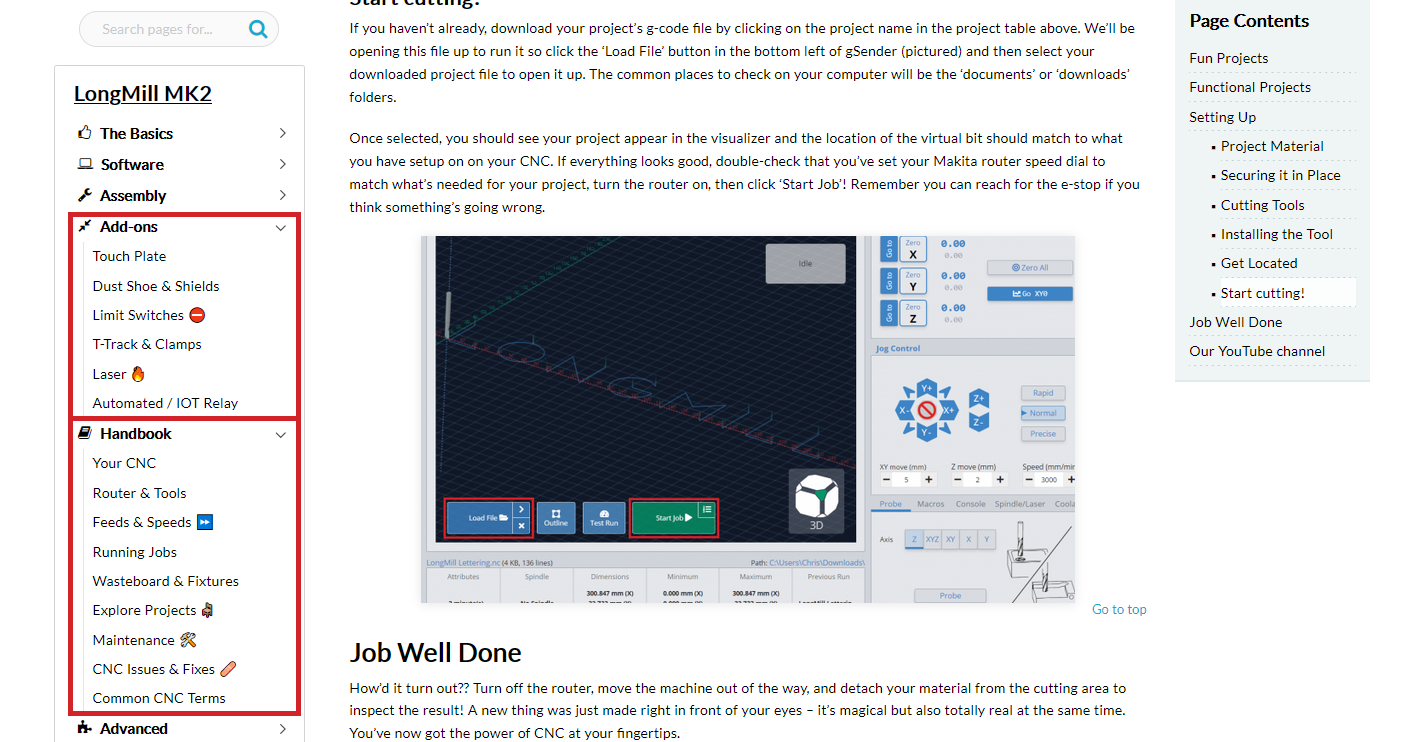
If you haven’t already, download your project’s g-code file by clicking on the project name in the project table above. We’ll be opening this file up to run it so click the ‘Load File’ button in the bottom left of gSender (pictured) and then select your downloaded project file to open it up. The common places to check on your computer will be the ‘documents’ or ‘downloads’ folders.
Once selected, you should see your project appear in the visualizer and the location of the virtual bit should match to what you have set up on on your CNC. If everything looks good, double-check that you’ve set your Makita router speed dial to match what’s needed for your project, turn the router on, then click ‘Start Job’! Remember you can reach for the E-stop if you think something’s going wrong.
Job Well Done
How’d it turn out?? Turn off the router, move the machine out of the way, and detach your material from the cutting area to inspect the result! A new thing was just made right in front of your eyes – it’s magical but also totally real at the same time. You’ve now got the power of CNC at your fingertips.
Now that you’ve got your machine running successfully, you’ve reached the end of assembly! We’ve got a lot more information for you to check out that we hope will continue pushing your CNC journey forwards. This first project doesn’t even mention other aspects like designing your own projects, probing, carving multi-tool jobs, other forms of workholding, feed overrides, and much more! For now be happy / celebrate your first successful project and feel free to be a bit of a show off to your friends and family.
If you bought the touch plate, dust shoe, t-track, or any other add-ons alongside your machine, you’ll find the information to assemble and use those next so you can finish levelling up your MK2: https://resources.sienci.com/view/lmk2-add-ons
The Handbook section that follows the add-on assembly will be the spot you’ll want to check out next. This contains all the information you’d want to refer to for all your day-to-day CNC operation including:
- Machine maintenance
- Wasteboard surfacing
- Guidance on running jobs from start to finish
- Project sources and inspiration
- CNC terms glossary
- CNC troubleshooting (in case you hit any issues during your assembly)
- and more! https://resources.sienci.com/view/lmk2-handbook
Our YouTube channel
We also have a YouTube channel where you can find videos and tutorials on using your LongMill like:
- How to go from idea to completed project
- V-carving signs
- Carving 3D hills and terrain
- Live Webinars and Q&A sessions
- and more!
Additional Project Videos
Each of these project videos come with step-by-step instructions on making your own!
We really hope you enjoy using your LongMill MK2 Benchtop CNC in the days, weeks, and months to come. Remember that CNC routers are an amazing tool that you can use for whatever you like, and the point of the LongMill and it’s community is to offer you resources and support so that you can be confident in using your CNC to make what you imagine. Good luck and happy making!
-The Sienci Labs team