
The LongMill runs off the grbl firmware, an open source firmware that is designed for Arduino-based CNC machines. Sometimes your machine could use a re-flash of this firmware in the case that:
- Your firmware has somehow gotten corrupted which is causing unpredictable behaviour of your machine
- You’re looking to upgrade your LongBoard to the latest version of grbl
This page covers how to perform a re-flash of grbl already baked for the LongMill MK2. This can be done either by:
- Using gSender – this is the easiest method since gSender will always contain the most up-to-date LongMill MK2 firmware and it also performs the entire process automatically
- Using the Arduino IDE – this is a more complex process that you can fall back on if you’re unable to flash the firmware using gSender or you’d like to make your own firmware modifications
If you’d like to experiment with anything outside of the basic flashing process, the grbl Wiki has a wealth of knowledge on compiling, connecting, flashing, and modifying grbl.
Flashing grbl using gSender
Download gSender
You can download the installer for gSender here: https://sienci.com/gSender/.
If you need instructions on how to install it, this documentation goes through the steps: https://resources.sienci.com/view/gs-installation/.
Use the Firmware Tool
Current
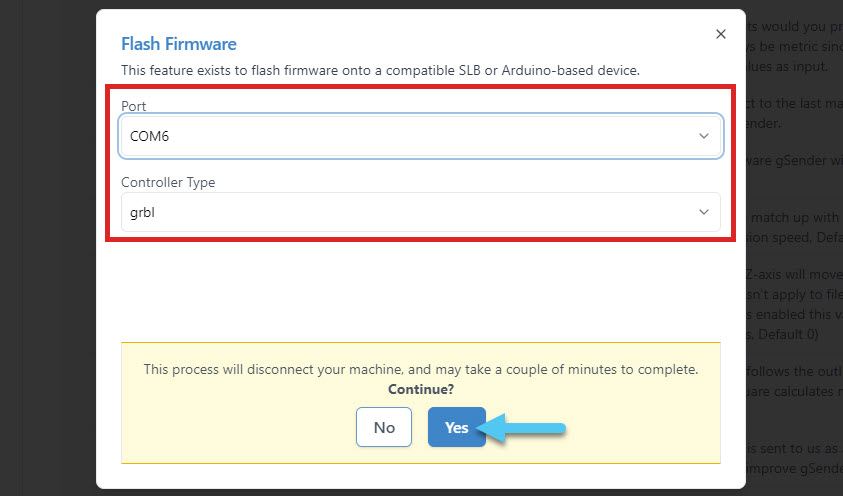
Once you’ve completed the installation, open gSender and connect to your machine. Open the Config Tab on the left side then check that you’ve selected your specific CNC in the profiles drop down so that the correct firmware is flashed. Click the Flash button to bring up the confirmation prompt.
NOTE: If you’ve made custom changes to your machines firmware that you don’t want to lose, use the ‘Export Settings’ button to save your settings to a file that you can then reload when flashing is complete.

Select your current Port and keep the controller type as “grbl”. When ready, click the ‘Yes’ button to flash the latest firmware.
You will need to reconnect once you see the process is complete.
Classic gSender
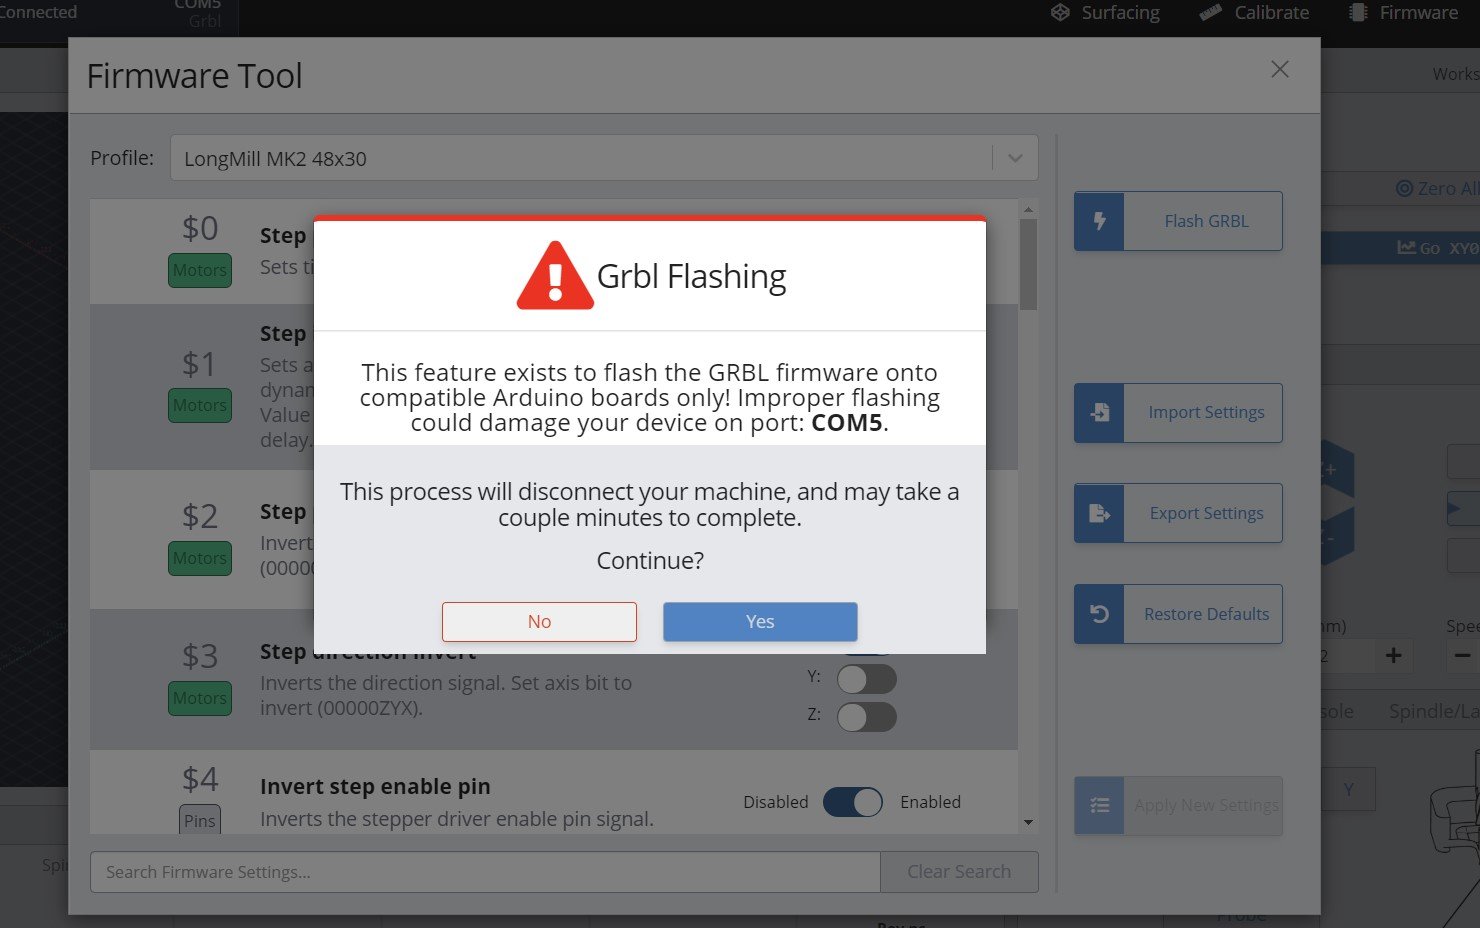
Once you’ve completed the installation, open gSender and connect to your machine. Open the ‘Firmware’ tool and check that you’ve selected your specific CNC in the profiles drop down so that the correct firmware is flashed. Click the “Flash grbl” button to bring up the confirmation prompt.
NOTE: If you’ve made custom changes to your machines firmware that you don’t want to lose, use the ‘Export Settings’ button to save your settings to a file that you can then reload when flashing is complete.

You will see a warning about the risk of flashing the firmware. If you own a LongMill and have not made any modifications to your control board, there is almost no risk in completing this process. Press ‘Yes’ to continue.
Restore Settings
Current
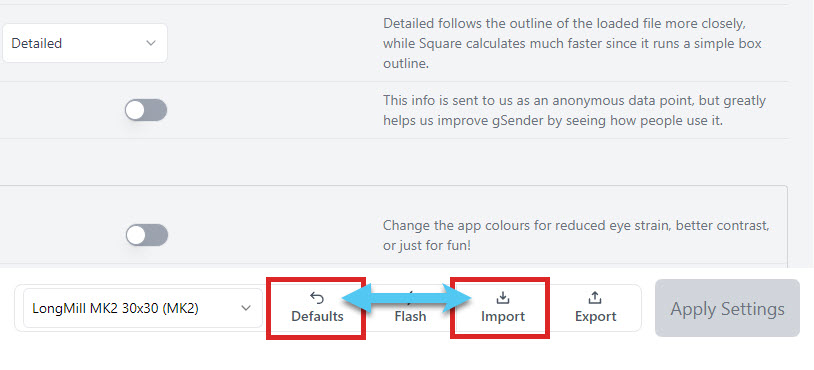
To make sure your machine is properly set up with all the default settings, go back to the Config Tab and press the Defaults button, then click Restore Defaults.
If you previously exported your own custom settings, you can instead click the Import button to load your original settings back onto your machine. Navigate to the Carve Tab, and try jogging to ensure the machine is working properly.
Classic gSender
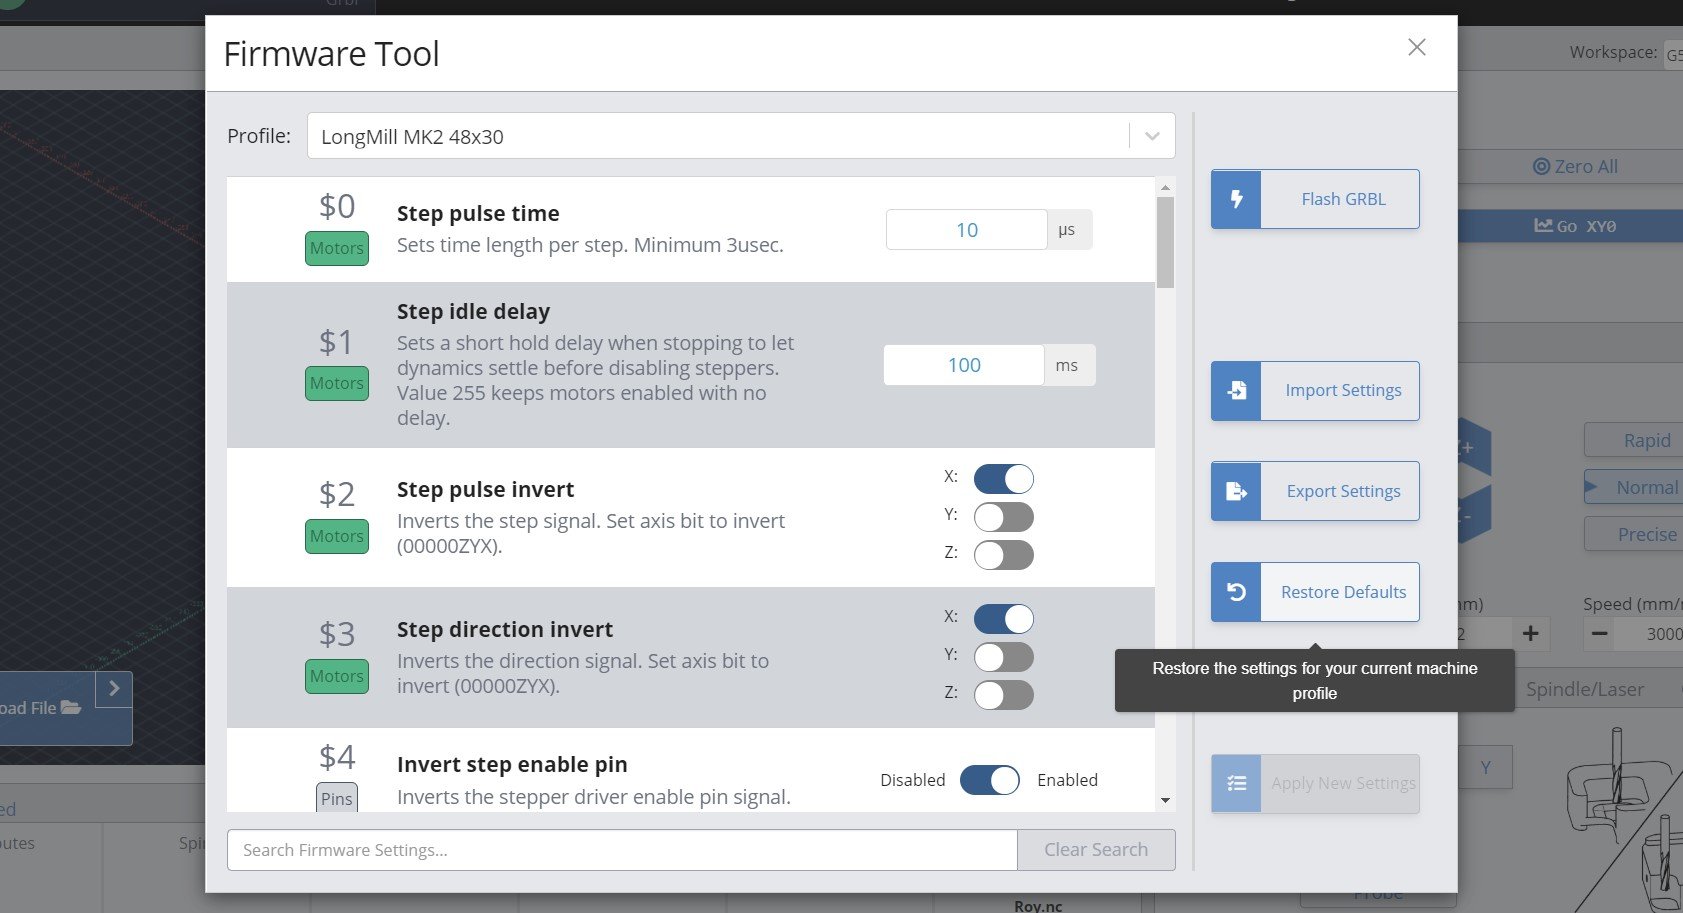
Once the flashing process is completed, you’ll have to reconnect to your machine using the connection drop-down at the top-left corner. To make sure your machine is properly set up with all the default settings, go back to the Firmware Tool and press the ‘Restore Defaults’ button, then click ‘Yes’.
If you previously exported your own custom settings, you can instead click the ‘Import Settings’ button to load your original settings back onto your machine. Close the Firmware Tool window, and try jogging to ensure the machine is working properly.
Flashing grbl using Arduino IDE
NOTE: If you’ve made custom changes to your machines firmware that you don’t want to lose, you’ll want to record them down before starting the flashing process. Whichever g-code sender you use you’ll want to find the ‘console’ area and type ‘$$’ and hit ‘Enter’. This will pop up a block of values that you’ll want to record however you wish. When you complete the flashing process you’ll then be able to go back into your g-code sender and compare the new values the written ones and adjust them appropriately.
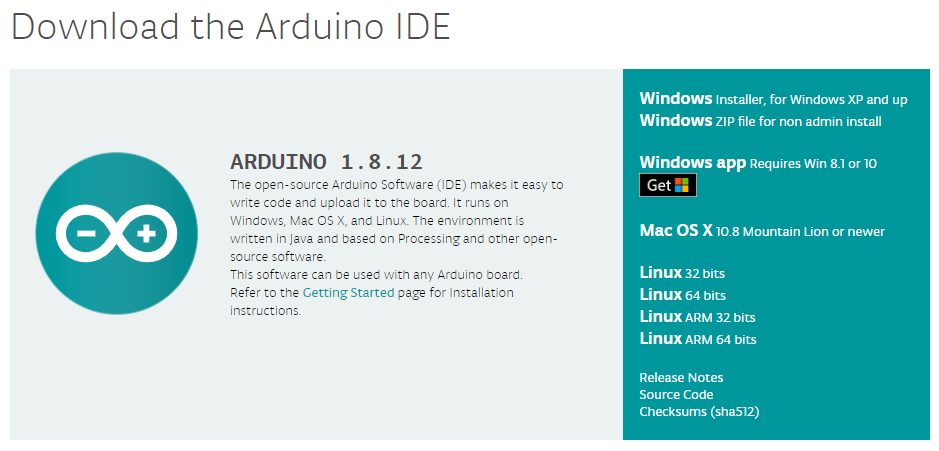
Download Arduino IDE
Start by closing any programs (like gSender, UGS, CNCjs, Easel, etc.) that can connect to your LongMill MK2 controller. Since the LongBoards ‘brains’ come from an Arduino that it has on-board, you will need a program called “Arduino IDE” in order to compile and flash any firmware changes onto the LongMill. The download page can be found here: https://www.arduino.cc/en/software.
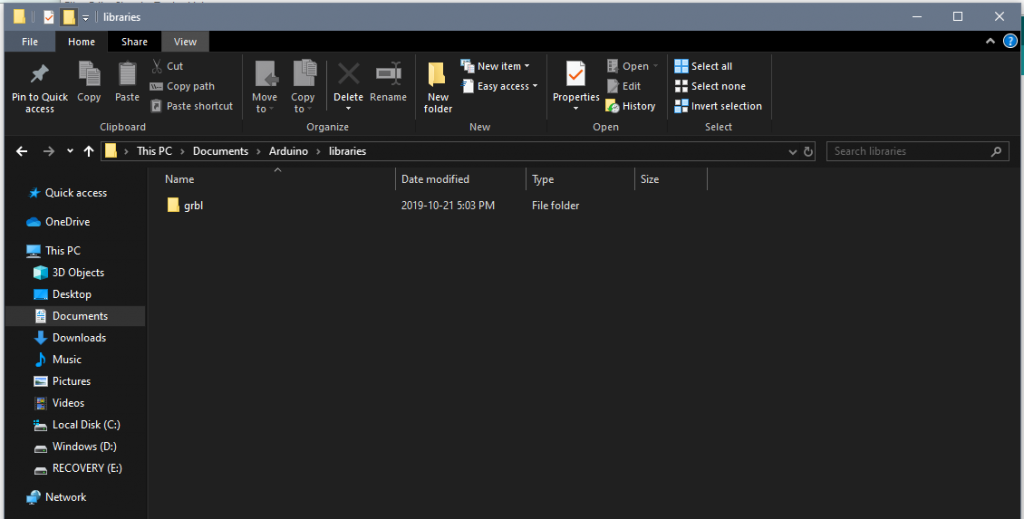
!! If you have flashed grbl firmware before using Arduino IDE, you will need to make sure to delete any old libraries for grbl. Arduino typically saves libraries in the Documents ➜ Arduino ➜ Library folder of your computer for both Windows and Mac. If you do not delete the old library first, you will install the old version of grbl. !!
Clear the board’s EEPROM
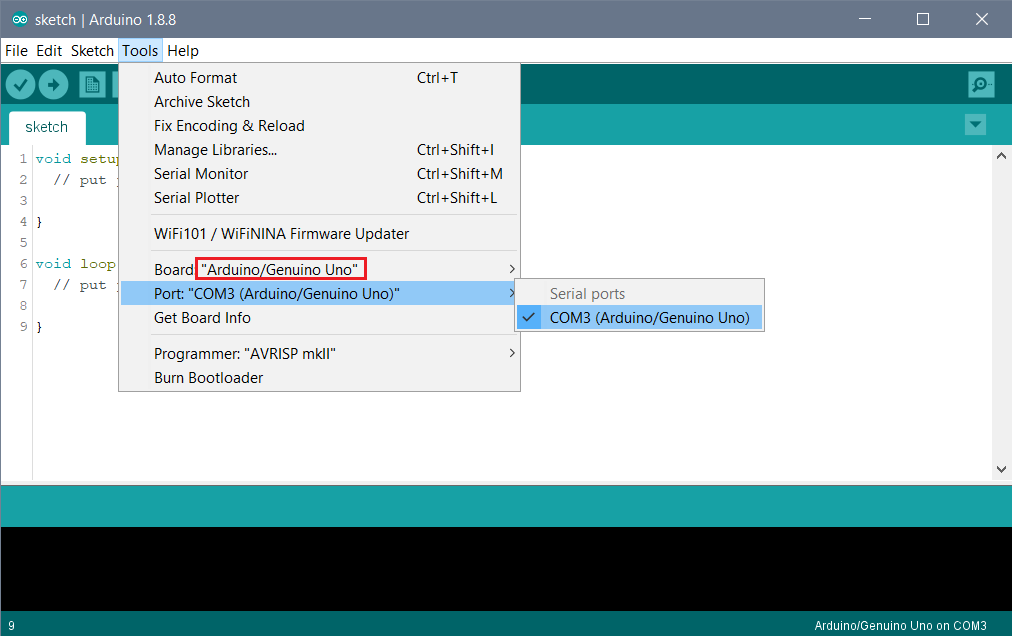
Once Arduino IDE has been installed, plug your control board into your computer then open the Arduino IDE program. Click on the “Tools” menu at the top and make sure that “Board” is set to “Arduino Uno” or “Arduino/Genuino Uno” and “Port” is set to the port you normally use for your LongMill (for example, COM3). The naming scheme for port names on Mac can look a little bit different, but typically the correct port is indicated with “(Arduino/Genuino Uno)” in the name. Later on if your program fails to upload, you can come back and try a different port until you find the correct one.
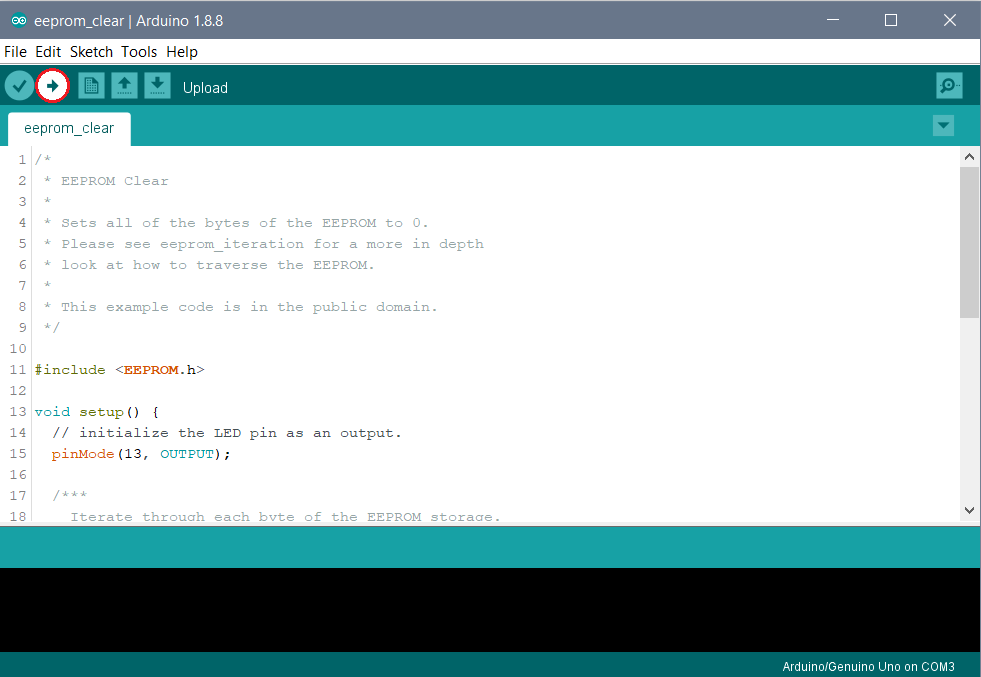
To ensure that all of the old settings are cleared from the board’s memory, we will do an EEPROM clear. You can find this ‘example program’ under File ➜ Examples ➜ EEPROM ➜ eeprom_clear.
Clicking this will open up a new window where you’ll see the window is titled “eeprom_clear“. Click on the “Upload” button on the top left of the program to compile and upload this code. If you run into an upload error at this step, you might still be connected to your LongMill on your computer in gSender, UGS, CNCjs, or even LightBurn. You’ll need to disconnect from the LongMill in that program and then you should be able to retry the Upload.
Upload the grbl firmware
Now that we’ve erased all previous memory from the control board, we can move forward by giving it new instructions to remember: this will be a brand new firmware installation. We keep all major LongMill firmware instances available for download, you’ll likely want to click to download the most recent one: LongMill MK2 Firmware (Feb 11, 2022)
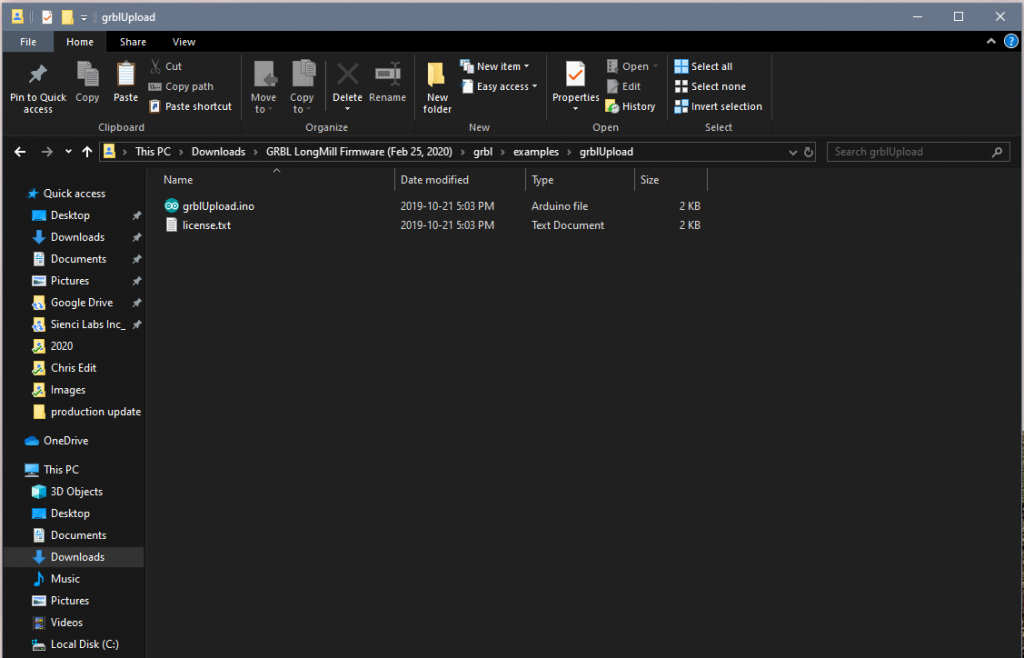
Once downloaded, this will appear onto your computer as a compressed or ‘zipped’ file. Locate the downloaded file in your computer folders, ‘un-zip’ or ‘extract’ it (usually found when you right-click the file), and then you’ll notice a firmware folder with a name that matches the downloaded file and contains all the necessary files. If you open this folder up you should see a folder called “grbl“, and from there if you open up the “examples” folder followed by the “grblUpload” folder. If you notice a file called “grblUpload.ino” this is what you’ll want to open with the Arduino IDE program (this should be as simple as double-clicking the file which will open up a new window where you’ll see the window is titled “grblUpload“).
Before hitting the “Upload” button, another step here is to prepare the grbl library. This is done by clicking on “Sketch” in the menu, then: Include Library ➜ Add .ZIP library.
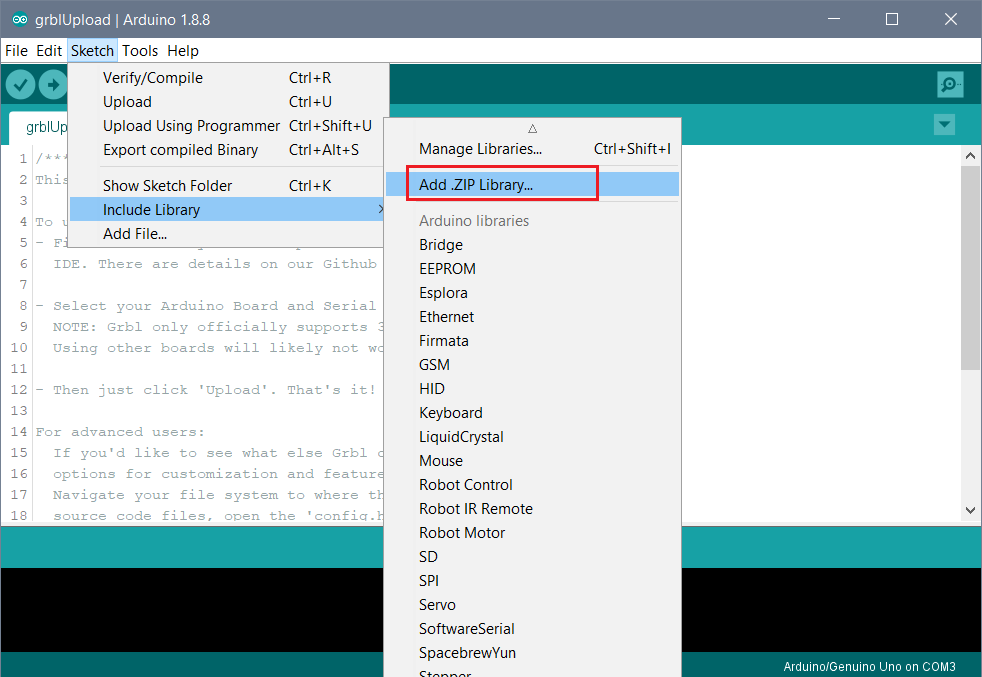
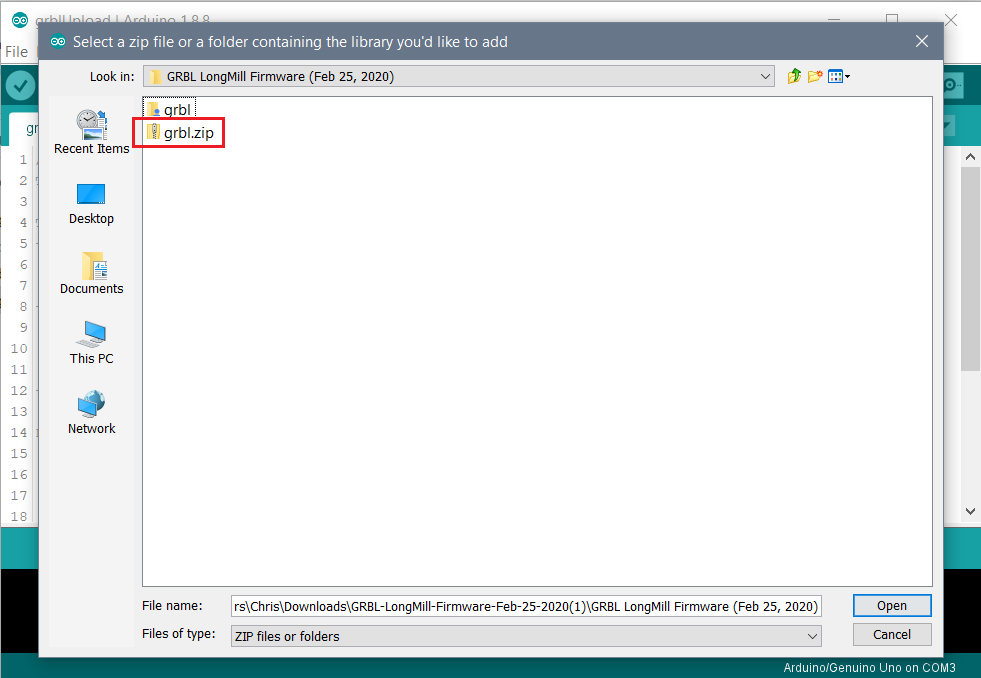
After clicking “Add .ZIP library“, you’ll need to find your way back to the LongMill Firmware folder that you were already at before and select the grbl.zip file (shown in the picture). Click “Open” to add this grbl library to the Arduino program.
Now, upload the firmware code by clicking on the “Upload” button on the top left corner. It can take a minute or two for the firmware to finish uploading. Once completed you should see “Done uploading” in the turquoise bar as the bottom to let you know that the firmware has successfully been uploaded. Don’t worry about if you see a message for “low memory available”. The grbl firmware uses up a lot of the Arduino storage space but is designed to work very reliably regardless. The LongMill version is, if anything, a little bit smaller than the default grbl firmware so it will be just as stable.

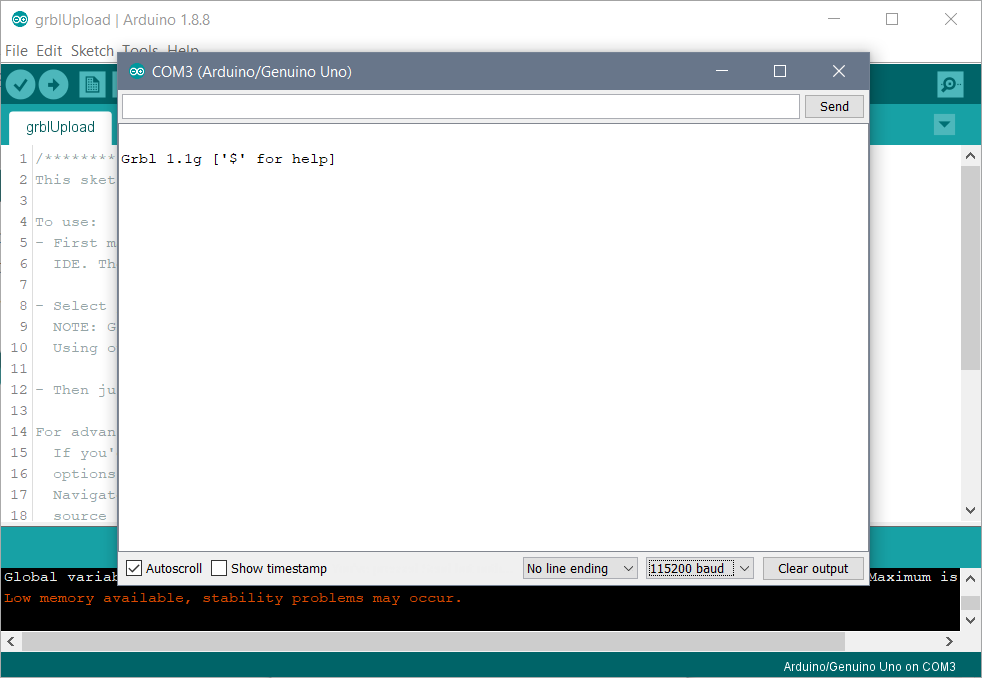
You can check if your firmware has been correctly installed by going to Tools ➜ Serial Monitor. This will open a window to show the console output of the Arduino. If your output looks garbled, make sure to set your baud rate to 115200. As you can see, the output shows the firmware version and build date.
Your controller should now be flashed with the new firmware. Before opening your g-code sender, make sure to close the Arduino IDE first.