The T8 Spring Loaded Anti-Backlash Nuts are compatible with LongMill MK1 & MK2 designs, and ship by default with the MK2.5. The only exception is if you have a LongMill 48×30 in which case the X-axis requires the larger T12 Spring Loaded Nut.
Anti-backlash nuts are used on the LongMill to both reduce backlash on the lead screws and to compensate for wear over time. These spring-loaded nuts are a novel design by Sienci Labs which bring traditional anti-backlash nuts to the next level by introducing auto-tensioning. This means you won’t need the manually tension these nuts or adjust them over time, as they will take care of this on their own. You can read more about this in our blog post about them.
Upgrading to the new nuts is fairly simple, the only parts you need are the new nuts and the Allen key provided for assembly, all other hardware is reused. The fastest way to follow these steps will be to have easy access to all sides of your machine and have your machine turned on so you can jog it around. Once you swap out the first nut, you’ll find that swapping out the other 3 is very similar! Follow the instructions below or watch the video if it helps.
Y-Axes
We are replacing 4 nuts, one on each Y-axis plate (left and right) and two next to each other at the XZ-gantry.
- Jog the Y-axis close to the back of the machine.
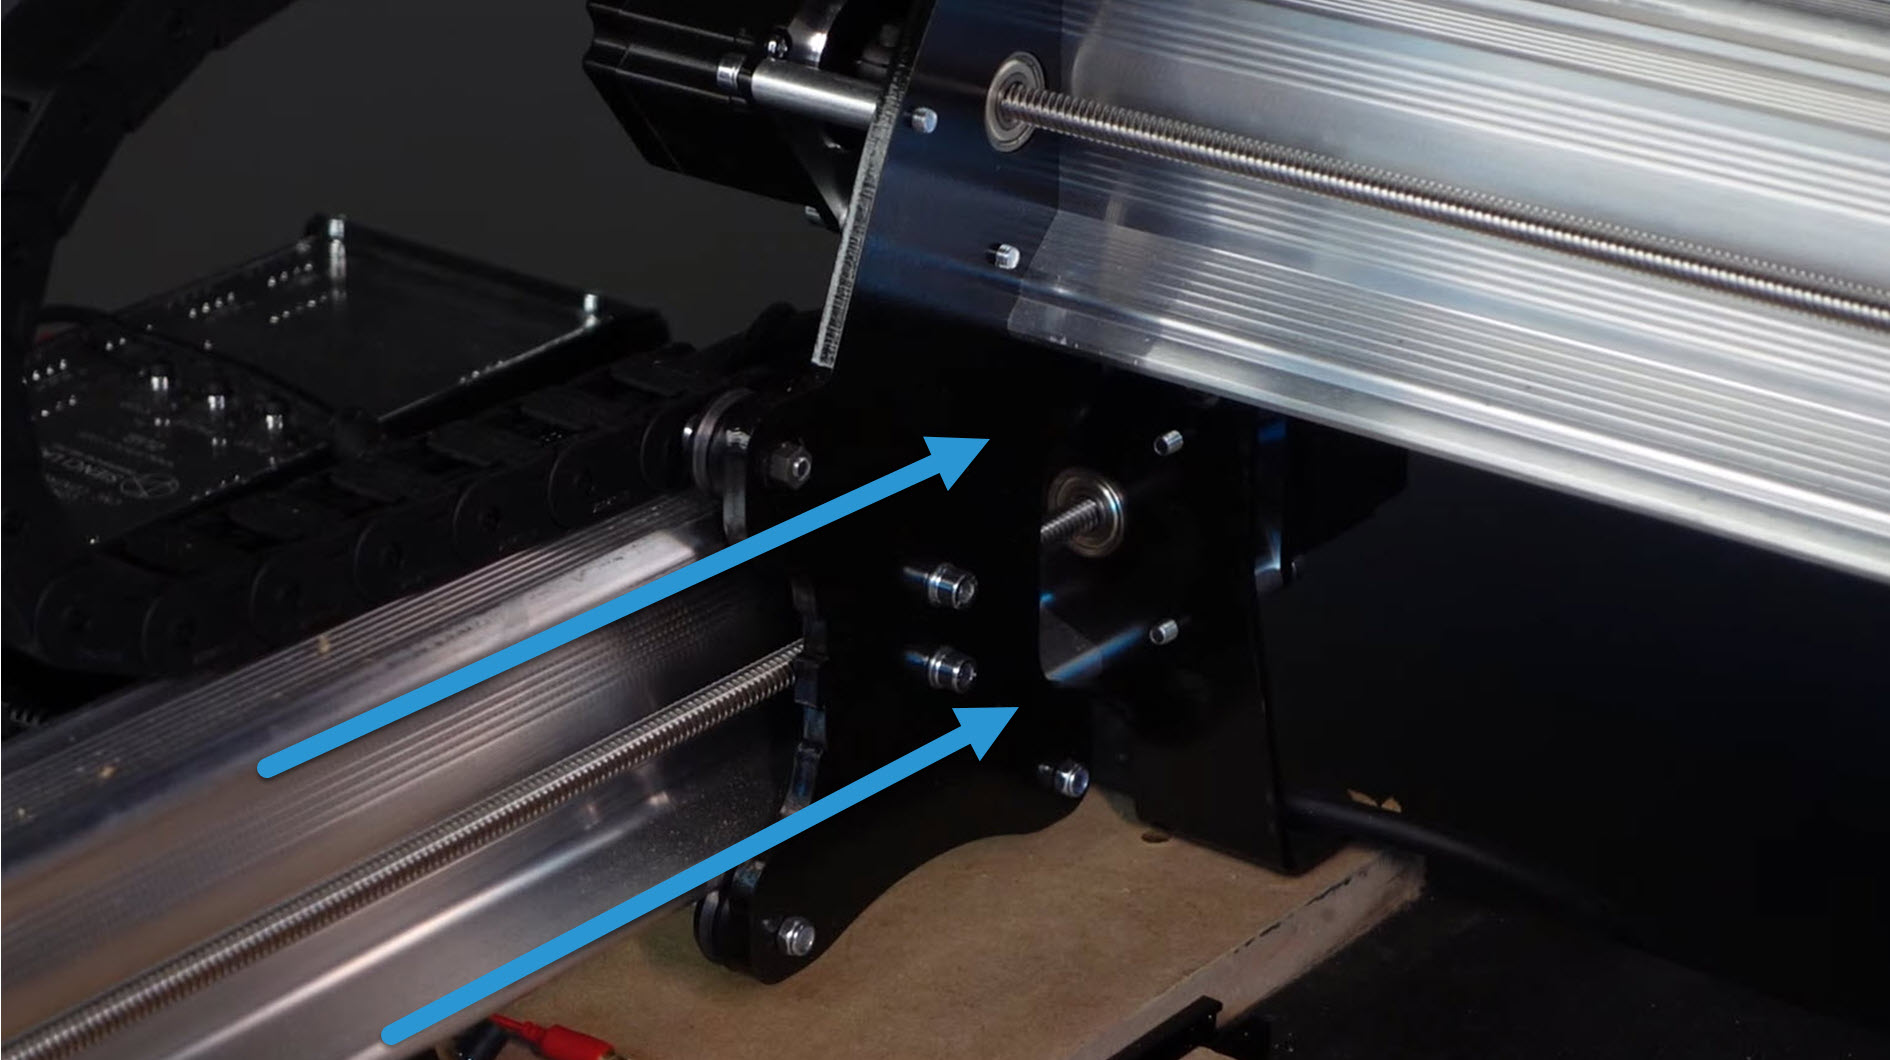
- With your Allen key, remove the two M5 mounting screws from the backlash nuts on the Y-axis plates on both the left and right sides. Once they’re removed, manually push the Y-axis away from the nuts so you can reach them underneath.
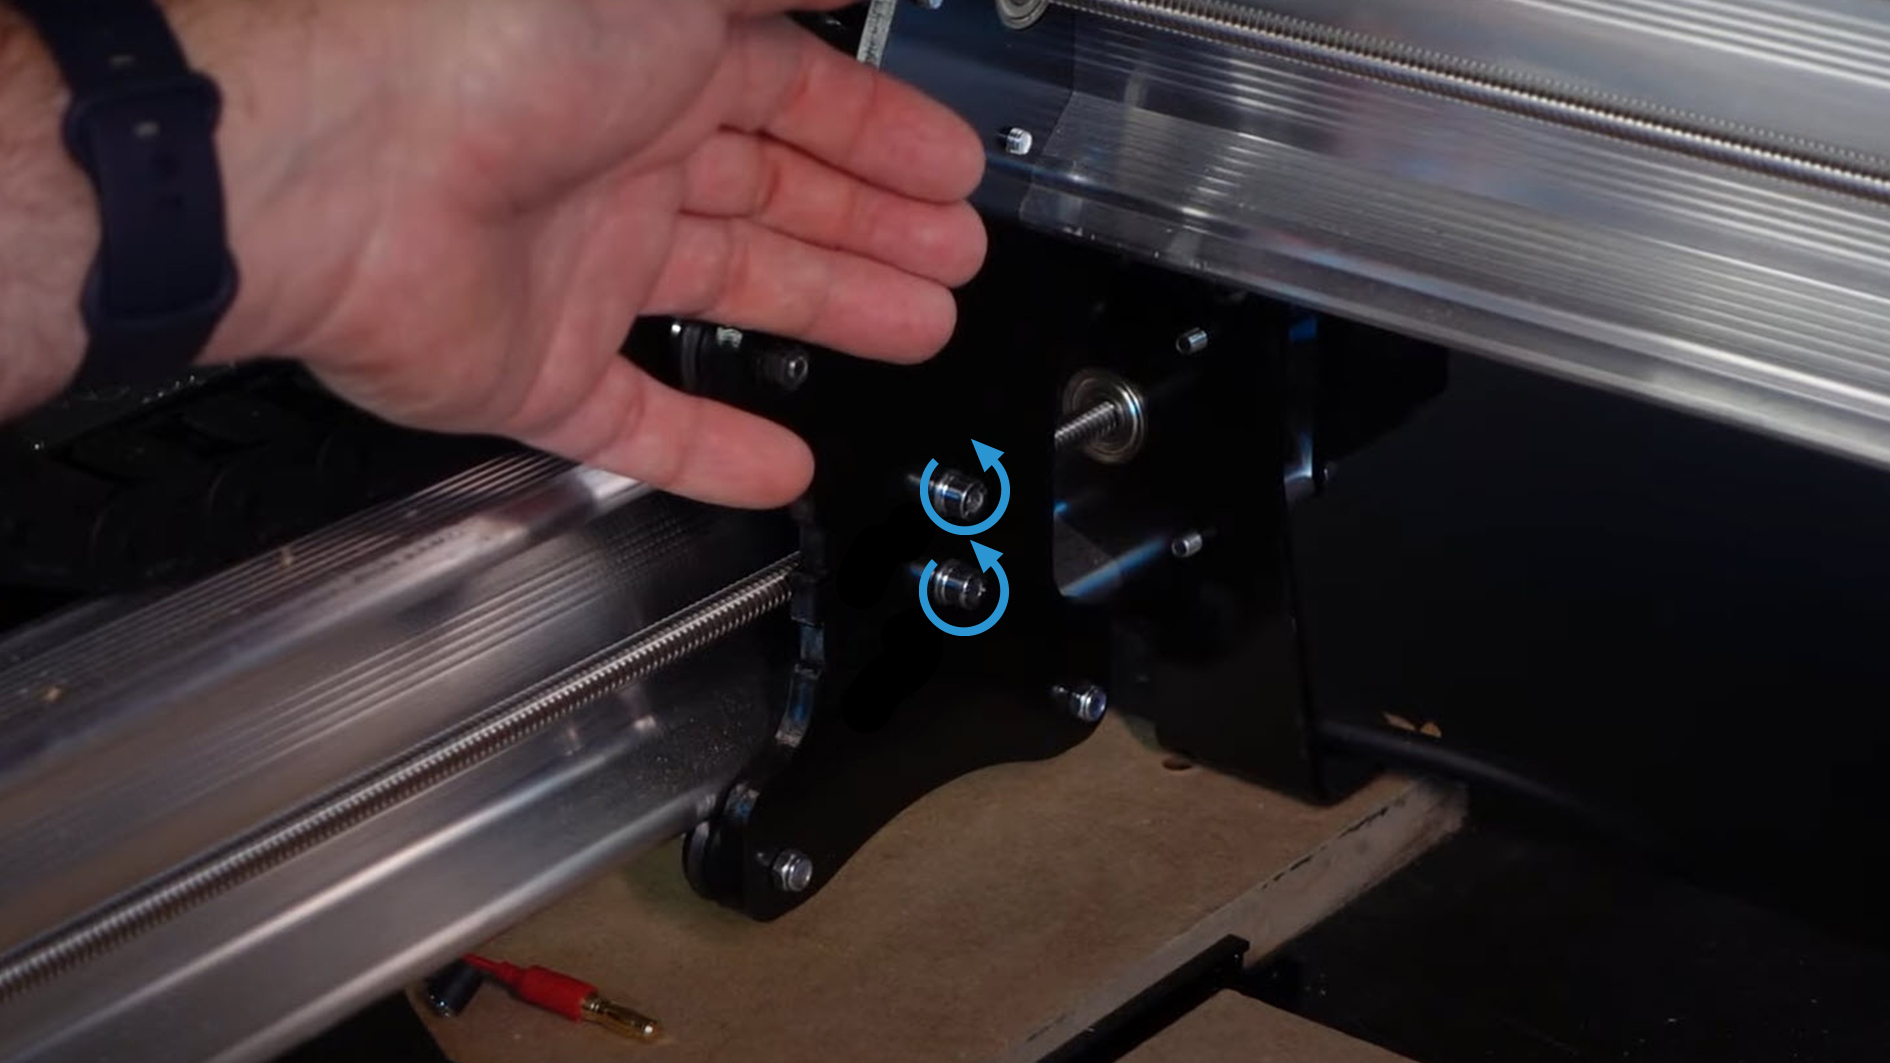
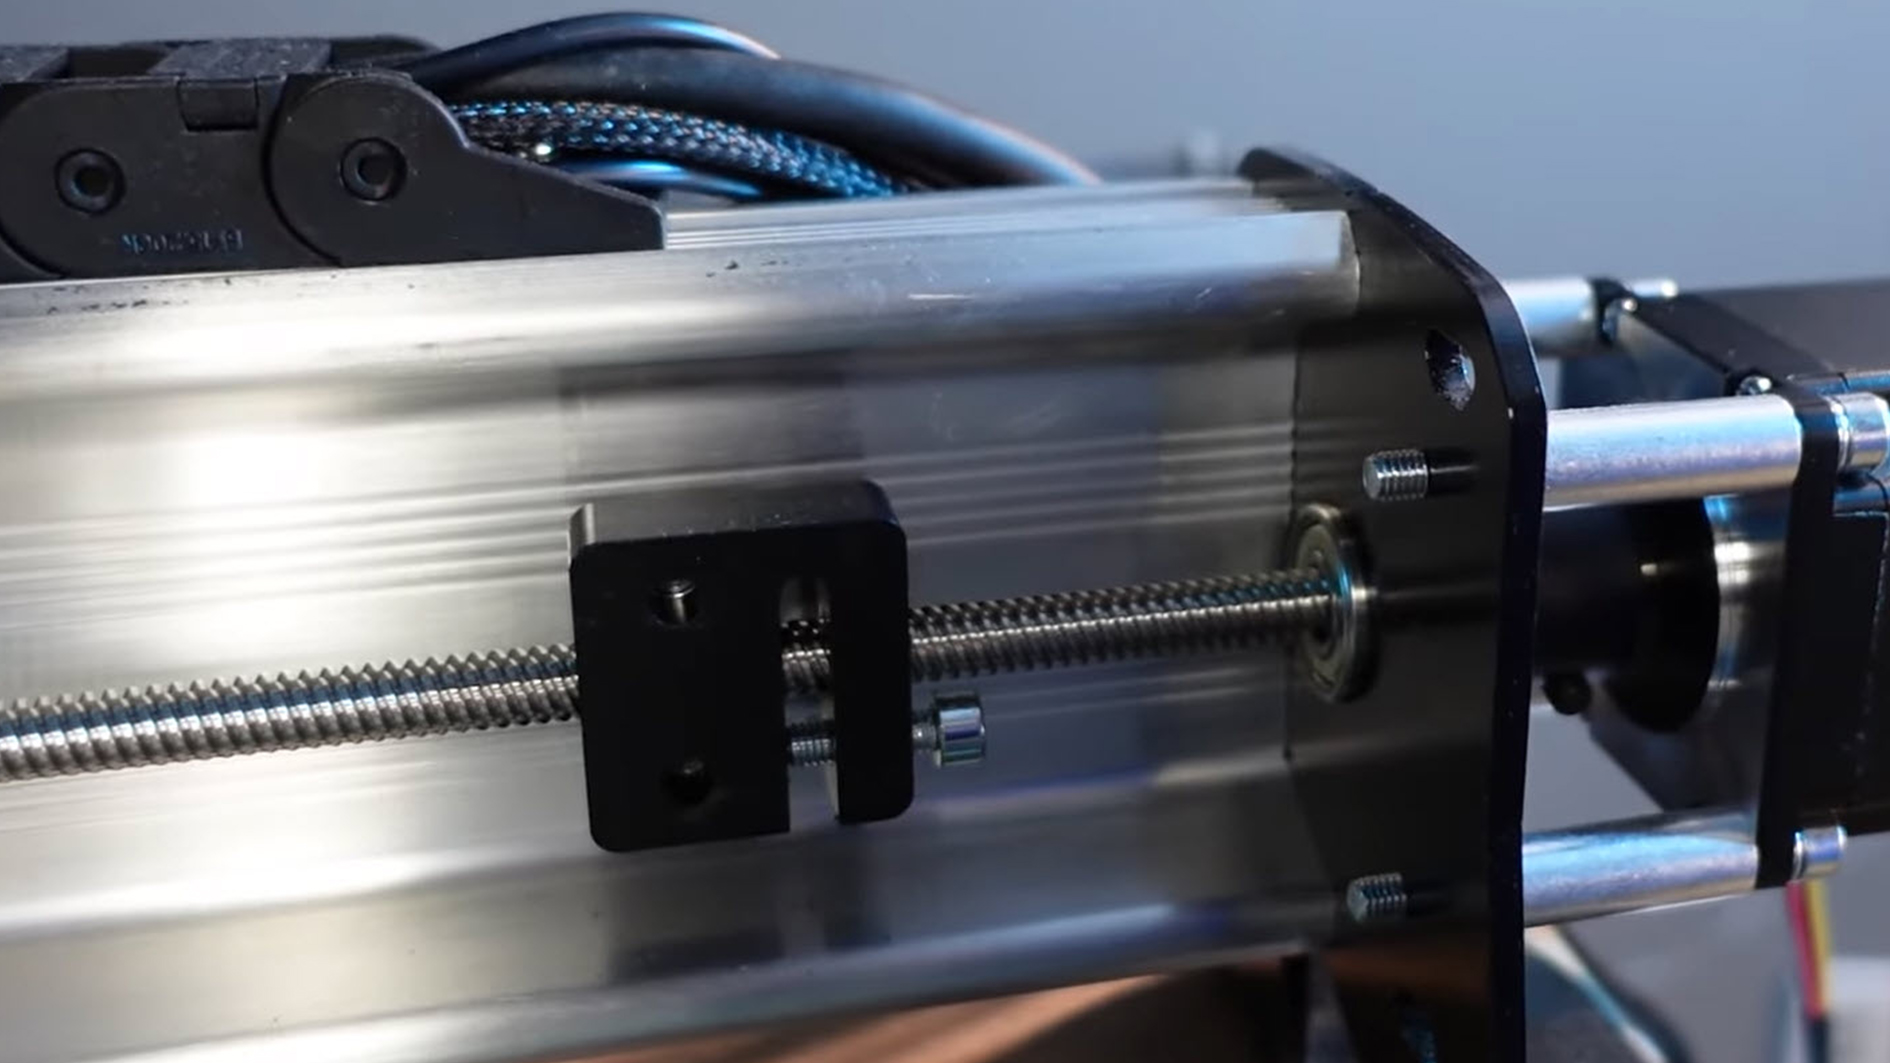
- On the motor coupler, loosen the screw on the lead screw side. Do this until you can slide the lead screw out through the bearing completely.
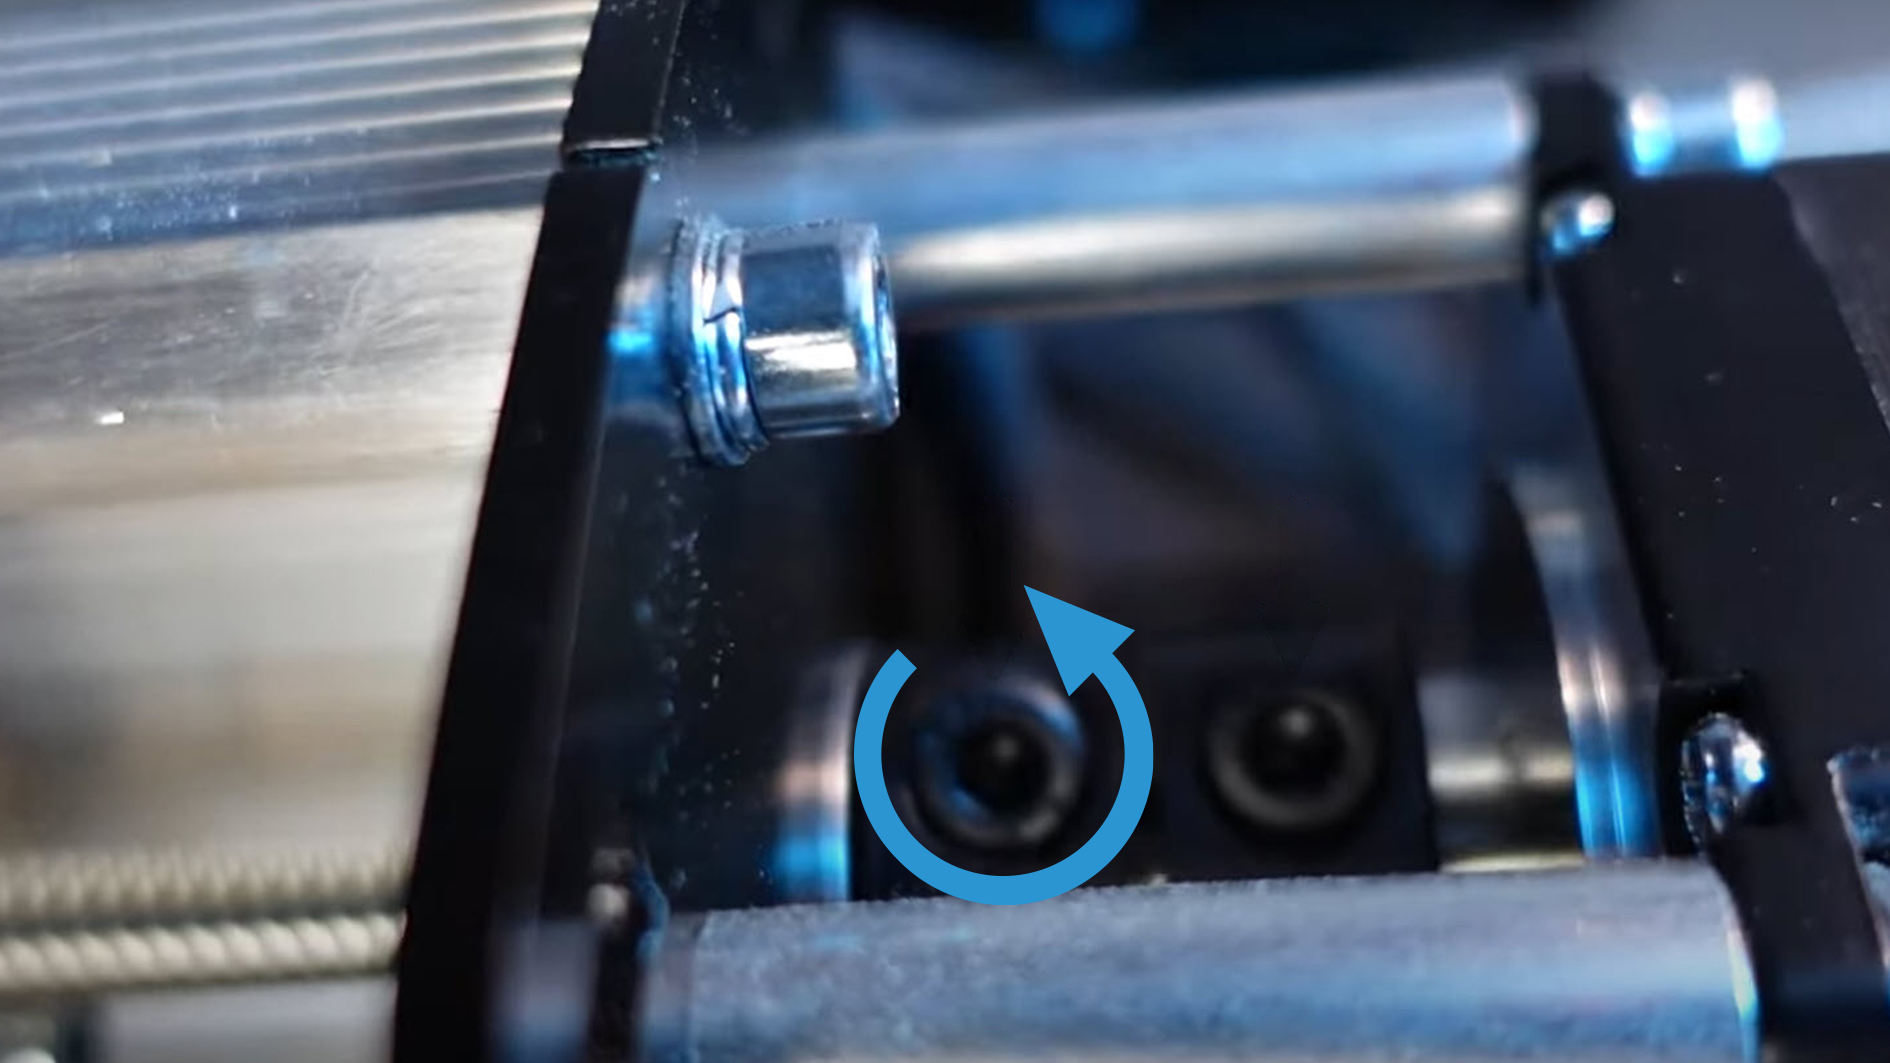
- Rotate the lead screw until the old backlash nut is off, or rotate the nut itself.
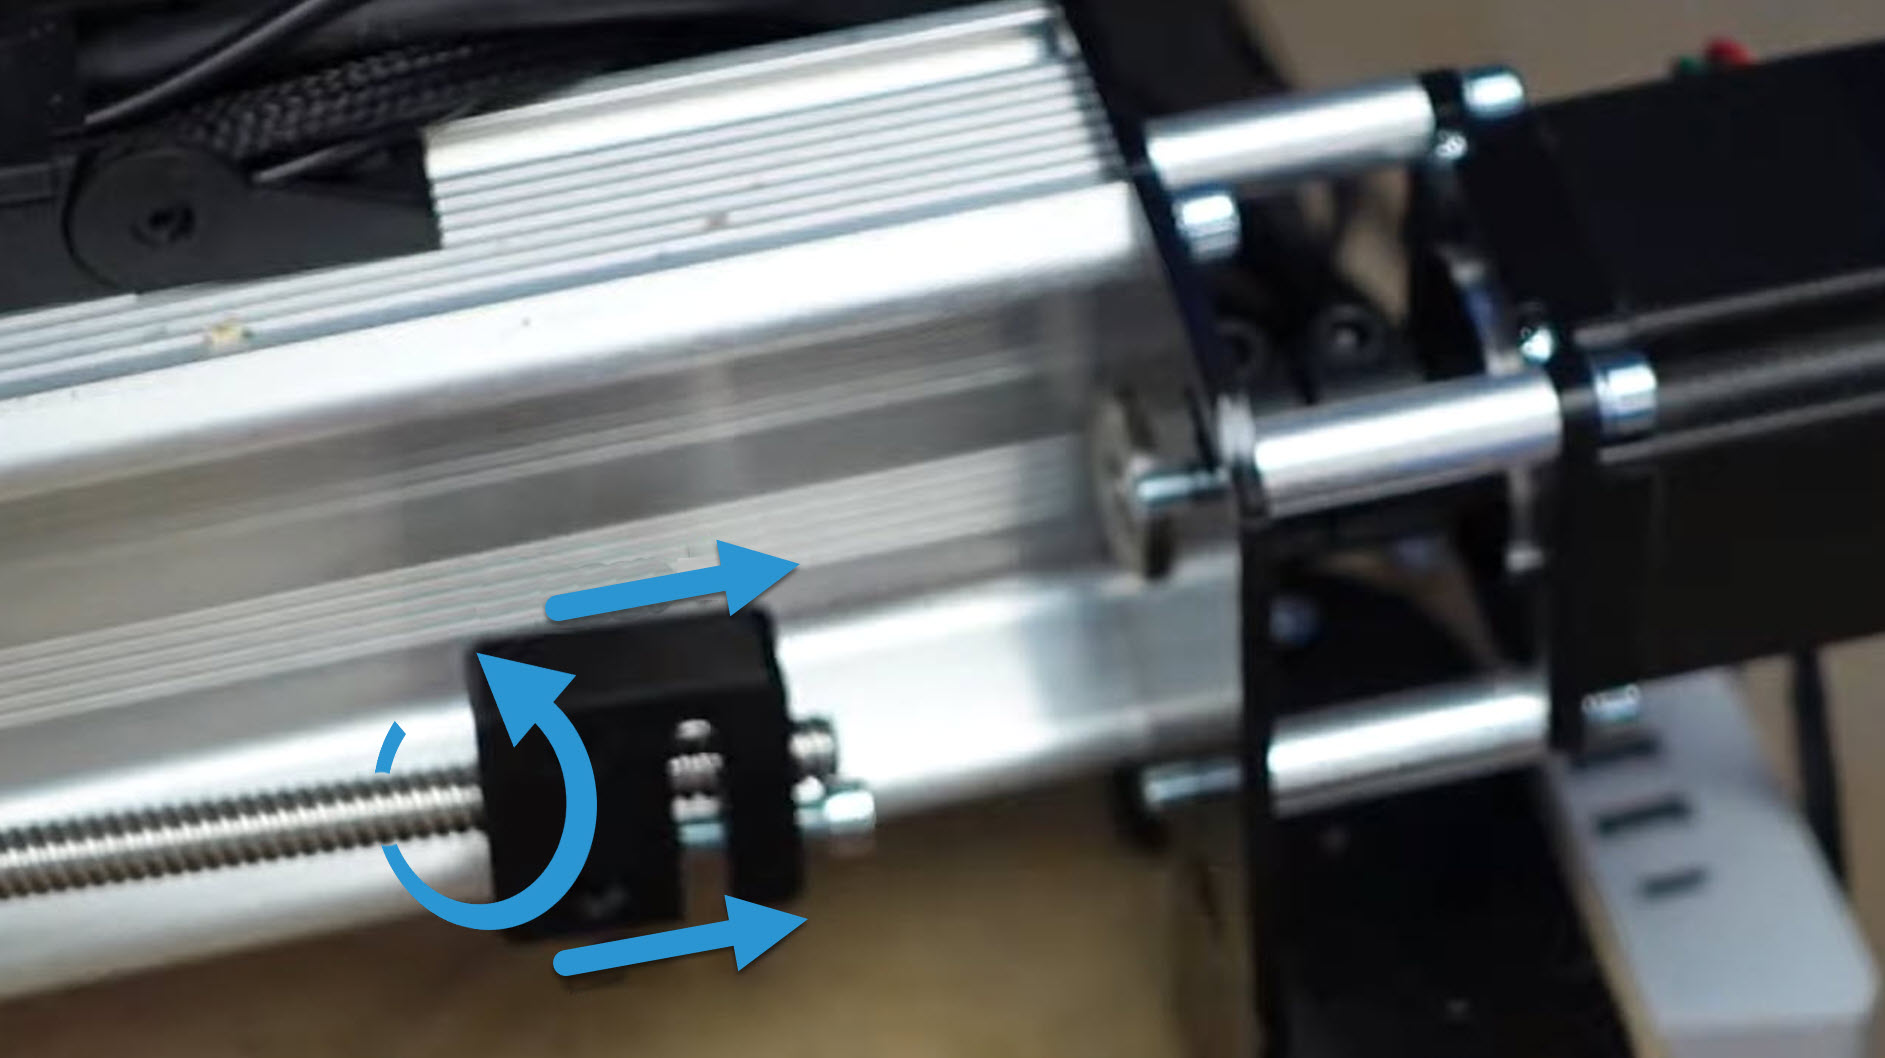
- Grab a new T8 spring loaded nut and thread it onto the lead screw, with the spring side facing the motor/back.
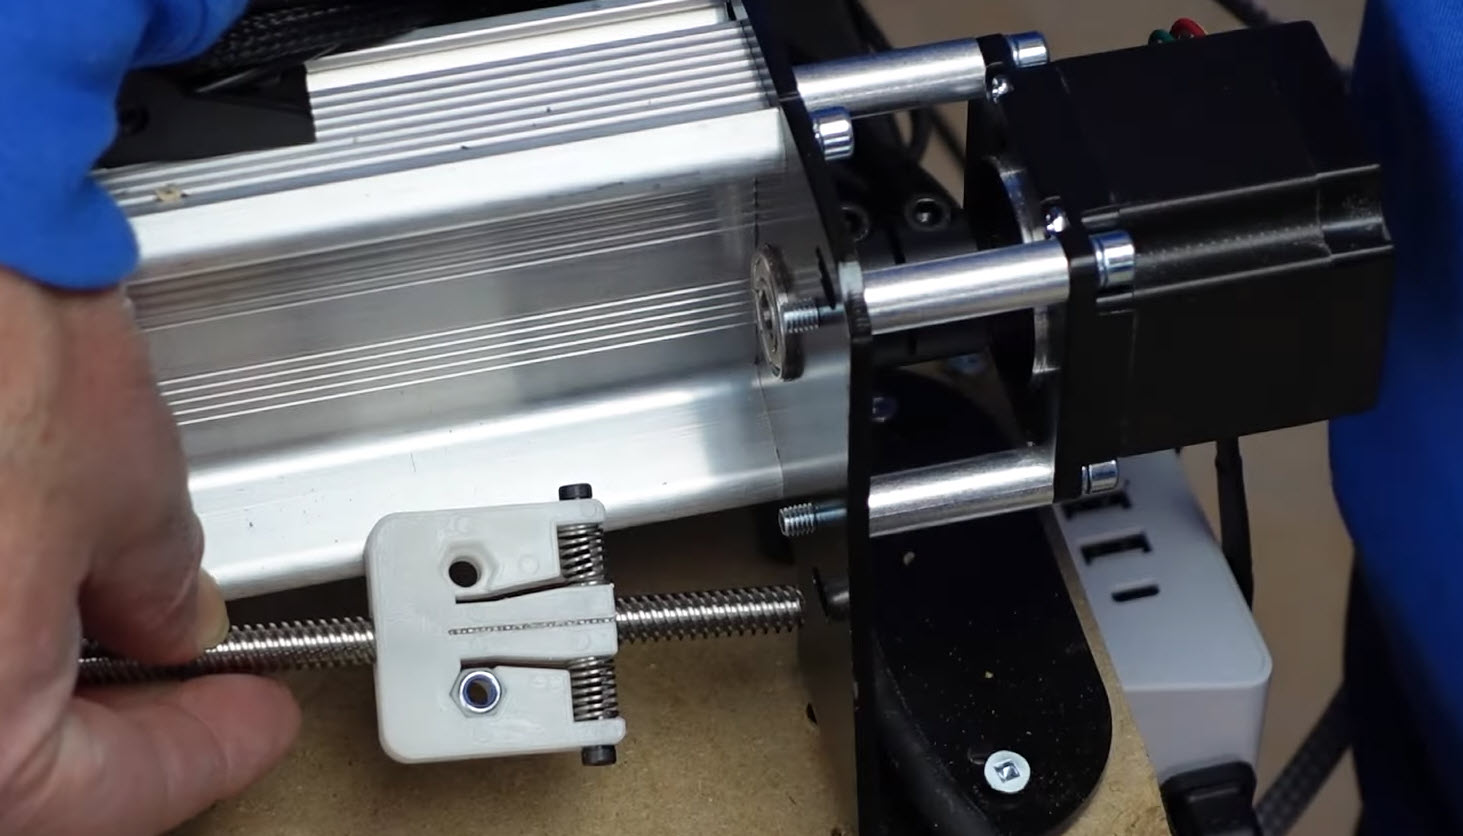
- Push two nylon lock nuts into the back of the spring loaded nut (rounded side of the nylon nuts should face out) and apply a piece of tape to hold them in place during installation.
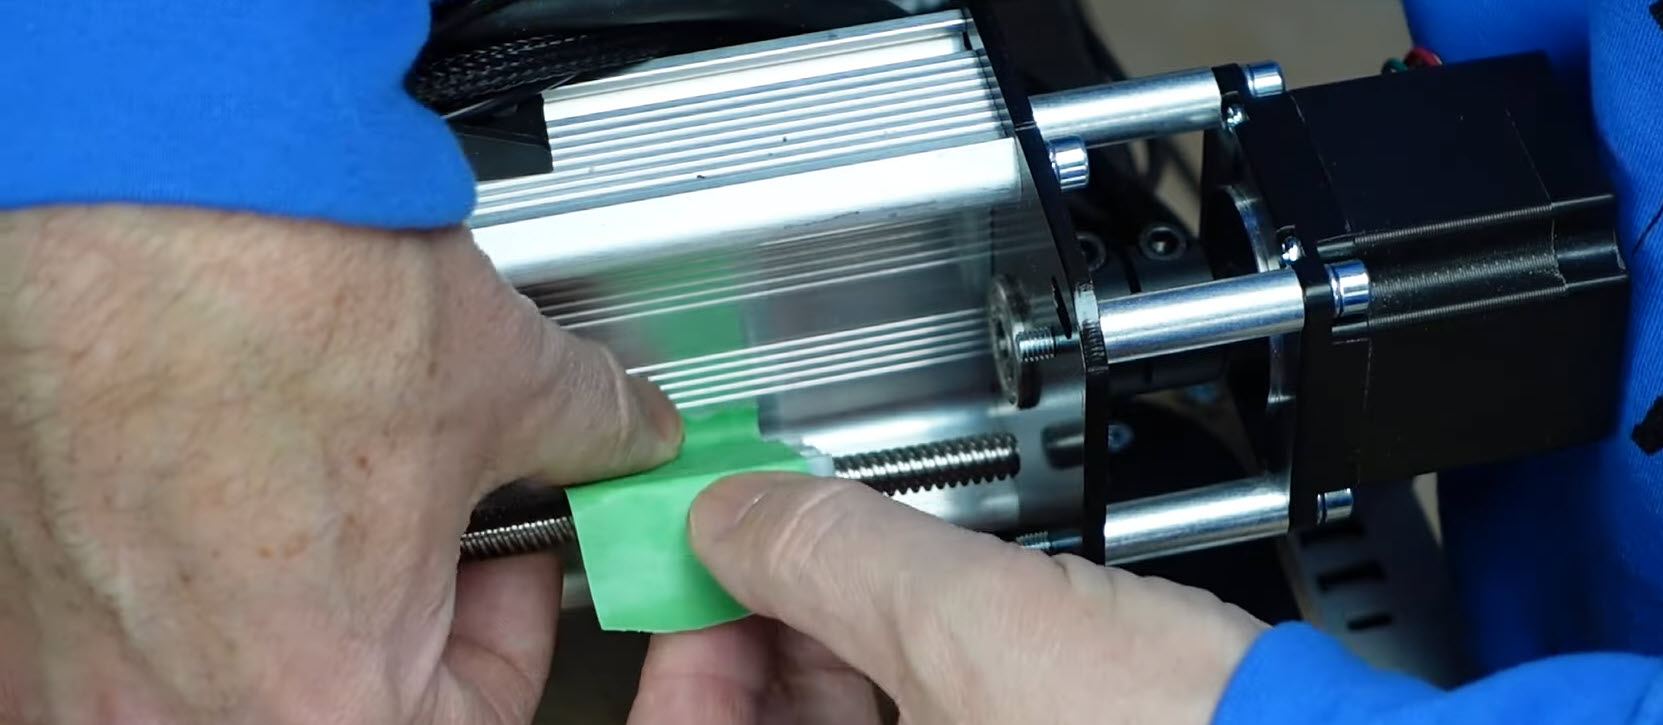
- Put the lead screw back into the motor coupler and tighten the screw back down. Remember to repeat steps 3 – 7 for the right Y-axis if you haven’t been mirroring the steps as you went along.
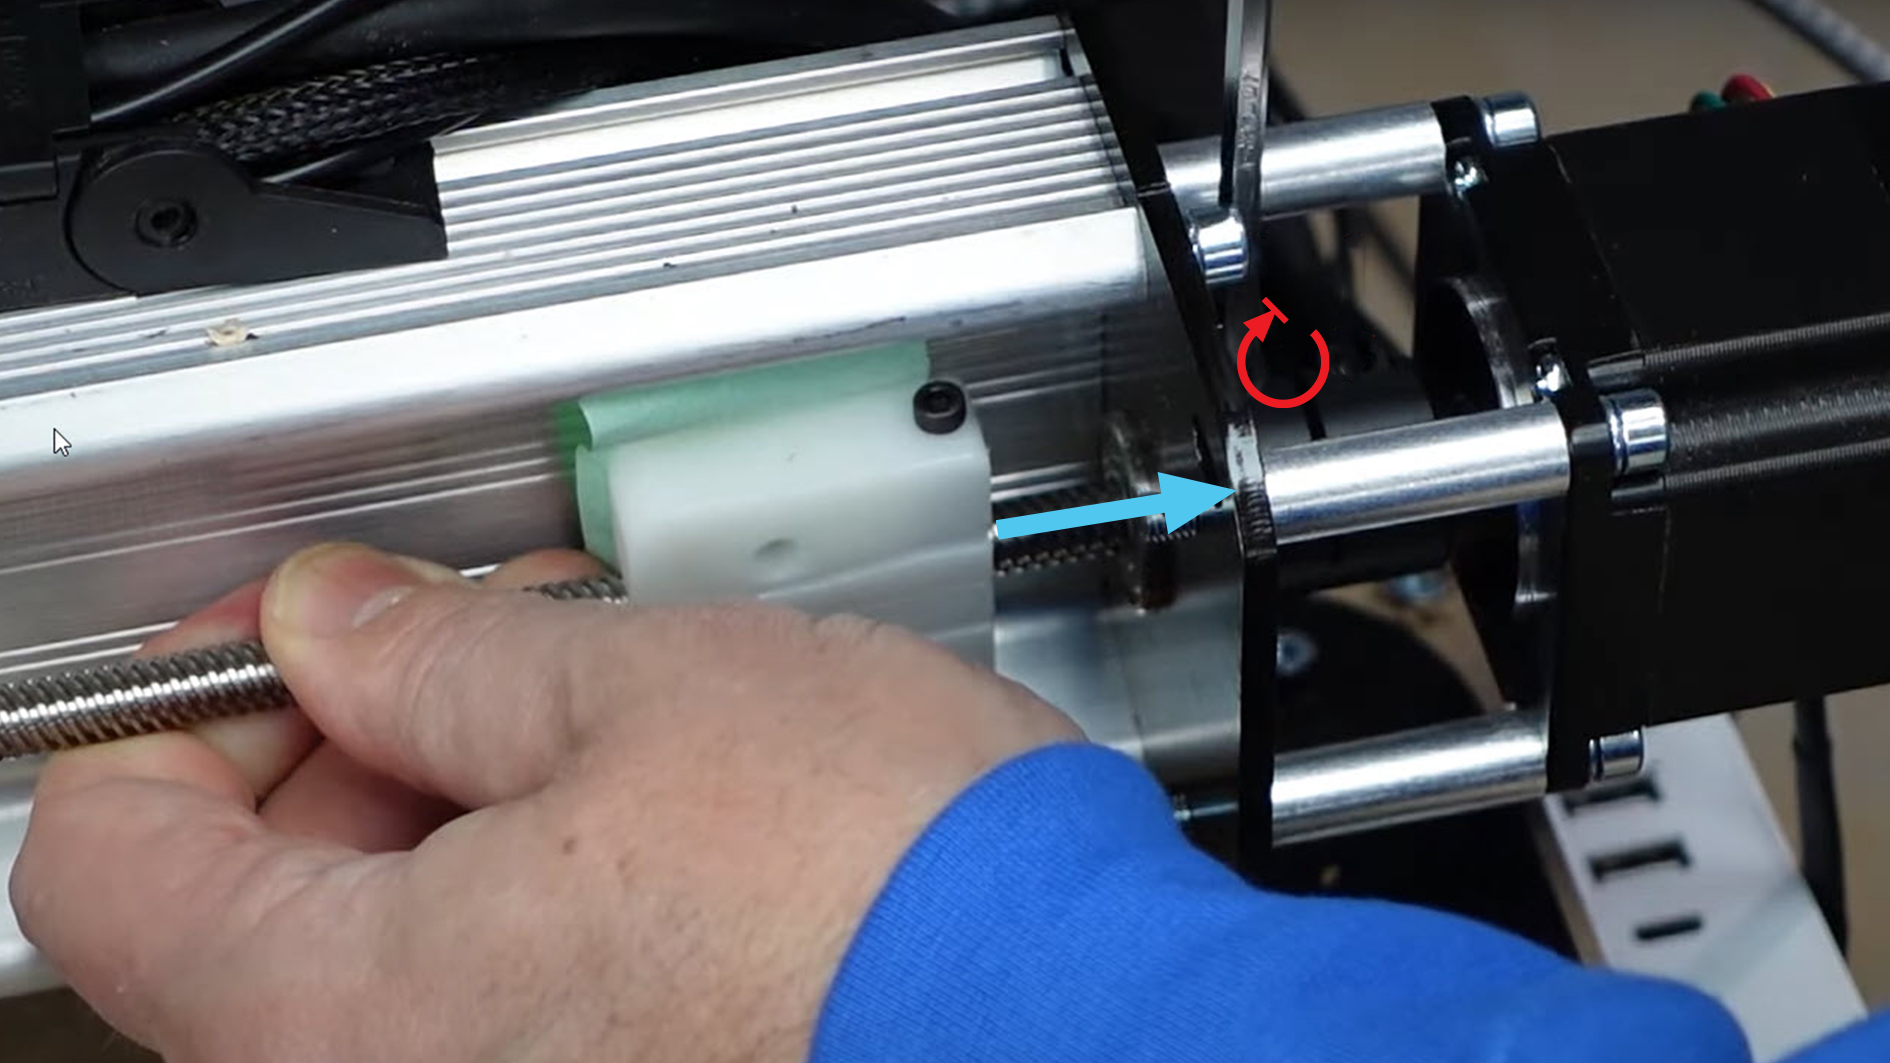
- Great job! Now push the Y-axis to the back again, over the new backlash nuts and reinstall the mounting screws. Tighten until the split washer is compressed, alternating between both bolts to maintain even pressure, being careful not to over tighten them. Repeat this step for the right side of the Y-axis.
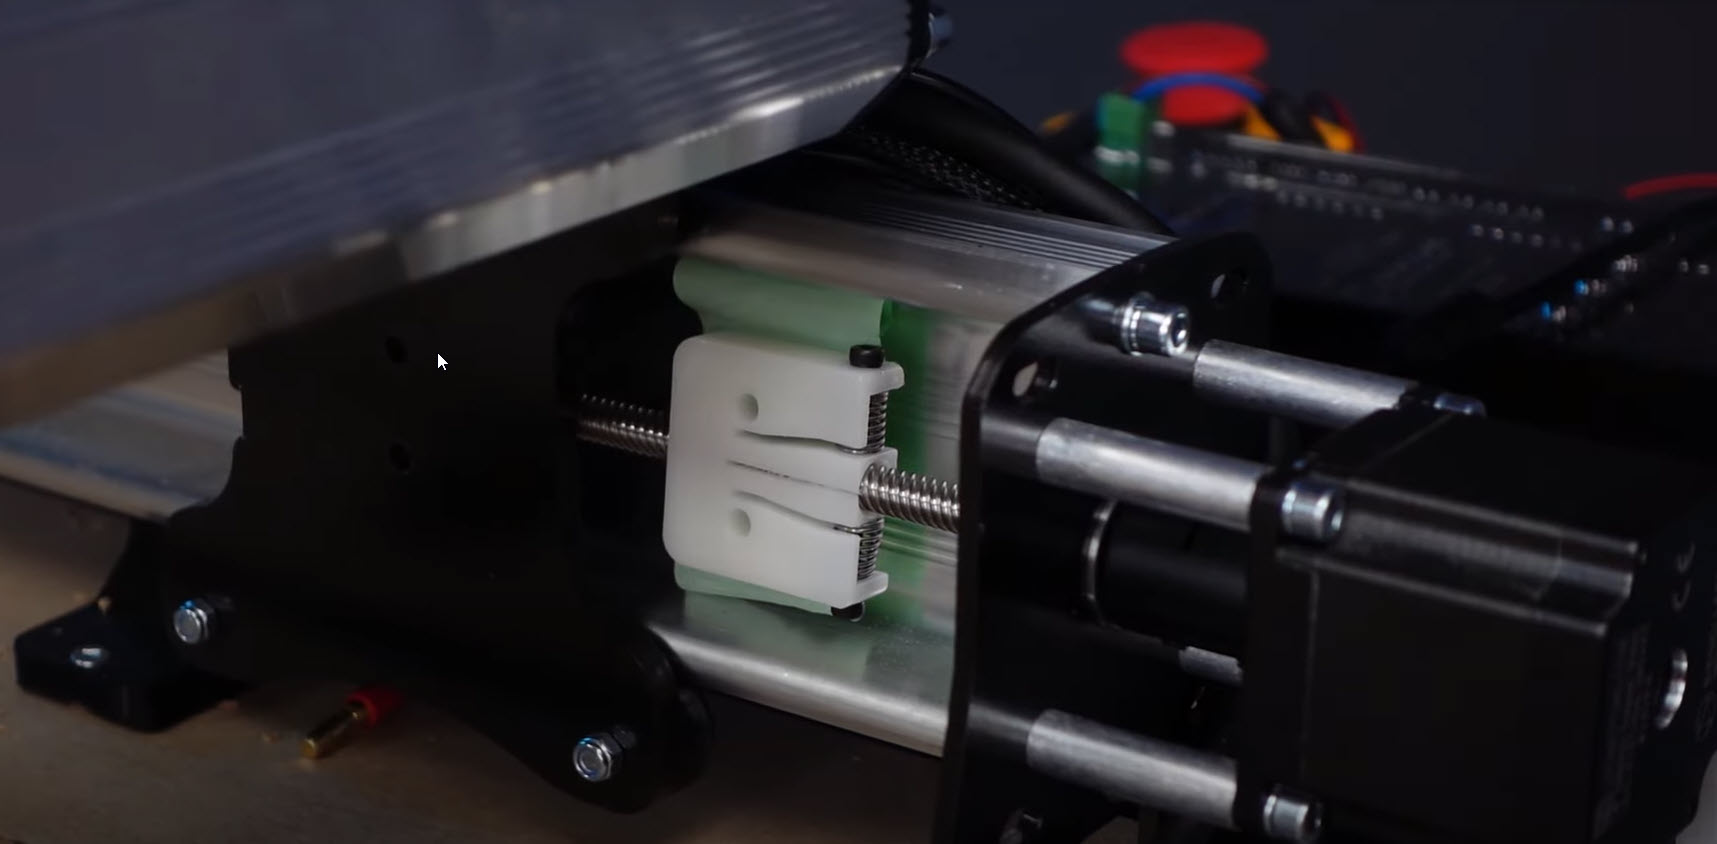
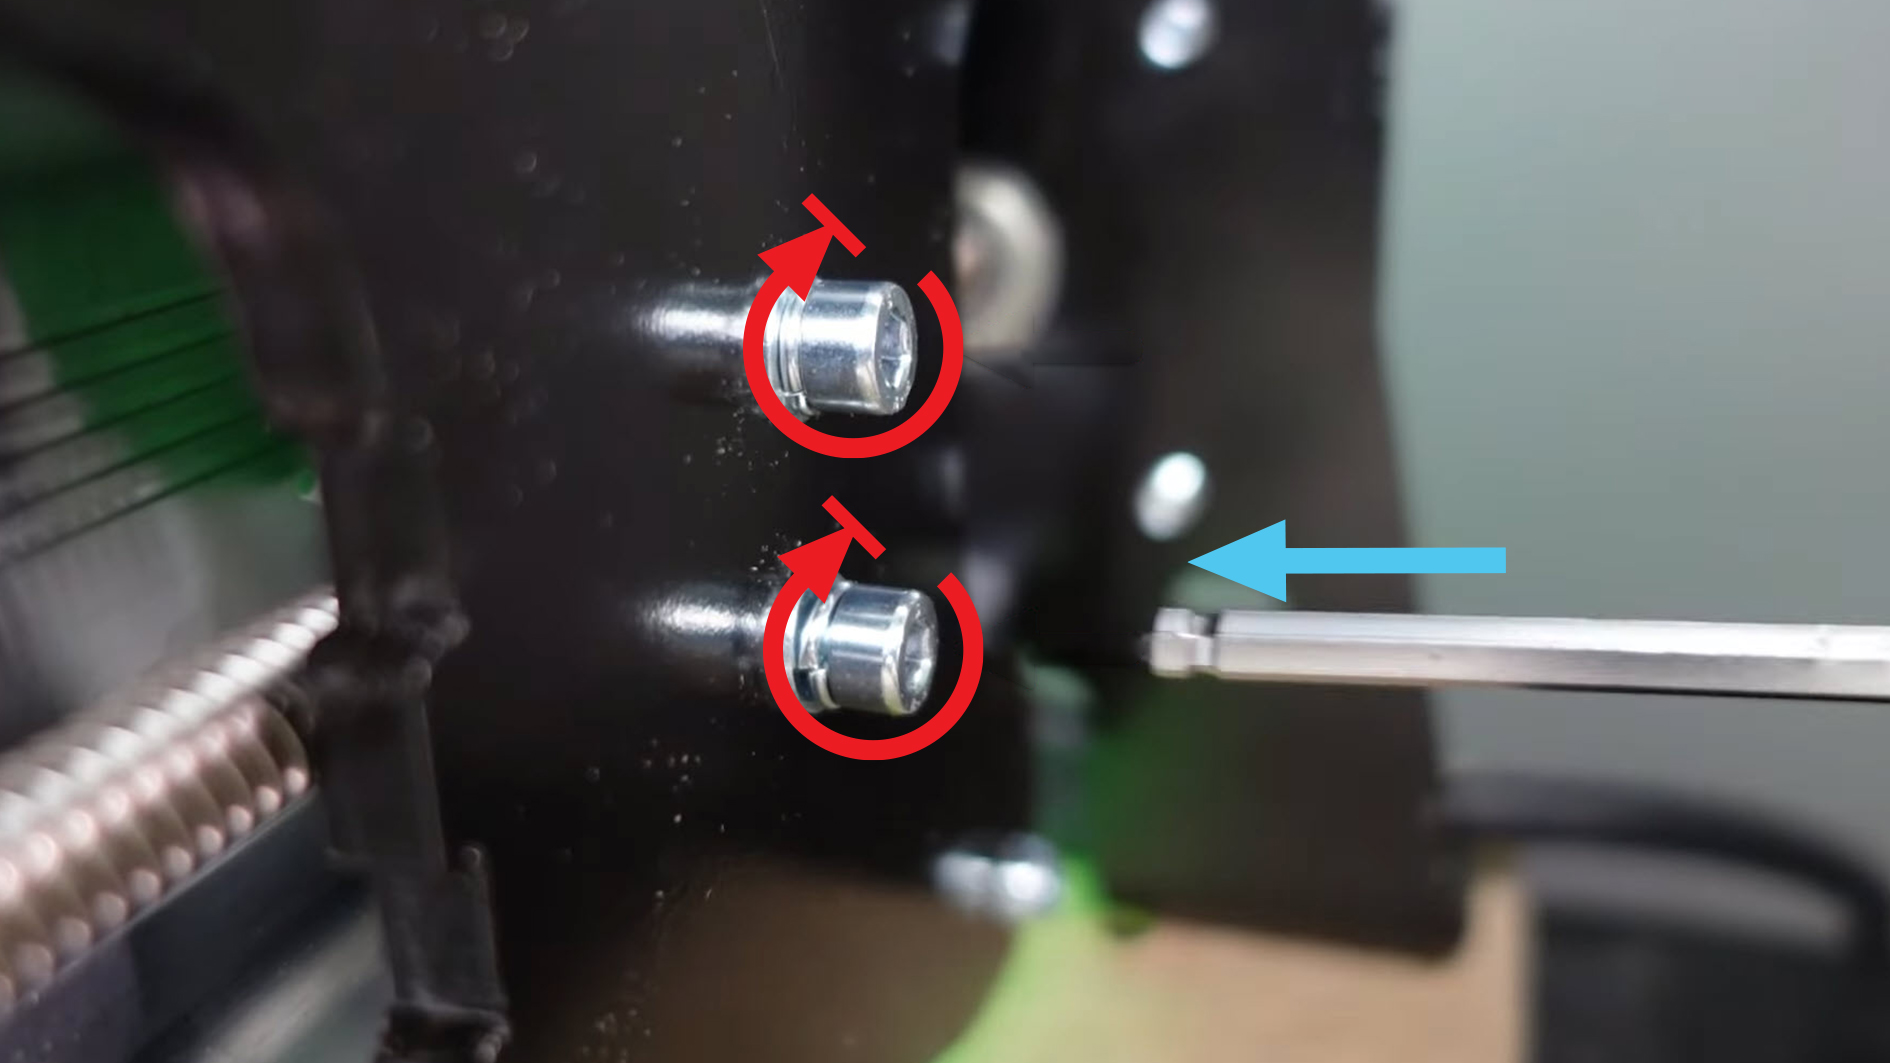
You can now remove the tape, you’re already over halfway through this upgrade!
X-Axis
Just like with the Y-axis, we want to be close to the motor to remove the lead screw, so jog your X-axis all the way to the left side to begin the same process we just completed on the Y-axis.
Note that if you have a 48×30, you will need to use a T12 nut instead of a T8 nut since the lead screw is larger.
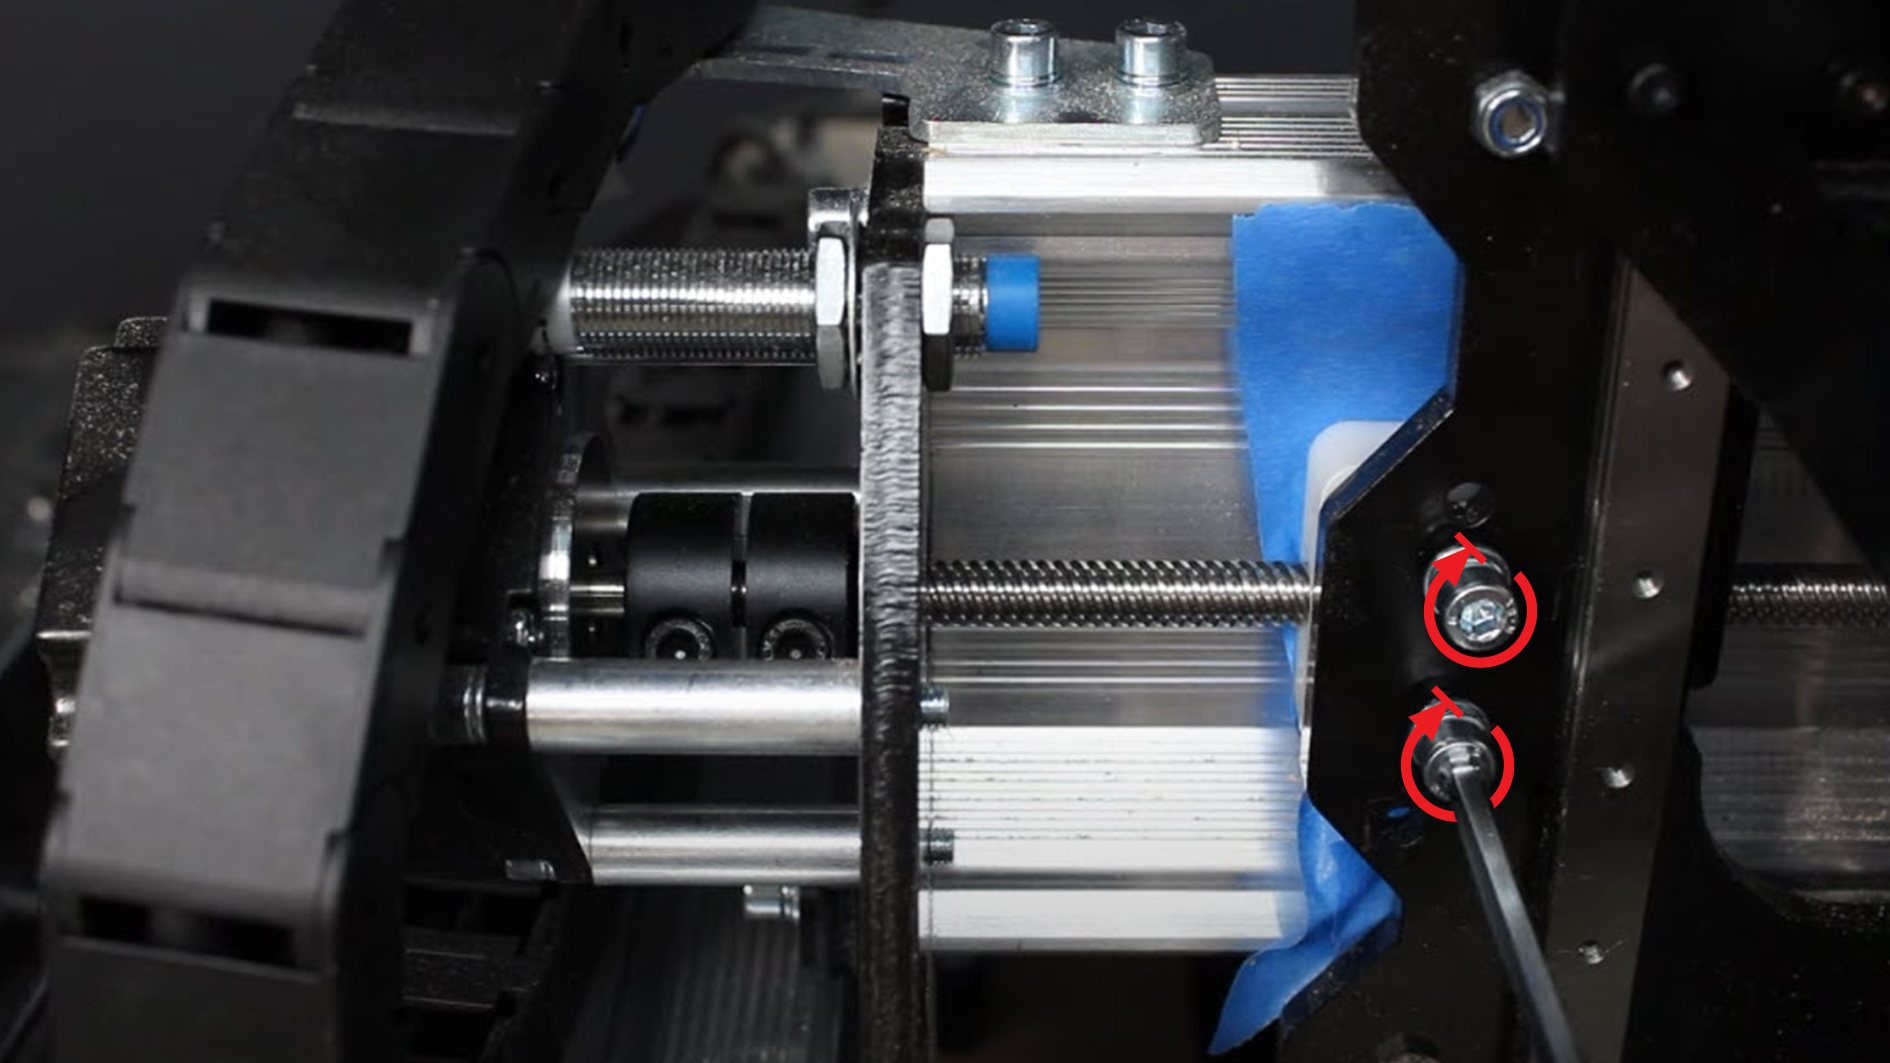
- With the X-axis moved to the left side, remove the mounting screws from the backlash nut, then manually push the X-axis to the right to expose the old backlash nut.
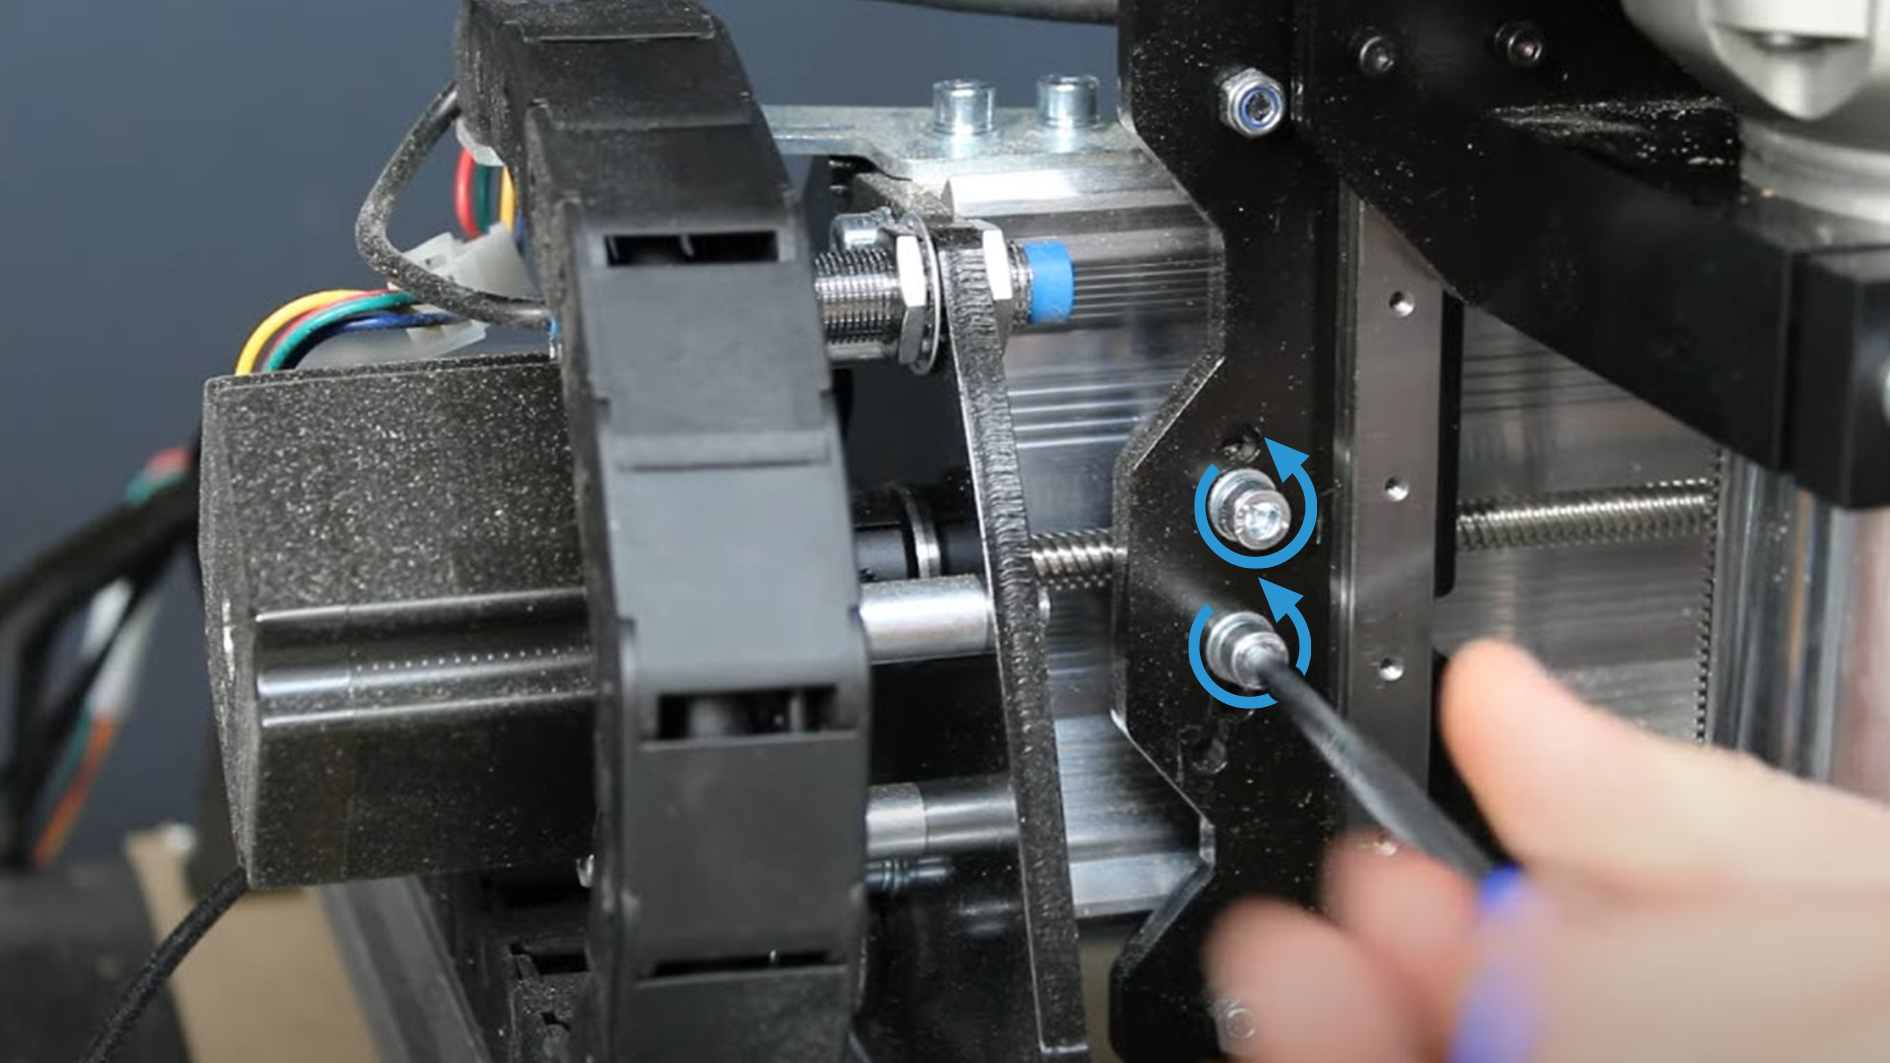
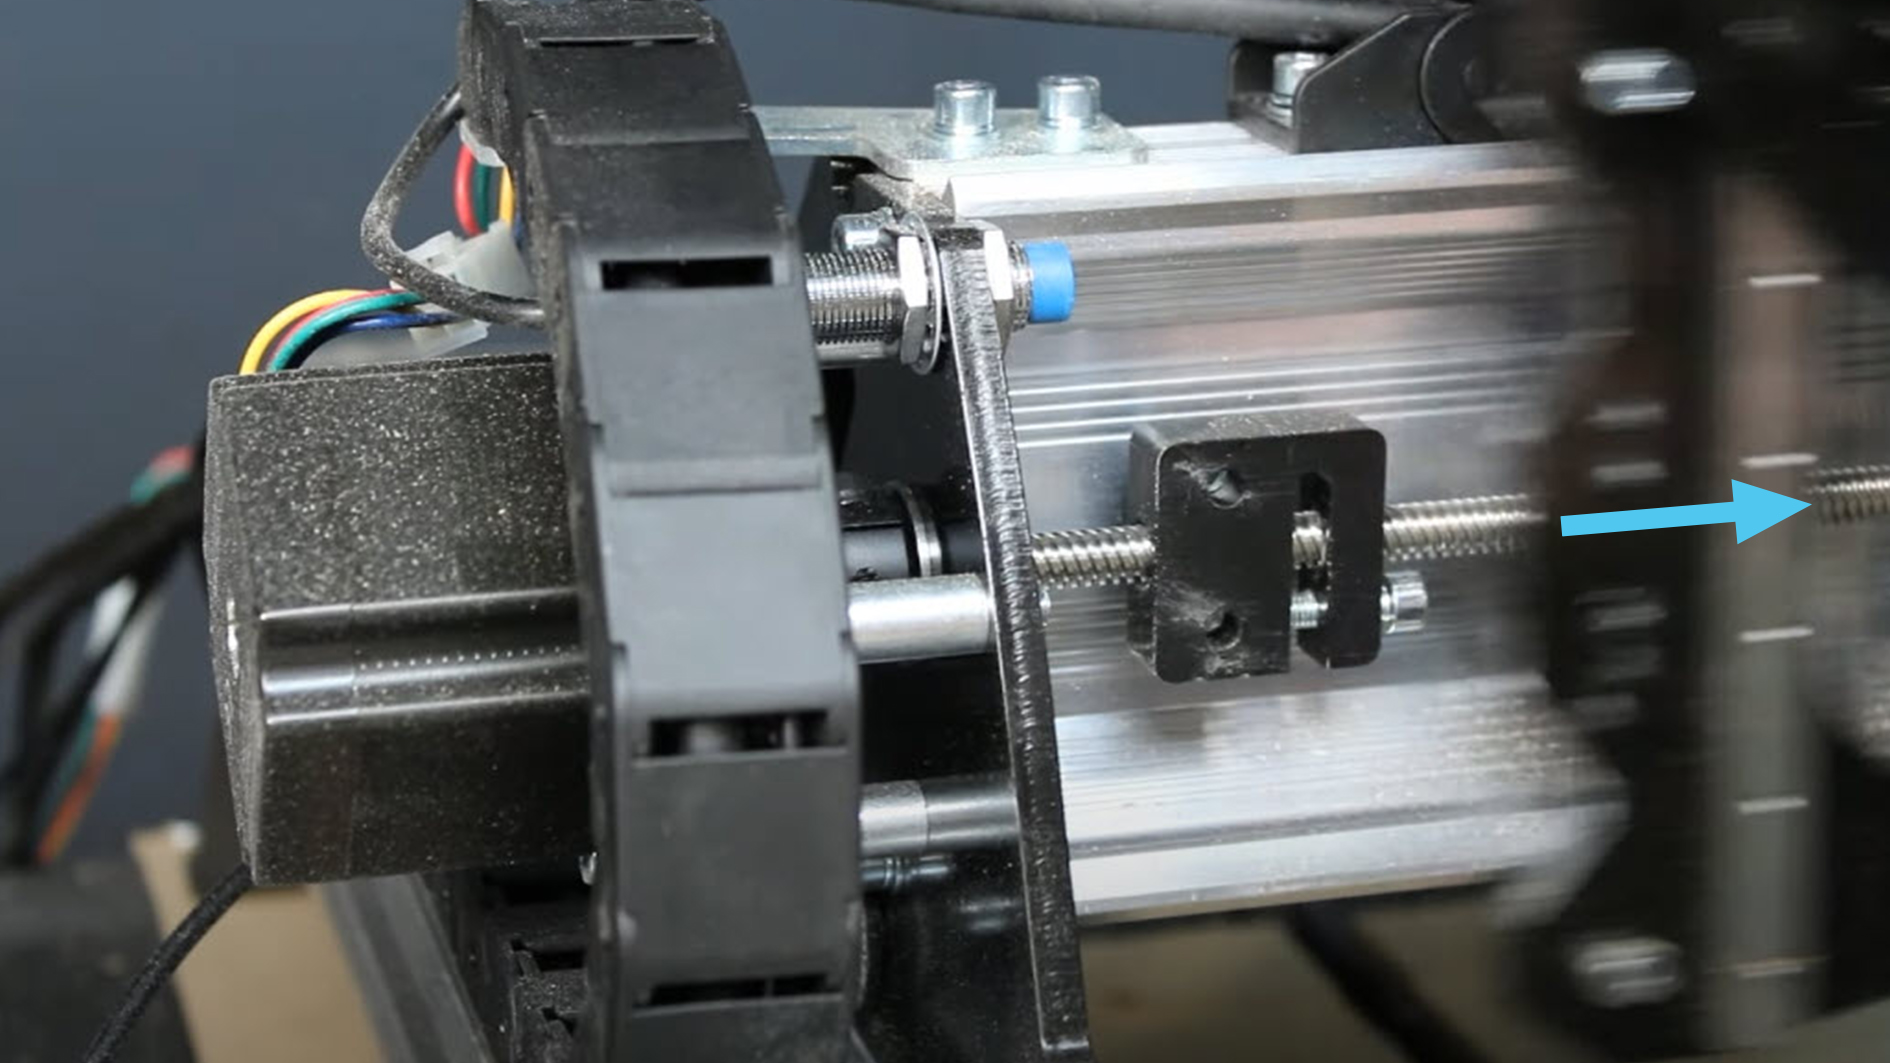
- Loosen the screw on the lead screw side of the motor coupler and slide the lead screw out through the bearing.
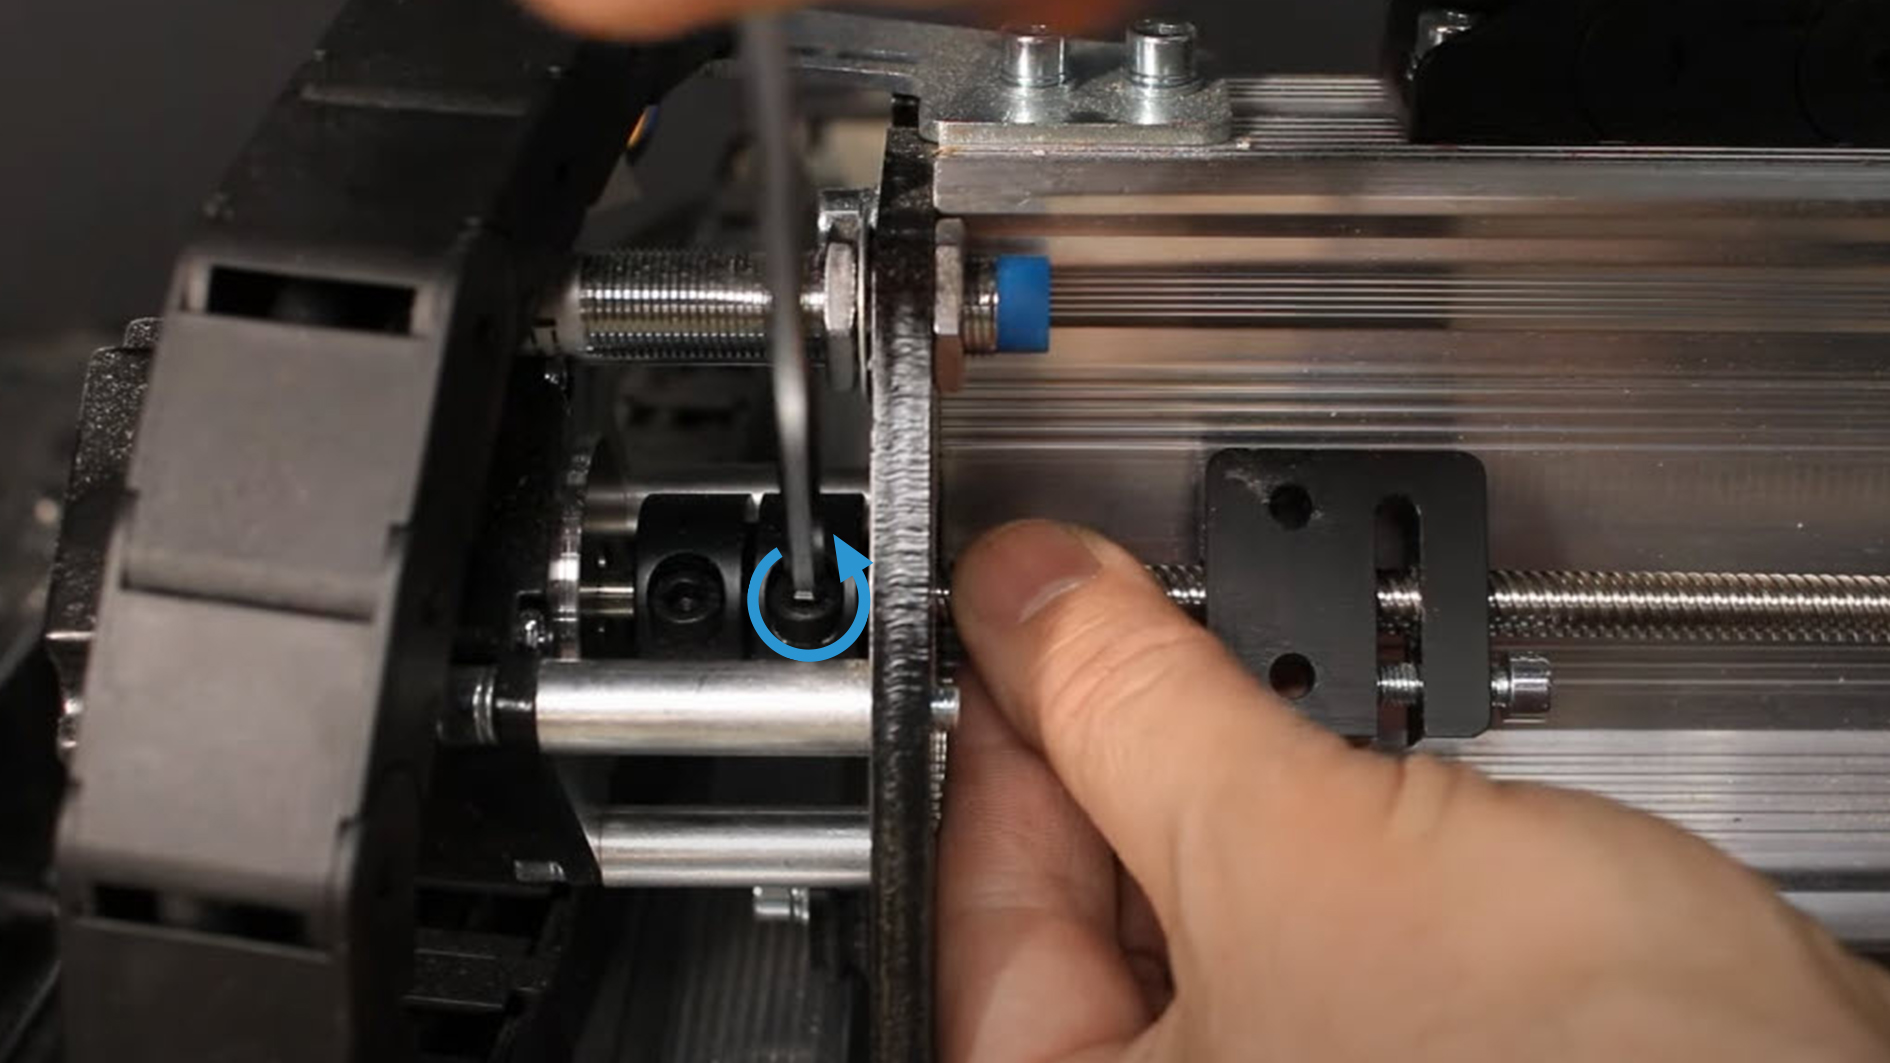
- Rotate the lead screw until the old backlash nut is off, or twist the nut itself to remove it.
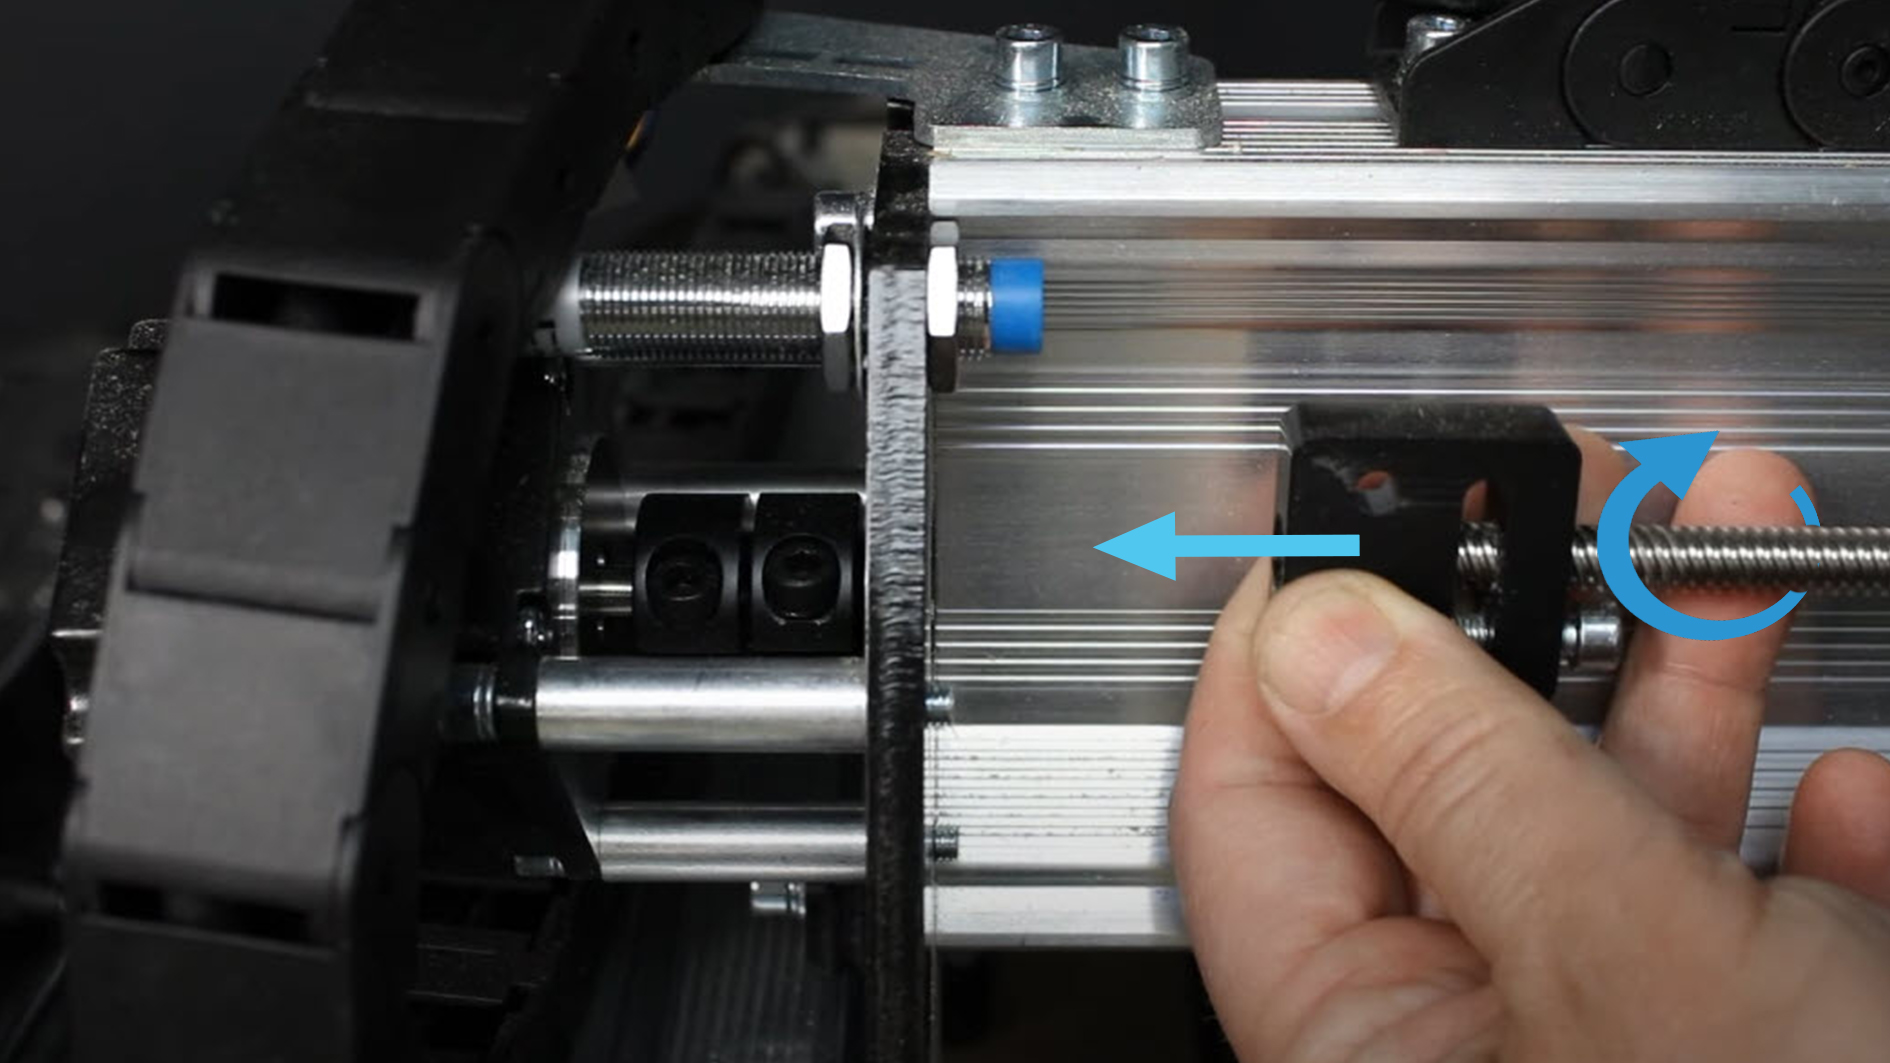
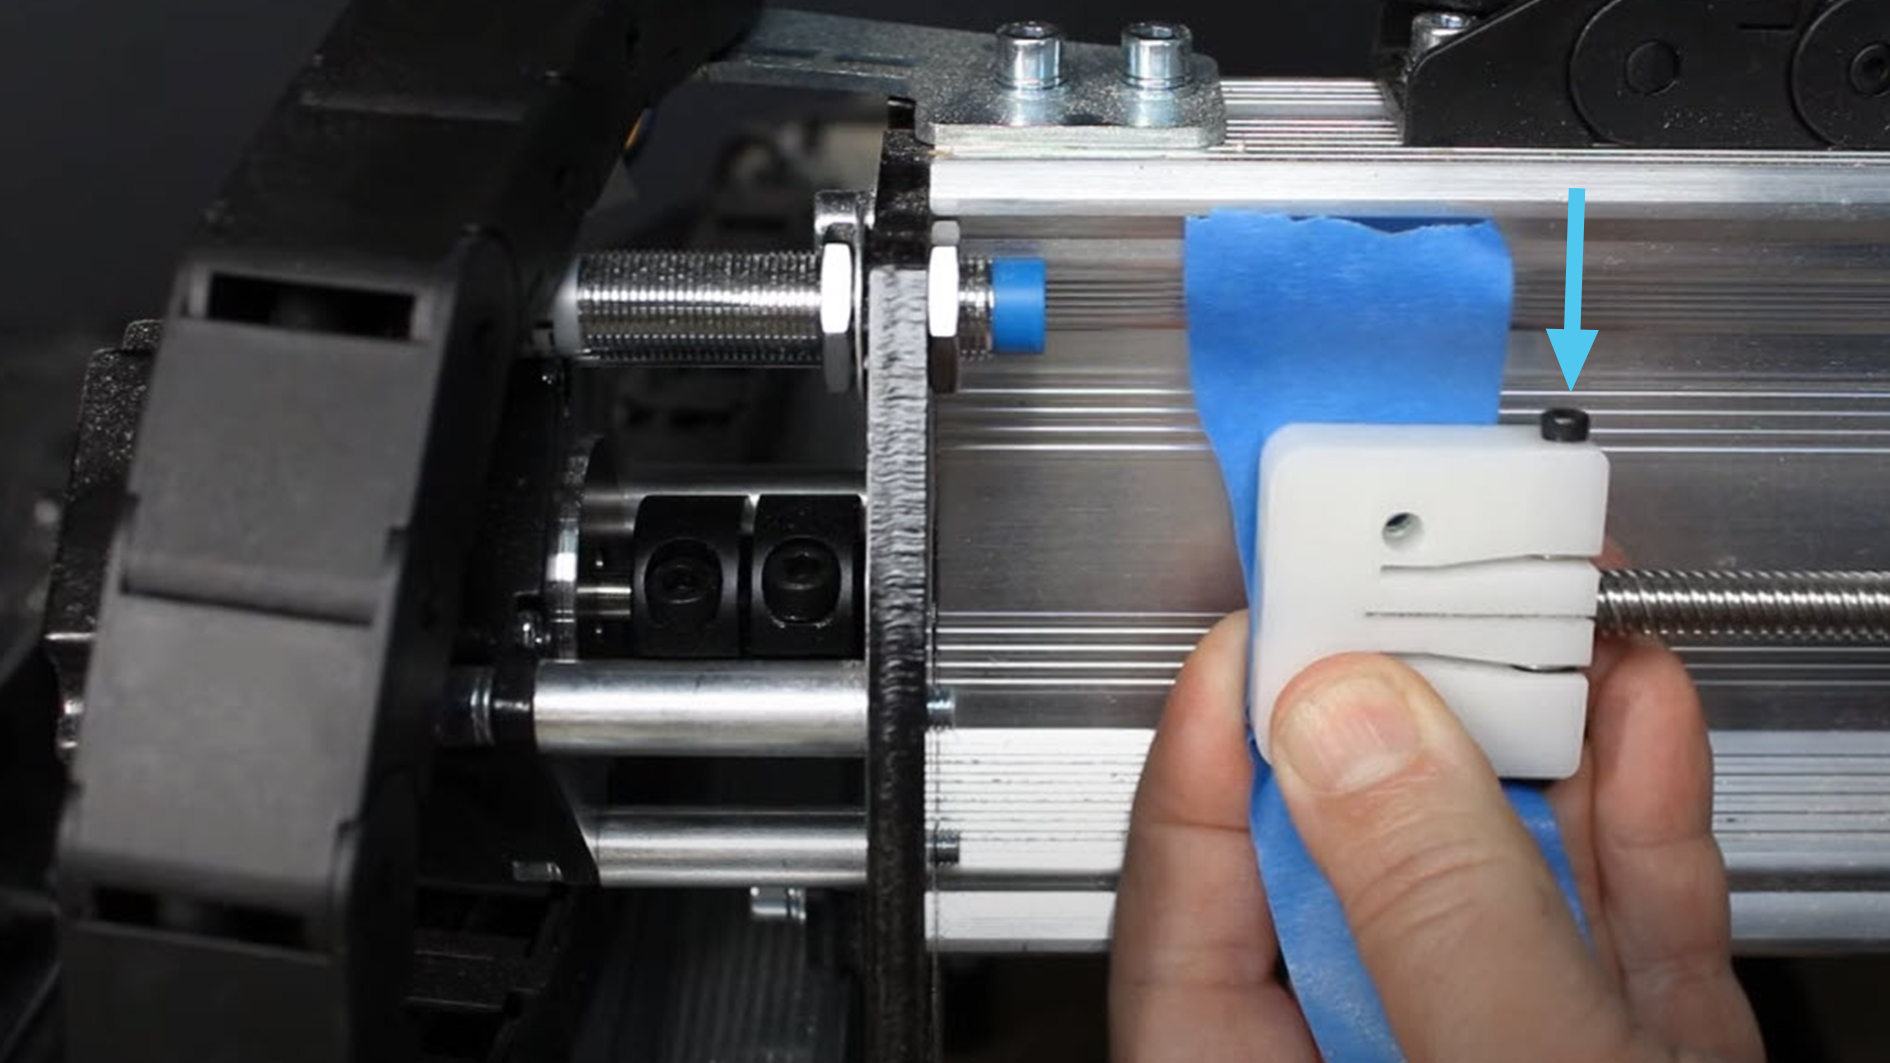
- Thread the new spring loaded nut onto the lead screw, with the spring side facing to the right (double-check the picture). Similar to before, push two nylon lock nuts into the back of the spring loaded nut (rounded side of the nylon nuts should face out) and apply a piece of tape to hold them in place during installation.
- Put the lead screw back into the motor coupler and tighten the screw back down.
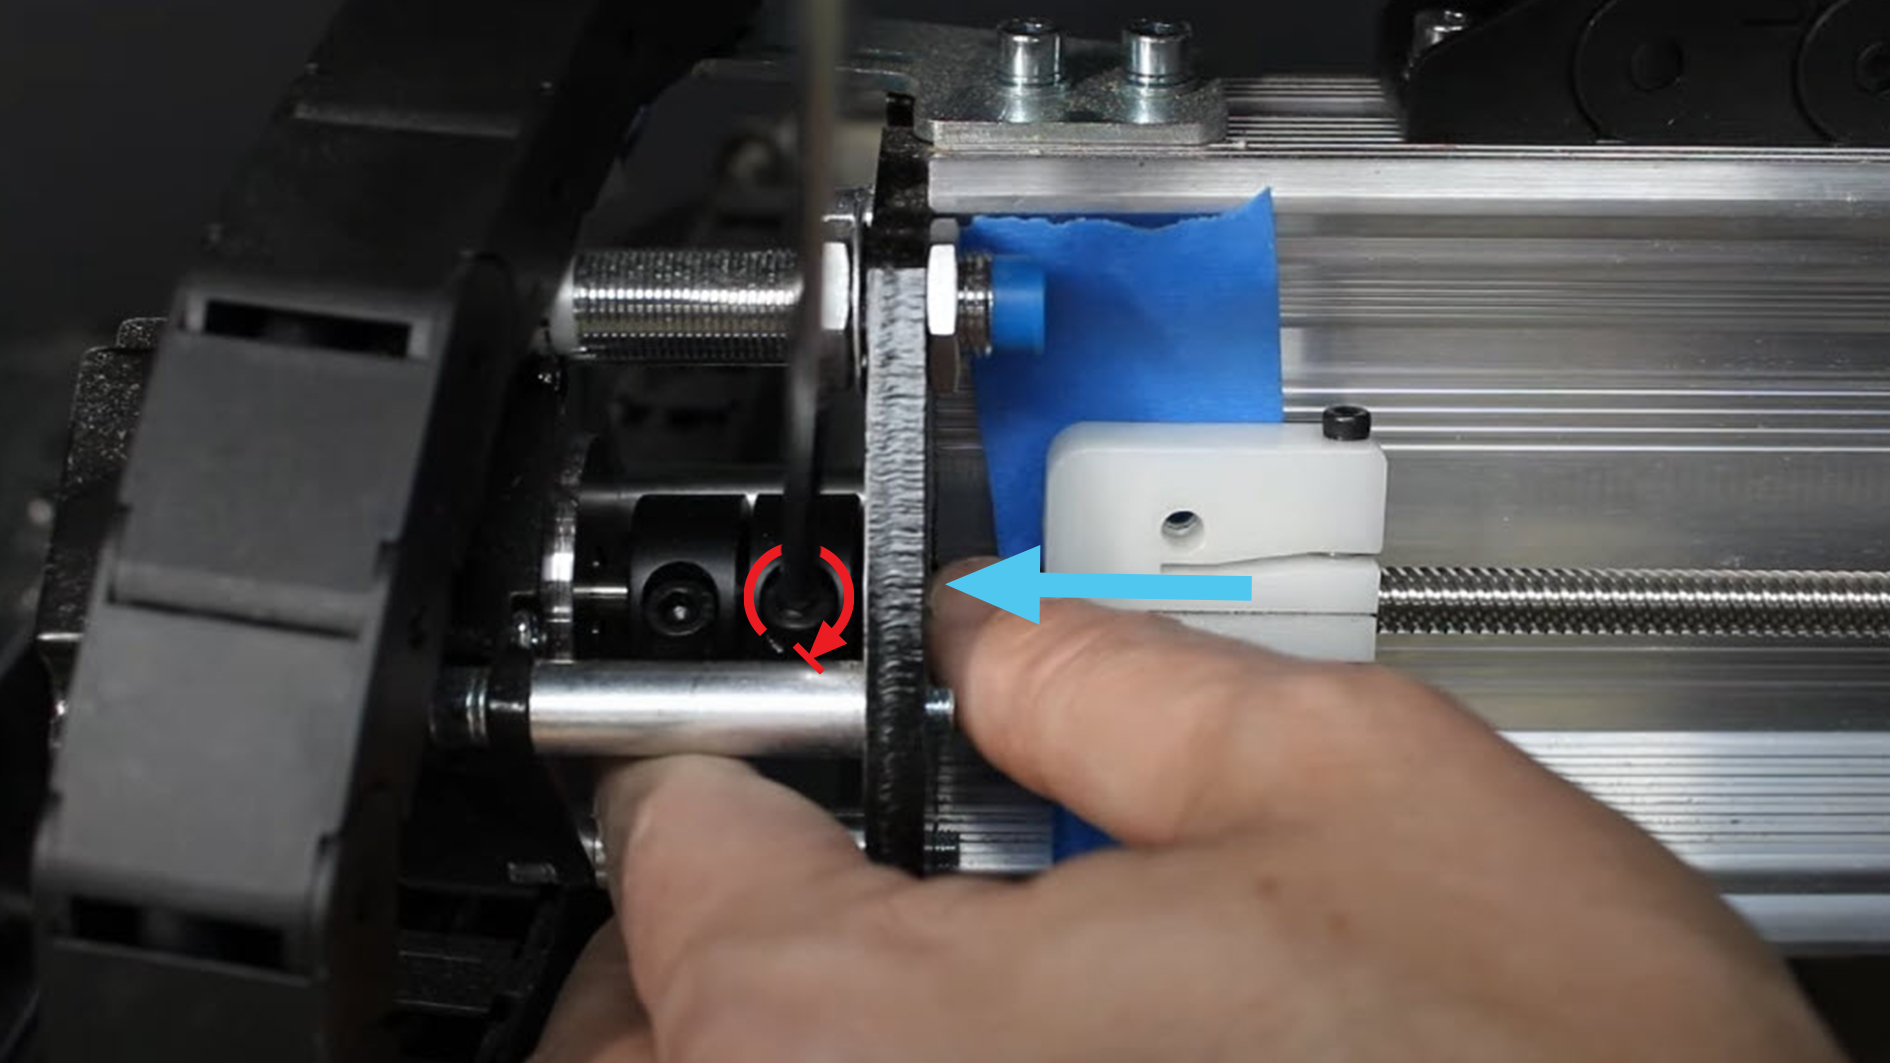
- Push the X-axis back over the backlash nut and reinstall the mounting screws. Tighten till the split washer is compressed, alternating between both bolts to maintain even pressure, being careful not to over tighten them.
Z-Axis
The Z-axis nut is easier to remove because we don’t have to remove the lead screw from the motor on the MK2 (you will have to do this with the MK1 however).
- Jog the Z-axis to be about halfway up the lead screw then remove the two bolts holding the anti-backlash nut.
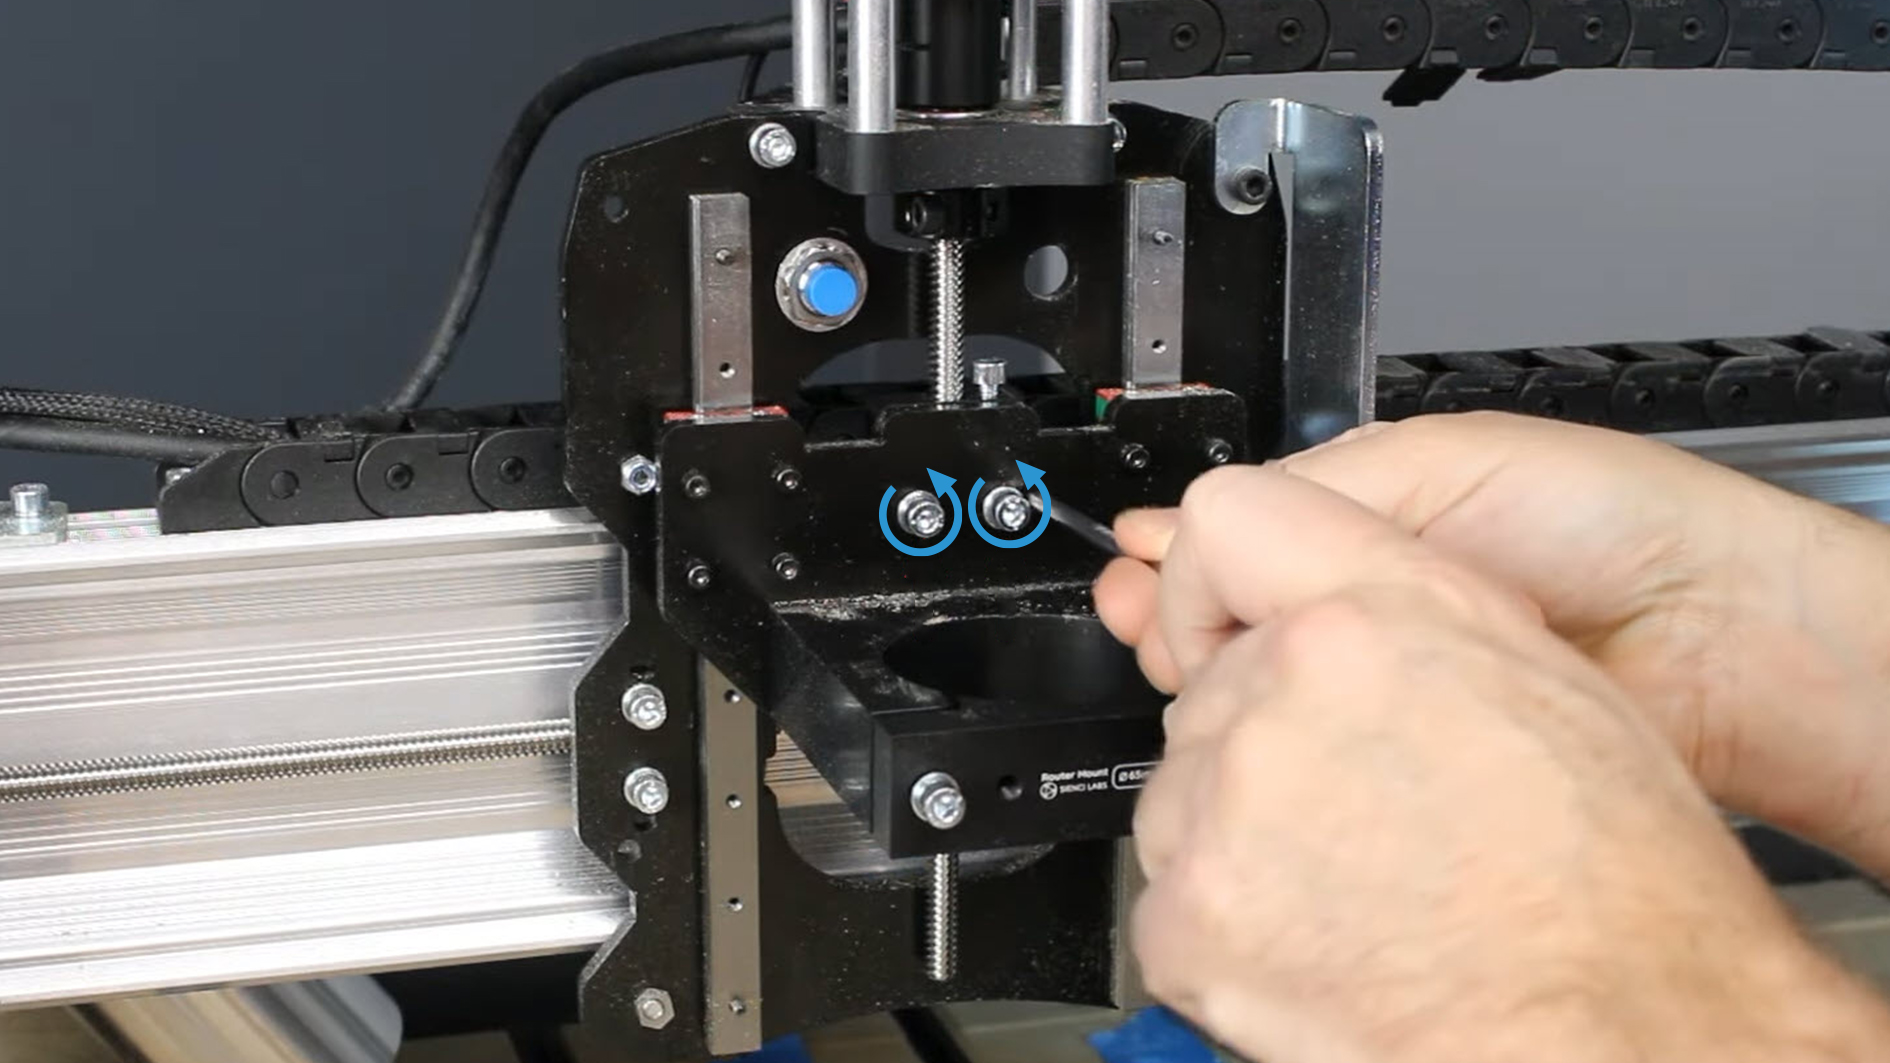
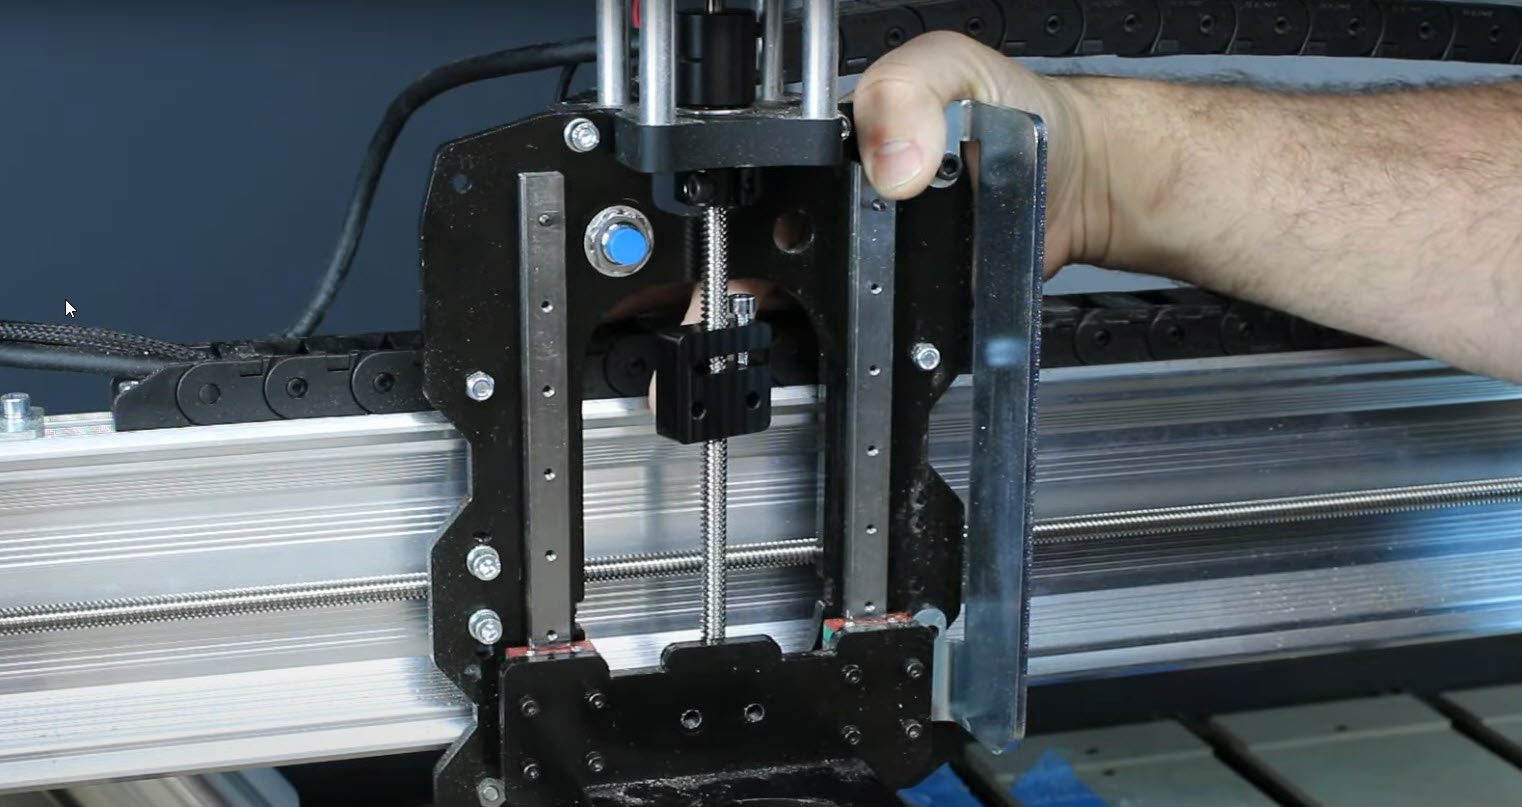
- Once the bolts are removed, the Z-axis plate can be lowered out of the way.
- Remove the two screws that hold the Z-axis mount onto the X-axis plate. If you have limit switches installed, remove the Z-axis one now too.
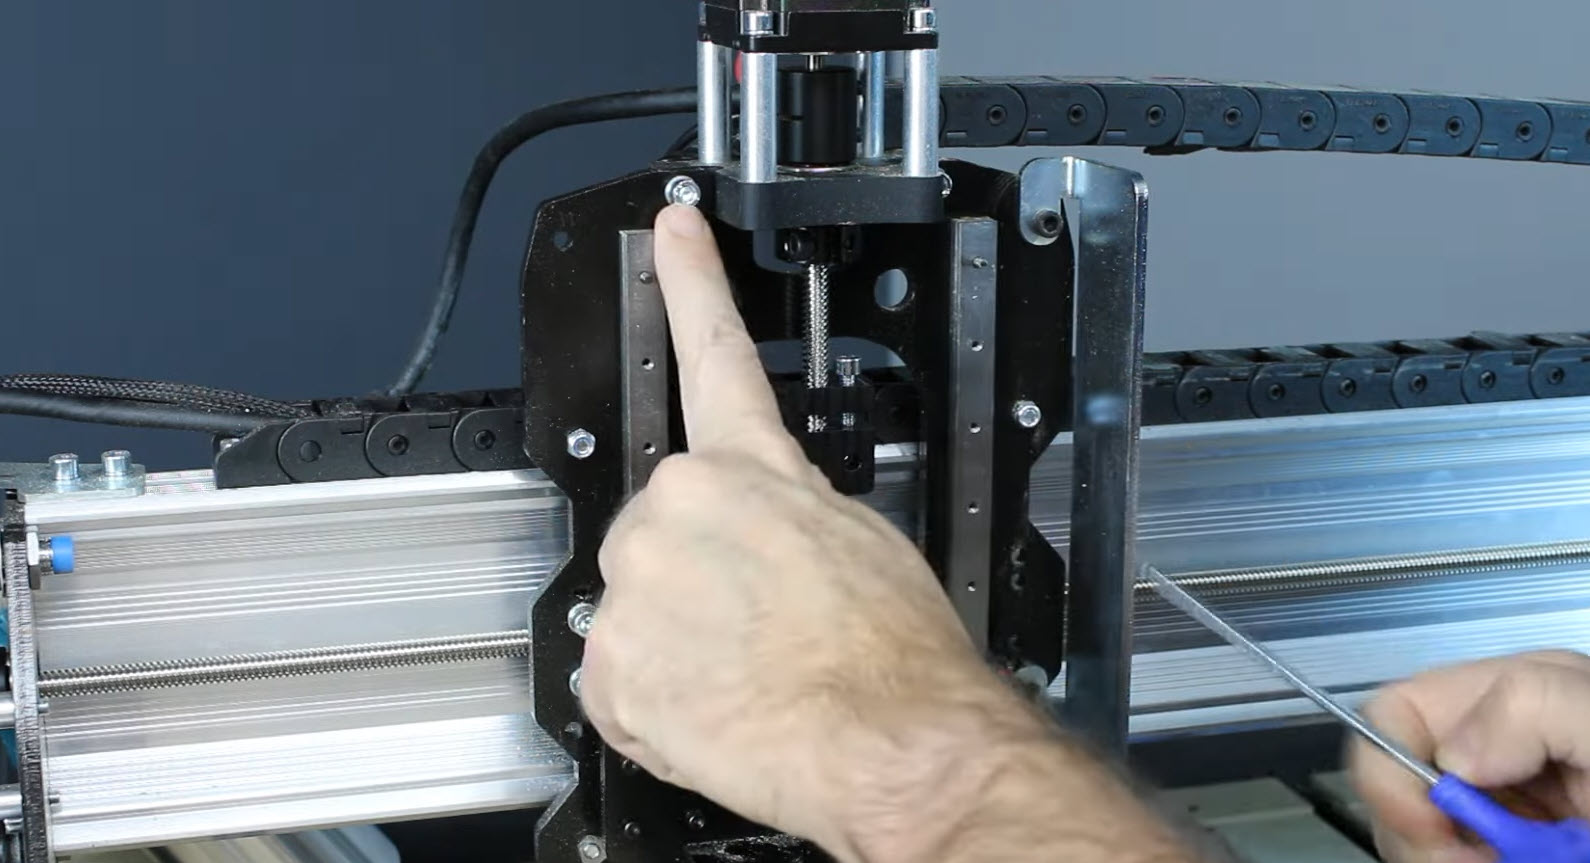
- Once those two bolts are removed, this will allow you to tip the motor and lead screw backwards.
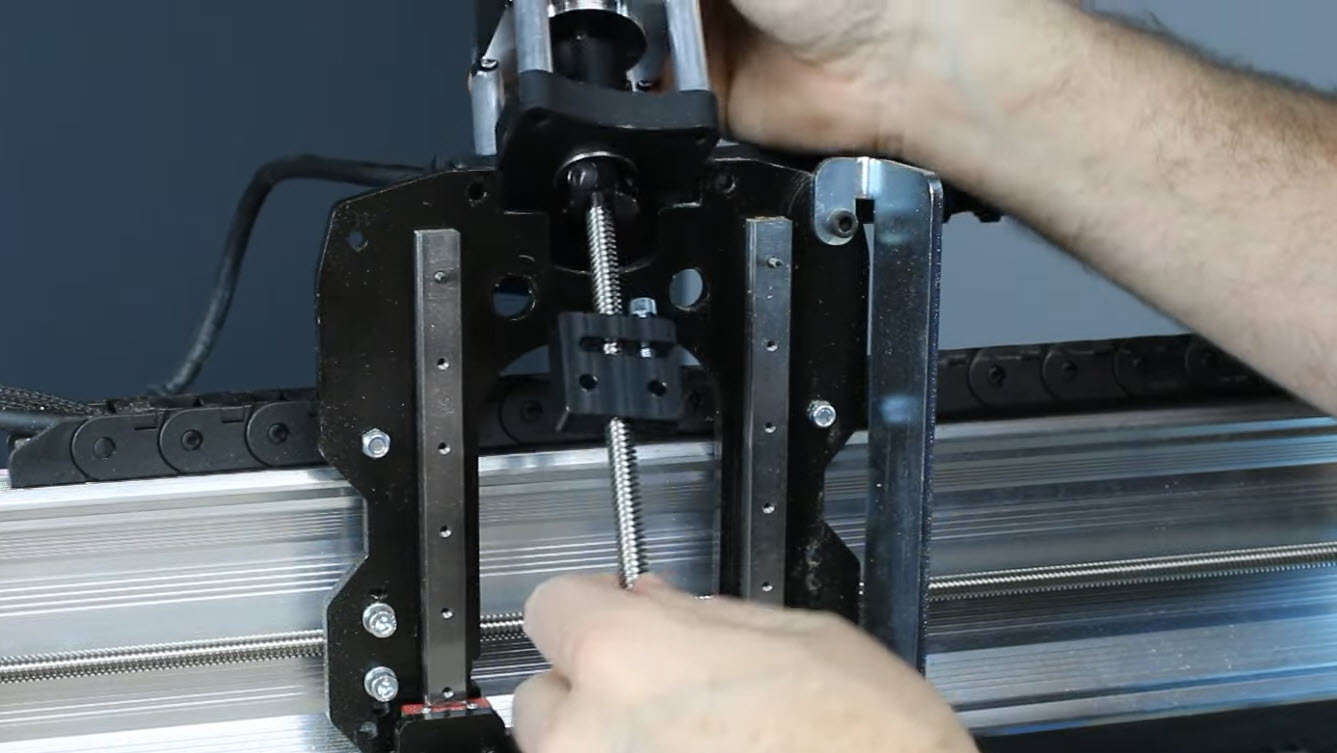
- Twist the old anti-backlash nut off the bottom of the lead screw.
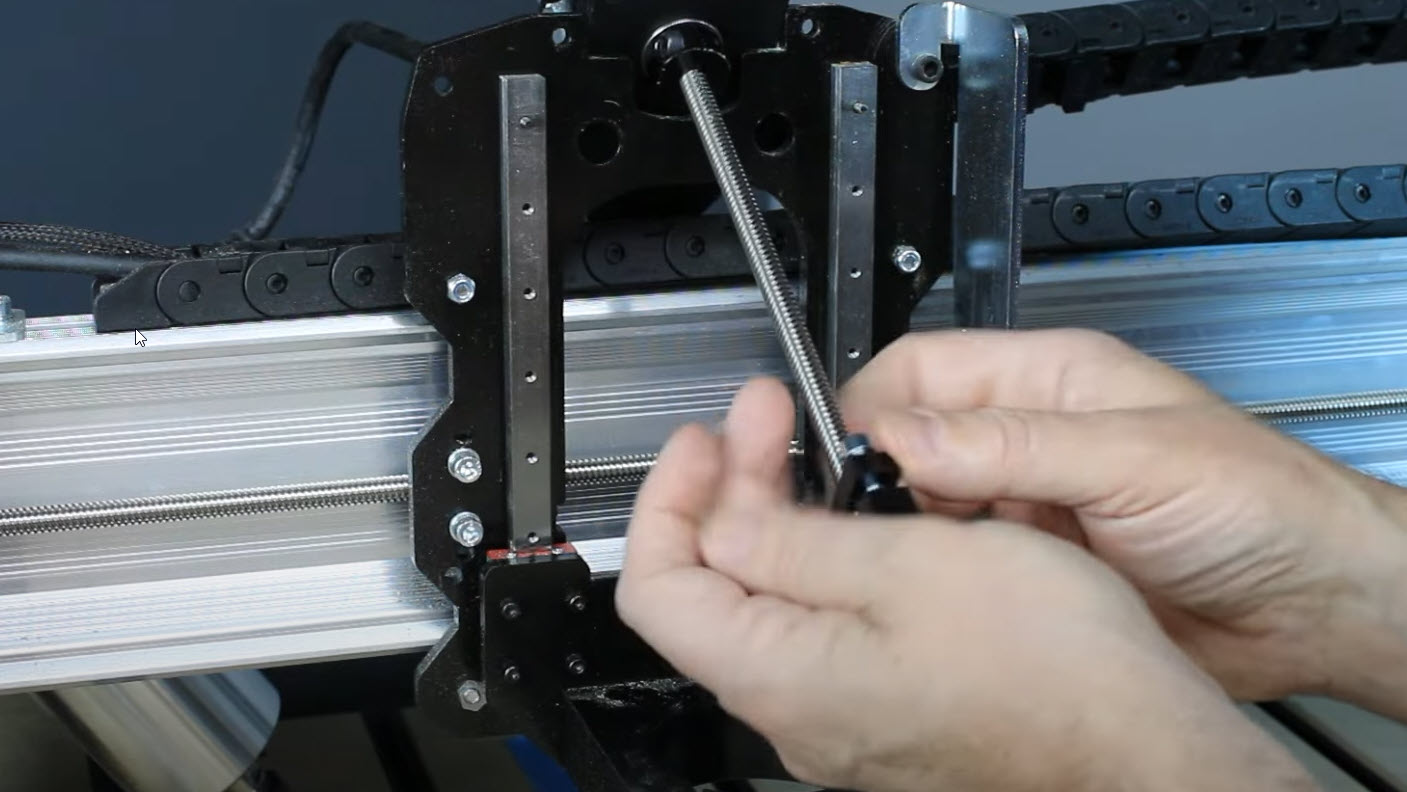
- Thread the new spring loaded nut onto the lead screw, with the spring side facing down, as indicated with the blue arrow. Spin it to the centre of the lead screw, then push two nylon lock nuts into the back of the spring loaded nut (rounded side of the nylon nuts should face out) and apply a piece of tape to hold them in place.
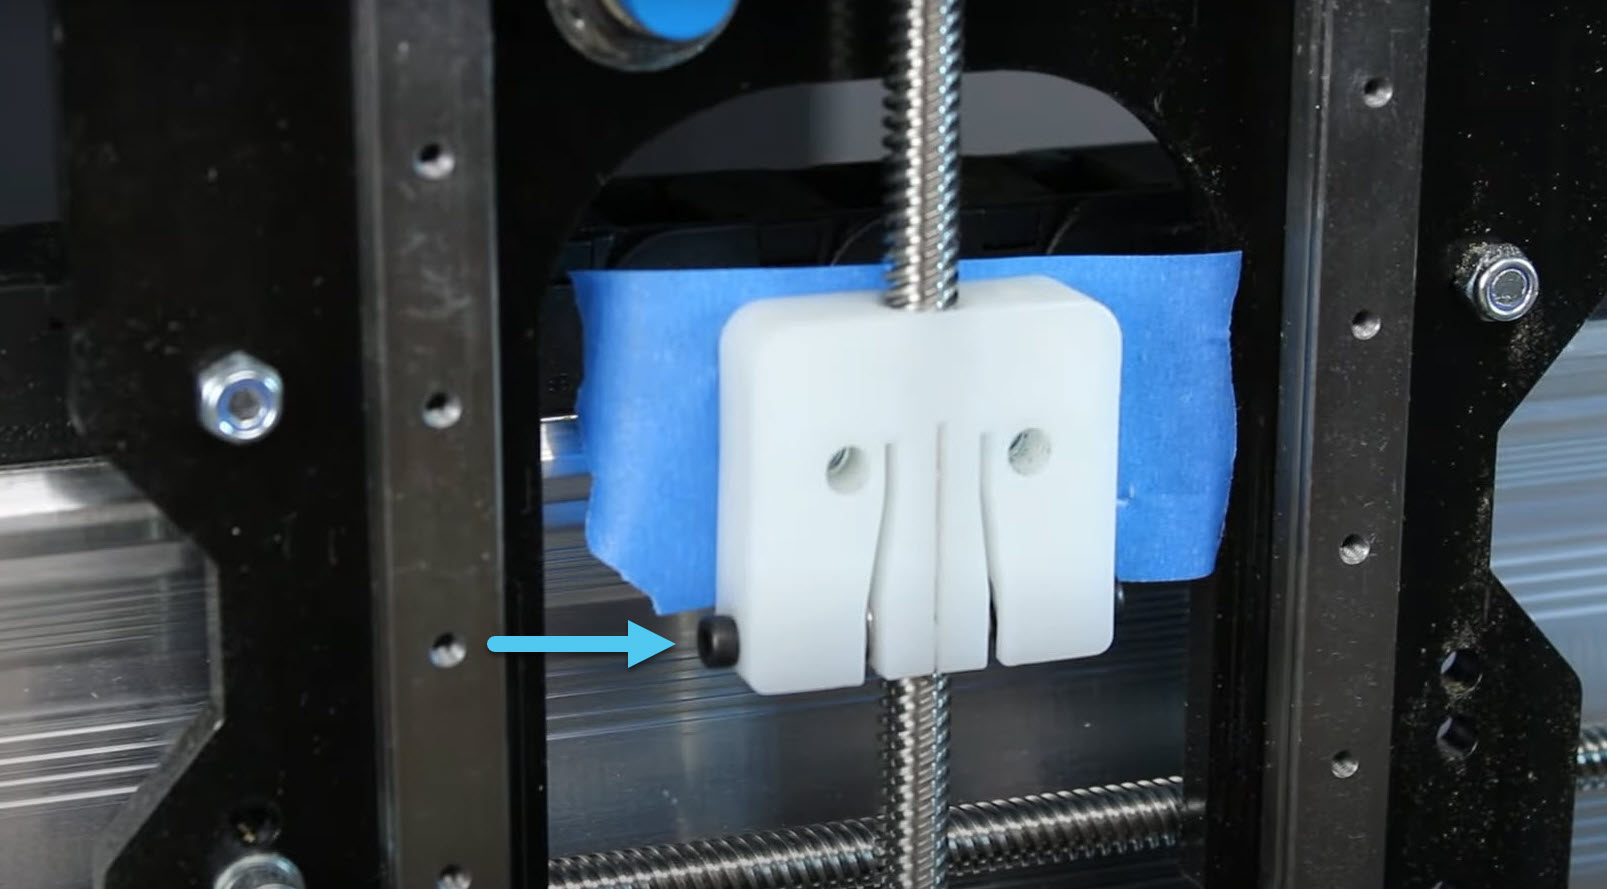
- Reinsert the two bolts to hold the Z-axis mount onto the X-axis plate and tighten them fully.
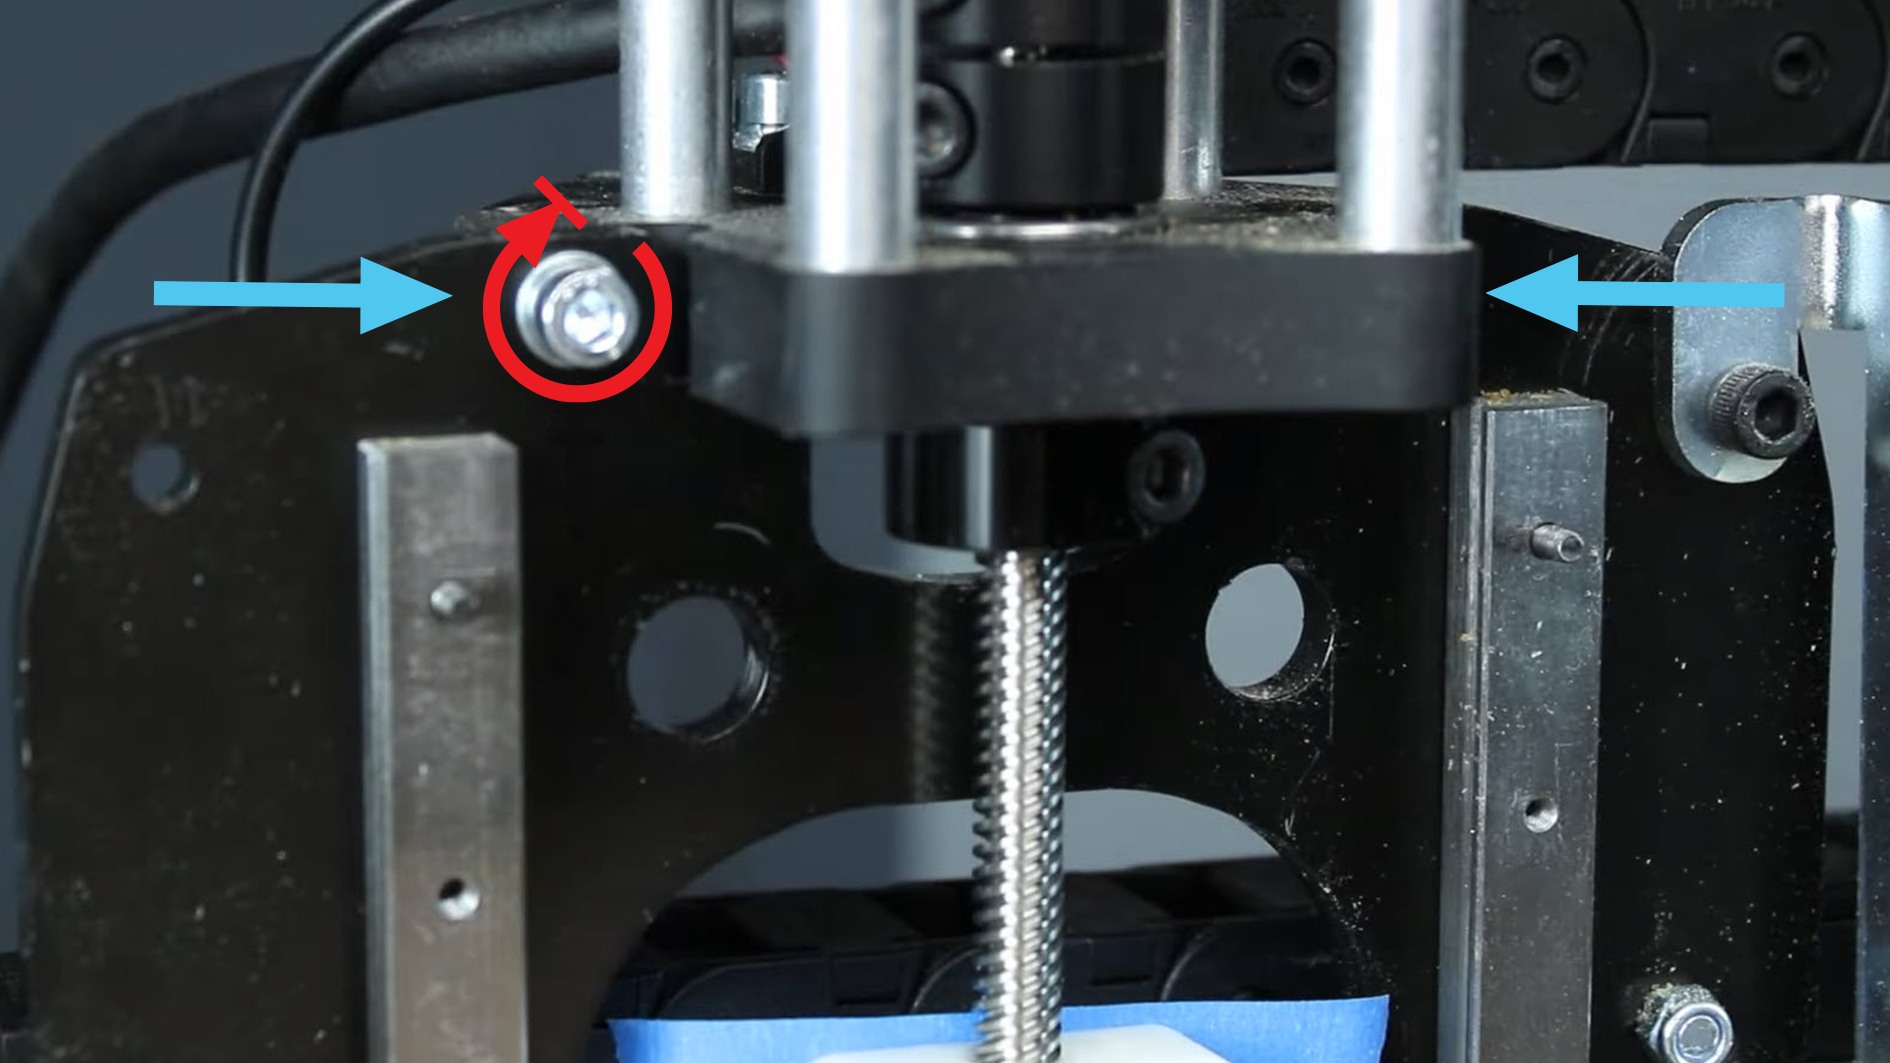
- Reinstall the limit switch, ensuring that the washer is flat on the top/bottom to give maximum space for your Z axis to travel.
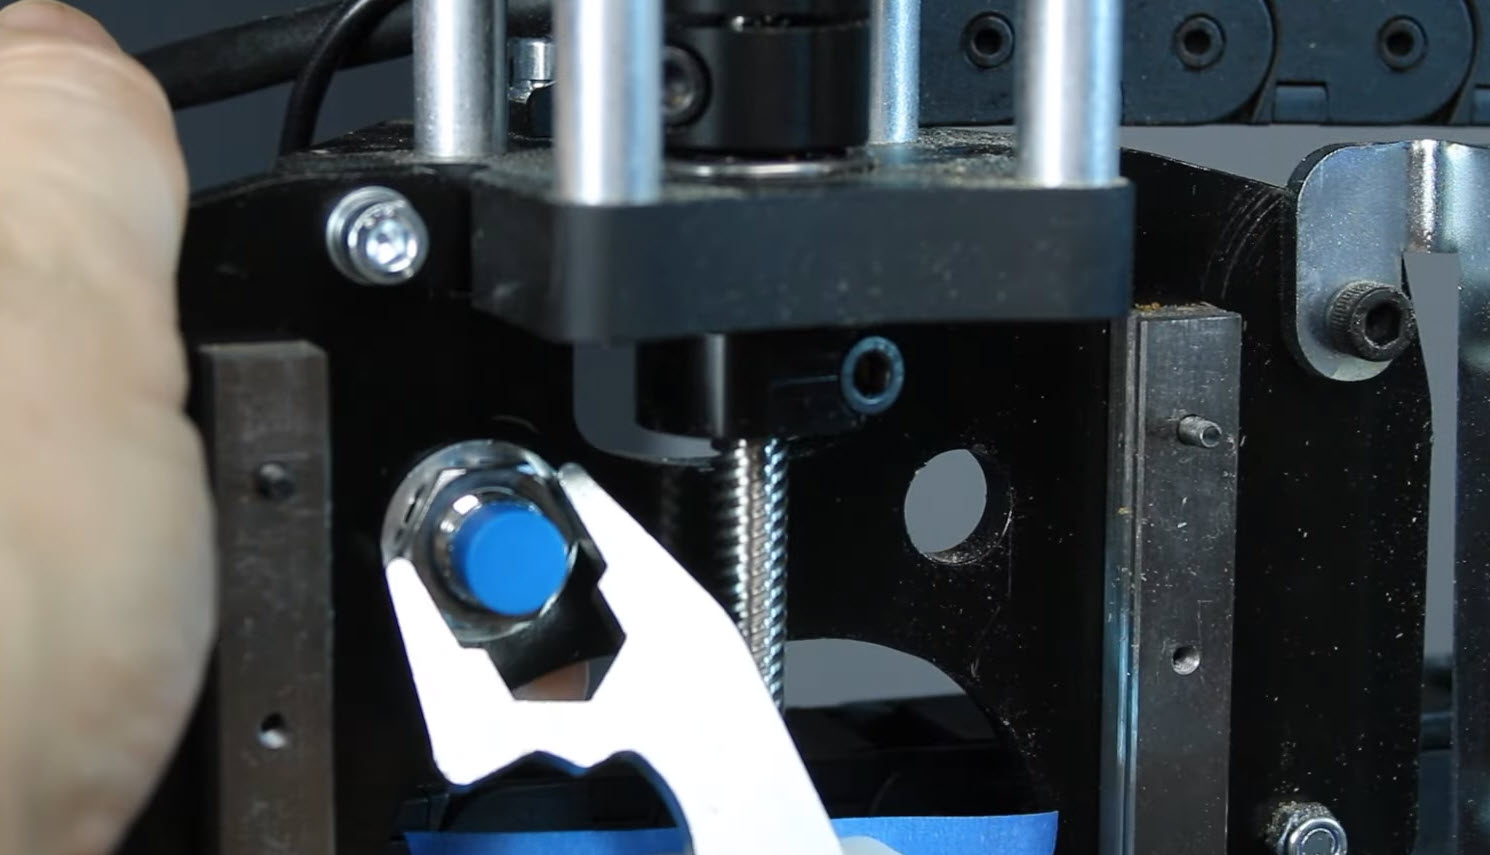
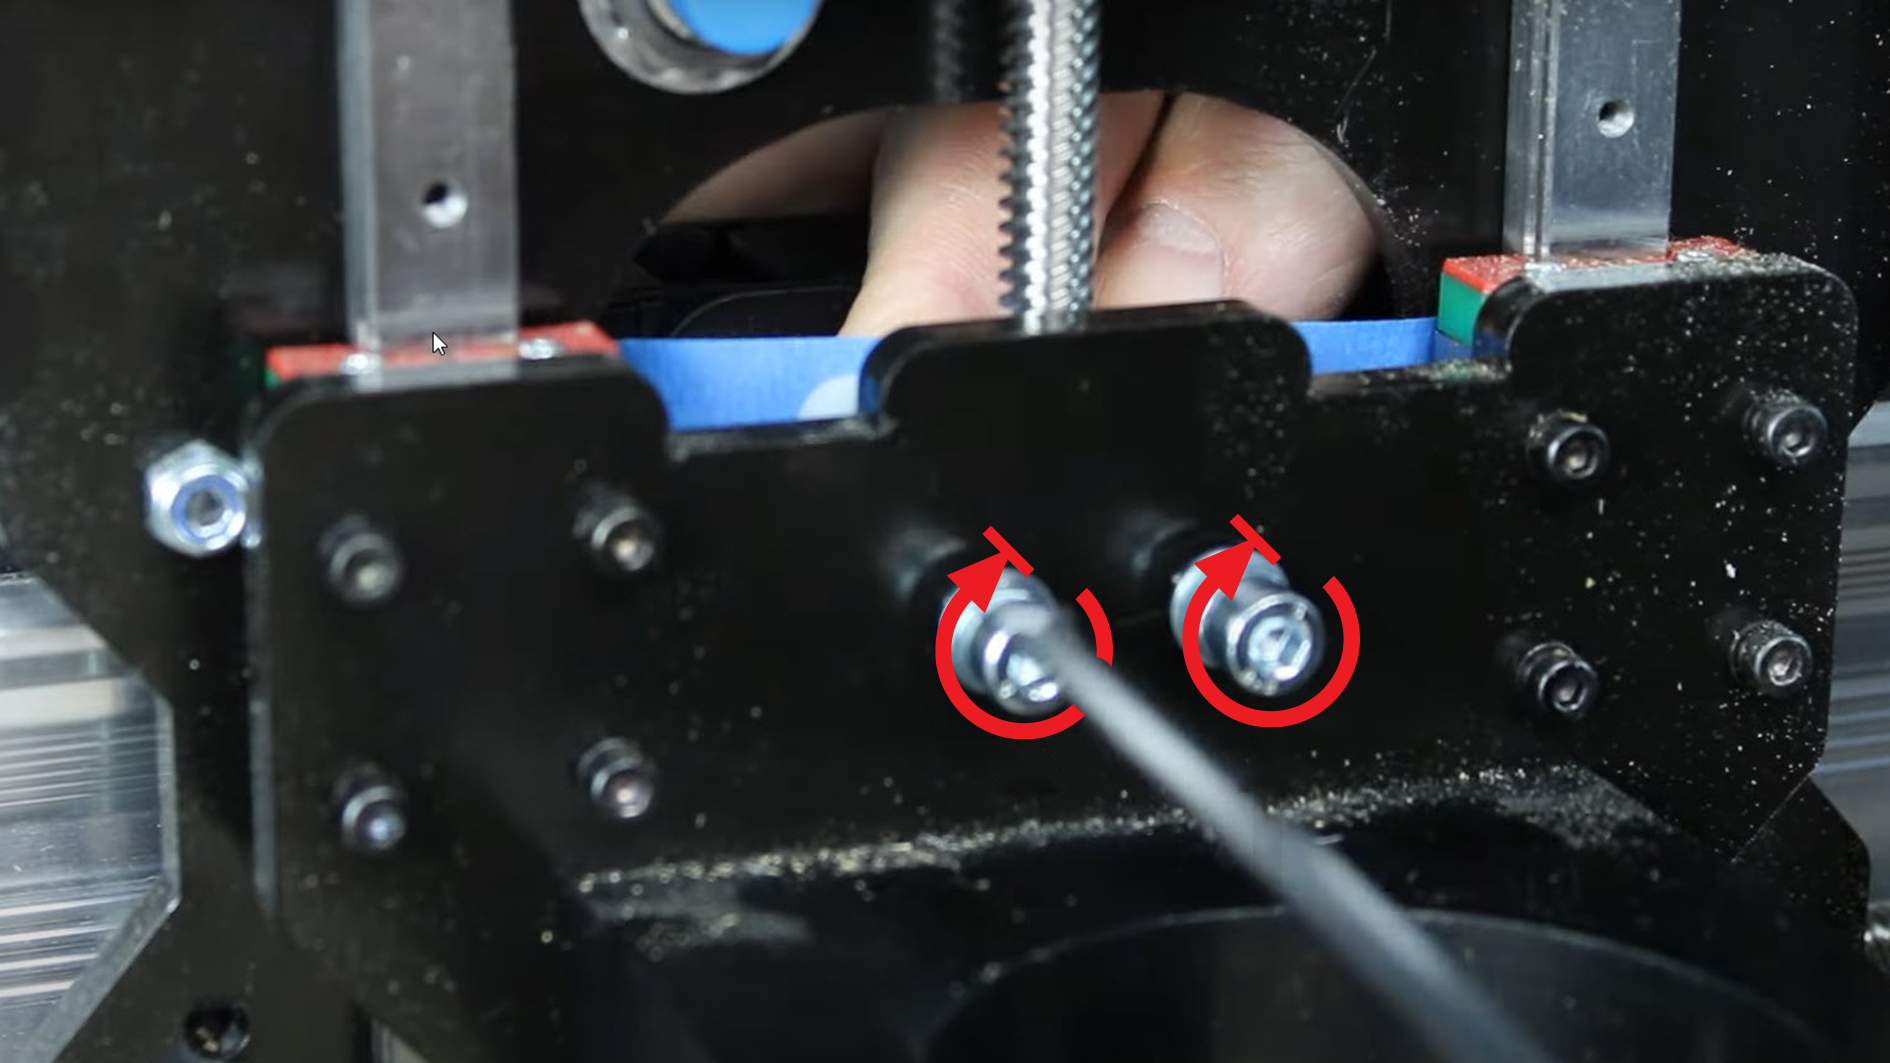
- Push the Z-axis plate back up to align it with the new spring loaded nut and reinstall the 2 mounting screws. Don’t over-tighten. Like before, the 2 screws should be tightened till the split washers are compressed, and you should alternate when tightening them to create even pressure.
Conclusion
Congrats! All of your hard work is complete. You now have an upgraded machine where you won’t have to manually adjust the nuts like with the old version. Still, keep an eye out, since any nuts that run on a lead screw will eventually wear out and need to be replaced.
Troubleshoot
If you finish installing the spring loaded nuts and find that your machine is now getting stuck whenever you try to move fast, we recommend lubricating the lead screw with a light coating of WD-40 or a similar lubricant. Follow this up with a “break-in cycle” where you jog the stuck axis back and forth at a normal speed, increasing to rapid after a few passes. If the nut binds on rapid, reduce the speed to normal and re-run a few more passes.
Once it seems sorted out, wipe the lubricant back off the lead screw to prevent increased buildup of dust. If you have any other issues with the spring loaded anti-backlash nuts, make sure to carefully re-read the assembly instructions or reach out to us for help.
Community posts
If you want to learn why this part has been upgraded, you can check out the video below where Andy chats about the evolution of the spring loaded nuts. You can also check out a couple of our community links for a couple solutions our users have found.
| Topic | Type | Link |
|---|---|---|
| Spring Loaded Anti-Backlash Nut Update Video | 17 min Video | Watch |
| Coupler Found to be Slipping After Upgrade | Community Post | Read |
| Replacement Parts Sent Out | Community Post | Read |
