
Sienci Labs is dedicated to growing the maker community and advancing the development of open source automated manufacturing technologies. Because of our vision, designs for the Mill One are open for anyone to use.
We encourage makers around the world to use our designs and ideas to modify existing Mill Ones and even build their own from scratch. Check out the resources available below for files, instructions, and other information.
We sell parts and kits for our machines, and we work hard to make our designs available for everyone. Consider supporting us by purchasing parts on our store.
Looking for help or need other resources, feel free to reach out!
Thingiverse
Find 3D printable parts for the Mill One on our Thingiverse page as well as design files, sample g-code, STLs, and other initialization info.
Instructables
Find photos, links, downloadable designs files, and manufacturing tips.
Onshape
Onshape is a powerful browser-based CAD software. Explore our design changes live. For the latest design files, or if you want to modify the design, visit our project on Onshape. These design files change constantly and may be inconsistent at times, but typically have the new improvements.
Bill of Materials
Google Sheets file on Google Drive with the bill of materials.
Community Contributions
Here are some other contributions for modifying or upgrading your Mill One:
➜ Add Homing Switches to a Sienci Mill One CNC by Troy Barbour
➜ Sienci Mill One Air/Oil Mist Coolant System by Andrey Gubanov
➜ CNC Hero! Guitar-ify Your CNC Machine by Chris Thorogood
➜ PDF Files for the Mill One Frame by Chris Zindrik (Files can be found in the Facebook group files and also on our Thingiverse)
➜ 3D Printable Mods by Tom Sanladerer
➜ Add an Arduino-based Optical Tachometer to a CNC Router by Troy Barbour
➜ Easy Z Probe for you CNC Router by Troy Barbour
➜ Add a Laser Guide to your Sienci Mill One Router by Troy Barbour
➜ Sienci Mill – Angle Mount – 4 holes by M1kka
➜ 52mm Spindle Bracket for Sienci Mill One by Matty812004
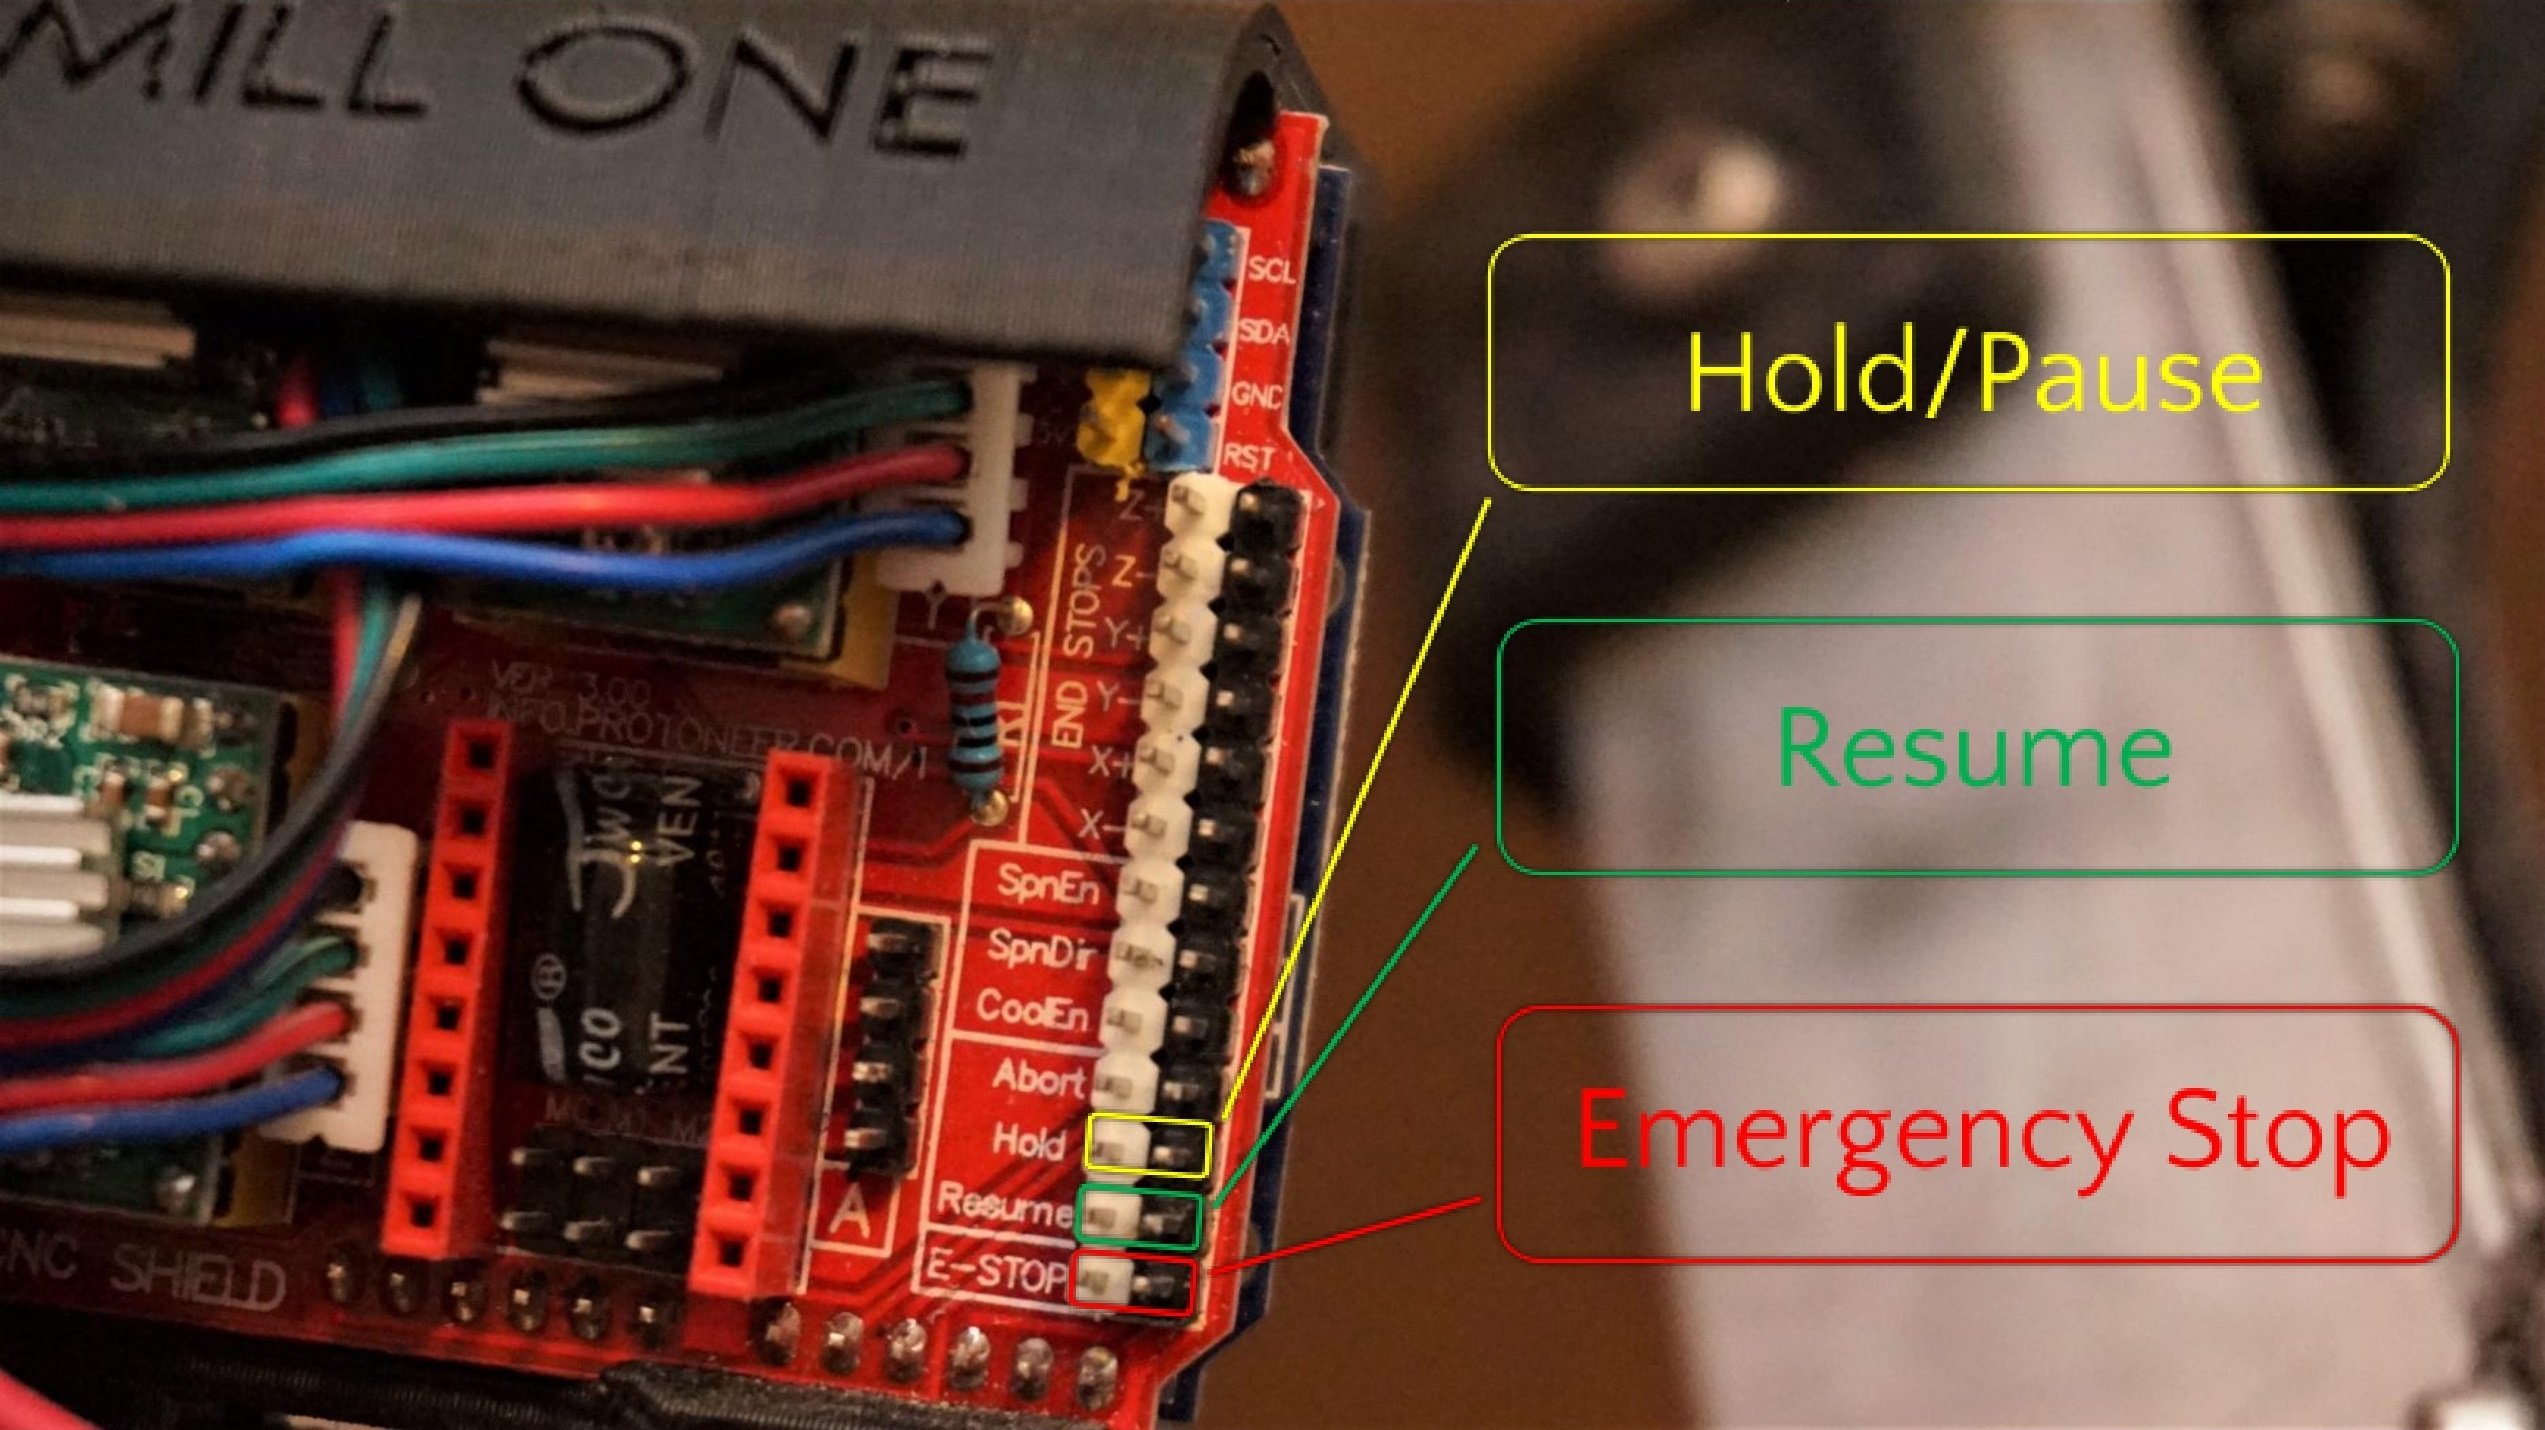
Adding Buttons
If you’d like to control your machine at the hardware level, you can wire in NO (normally open) buttons to the Mill Ones CNC shield to Play, Pause, and E-stop without needing to find the button in software. This also adds extra safety in case your computer or g-code sender freeze.
Version Enhancements
Moving along versions through Mill One V1, V2, then V3 notably came with increases in rigidity and cutting area while keeping all else relatively equal (e.g. core components like motors, lead screws, etc.). The most prominent tweaks were:
- More rigid 3D printed part design for angle mounting, router mounting, and ACME nut holding
- Added top wall brackets to better brace the frame of the machine
- More M3 bolts for the newer 3D printed ACME nut holder
- Redesigned X-axis gantry for more travel and redesigned Y-axis gantry for more rigidity and to have a consumable MDF bed
- Extra tapped hole on Z-axis rail for better attaching the 4-hole router mount
Other changes which had much less effect were:
- Redesigned 3D printed enclosure for electronics with better covering
- New barrel jack connector used
- Wall brackets changed over from 3D printed to metal
- Front acrylic shield has “Sienci Labs” engraved into it 🙂
With this in mind, if you were thinking about upgrading your older version Mill One and had the right tools and materials on hand we’d recommend exploring the following upgrades:
- Replace the HDPE Y-axis with the steel + MDF wasteboard combo of V3 which will make cutting to the left and right side of the cutting area much more rigid
- Add top brackets to the MDF frame or if you have other materials on hand consider changing out the frame for steel sheet – a modification I’ve seen done before with the Mill One – or some other form of rigid material or bracing
- Definitely 3D print the new router mount to better secure the router – there’s another community designed version here that might be even better still: Onshape
- Consider reprinting the angle brackets that hold the rails to the MDF since the V1 brackets were a bit on the skinny side. The V3 design is much better suited as well as a community design that added two more bolt mounting positions: Onshape