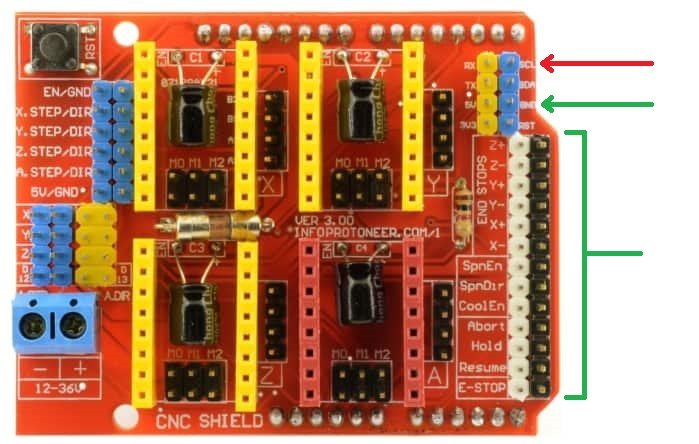
Though the Mill One never shipped with a touch plate or officially supported one during it’s production life, its Arduino Uno CNC shield had provisions for connecting one. This can be a simple Z-axis ‘puck’ that you can find for cheap online, or a surface-probing mechanical switch, all the way up to the AutoZero touch plate accessory that’s now widely used on the LongMill CNC.
To wire it up you’ll want to locate the positive 5V touch plate pin (marked as “SCL”, noted with the red arrow) and any spare ground pin as the second pin (marked as “GND”, noted with the green arrow, the row of black pins, and still more can be found on the board).
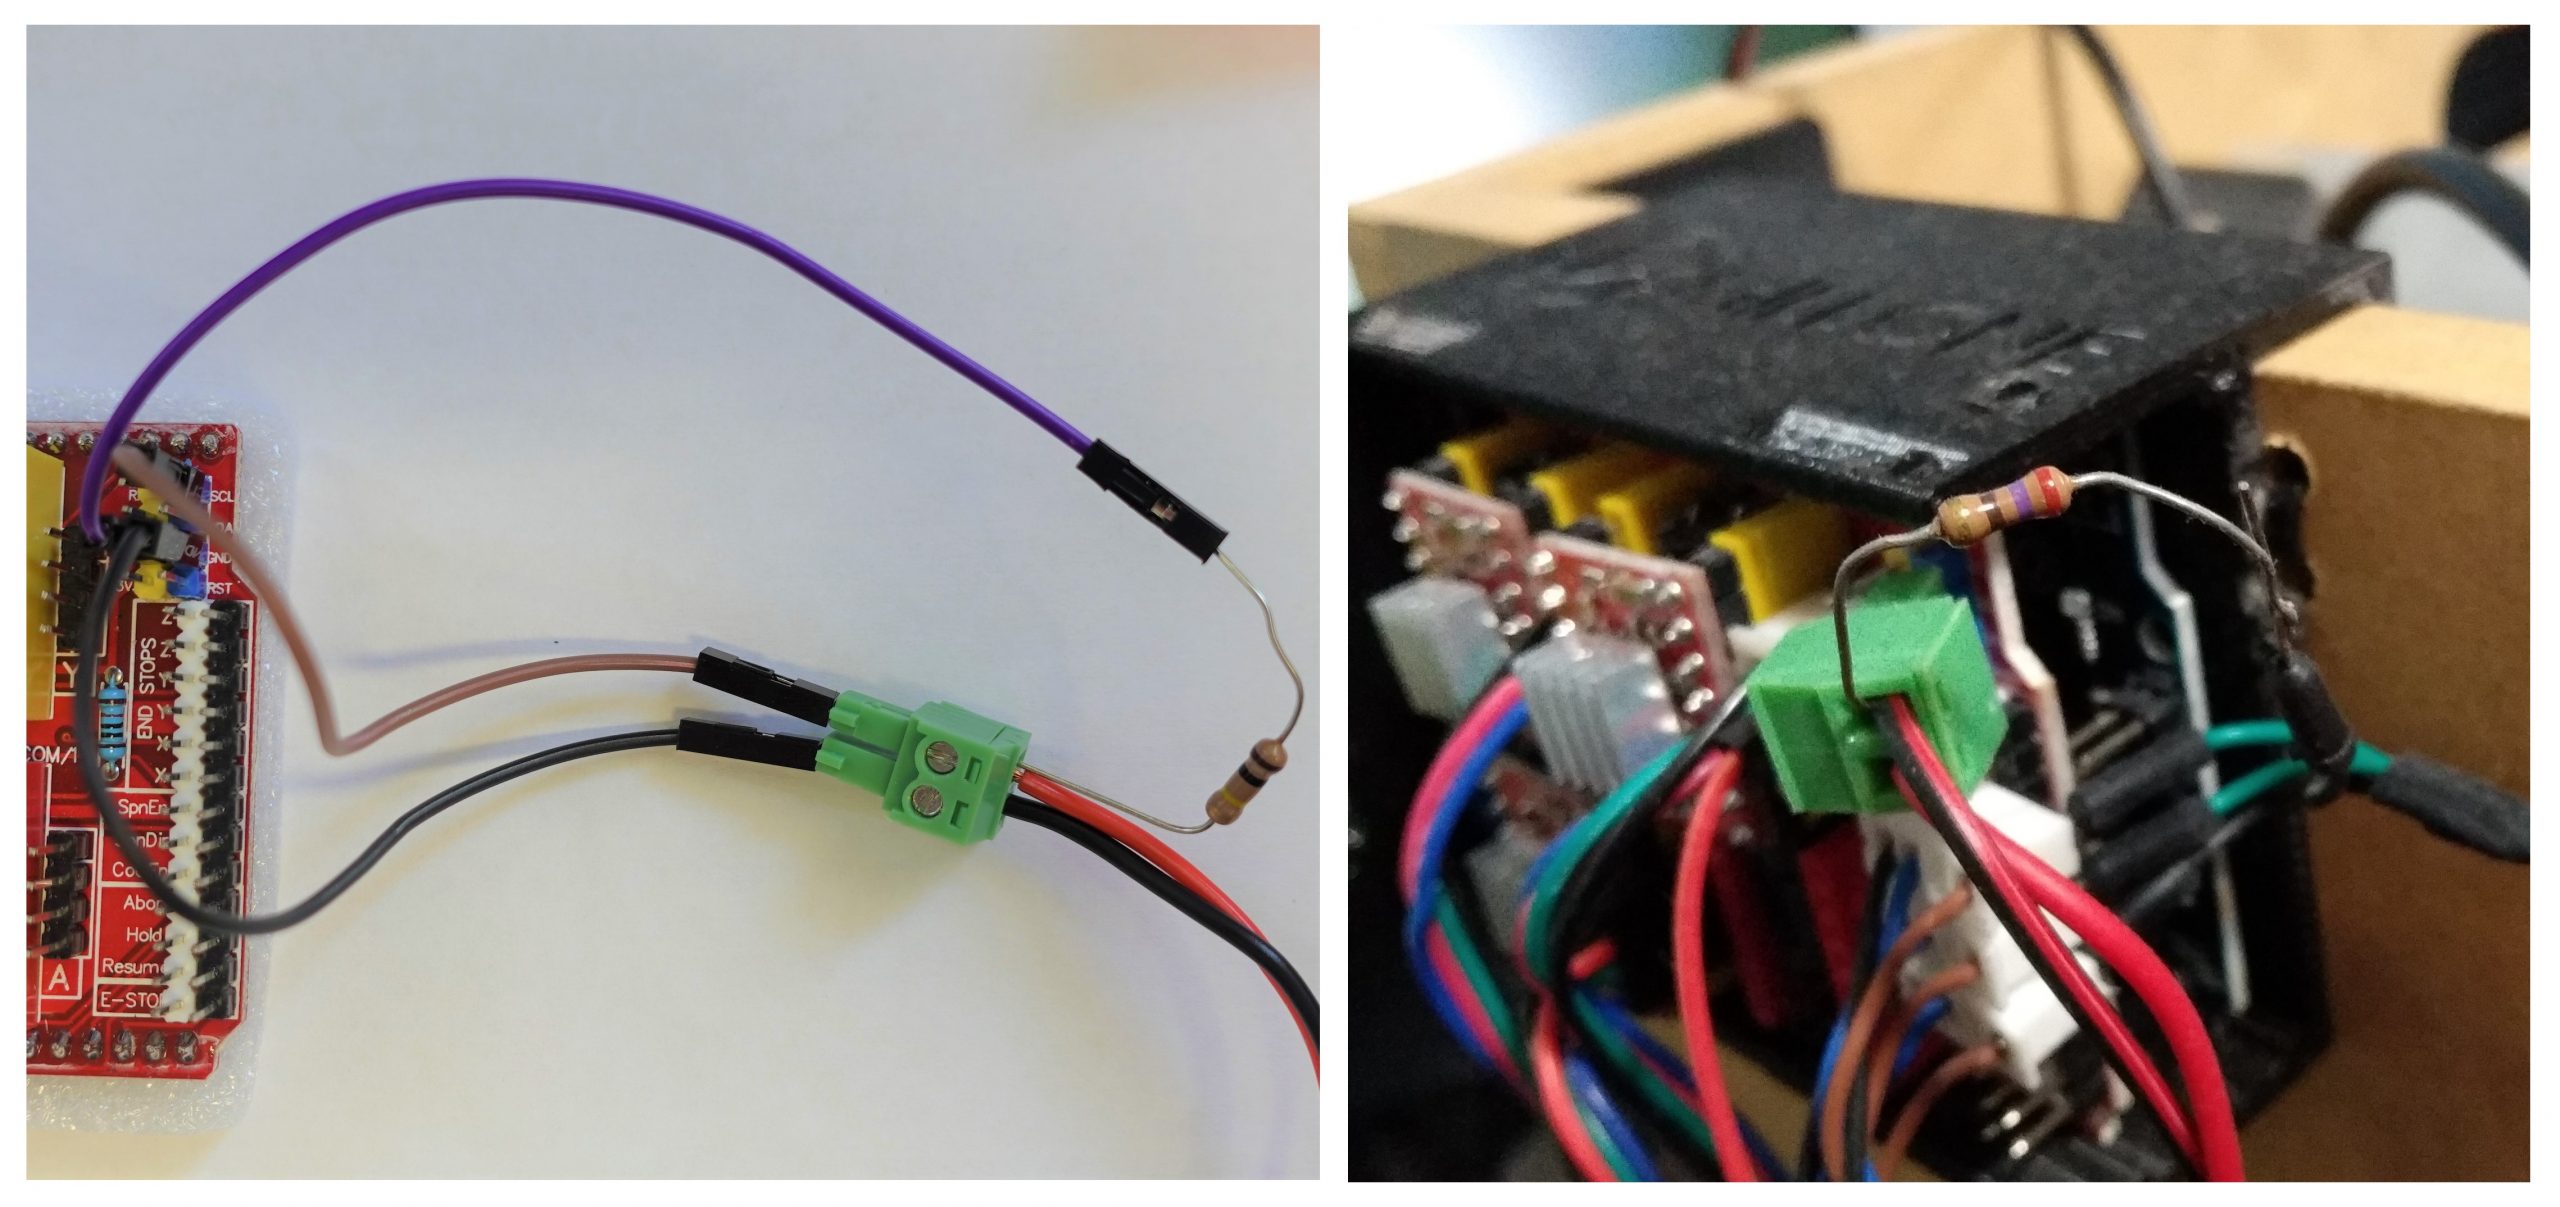
During testing, we also found that the Arduino Unos internal pull-up resistors weren’t strong enough to prevent the touch plate from having false triggers, so wiring in a 270Ω resistor did the trick. These are fairly easy to find from many electronics suppliers and are colour code: red, purple, brown.
So altogether you can see below two examples of the completed wiring with the 270Ω resistor plugged into one of the available “5V” pins, one touch plate wire plugged into “SCL”, and the other plugged into “GND”. On the left is an example of running extension wiring, and on the right a direct connection to the pins with a terminal connector. In both cases the resistor is easily added to the back of the terminal connector by unscrewing the terminal to fit in the resistor pin before re-tightening it.
Note: in these examples the wiring polarity doesn’t matter.