
So you just purchased your AltMill…now what? While you’re waiting for your machine to show up, you can:
📖 Start Learning
- Familiarize yourself with fundamental CNC concepts and workflows
- Dive into understanding CNC software, and set up your post processor
- Bookmark this page for add-on installation and usage guides (e.g. spindle, AutoZero touch plate, gControl panel)
🔌Setup Your Space
- Install the proper electrical for 220V spindles
- Clear a work space in your shop or garage for the machine
🛠️ Get Materials and Equipment
- Buy a sheet of 4’x8’x¾” MDF for your table, and consider how to hold down your projects during cutting (workholding)
- Source your spindle if you are not getting it from our store
- Grab cutting tools for the types of projects you’re interested in making
- Figure out your dust collection system
- Determine what computer you would need, if you are not getting gControl panel
- Familiarize yourself with the software options available, and set up your post processor
🗪 Join the Community
CNC Software
Software is a crucial part of running a CNC machine, and we have many articles and videos to explain how to choose and use these programs.
💡Just getting started? Read this introductory article on the types of CNC software you’ll need, and this systems requirements page on what specs your computer needs to have. If you have the gControl panel, that’s great! It can run both design (CAM) and g-code sending programs, but we recommend plugging in a keyboard and mouse if you want to do detailed design work.
🔎 Deciding on which design (CAM) software to use? The video below compares a wide range of programs.
🚀 Looking for a g-code sending program that is easy, capable and compatible with your 4×8? Check out gSender, developed and maintained by our in-house team of software engineers. You can learn more about its features on the gSender resources pages.
🏁 When you’re ready to prepare and run g-code, these final key resources will prepare you for success:
- Post-Processors – when you export your g-code in the design (CAM) program, a post-processor formats your g-code so the machine can correctly interpret the instructions. See here for compatible post-processors for different CAM programs. If you have an ATC, see this page to download suitable post-processors.
- Vectric VCarve – see these video tutorials for step by step instructions.
- Machine Coordinates and Setting Zero – these fundamental concepts of 1) how to set the starting location of your job, and 2) how the machine keeps track of where it can travel to, are appliable to virtually every CNC, from hobby to industrial-level. Learn about them in this article. This will enable you to successfully home and zero your machine on gSender.
- gSender – This video overview is comprehensive, running through important gSender features and showing how to run a CNC job.
Work Space
Detailed drawings for the 2×4 and 4×4 AltMill can be found on this page. Ensure that you allocate at least 6’x12’ of space for the machine build.
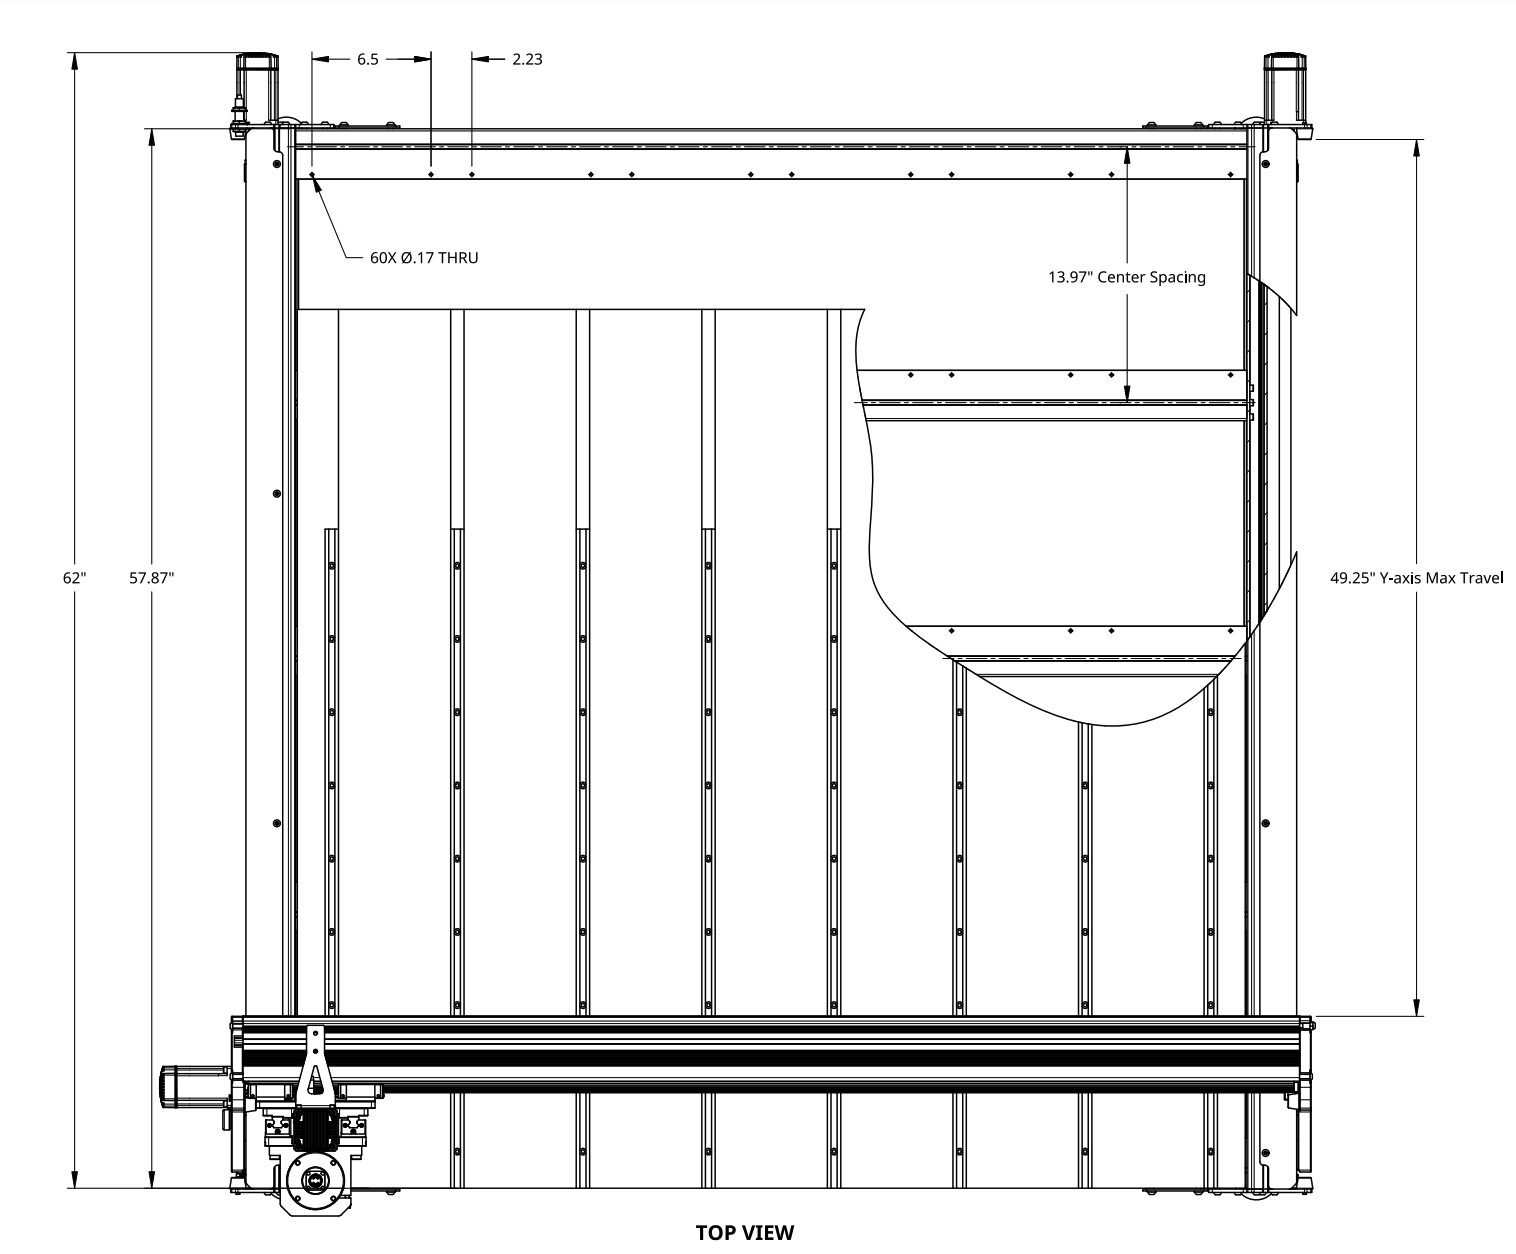
Top view of AltMill MK1 4×4 showing width and depth dimensions, PDF found here
Workholding
The AltMill comes with a sturdy frame that you can mount a table surface and wasteboard to. The ¾” thick 4’x8’ MDF sheet (purchased separately) will act as our table surface and will attach onto the frame with screws. Full instructions can be found here. The wasteboard is mounted on top of the table surface, and can be fully customized to suit your application, allowing for various workholding options to be implemented. Here are some common examples of workholding methods used in consumer-level CNCing:
Using clamps
- T- tracks with MDF slats
- Grid of 5/16” threaded inserts, counterbored on a second MDF sheet
Using adhesives
- Painter’s tape with CA (cyanoacrylate) glue, on a second MDF sheet
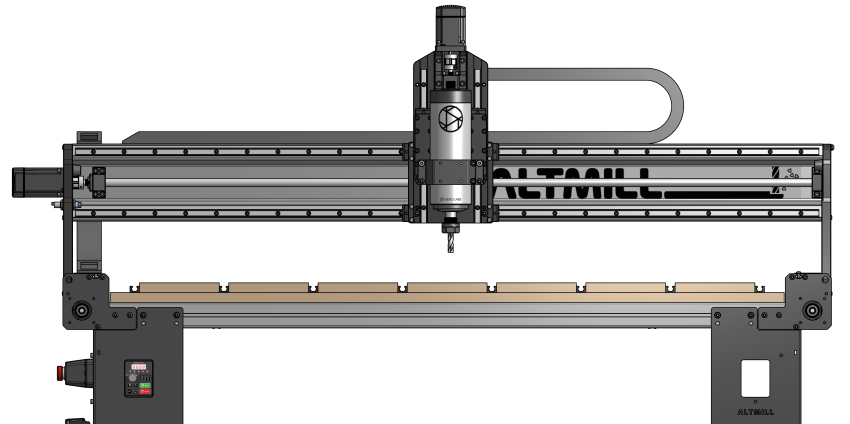
Front view of AltMill with MDF table, T-tracks and MDF slats
More workholding options, including vacuum tables and clamps, are discussed in detail in this article.
Spindle
For the AltMill, we recommend using our Spindle Kit since it is already pre-programmed and tested under our specifications. It is air-cooled and rated at either 1.5KW or 2.2KW.
However if you are looking for another option please keep in mind:
- For spindles 2.2KW or above, you will need to install extra 220VAC wiring
- The AltMill comes with an 80mm spindle mount
- The VFDs that may work with our controller are: Huanyang v1, Huanyang P2A, Yalang YL620, H-100, and GS20
- Third-party spindles are NOT plug and play, and we have limited technical support for them, please read this article for further information
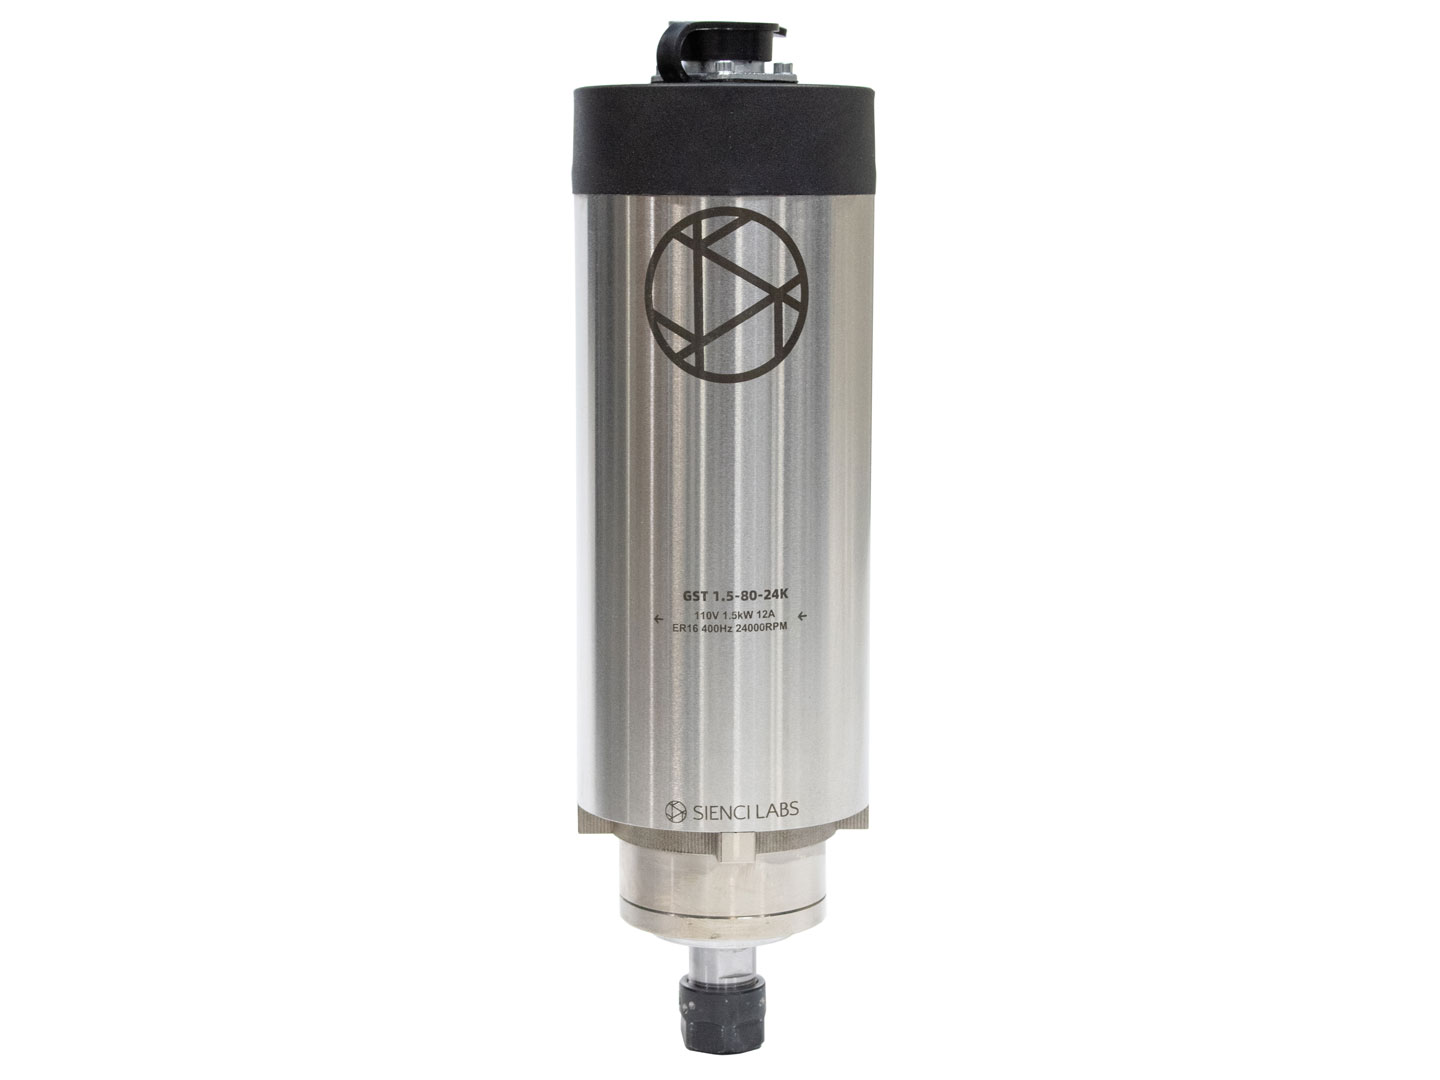
AltMill 1.5KW 110V spindle
Cutting Tools
There is a vast variety of end mills and specialized bits available for different use cases, from carving signage to cabinetry pieces. The video below explains the basic features of a cutting tool, and highlights the differences between common types of tools.
Further reading on the recommended tools for specific project types can be found here.
Dust Collection
Having proper dust collection for you CNC machine will:
- Keep dust out of the air and on sensitive machine components
- Remove chips and debris out of the cutting areas, reducing the chance of rubbing or burning
- Reduce cleanup after your job is completed
The general specifications for a dust collector suitable for the AltMill are as follows:
- 1-3hp
- Single, double or triple bag
- 4” diameter hose (or you can source/make your own adapter)
- At least 600 CFM rated flow rate
Also known as the vacuum attachment, the dust shoe is connected to a hose leading to the dust collector, sucking up debris on the work surface. If you are choosing a different dust shoe for the machine, here are some factors to consider:
- Spindle size
- Hose size/suction power
- Z-axis adjustability of the dust shoe
![]()
AltMill Clear Cut Dust Shoe