
We’re sure you’re itching to start cutting! Before you begin making chips fly, we recommend going through these final checks to ensure you are set up for success.
Mechanical
- All screws in the table frame have been tightened
- End plates with T-nuts
- End plates to Y rails
- Crossbeams to Y rails
- Clamping nuts on levelling feet
- Legs to frame
- Table is level on all 4 corners of the machine
- All couplers have been fully tightened on both the motor shaft and ballscrew sides
- You may need to unfasten from the ballscrew side to check the motor shaft side
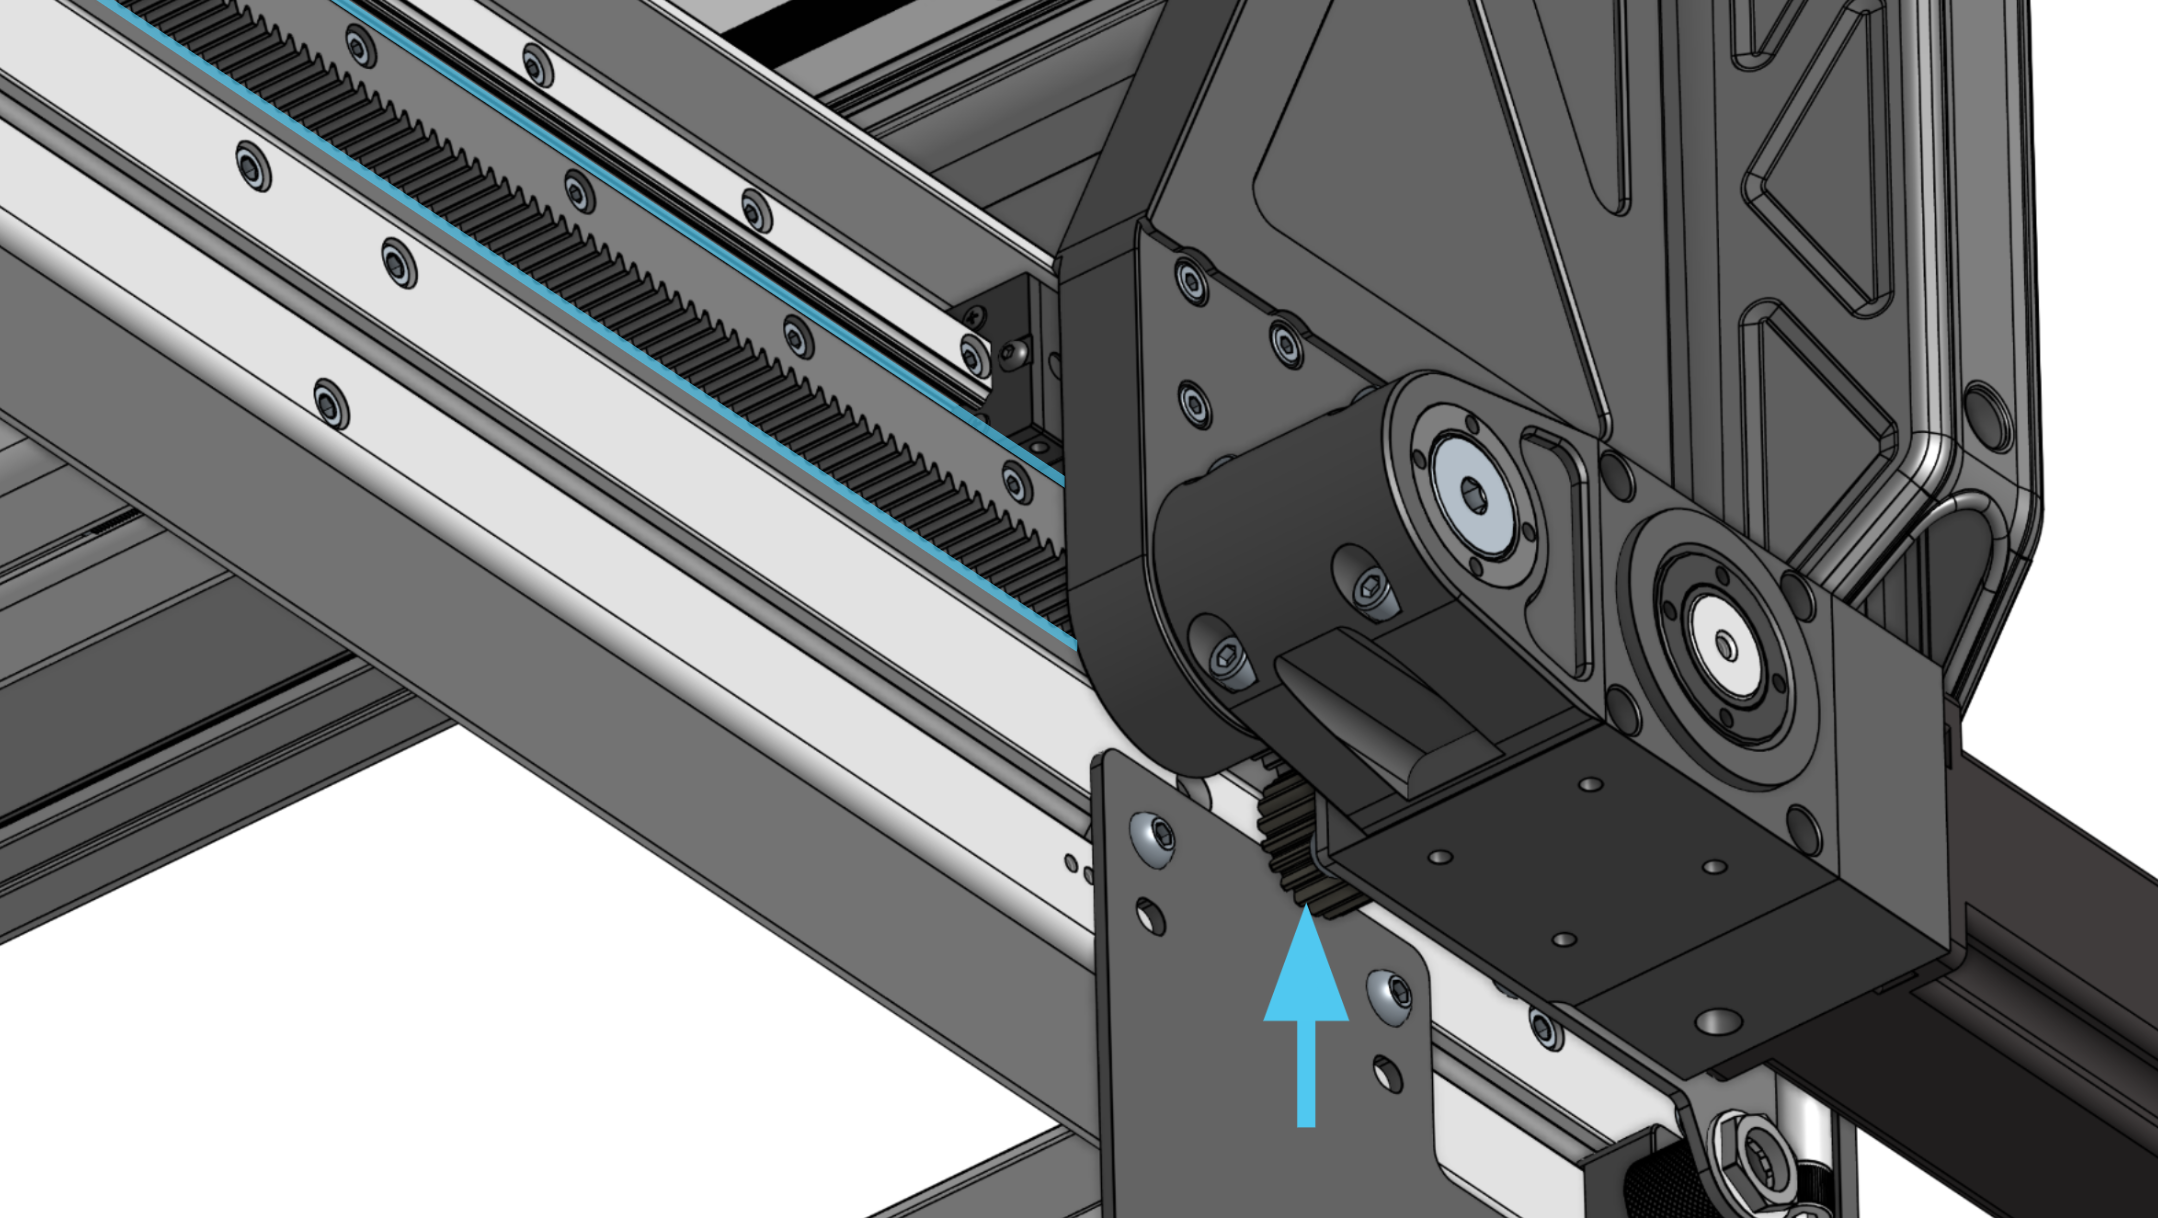
- Grease has been applied to the gear rack
Electrical
- Motor DIP switch positions are correct for each axis
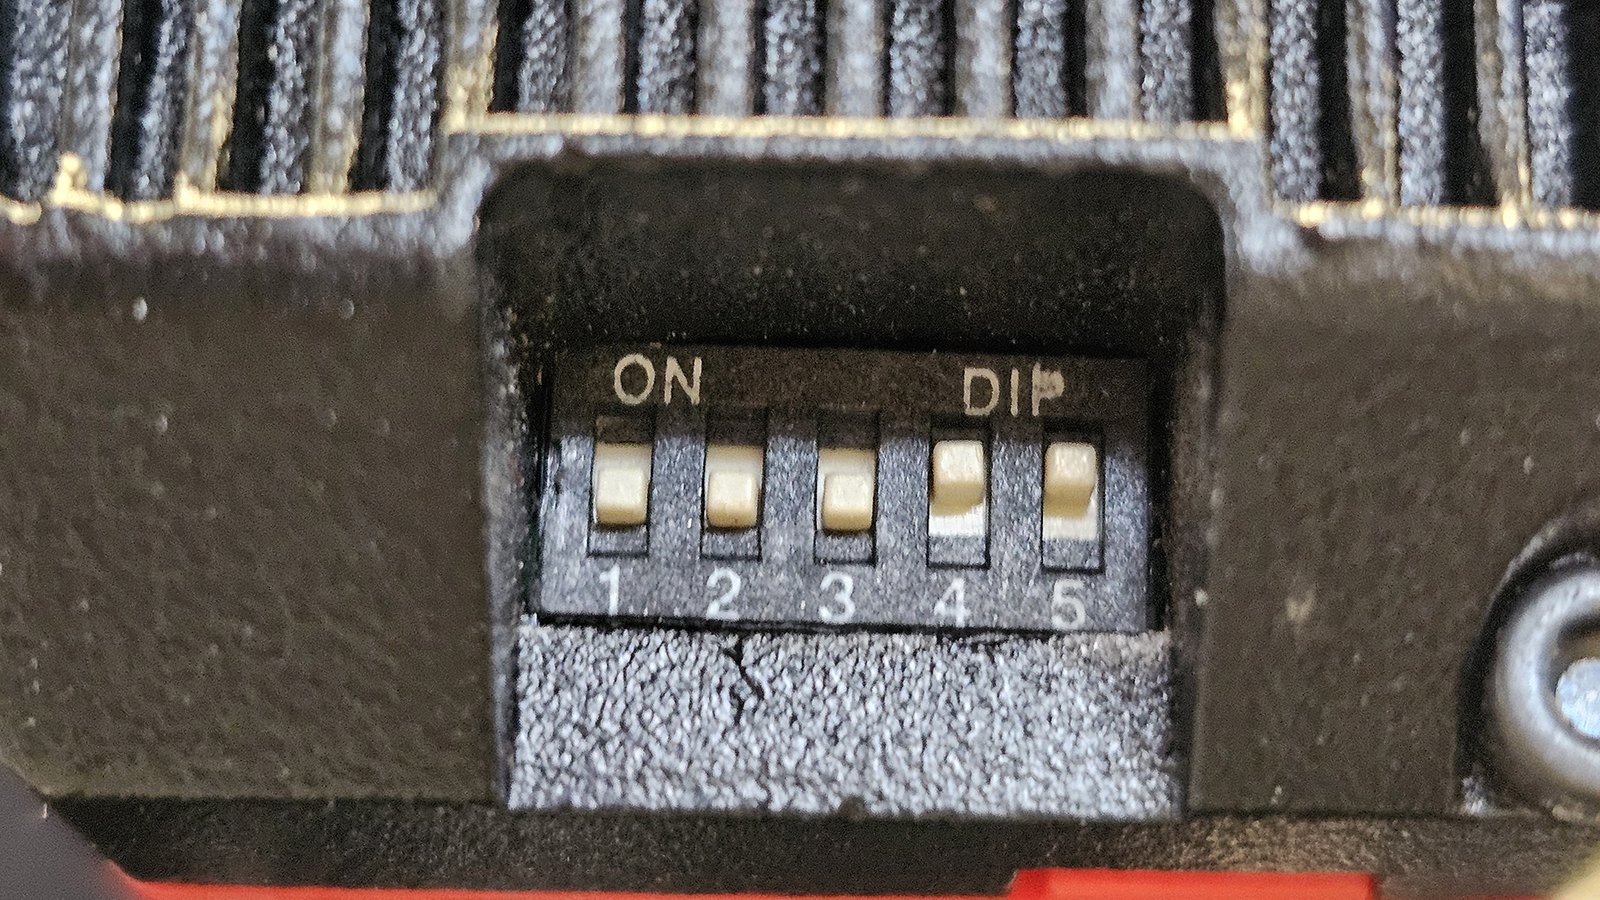
X and Y-axis motor, from 1-5: OFF, OFF, OFF, ON, ON
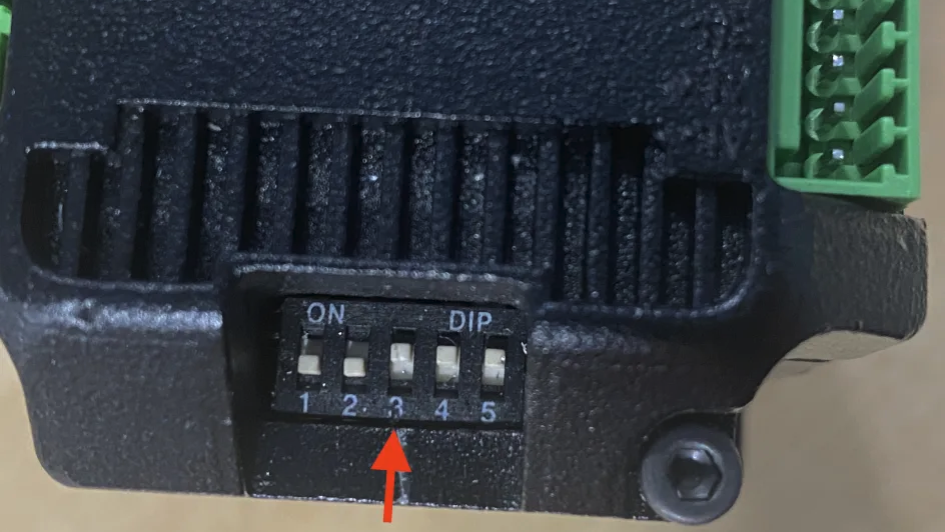
Z-axis motor, from 1-5: OFF, OFF, ON, ON, ON
- Motor cable wires are not frayed or detached from connectors
- If they are simply detached, you can use a small screwdriver to press each orange spring terminal release to insert the wire back in
- You may need to remove the motor cover to check
- Inductive sensors are functional
- Check by putting a metal object near the blue sensor face and see if a small red light triggers on the back
- Spindle VFD is plugged in to a separate circuit from the SLB-EXT control board
Software
- You are using gSender version 1.6.2 or newer
- Older versions of gSender do not support the ATC
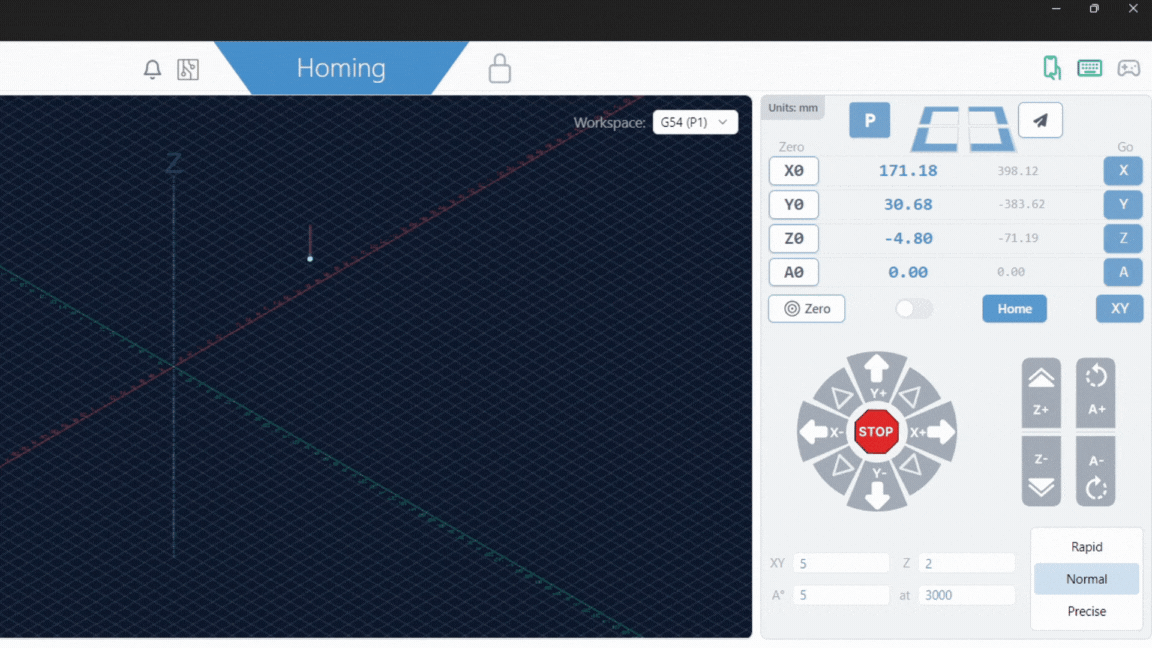
- Alarm 10 can be cleared using the “Click to Unlock Machine” on gSender, after pressing and releasing the E-stop button

- Machine can jog in the X, Y and Z directions smoothly using the jog control buttons
- Machine can jog over the table joint without any clunking sounds
- Spindle can spin up to speed, without alarms or errors, using the CW or Forward button

- Machine is able to successfully home without alarms or errors
- Jog the machine away from the X, Y and Z sensors
- Then press “Home”
If you have gone through the checks above, then you are ready to start cutting!
Encountered troubles? Check our 4×8 troubleshooting guide.
What’s next?
- Square and/or tram your machine as described in our article
- Bookmark this pre-flight checklist to prepare for each job you do
- Learn how to maintain your AltMill 4×8 to keep it in good condition
- Understand how to use and maintain your spindle
- Follow along this video as Ben goes through the steps to successfully carve a simple, first project.