The wasteboard for your LongMill MK2 can come in all sorts of shapes and sizes and can allow you to do a variety of things such as:
- Bottom-left hardstop for repeatable material positioning
- Spots to screw, tape, or glue material down
- Low-profile side holding or camp clamps using t-track or threaded inserts
- Elevated surface to allow sheet material to pass through for tiling
- Spaced off with Y-axis risers to cut really thick materials or pre-made furniture
- Mounted vise for metal fixturing or multi-axis machining
- Vertical or pivoting surface for end grain CNCing
We’re working on more documentation so that you can see more examples of different wasteboards and see the range of possibilities available to you. To start off though, you’ll need to know how to prepare your surface so that it can help you to get accurate cuts on your MK2.
Wasteboard Surfacing
Surfacing is simply the process of ‘flattening’ your LongMill wasteboard setup. Flattening is in quotes because we’re not actually making a true flat surface with this process, instead we’re trying to make a surface that’s parallel to the CNC. This is important since when you tell it to cut a 1mm deep circle into your material you’d want it to me 1mm deep at all points along that circle, not deeper in some areas and shallower in others. Surfacing can also:
- Eliminate warps or bumps in the material being used as your wasteboard
- Be used for maintenance purposes to clean off old marks and scars and leave you with a new, clean surface to glue, clamp, and mount your material to
When surfacing, you’ll generally want to buy a purpose-made surfacing bit. These are made for light passes but are usually larger in diameter so they can cover a large area quickly and leave a good surface finish. Larger bits can also reach further outside the cutting area of the machine.
We tend to use the 22mm surfacing bit we sell on our store. If you don’t have one of these available it’s still possible to flatten your wasteboard with something as small as a 1/4″ but it’s going to take much longer to process your whole cutting area.
Making the G-code
There’s nothing fancy about surfacing g-code, it’s usually a simple spiral or zig-zag pattern that fills a rectangular space and usually takes 30-40 minutes to run. The only inconvenience is making it in the first place and ensuring that the finished surface comes out flat as expected. When making the g-code, keep in mind the following:
- Cutting width and depth: you’ll usually want to cut as much of the MK2’s area as possible so over-size your cutting job and consider disabling limit switches if you have them
- Step over: generally about 40% overlap, close passes will result in a longer cutting time but far passes might not make for a smooth finish
- Step down / layer depth: usually 1mm or less, cutting any deeper with a large bit can result in an uneven surface
- Feeds & speeds: setting the Makita between 3 and 4 (around 18,000RPM) works well on MDF and other woods and the MK2 can usually handle these at 2000mm/min (80ipm)
- Max / total depth: will repeat the surfacing pattern more than once if it’s larger than the step down value. This will cut deeper into your wasteboard if your board is very warped or you’re trying to eliminate deep cuts
With all these values in mind, you should be able to plug them into whatever program you typically use and create the surfacing code you need. Draw a rectangle, specify a ‘pocket’ cut out operation, and fill in the remaining settings.
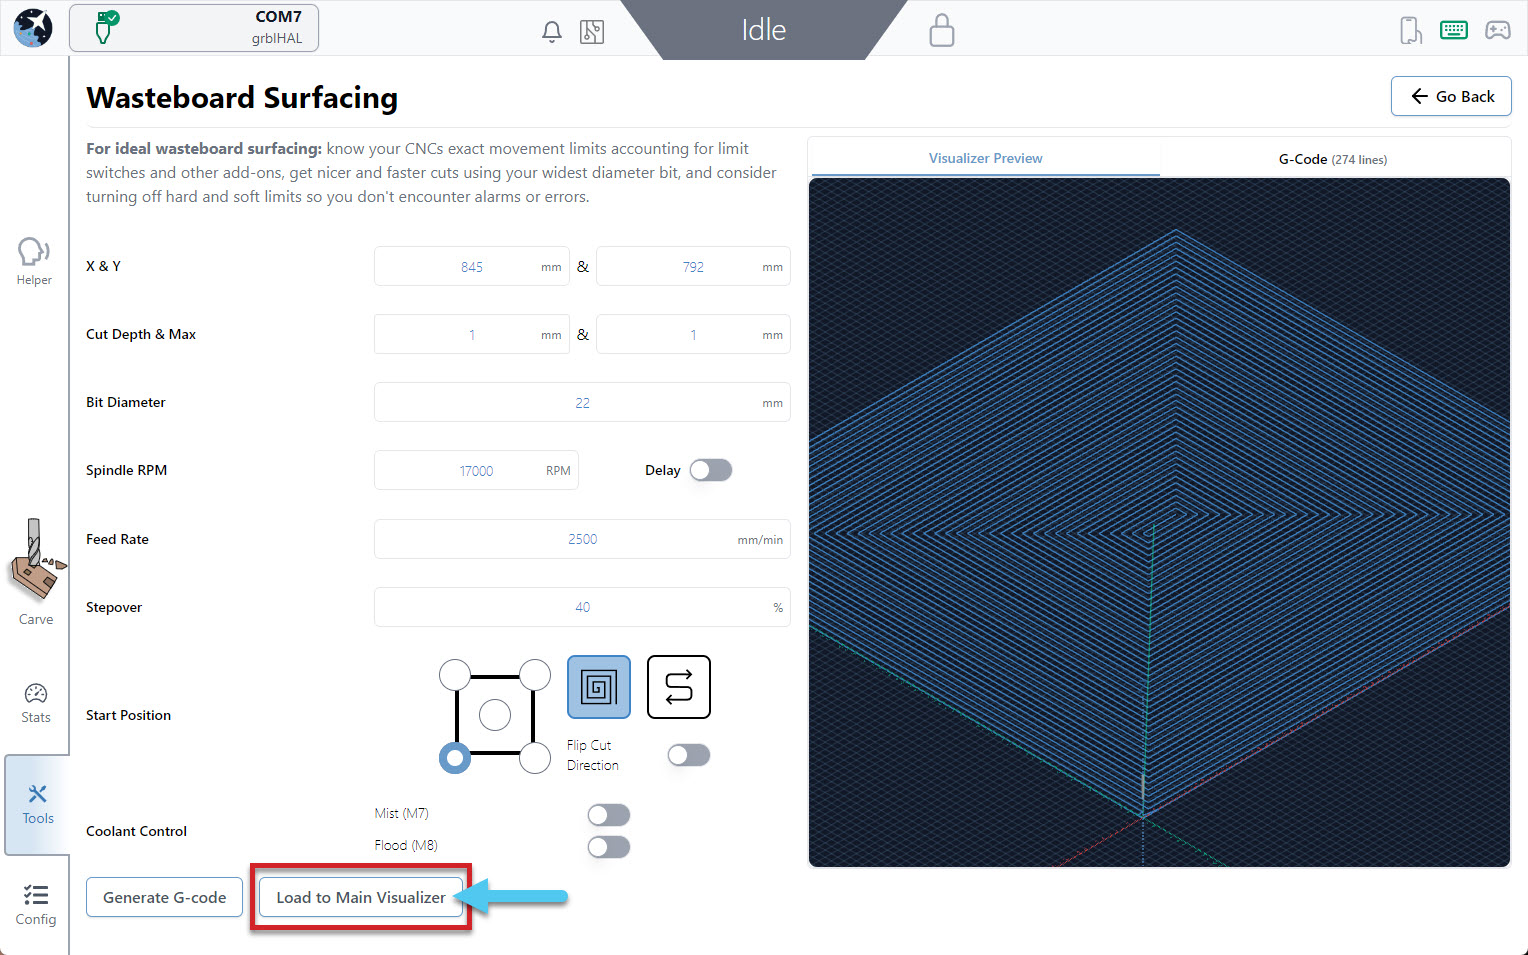
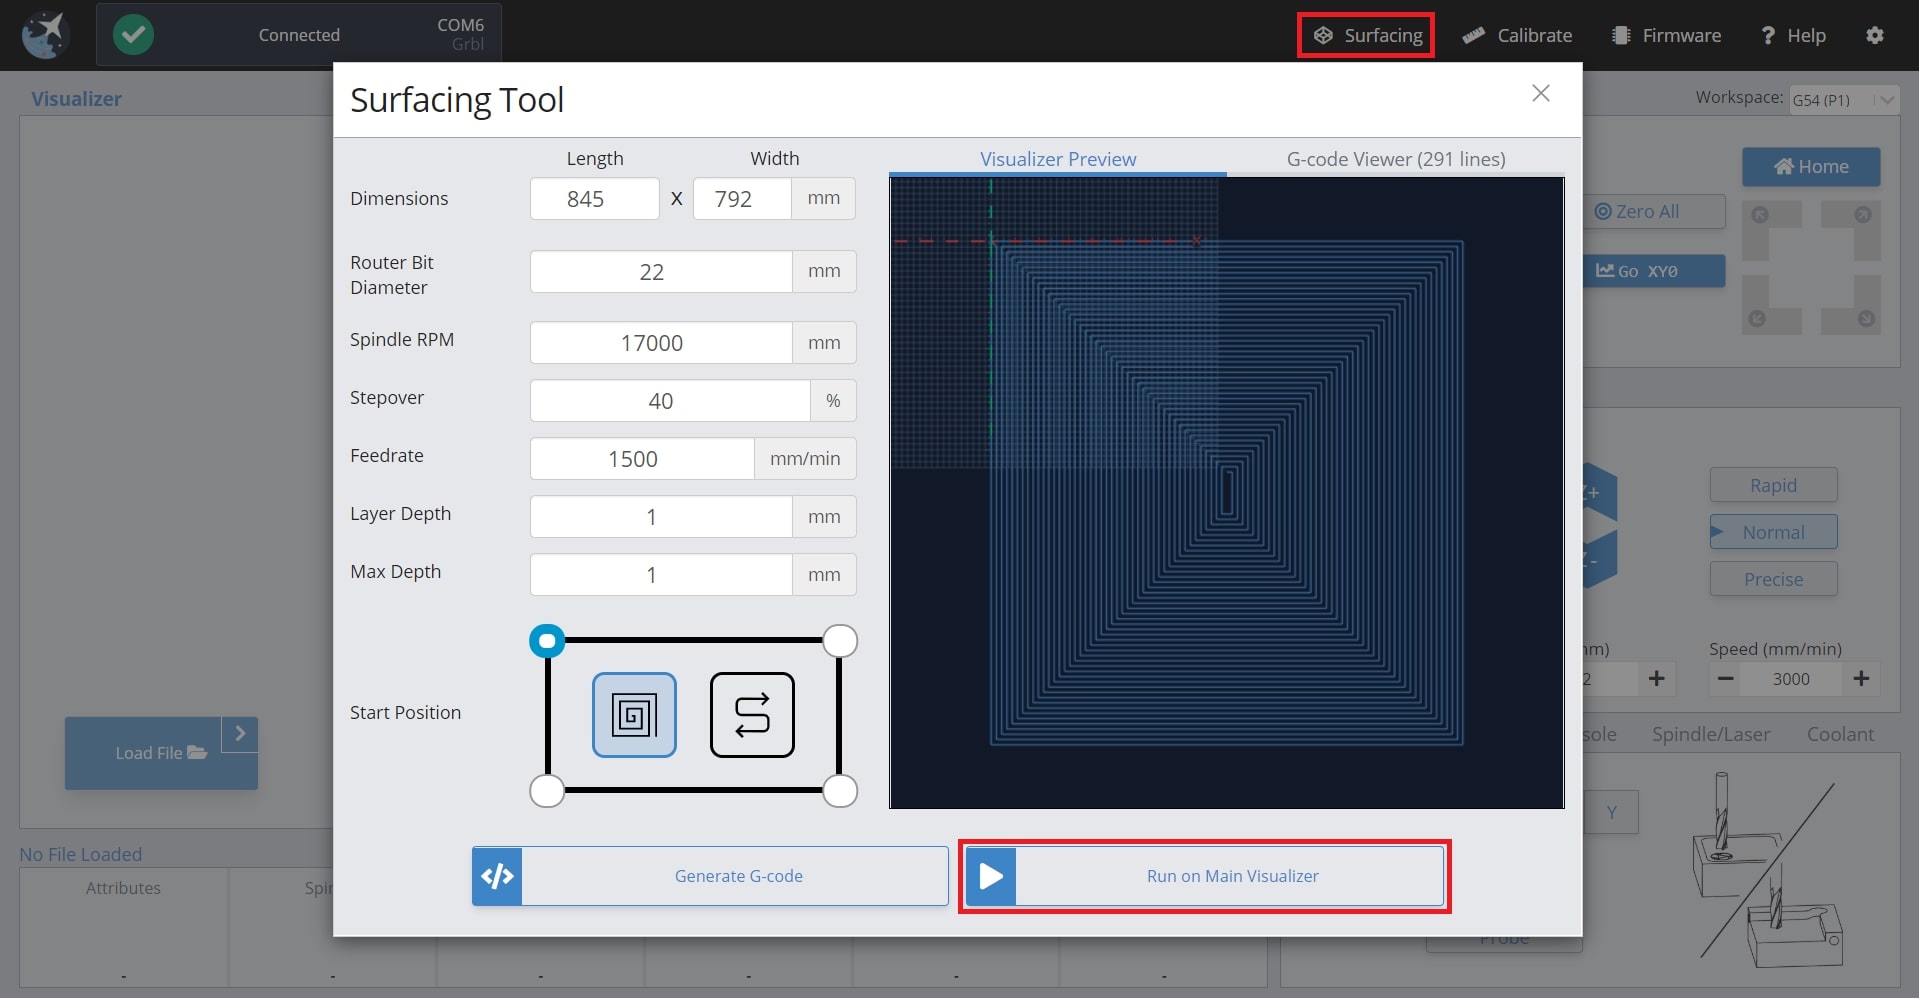
We also have a ‘Surfacing’ utility built into gSender that you can use for g-code generation with much less fuss. Once you decide on your settings you can ‘Generate G-code’ to view the path and then ‘Load to Main Visualizer’ to import the g-code to run it just like a regular g-code file.
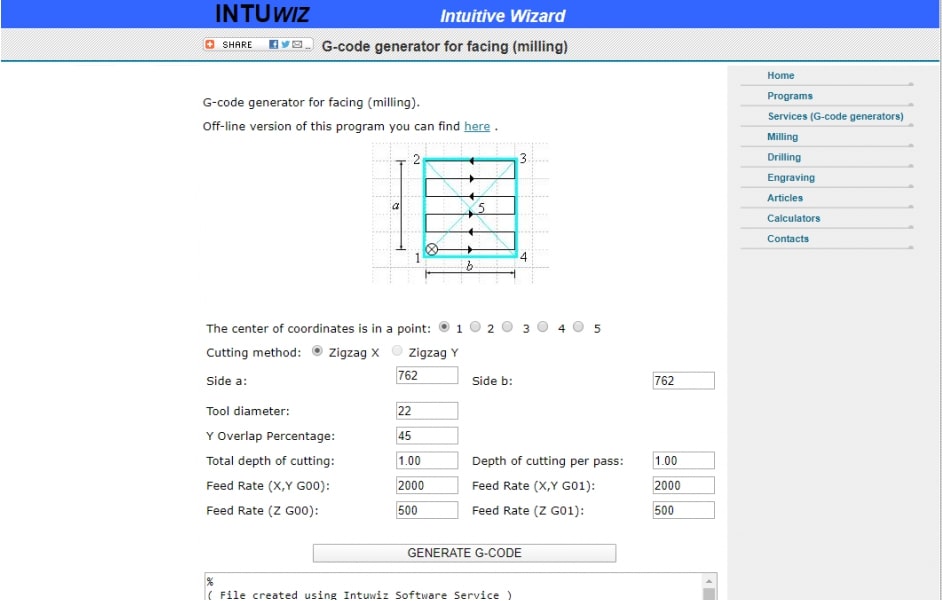
And there are still more options like INTUWiz, an online g-code generation program that is able to generate “facing” g-code (http://www.intuwiz.com/plane.html#.Xidt8sjYouV).