Before we get into specific error messages and scenarios, you should know the following solutions. These are quick and easy to do, and are relevant for many different issues. They may just solve your problem!
Power Cycle / Hard Reset
The classic “did you try turning it on and off?” solution. This may help eliminate some stubborn alarms, reset to the correct spindle profile, and allow for recently-changed firmware settings to take effect.
- Disconnect on gSender, press the E-stop, then toggle OFF the power switch on the controller
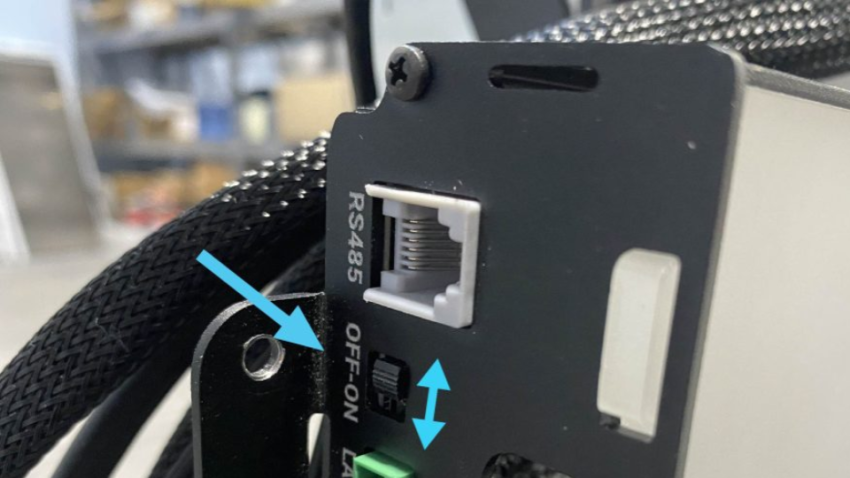
- Wait for 5-10 seconds
- Then turn everything back on – toggle ON the power switch, rotate the E-stop, then reconnect on gSender
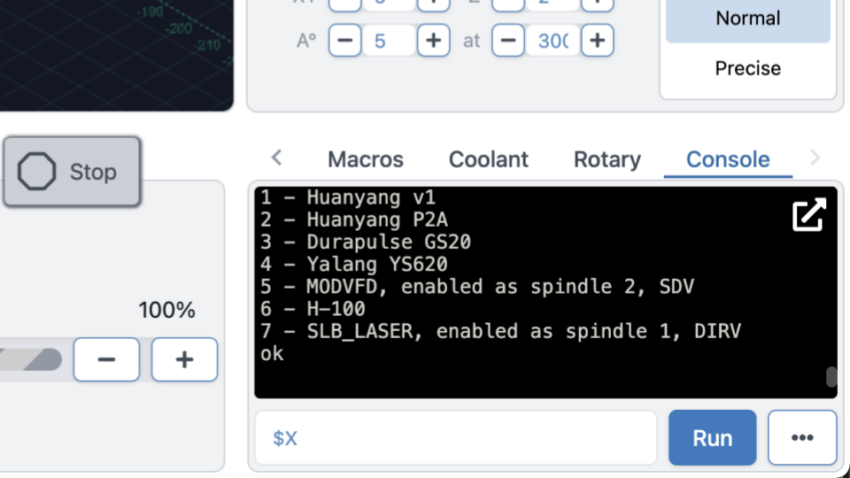
Clear Alarms
If you need to clear homing-related alarms that cannot be removed with any buttons in the visualizer, try the following.
1. Click ‘Console’ in the bottom corner of gSender.
2. Type $RST=$ (capitalized) then press ‘Run,’ which will reset to factory firmware settings.
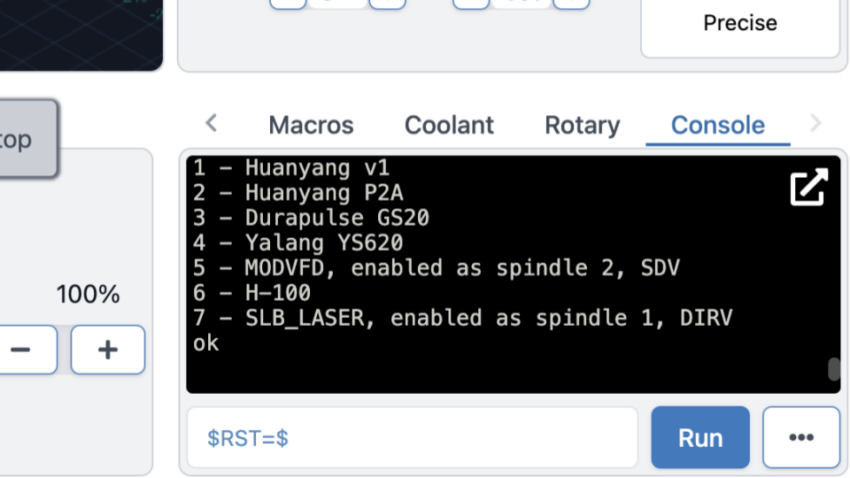
3. Type $X (capitalized) then press ‘Run’ to unlock the machine. Your alarms should be cleared.
Restore Defaults
Restoring defaults means that you are reverting the controller’s firmware settings to their original factory values. This may be helpful in a large variety of scenarios, like if the machine is stuck in the homing cycle, if an axis is travelling inaccurately, and if limit switches are triggering too late.
There are two ways to do it: either through the Console or through Firmware Tools/Config.
Console
- Click console in the bottom corner
- Type $RST=$
- Click ‘Run’
- Turn OFF and ON your controller to have the settings take effect
Firmware Tool/Config
1. If you are on gSender 1.4.12 or lower go to ‘Firmware’ on the top of the screen. Select your machine profile in the dropdown, then press Restore Defaults.
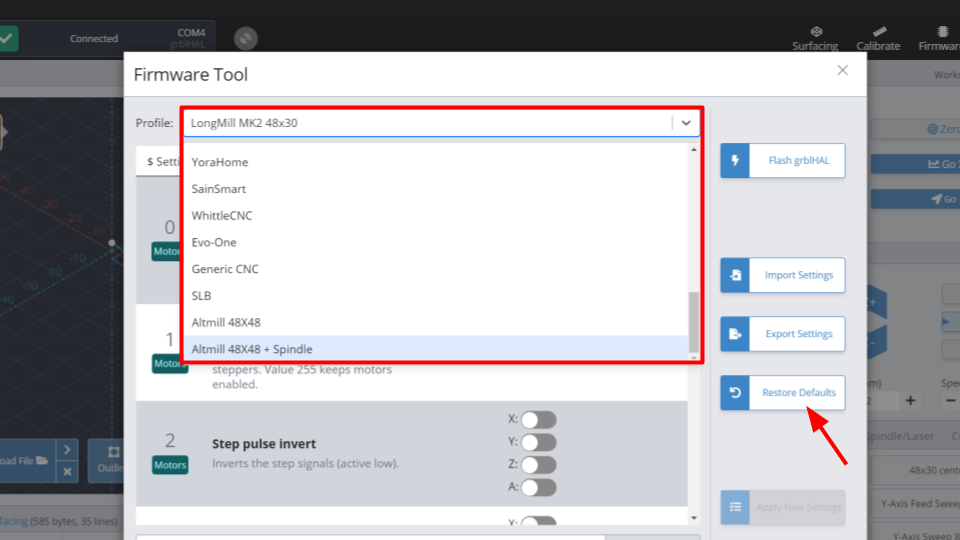
If you are on gSender 1.5.0 or higher, go to ‘Config.’ Select your machine profile in the drop down, then press Apply Settings.
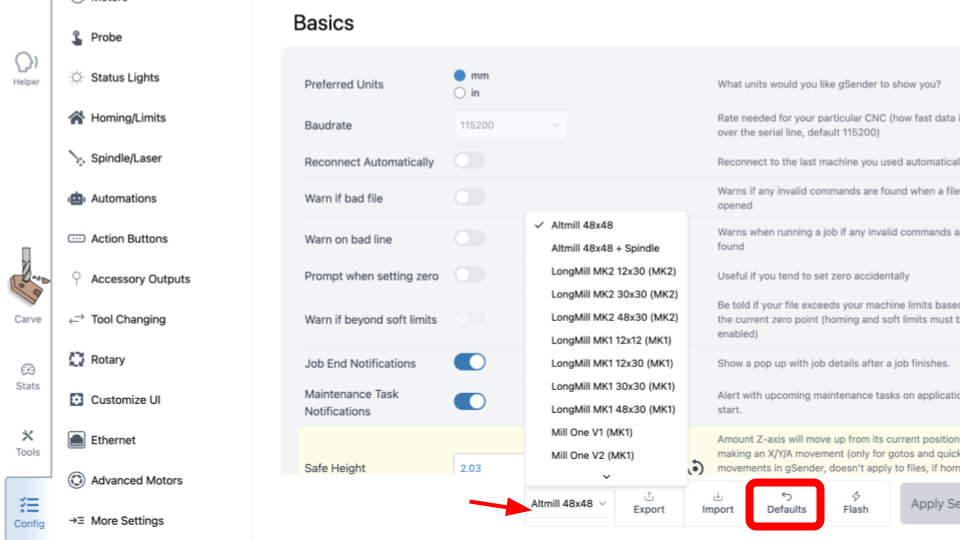
2. Once it has processed turn OFF and ON your controller to have the settings take effect.
Troubleshoot Firmware Settings
Every AltMill controller comes pre-loaded with firmware settings suited for normal machine operation, which accounts for limit switch (inductive sensor) and Sienci Labs spindle compatibility. However, if you are…
- Installing new add-ons, or
- Running into movement issues, jobs stopping midway or constant alarms
…then you may need to modify the firmware settings, which can be done on gSender. We recommend the following steps for safely testing and saving these changes:
1. On gSender 1.4.12 or below, go to ‘Firmware.’
On gSender 1.5.0 or above, go to ‘Config.’
2. Press ‘Export Settings’ to save your current firmware settings as a text file – this is your backup in case something goes wrong.

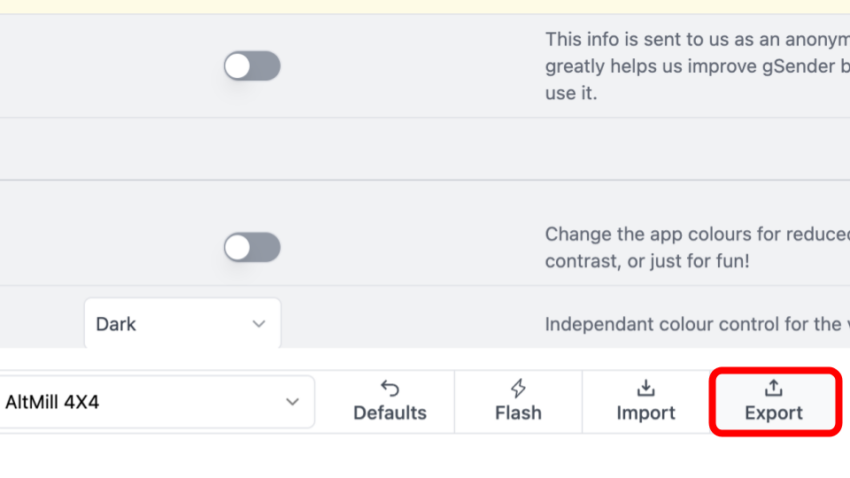
3. Select the correct profile for the machine you own, then press ‘Restore Defaults’ – this ensures that you are starting off your testing with factory firmware settings (this is equivalent to the $RST=$ method shown above).
4. Adjust the settings as needed, referring to the resources pages and/or tech support guidance.
5. Press ‘Apply Settings’ and test machine functionality.
6. If things are working as expected, export your updated firmware settings as a new, separate file.
7. Apply the settings from your new file whenever you need, by pressing ‘Import Settings’ – this will overwrite the existing firmware settings on your controller.
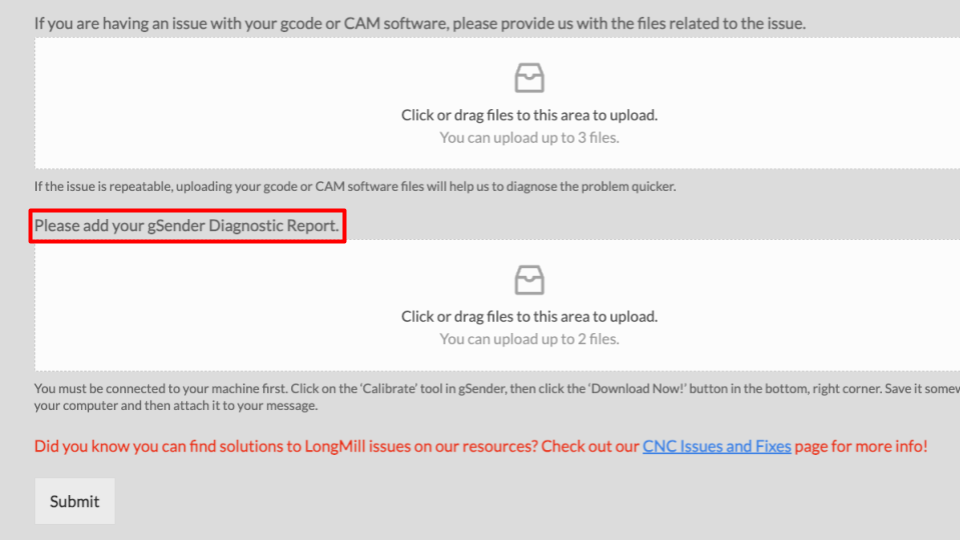
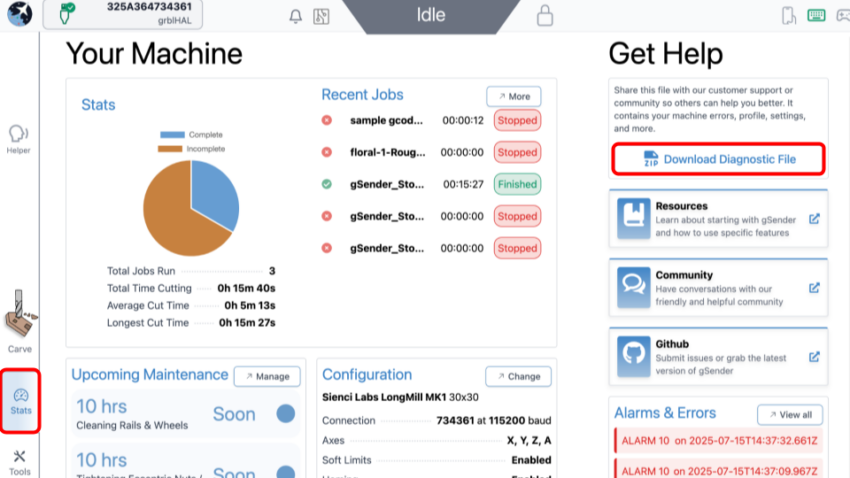
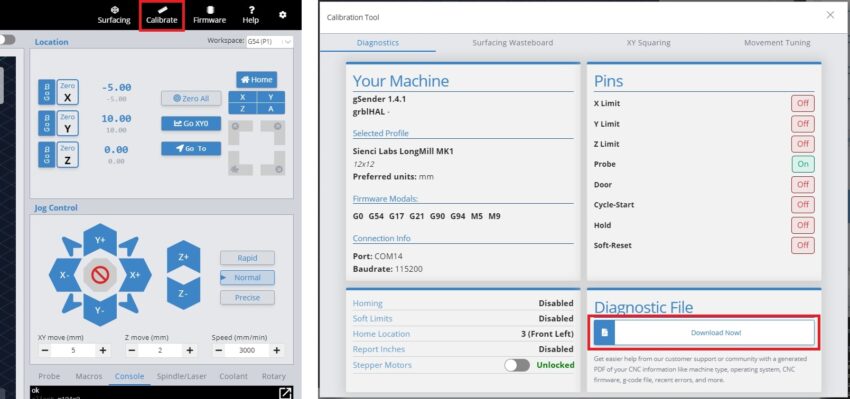
Generate Diagnostic File
This is not a direct solution, but could save you a lot of time and headache. If you are having issues and want to contact customer support, we highly recommend attaching a diagnostic file, which contains information about your most recent cutting job. This can help our team figure out what went wrong. This should be done right after first encountering your issue, or if possible, after you have recreated the issue.
- Keep your machine connected on gSender.
- On gSender 1.5.0 and higher, navigate to ‘Stats’ at the bottom left corner, then press the ‘Download Diagnostic File’ button.
On gSender 1.4.12 and lower, navigate to ‘Calibrate,’ then under Diagnostic File press the ‘Download Now!’ button.
Save the file on your computer.
- Attach the file when you submit the Contact Us form.