
Clear Cut Dust Shoe
80mm Dust Shoe
The video below illustrates how to set up the dust shoe from the AltMill Spindle and Dust Shoe Kit.
Parts List
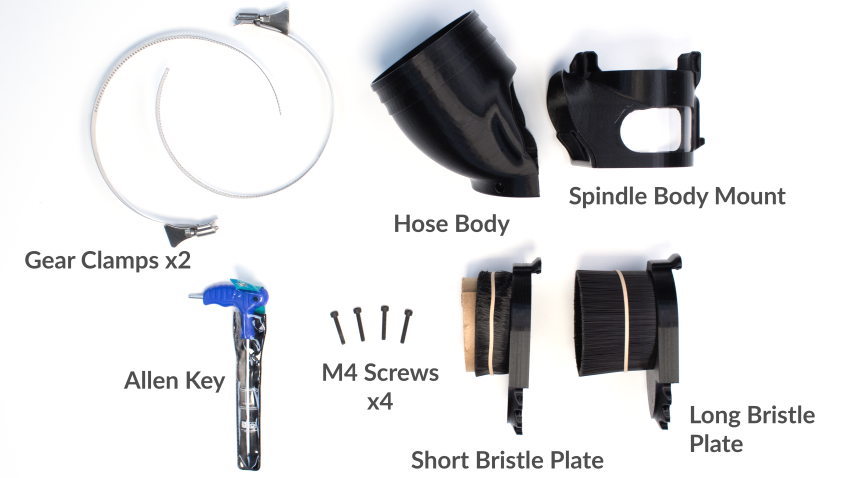
Remove the contents from the dust shoe box. Ensure you have the following parts before proceeding. If anything is missing please reach out to us at https://sienci.com/contact-us/
| Parts Description | Quantity |
| Gear Clamps | 2 |
| M4x25mm Screws | 4 |
| Hex Head Allen Key | 1 |
| Dust Hose Body for 4″ hoses | 1 |
| Spindle Body | 1 |
| Short Bristle Plate | 1 |
| Long Bristle Plate | 1 |
Dust Shoe Assembly
Bristle Plate installation
Parts Required: 2x 4mm screws, choice of bristle plate, we typically recommend the shorter strip for general purpose cutting
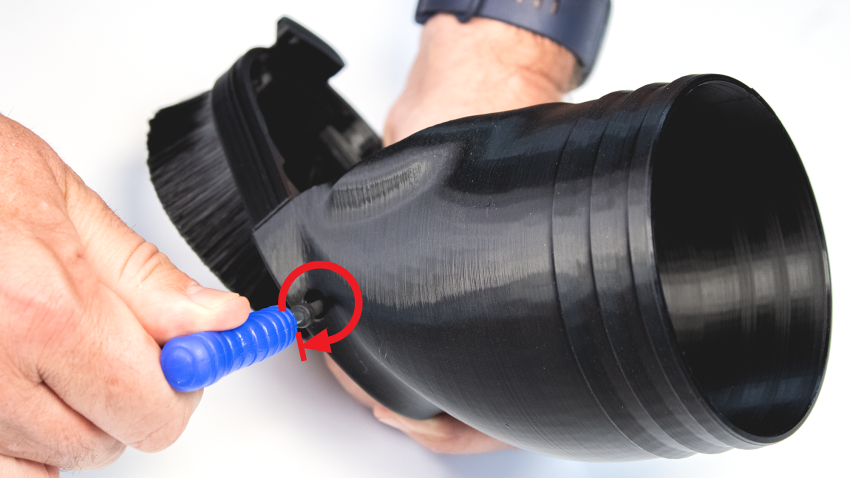
Take one of the bristle plates, align the wavy tabs on the plate with the matching notches on the hose body. Press into place. You should feel or hear it click when seated correctly.

Using the Allen key insert 2x M4 screw into the openings on the side of the hose body. Tighten the screw till the head is seated. Don’t over tighten as you may damage the hose body or the bristle plate.
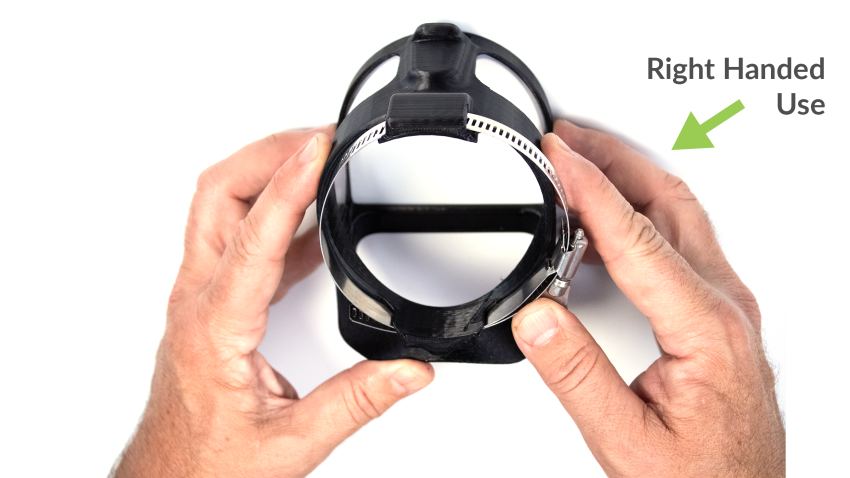
Next we’ll install the gear clamp onto the Spindle Body Mount.
- Parts required, 1x gear clamp, Spindle Body Mount.
- Thread the end of the gear clamp into the loop above the viewing window of the spindle body. If you are right handed, insert the end on the right side with the window facing away from you. If you are left-handed, insert the end on the left side.
While rotating the clamp, insert the end into the second loop. Insert the end into the back side of the clamp to engage the gears. Rotate the lever to tighten the clamp. At this point, have the clamp tightened till it’s slightly larger than the diameter of the Spindle mount. Finished mounting positions shown below.

Slide your 4″ dust hose onto the dust hose body over the gripper channerls. With the second gear clamp, tighten the clamp onto the body till snug. Don’t overtighten.
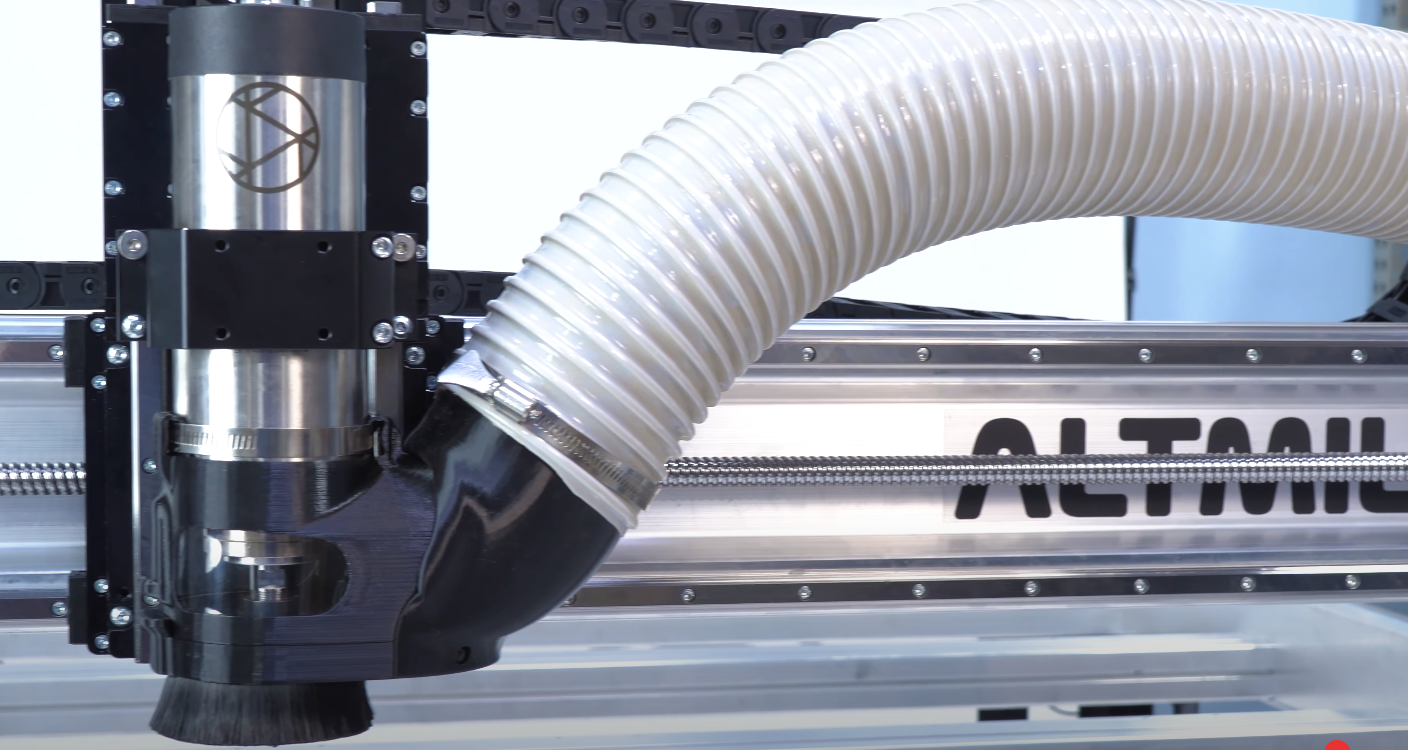
The assembled dust hose body mounts to the spindle body by two mechanisms detailed below. The first is the small lip on the dust hose body. Slide the lip inside the top of the spindle body and rotate slightly to sit.

Slide the hose mount (with the hose attached) onto the spindle mount, connecting the spindle mount at tab on the bristle holder – to remove, pull down on the tab

To assemble onto the machine, slide the spindle mount onto the spindle from the bottom, then move as needed so that the opening for the hose is in the direction of the dust collector, and the mount is at an ideal height. Tighten the hose clamp until just secured.
Slide the hose mount (with the hose attached) onto the spindle mount, connecting the spindle mount at tab on the bristle holder – to remove, pull down on the tab.
Feel free to adjust the dust shoe using the hose clamp. We recommend positioning it so that it faces along the Y-axis so it does not interfere with your cutting jobs.
You are now ready to make dust without dirtying your work surface!