
Drag chains and drag chain ends are packed inside the X-rail. Ensure to remove the drag chains first.
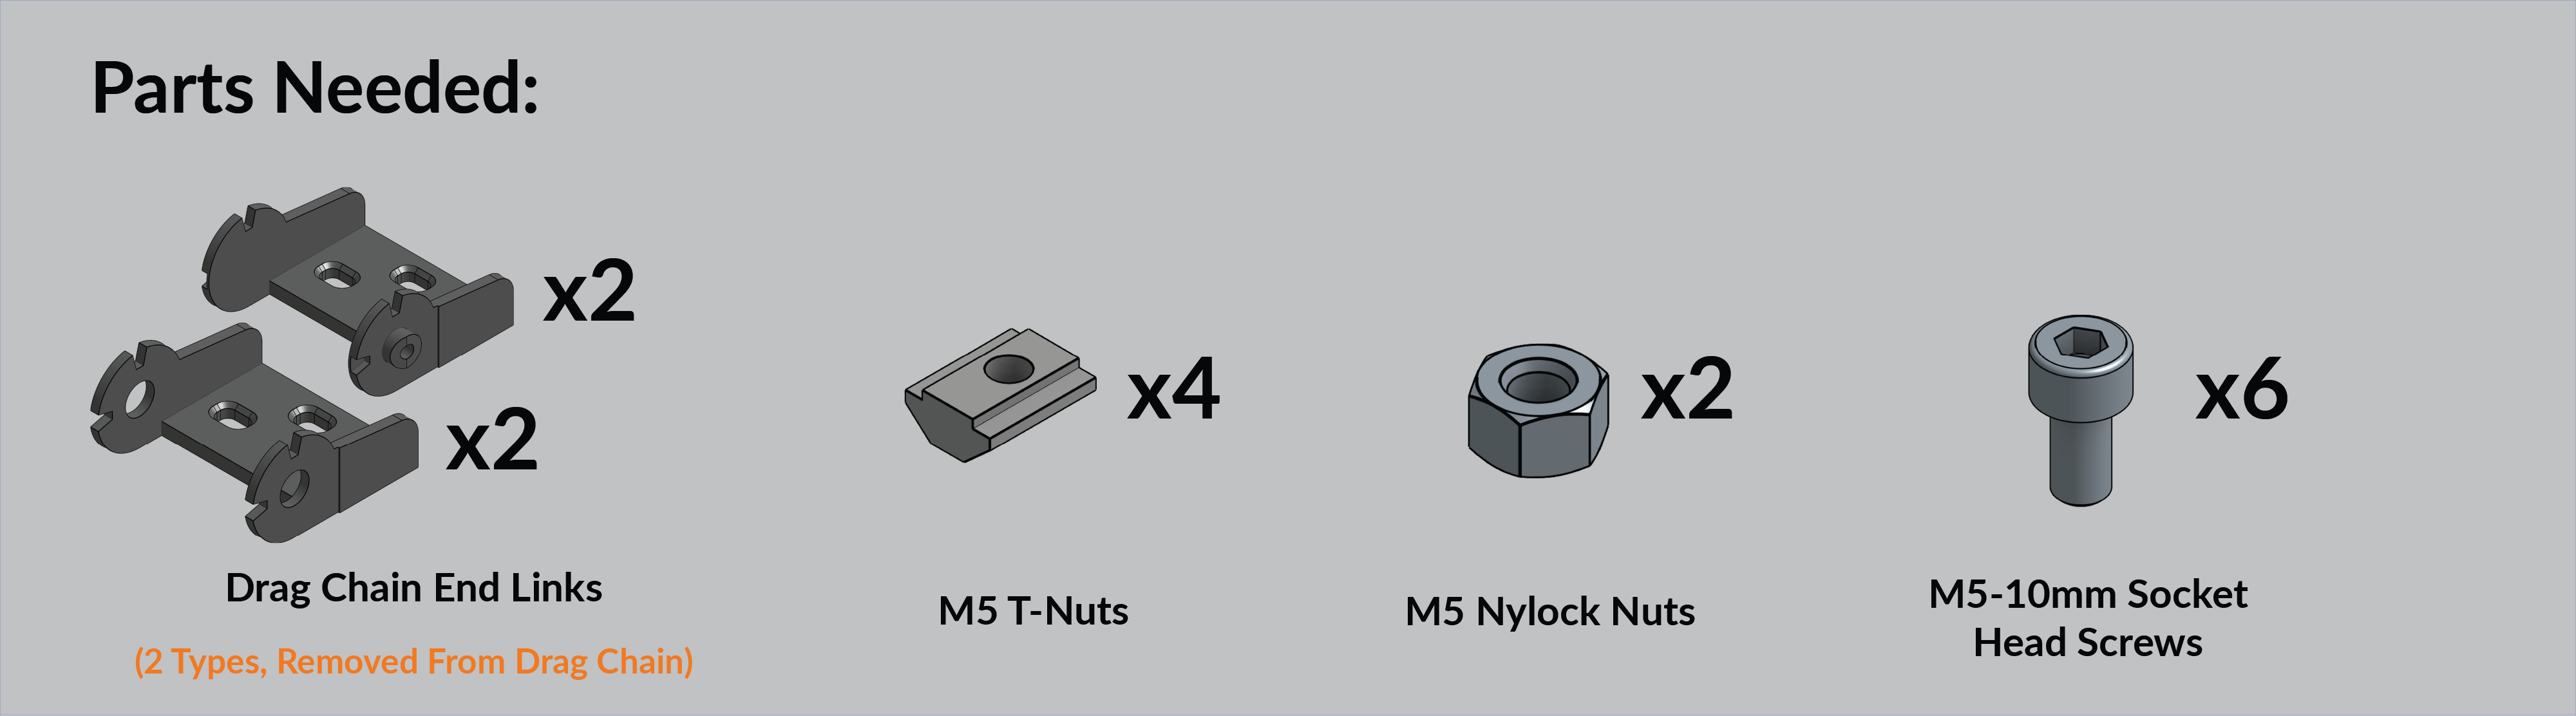
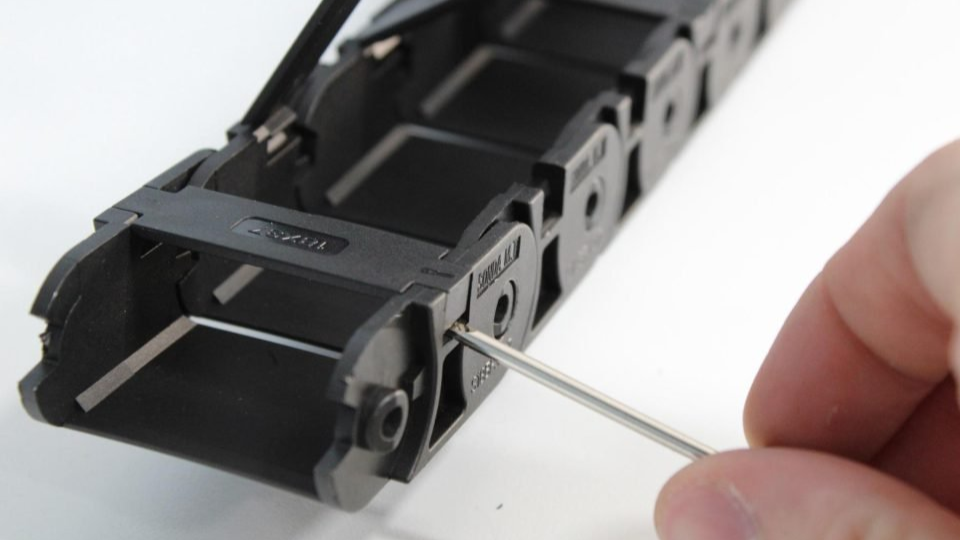
Remove the four (4) drag chain end links from the drag chains.
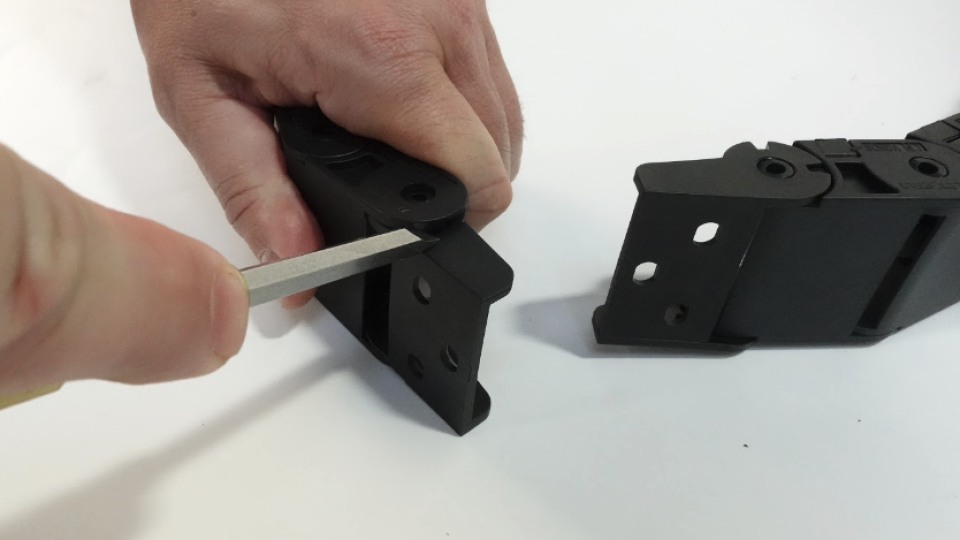
Removing end link with flathead screwdriver
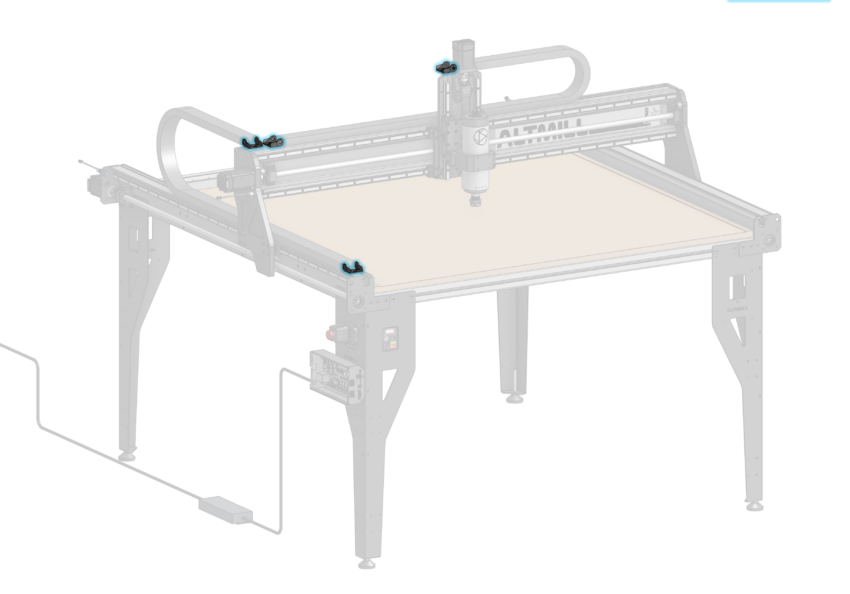
See the image below for locations of drag chain end links, to be attached on the machine.
Note: Drag chain end links are in pairs. You will notice one drag chain end link has a flange with holes and the other link has a flange with knobs. It is important you use one of each type for each axis’s drag chain.
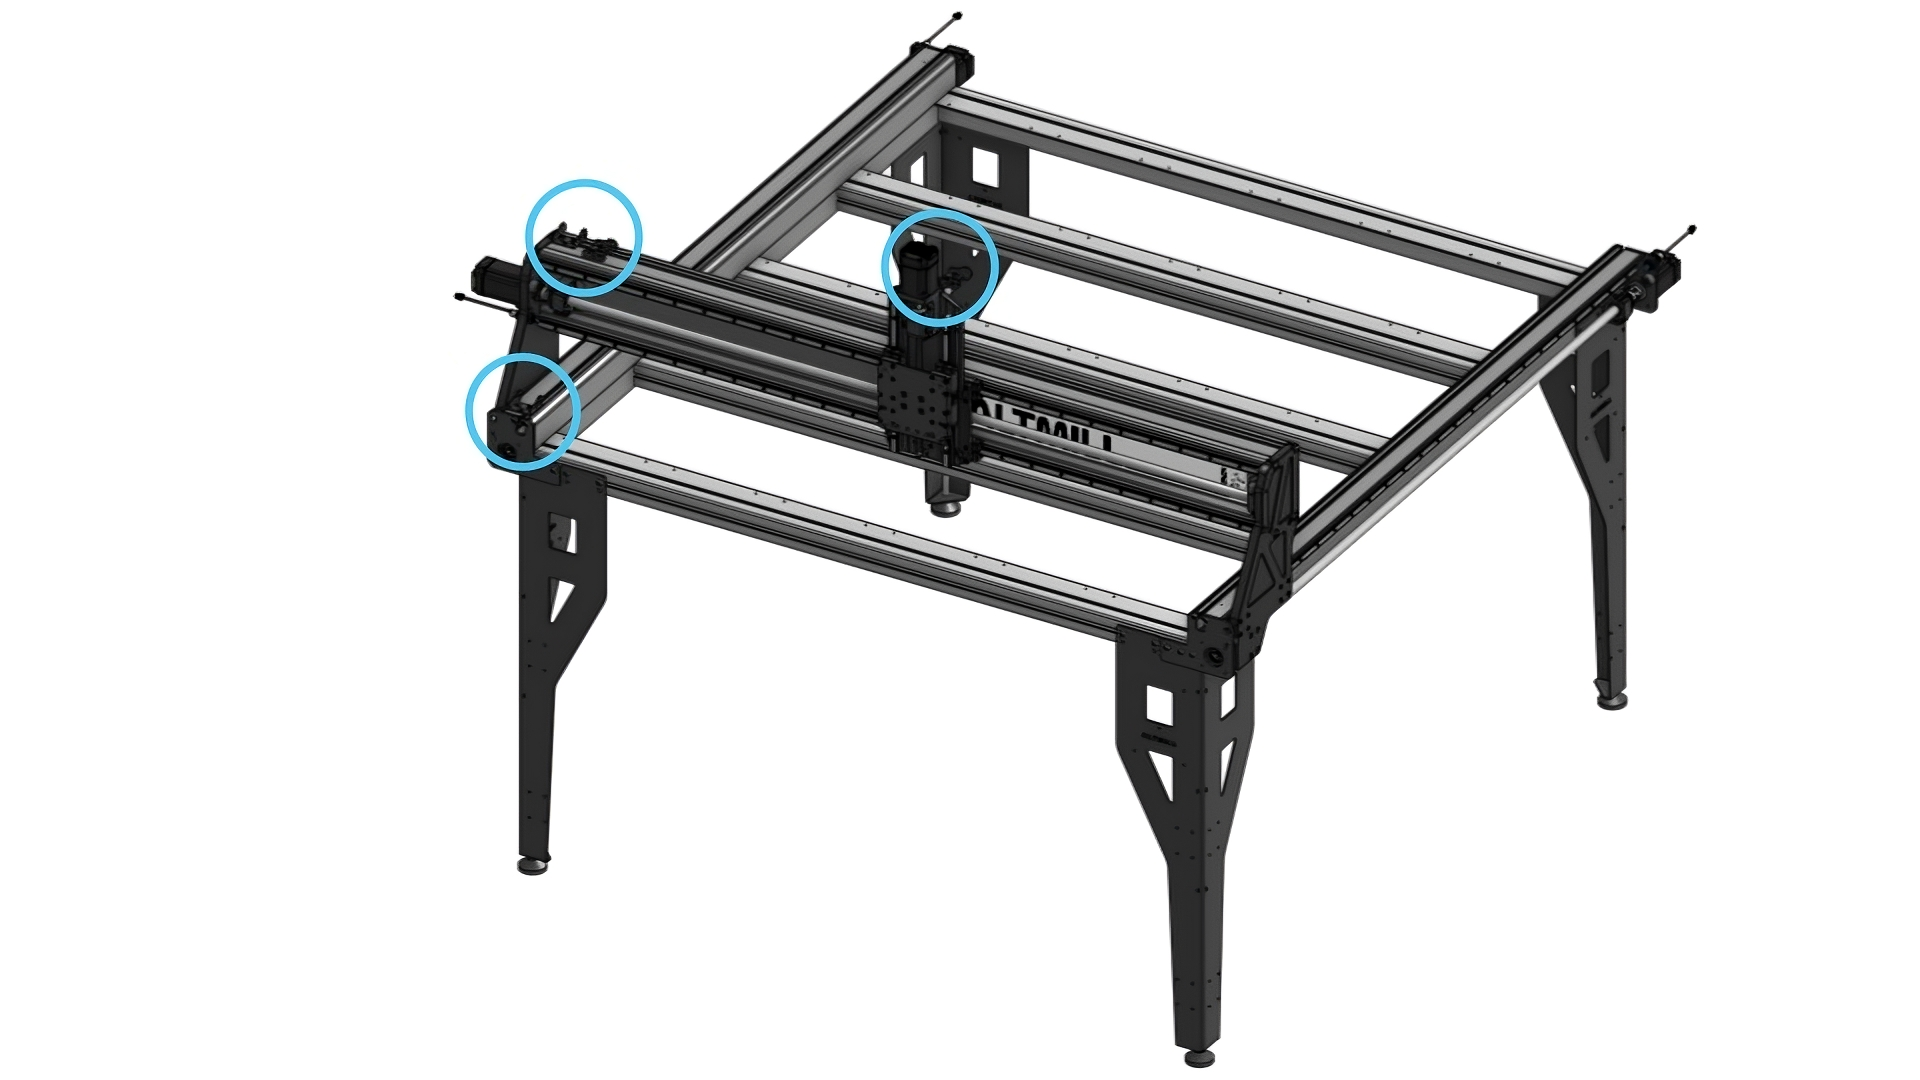
General location of drag chain ends on the AltMill
Insert three (3) M5 T-nuts into the T-slot on the left side of the X-axis rail via the opening in the Y-axis gantry plate.
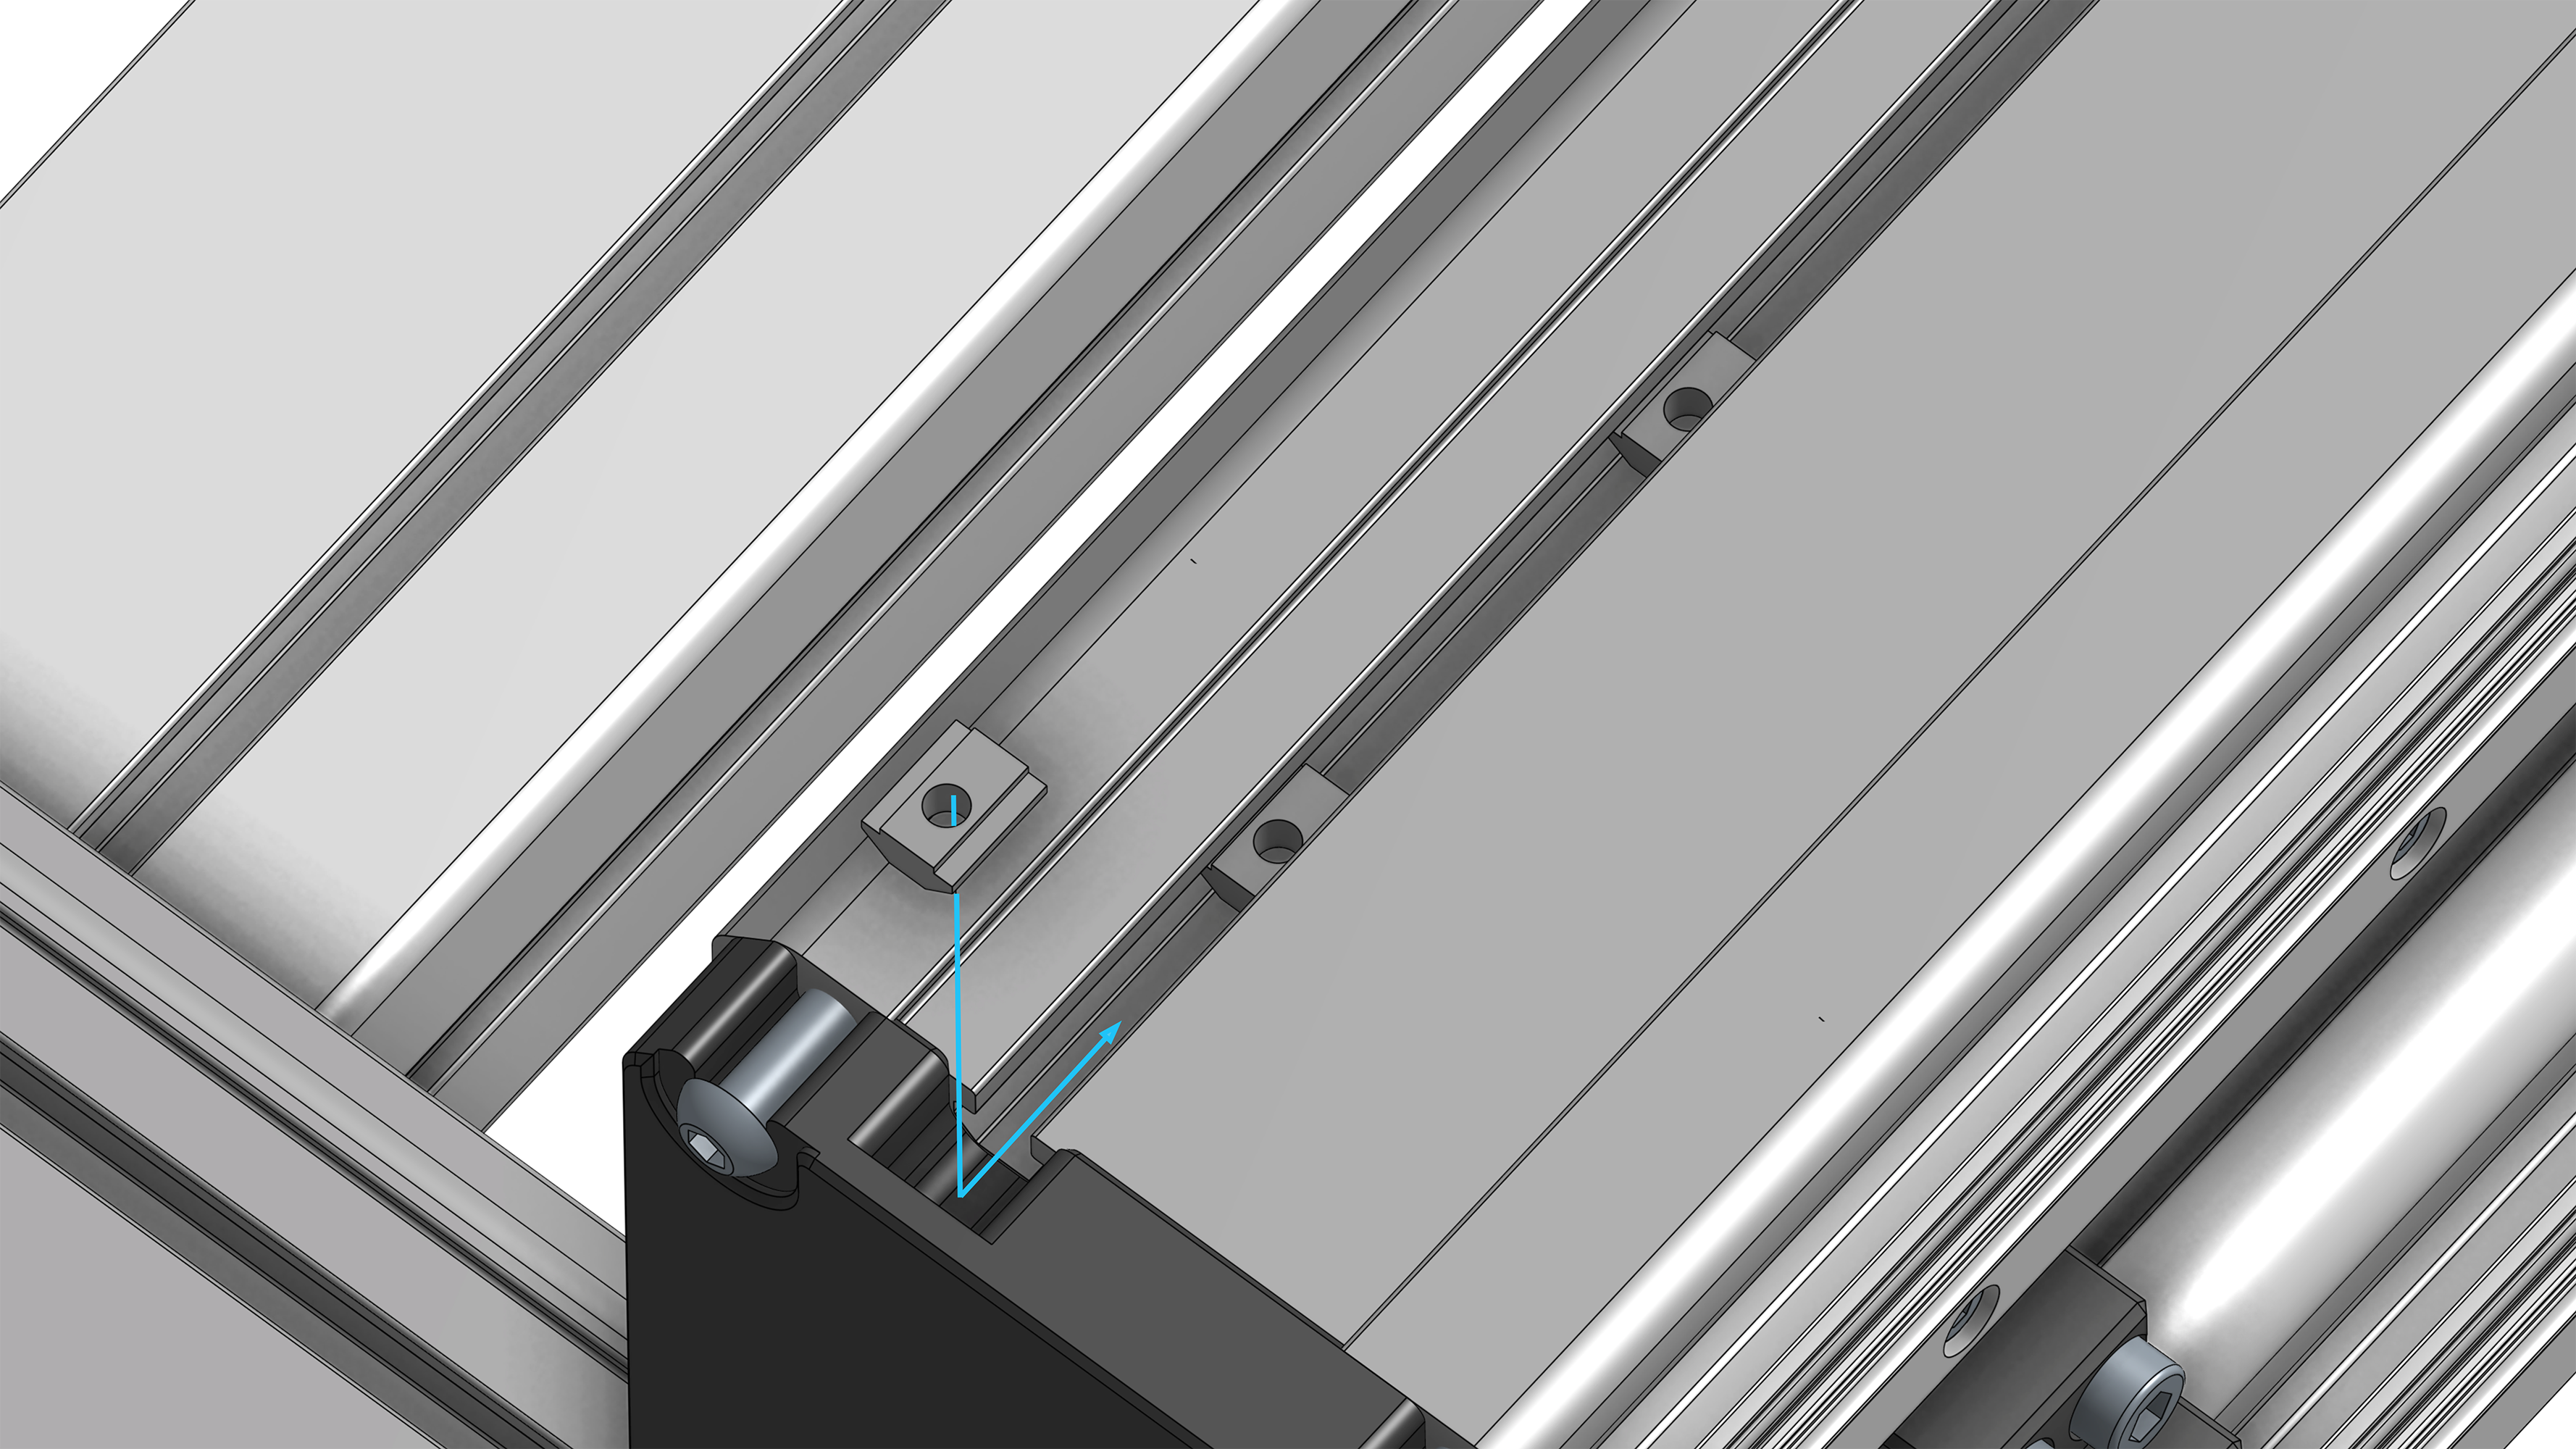
T-nuts in X-axis extrusion
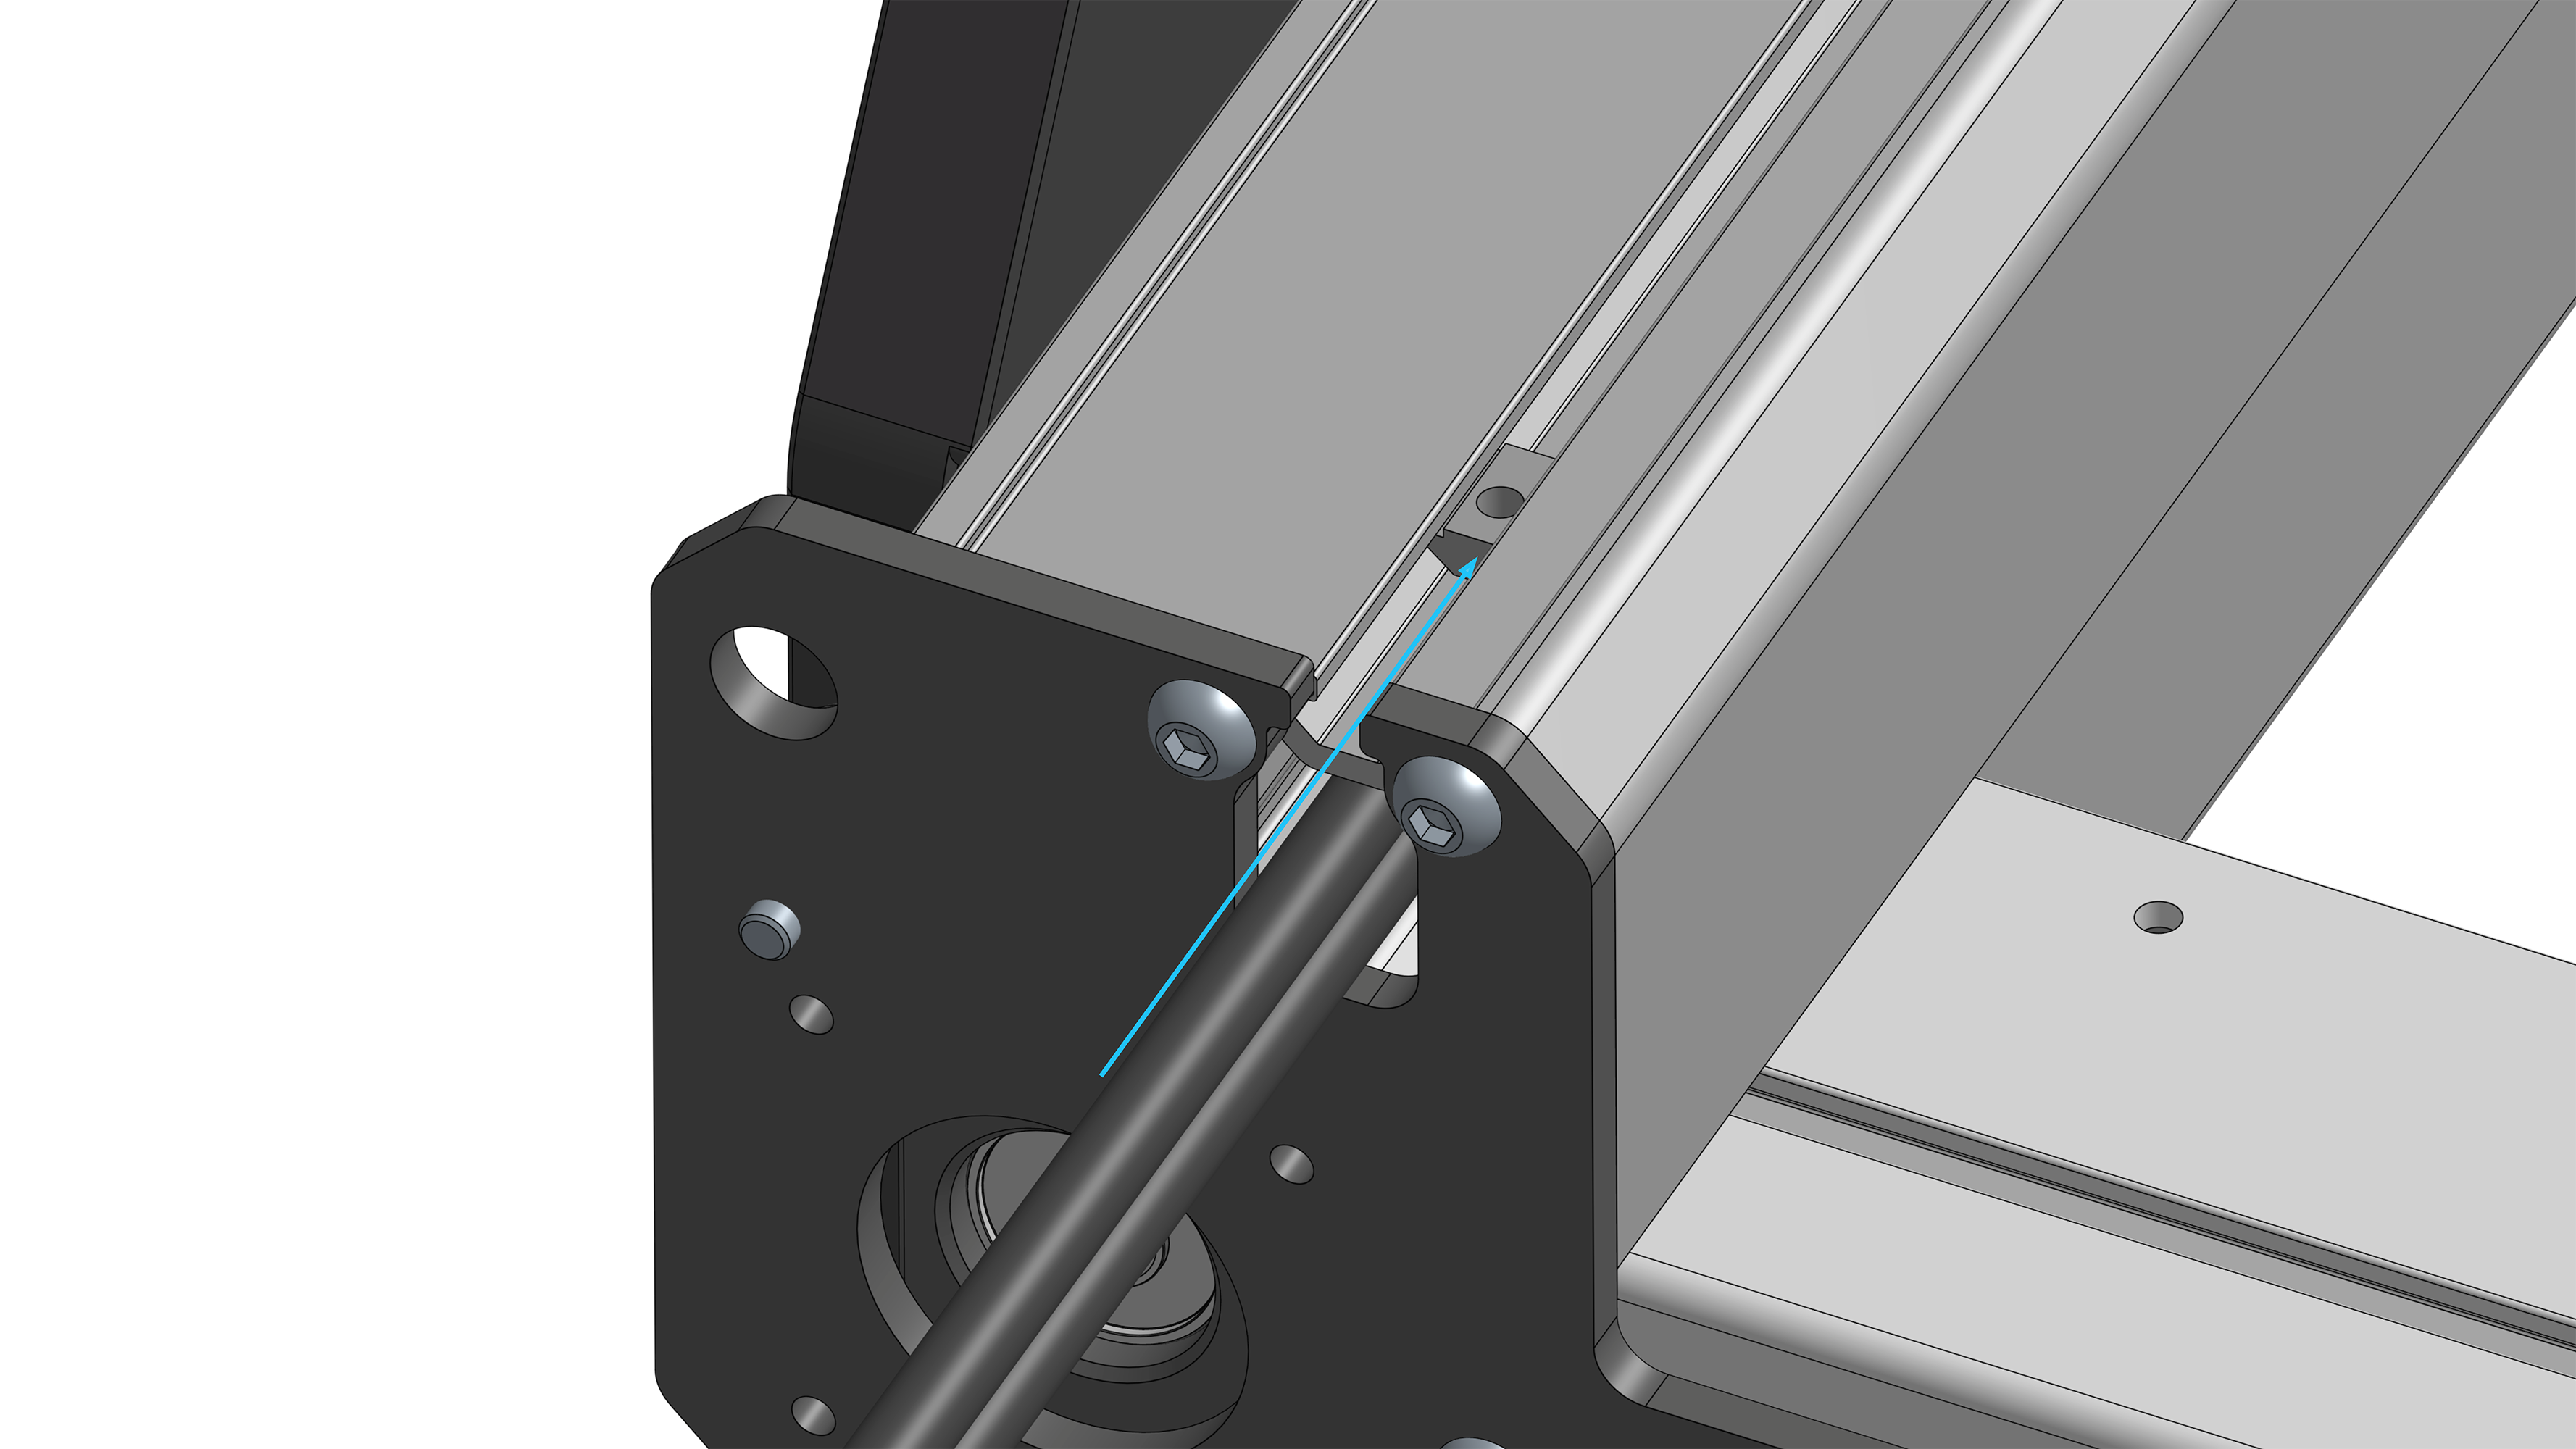
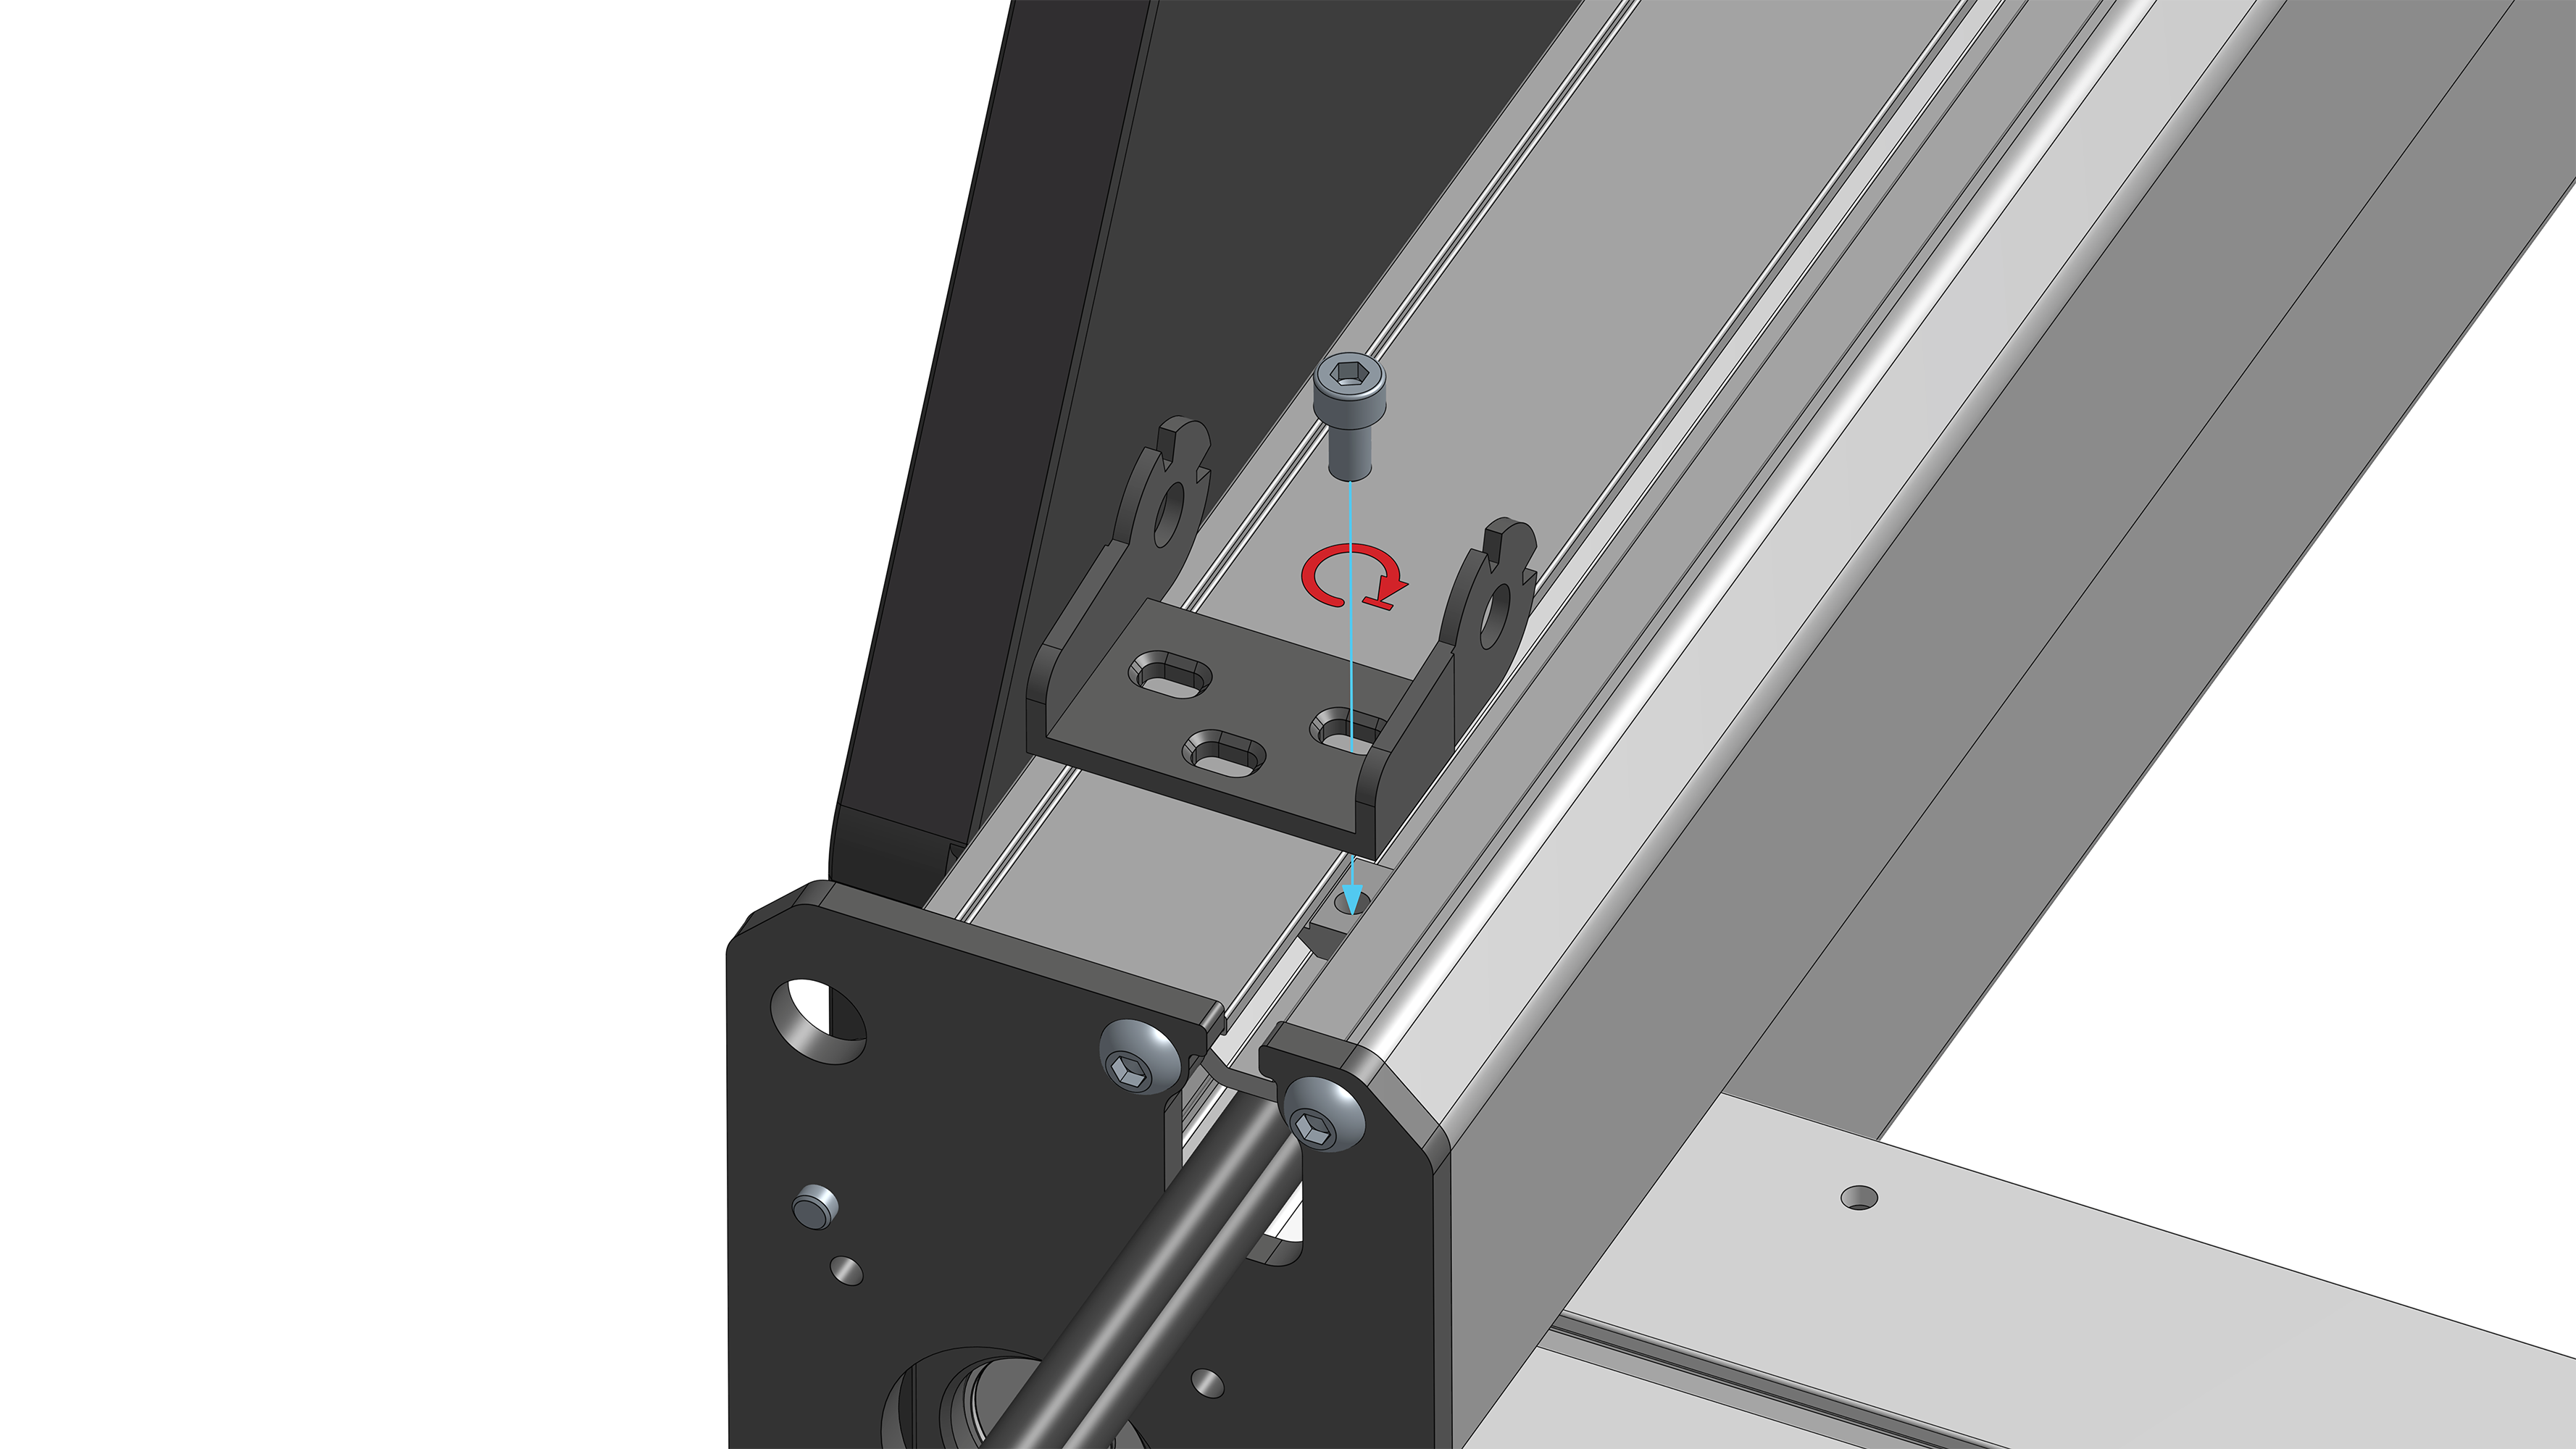
Install two (2) drag chain end links using three (3) M5-10mm socket head screws and the three (3) M5 T-nuts pre-installed. Do not overtighten – these ones do not sit completely flat and may break if there is too much tension.
The X-axis drag chain end link will utilize one (1) T-nut located furthest along the length of the X-axis rail. Insert the screw into the left side slot in the drag chain end link, so the link fits into the shallow recessed valley on the top of the rail.
The Y-axis drag chain end link will utilize the two (2) T-nuts located nearest to the edge of the X-axis rail. Refer to the below image to note the orientation of each drag chain end link.
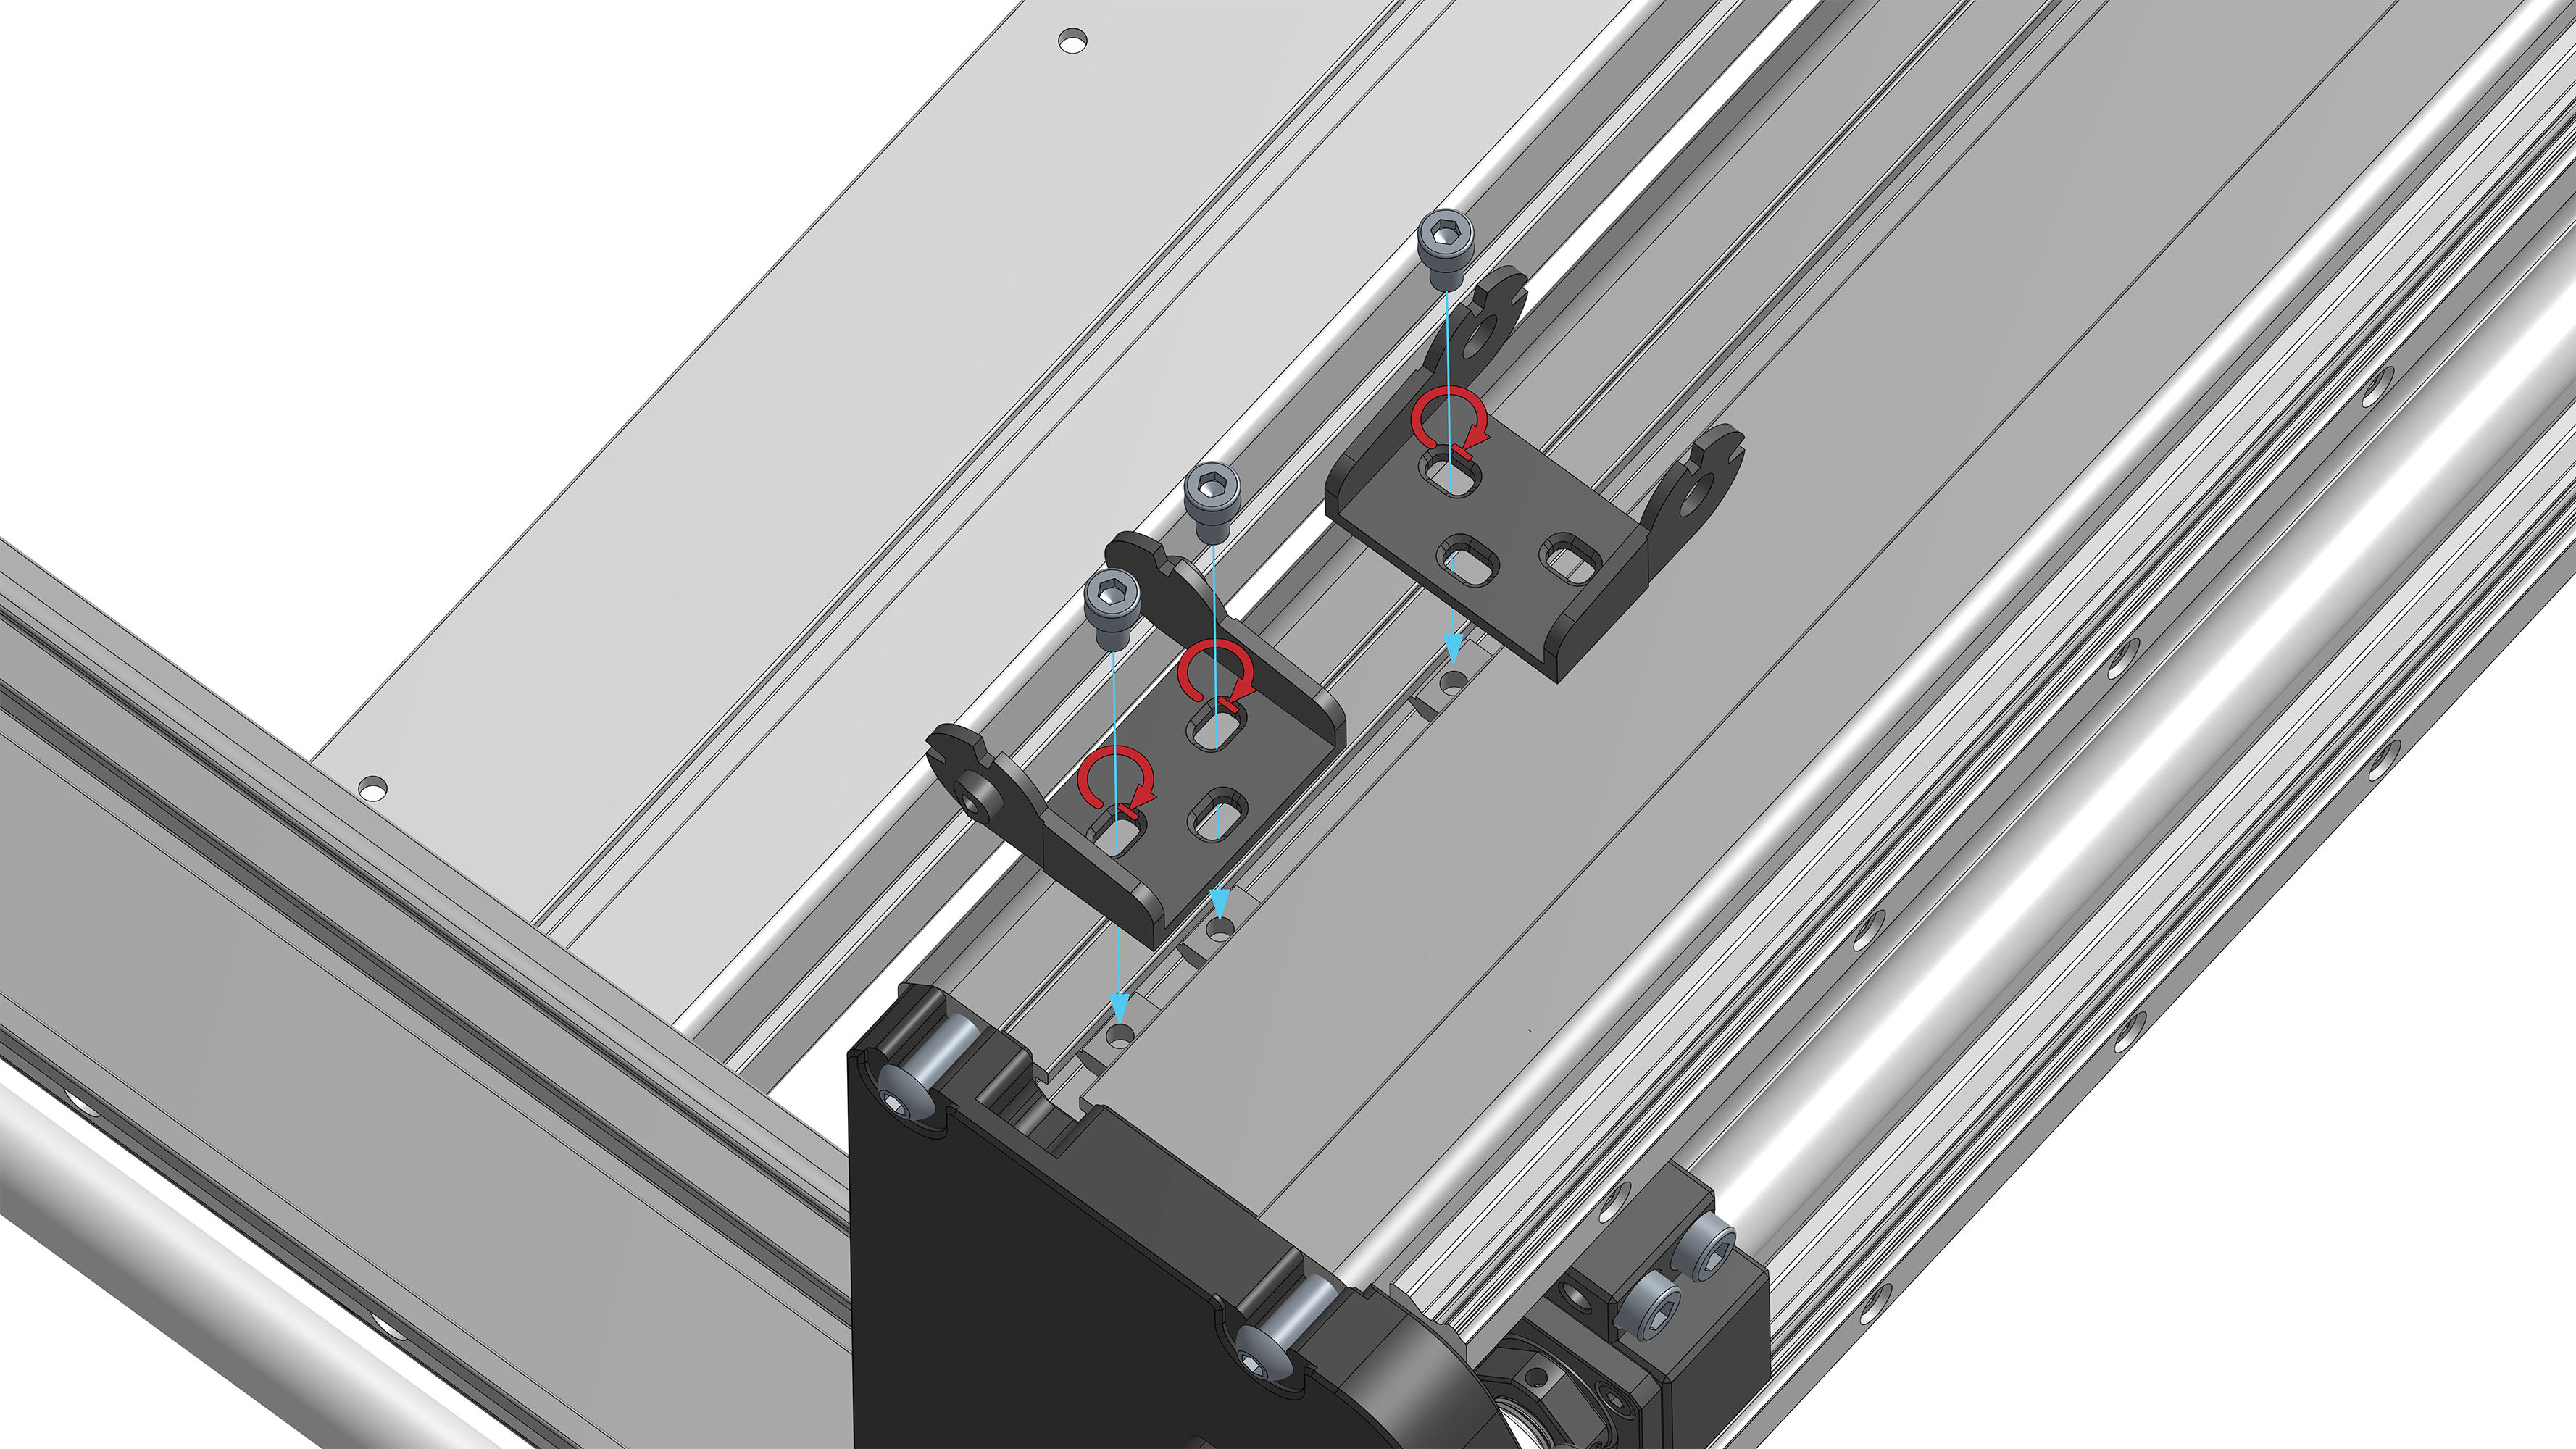
Orientation of drag chain ends links on X-axis rail
Insert one (1) M5 T-nut into the front of the left Y-axis rail T-slot.
T-nut in left Y-axis rail
Install one (1) Drag chain end link at the front of the Y-axis rail using one (1) M5-10mm socket head screw and the one (1) pre-installed T-nut. Insert the screw into the right side slot in the drag chain end link so the link fits into the shallow recessed valley on the top of the rail.
Note: Remember that each axis will have a pair of drag chain end links, one with holes and the other with knobs in the flanges.
Securely fastening drag chain end on left Y rail
Install a drag chain end link on the Z-axis drag chain bracket, using two M5-10mm socket head screws and M5 nylock nuts. Orient the link such that the two flanges are pointed toward the right side of the machine.
Note: Remember that each axis will have a pair of drag chain end links, one with holes and the other with knobs in the flanges.
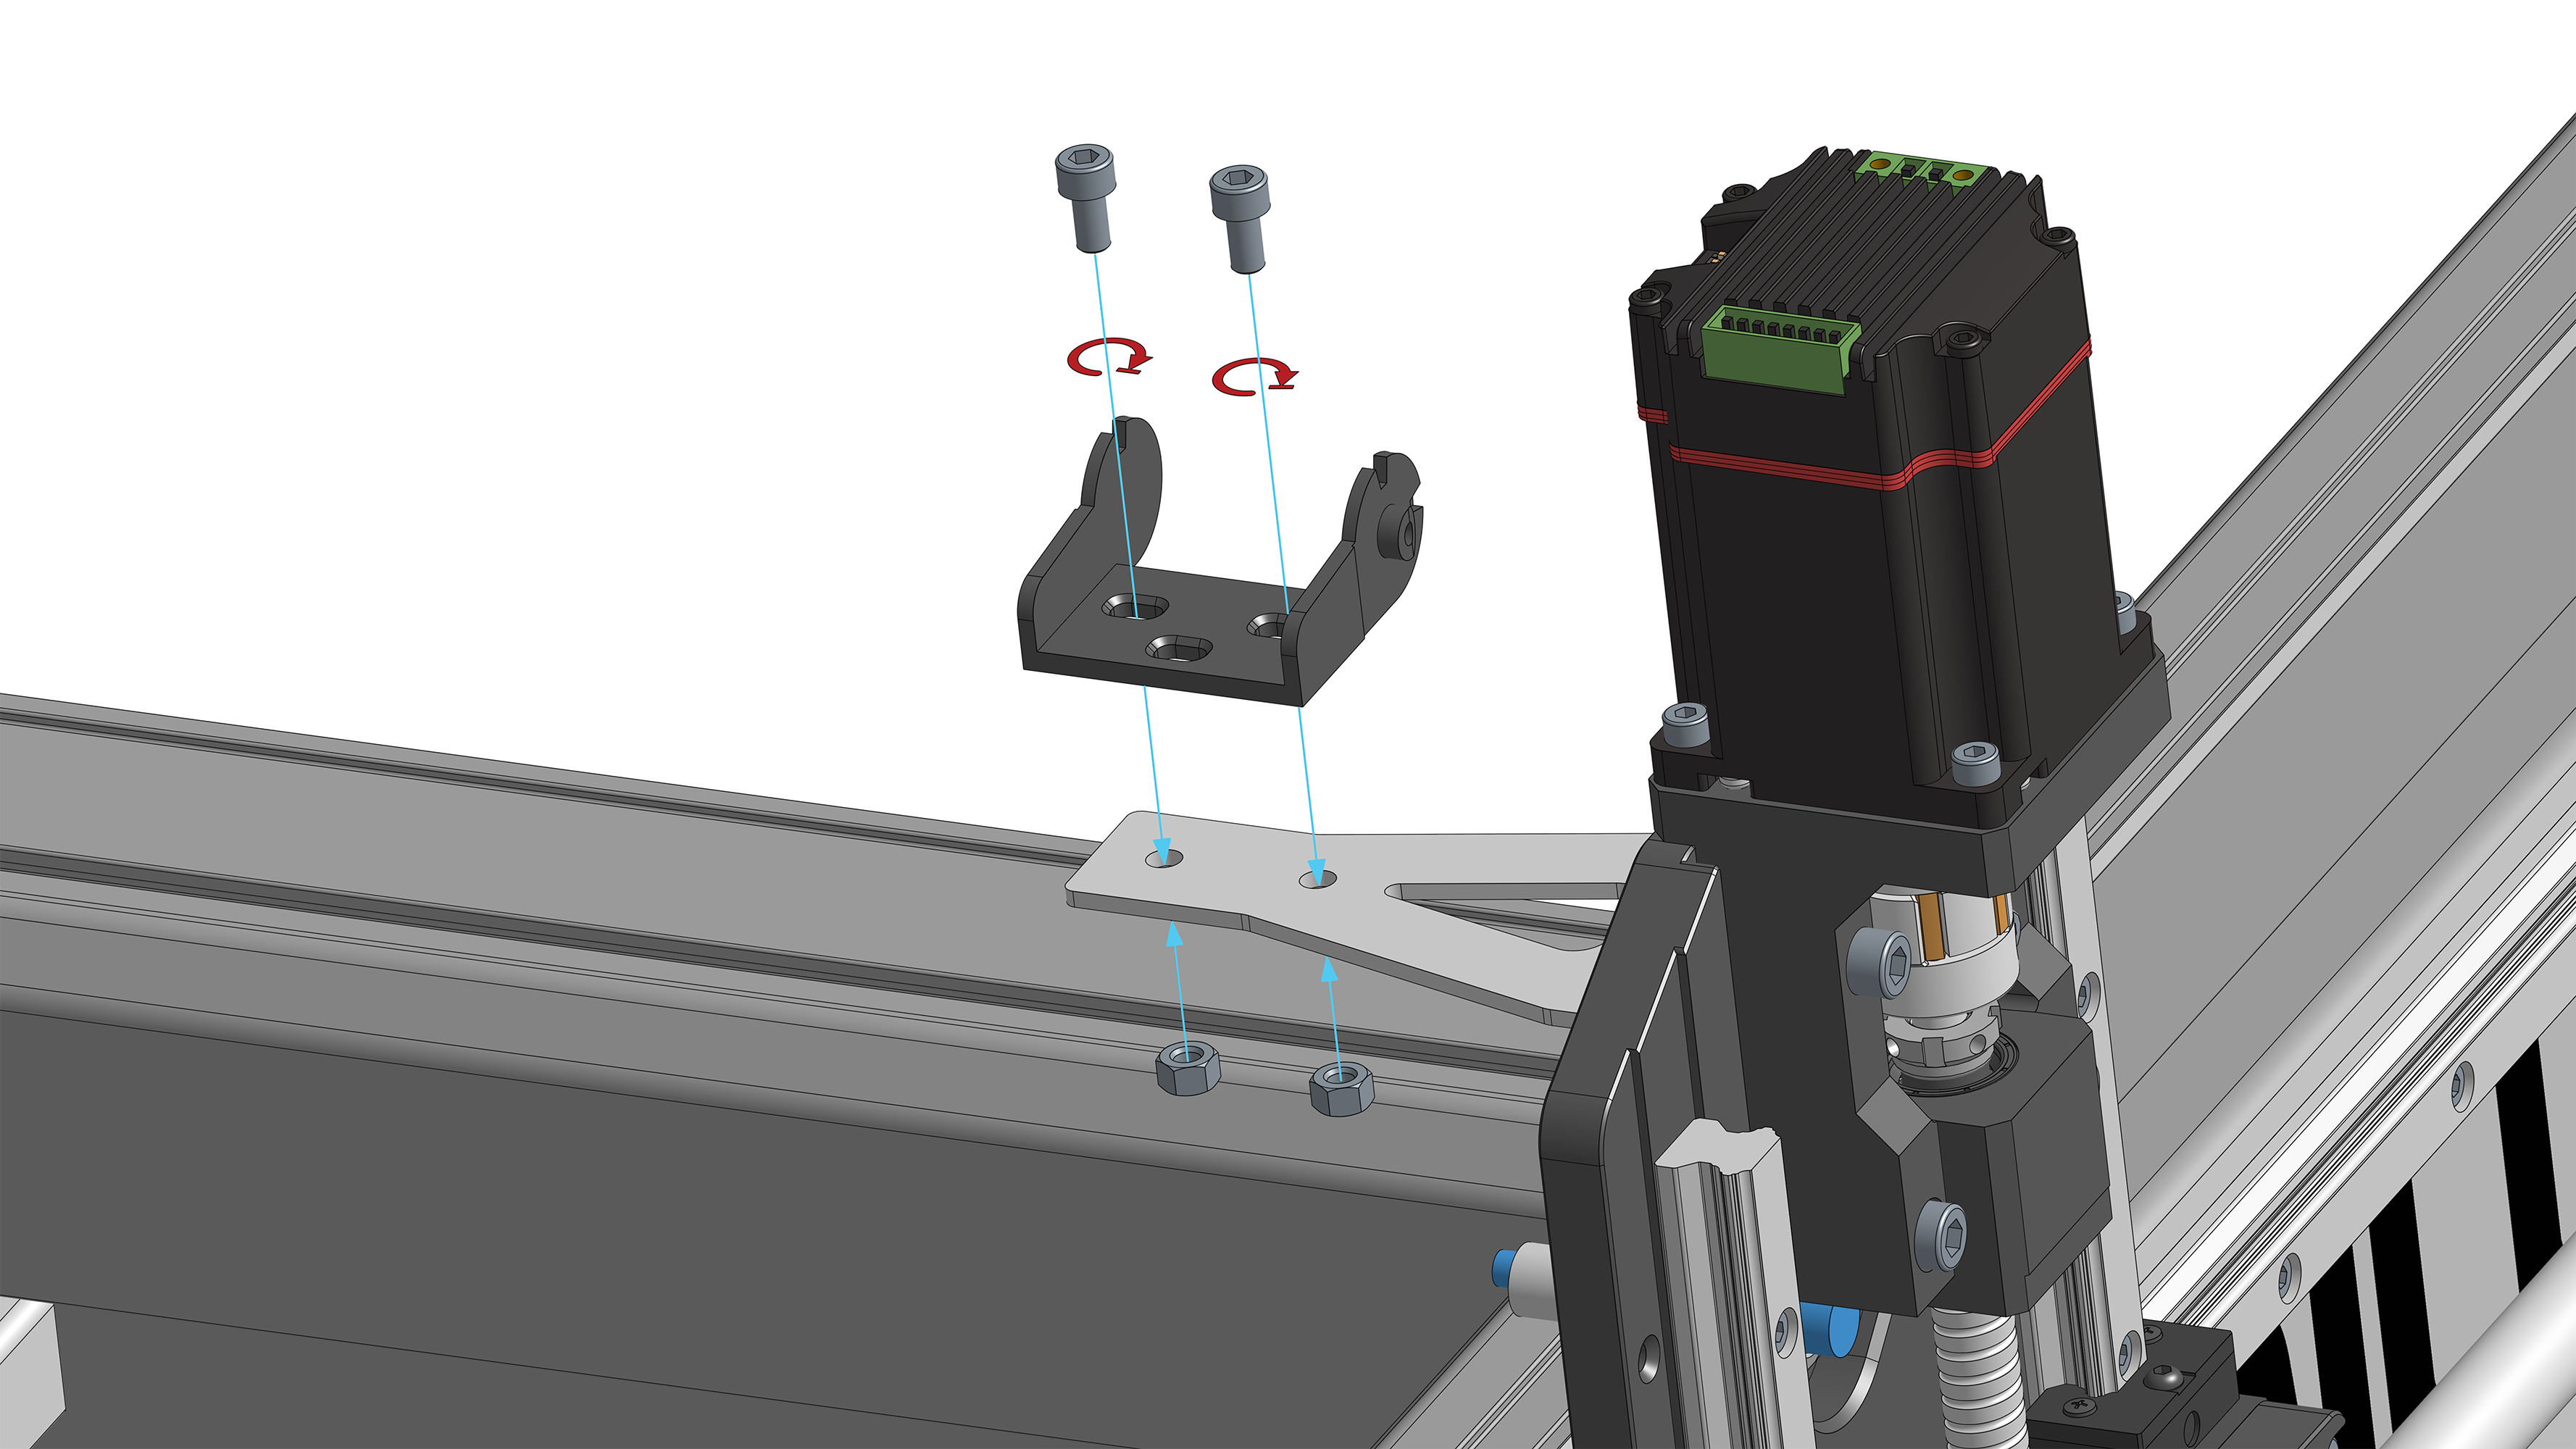
Securely installing drag chain end on bracket at the Z-axis
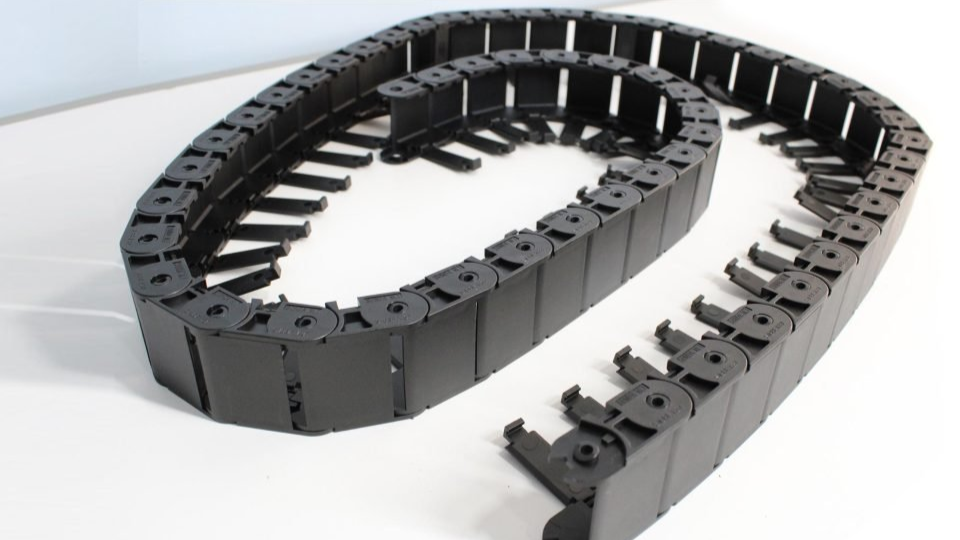
For the 4×4 AltMil the length of the Drag Chains are both 51 links long, for both the Y-axis and X-axis.
For the 2×4 AltMill, the length of the Drag Chains are 36 links long for the Y-axis and 51 links long for the X-axis.
Using a small flat head screwdriver, unclip the top retaining clips of the drag chain to allow the wire harnesses to be installed into the drag chain.
Leave the prepared drag chains to the side at this point as they will be used later on.
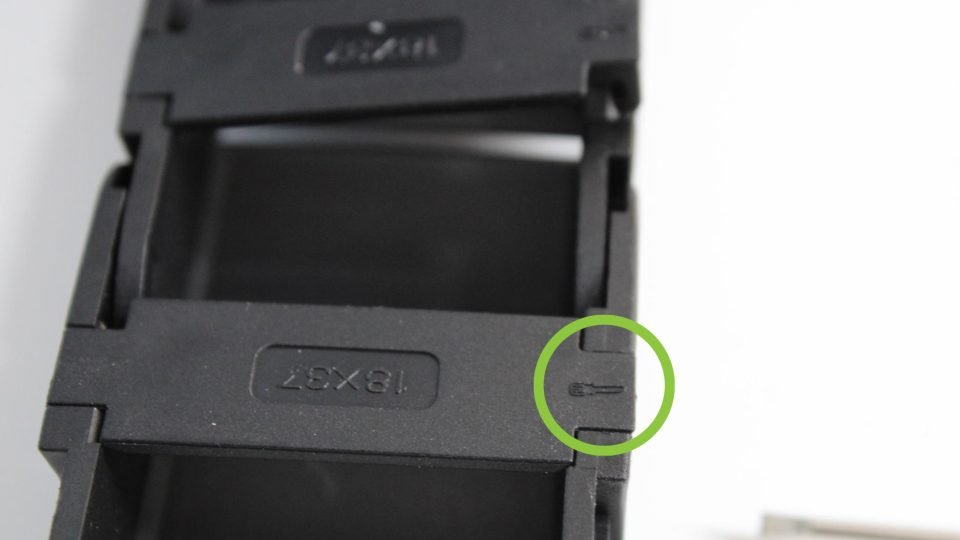
Opening drag chain clips, please use the side circled in green to open