
Power On Procedure
These steps must be followed in this order to successfully turn on the driver.
1. Ensure the power supply is getting power and the interlock connector is secure.

Power supply indicator
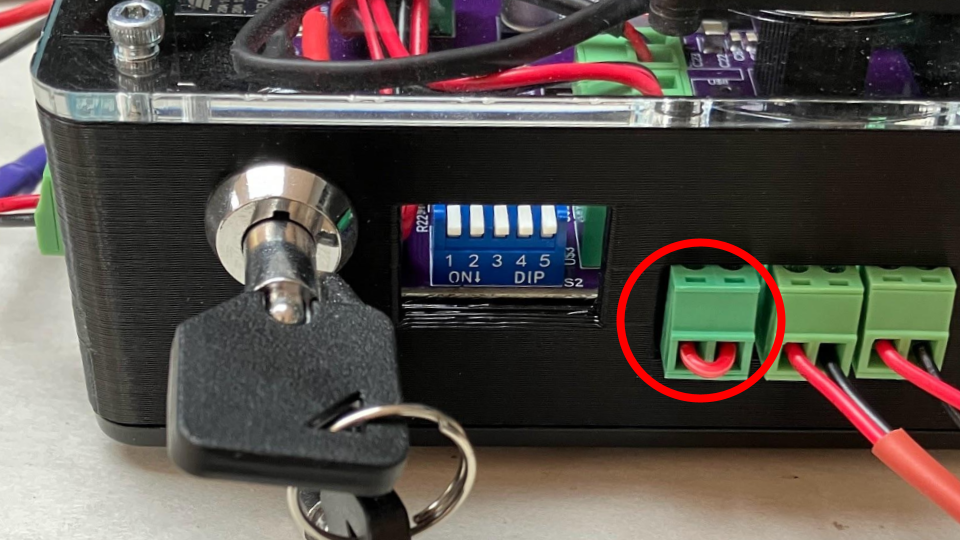
Interlock connector on
2. Insert the driver key into the key switch, then push and turn the key 90 degrees clockwise
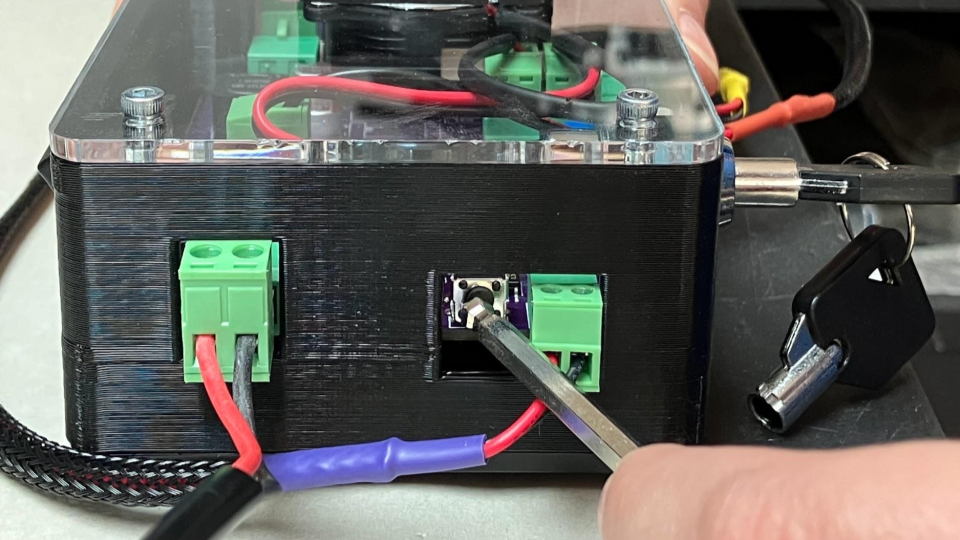
3. Press the power reset button, you can use an Allen key if it is difficult to press
4. Flip the power switch ON (“1” position)
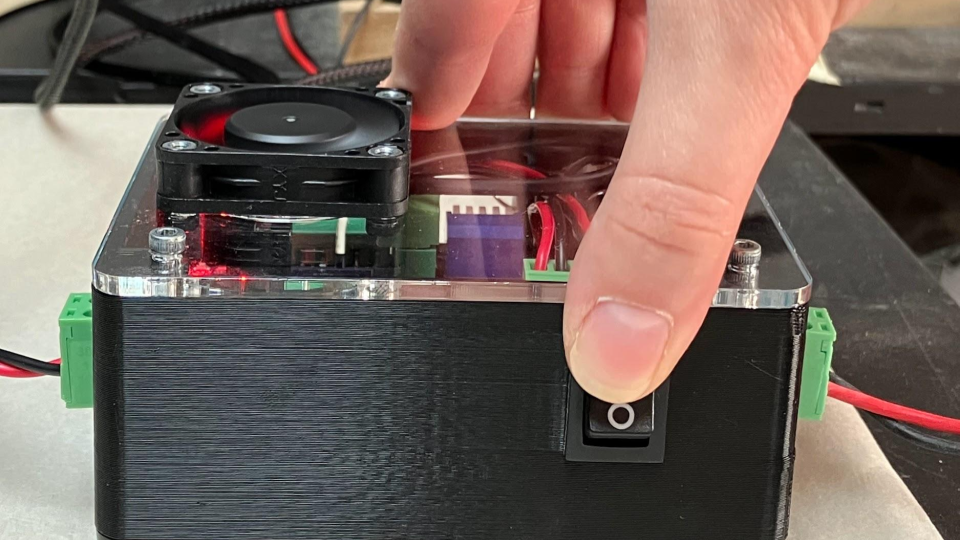
You should hear a fan sound, with 1 red LED lighting up in your driver. If none of this happens, there may be a wiring mistake.
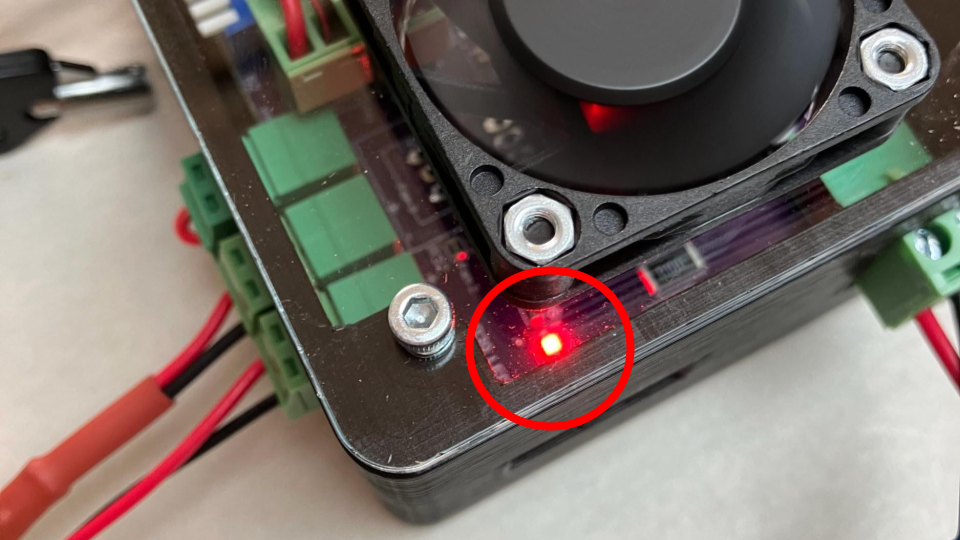
Top view of driver power LED on
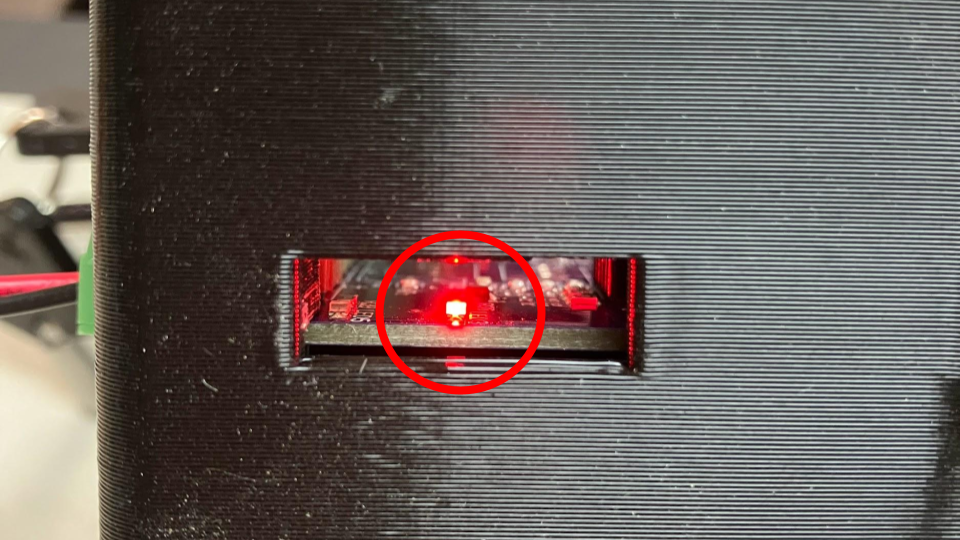
Side view of driver power LED on
The following information will focus on specific buttons and inputs and how to use them.
Interlock
If you are looking to install a different switch, you need to make sure it is a normally closed (NC) switch in order to enable driver functionality. Simply replace the interlock connector with your switch of choice.
Power Reset Button
Usually the power reset button does not need to be pressed during normal startup. If your driver is already enabled, pushing the power reset will do nothing. However, the button will need to be pressed if:
- If you’re turning your driver on for the first time
- If the interlock was opened (the connector was removed)
- If the key was not in the enabled position in the key switch
- If you removed the power supply
- If your power source was cut (if the driver was turned off in any way other than through the power switch)
- Or any combination of the above situations
If those situations above happen:
- Ensure the power supply is getting power and the interlock connector is secured
- Turn the power switch OFF
- Insert the driver key into the key switch, then push and turn the key 90 degrees clockwise
- Press the power reset button
- Flip the power switch ON
LED indicators
There are two LED indicators to know. The first is the driver power LED, which will be on when you successfully turn on your driver.
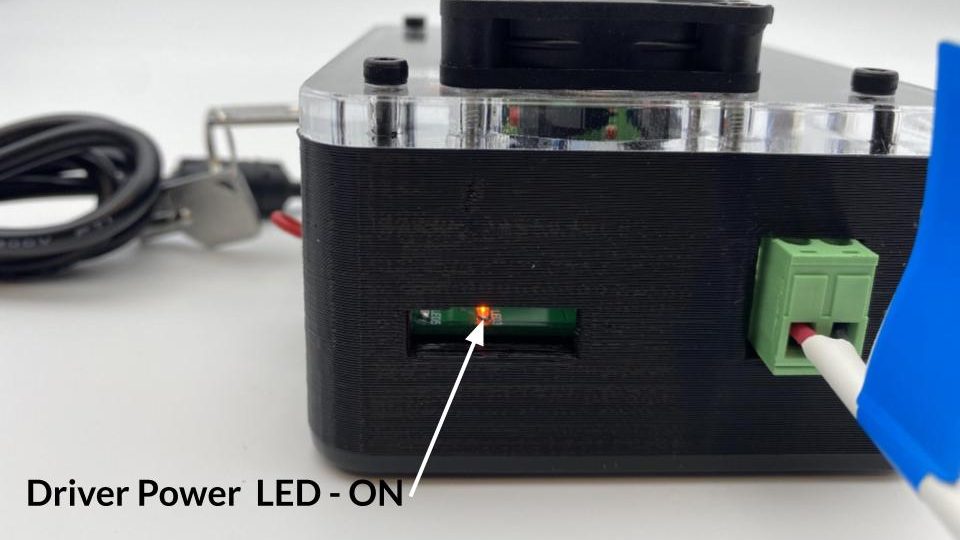
Driver power LED on
The second LED indicator is for laser emission. It will turn on when your laser output is enabled (through gSender) and when the driver power LED is on.
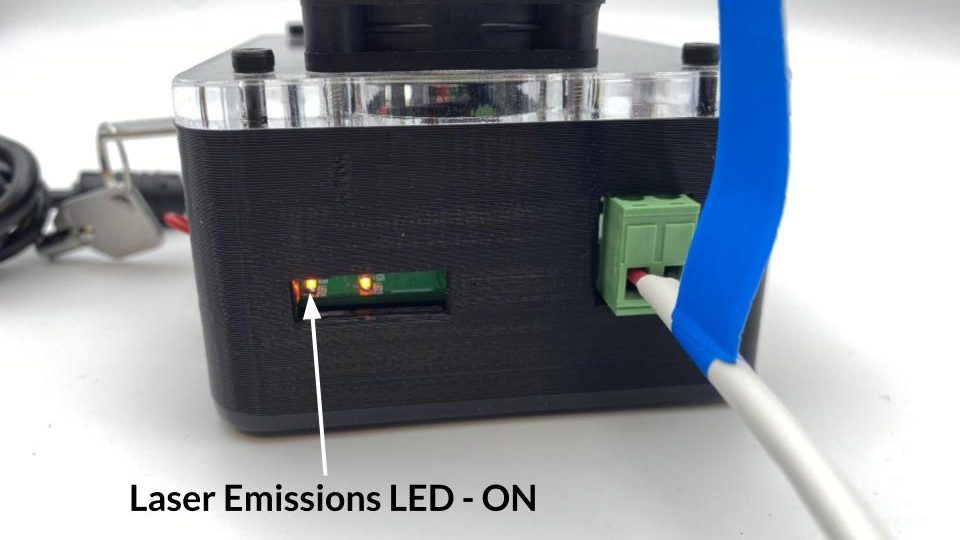
Laser emissions and driver power LEDs on
Because the laser can be turned on at different intensities and off at different frequencies, this laser emissions LED will mimic the signal that your laser is receiving, relative to the LED’s max intensity.