
Below are potential issues you may run into, which could be resolved through the instructions provided.
Laser driver is not turning on
1. First check that the power supply is plugged into power. A faulty wall outlet, power bar or extension cable could also impact your issue.
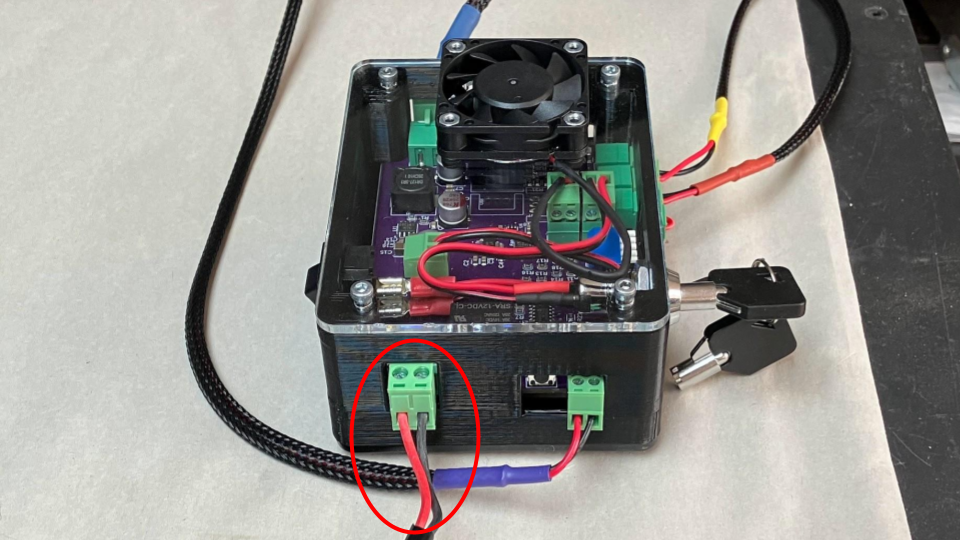
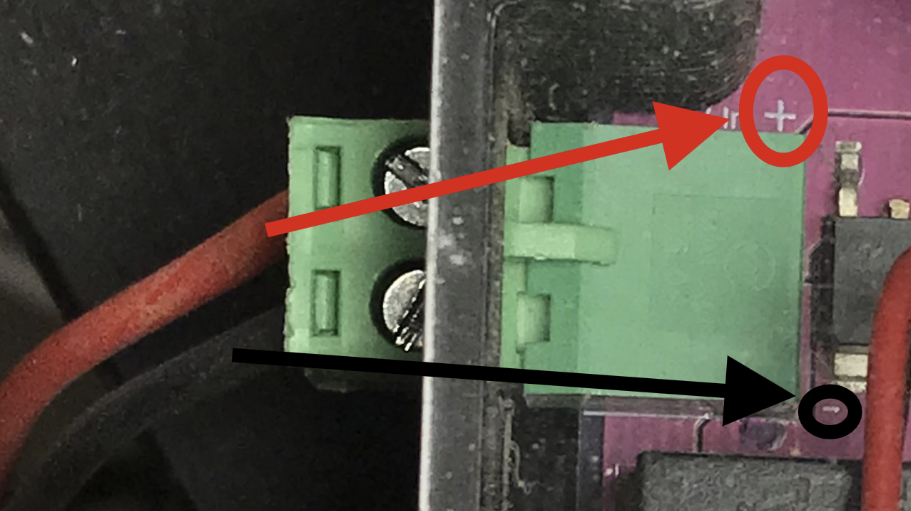
2. Ensure the wire connection from the power supply to the driver is secured, and matches the polarity as shown in the photo below.
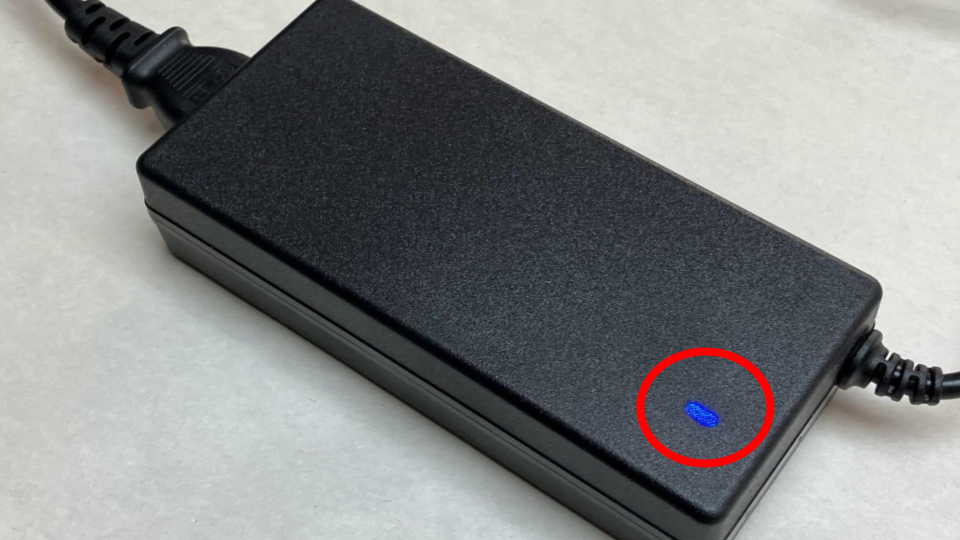
3. Verify that the single LED on the power supply is ON, it should be a green or blue light. If this is OFF then there is a problem with the power supply receiving power.
4. Make sure you are starting up the driver in the correct order:
i. Ensure the interlock connector is secured
ii. Insert the driver key into the key switch, then push and turn the key 90 degrees clockwise
iii. Press the power reset button
iv. Flip the power switch on (to “1” position)
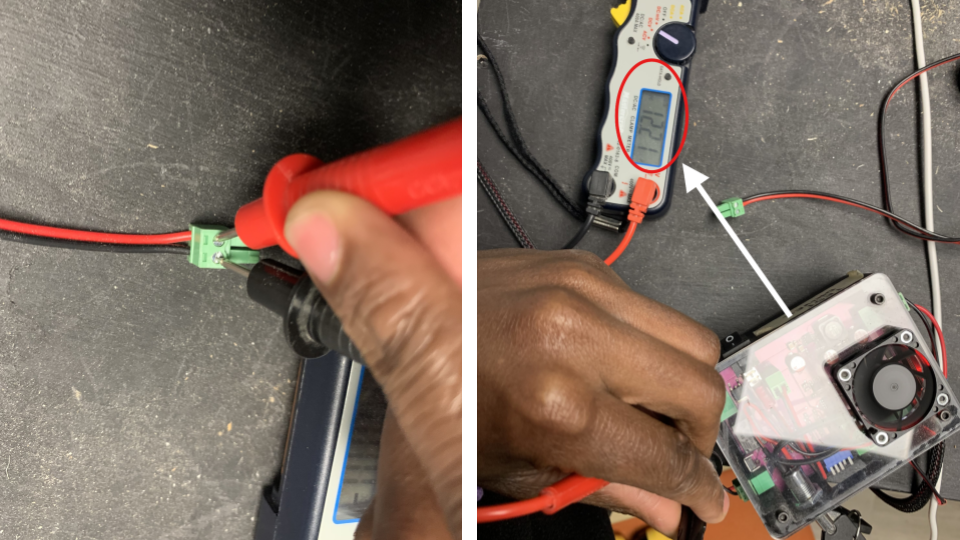
5. Using a voltmeter or a multimeter, measure the voltage from power supply to driver. Warning: Set your device to DC voltage mode before measuring. If the multimeter is in current mode, the LaserBeam Driver will feed the current back into the driver and damage it. On the power supply male connector, use the red probe for the red wire and the black probe for the black wire. The reading should be positive, and be approximately 12V.
Laser driver is on, but unable to fire
This should also mean that the driver power LED is ON but when you press “Laser On” on gSender, the emissions LED remains OFF.
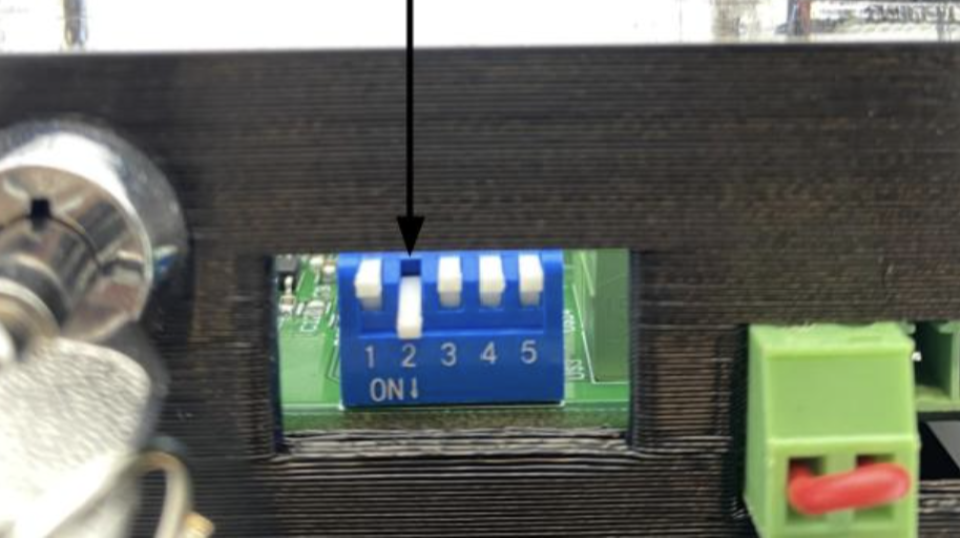
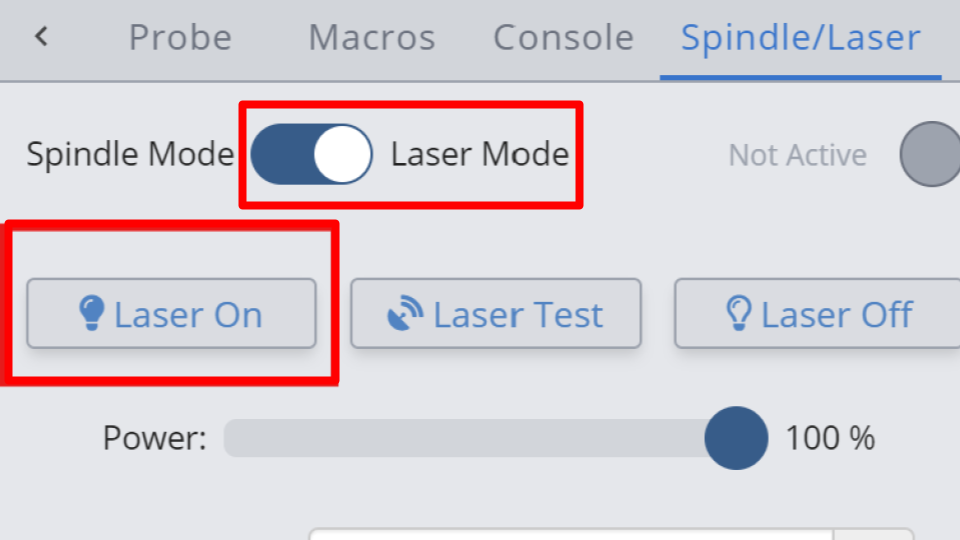
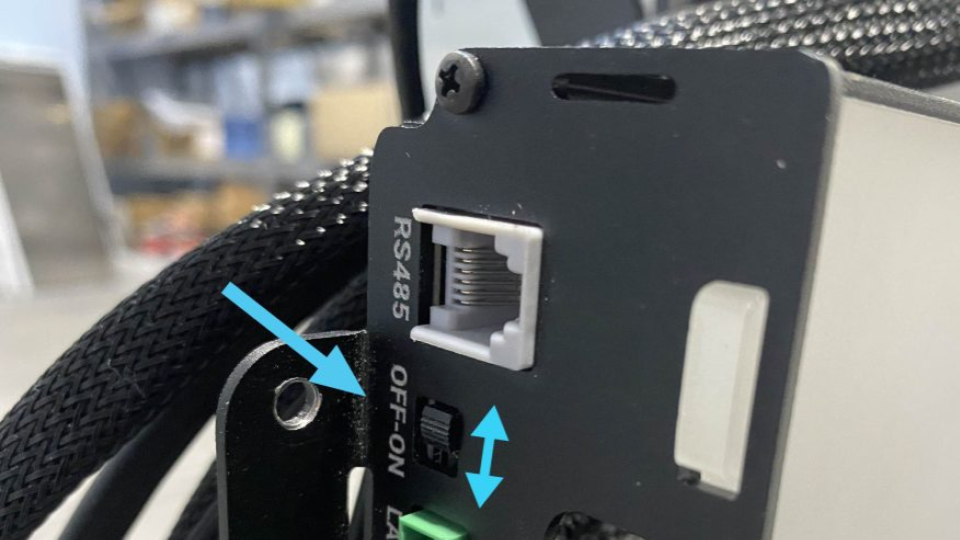
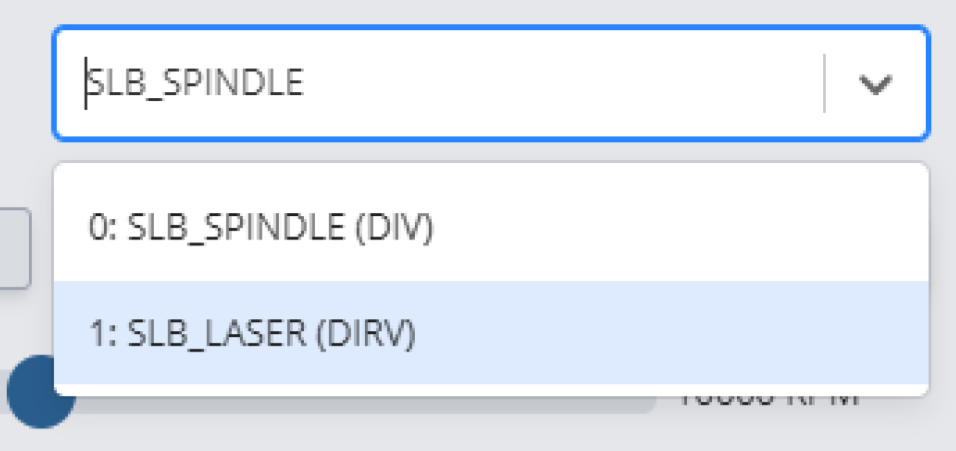
1. Make sure that only a singular DIP switch is down (any one of them) and that the SLB_LASER is selected on gSender and is in “Laser Mode.”
2. Turn OFF the laser driver and check that the lens is not damaged in any way. Any sort of imperfection could prevent the laser from firing, which could include cracks and melting within the glass.
Laser is unable to fire at full power
1. High speeds and accelerations could cause the laser to mark incompletely, which makes it look like it is unable to fire at full power. This is especially important if you have the AltMill, because the SLB-EXT default settings are much higher. We recommend the following firmware settings:
$110 = 4000
$111 = 4000
$120 = 750
$121 = 750
2. A weak laser could be due to the controller’s inability to provide 4-5V through its PWM signal output.
For the Longboard try plugging your controller into another USB port on your computer, or using a different computer altogether, since the Longboard receives power through the USB connection.
For any controller, we can measure the PWM voltage to verify if sufficient voltage is being outputted.
Wear your safety glasses before proceeding!
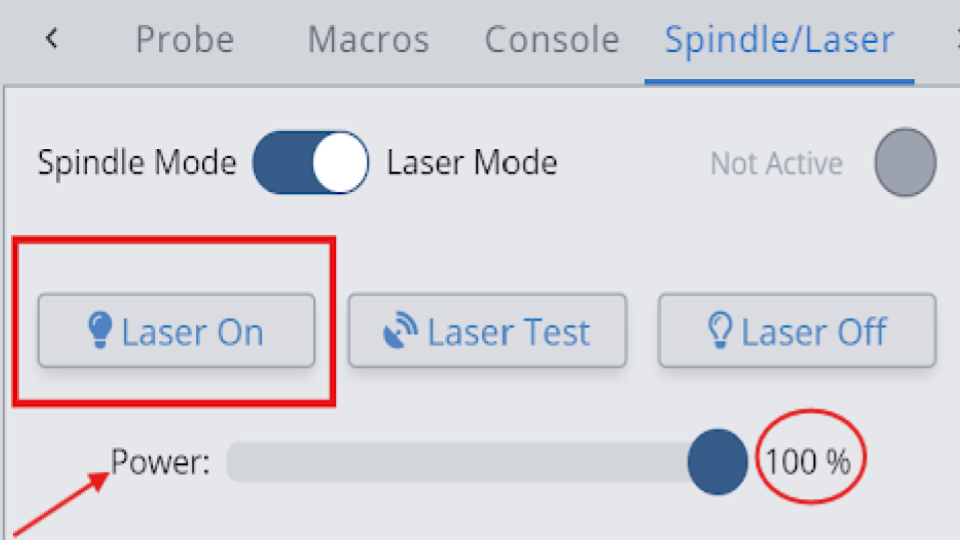
Open gSender. Turn ON your driver and press “Laser On” to fire your laser. Make sure “Power” is set to 100%.
Warning: Set your device to DC voltage mode before measuring. If the multimeter is in current mode, the LaserBeam Driver will feed the current back into the driver and damage it.
At the “LASER” connection, use the red probe on the “PW” side of the screw terminal, and the black probe on the “GD” side of the screw terminal. You should get a reading of about 4.5V.
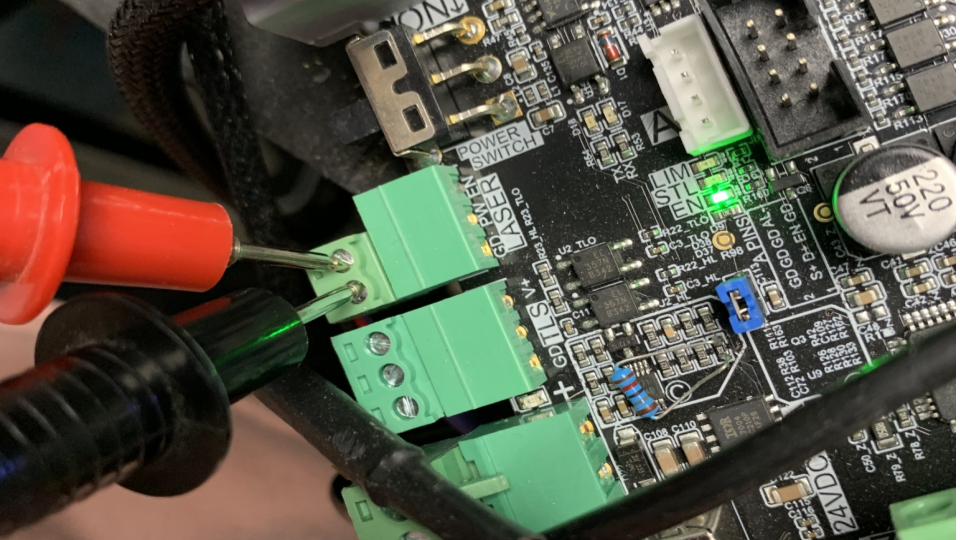
*Note: This photo shows the probing an SLB, if this was the Longboard, the process is the exact same except the connector would be plugged into the SpinPWM and ground terminals
The lens is too loose on my laser
Ensure you have the correct spring assembled for your specific lens. Additionally, you can add another spring (of the same type) to provide more tension.
SLB_LASER option is missing on gSender
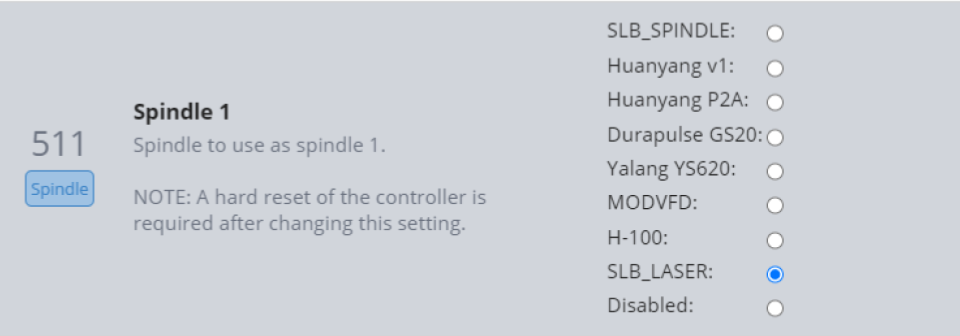
This is due to improper firmware settings on the SLB. On the gSender Firmware tool, make sure $395 is set to SLB_SPINDLE (or H-100 if you have the Sienci Labs Spindle) and $511 is set to SLB_LASER. 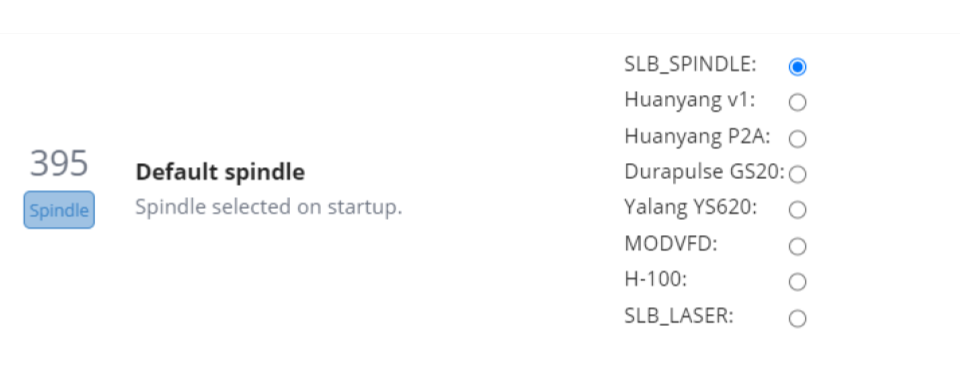
Press “Apply New Settings” then turn the control board OFF then ON.
You should be able to see the option on gSender now, once you reconnect.
My laser offsets are incorrect
For the Longboard, you must save the offsets locally through the preferences (gear icon) on gSender. For the SLB/SLB-EXT, you must save the offsets on the board itself, by going through the Firmware Tool. Make sure you input the offset values as millimeters, otherwise it will not work. For more detailed steps on laser offsets, check this resource page.
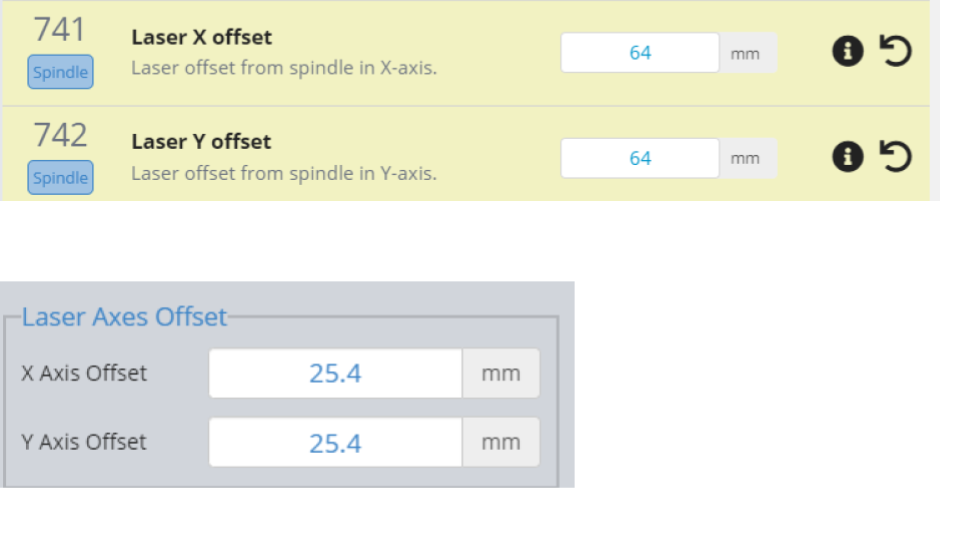 Laser offsets on Firmware Tool ($741, $742) vs. Preferences settings
Firmware settings are not saving
Some firmware settings will specify that you need to turn off and on (power cycle) your control board, in order for the changes to take effect. As best practice, we recommend power cycling every time you make firmware changes.
If you are unable to find a solution and are still looking for assistance, please feel free to contact us.